Inside ASUS ROG Strix GL753VE – disassembly, internal photos and upgrade options
In terms of upgradeability and disassembly steps, the ASUS ROG Strix GL753VE is absolutely identical to its predecessor and its smaller 15-inch (G553VE) sibling. There are no service hatches but offers hassle-free access to the hardware.
You can find the available configurations and their prices here: http://amzn.to/2voDgxq
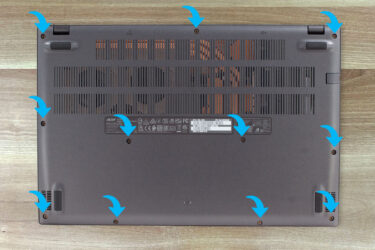
1. Removing the bottom plate
To detach the bottom plate, you have to remove all the screws around the bottom and don’t forget the one hiding under the rubber cap in the middle.
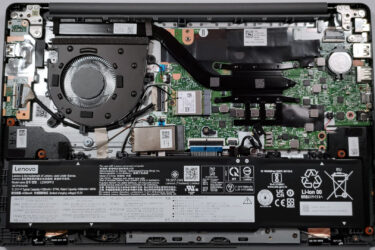
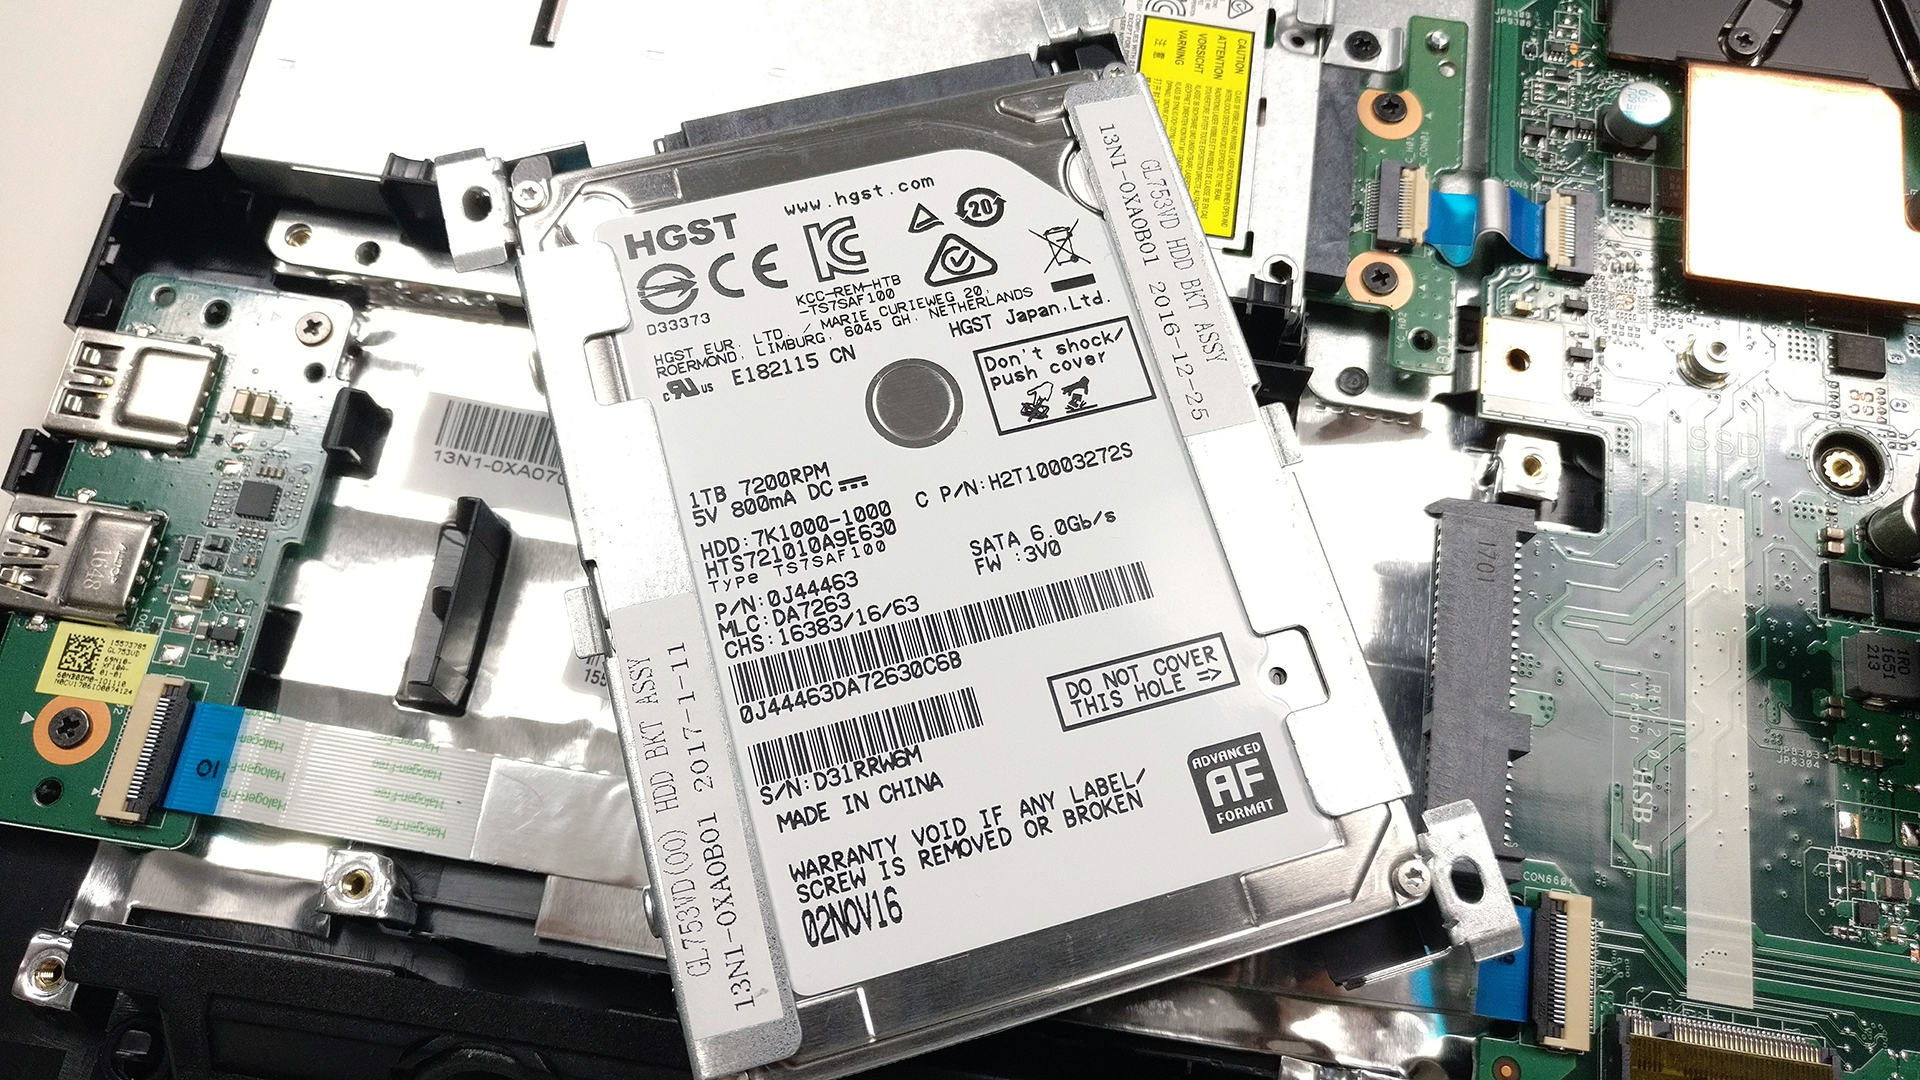
2. Storage
As expected, the laptop carries a single 2.5-inch drive bay and an M.2 SSD slot. The unit we’ve tested came with an HGST 1TB HDD while the M.2 slot was empty. It can be upgraded with a PCIe NVMe 2280 stick if needed.
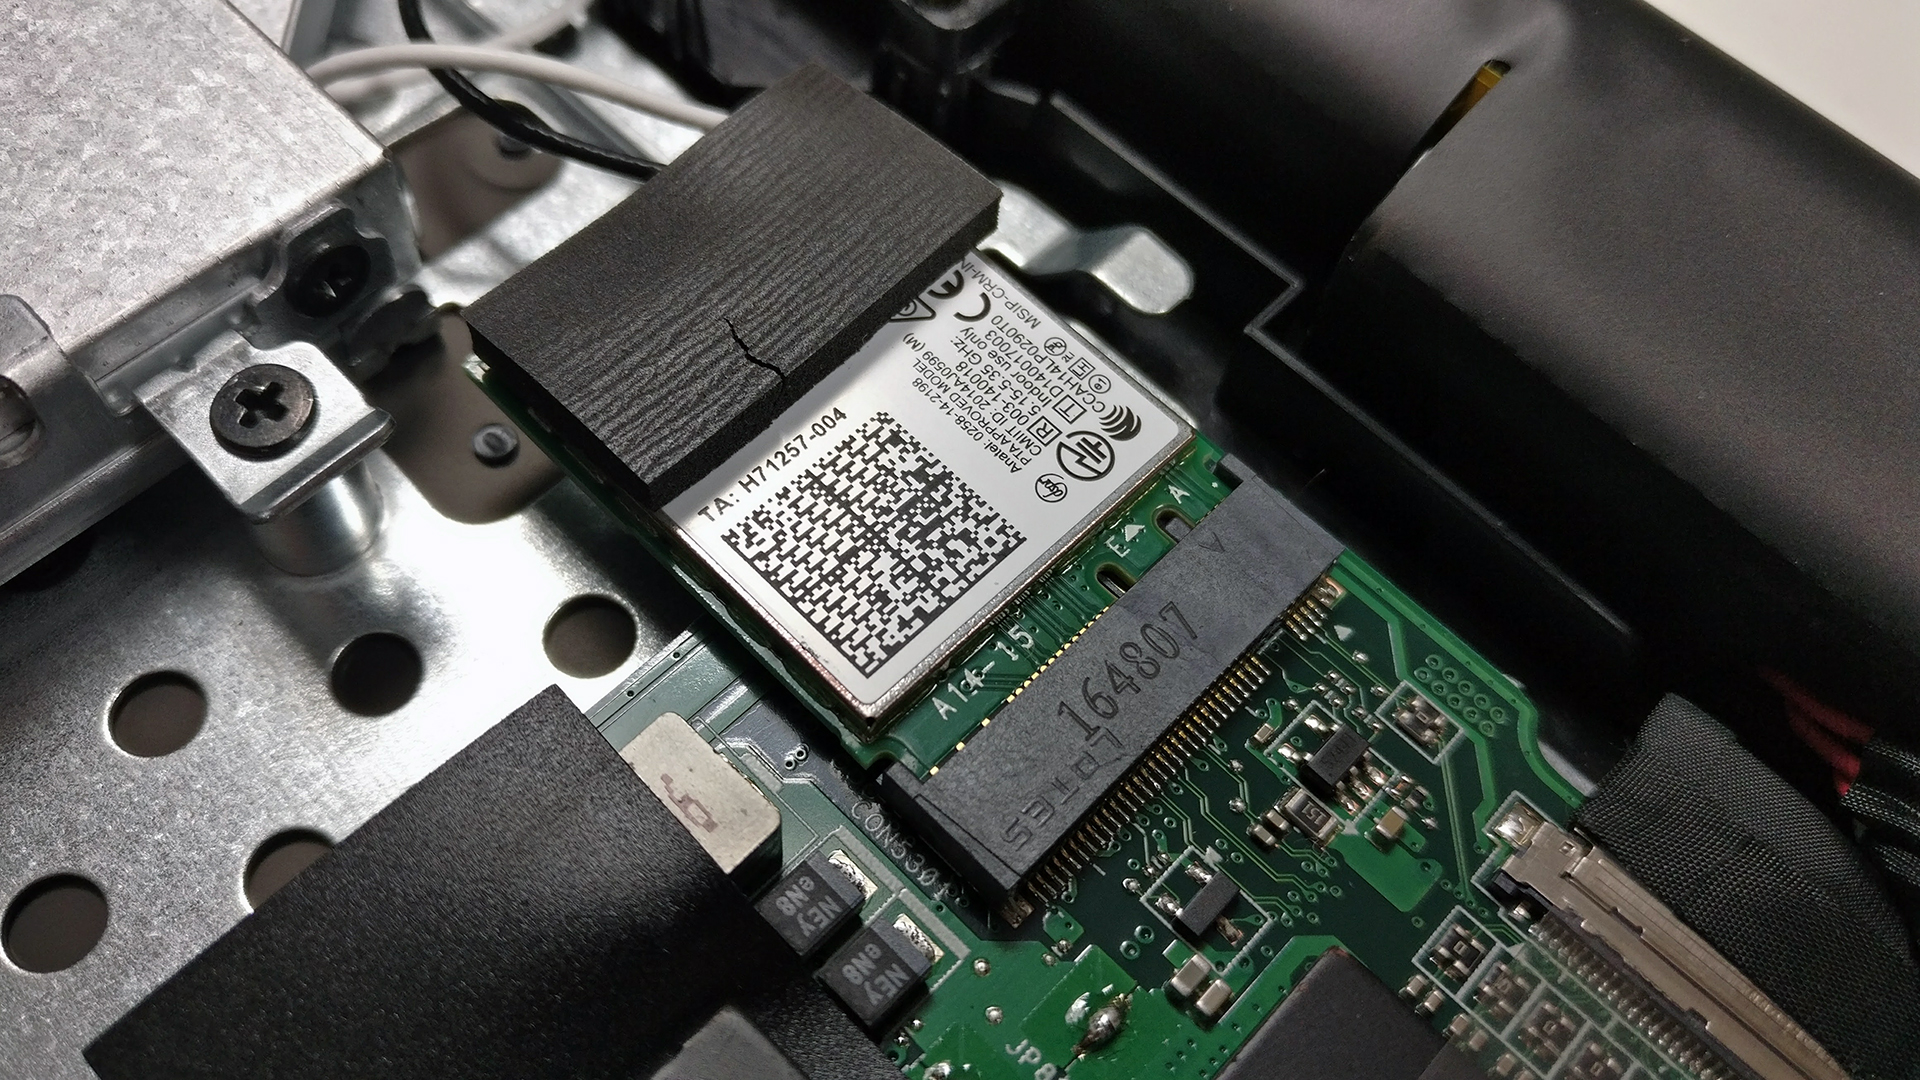
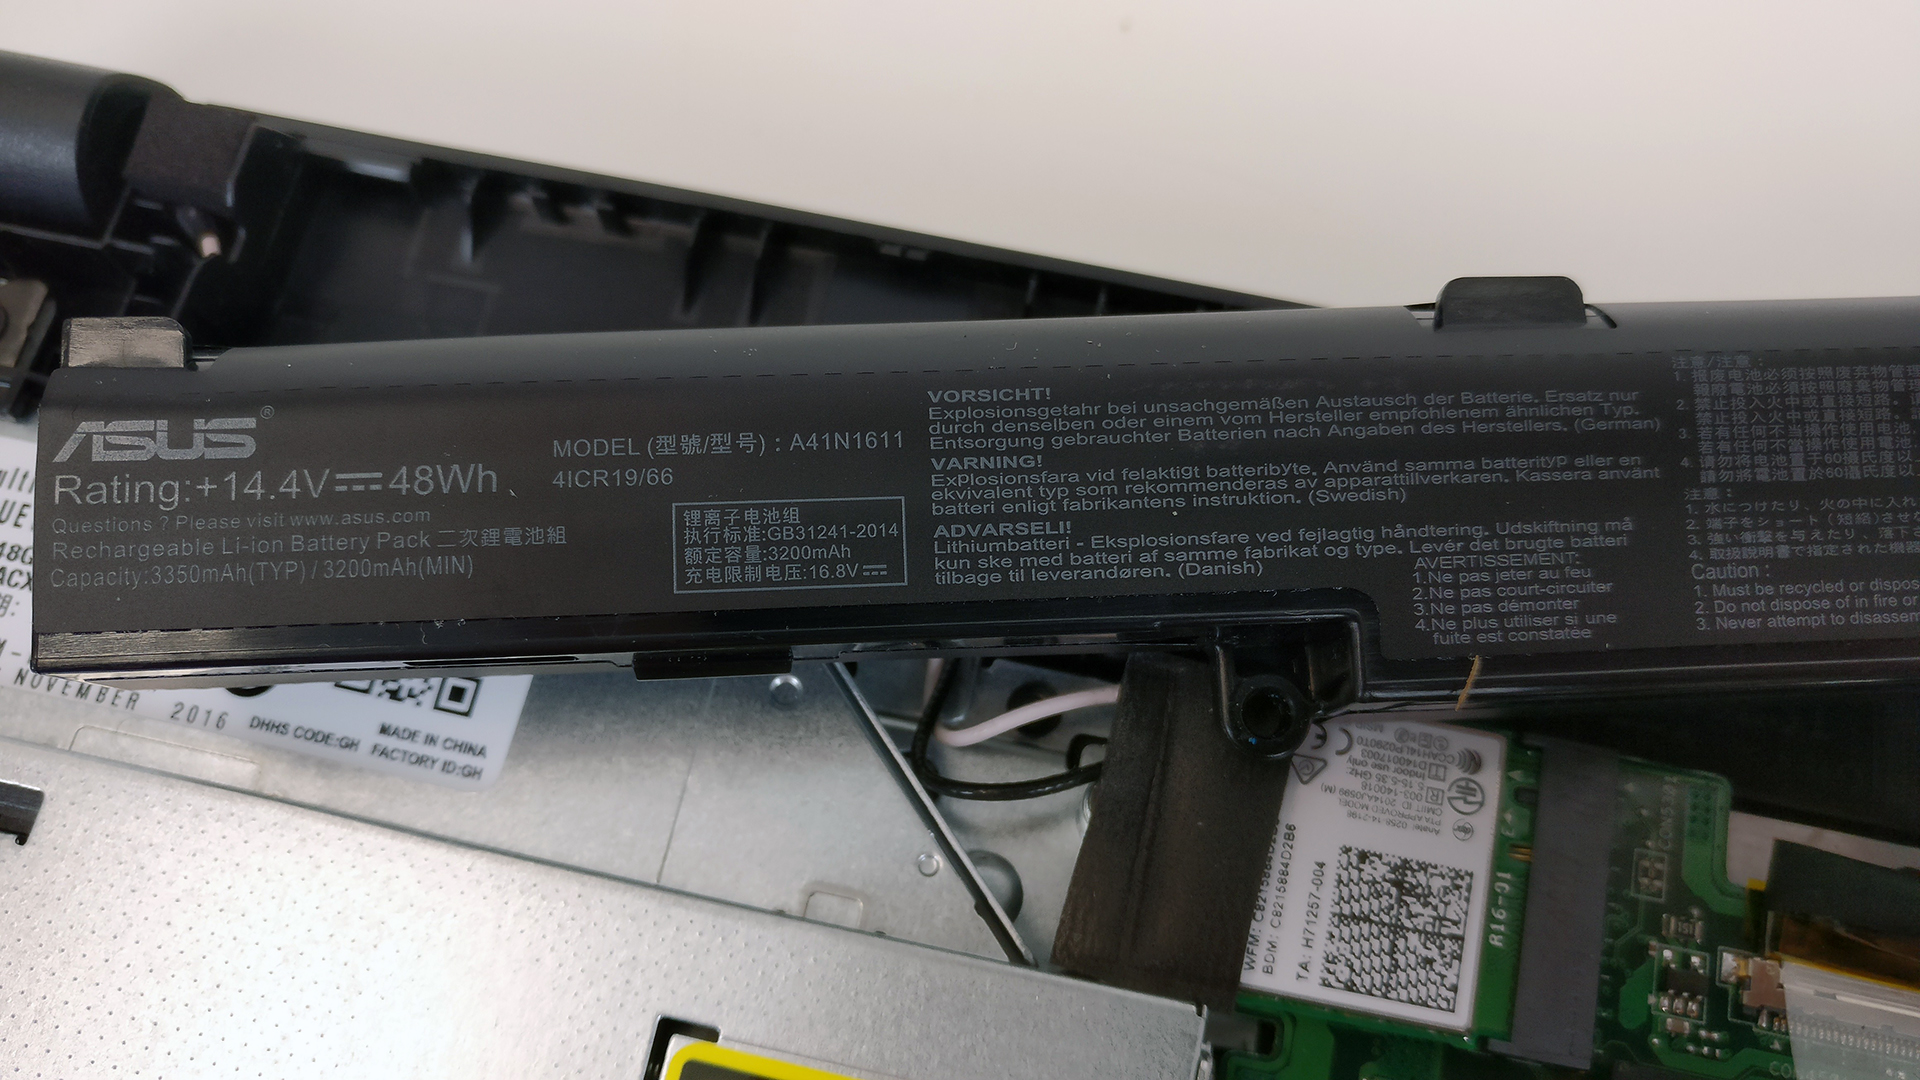
3. Memory, battery and Wi-Fi
As far as memory is concerned, the device can go up to 32GB of DDR4-2400 RAM using the two available slots. In our case, however, the memory configuration includes only one 8GB Samsung chip.


The Wi-Fi card is placed near the optical drive and it’s Intel 7265NGW.
The battery is again placed between the screen hinges and it’s rated at 48Wh.
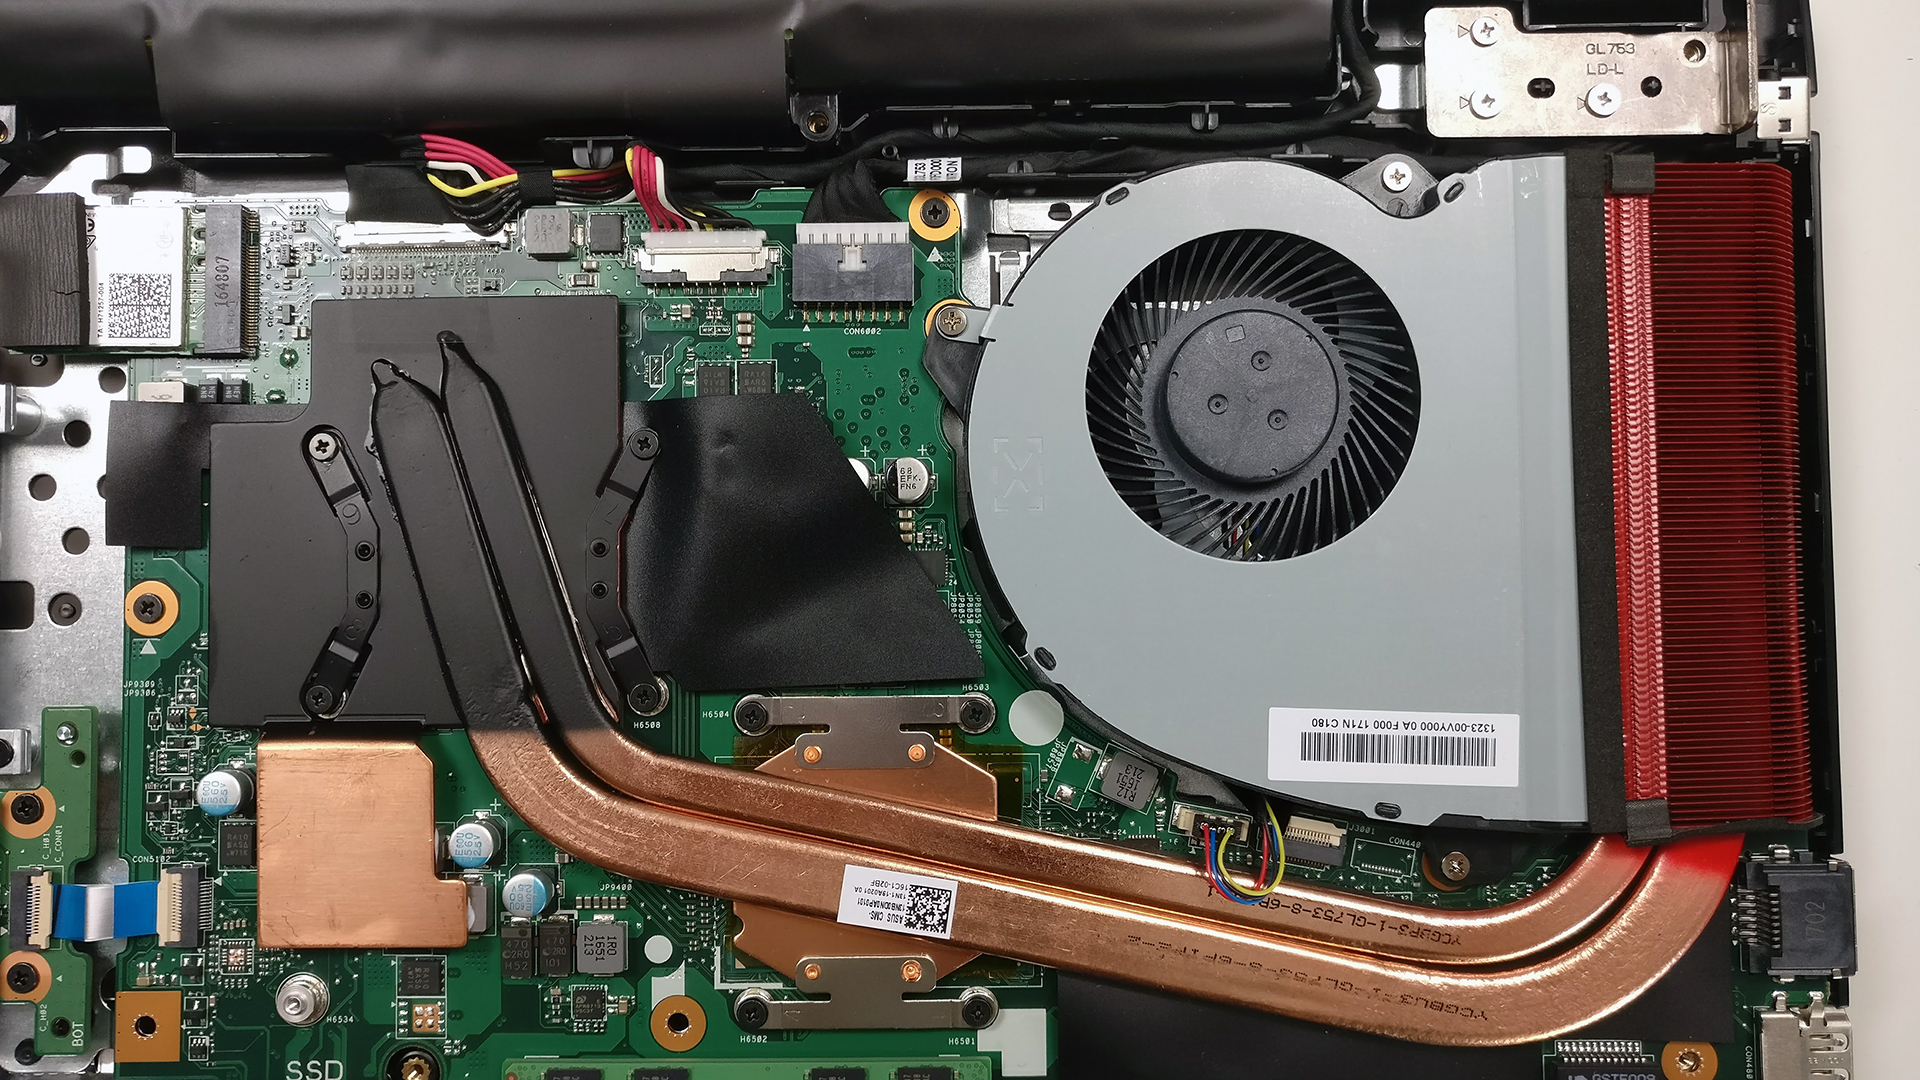
4. Cooling system
The cooling system is identical to the previous generation and the 15-inch model – two heat pipes connecting both heat sinks and the cooling fan.
The full review of the ASUS ROG Strix GL753VE can be found here.
You can find the available configurations and their prices here: http://amzn.to/2voDgxq