How to open HP OmniBook Ultra Flip 2-in-1 Laptop (14t-fh000) – disassembly and upgrade options
Before you start: Shut the laptop down, unplug the charger and peripherals, and hold the power button for a few seconds to discharge residual power. Work on a clean, non-conductive surface and, if possible, use an anti-static wrist strap.
Opening the bottom panel
- Place the laptop upside down with the hinge edge facing away from you.
- Using a Torx T5 screwdriver, undo the four screws that secure the bottom panel.
- Insert a thin plastic pry tool along one of the side edges between the panel and the chassis.
- Gently twist the tool to release the first clip, then continue along the perimeter to unlatch the rest of the clips.
- Once all clips are released, lift the bottom cover straight up and set it aside. There are no cables or adhesive attached to the panel.
Caution: Avoid using metal tools on the painted edges to prevent scratches and bending of the thin aluminum panel.
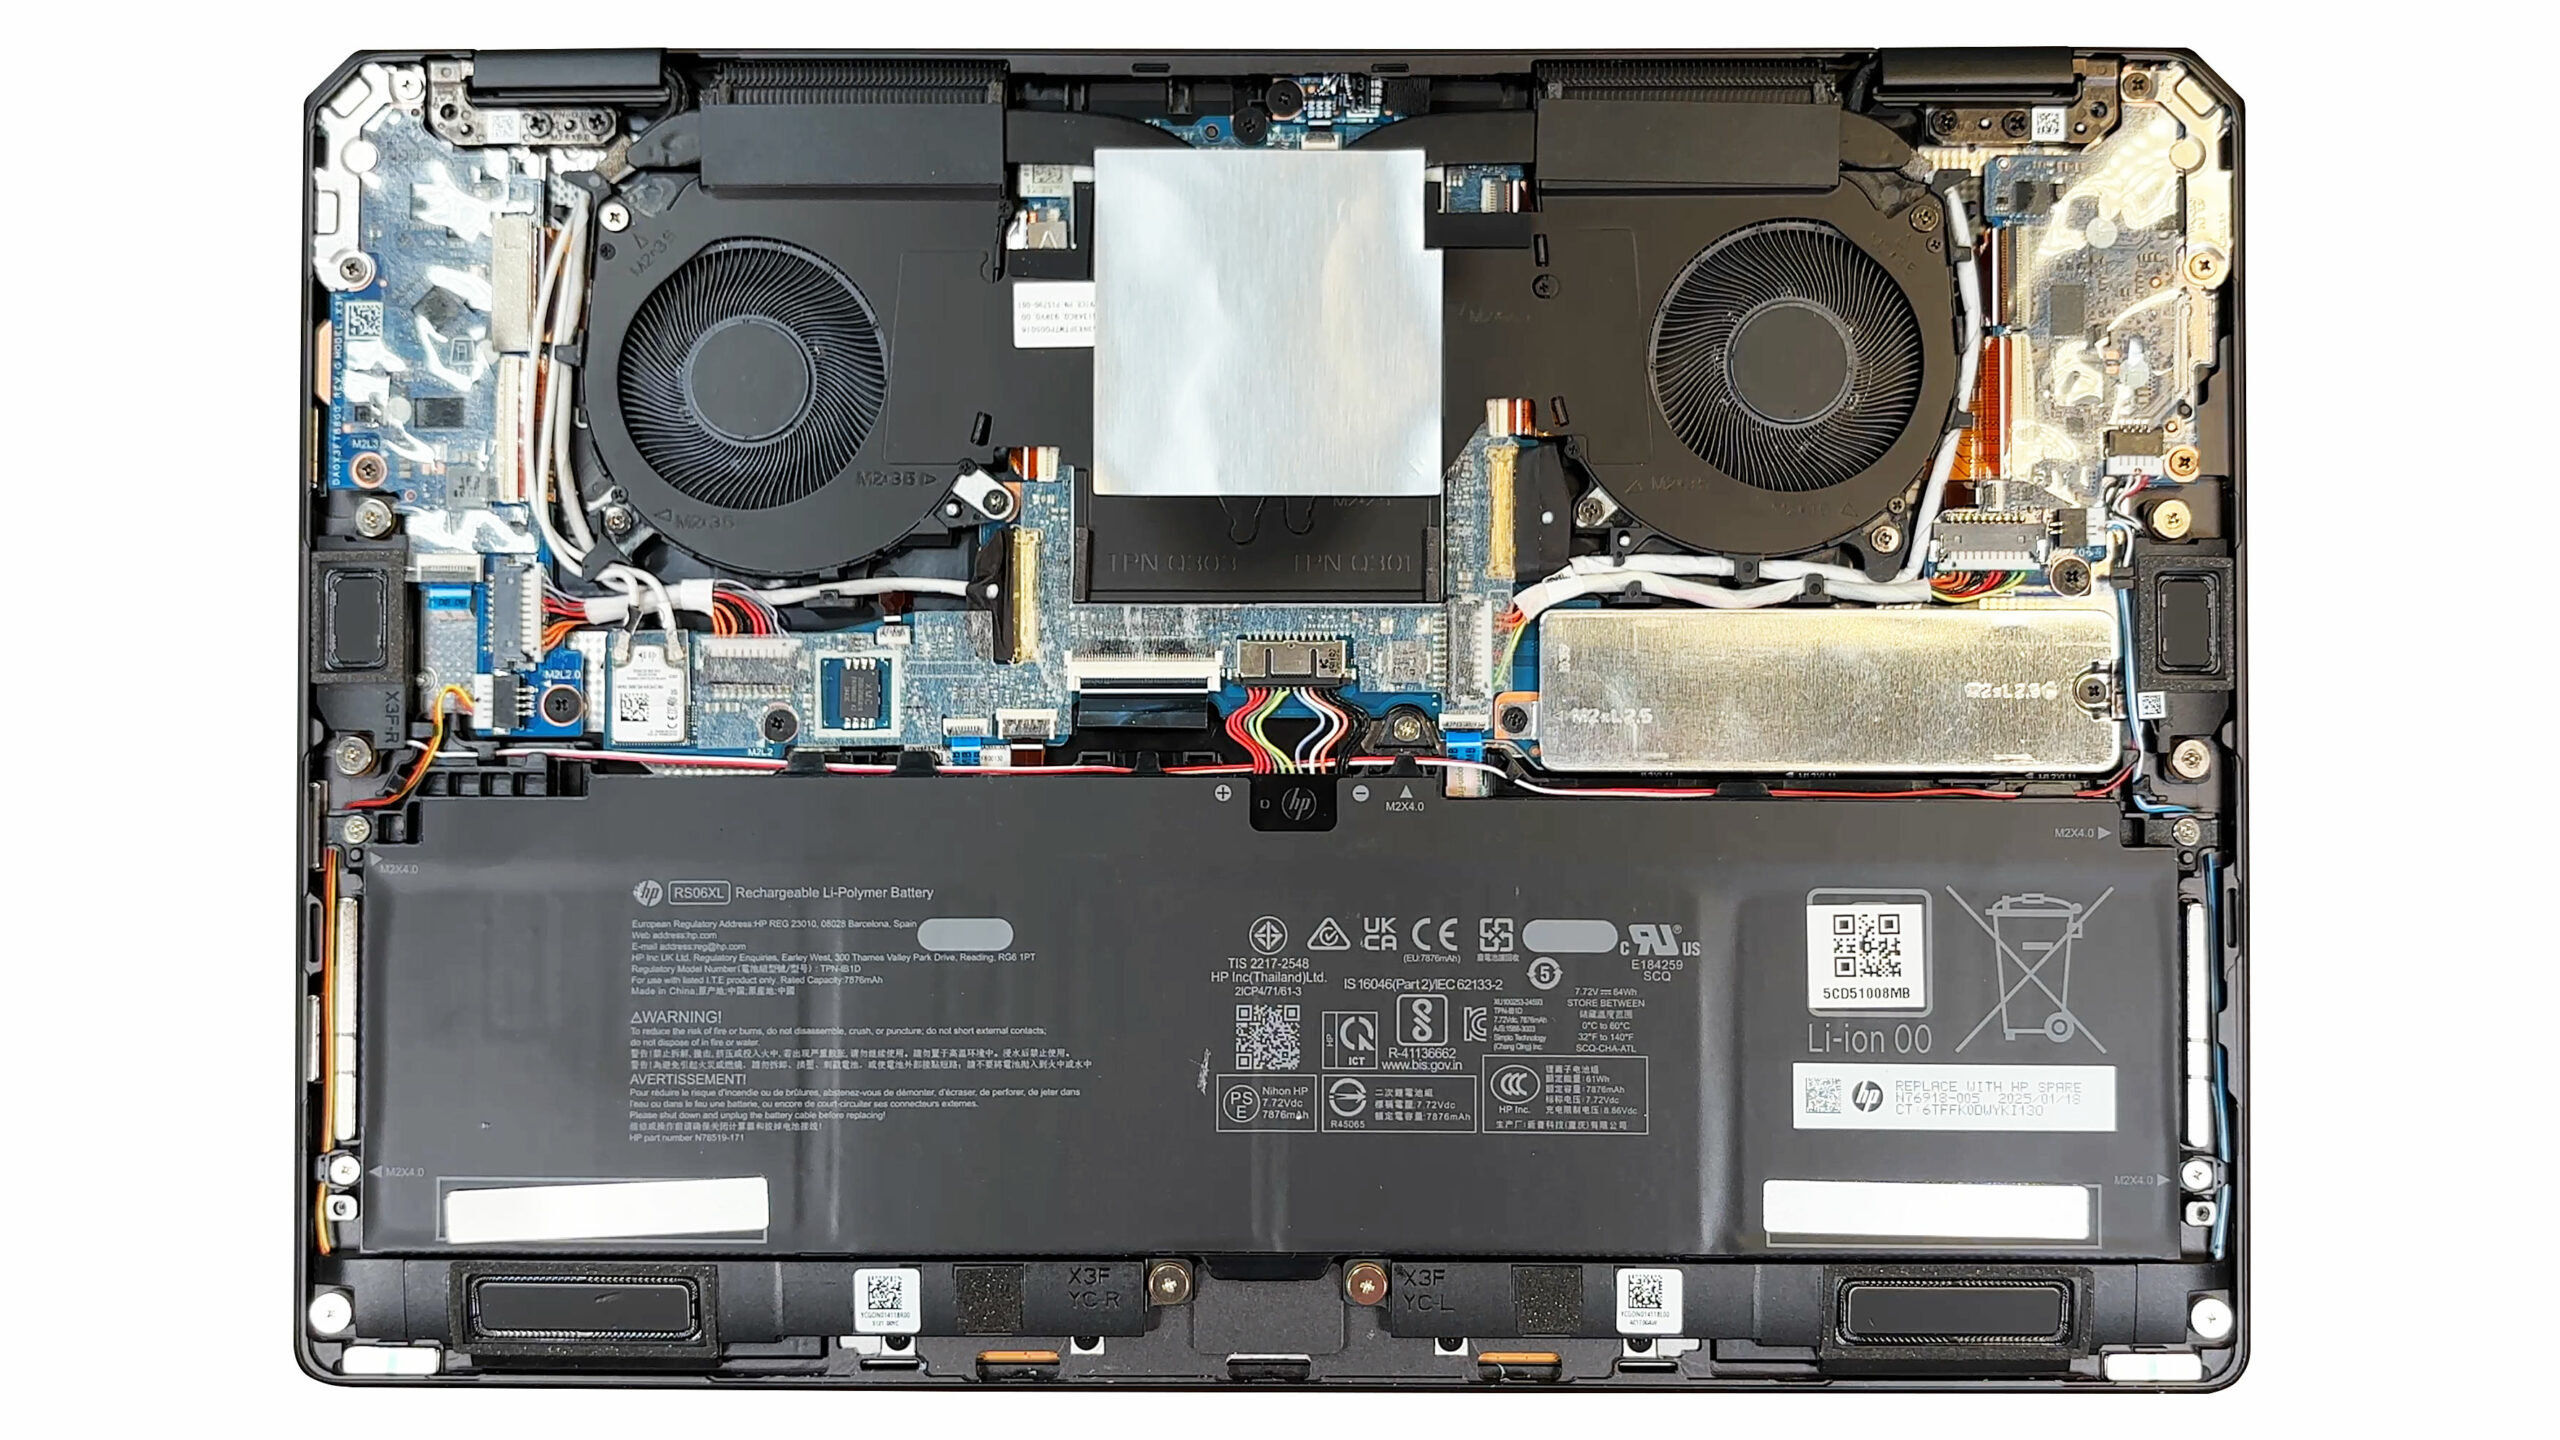
Battery removal and replacement
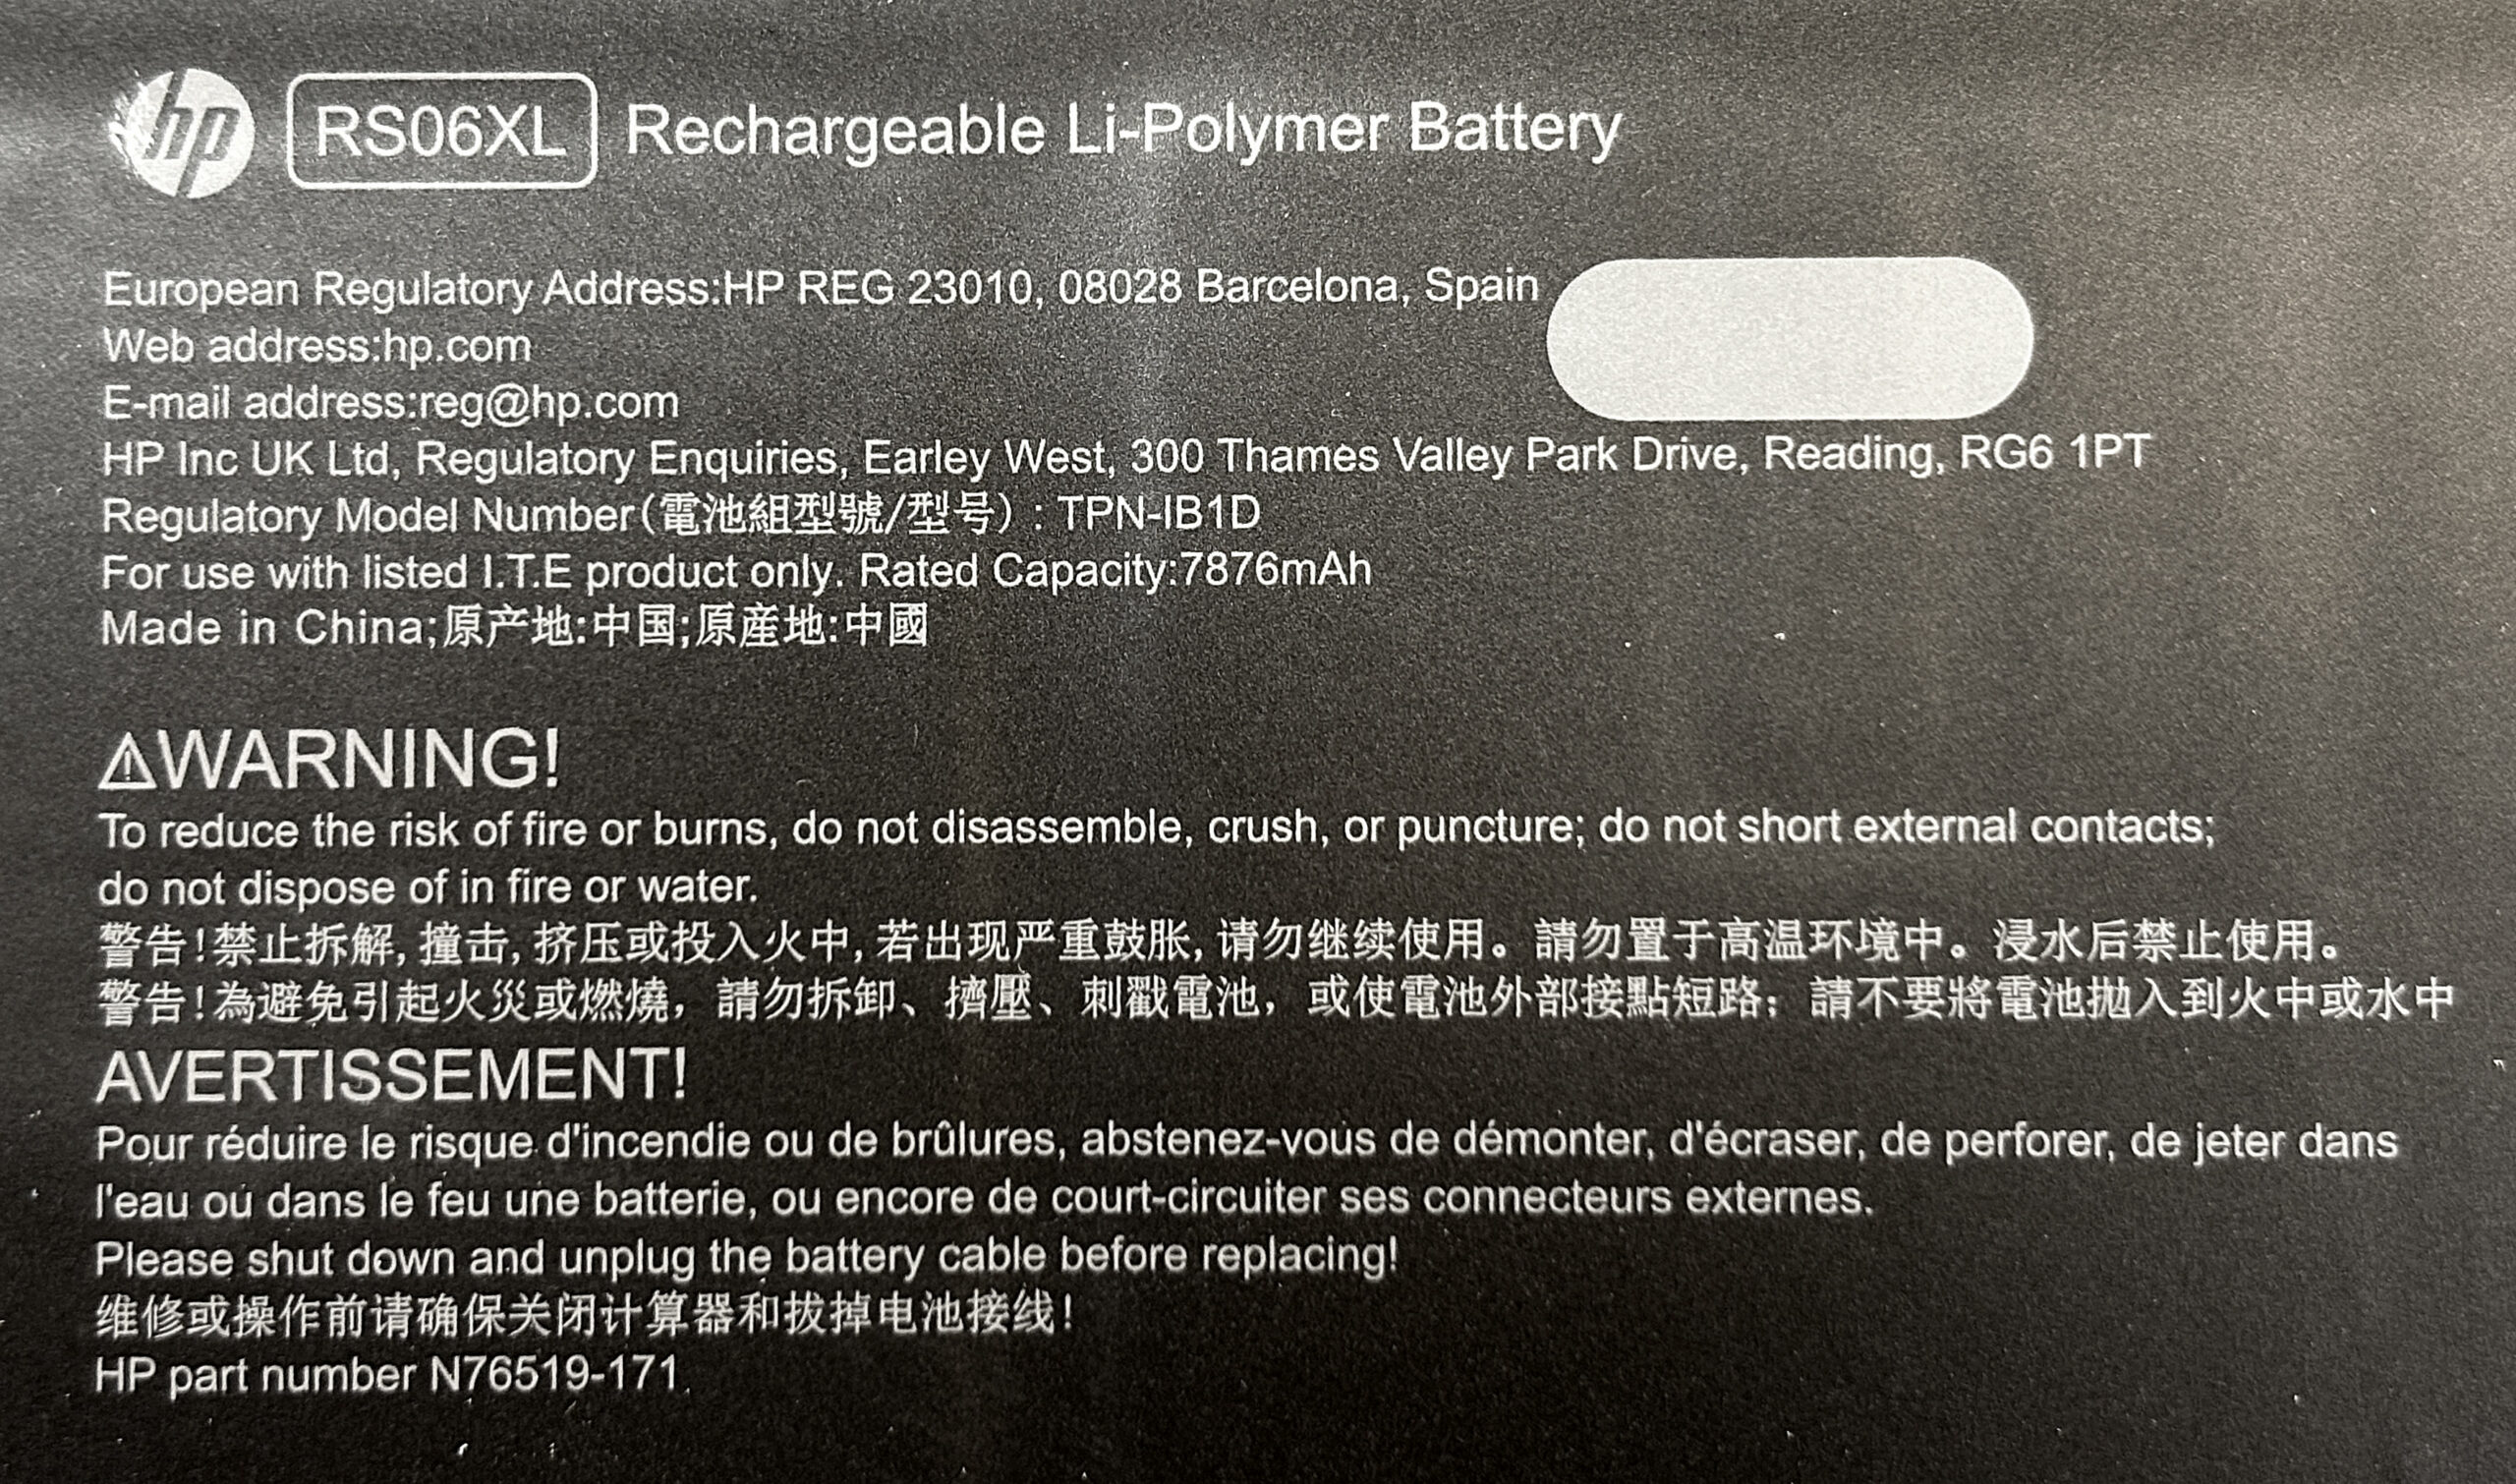
- Locate the 64Wh RS06XL battery, which spans most of the palm-rest area.
- Identify the left and right speaker modules in front of the battery. Undo their Phillips screws so you can lift them slightly and gain better access to the battery connector.
- Carefully lift the speakers just enough to reach underneath; do not strain their cables.
- Gently unplug the battery connector from the motherboard by pulling it straight out of the socket.
- Undo the five Phillips-head screws that secure the battery to the chassis.
- Lift the battery out of the bay, checking that no cables are caught underneath.
- To install a new battery, place it in position, reinstall the five screws, reconnect the battery cable firmly, and reposition and screw down both speakers.
Memory (RAM) information
- The OmniBook Ultra Flip uses soldered LPDDR5X-8533 memory with no SO-DIMM slots.
- HP offers configurations with up to 32GB of RAM in dual-channel mode.
- Because the RAM is permanently attached to the motherboard, it cannot be upgraded later. Choose your preferred capacity at purchase time.
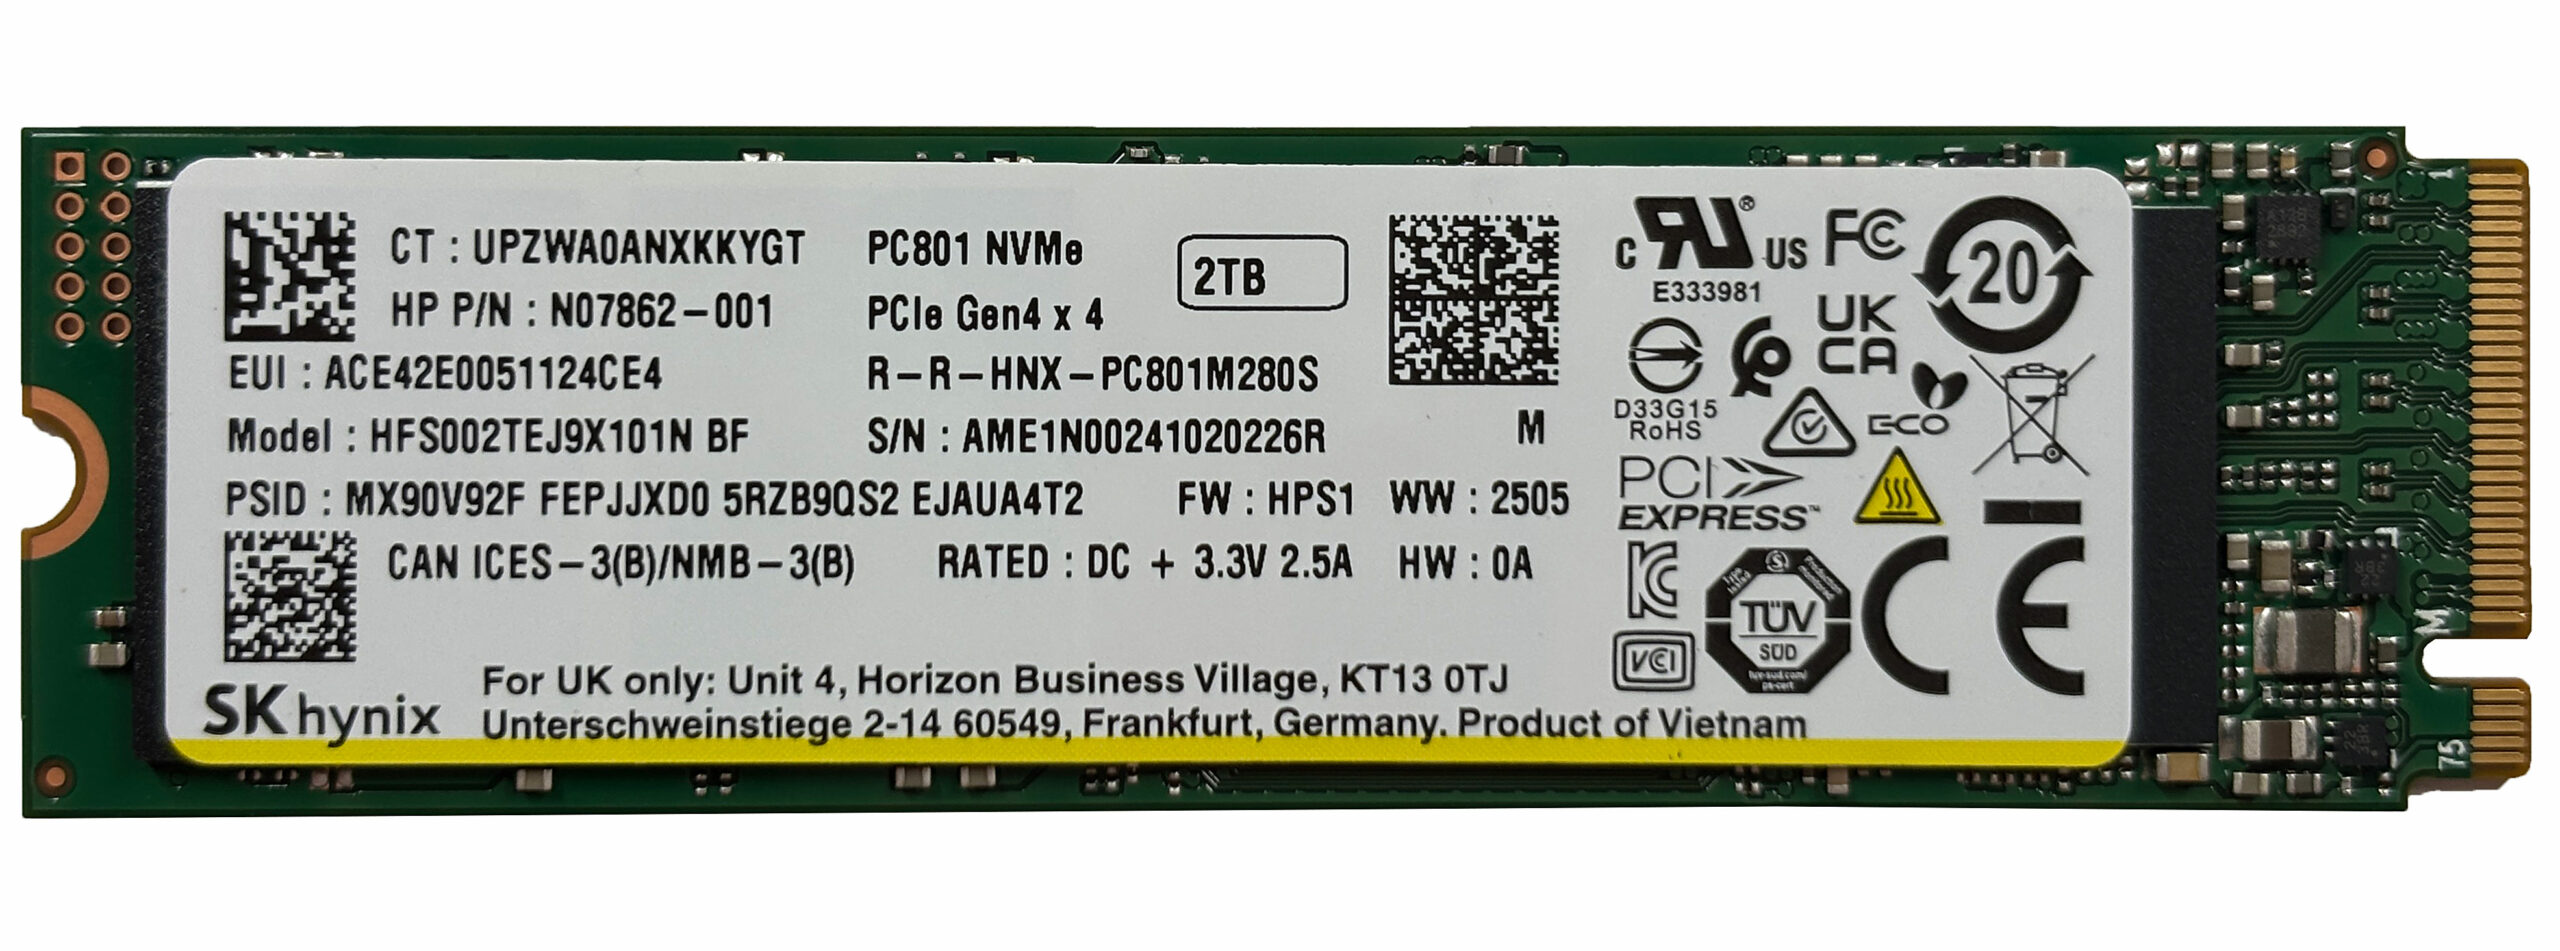
Storage upgrade options
- This laptop provides a single M.2 2280 slot for PCIe Gen 4 NVMe SSDs.
- Locate the SSD under its metal shield near the center-right area of the motherboard.
- Gently lift or remove the metal shield (if it is held by a screw, undo it first). Be mindful of the pre-applied thermal pad underneath.
- Undo the SSD mounting screw. The drive will spring up at a slight angle.
- Slide the SSD out of the M.2 connector.
- Insert the replacement PCIe 4.0 2280 NVMe SSD into the slot at the same angle, press it down, and secure it with the mounting screw.
- Re-seat the metal shield so that the thermal pad makes full contact with the SSD controller and chips.
Hint: Consider reviewing our Top M.2 SSDs Performance Rankings to select the best storage solution for your needs.
You can buy PCIe 4.0 NVMe SSDs here: Buy from Amazon.ca (#CommissionsEarned)
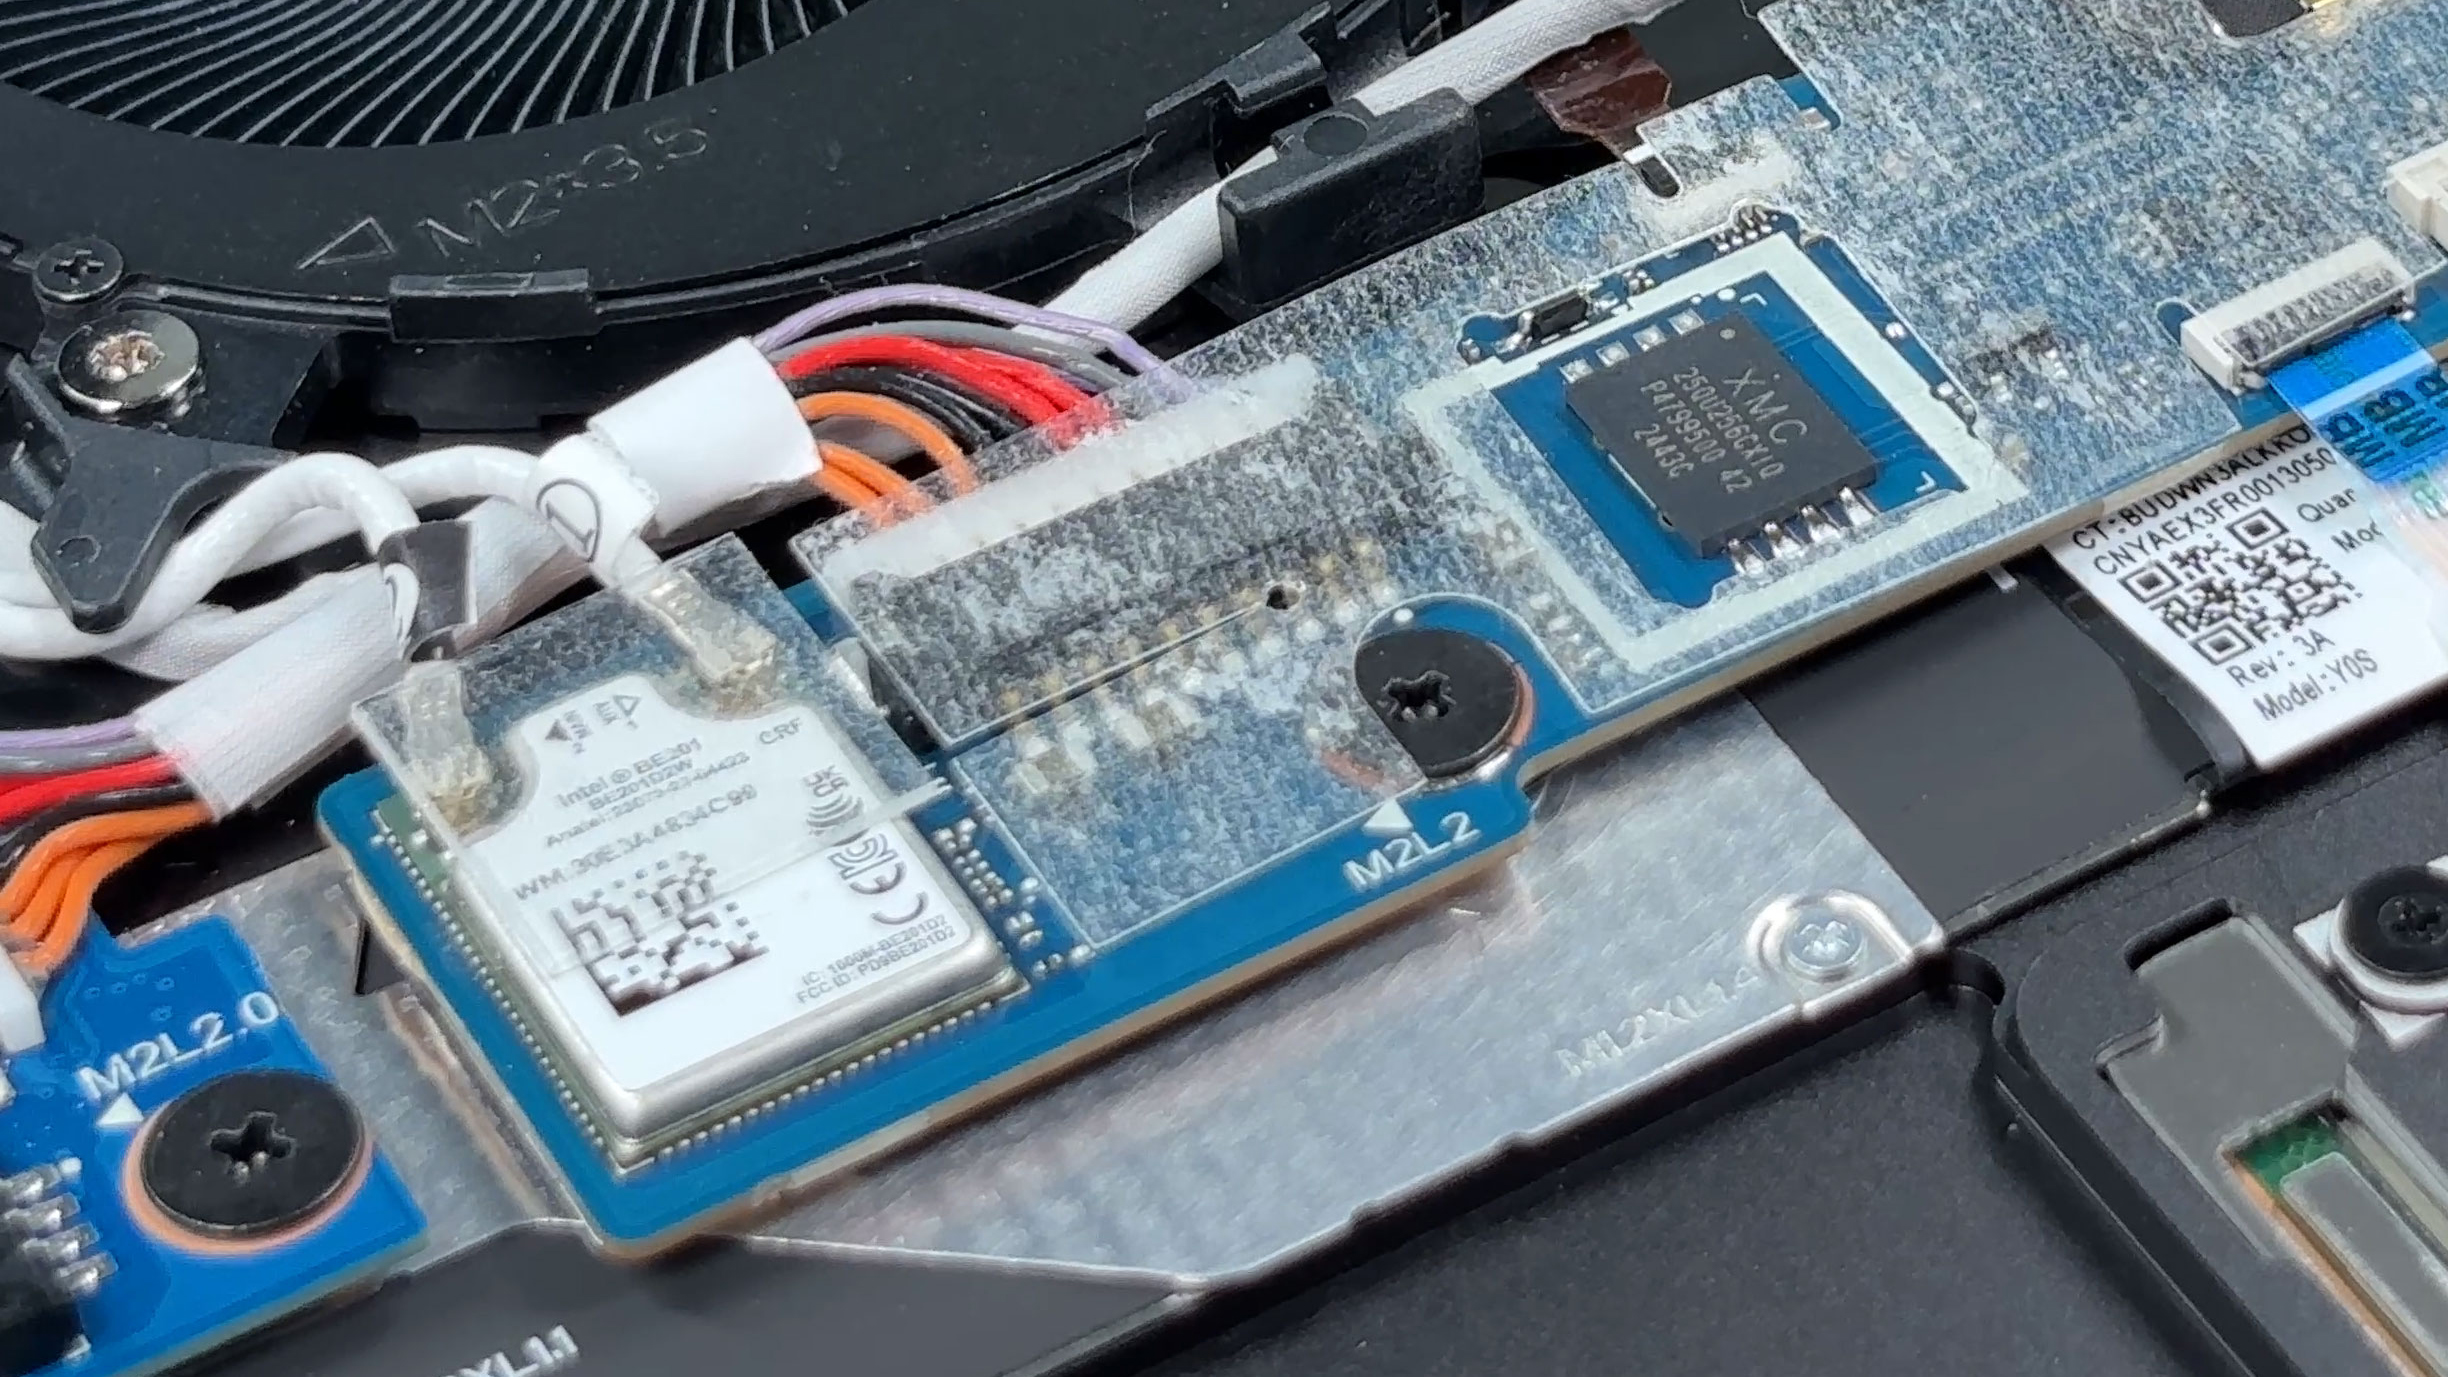
Wireless card and other serviceable components
- The wireless module is an Intel Wi-Fi 7 BE201 card in an M.2 2230 slot.
- To replace it:
- Carefully lift the two antenna connectors (Main and Aux) straight up using a plastic tool.
- Undo the single Phillips screw that secures the card.
- Slide the Wi-Fi card out of the slot at a slight angle.
- Insert the new M.2 2230 Wi-Fi card, press it down, and secure it with the screw.
- Reattach the antennas by pressing them straight down onto their posts until they click into place.
- Speakers are screwed in and can be replaced individually if needed.
Cooling system and maintenance
- The cooling solution uses two slim fans and a vapor-chamber heat spreader over the CPU and iGPU, with copper heat pipes routing heat to rear-edge vents.
- For routine cleaning:
- Ensure the battery is disconnected before working near the fans or heatsink.
- Use short bursts of compressed air through the vents while gently holding each fan to prevent overspinning.
- Visually inspect the fin stacks and clear any accumulated dust from the intake and exhaust areas.
- The fans are replaceable. If one starts to rattle or fails, you can undo its screws and disconnect its cable from the motherboard, then swap in a compatible replacement.
- Removing the vapor chamber and repasting the CPU should be done only if you have experience and suitable thermal materials; all thermal pads and interfaces must be returned to their original positions.
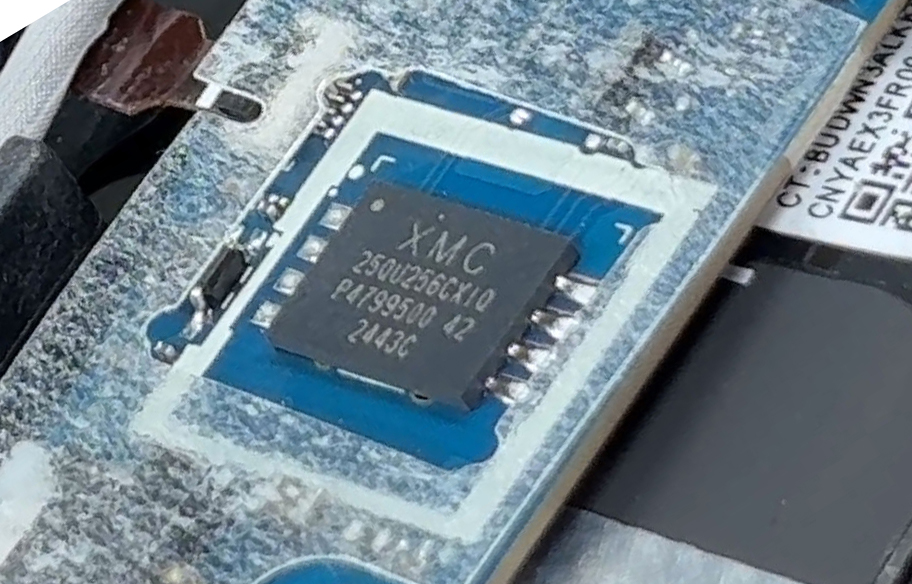
More info: A small XMC serial flash chip near the audio daughterboard stores the system BIOS. It is not intended as a user-serviceable component, but technicians may access it for advanced repair work.
Reassembly tips
- Before closing the laptop, double-check that:
- The battery connector is firmly seated.
- The SSD is secured and its shield and thermal pad are correctly positioned.
- The Wi-Fi card is screwed down and both antennas are attached.
- Speaker cables and other ribbon cables are routed properly and fully connected.
- Place the bottom cover back on the chassis and press gently around the edges until all clips click into place.
- Reinstall the four Torx T5 screws and tighten them evenly.
- Power on the laptop and verify that the new SSD and Wi-Fi card (if changed) are recognized in the BIOS and operating system.
Summary: With only four external screws and no glue inside, the OmniBook Ultra Flip scores well for serviceability, even though the soldered RAM limits performance upgrades to the SSD and Wi‑Fi card.
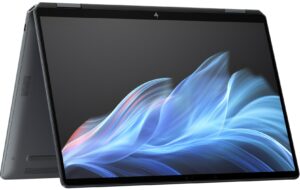
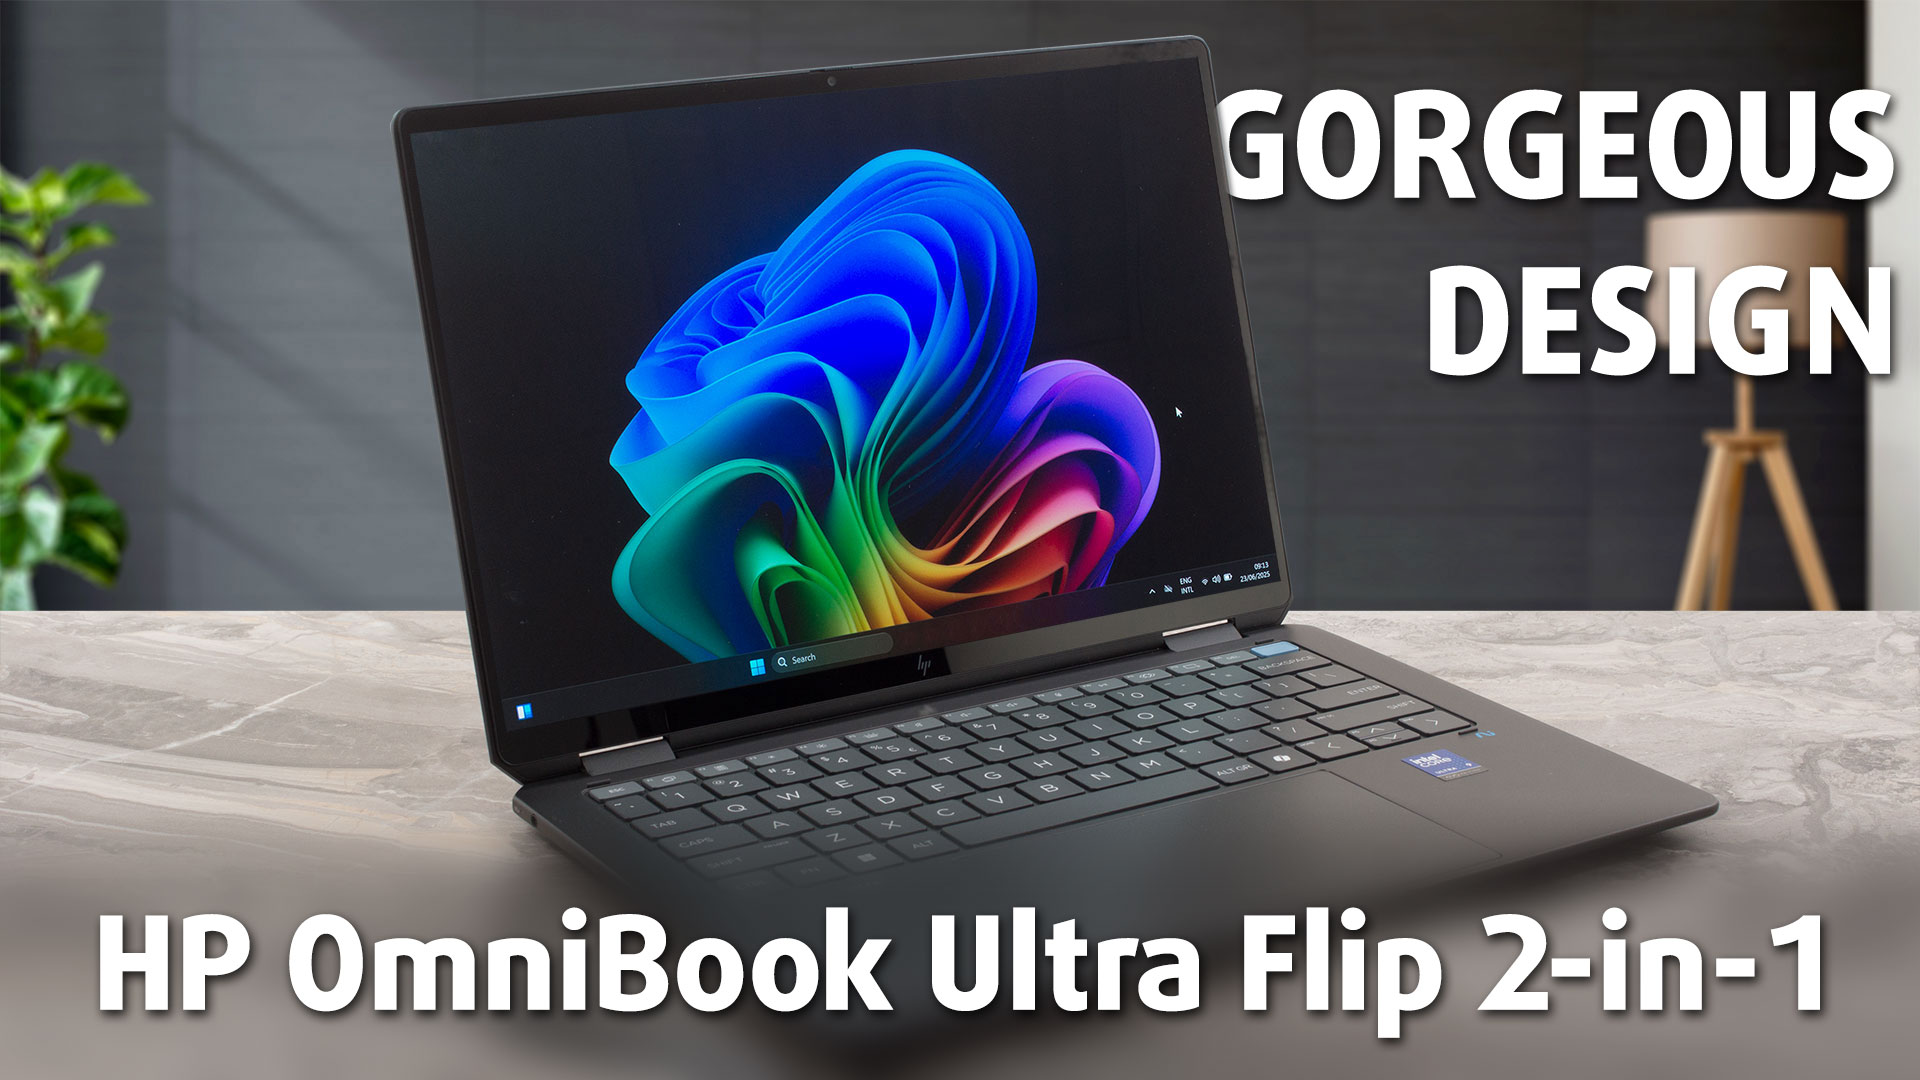
HP OmniBook Ultra Flip (14-fh0000) in-depth review
The HP OmniBook Ultra Flip arrives on the scene as a masterclass in premium design. From its stunning all-metal chassis to its vibrant 120Hz OLED screen, every inch of this 2-in-1 convertible screams luxury and thoughtful craftsmanship. It’s a device that aims to be the perfect portable companion for the modern professional who values style and versatility above all else. But as we discovered during our testing, this beautiful facade hides a critical, user-hostile compromise that fundamentally challenges its long-term value. Is this the ultimate convertible, or a gorgeous piece of tech w[...]
Pros
- Exceptional and elegant aluminium build quality
- Gorgeous 2.8K 120Hz OLED display with 100% DCI-P3 coverage
- Excellent battery life for a compact convertible
- Incredibly comfortable keyboard with massive keycaps
- Future-proof connectivity with two Thunderbolt 4 ports and Wi-Fi 7
- Great security features, including a physical camera shutter
Cons
- Soldered RAM with no upgrade options
- Significant performance throttling under sustained load
- Highly reflective glossy screen
- No USB-A ports, requiring dongles for legacy devices


![[May 2026] Global Ranking of Best-Selling Laptop GPUs on Amazon – Apple Dominates with 45% Share, Sweeps Top 3 Spots; NVIDIA’s RTX 5060 Leads the Dedicated GPU Pack](https://laptopmedia.com/wp-content/uploads/2026/06/Best-Selling-GPUs-GLOBAL-Top-10-400x225.jpg)
![[May 2026] Global Ranking of Best-Selling Laptop CPUs on Amazon – Apple Crushes Competition with 45.2% Market Share, M5 Dominates](https://laptopmedia.com/wp-content/uploads/2026/06/Best-Selling-CPUs-GLOBAL-Top-10-400x225.jpg)
![[May 2026] Amazon Germany: Top 7 Best-Selling Gaming Laptops – Lenovo Legion 5i Crowned Champion Amidst Fierce Mid-Range Competition](https://laptopmedia.com/wp-content/uploads/2026/06/Best-Selling-Gaming-Laptops-DE-Top-10-1-400x225.jpg)
![[May 2026] Amazon Italy: Top 10 Best-Selling Laptops – Apple MacBook Neo Reigns Supreme, Premium Models Capture Dominant Revenue Share](https://laptopmedia.com/wp-content/uploads/2026/06/Best-Selling-Laptops-IT-Top-10-400x225.jpg)
![[May 2026] Best-Selling Laptop Brands on Amazon Italy – Apple Dominates Across All Metrics](https://laptopmedia.com/wp-content/uploads/2026/06/IT-Best-Brands-400x225.jpg)