Inside HP Pavilion 15 (15-cs3000) – disassembly and upgrade options
While HP has done some job polishing the chassis and body of this laptop, the changes remain barely visible to the naked eye. On the inside, however, the device comes practically unchanged in terms of layout and even some hardware installed.
Check out all HP Pavilion 15 (15-cs3000) prices and configurations in our Specs System or read more in our In-Depth review.


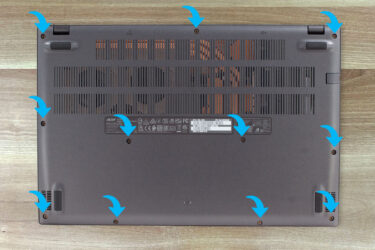
1. Remove the bottom plate
On the inside, this notebook is an exact same copy of its predecessor. So is the bottom panel, which requires the removal of the two back feet in order to access all three hidden screws. You can remove them easily with the help of a pointy plastic pry tool. By the way, be patient, when prying the bottom plate, itself, as there are some very fragile parts of the body, especially around the ports and the SD card slot.
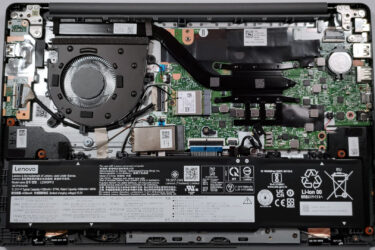
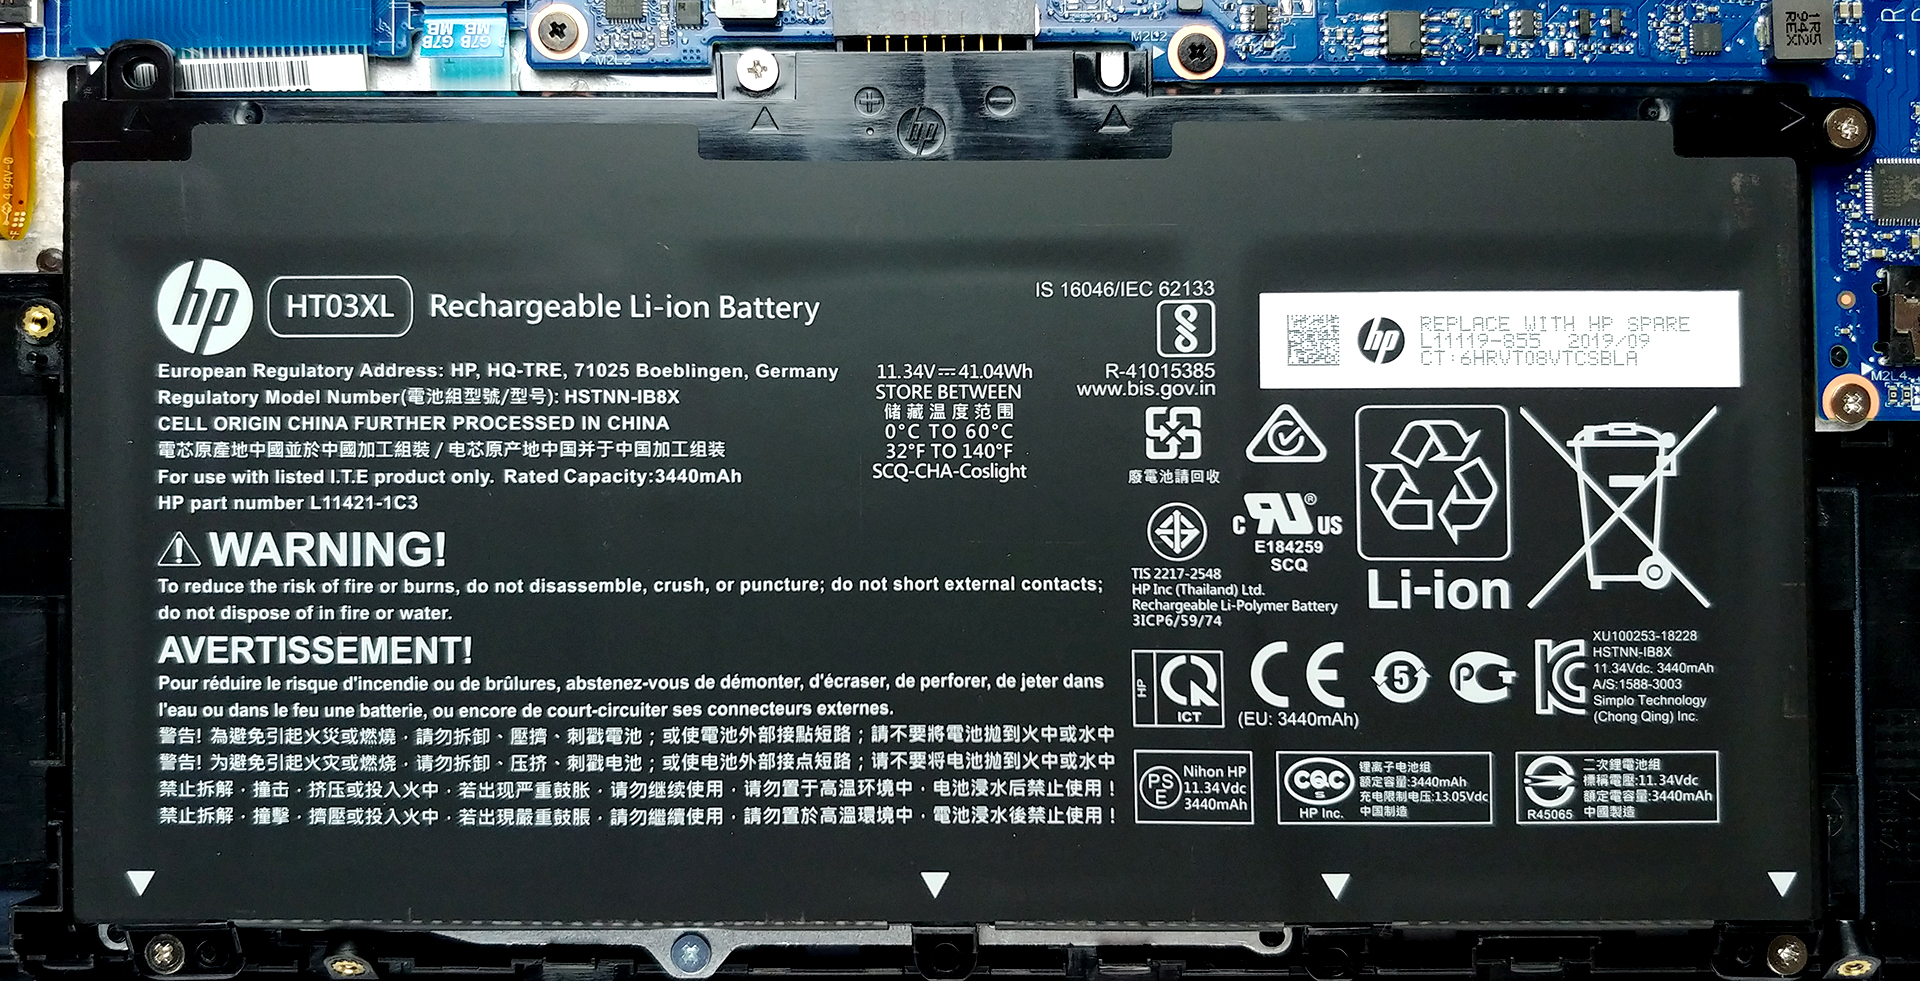
2. Battery
The first thing you should remove from the machine is the 41Wh battery. With some laptops, you only need to remove the battery connector from the motherboard. However, with this one, you have to remove the entire battery pack in order to unplug it from the board. You can do so by removing four Phillips head screws, clearly seen in the picture below.
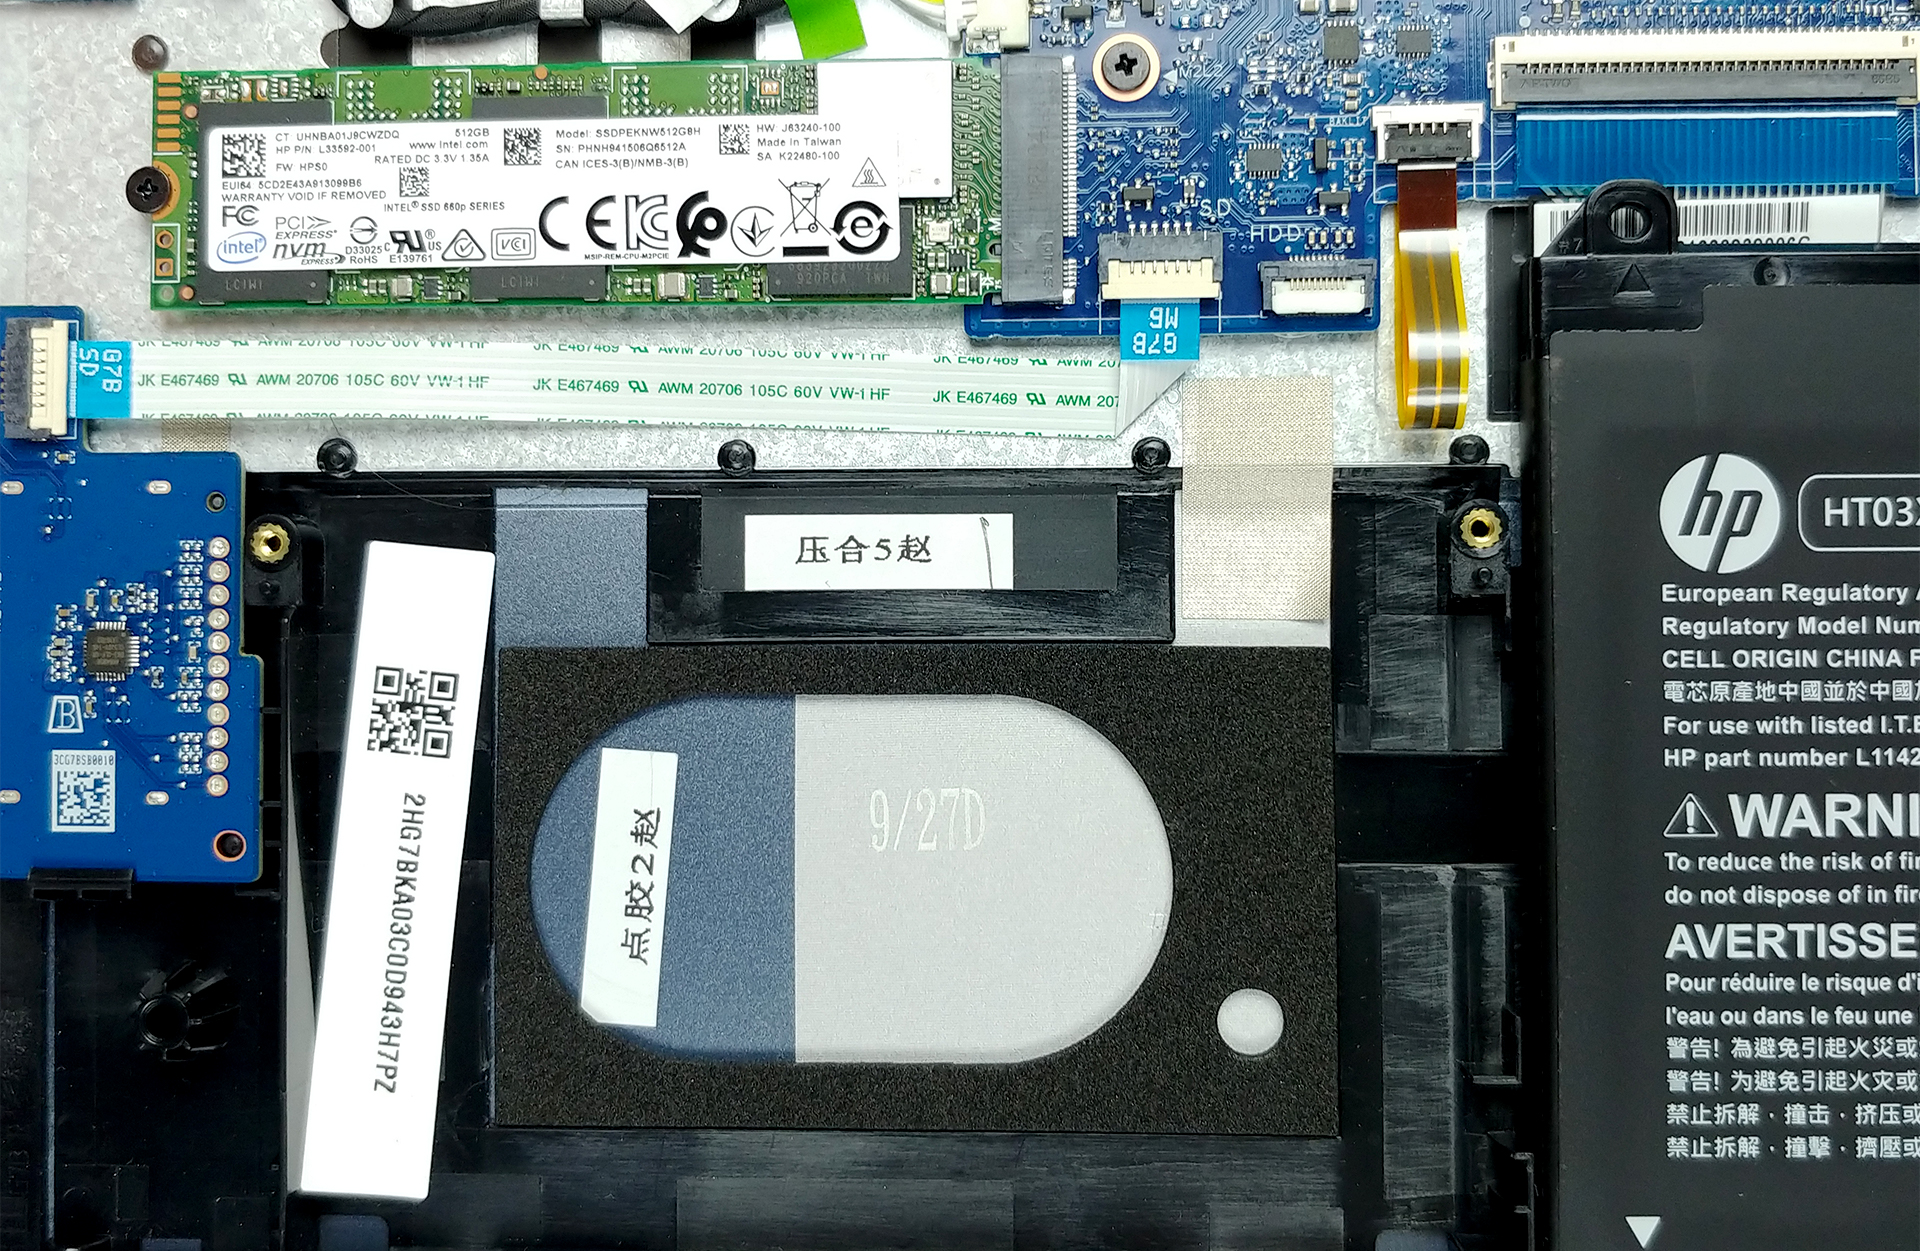
3. Memory and storage
In terms of upgradability, there are two RAM DIMMs, which support 32GB of DDR4 memory with speeds of up to 2666 MHz. As of the storage – HP provides you with a 2.5″ SATA drive slot and an M.2 slot with support of NVMe drives.

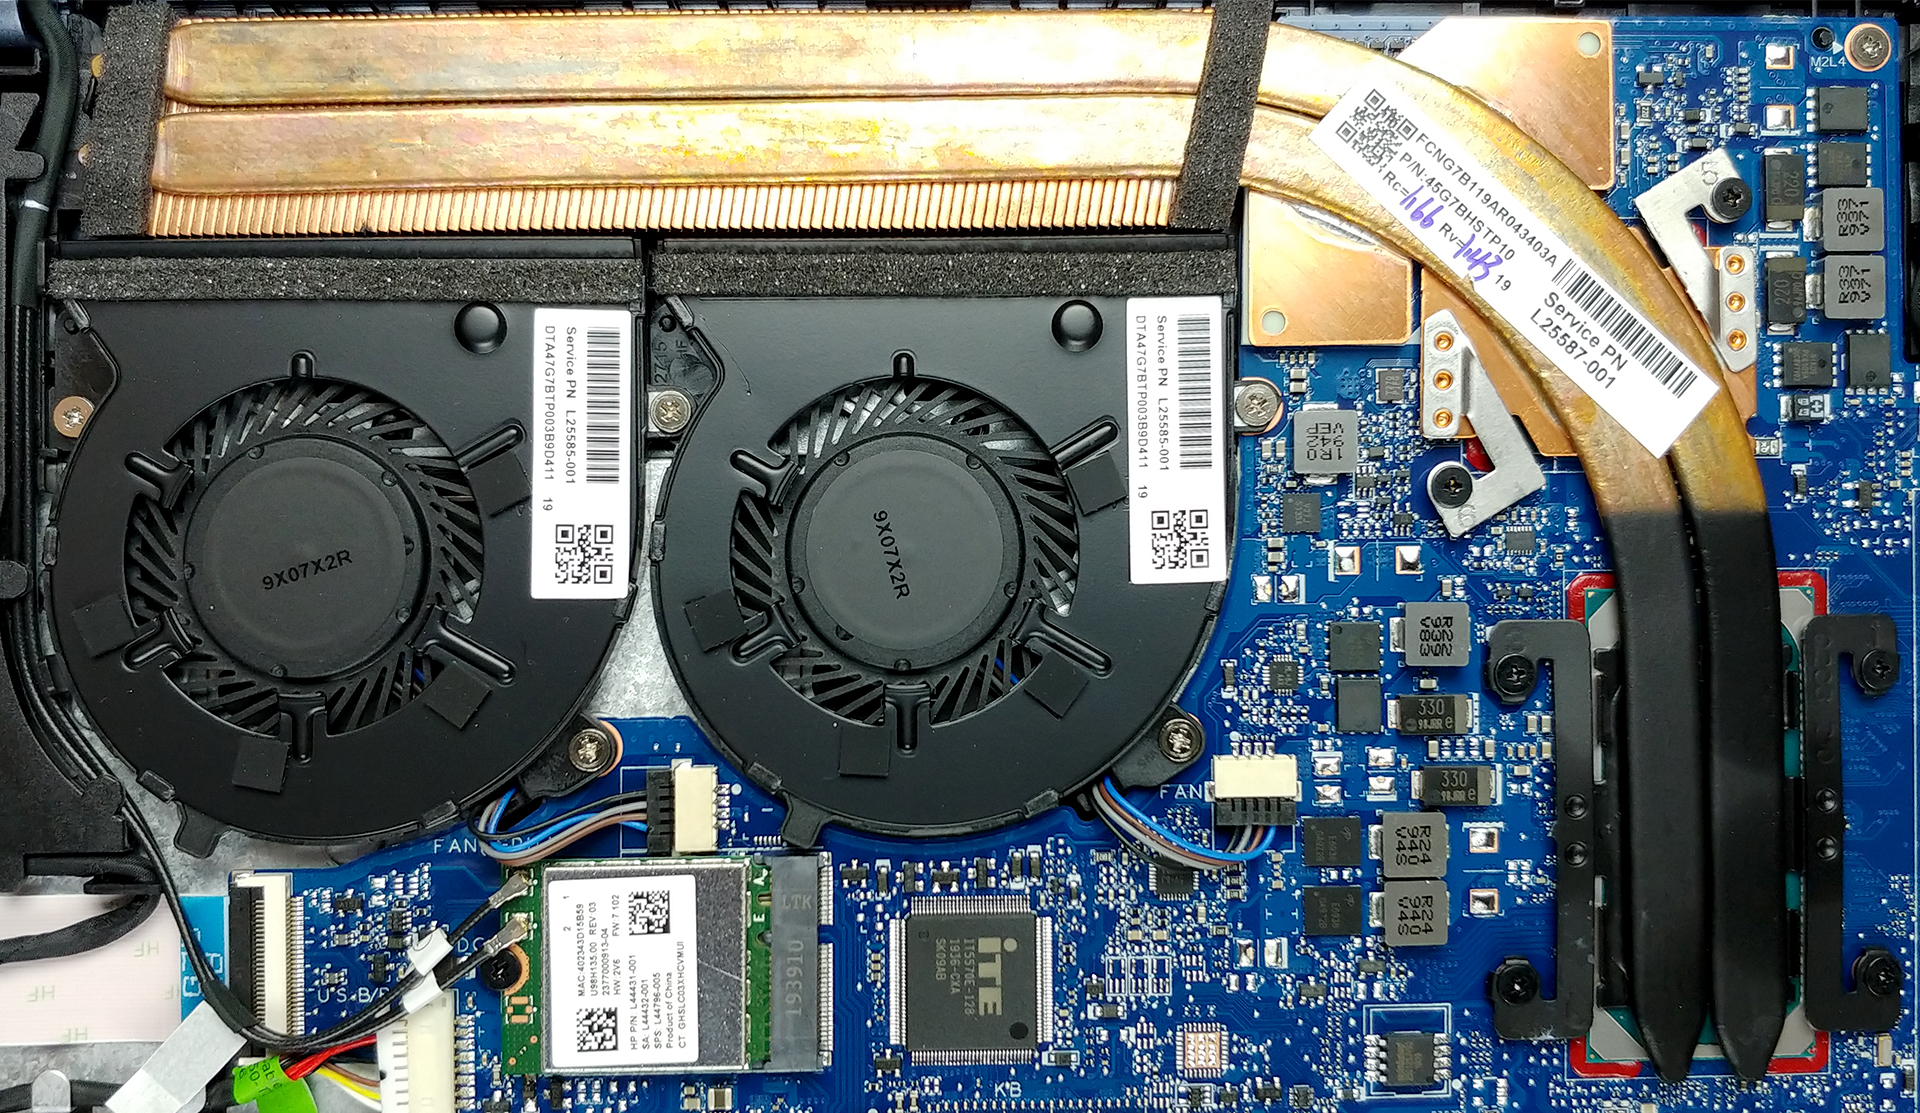
4. Cooling system
Cooling-wise, there are two heat pipes that cool both the CPU and the GPU. They end in a rather long heat spreader that has two fans attached to it, which blow the heat away.
Check out all HP Pavilion 15 (15-cs3000) prices and configurations in our Specs System or read more in our In-Depth review.