Inside the new Acer Aspire S7 – disassembly, internal photos and upgrade options
The first thing we did when receiving the testing unit of the update Aspire S7 series with Broadwell CPUs, was to open the bottom of the chassis and see what’s inside. Quite frankly, we were really surprised how easy we can open the notebook, since the bottom lid is held only by 11 screws and no other tools are needed for the opening. However, there aren’t any additional upgrade options, but if you find yourself in a situation that requires the ultrabook to be disassembled, you’ve come to the right place.
1. Removing the bottom cover
As we mentioned earlier, you will need to remove about 11 screws and no other tools are necessary to open the cover. You will open it without any hassle.

2. Removing the battery
The Aspire S7 is equipped with 6280 mAh (47 Wh) battery that should be removed before any further operations are done. This can be done quite easily by removing the screws highlighted below. Also, be careful when removing the battery’s cable.


3. Removing the motherboard and SSD
After you’ve removed the battery, you can proceed with the SSD, motherboard and the CPU fans. Quite uncommon for an ultrabook, the Aspire S7 has two fans that work really great, and keep the system relatively cool and quiet. This we are going discuss in our upcoming detailed review. The SSD used in the Aspire S7 is a 30 mm long Kingston mSATA. In our case, the capacity of the SSD is 256GB.
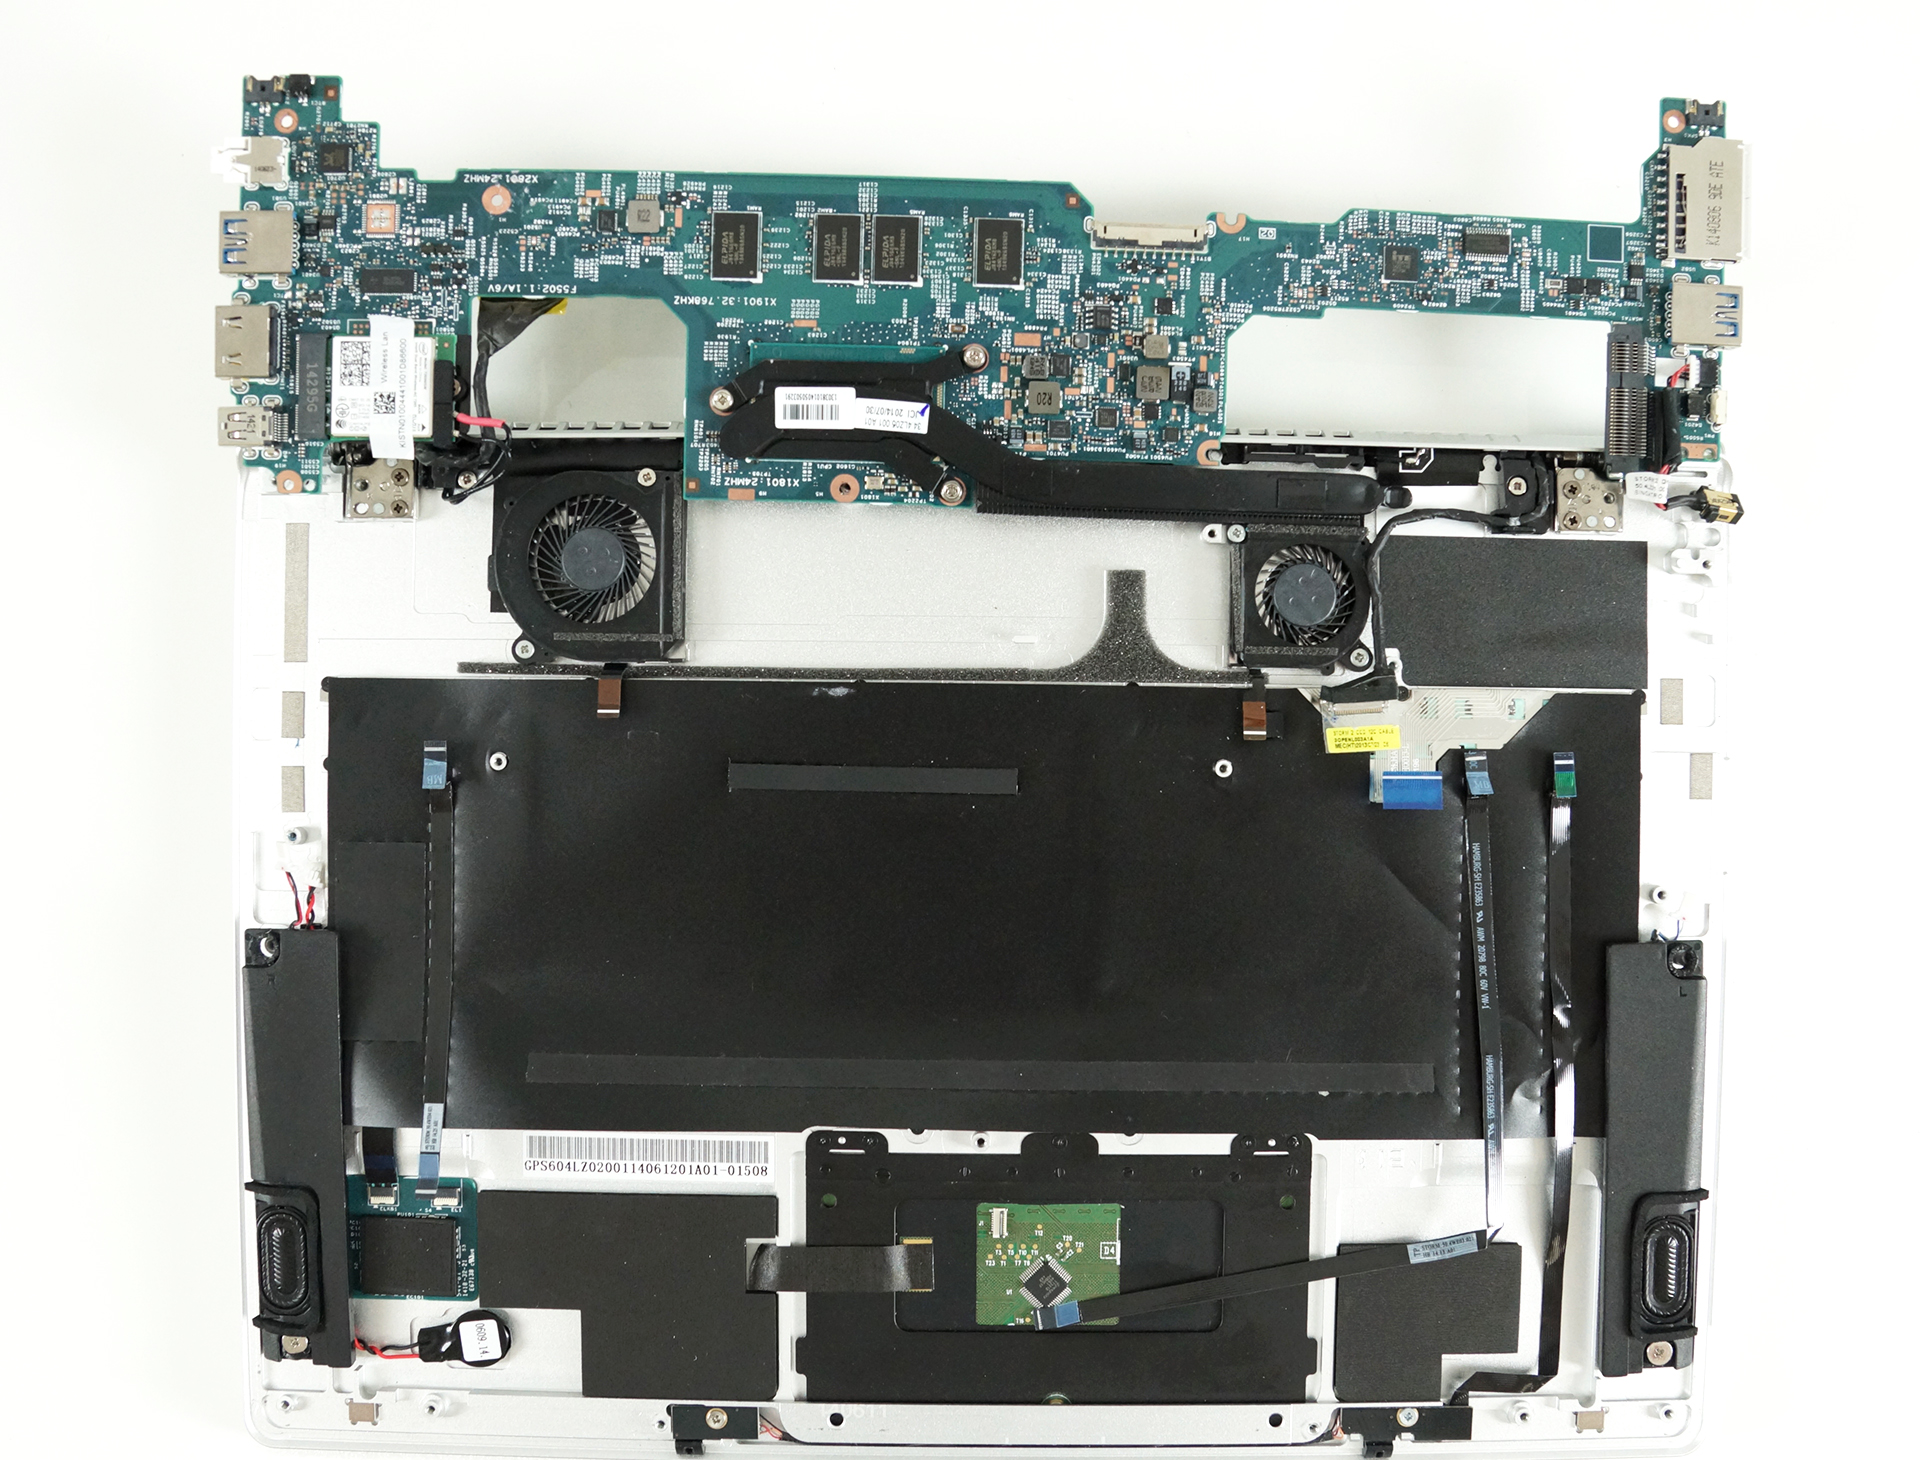

Quick tip: Try removing the attached cables to the motherboard as they will prevent you from lifting it, even if you removed the screws.


![[Junio de 2026] Las marcas de ordenadores portátiles más vendidas en Amazon Global: el dominio sin rival de Apple en unidades y facturación](https://laptopmedia.com/wp-content/uploads/2026/07/GLOBAL-Best-Brands-400x225.jpg)
![[Junio de 2026] Amazon Global: Las 10 portátiles más vendidas – El nuevo MacBook Neo de Apple se aupó al número 1 y está revolucionando el mercado gracias a su precio asequible](https://laptopmedia.com/wp-content/uploads/2026/07/Best-Selling-Laptops-GLOBAL-Top-10-400x225.jpg)
![[Junio de 2026] Amazon Global: Las 10 portátiles para videojuegos más vendidas – La Nitro V 16S AI de Acer domina las ventas, mientras que ASUS lidera los ingresos totales](https://laptopmedia.com/wp-content/uploads/2026/07/Best-Selling-Gaming-Laptops-GLOBAL-Top-10-400x225.jpg)
![[Junio de 2026] Clasificación mundial de las GPU para portátiles más vendidas en Amazon: la NVIDIA RTX 5060 es la GPU dedicada más vendida](https://laptopmedia.com/wp-content/uploads/2026/07/Best-Selling-GPUs-GLOBAL-Top-10-400x225.jpg)
![[Junio de 2026] Clasificación mundial de las CPU para portátiles más vendidas en Amazon: el Apple M5 domina el mercado, mientras que el AMD Ryzen 7 260 consigue una sólida cuota en el segmento de gama alta](https://laptopmedia.com/wp-content/uploads/2026/07/Best-Selling-CPUs-GLOBAL-Top-10-400x225.jpg)

The fans look kinda small… I mean… really small. I wouldn’t wonder if it has a high pitched fan noise…
Actually they aren’t that loud. Wait for our detailed review and you will see. (: