Inside Acer Swift 1 (SF114-32) – disassembly and upgrade options
This is one of the most affordable notebooks you can get, that features an aluminum chassis. Of course, the low price takes its toll in some regions, like performance.
Check out all Acer Swift 1 (SF114-32) prices and configurations in our Specs System or read more in our In-Depth review.


1. Remove the bottom plate
There are 9 Torx-head screws that separate you from the insides of this machine. After you remove them, gently pop the bottom panel away with a plastic pry tool. Ultimately, this would enable you to lift the plate from the chassis, and take a look at the internals.
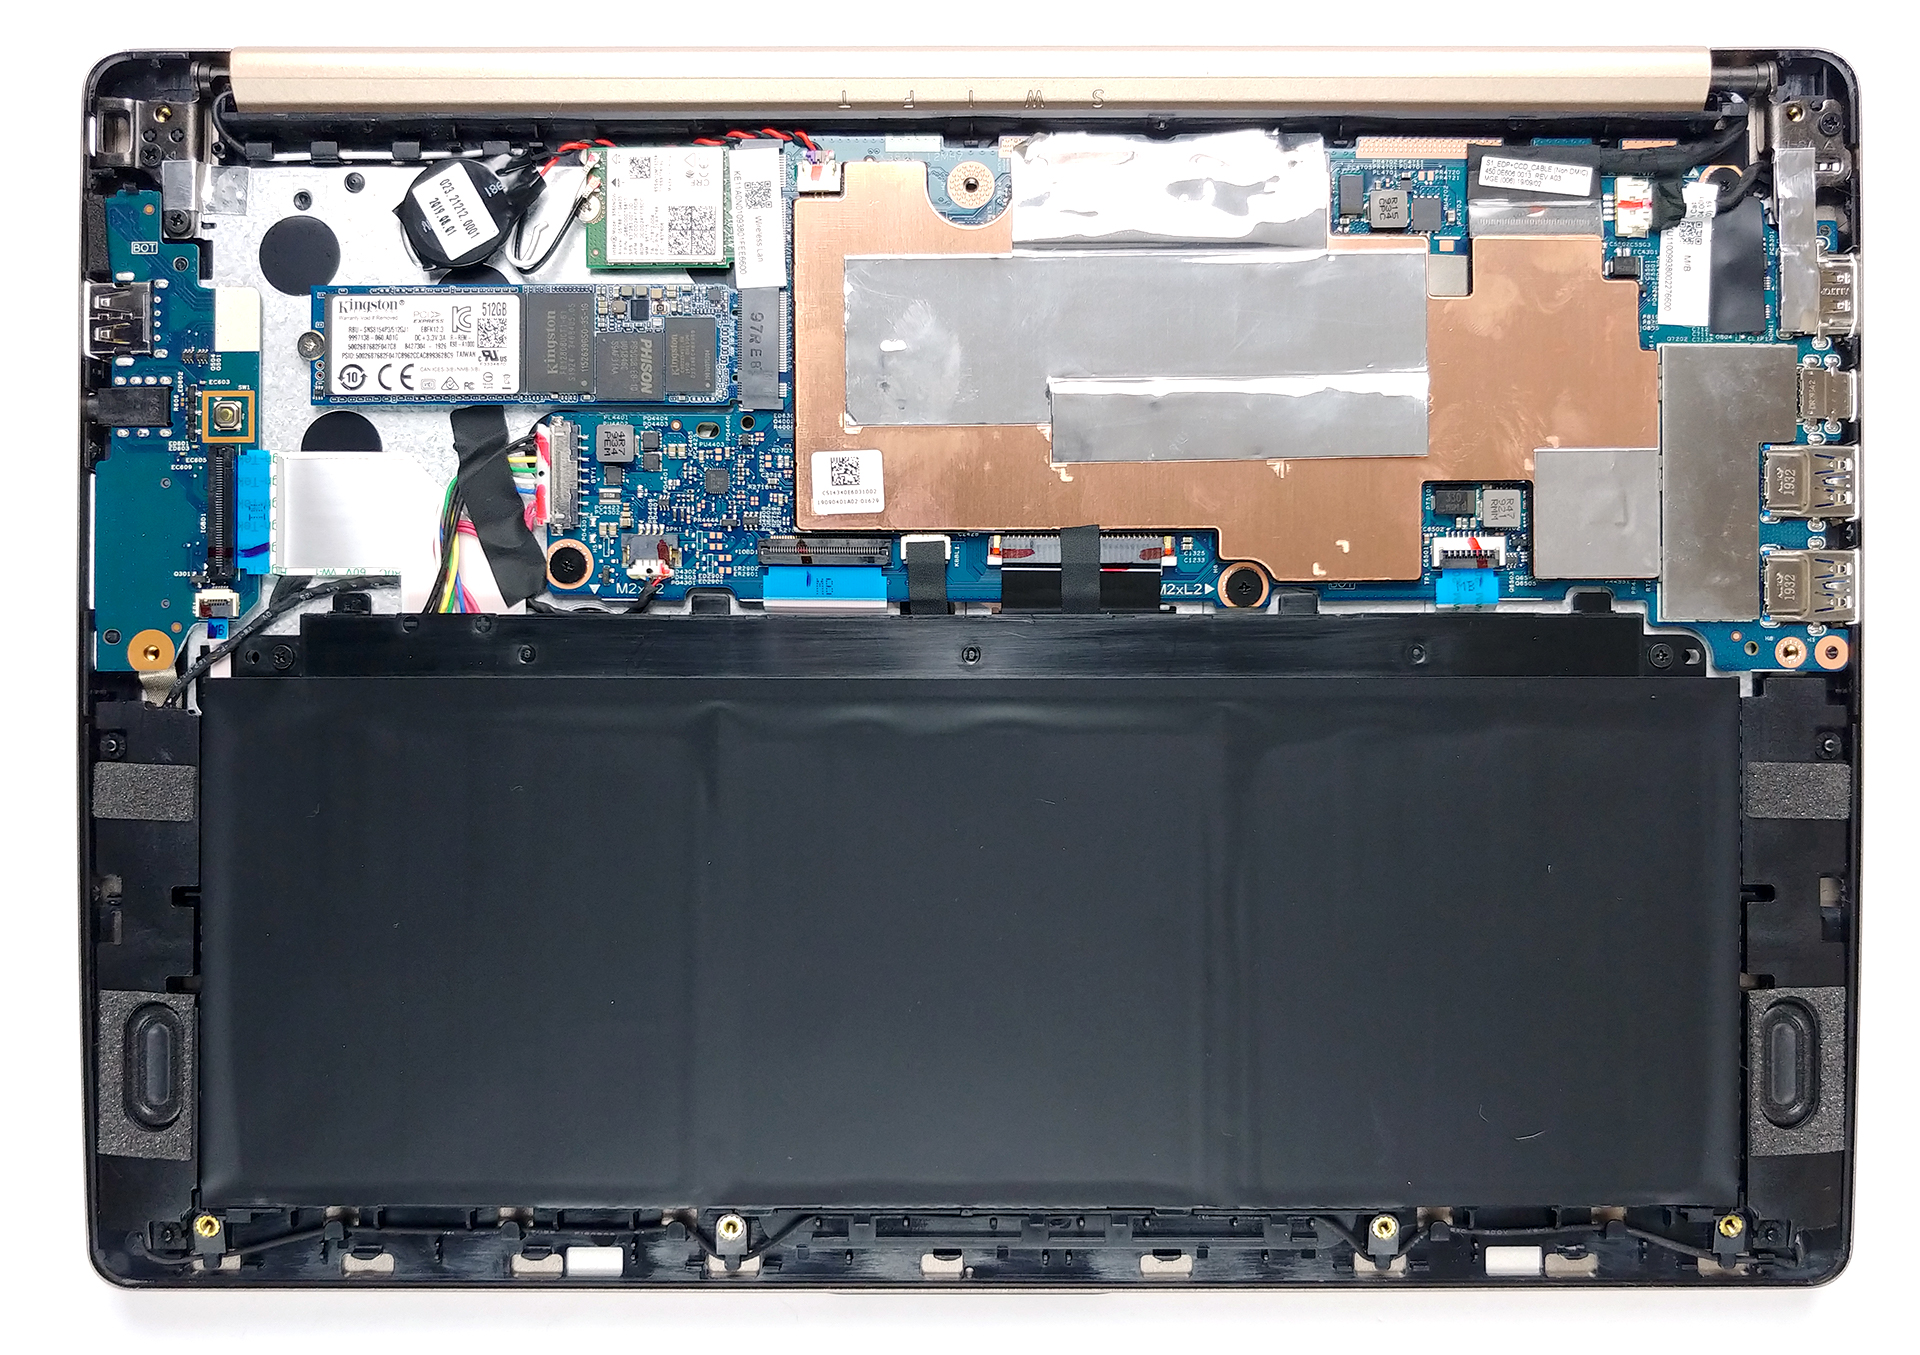
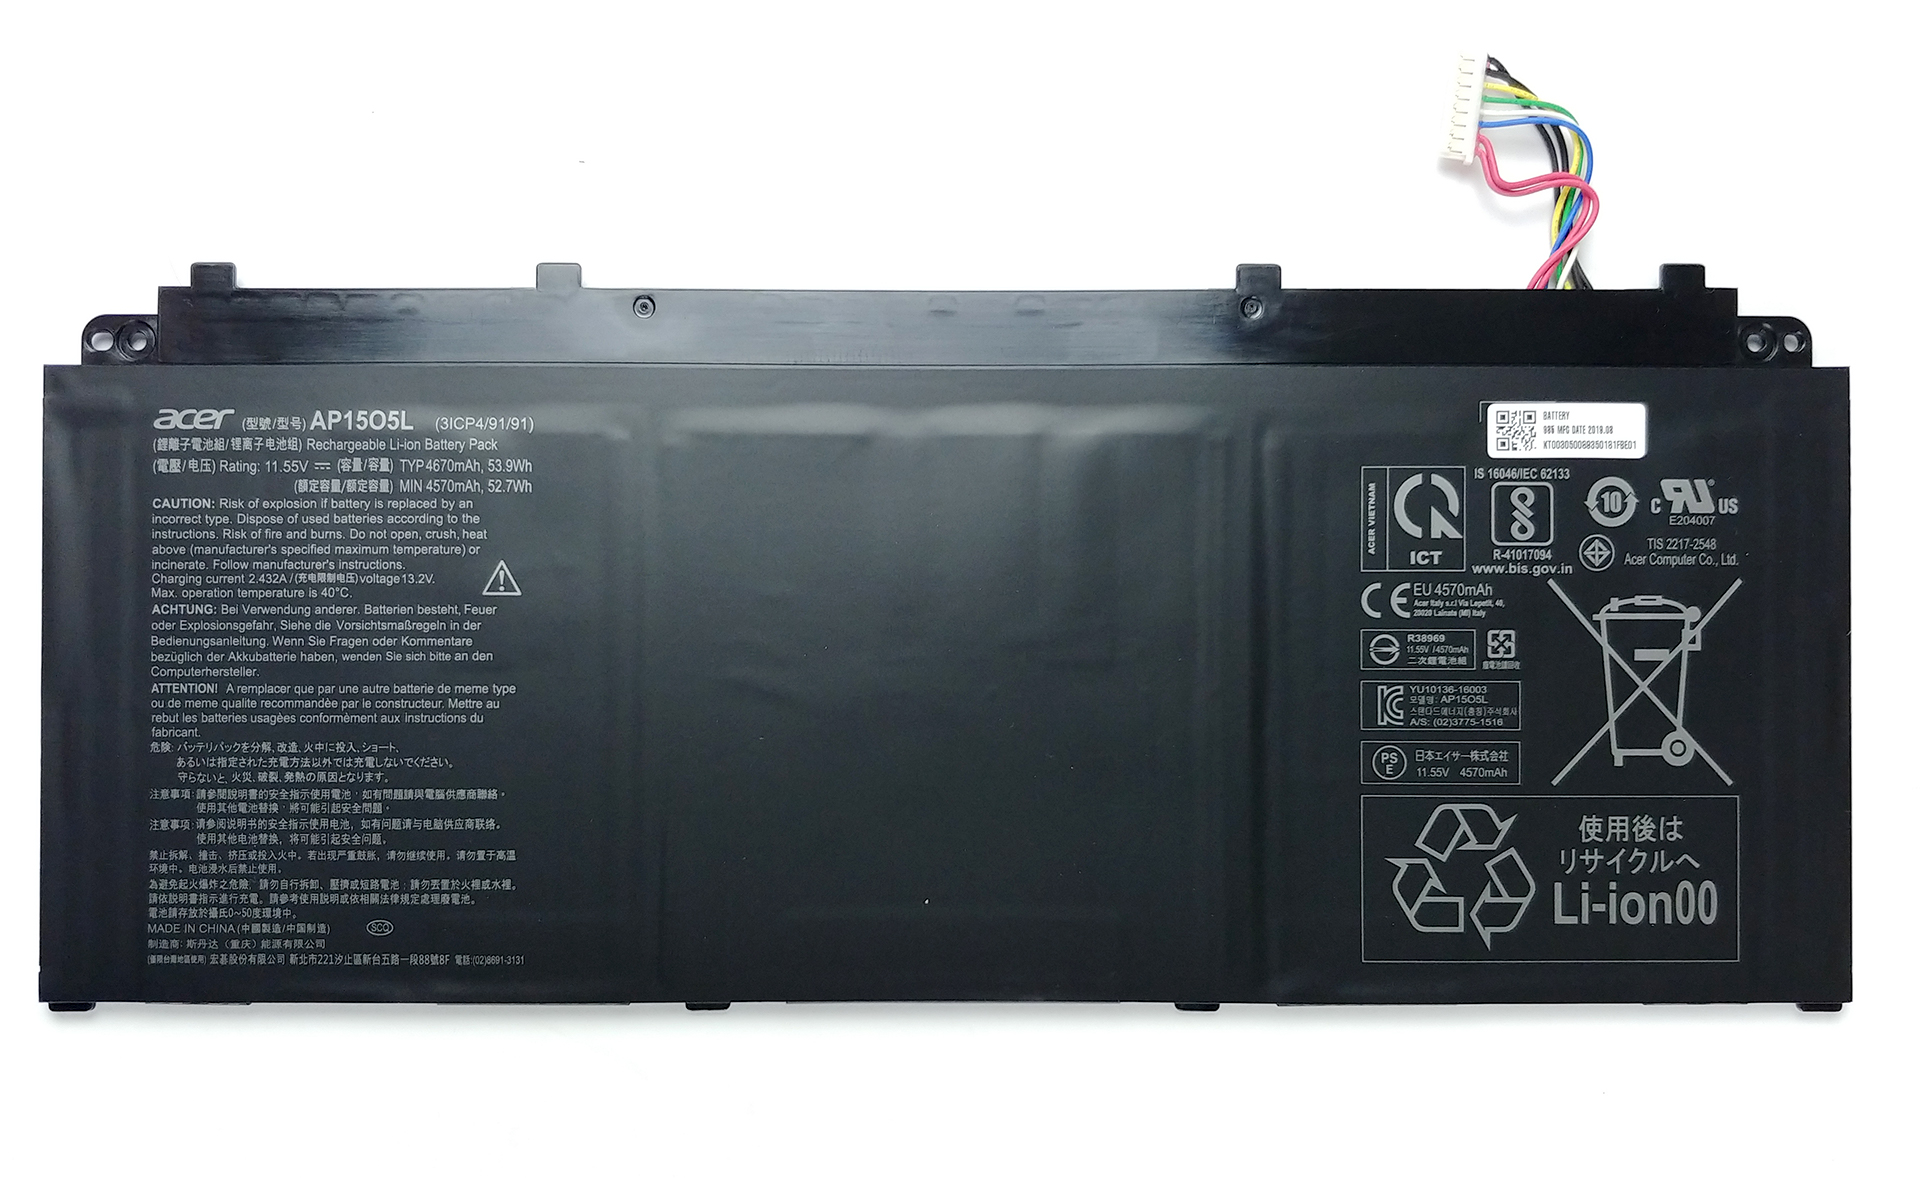
2. Battery
Lastly, there is the huge battery, which comfortably takes half of the space inside the machine. You won’t be able to information about it unless you turn it upside down. This reveals, Acer has put a 53.9Wh battery in a super-efficient laptop. We expect a huge number when it comes to battery life!
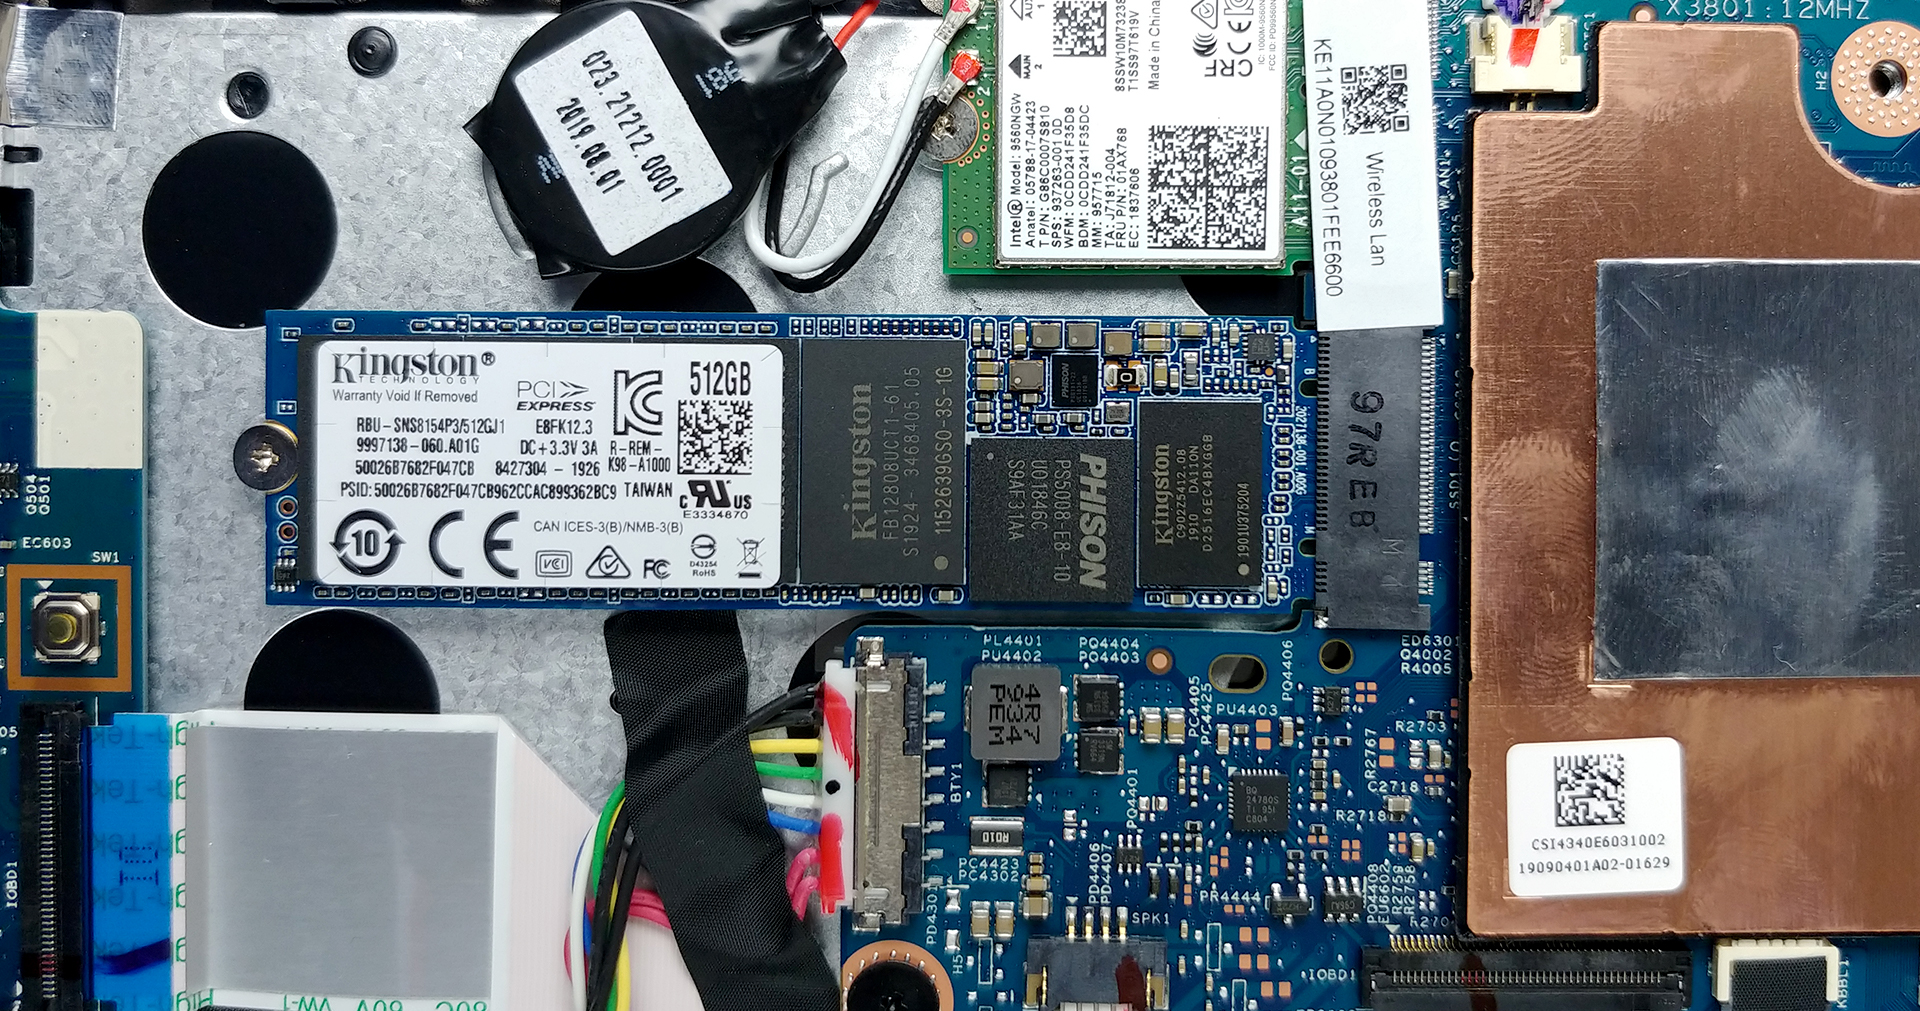
3. Memory and storage
Sadly, the memory is soldered to the motherboard, but on the bright side, you still can upgrade the storage, via the single M.2 PCIe/SATA slot.
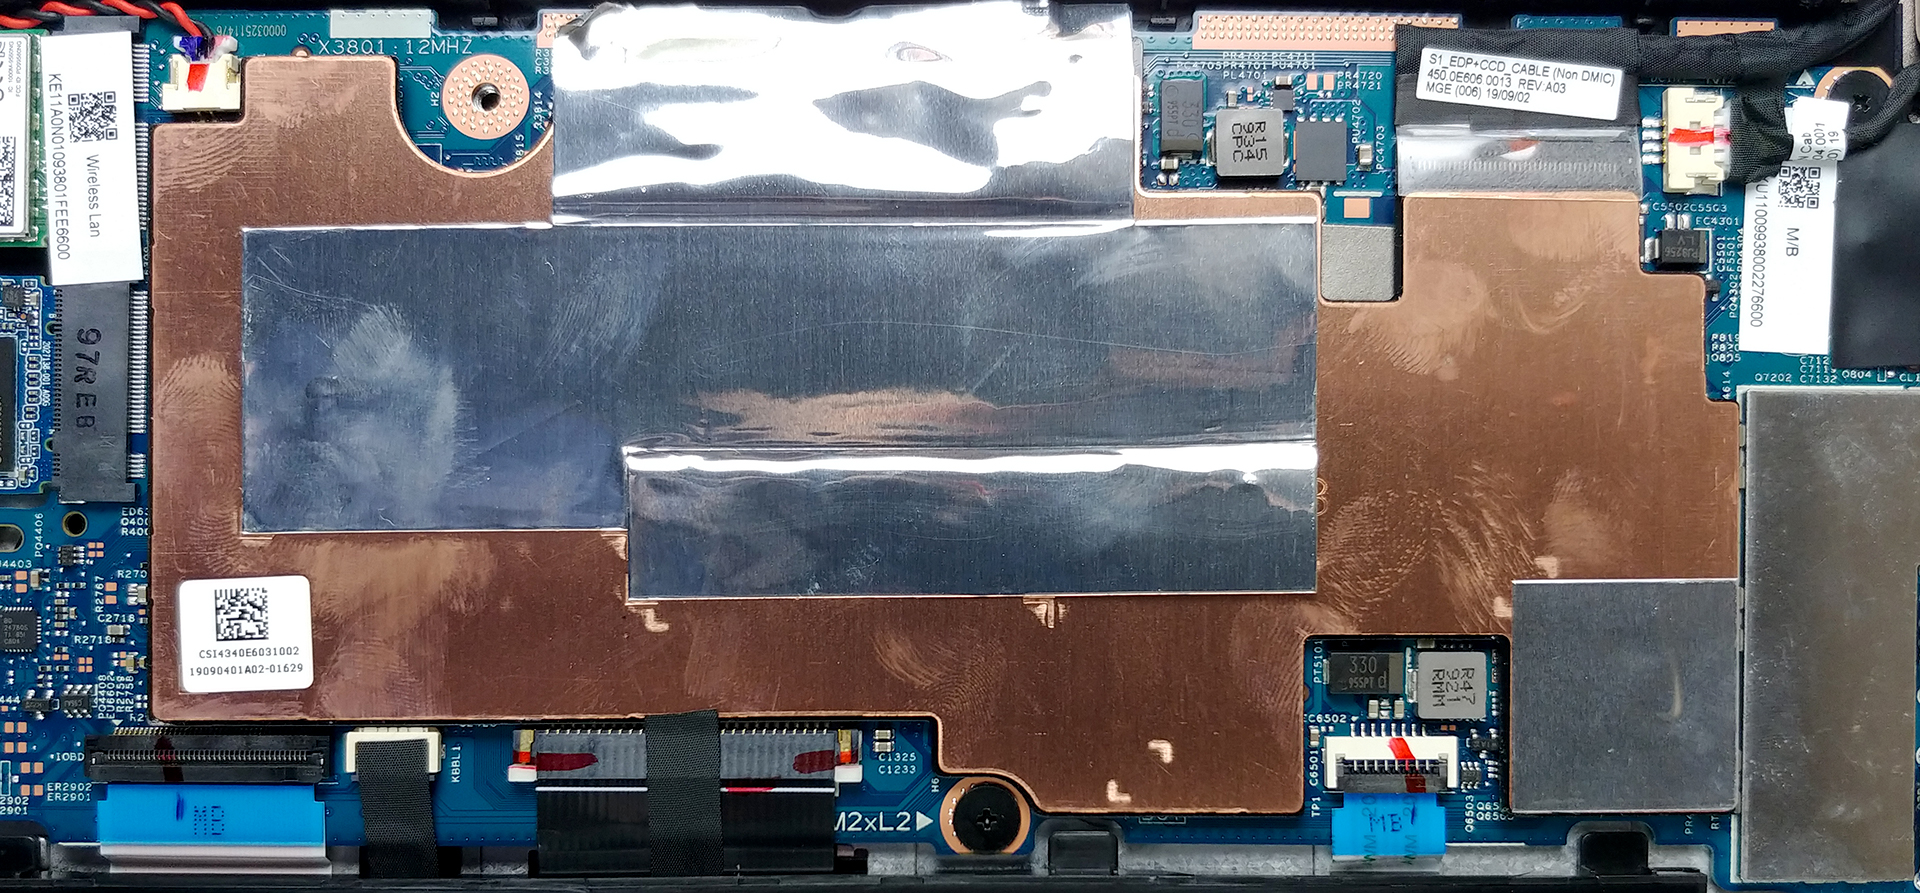
4. Cooling system
Quite expectedly, given the hardware in place here, the Swift 1 (SF114-32) features a passive cooling solution. It consists of a single copper plate, which has to dissipate the heat coming from the 6W processor inside.
Check out all Acer Swift 1 (SF114-32) prices and configurations in our Specs System or read more in our In-Depth review.


![[Juin 2026] Les marques d’ordinateurs portables les plus vendues sur Amazon Global – La domination sans égale d’Apple en termes de volume de ventes et de chiffre d’affaires](https://laptopmedia.com/wp-content/uploads/2026/07/GLOBAL-Best-Brands-400x225.jpg)
![[Juin 2026] Amazon Global : le top 10 des ordinateurs portables les plus vendus – Le nouveau MacBook Neo d’Apple s’empare de la première place et redéfinit le marché grâce à son prix abordable](https://laptopmedia.com/wp-content/uploads/2026/07/Best-Selling-Laptops-GLOBAL-Top-10-400x225.jpg)
![[Juin 2026] Amazon Global : le top 10 des ordinateurs portables de jeu les plus vendus – Le Nitro V 16S AI d’Acer domine les ventes, tandis qu’ASUS arrive en tête en termes de chiffre d’affaires global](https://laptopmedia.com/wp-content/uploads/2026/07/Best-Selling-Gaming-Laptops-GLOBAL-Top-10-400x225.jpg)
![[Juin 2026] Classement mondial des cartes graphiques pour ordinateurs portables les plus vendues sur Amazon – La NVIDIA RTX 5060 est la carte graphique dédiée la plus vendue](https://laptopmedia.com/wp-content/uploads/2026/07/Best-Selling-GPUs-GLOBAL-Top-10-400x225.jpg)
![[Juin 2026] Classement mondial des processeurs d’ordinateurs portables les plus vendus sur Amazon : l’Apple M5 domine, tandis que l’AMD Ryzen 7 260 s’impose dans le segment haut de gamme](https://laptopmedia.com/wp-content/uploads/2026/07/Best-Selling-CPUs-GLOBAL-Top-10-400x225.jpg)

I consider buying one but I am concerned that ram is soldered on to the motherboard. What if it dies? Can it be easily removed and replaced?
не покупай дерьмо