Inside HP Spectre x360 13 – disassembly, internal photos and upgrade options
Unlike the ultrabooks we’ve tested recently, the HP Spectre x360 13 was a bit tricky to open. Luckily, it wasn’t as bad as the normal Spectre 13.
You can find the available configurations and their prices here: http://amzn.to/2uiLbR9
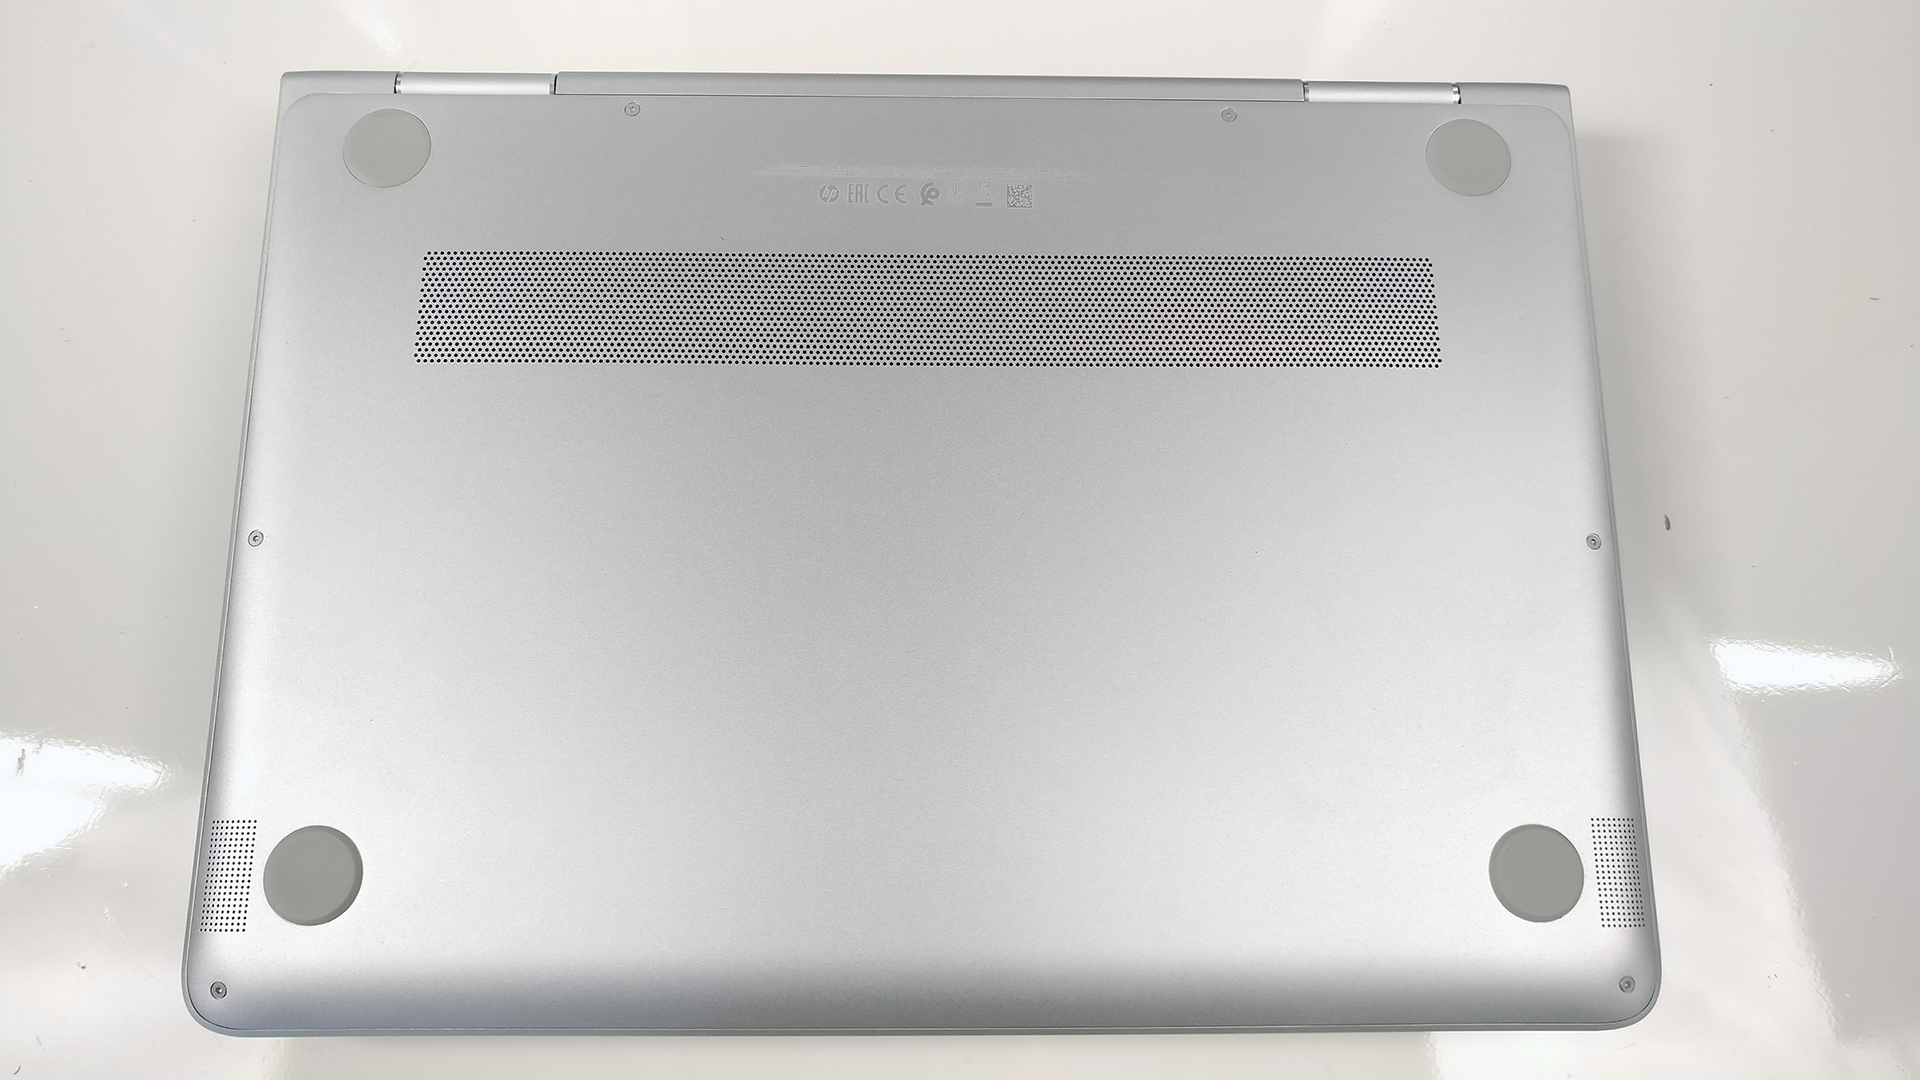
1. Removing the bottom piece
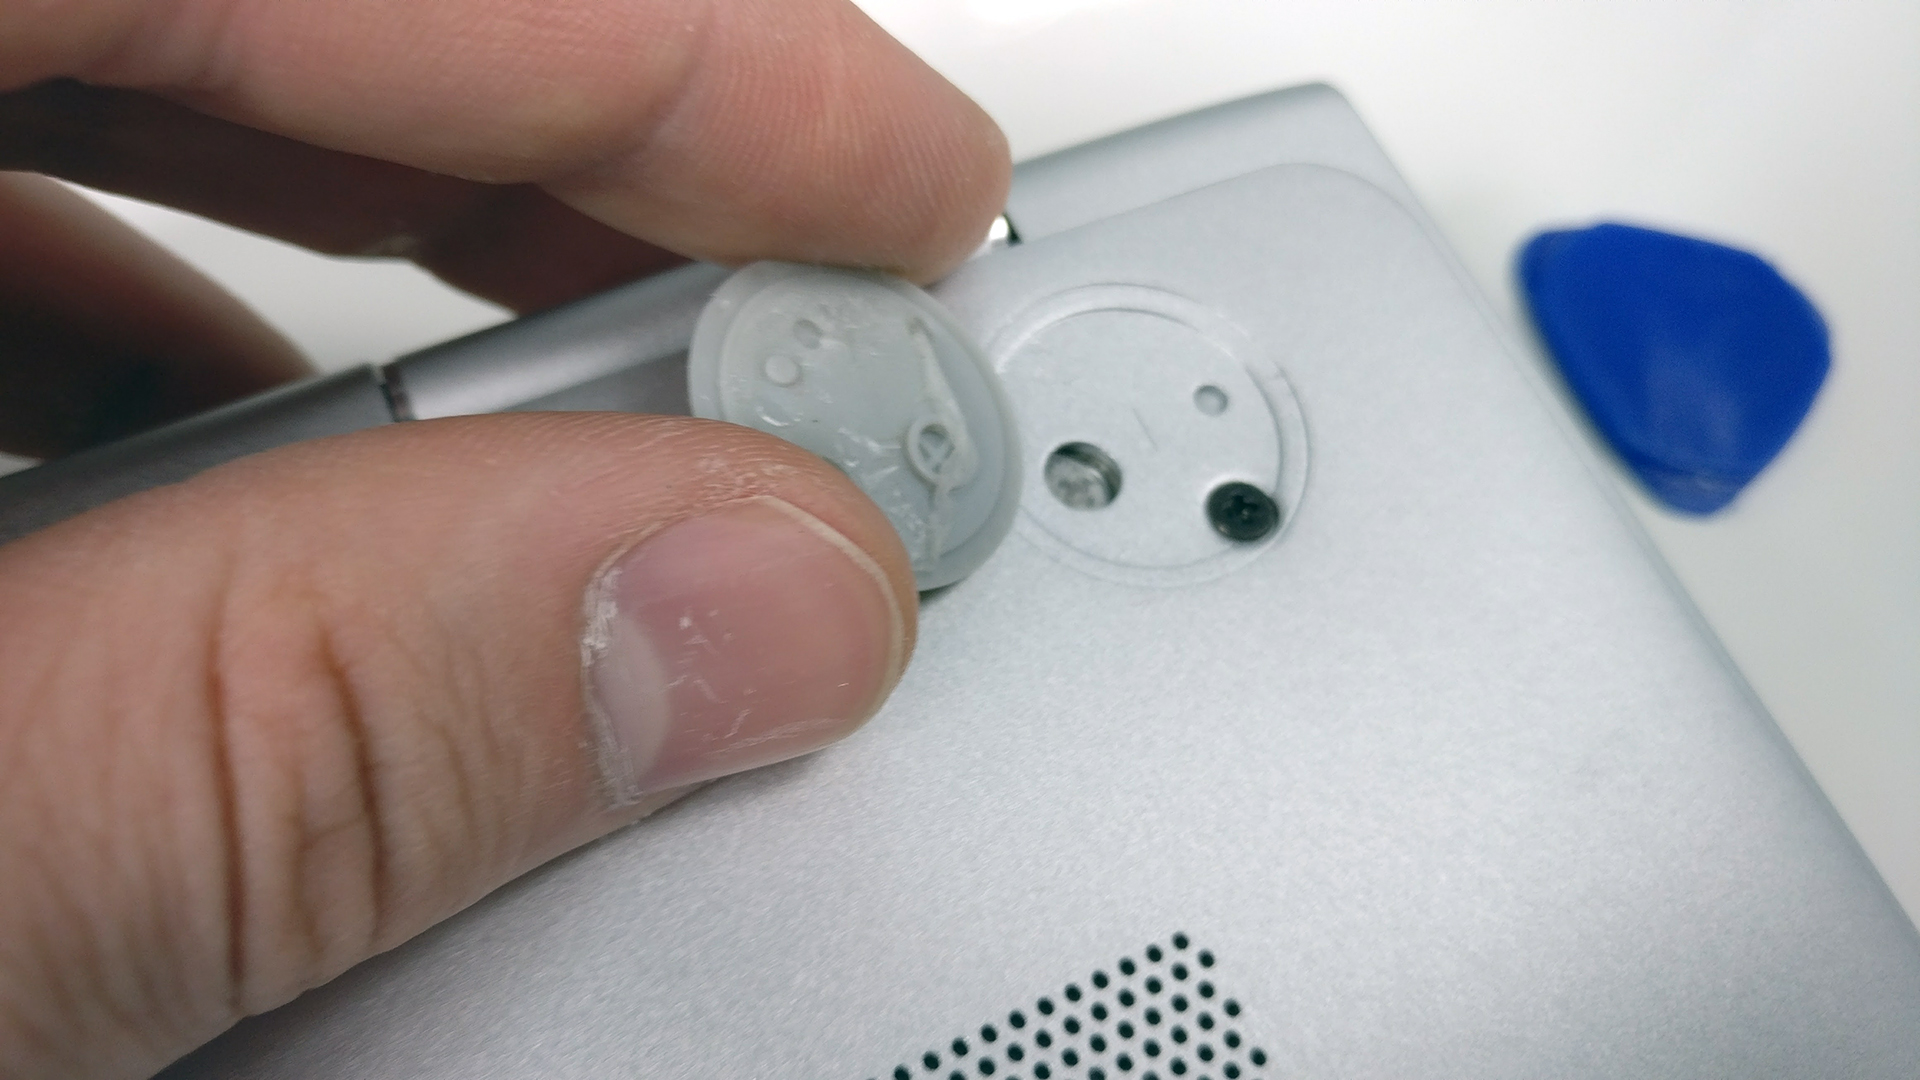
This one is actually the tricky part. You need to check under the silicone feet for screws as shown in the photo below. Once all bolts are unscrewed, gently pry up the plate.

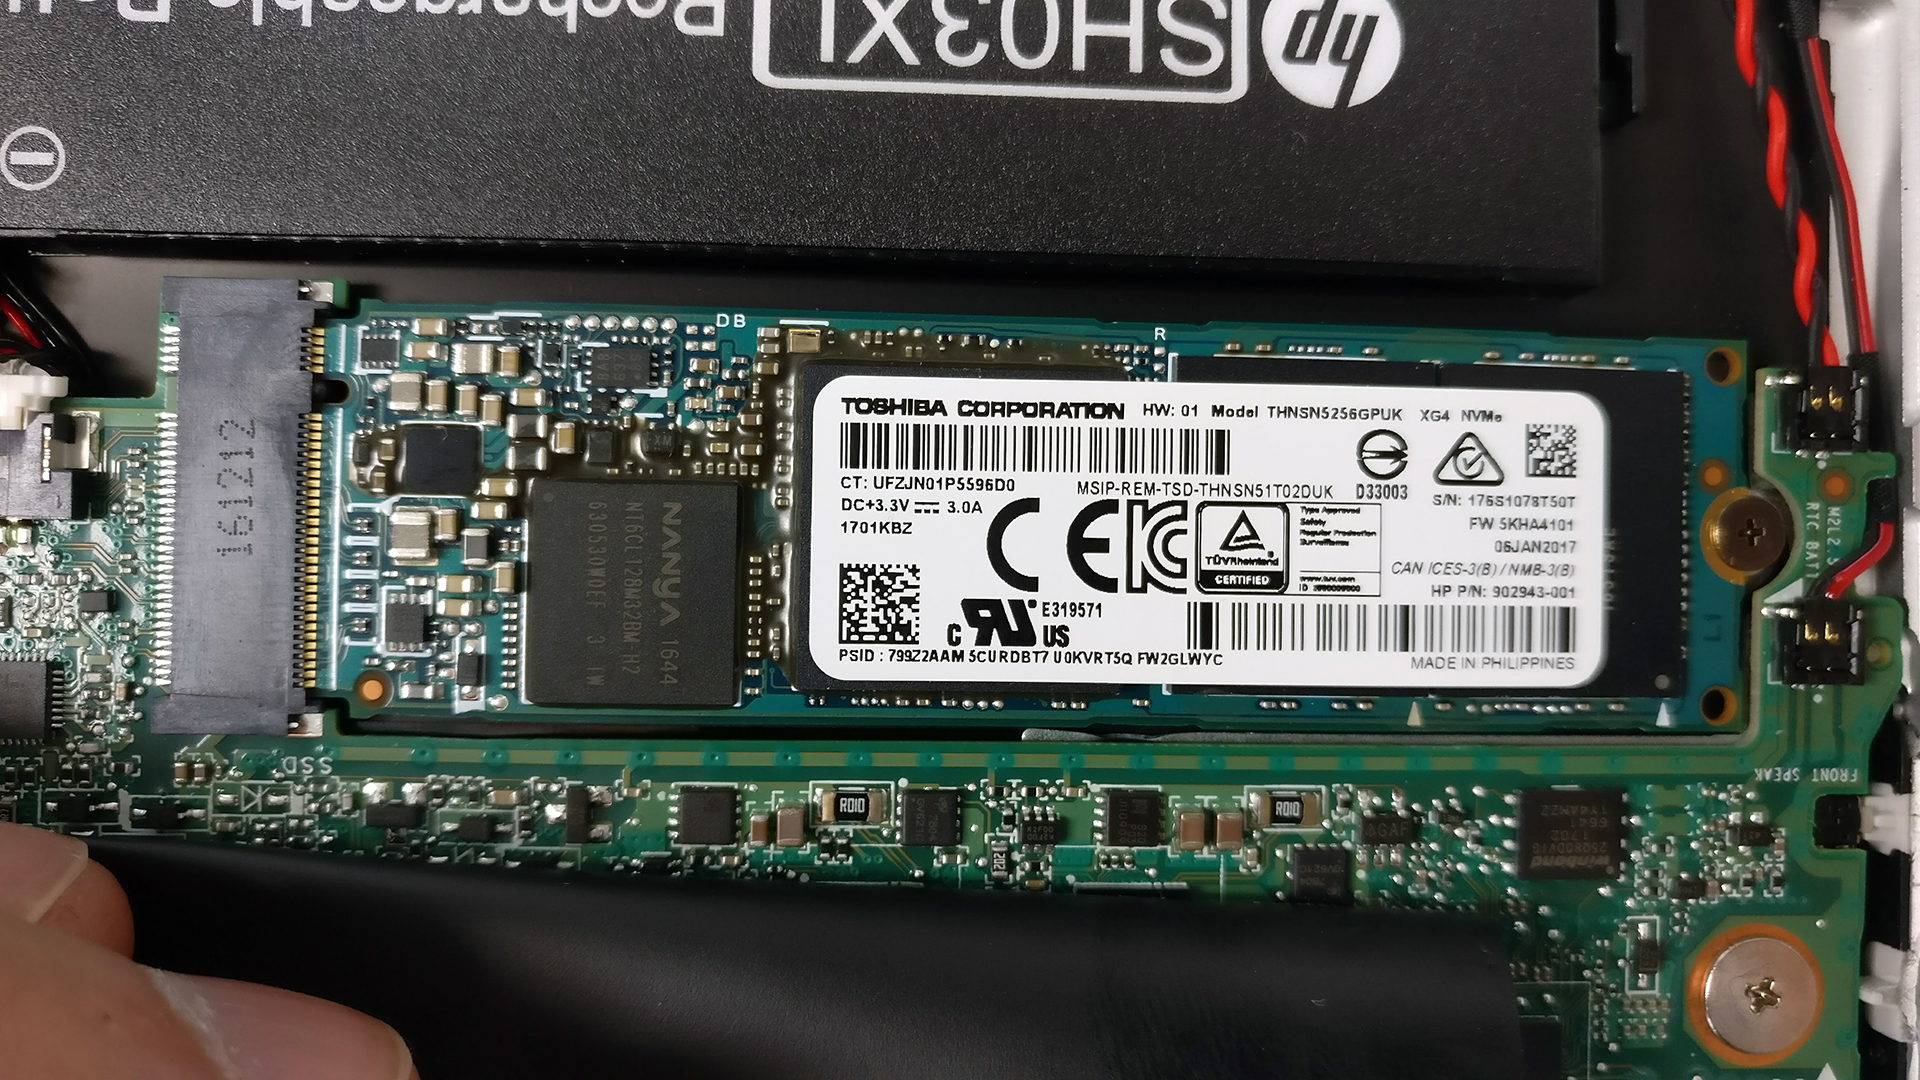
2. Storage
The laptop offers only an M.2 PCIe NVMe SSD and no 2.5-inch drive since there’s no room for one. The SSD installed on our unit is a Toshiba THNSN5256GPUK with 256GB capacity.
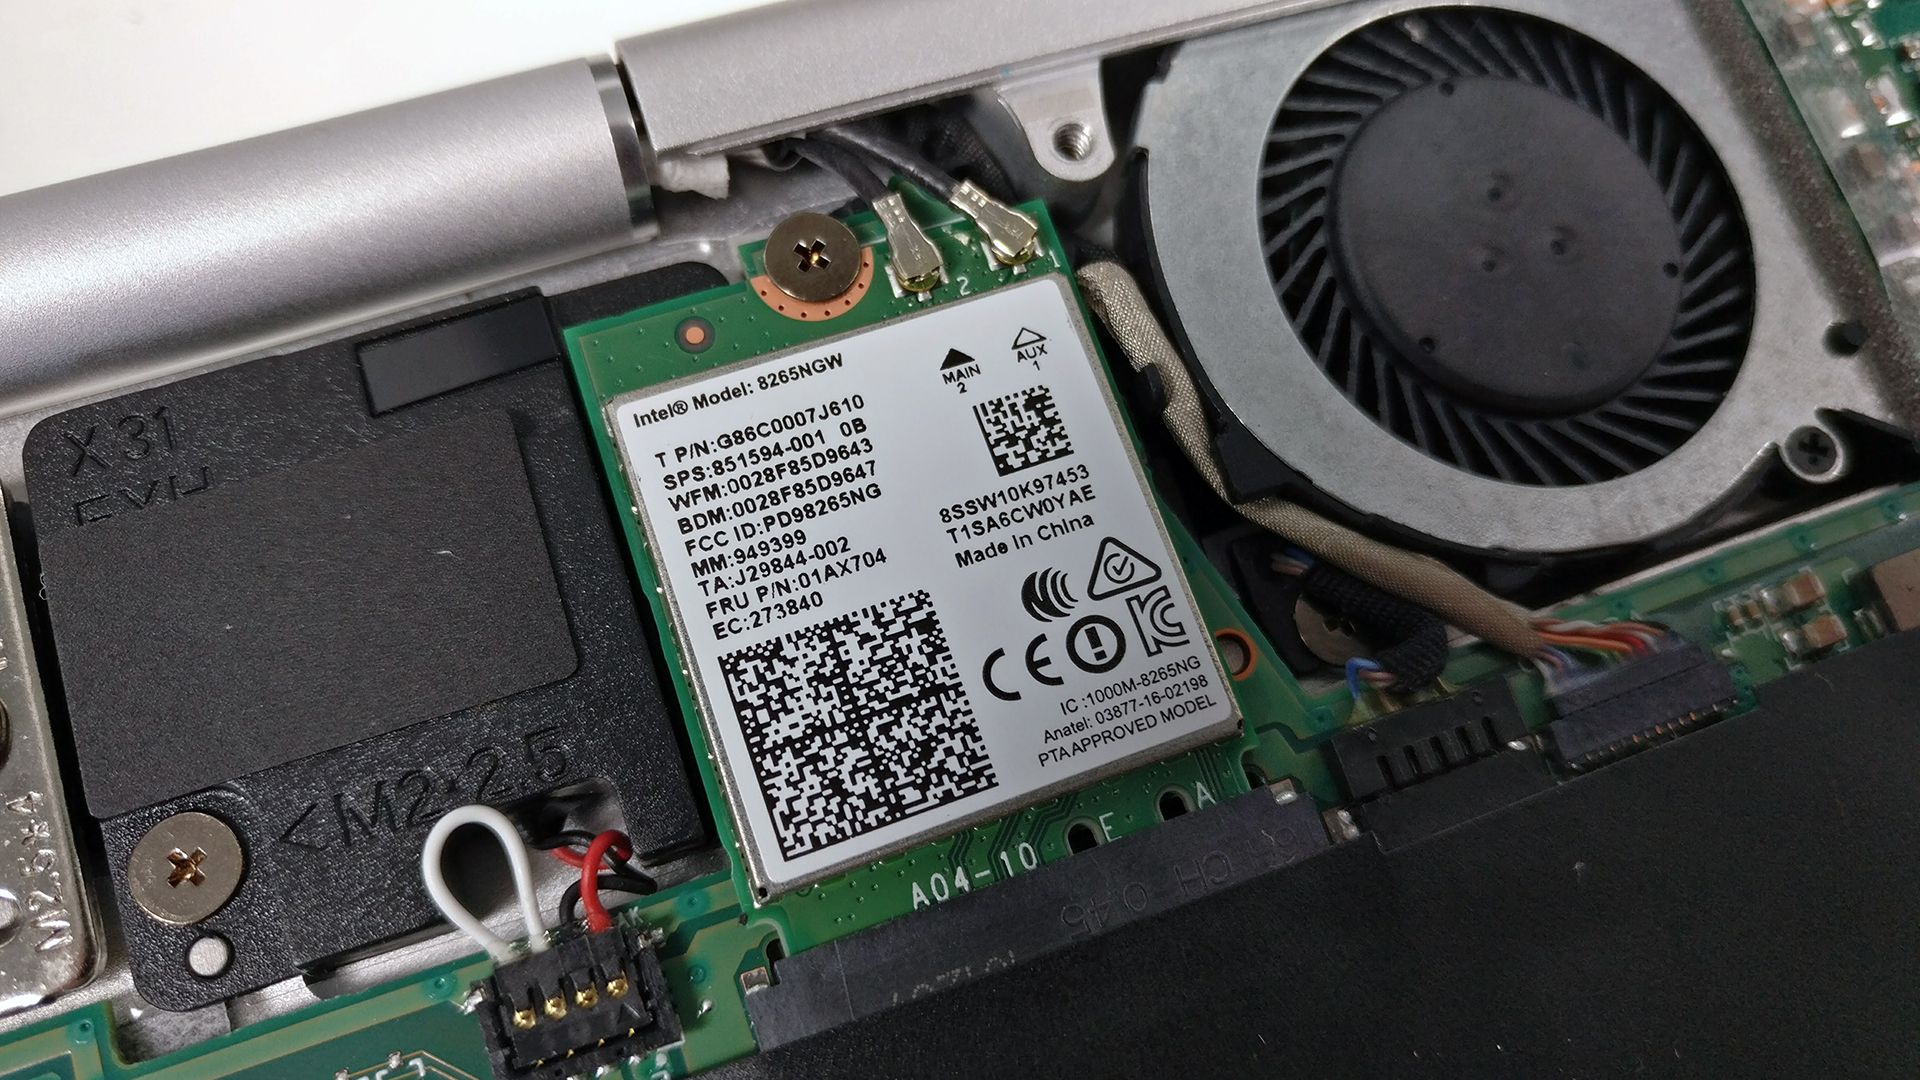
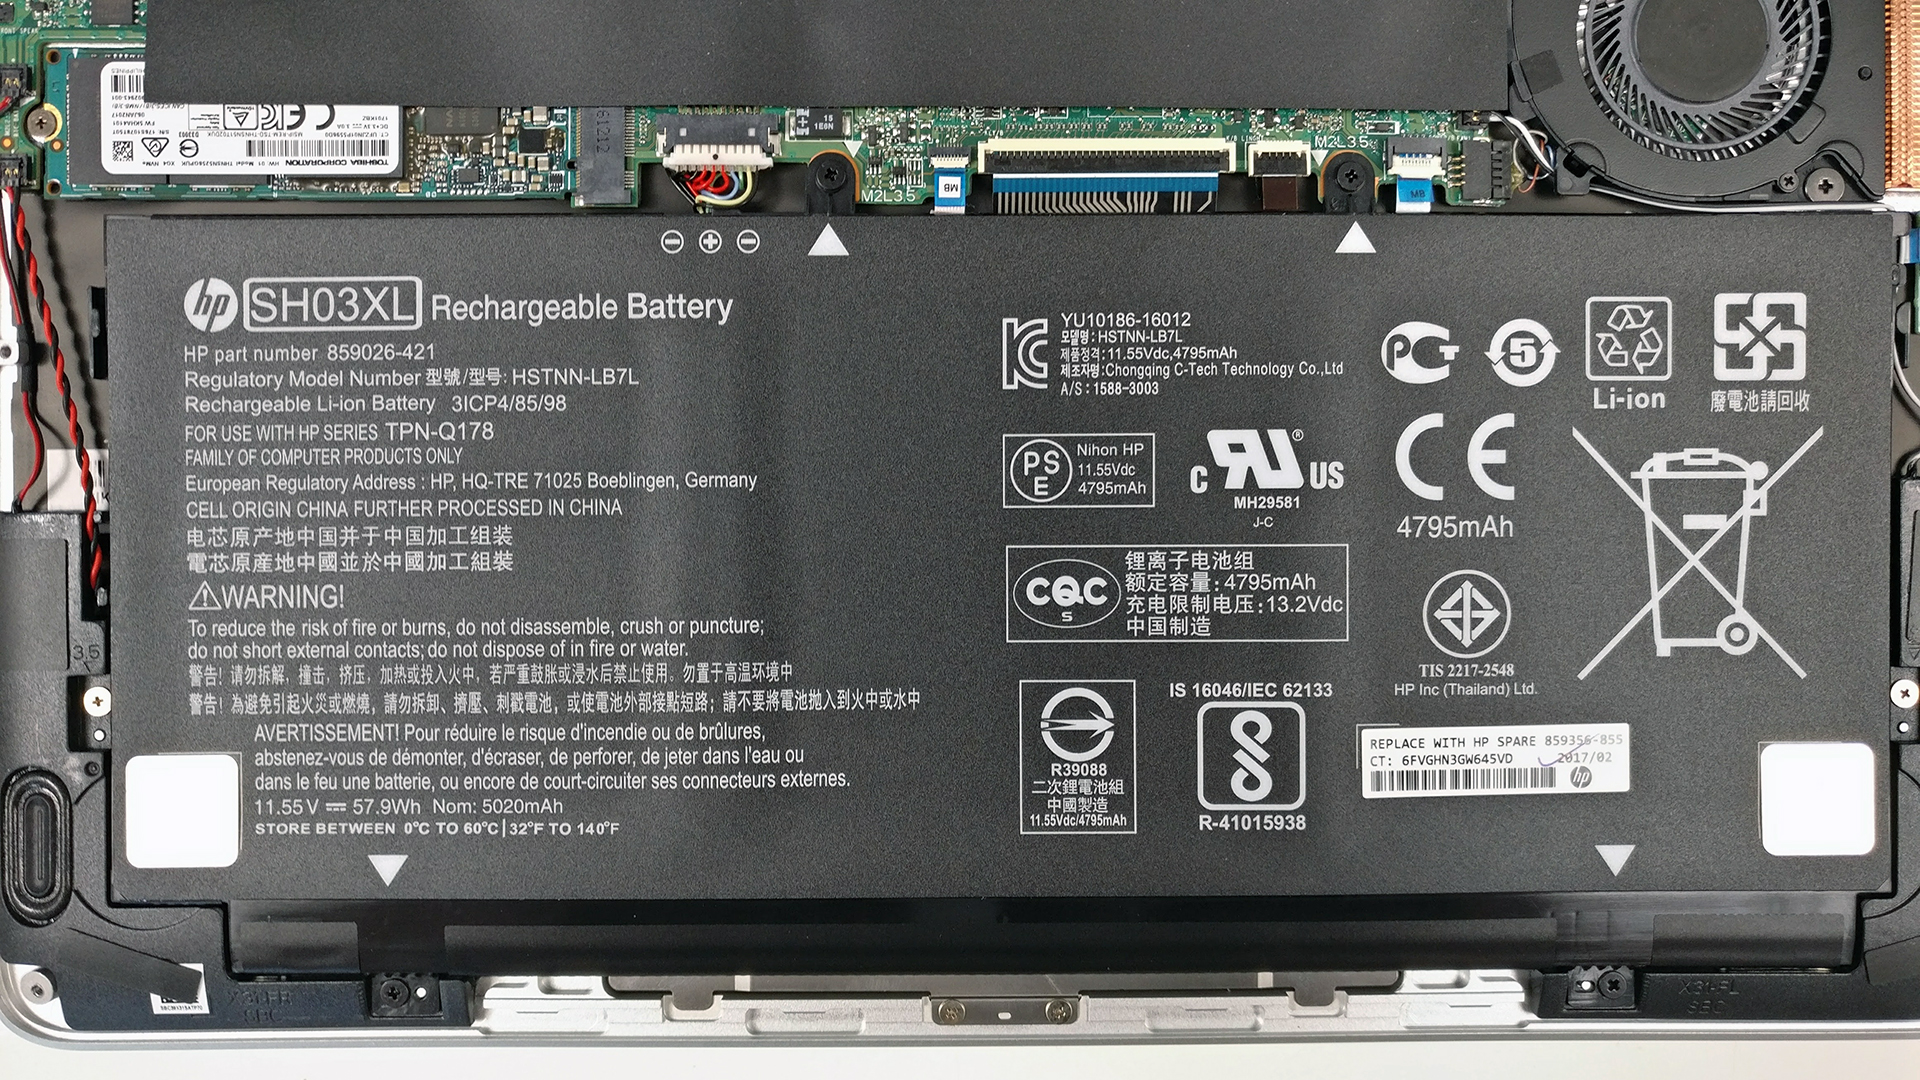
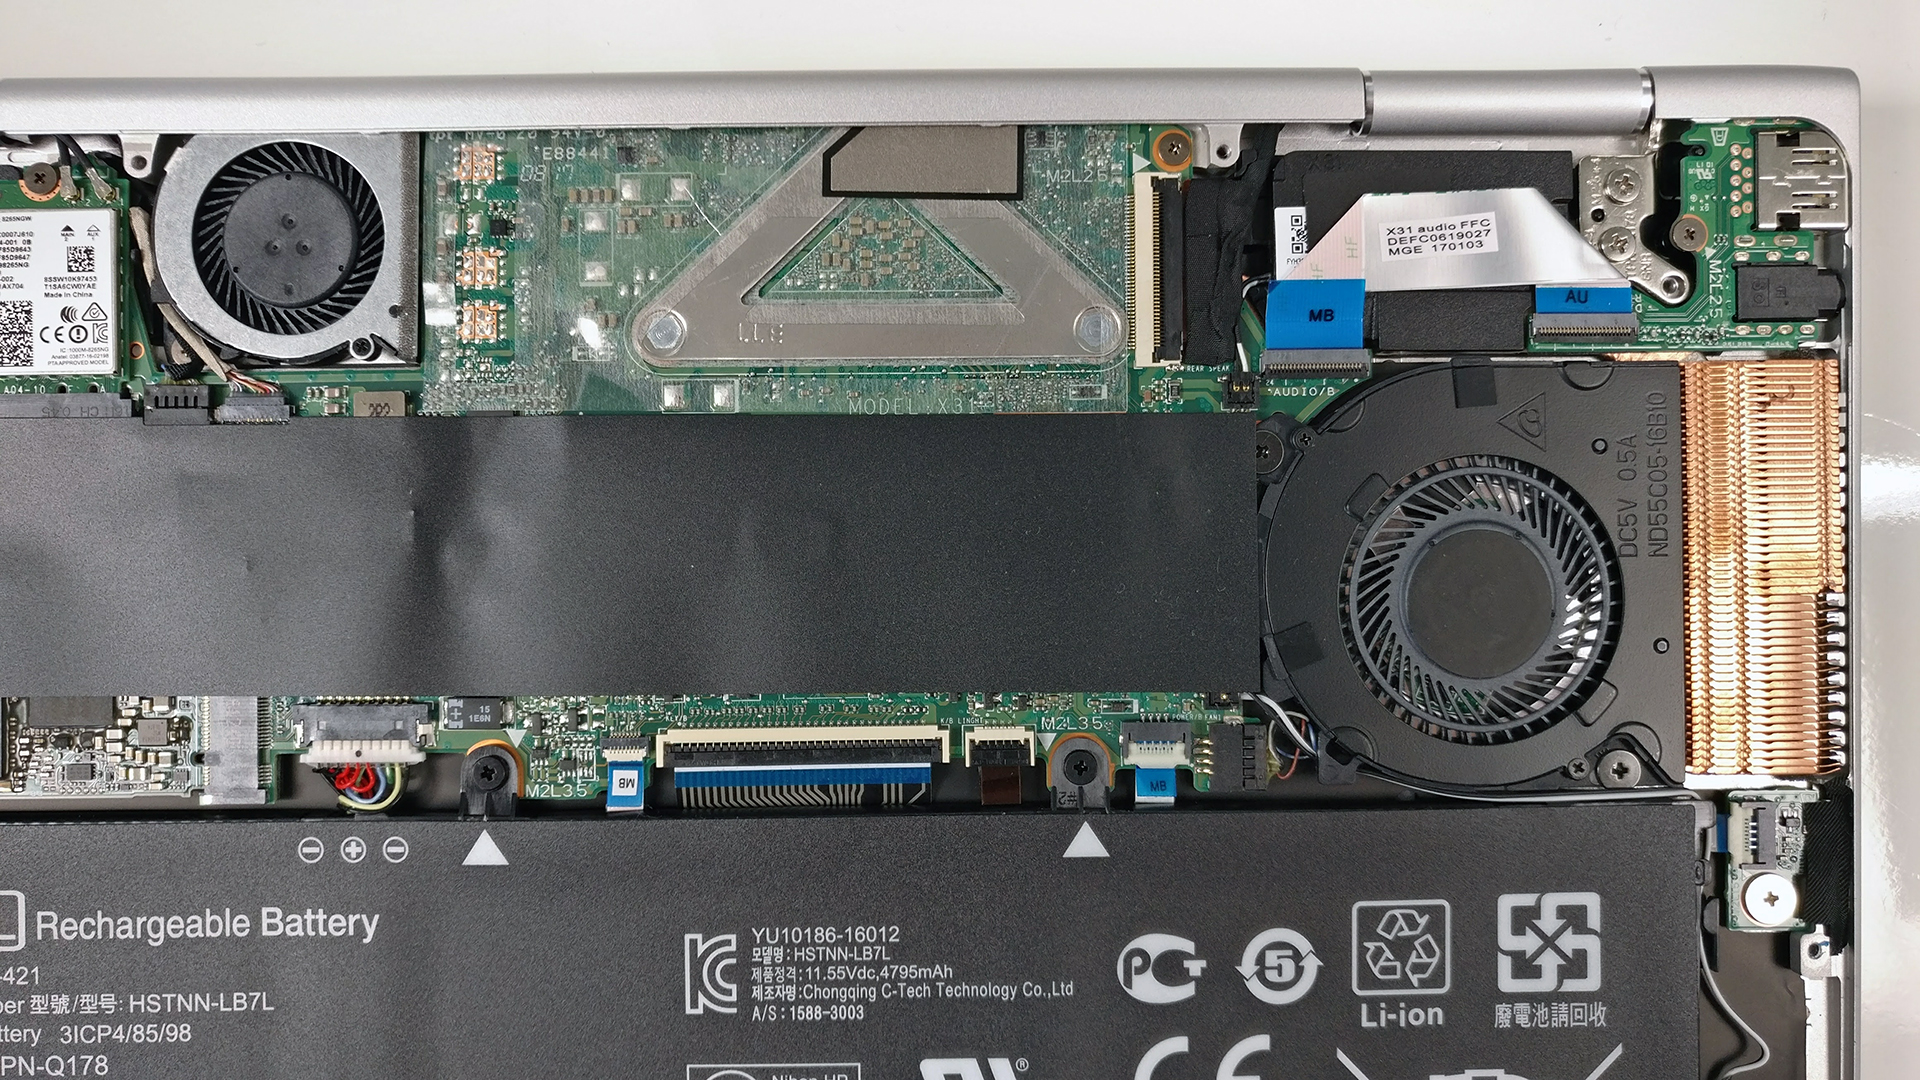
3. Memory, battery and Wi-Fi
All RAM chips are soldered to the motherboard providing 8GB of DDR3L-1866. This means that the device cannot be upgraded further.
The Wi-Fi module is made by Intel with model number 8265NGW.
Despite the small casing, the battery unit appears to be quite big and it’s rated at 57.9Wh, which explains the record-breaking battery runtimes we got in our tests.
4. Cooling system
Surprisingly, the device uses two cooling fans for keeping the chip cool. We’ve got one smaller fan positioned near the back a big one taking care of the heat at the left vent opening on the side.
The full review of the HP Spectre x360 13 can be found here.
You can find the available configurations and their prices here: http://amzn.to/2uiLbR9


![[Juin 2026] Les marques d’ordinateurs portables les plus vendues sur Amazon Global – La domination sans égale d’Apple en termes de volume de ventes et de chiffre d’affaires](https://laptopmedia.com/wp-content/uploads/2026/07/GLOBAL-Best-Brands-400x225.jpg)
![[Juin 2026] Amazon Global : le top 10 des ordinateurs portables les plus vendus – Le nouveau MacBook Neo d’Apple s’empare de la première place et redéfinit le marché grâce à son prix abordable](https://laptopmedia.com/wp-content/uploads/2026/07/Best-Selling-Laptops-GLOBAL-Top-10-400x225.jpg)
![[Juin 2026] Amazon Global : le top 10 des ordinateurs portables de jeu les plus vendus – Le Nitro V 16S AI d’Acer domine les ventes, tandis qu’ASUS arrive en tête en termes de chiffre d’affaires global](https://laptopmedia.com/wp-content/uploads/2026/07/Best-Selling-Gaming-Laptops-GLOBAL-Top-10-400x225.jpg)
![[Juin 2026] Classement mondial des cartes graphiques pour ordinateurs portables les plus vendues sur Amazon – La NVIDIA RTX 5060 est la carte graphique dédiée la plus vendue](https://laptopmedia.com/wp-content/uploads/2026/07/Best-Selling-GPUs-GLOBAL-Top-10-400x225.jpg)
![[Juin 2026] Classement mondial des processeurs d’ordinateurs portables les plus vendus sur Amazon : l’Apple M5 domine, tandis que l’AMD Ryzen 7 260 s’impose dans le segment haut de gamme](https://laptopmedia.com/wp-content/uploads/2026/07/Best-Selling-CPUs-GLOBAL-Top-10-400x225.jpg)

Rossen thanks so much, I could not remove my rear cover to replace the battery until I found your post. I did not know that there were two more screws underneath the rear rubber feat. You saved me from breaking or giving up replacing my dead battery. Thanks again. FYI Here is more info on my saga that you helped me resolve. myHP Spectre x360 Conve 13-w023dx (with USB-C) had an orange blinking light and would not charge. I bought a new power brick thinking it was bad, that was not the problem as that did not solve it. I… Lire la suite »
Thank you. I also almost broke my laptop because I could not get the back off and I did not know about the rear screws under the rear feet
Are the feet destroyed permanently after you take them off?
hi all, what sizes are the screws needed to be unscrewed for battery replacement? thanks