Inside ASUS ROG GX700 – disassembly, internal photos and upgrade options
Since the ASUS ROG GX700 came around, we were eager to do a full teardown and see what makes this laptop tick. But this isn’t just an ordinary gaming notebook, though. The GX700 is the first water-cooled laptop with an external cooling docking station. So let’s take a deep look at what ASUS has done here.
You can find the notebook here: http://amzn.to/1PF2cXc
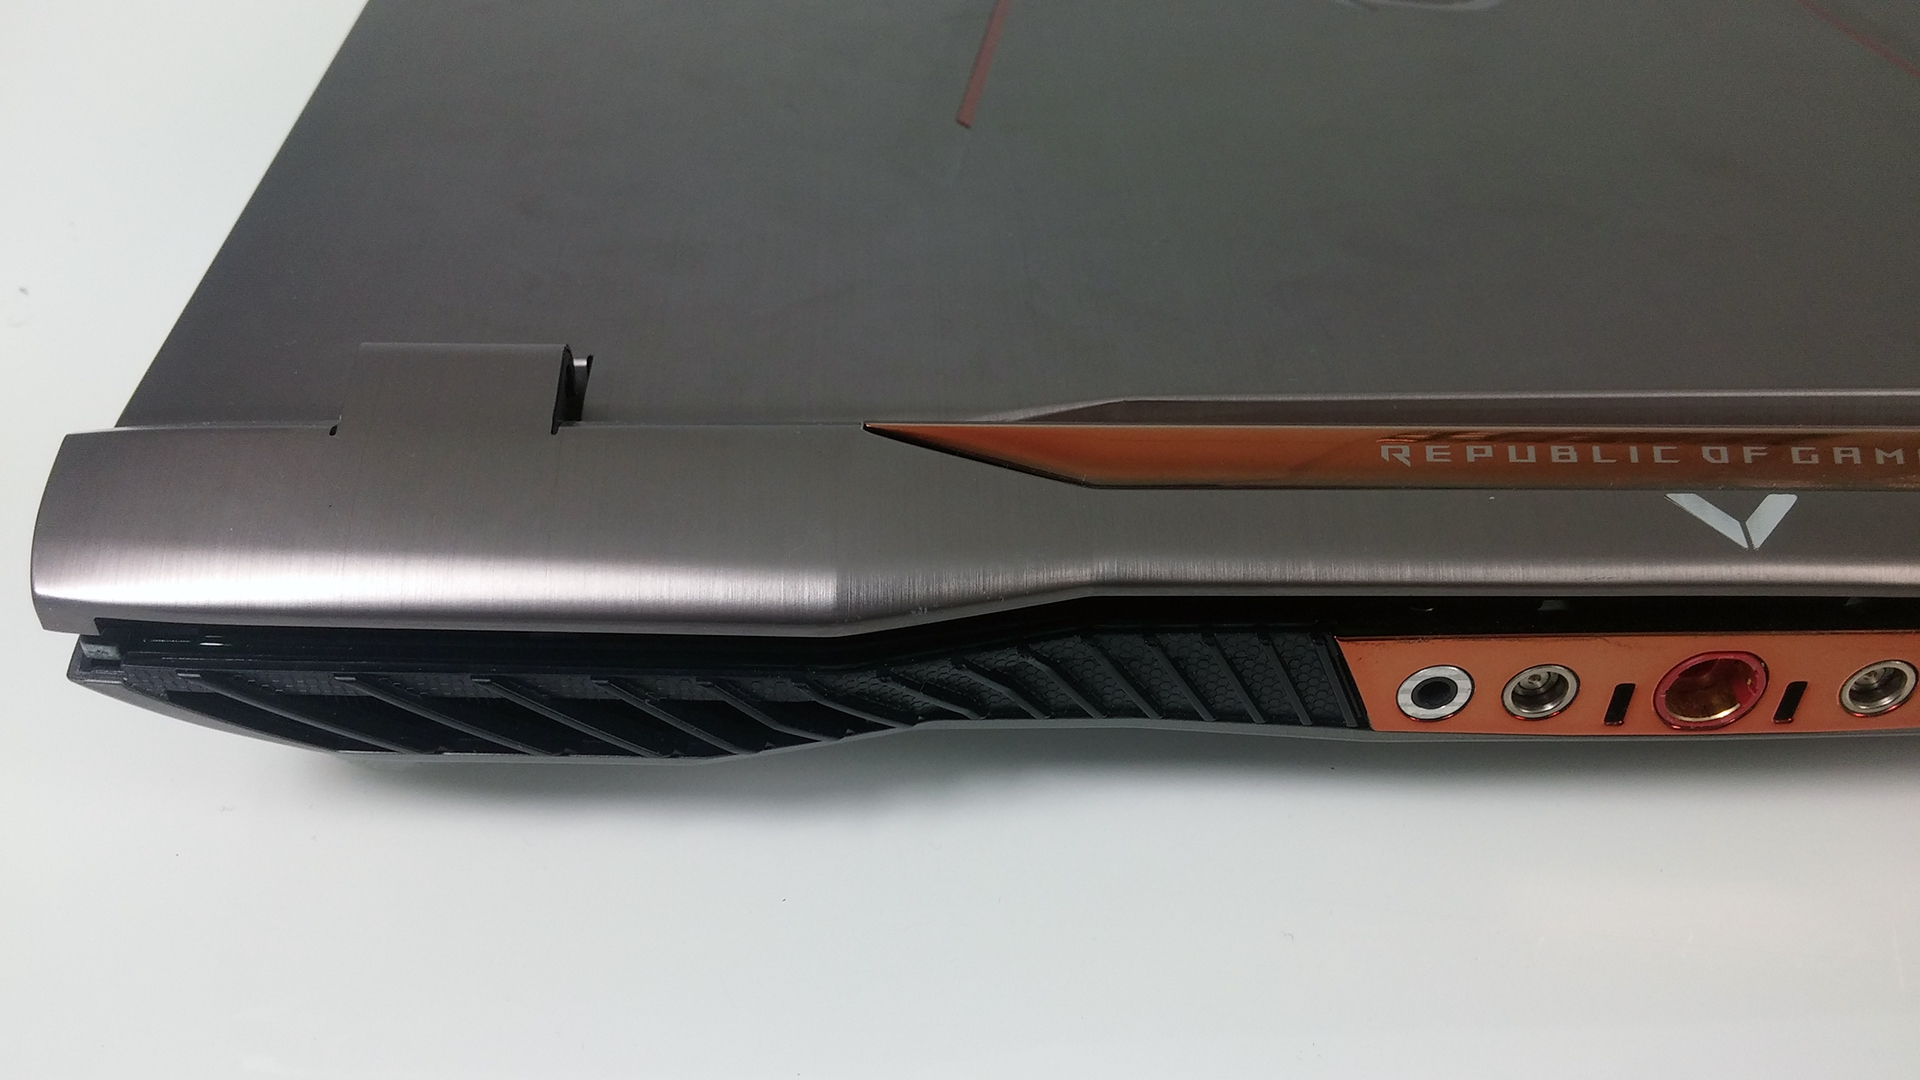
1. Removing the piece near the main vent openings
This one is fairly easy to do and it should be the first thing to remove. The steps for disassembling the notebook are quite similar to the ones of the ASUS ROG G752. Use a thin plastic tool to pry it up and then unscrew only the two bolts in the middle.
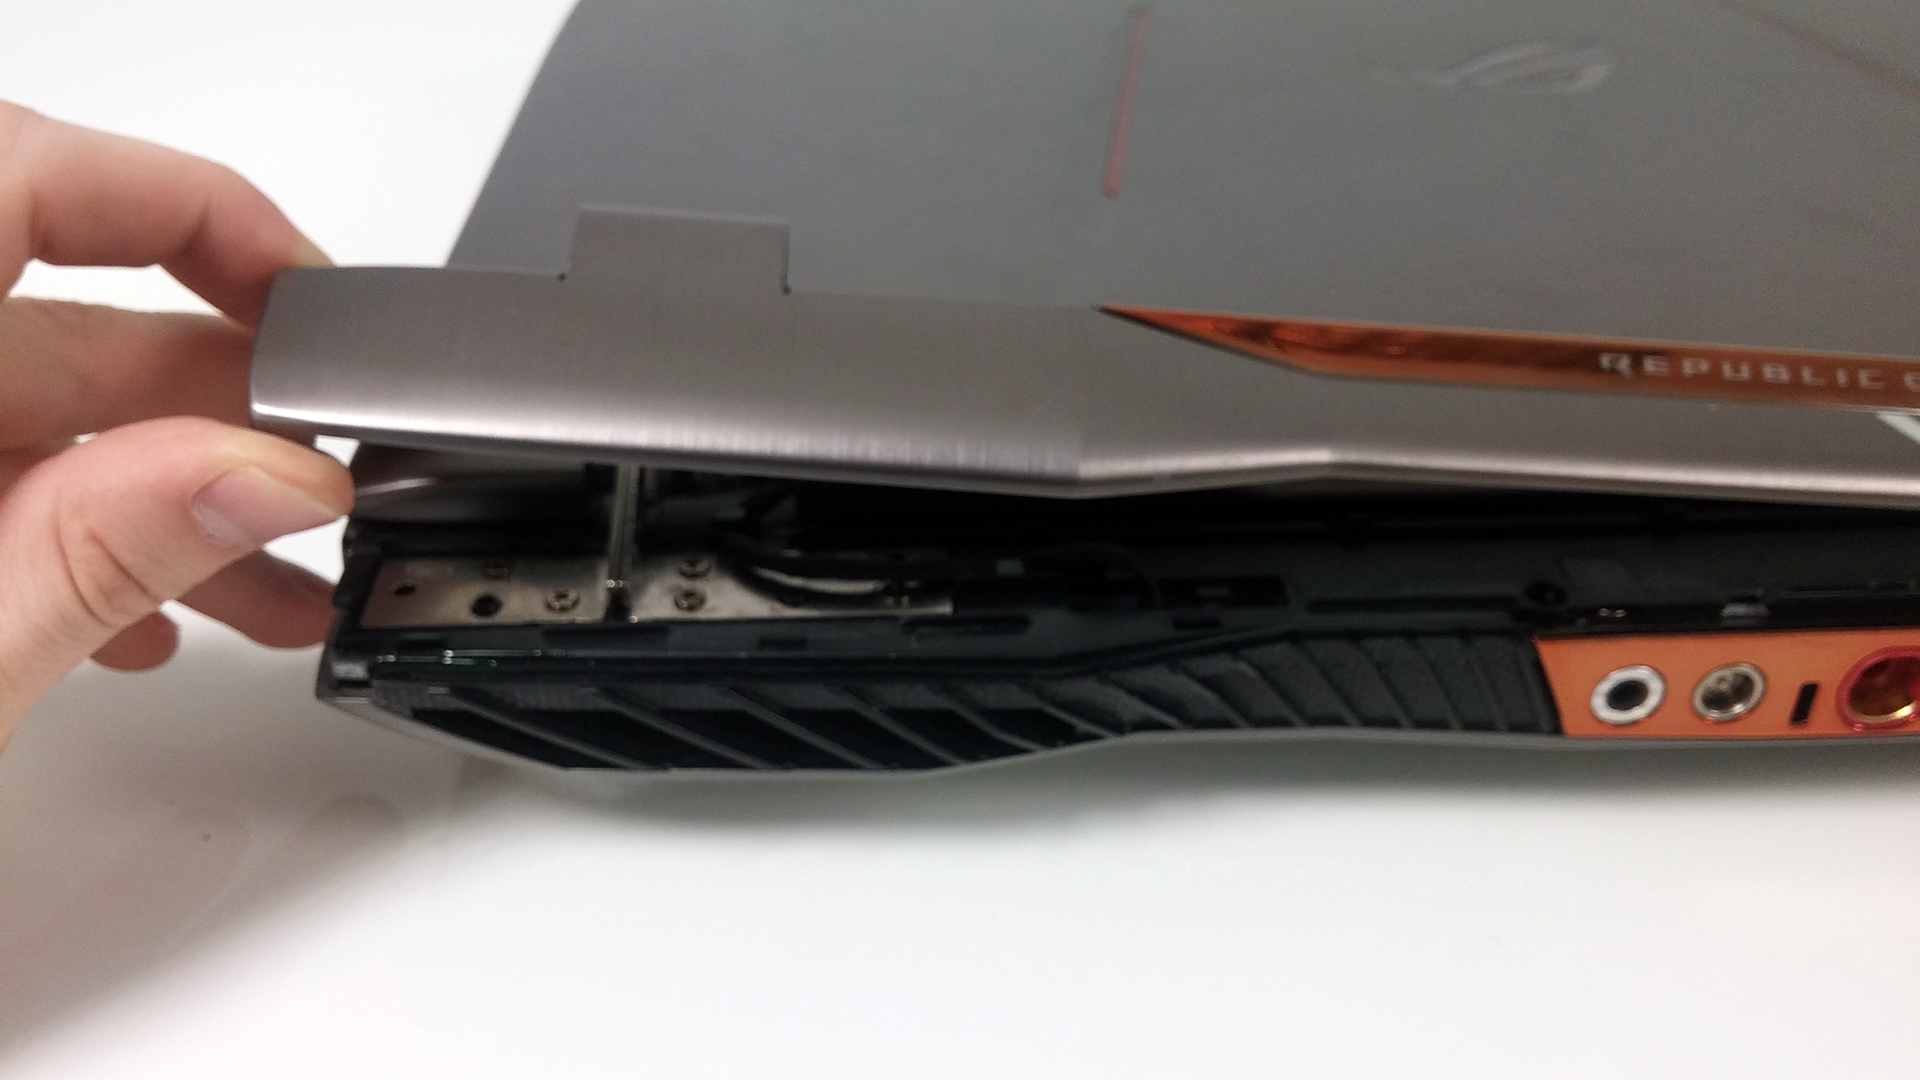
2. Removing the bottom plate
Removing it is also pretty easy. Make sure you’ve unscrewed all the bolts around the chassis as the laptop doesn’t provide the usual service lid that we are usually seeing on ROG series laptops. After it’s done, pry up the whole plate to take it off.
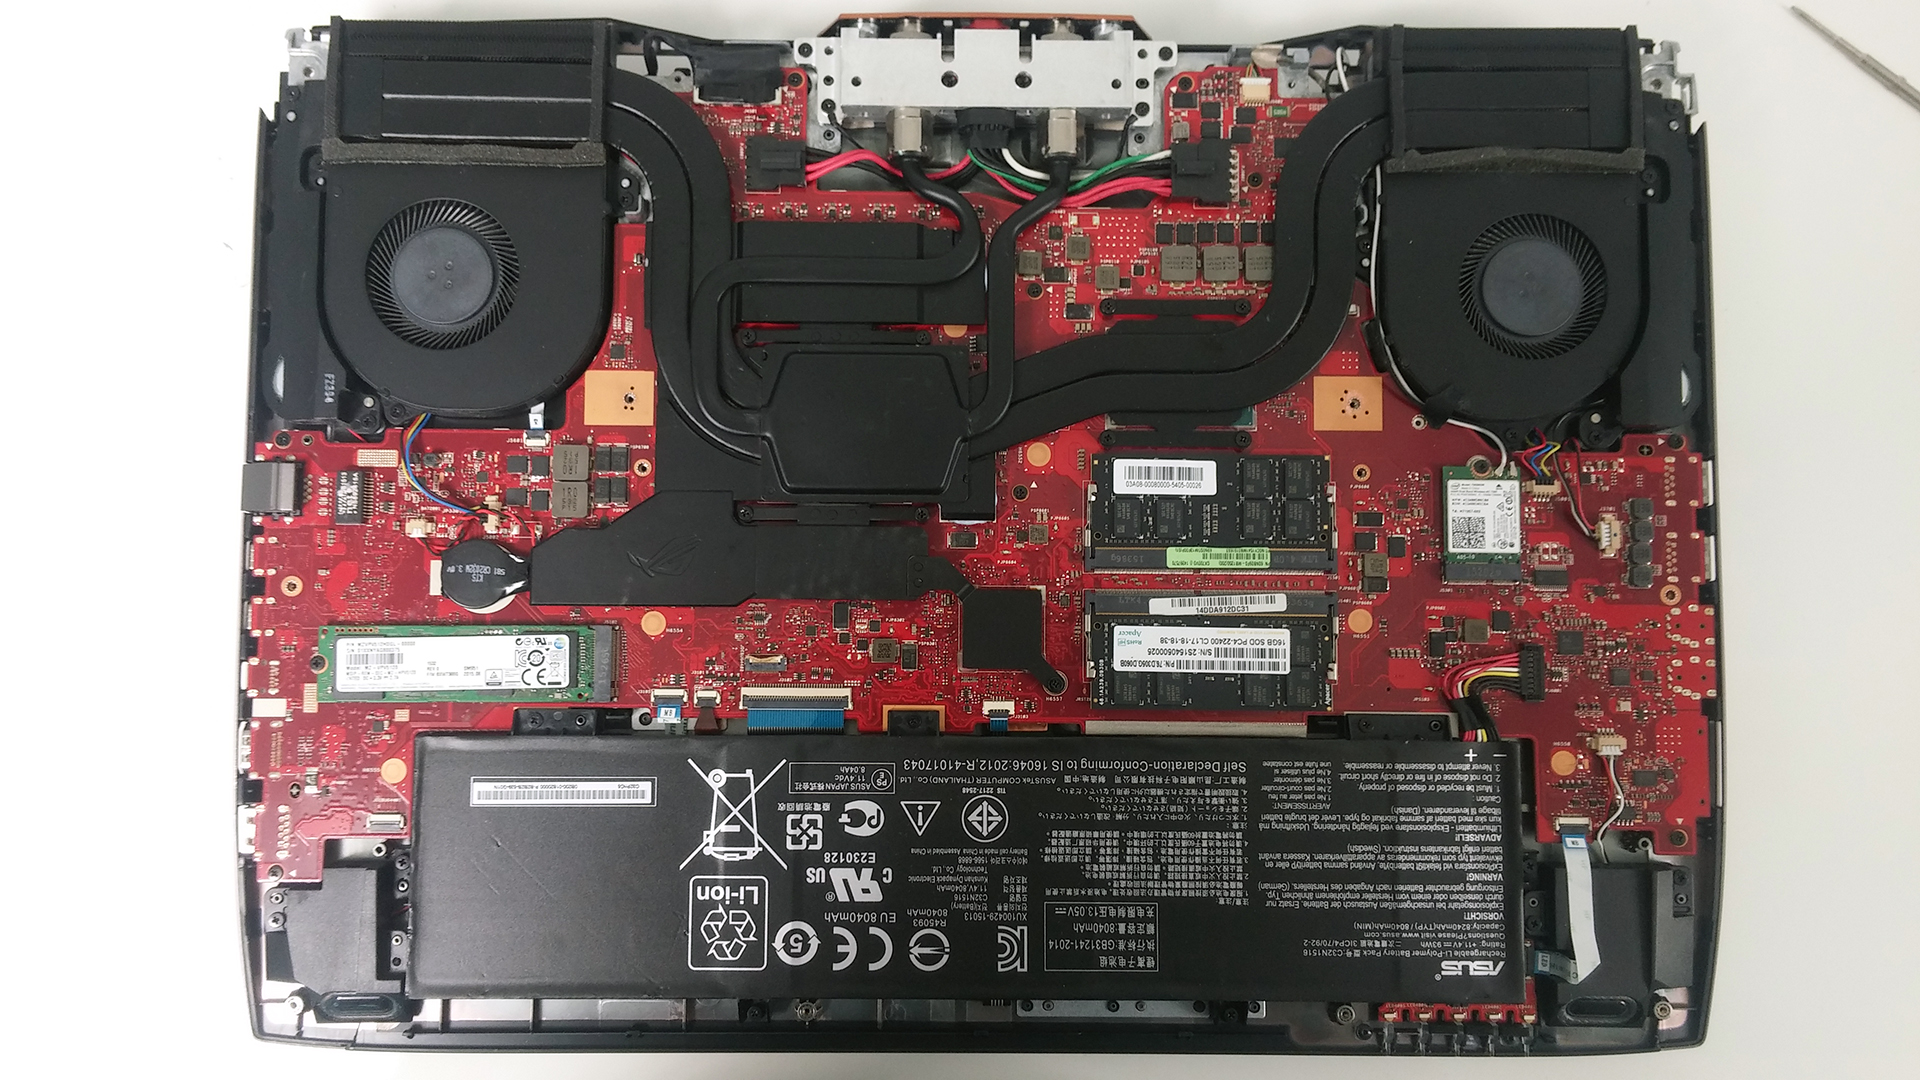
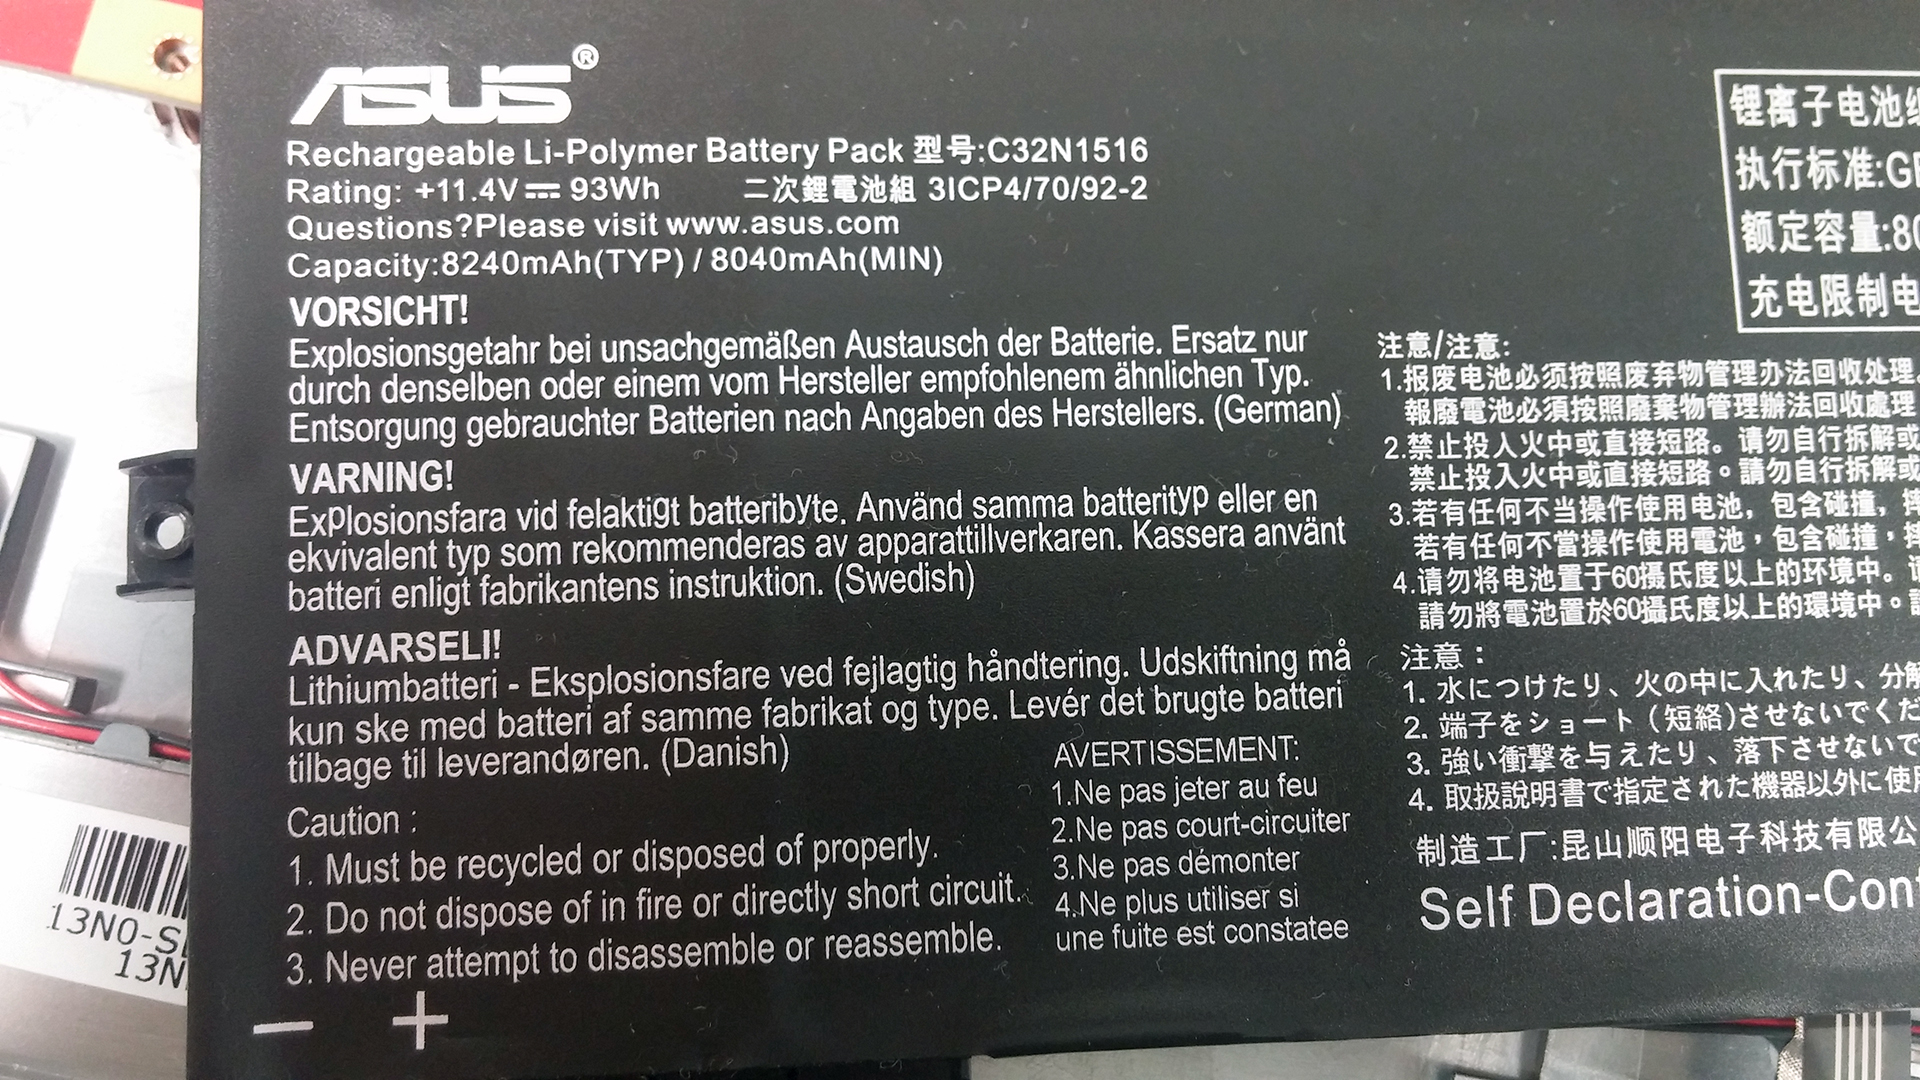
3. Upgrade options and battery replacement
Fortunately, the GX700 is way easier to disassemble than the G752, despite the former not having a maintenance lid. The battery is located at the bottom and holds a monstrous 93Wh battery that should last for hours while browsing or watching movies.
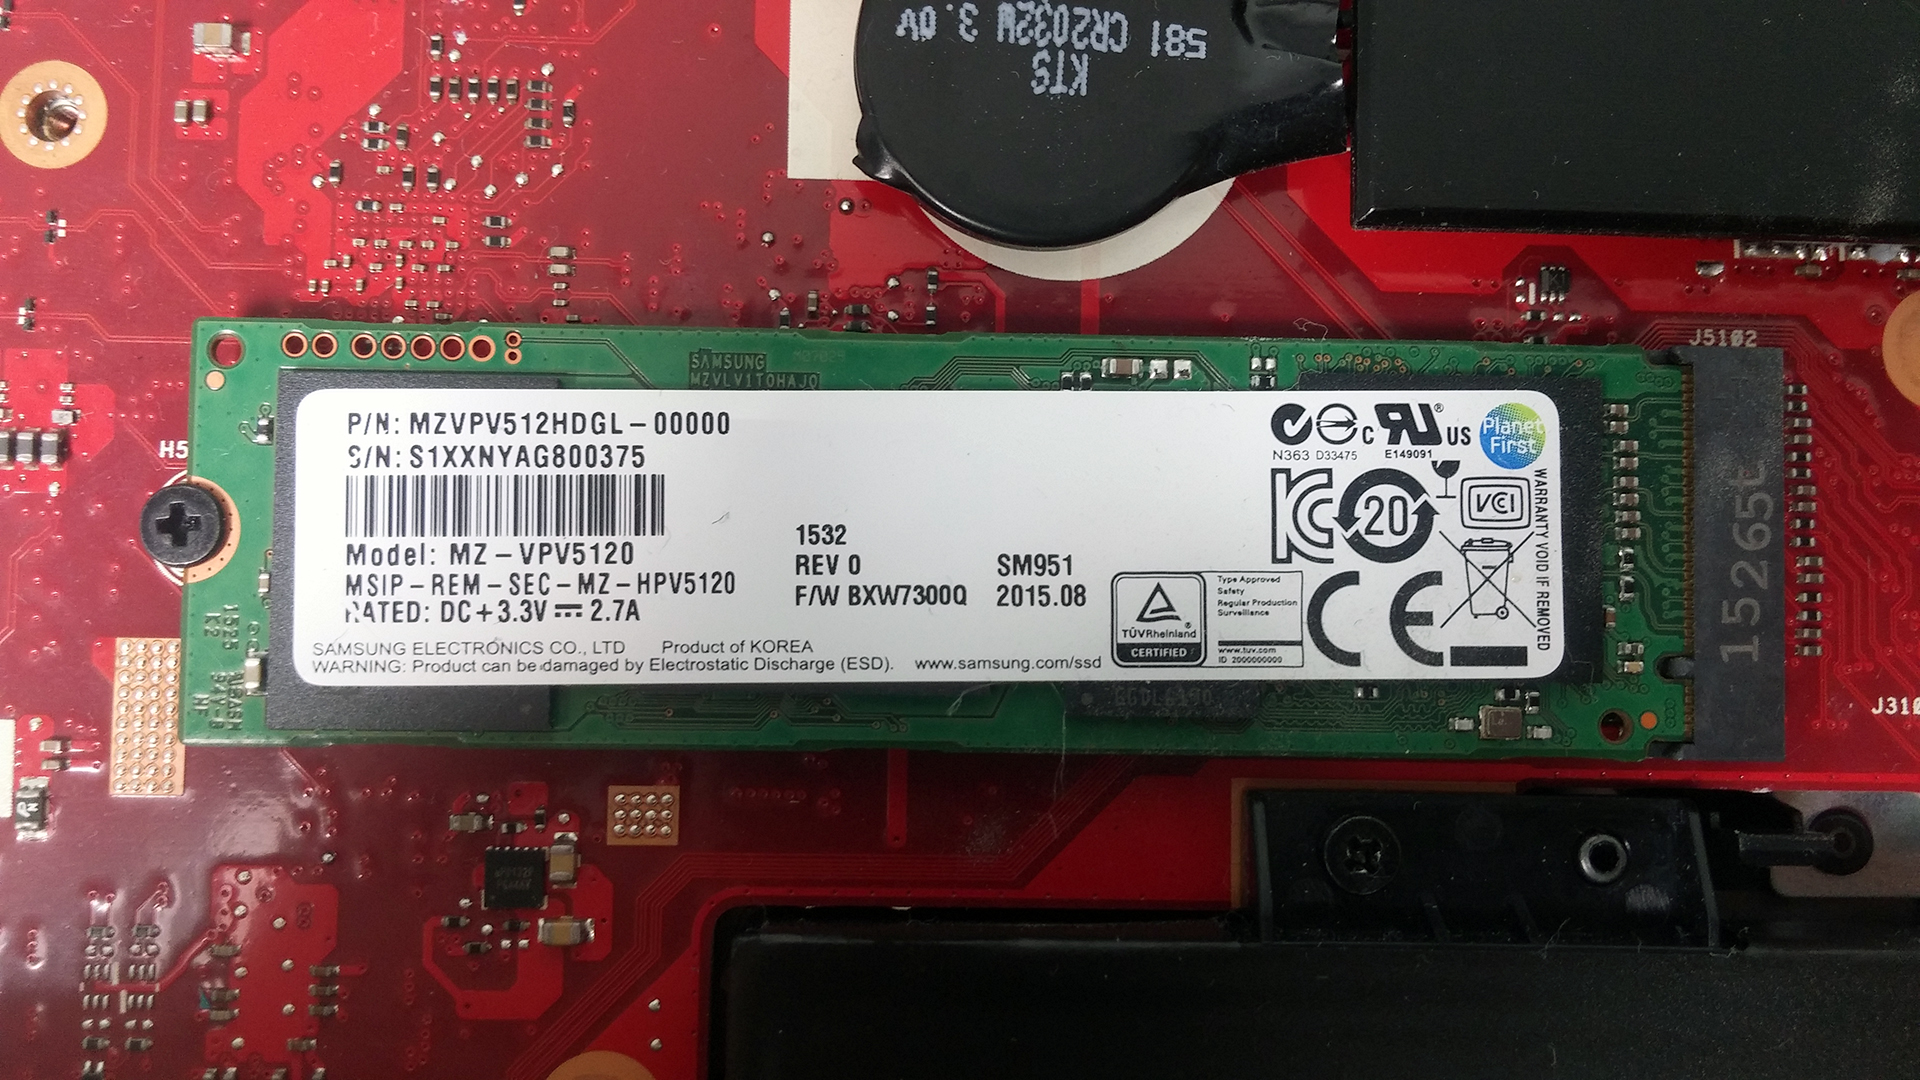
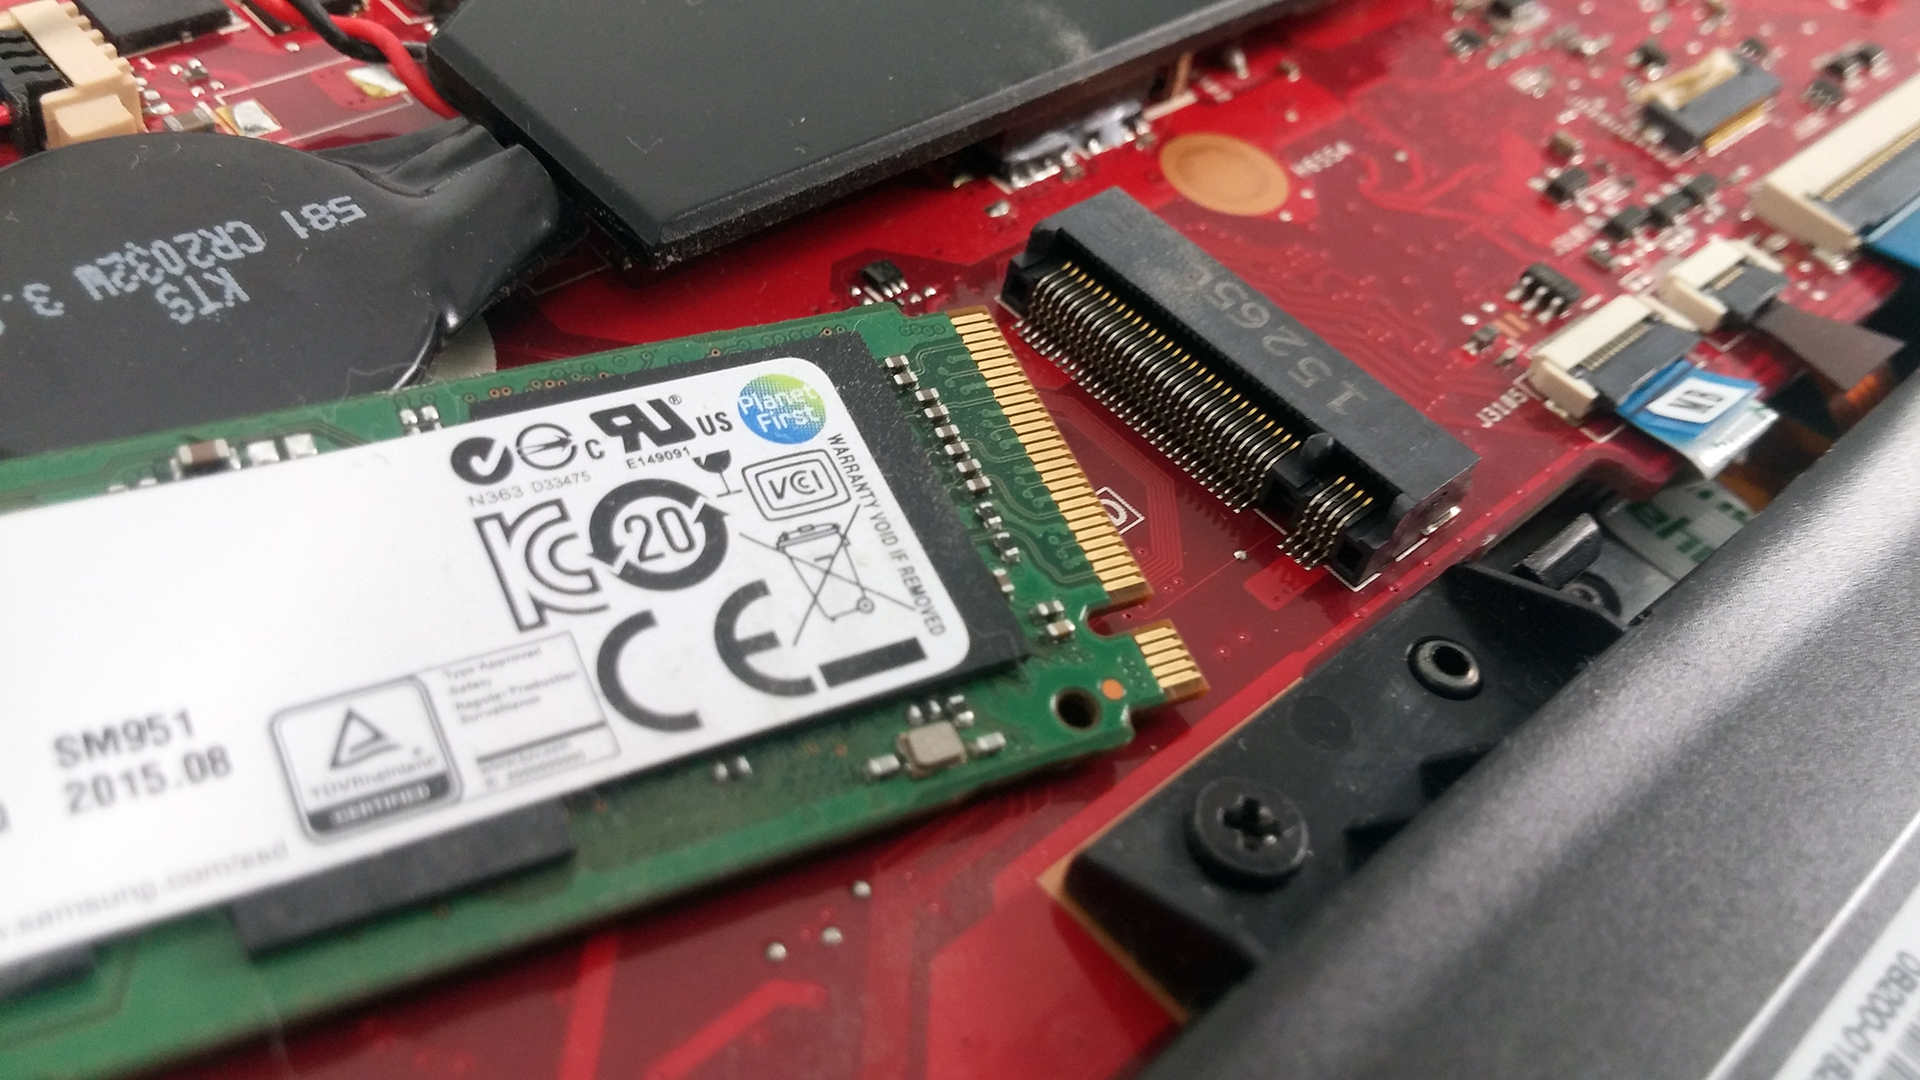
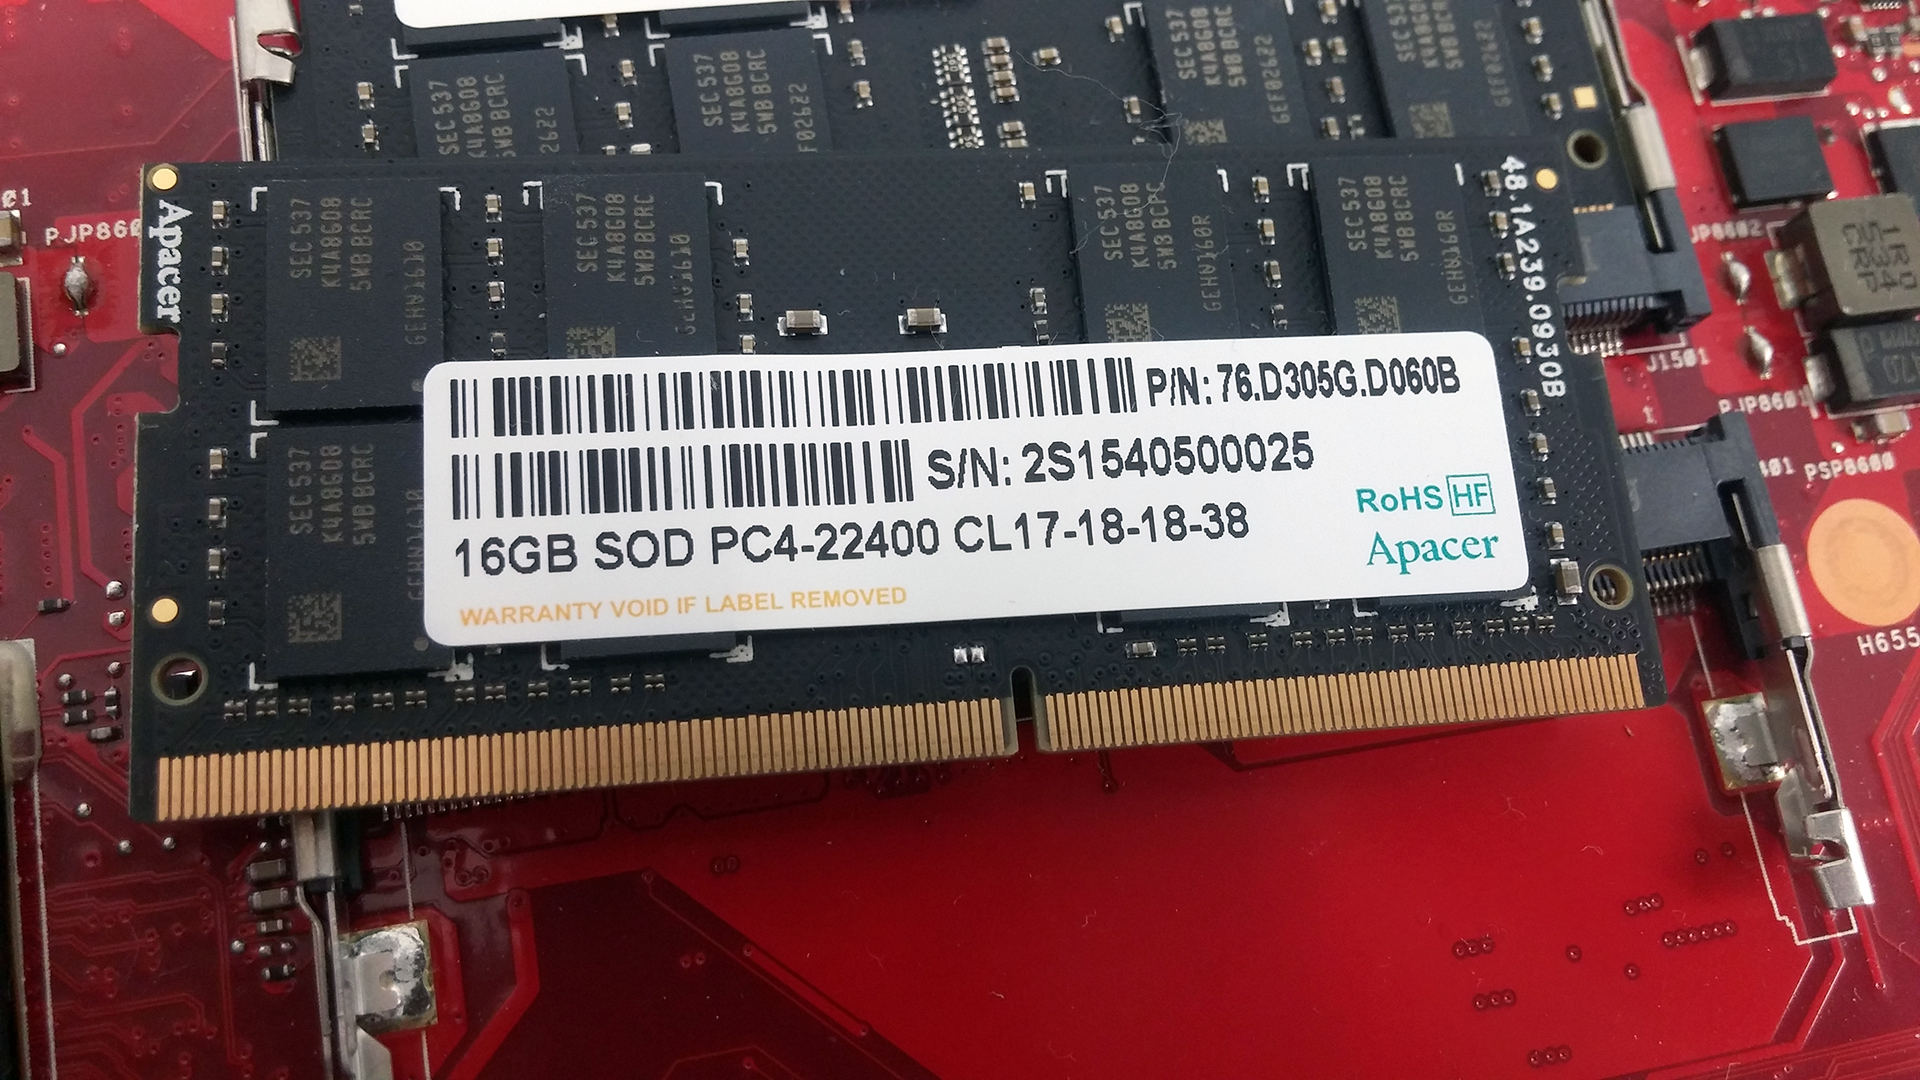
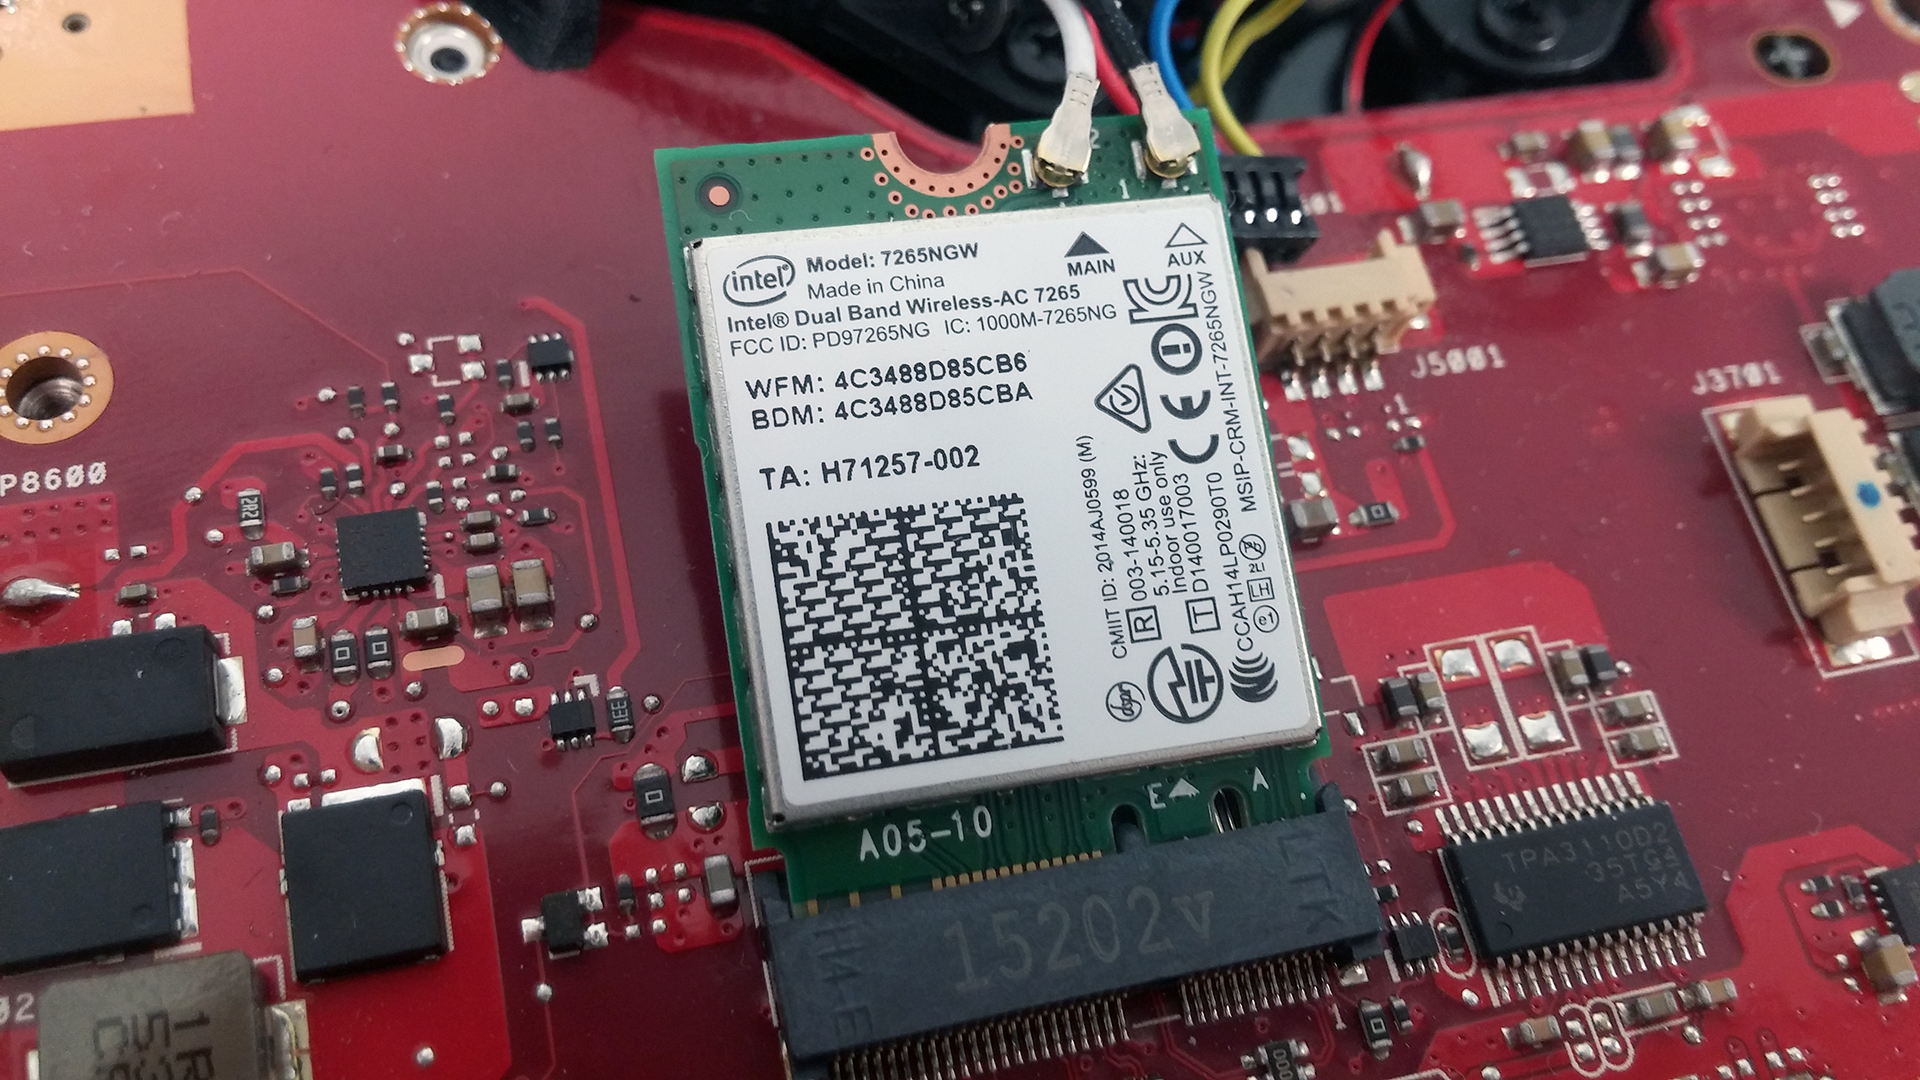
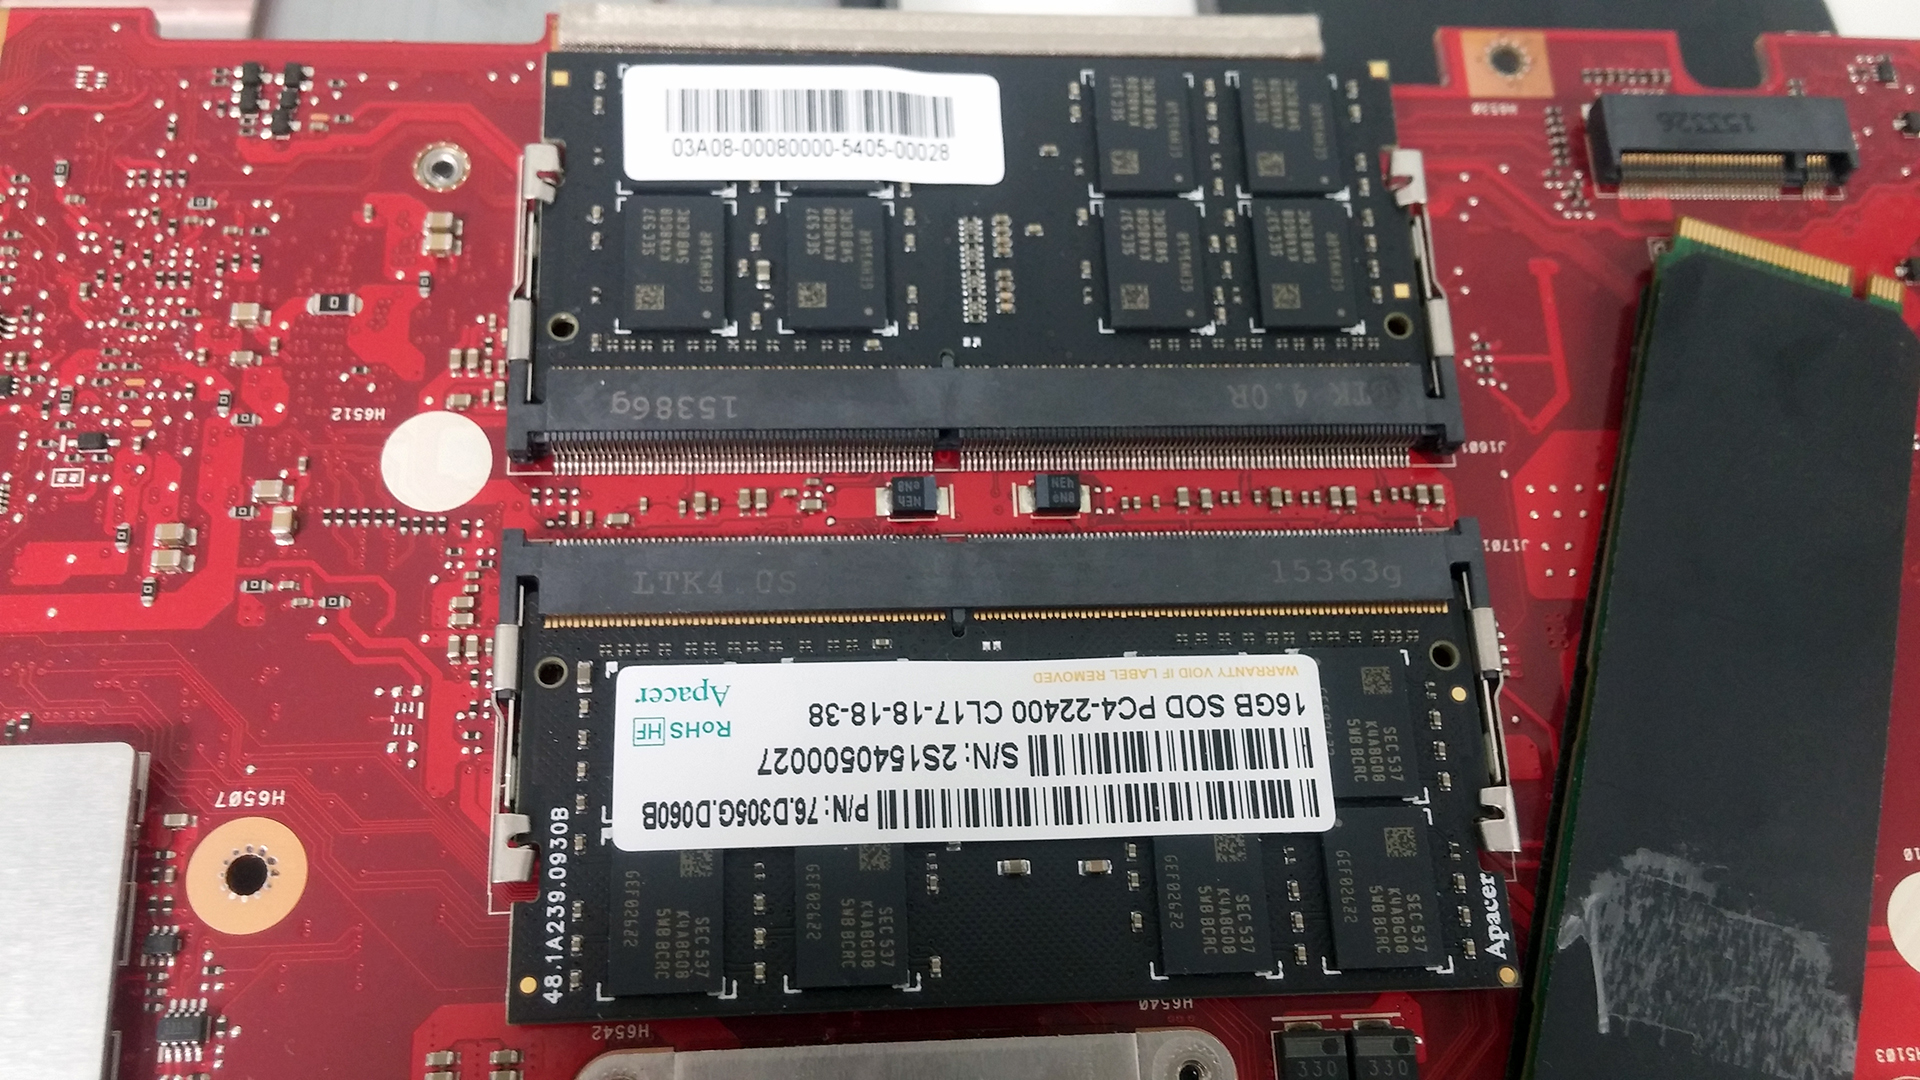
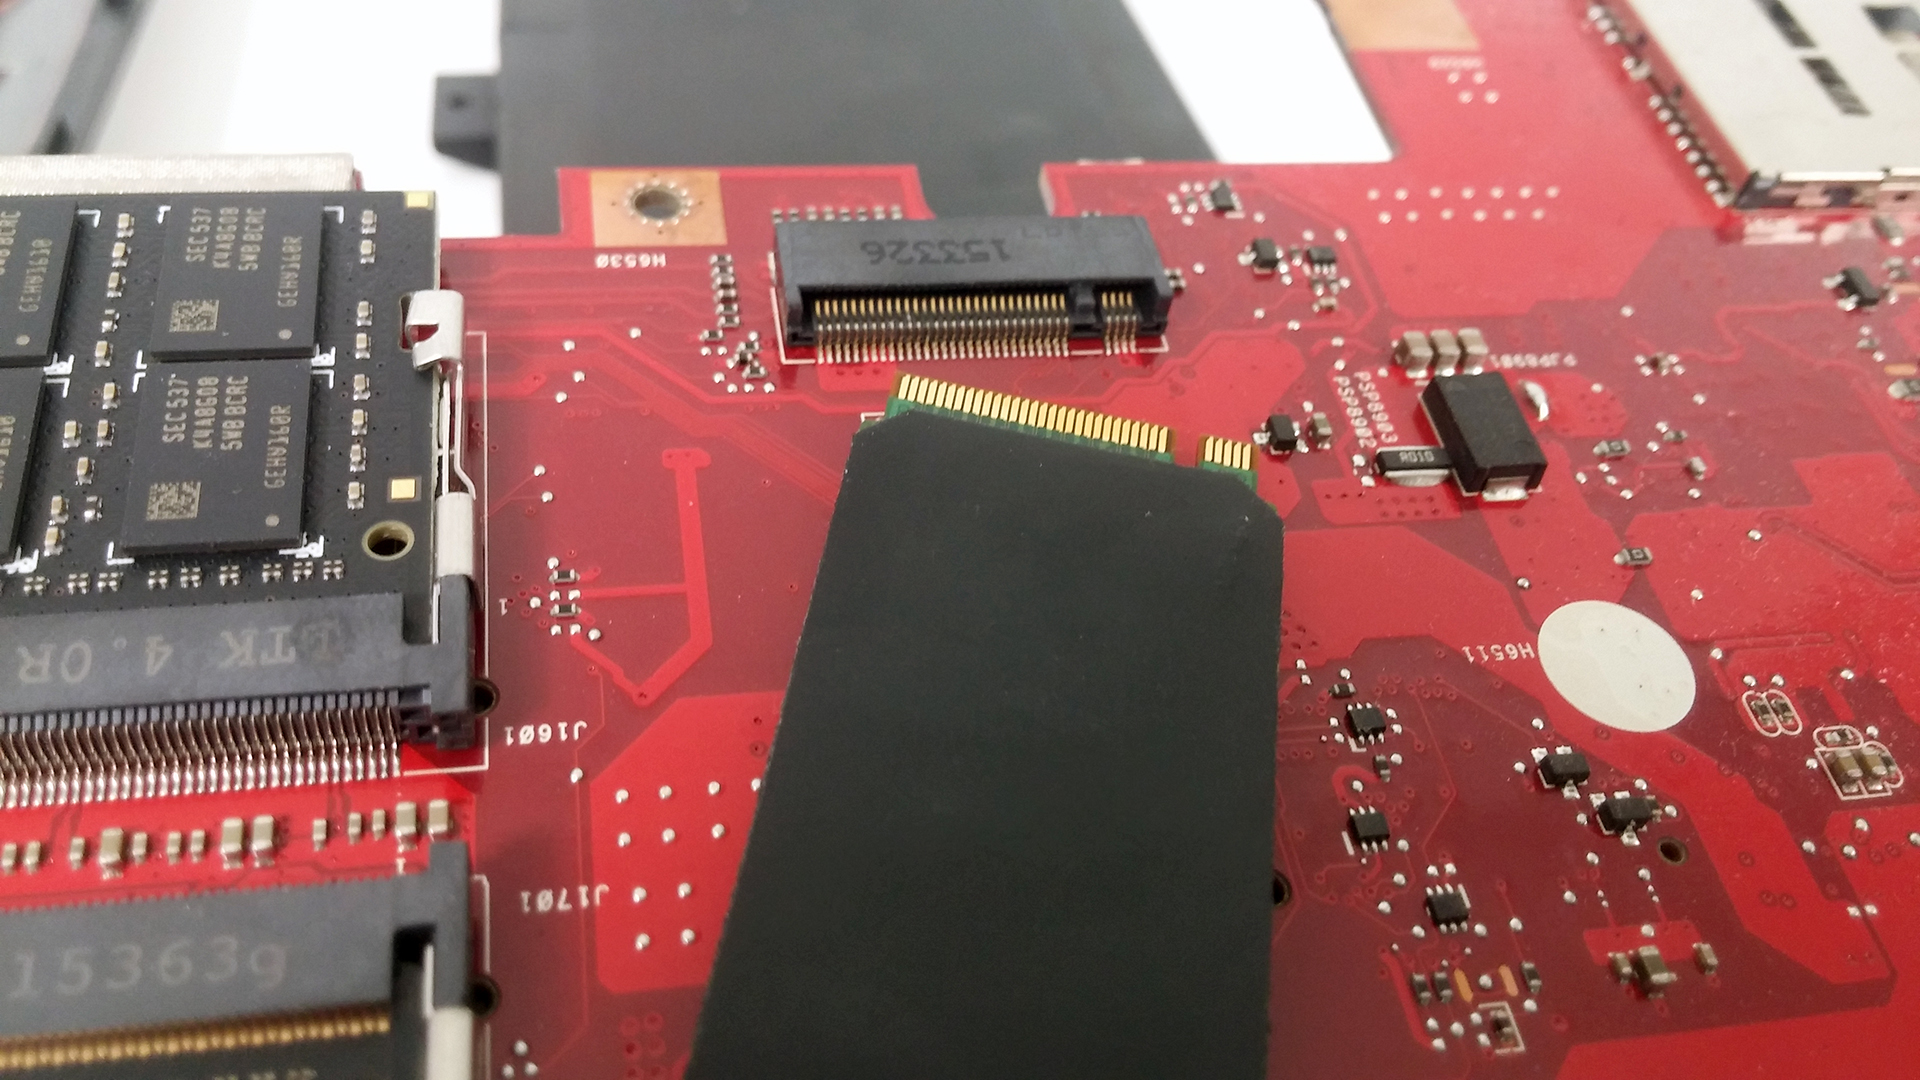
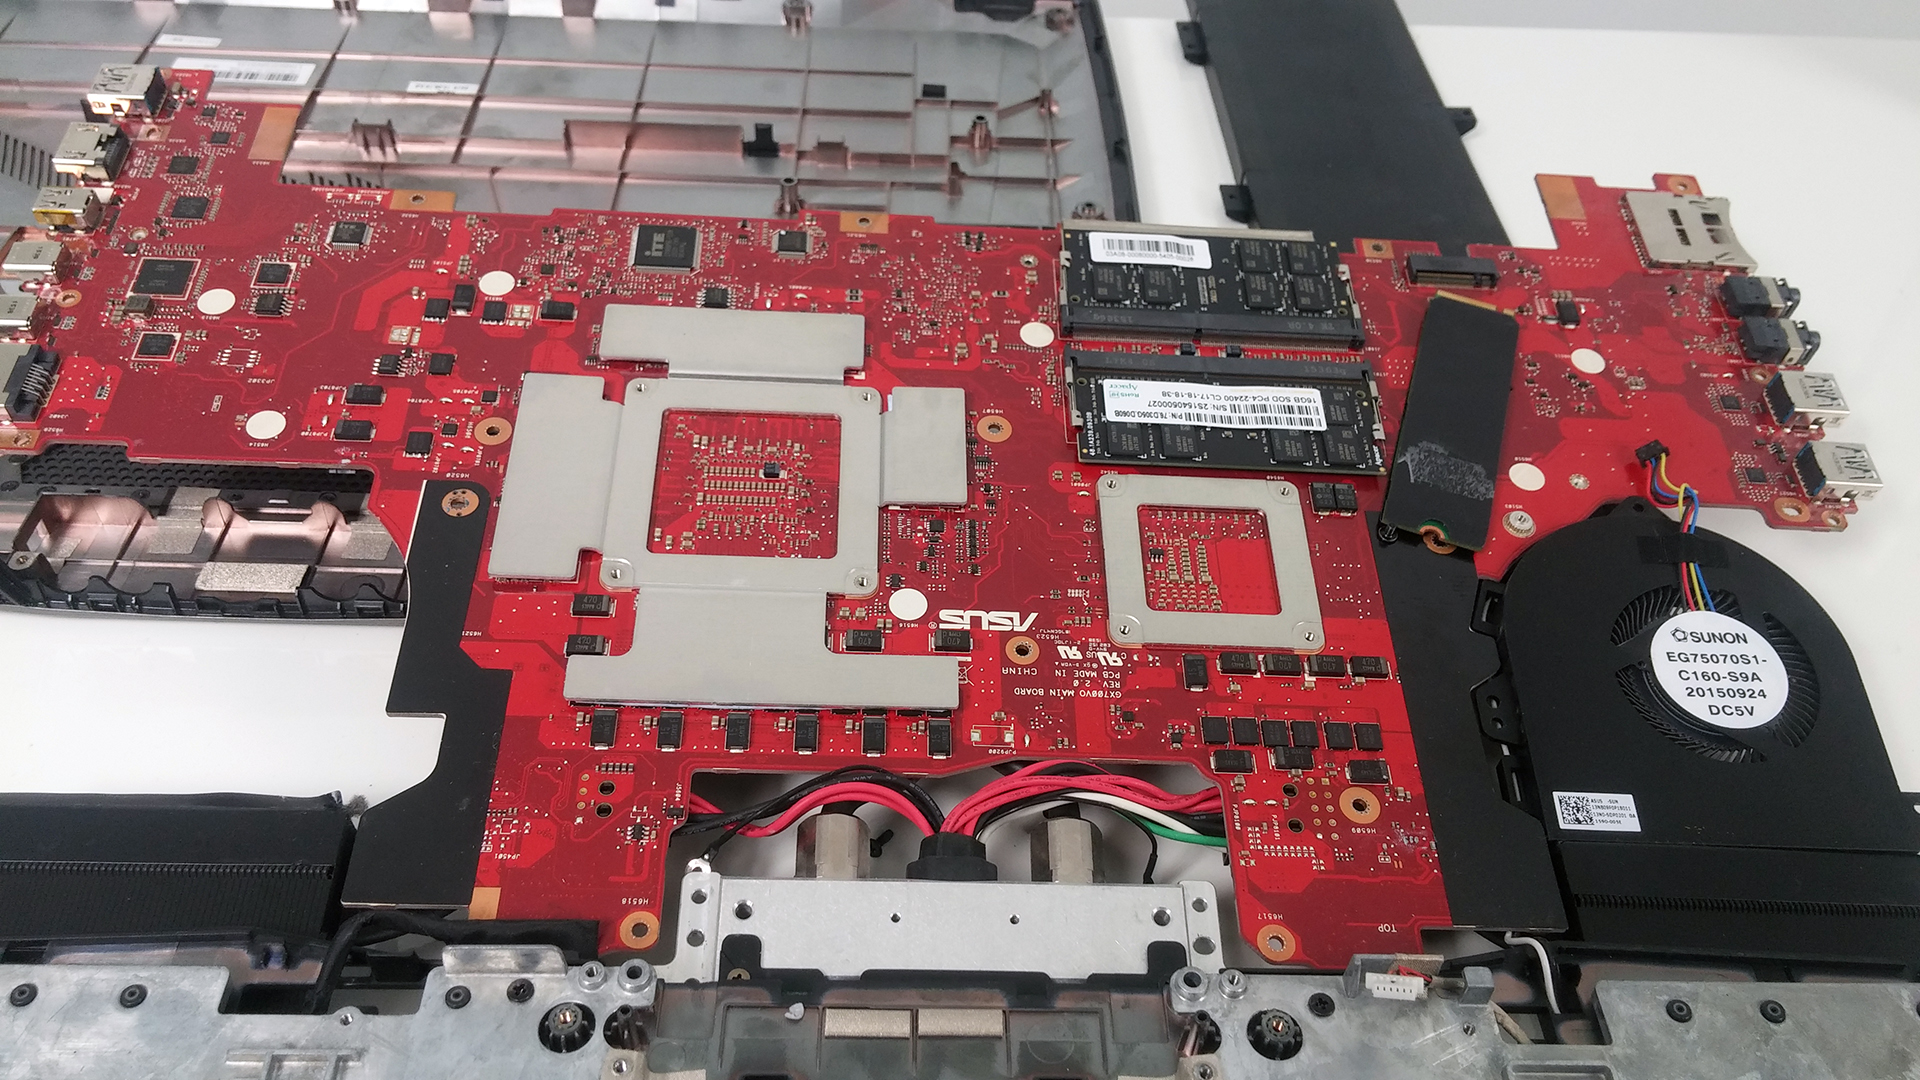
Also, one of the M.2 SSD slots is located on this side of the motherboard. It has an M-edge key connector and, of course, supports the future-proof NVMe standard. This side also holds two Apacer 16GB DDR4-2400 RAM chips and Intel Dual Band Wireless-AC 7265 Wi-Fi module. So in order to access the other M.2 PCIe NVMe SSD slot and the remaining RAM slots, you have to flip the motherboard.
Make sure you’ve disconnected all the cables and removed all the screws. There are a few holding the fans as well as the main cooling block at the rear of the machine. It’s held by four separate screws.
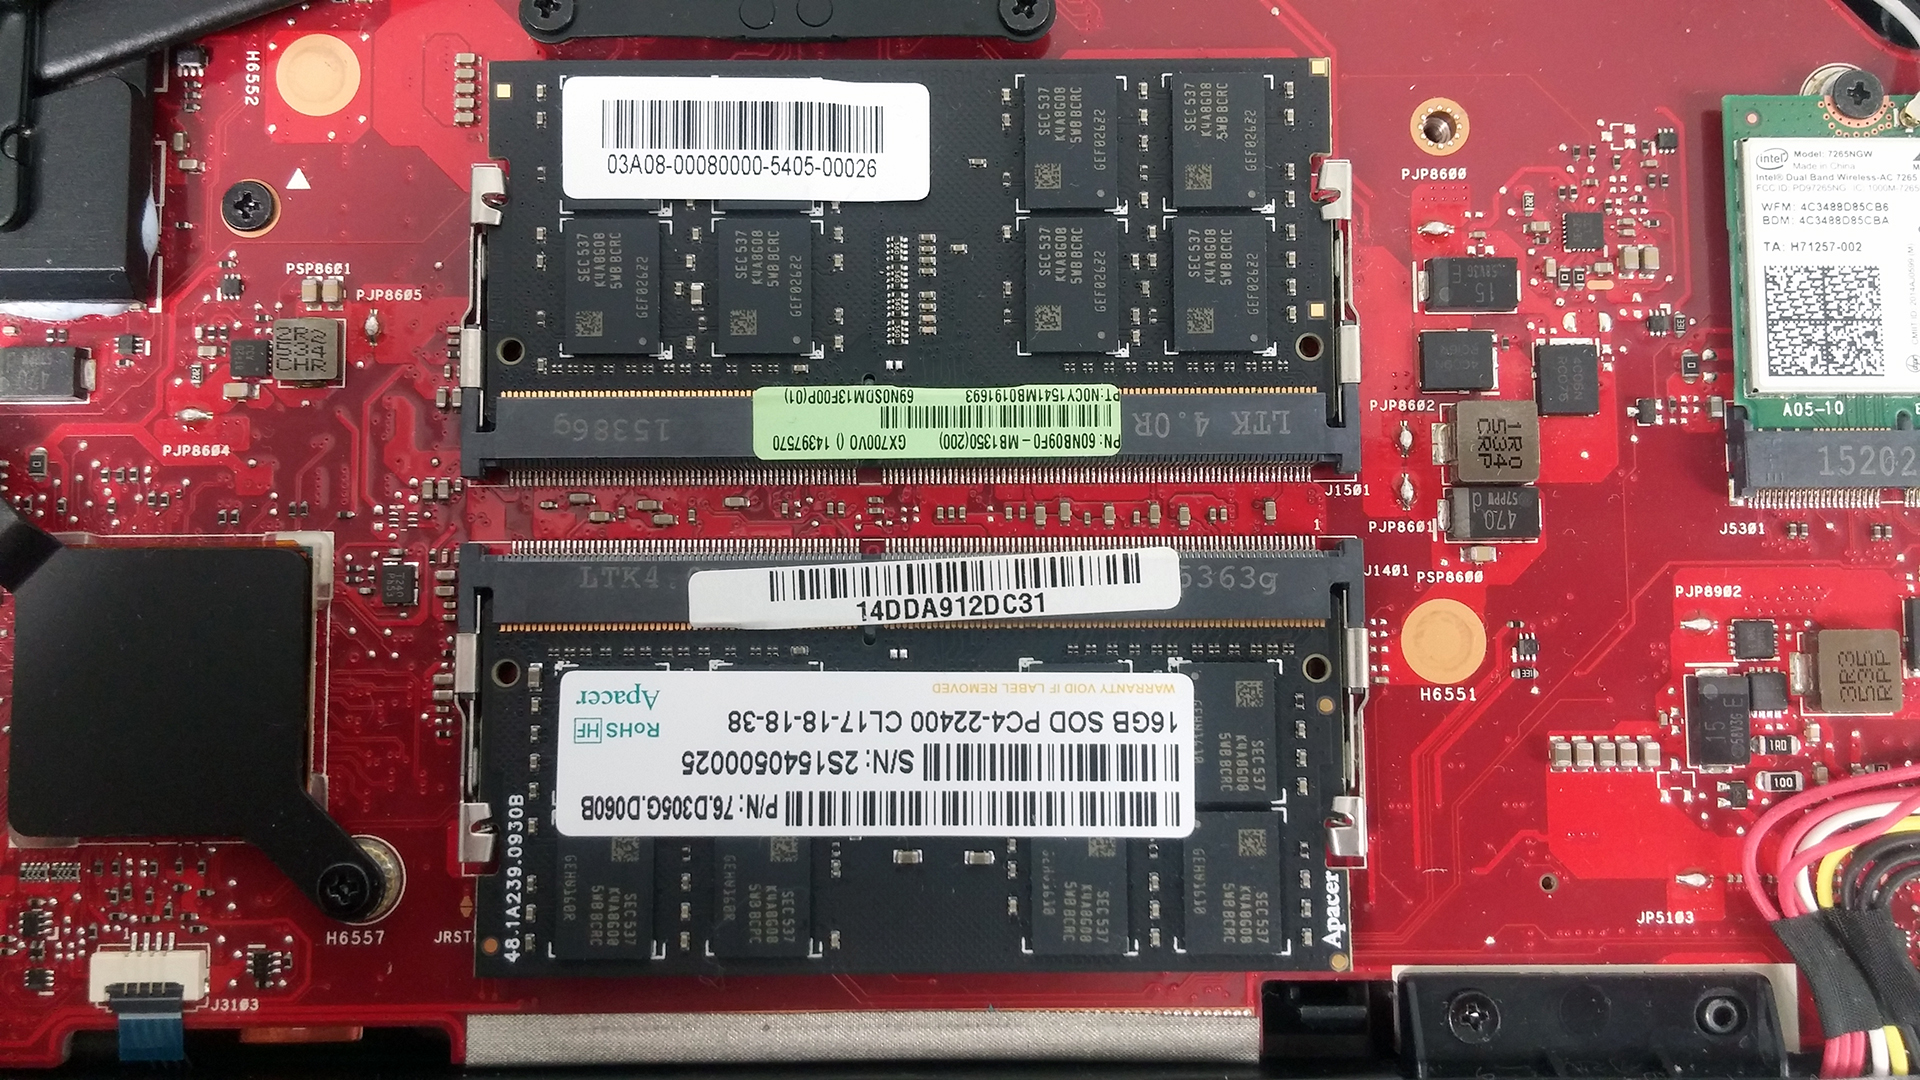
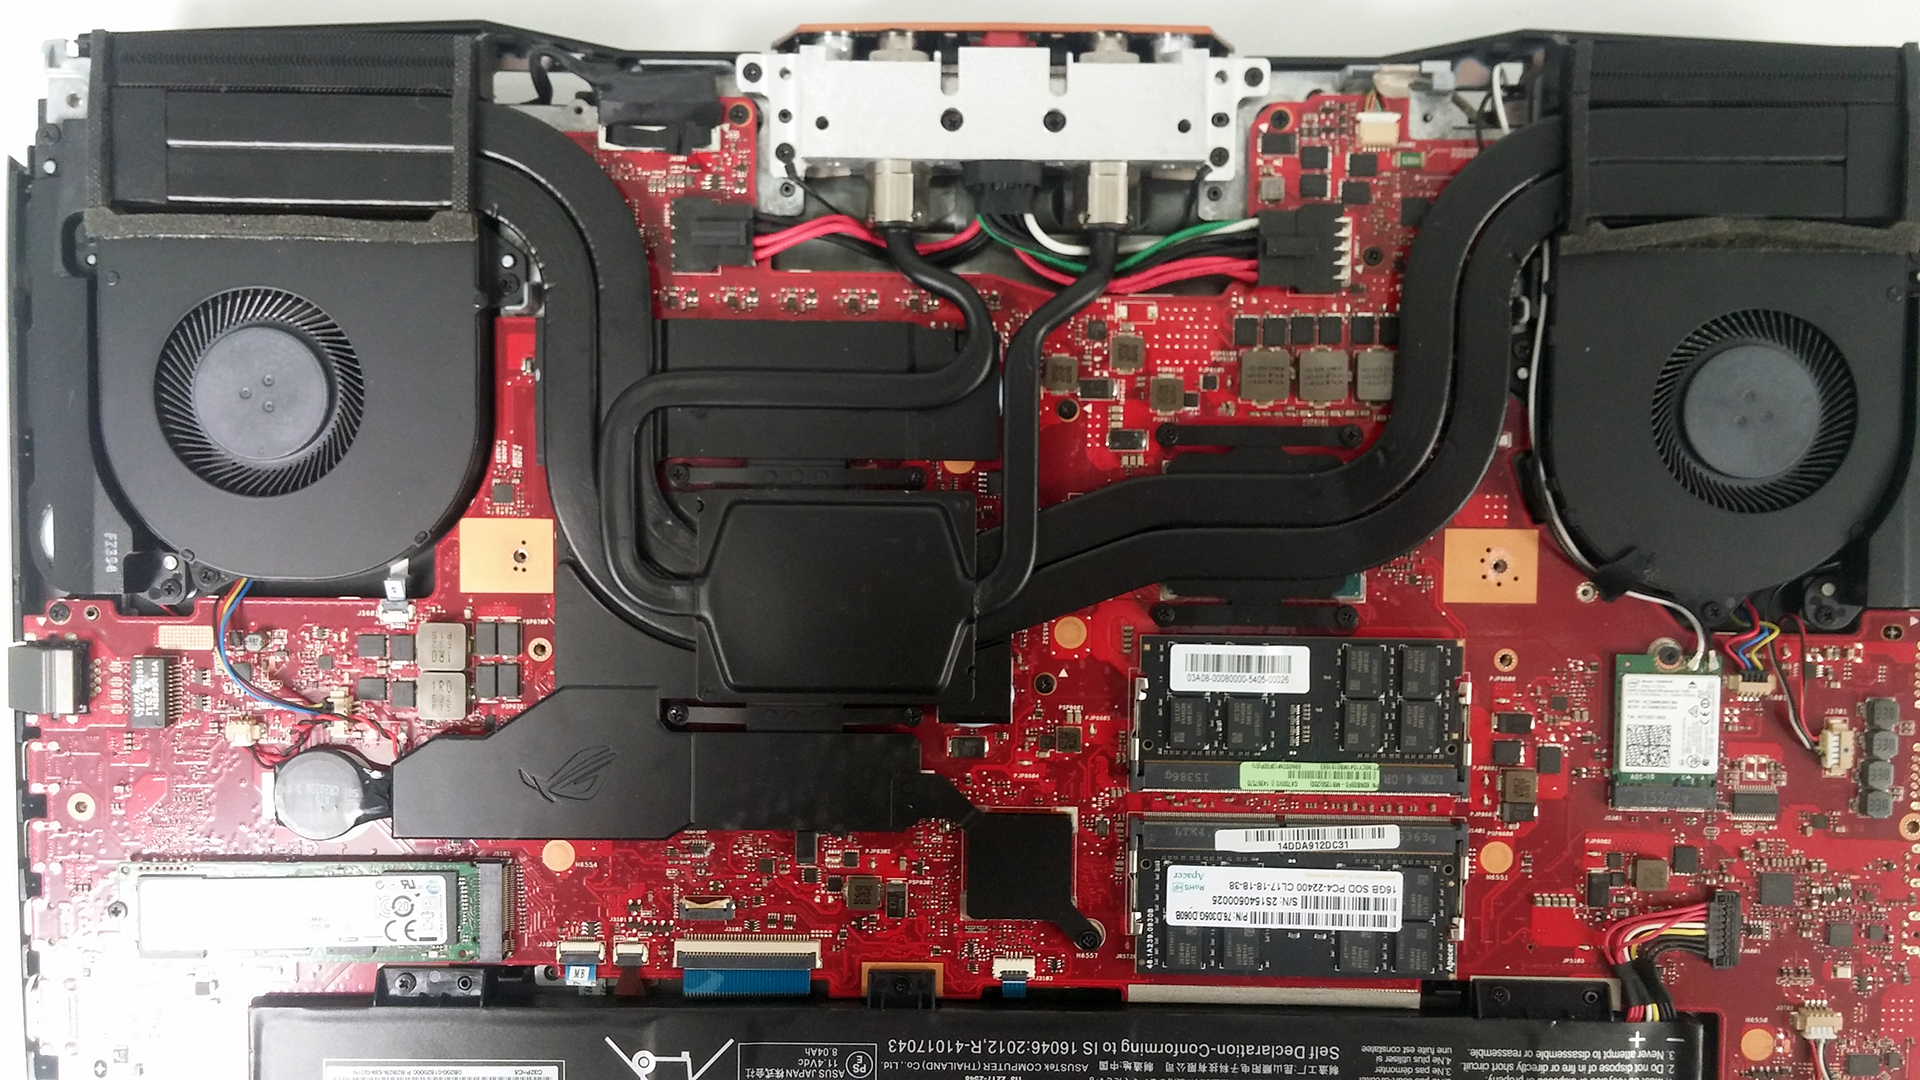
You can then proceed by flipping the motherboard. This side holds the other two RAM slots, which in our case are taken again by two 16GB DDR4-2400 chips and the other M.2 SSD slot taken by the same Samsun OEM stick. Also, note that the laptop doesn’t have a 2.5-inch HDD so you will rely only on the two M.2 SSD slots.
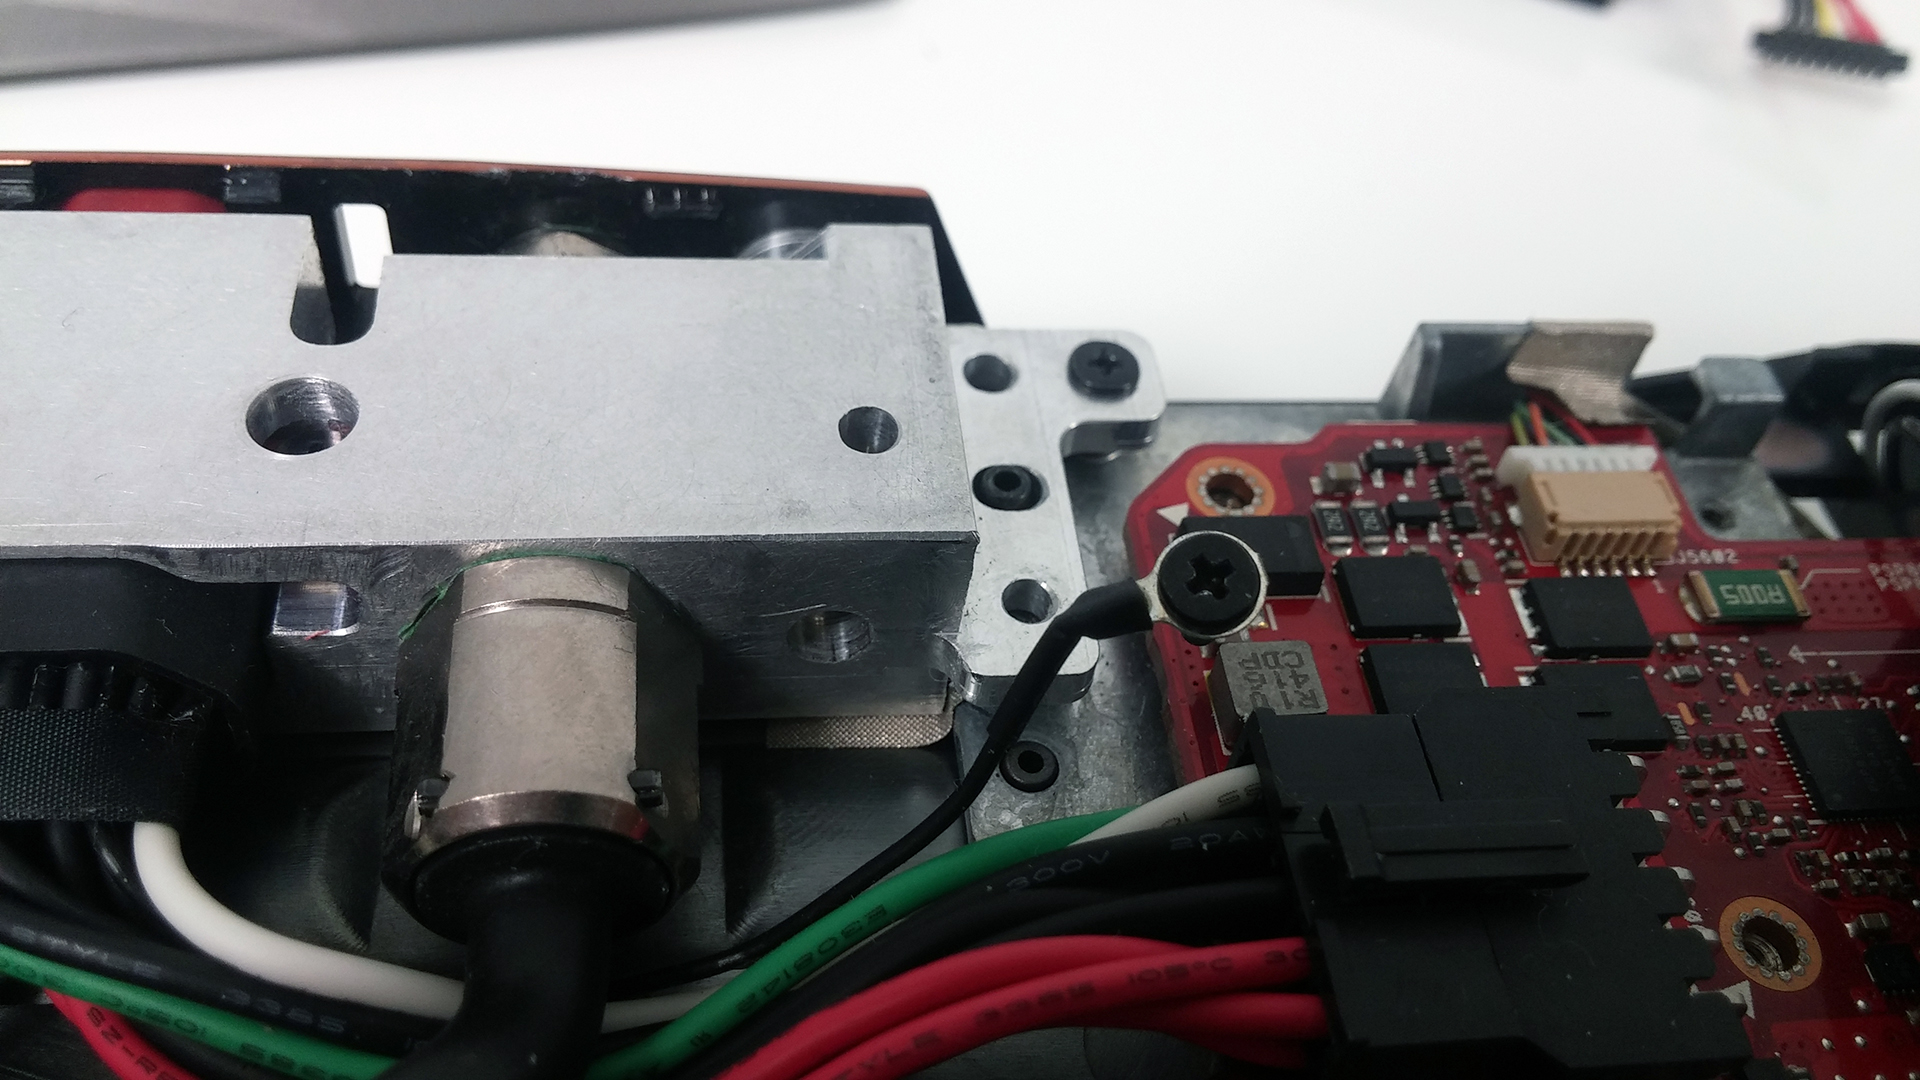
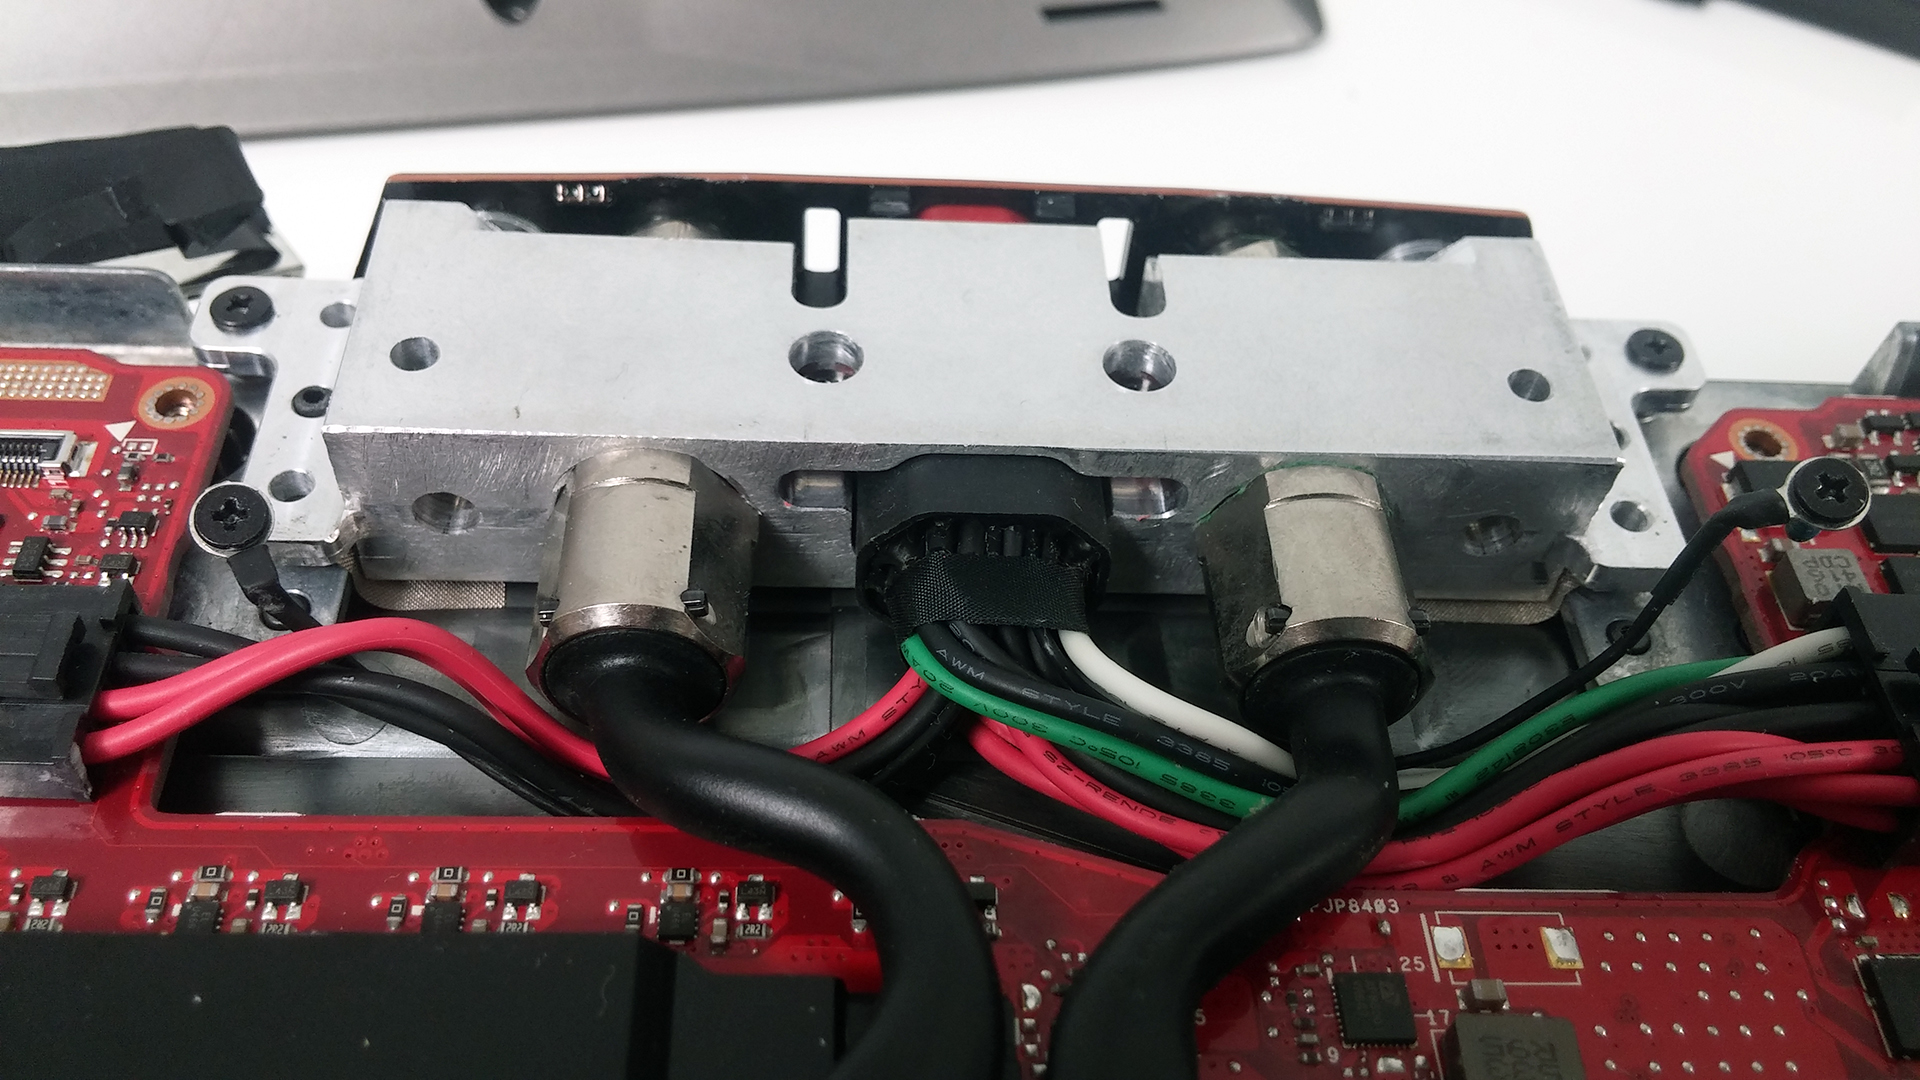
4. Cooling system
And this is the section that you’ve probably come for. The cooling system is almost the same as the one on the G752, but this time, it combines the power of a liquid cooler. You can see the separate heat pipes coming from the back of the machine. They start filling with the liquid when the docking is connected in order to take away the heat. However, the main liquid block is placed only on the GPU whereas the CPU relies on the conventional heat pipes with air cooling. We are yet to see how powerful the cooling system is.
Stay tuned for the full review.
You can find the notebook here: http://amzn.to/1PF2cXc


![[June 2026] Best-Selling Laptop Brands on Amazon Global – Apple’s Unrivaled Dominance in Units and Revenue](https://laptopmedia.com/wp-content/uploads/2026/07/GLOBAL-Best-Brands-400x225.jpg)
![[June 2026] Amazon Global: Top 10 Best-Selling Laptops – Apple’s New MacBook Neo Storms to #1, Reshaping the Market with Affordability](https://laptopmedia.com/wp-content/uploads/2026/07/Best-Selling-Laptops-GLOBAL-Top-10-400x225.jpg)
![[June 2026] Amazon Global: Top 10 Best-Selling Gaming Laptops – Acer’s Nitro V 16S AI Dominates Sales, While ASUS Leads Overall Revenue](https://laptopmedia.com/wp-content/uploads/2026/07/Best-Selling-Gaming-Laptops-GLOBAL-Top-10-400x225.jpg)
![[June 2026] Global Ranking of Best-Selling Laptop GPUs on Amazon – NVIDIA RTX 5060 is the Top-Selling Dedicated GPU](https://laptopmedia.com/wp-content/uploads/2026/07/Best-Selling-GPUs-GLOBAL-Top-10-400x225.jpg)
![[June 2026] Global Ranking of Best-Selling Laptop CPUs on Amazon – Apple M5 Dominates, AMD Ryzen 7 260 Gets Solid Premium Share](https://laptopmedia.com/wp-content/uploads/2026/07/Best-Selling-CPUs-GLOBAL-Top-10-400x225.jpg)

will be available a video-tutorial?