Acer Predator Helios 3D 15 SpatialLabs Edition (PH3D15-71) review – it’s a powerhouse but the stereoscopic 3D effect isn’t perfect
Disassembly, Upgrade options, and Maintenance
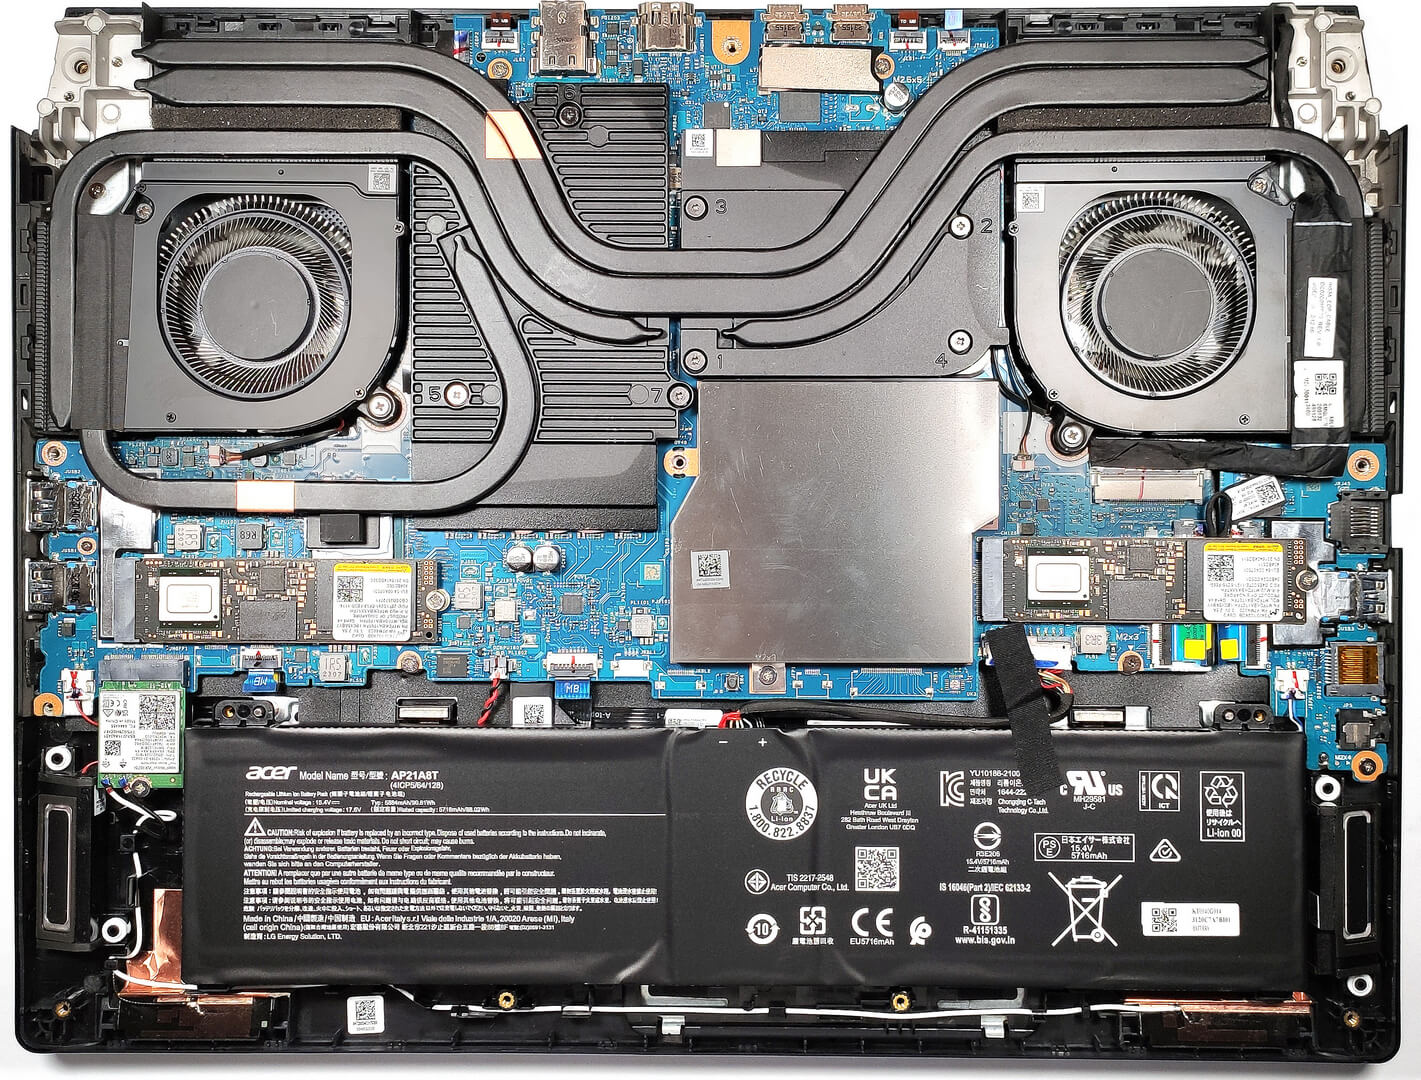
To gain access to the internals, you have to undo 11 Torx-head screws. Then, you can carefully raise the bottom panel by holding firmly the two exhaust vents on the back and lift away the plate from the chassis.
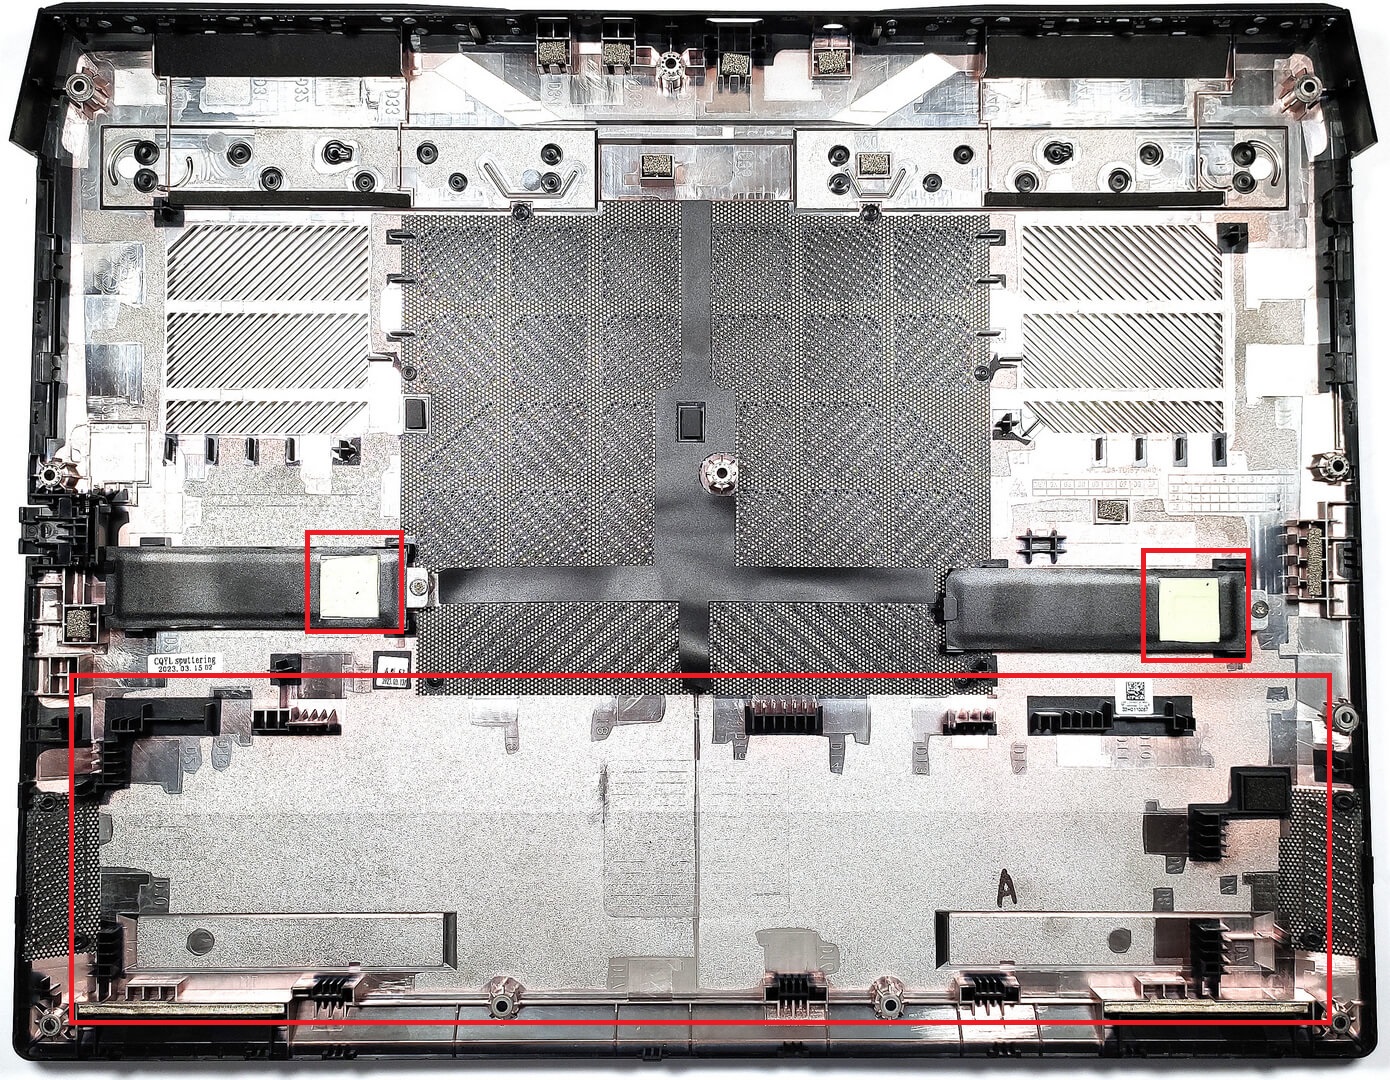
There are two cooling pads on the inside of the bottom panel for cooling the SSDs’ controllers. Clever idea!
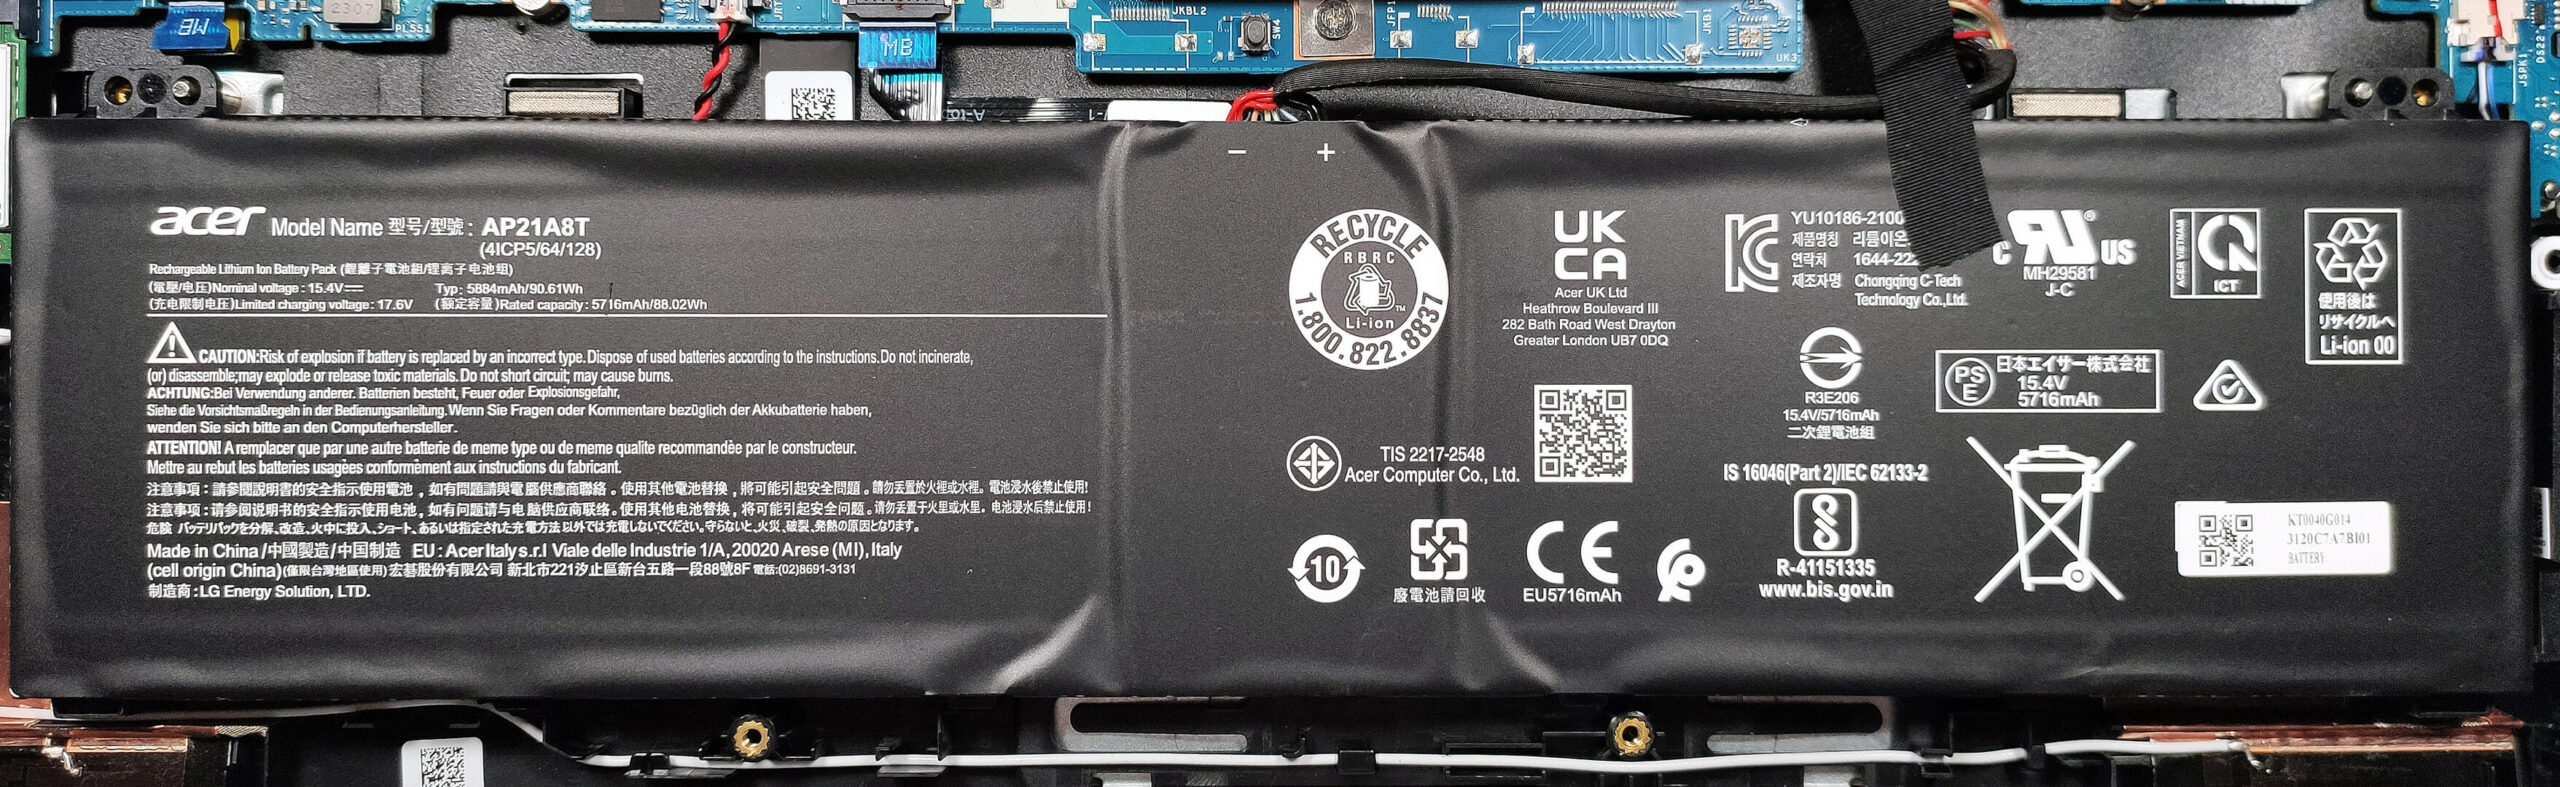
The battery is 90.61 Wh unit. Before taking it out, unplug the connector from the mainboard. The capacity is enough for 3 hours and 8 minutes of Web browsing or 2 hours and 56 minutes of video playback. The battery isn’t fixed to the base with screws because there is a dedicated socket for it on the inside of the bottom plate that is securing the unit in place.
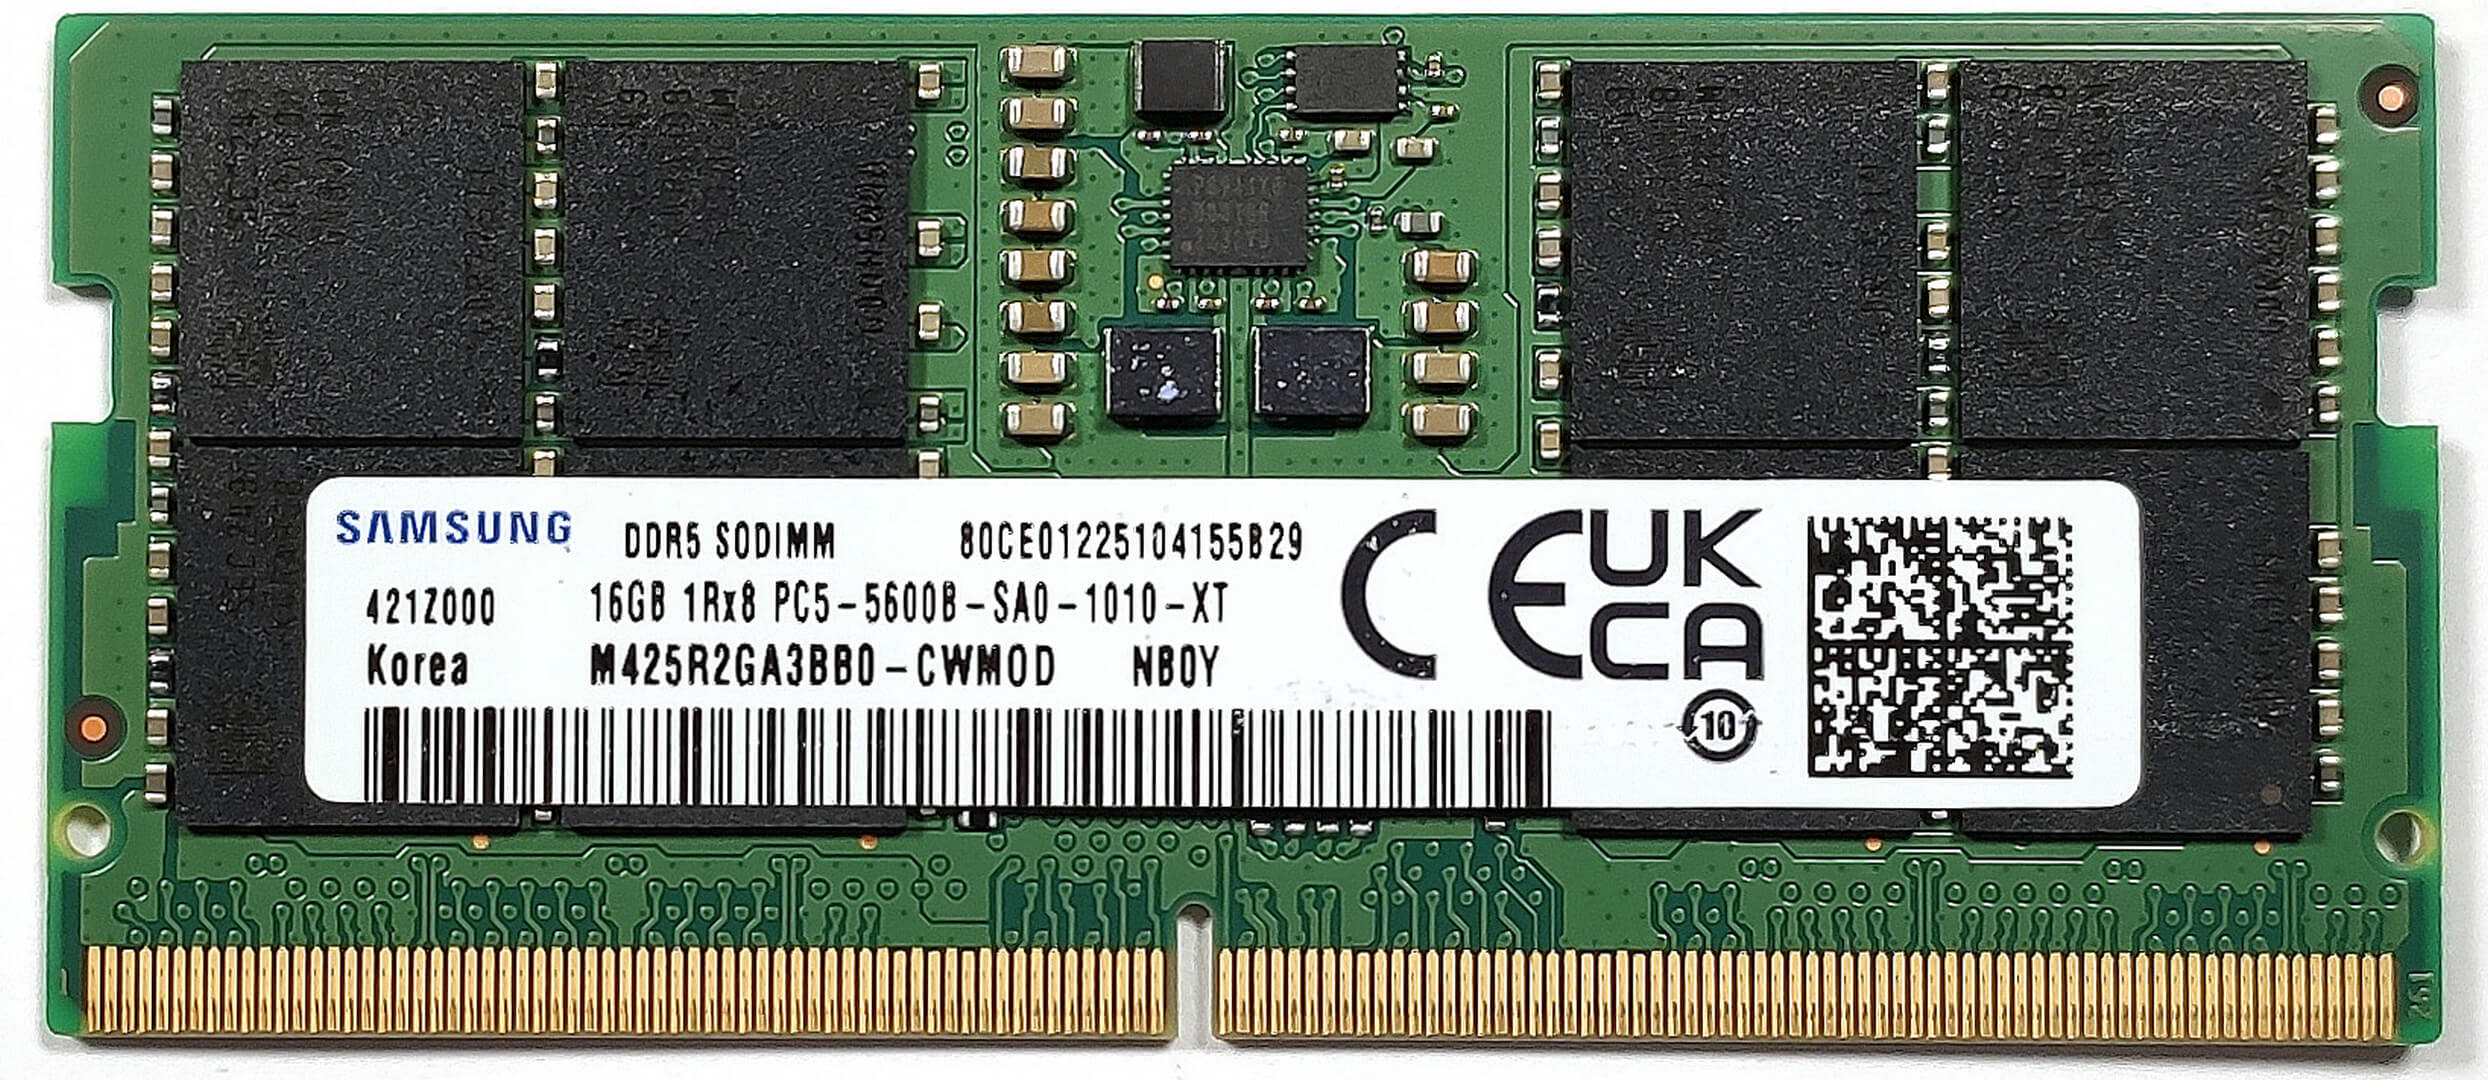
The memory is protected by a metal shroud. To remove it, you have to undo one screw and then you can lift up the plate with a plastic tool. There are two thin thermal pads on the inside of the metal cap for cooling the memory. Speaking of which, you get two SODIMMs for up to 32GB of DDR5-5600MHz RAM in dual-channel. Two additional cooling pads are placed below the RAM sticks – good job Acer!
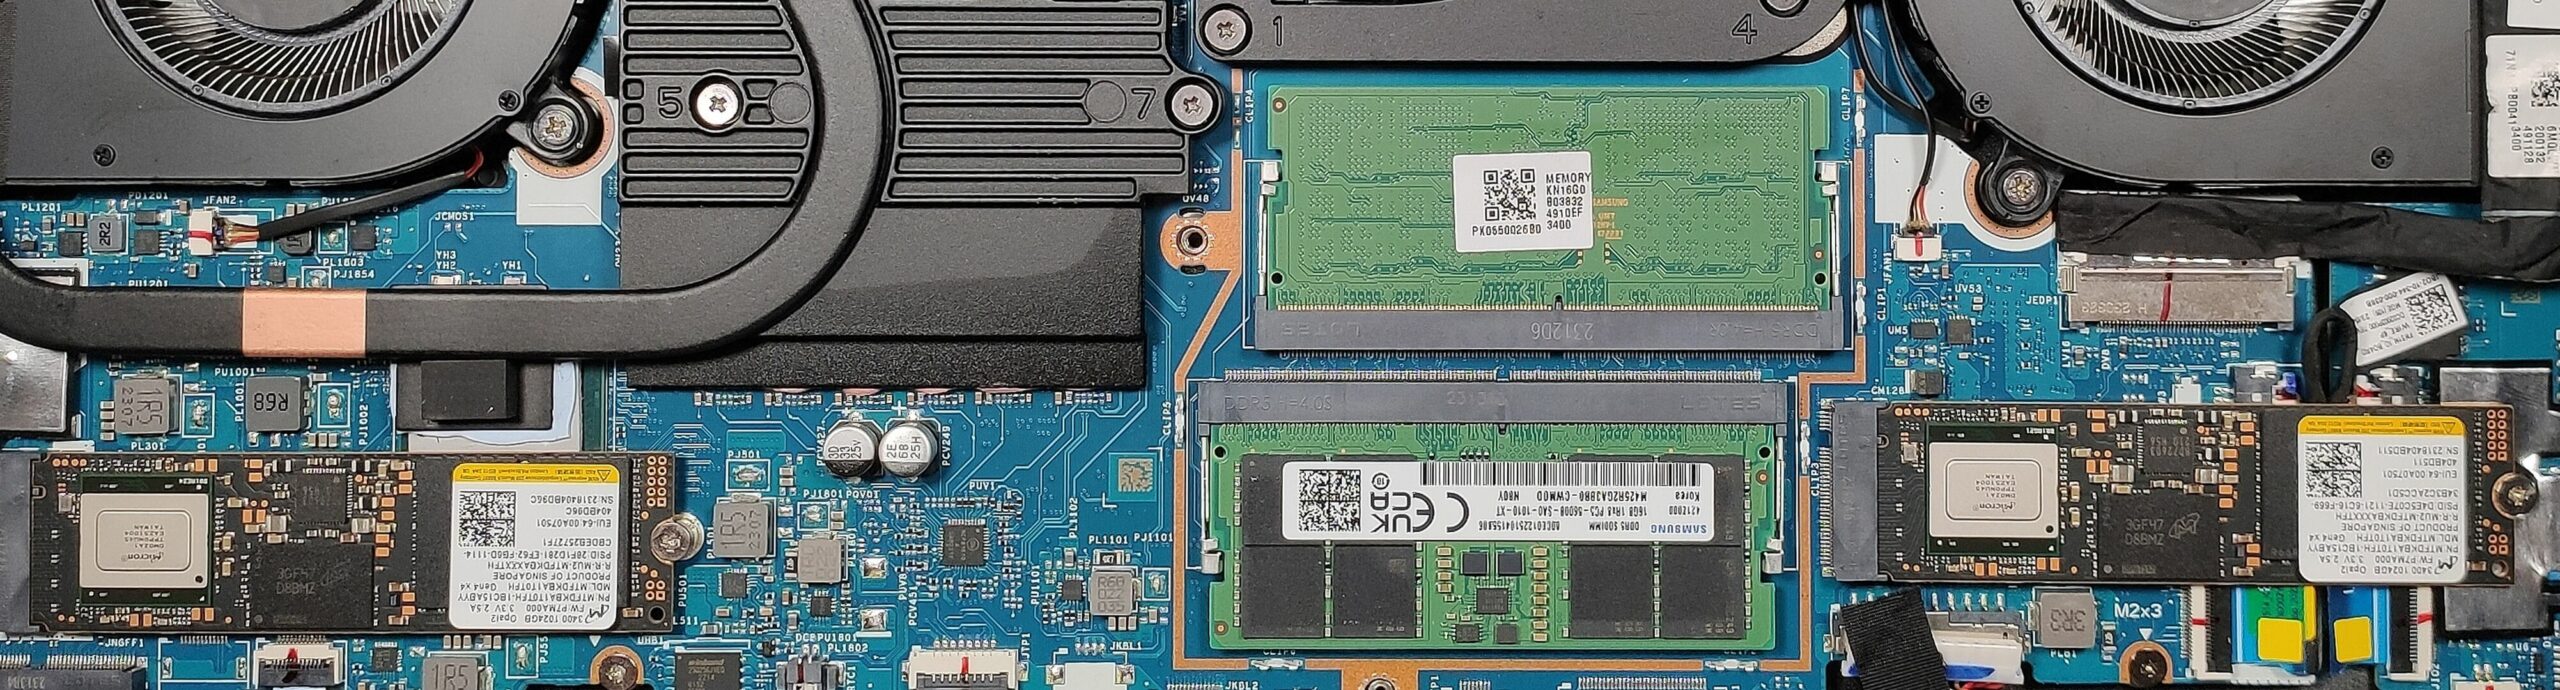
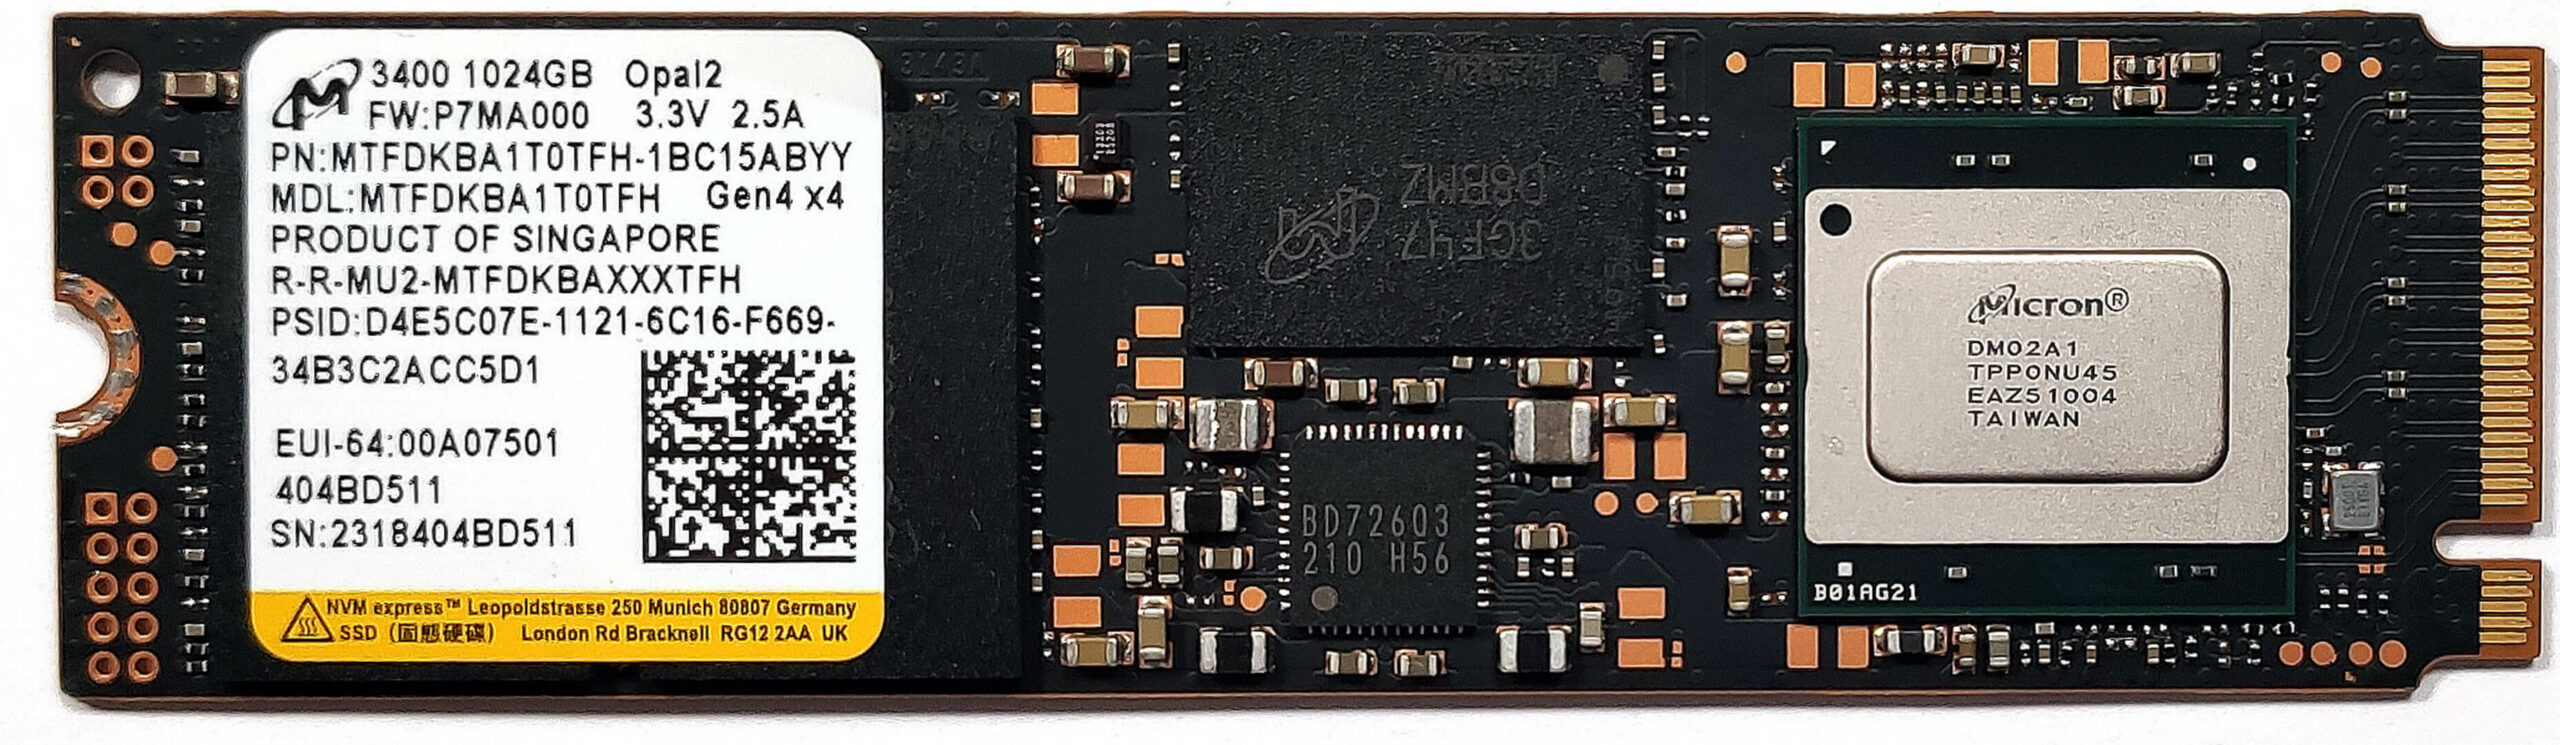
For storage, you can rely on two M.2 slots compatible with Gen 4 SSDs. In our case, the NVMes are working in RAID 0 mode. The SSD below the GPU chip and the chipset are additionally cooled by a thermal pad.


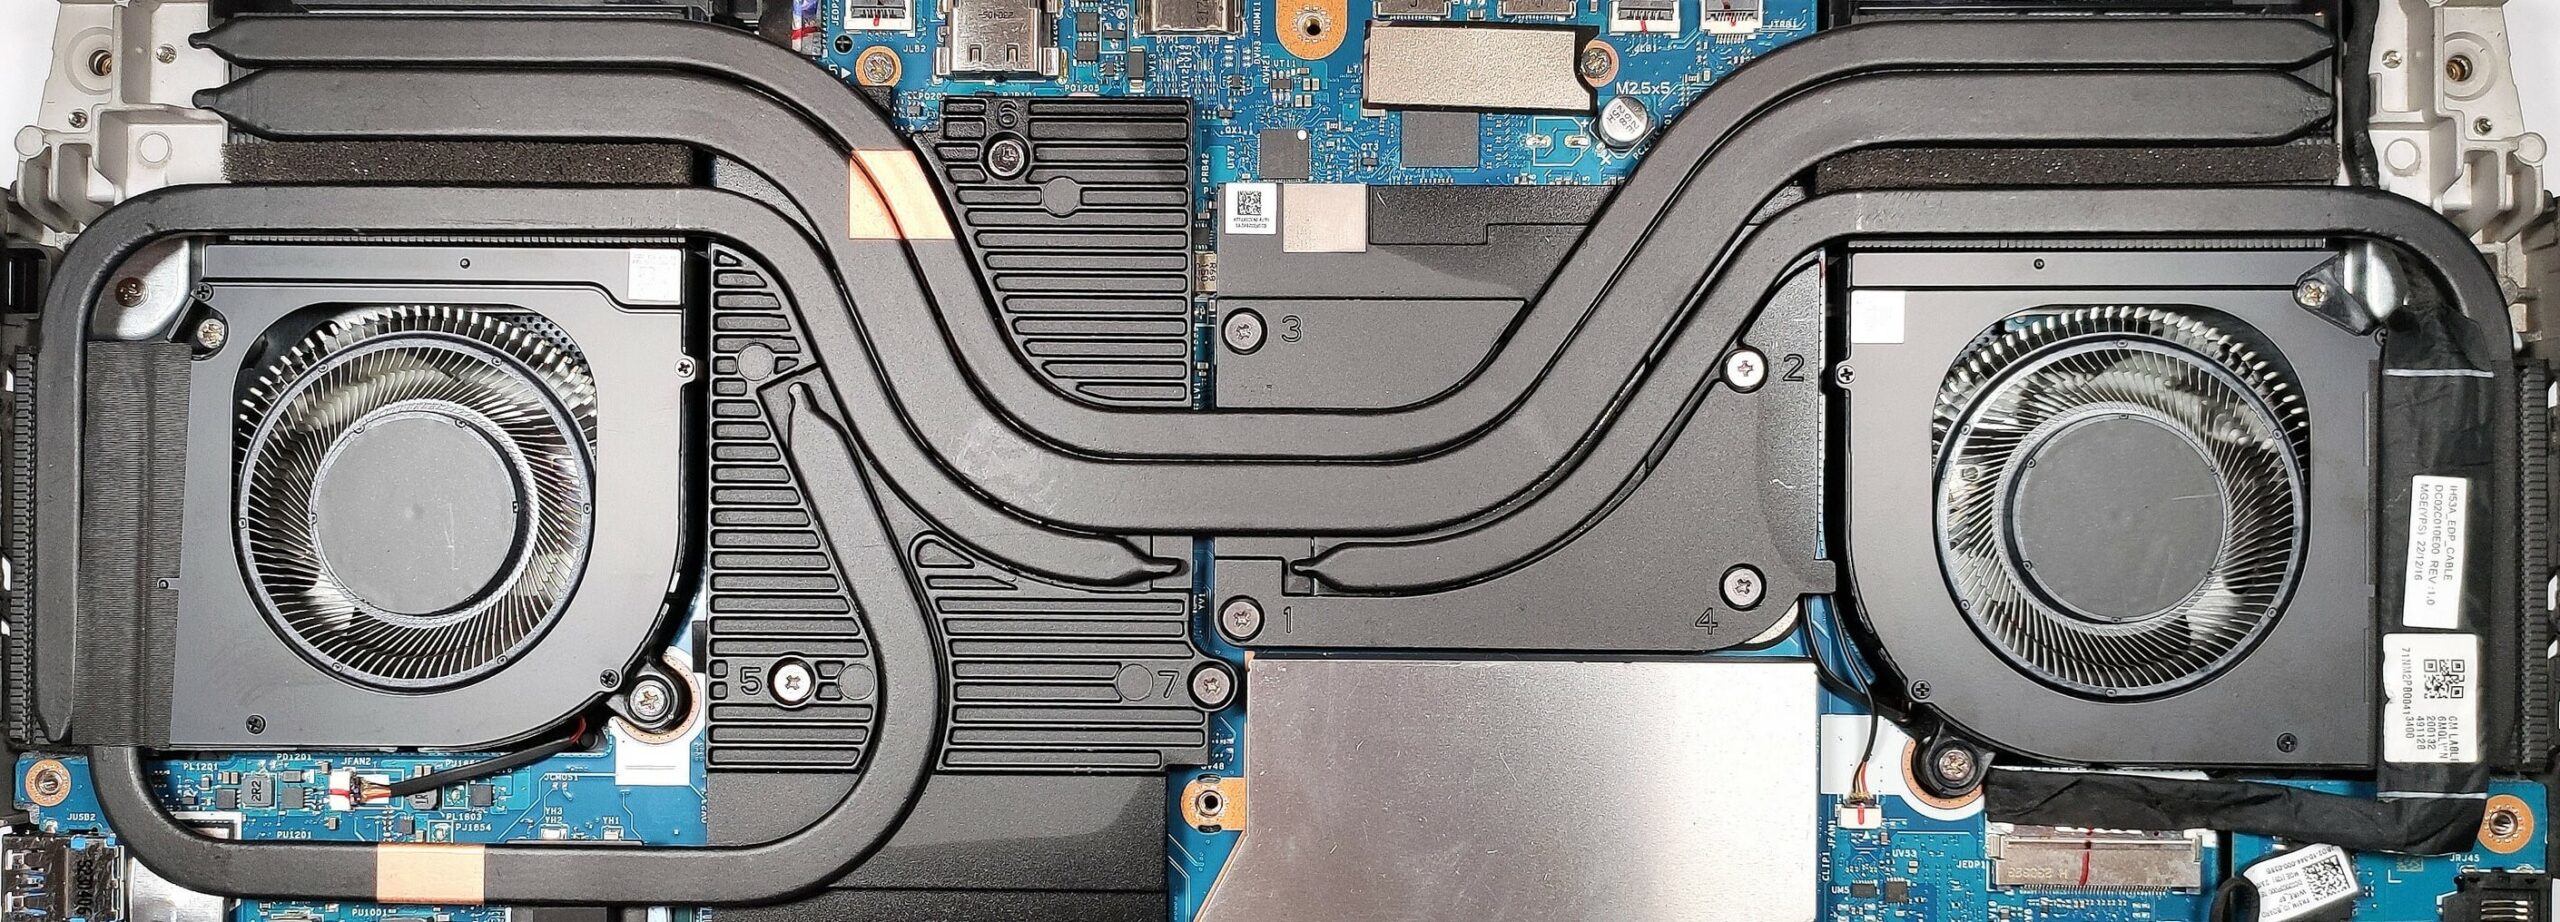
The cooling is massive. It comprises two fans and two heat pipes shared between the CPU and the GPU. There is one additional pipe for the processor and two more for to the video card. We can also spot four heat sinks and a duo of big heat spreaders, The larger one is on the side of the GPU. Acer has applied liquid metal on the CPU die.