Inside Dell Inspiron 17 5749 – disassembly, internal photos and upgrade options
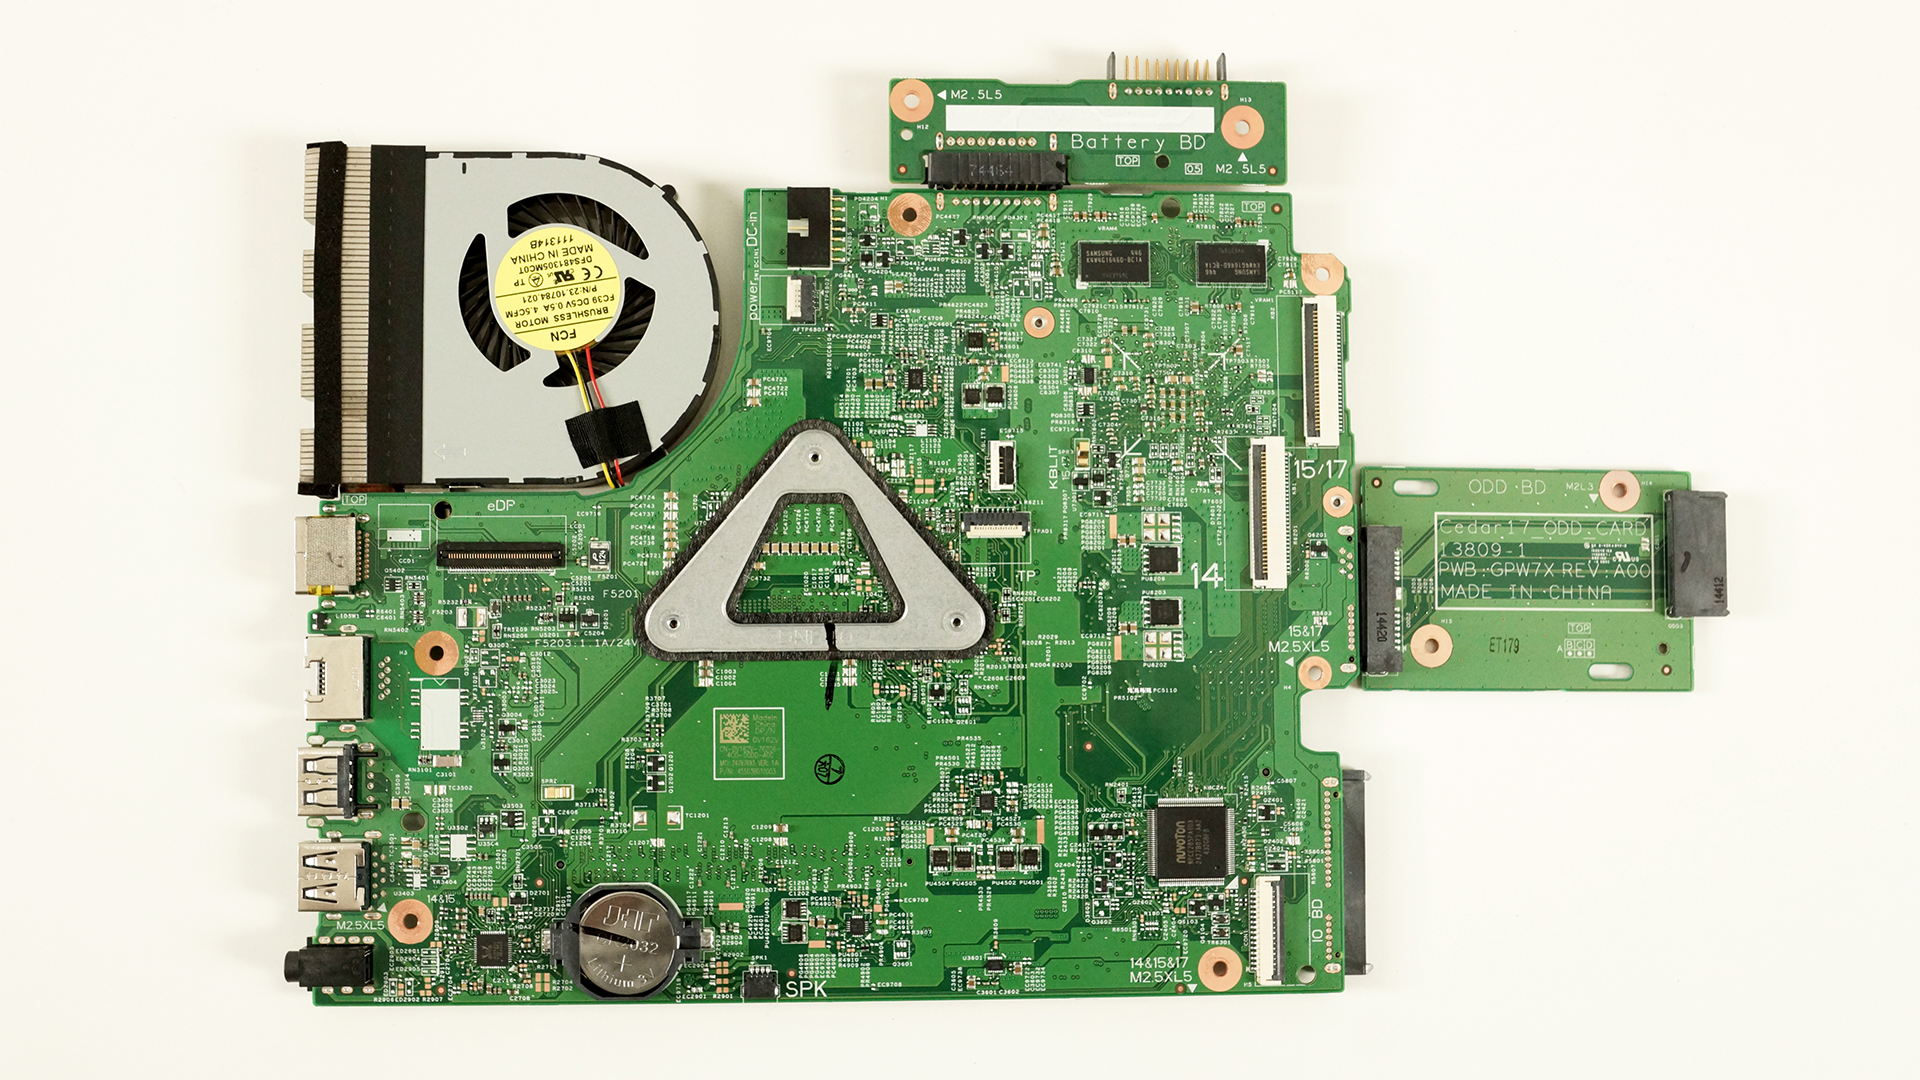
Dell Inspiron 5749 is one hell of a workstation, but maybe not in the good way. It’s really big, expensive and bulky. Soon you can expect detailed review on the model, but for now you should settle with this short upgrade and disassembly guide. We have to note that the Inspiron 5749 has a really thick construction and it’s really heavy too, but at the same time doesn’t offer anything special. There’s no M.2 SATA slot, nor a second SATA 3 slot for an extra HDD or SSD. In fact, the chassis contains only a motherboard suitable for 15-inch laptops with two extensions. The rest can be seen in the photos below.
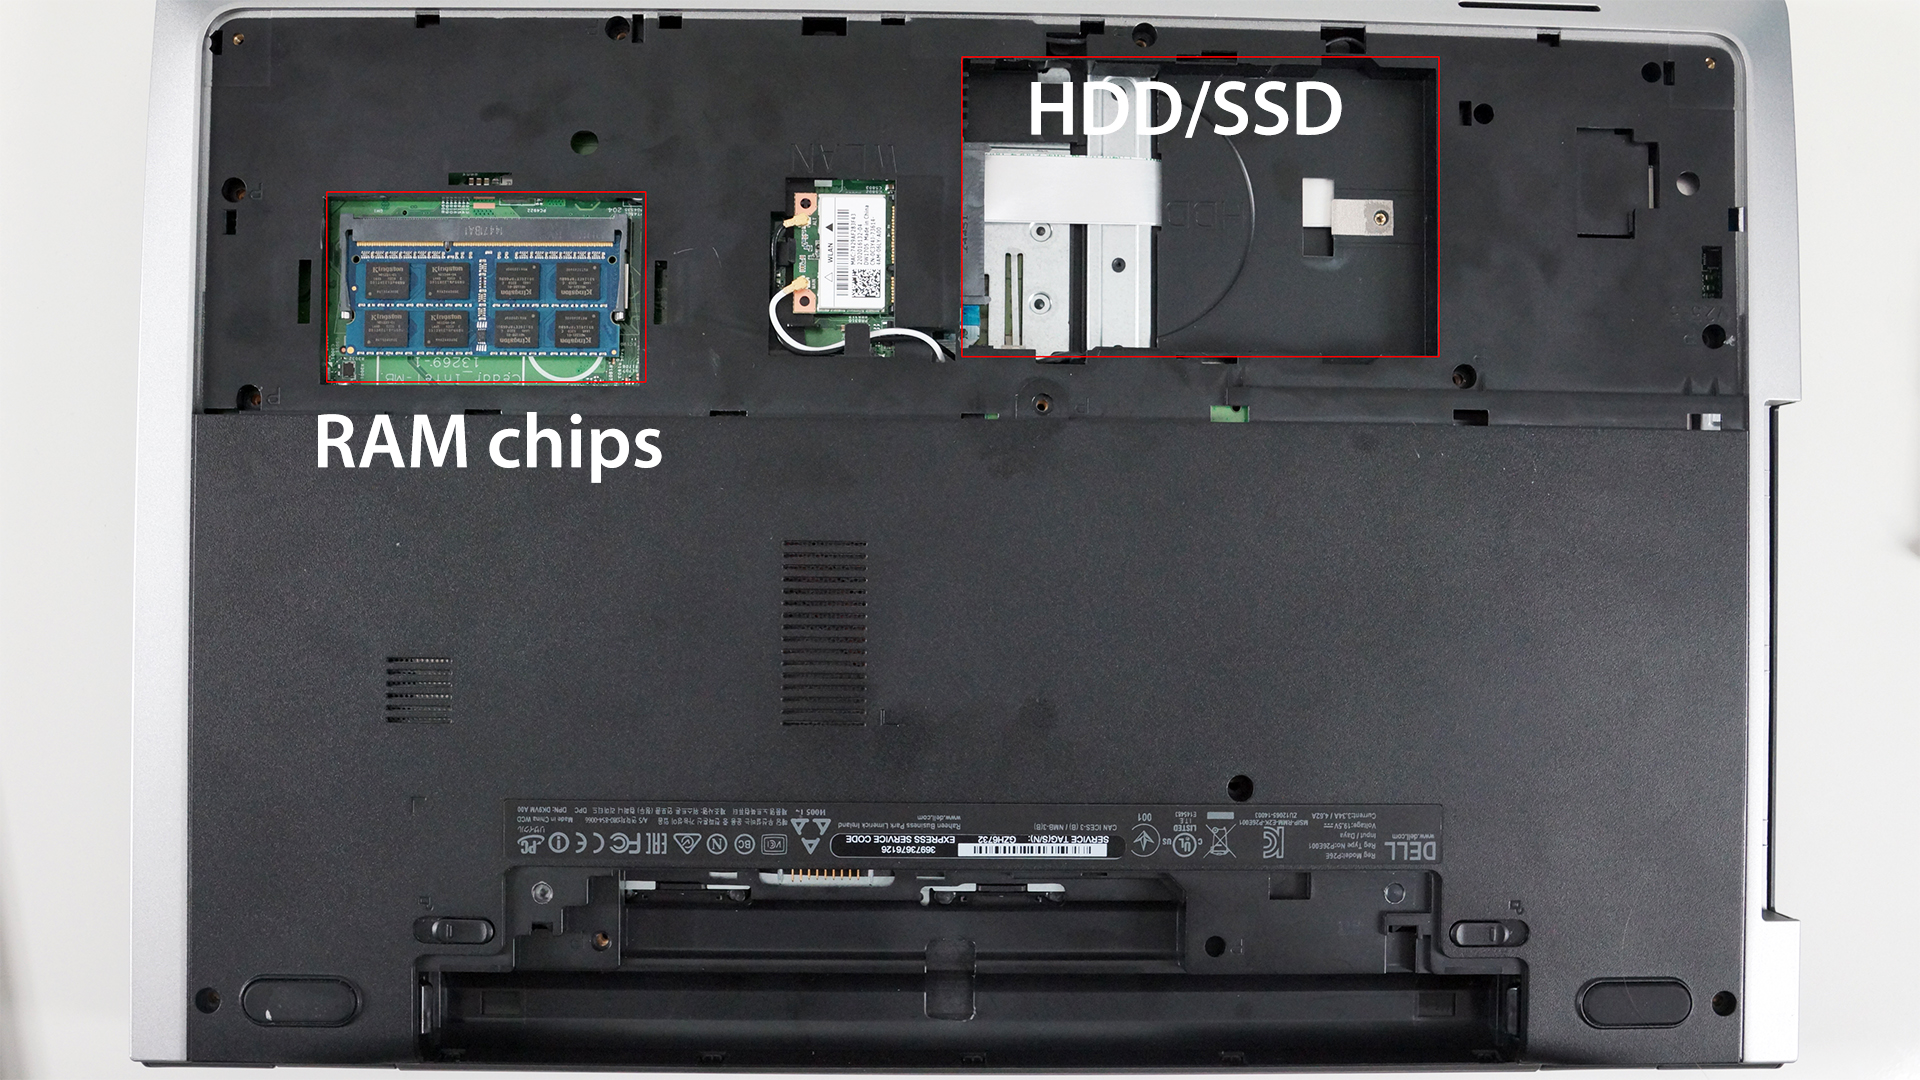
1. Removing the service cover
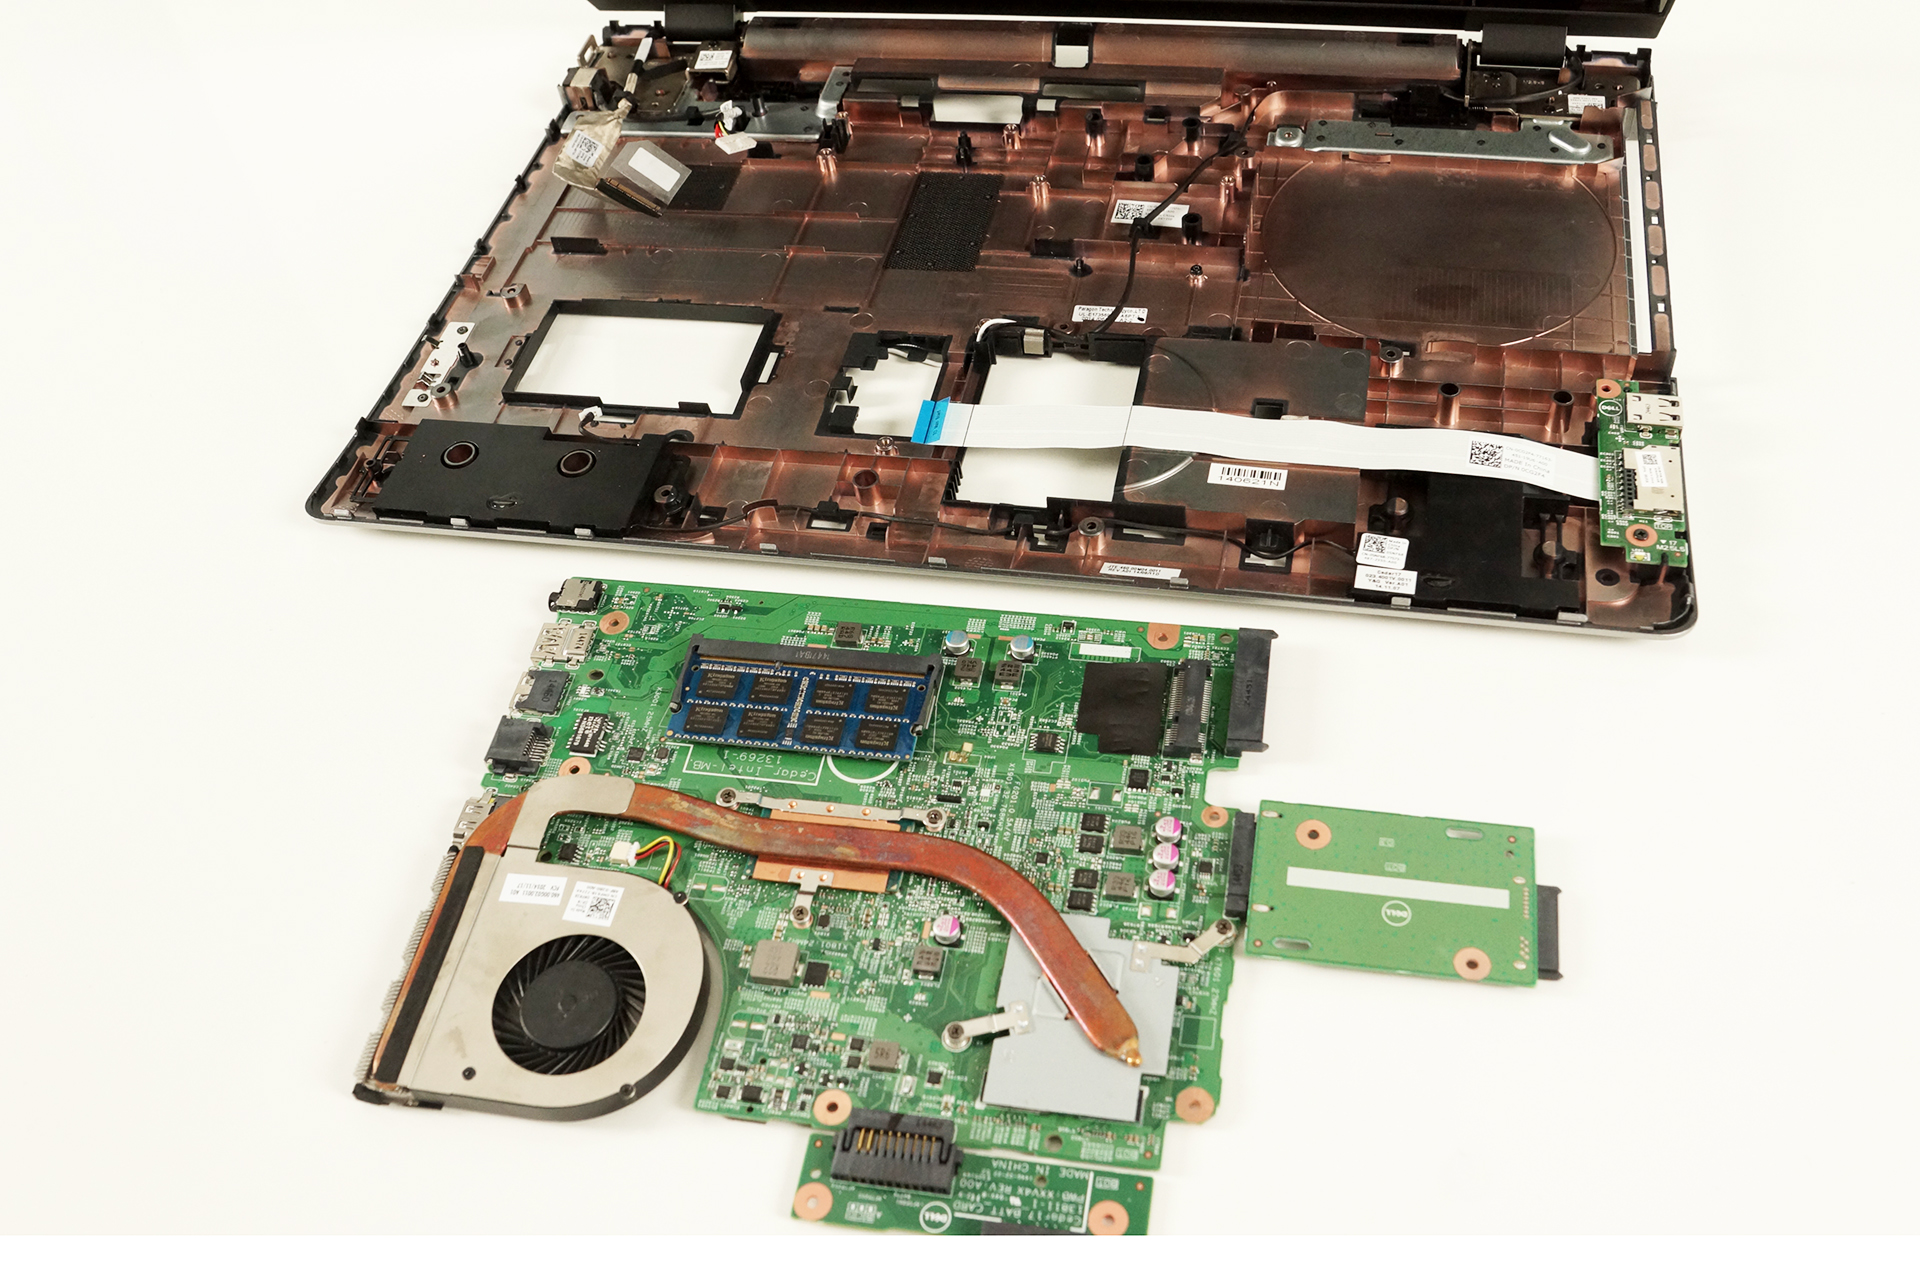
At the back, you will find a little cover held by two screws and beneath it you will find the HDD, RAM chips and the Wi-Fi module. Practically all you need for the usual upgrade, so no hassle here. Also, the battery is user-replaceable, which is also a plus.
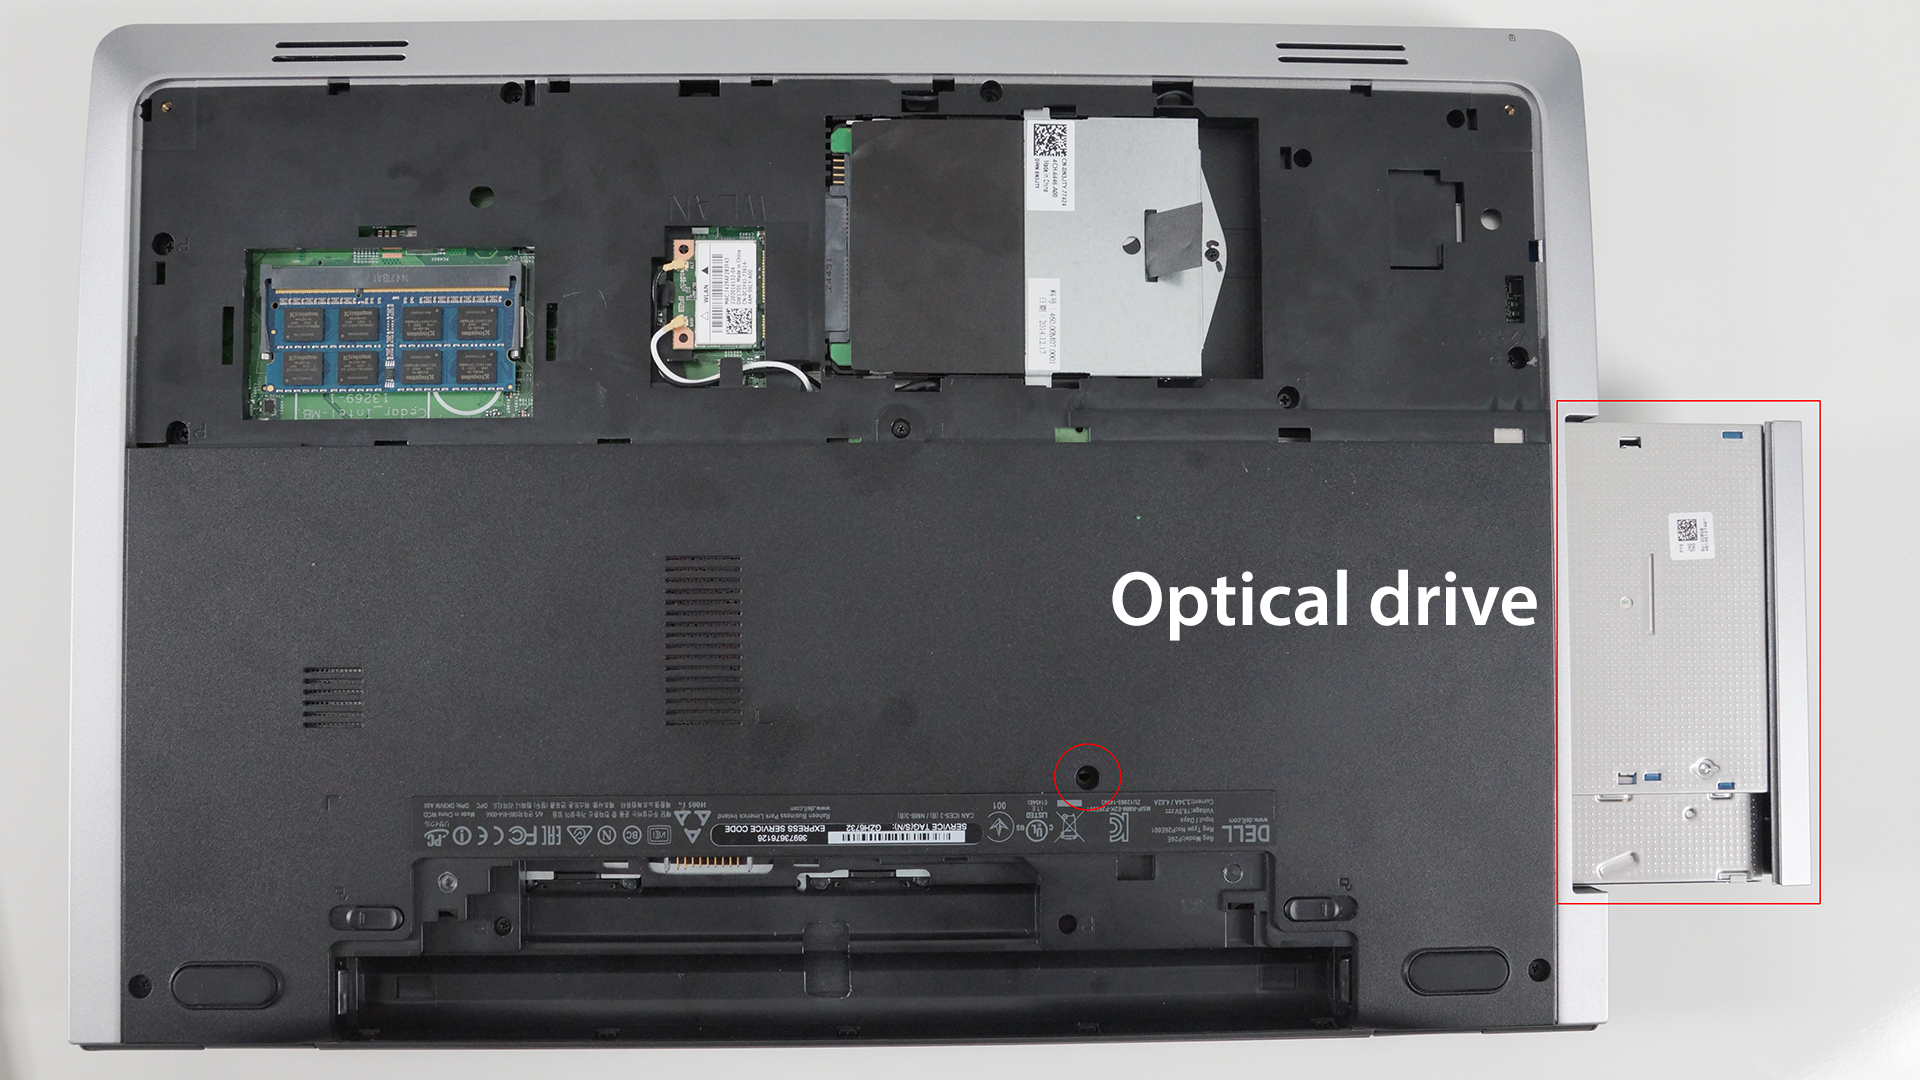
2. Removing the optical drive
The optical drive is kept in place by one screw (see the picture below) and you will need to remove it if you want to get even further and clean your motherboard or CPU fan. This will be explained in the following steps below.
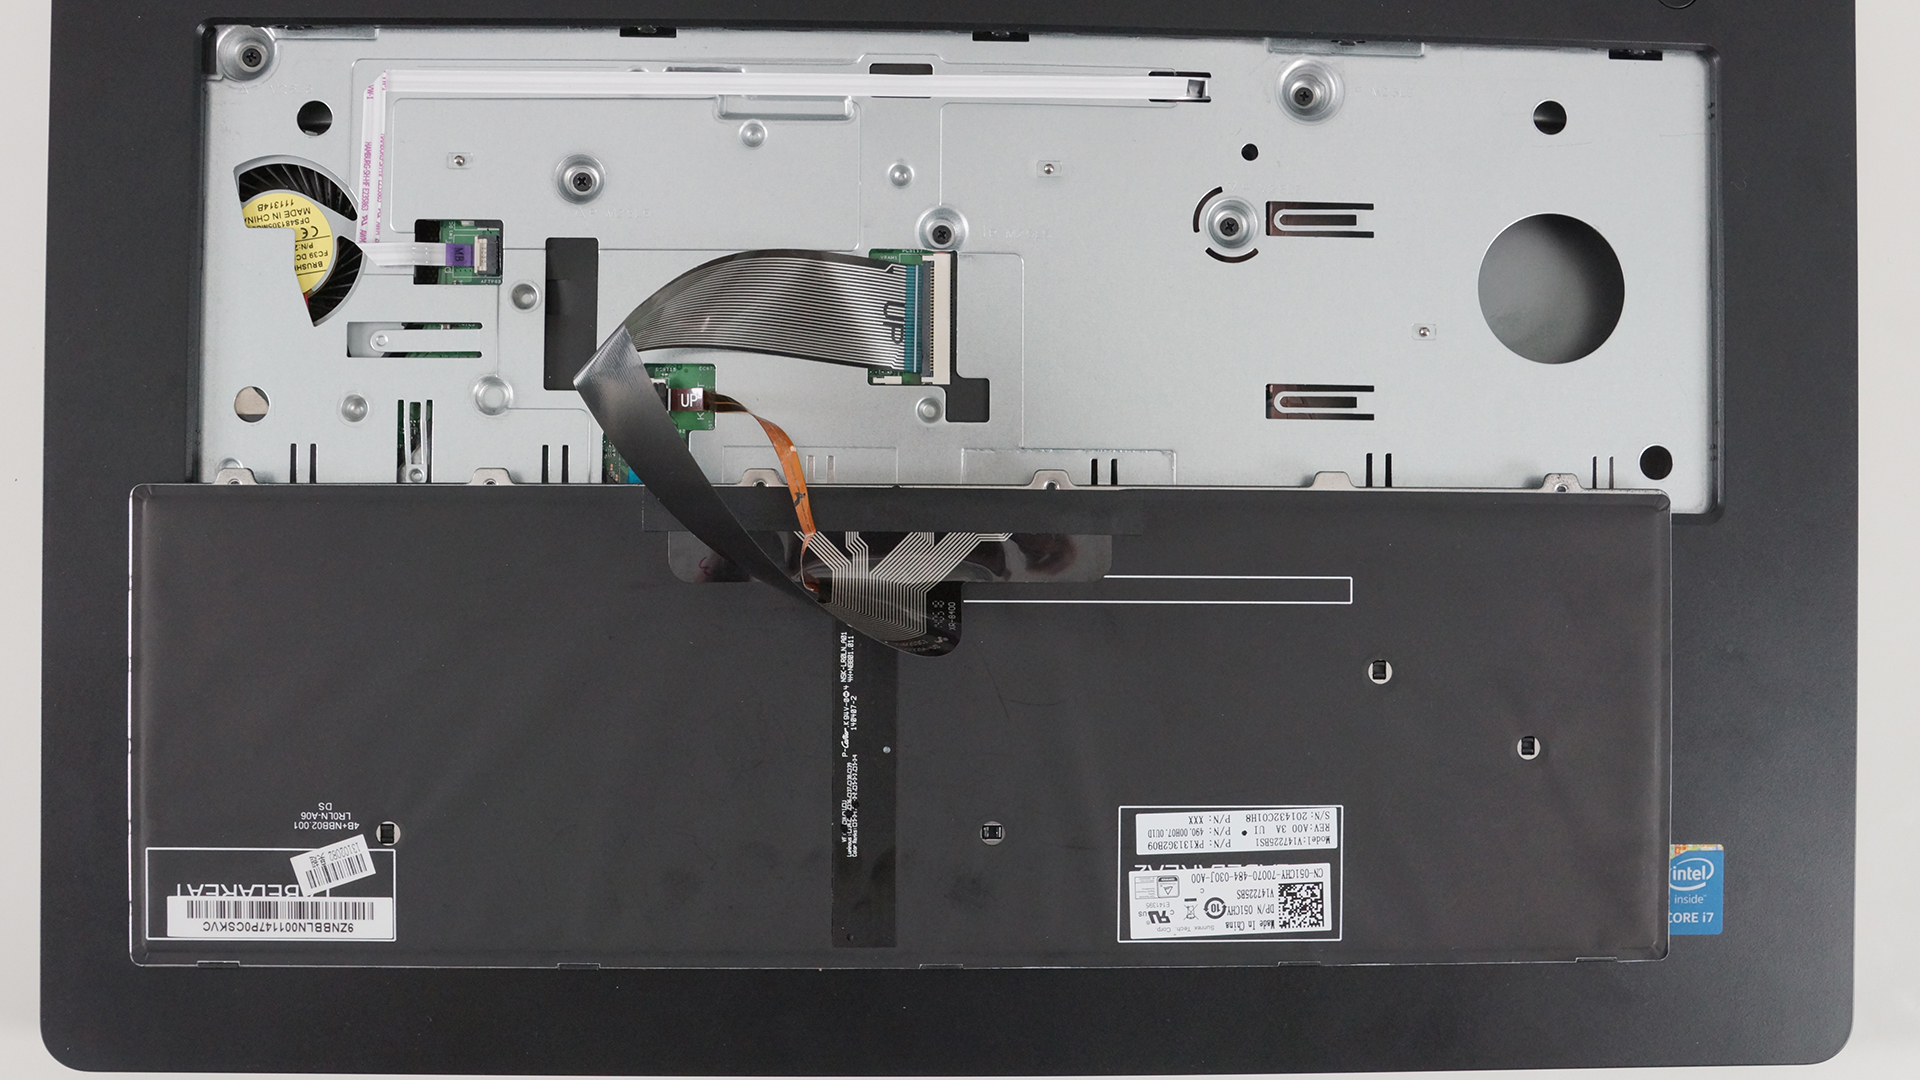
3. Removing the keyboard
Under the keyboard, Dell has placed 5 screws which keep the motherboard intact. To remove the keyboard you will need a soft plastic tool (so that you will not damage the keyboard) and you might want to start from the top of the keyboard.

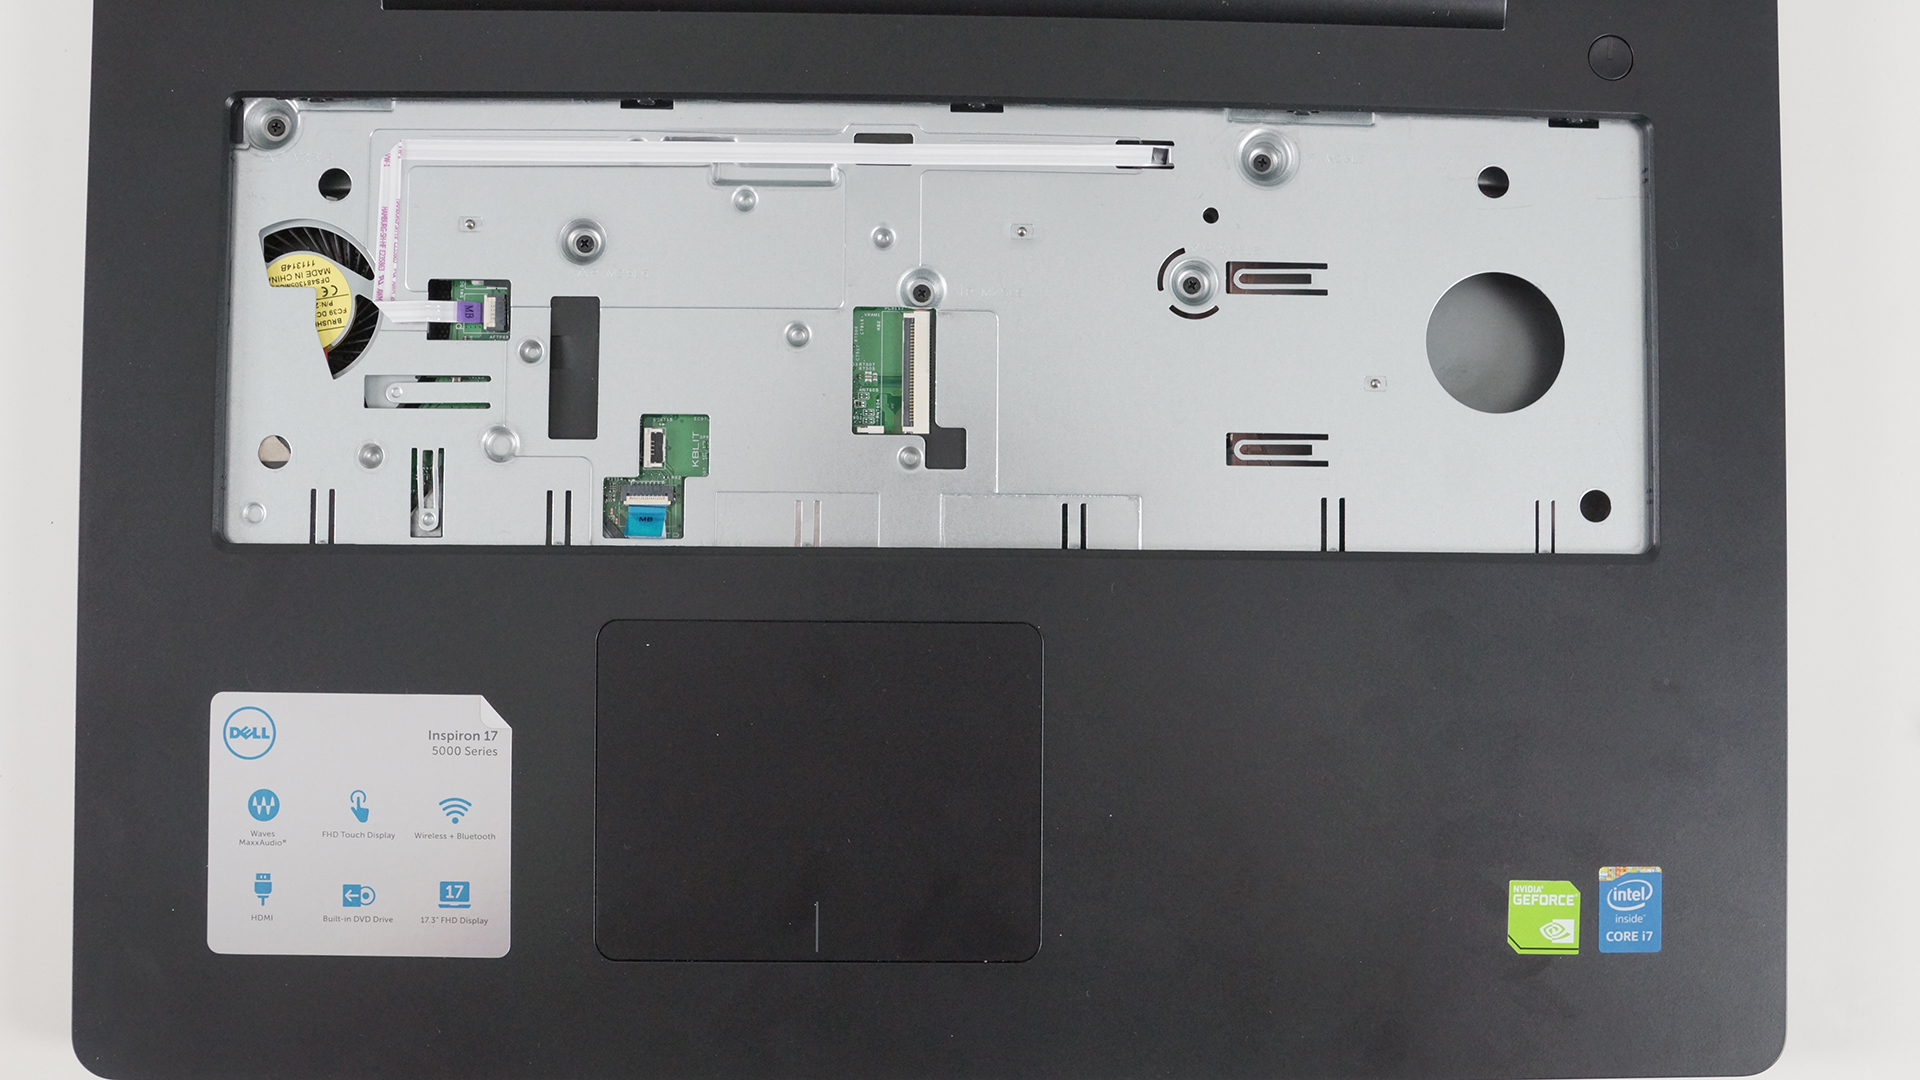
4. Disassembling the main frame and motherboard
After you’ve finished removing the screws beneath the keyboard, you can start displacing the main chassis, which will reveаl the motherboard, as well as the CPU fan. If you want to remove that too, you will have to unscrew 3 bolts, which are highlighted below. Keep in mind that there are a few cables you will need to take care of before removing the motherboard.

5. Cooling system
Dell has used only one heat pipe for the cooling system, which might be enough considering the not so powerful and power-hungry CPU, which in our case is Intel Core i7-5500U, but still the plate and the heat pipe seem large enough to handle well the temperatures. Also, the grill for dispersing the heat is big enough to handle the extra digits of temperatures. But to be absolutely sure, we have to test it and this will take place in our upcoming detailed review.


![[2026年6月] Amazonグローバルにおけるノートパソコンのベストセラーブランド ― 販売台数と売上高の両面で、Appleが圧倒的な優位性を示す](https://laptopmedia.com/wp-content/uploads/2026/07/GLOBAL-Best-Brands-400x225.jpg)
![[2026年6月] アマゾン・グローバル:ノートパソコン売上ランキングトップ10――Appleの新型「MacBook Neo」が1位に躍り出て、手頃な価格帯で市場を再編](https://laptopmedia.com/wp-content/uploads/2026/07/Best-Selling-Laptops-GLOBAL-Top-10-400x225.jpg)
![[2026年6月] アマゾン・グローバル:ゲーム用ノートPC売上ランキングトップ10――エイサーの「Nitro V 16S AI」が販売台数で首位を独占、ASUSが総売上高で首位に立つ](https://laptopmedia.com/wp-content/uploads/2026/07/Best-Selling-Gaming-Laptops-GLOBAL-Top-10-400x225.jpg)
![[2026年6月] AmazonにおけるノートPC用GPUの世界販売ランキング ― NVIDIA RTX 5060が専用GPU部門で首位を獲得](https://laptopmedia.com/wp-content/uploads/2026/07/Best-Selling-GPUs-GLOBAL-Top-10-400x225.jpg)
![[2026年6月] AmazonにおけるノートPC用CPUの世界販売ランキング ― Apple M5が首位を独占、AMD Ryzen 7 260がプレミアム層で堅調なシェアを獲得](https://laptopmedia.com/wp-content/uploads/2026/07/Best-Selling-CPUs-GLOBAL-Top-10-400x225.jpg)