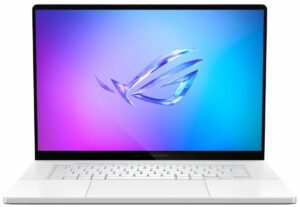
How to open ASUS ROG Zephyrus G16 GA605 – disassembly and upgrade options
Opening the Device
Hint: Ensure the laptop is powered off and disconnected from any power source before starting.
- Undo the eleven Torx-head screws on the bottom panel of the laptop. Note that the top two screws in the middle are hidden underneath rubber caps and must be unglued first.
- After removing the screws, you will notice slight gaps in the bottom edges. Use a thin plastic tool to pry the front and the sides gently.
- Once the front and sides are pried open, proceed to pop the back panel.
- Insert a thin plastic tool between the plate and the chassis and slide it gently to release the remaining clips. Do not push too hard to avoid snapping the stiff clips.
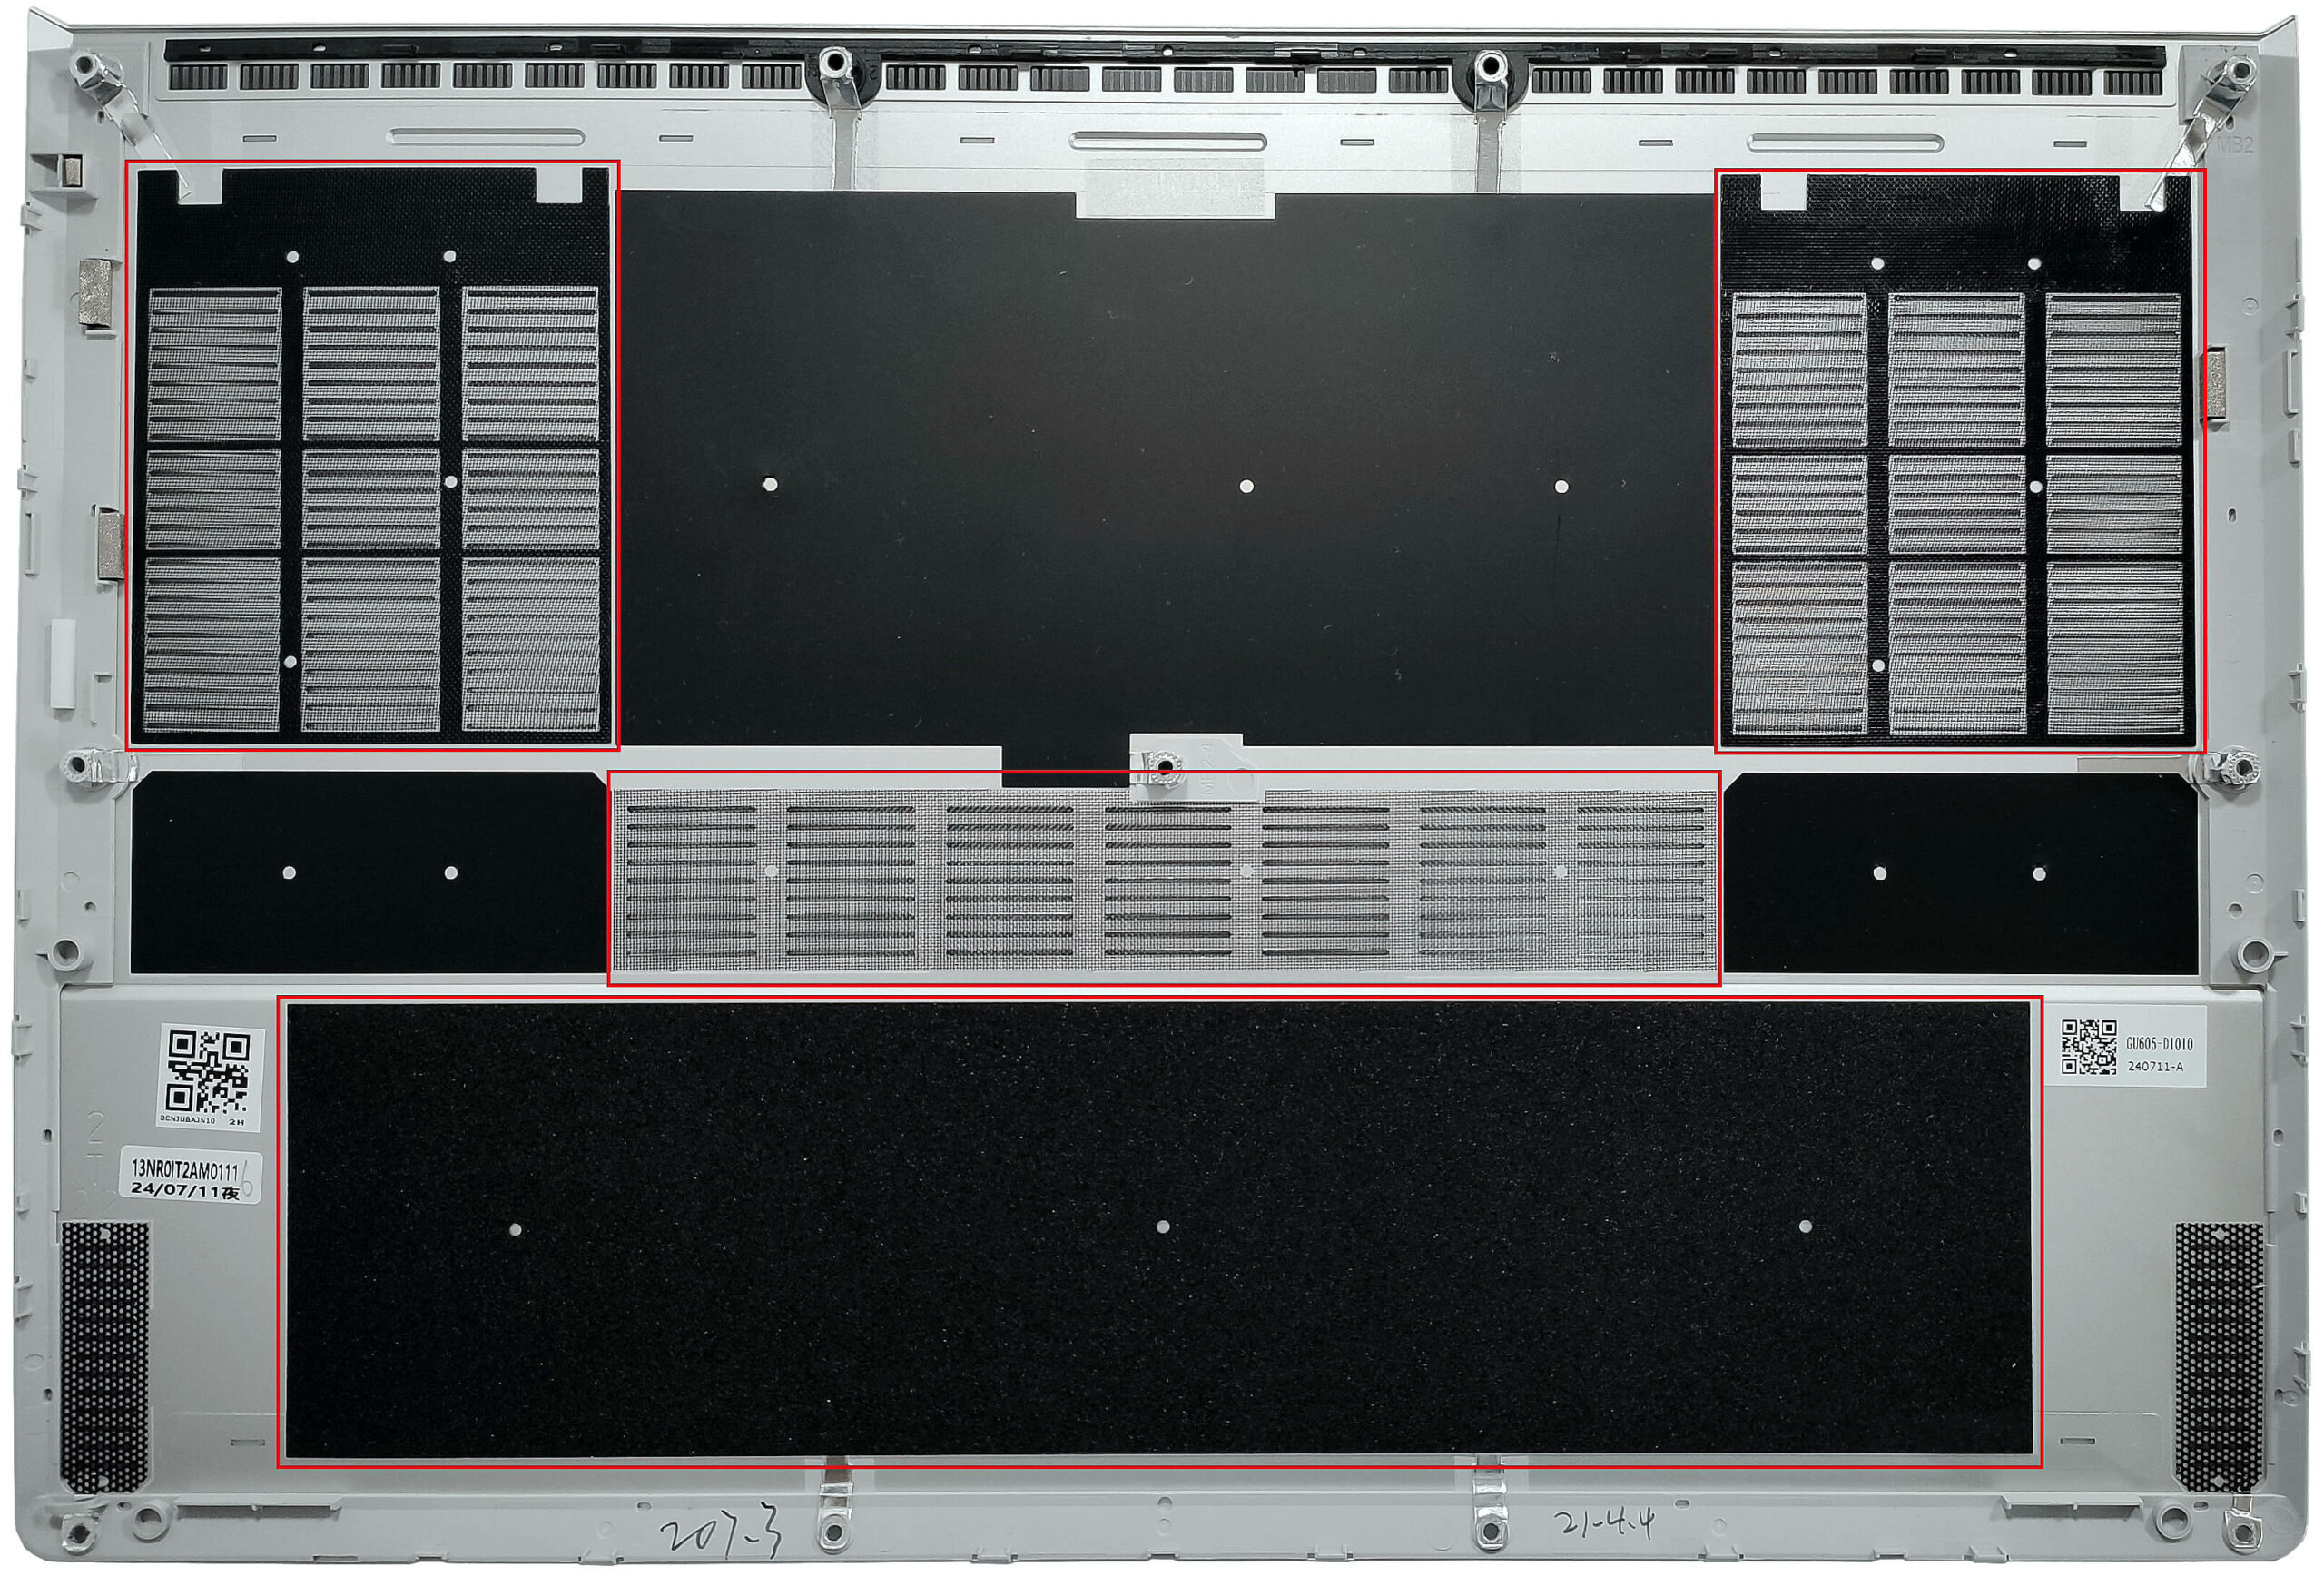
- Carefully remove the back panel to expose the internal components.
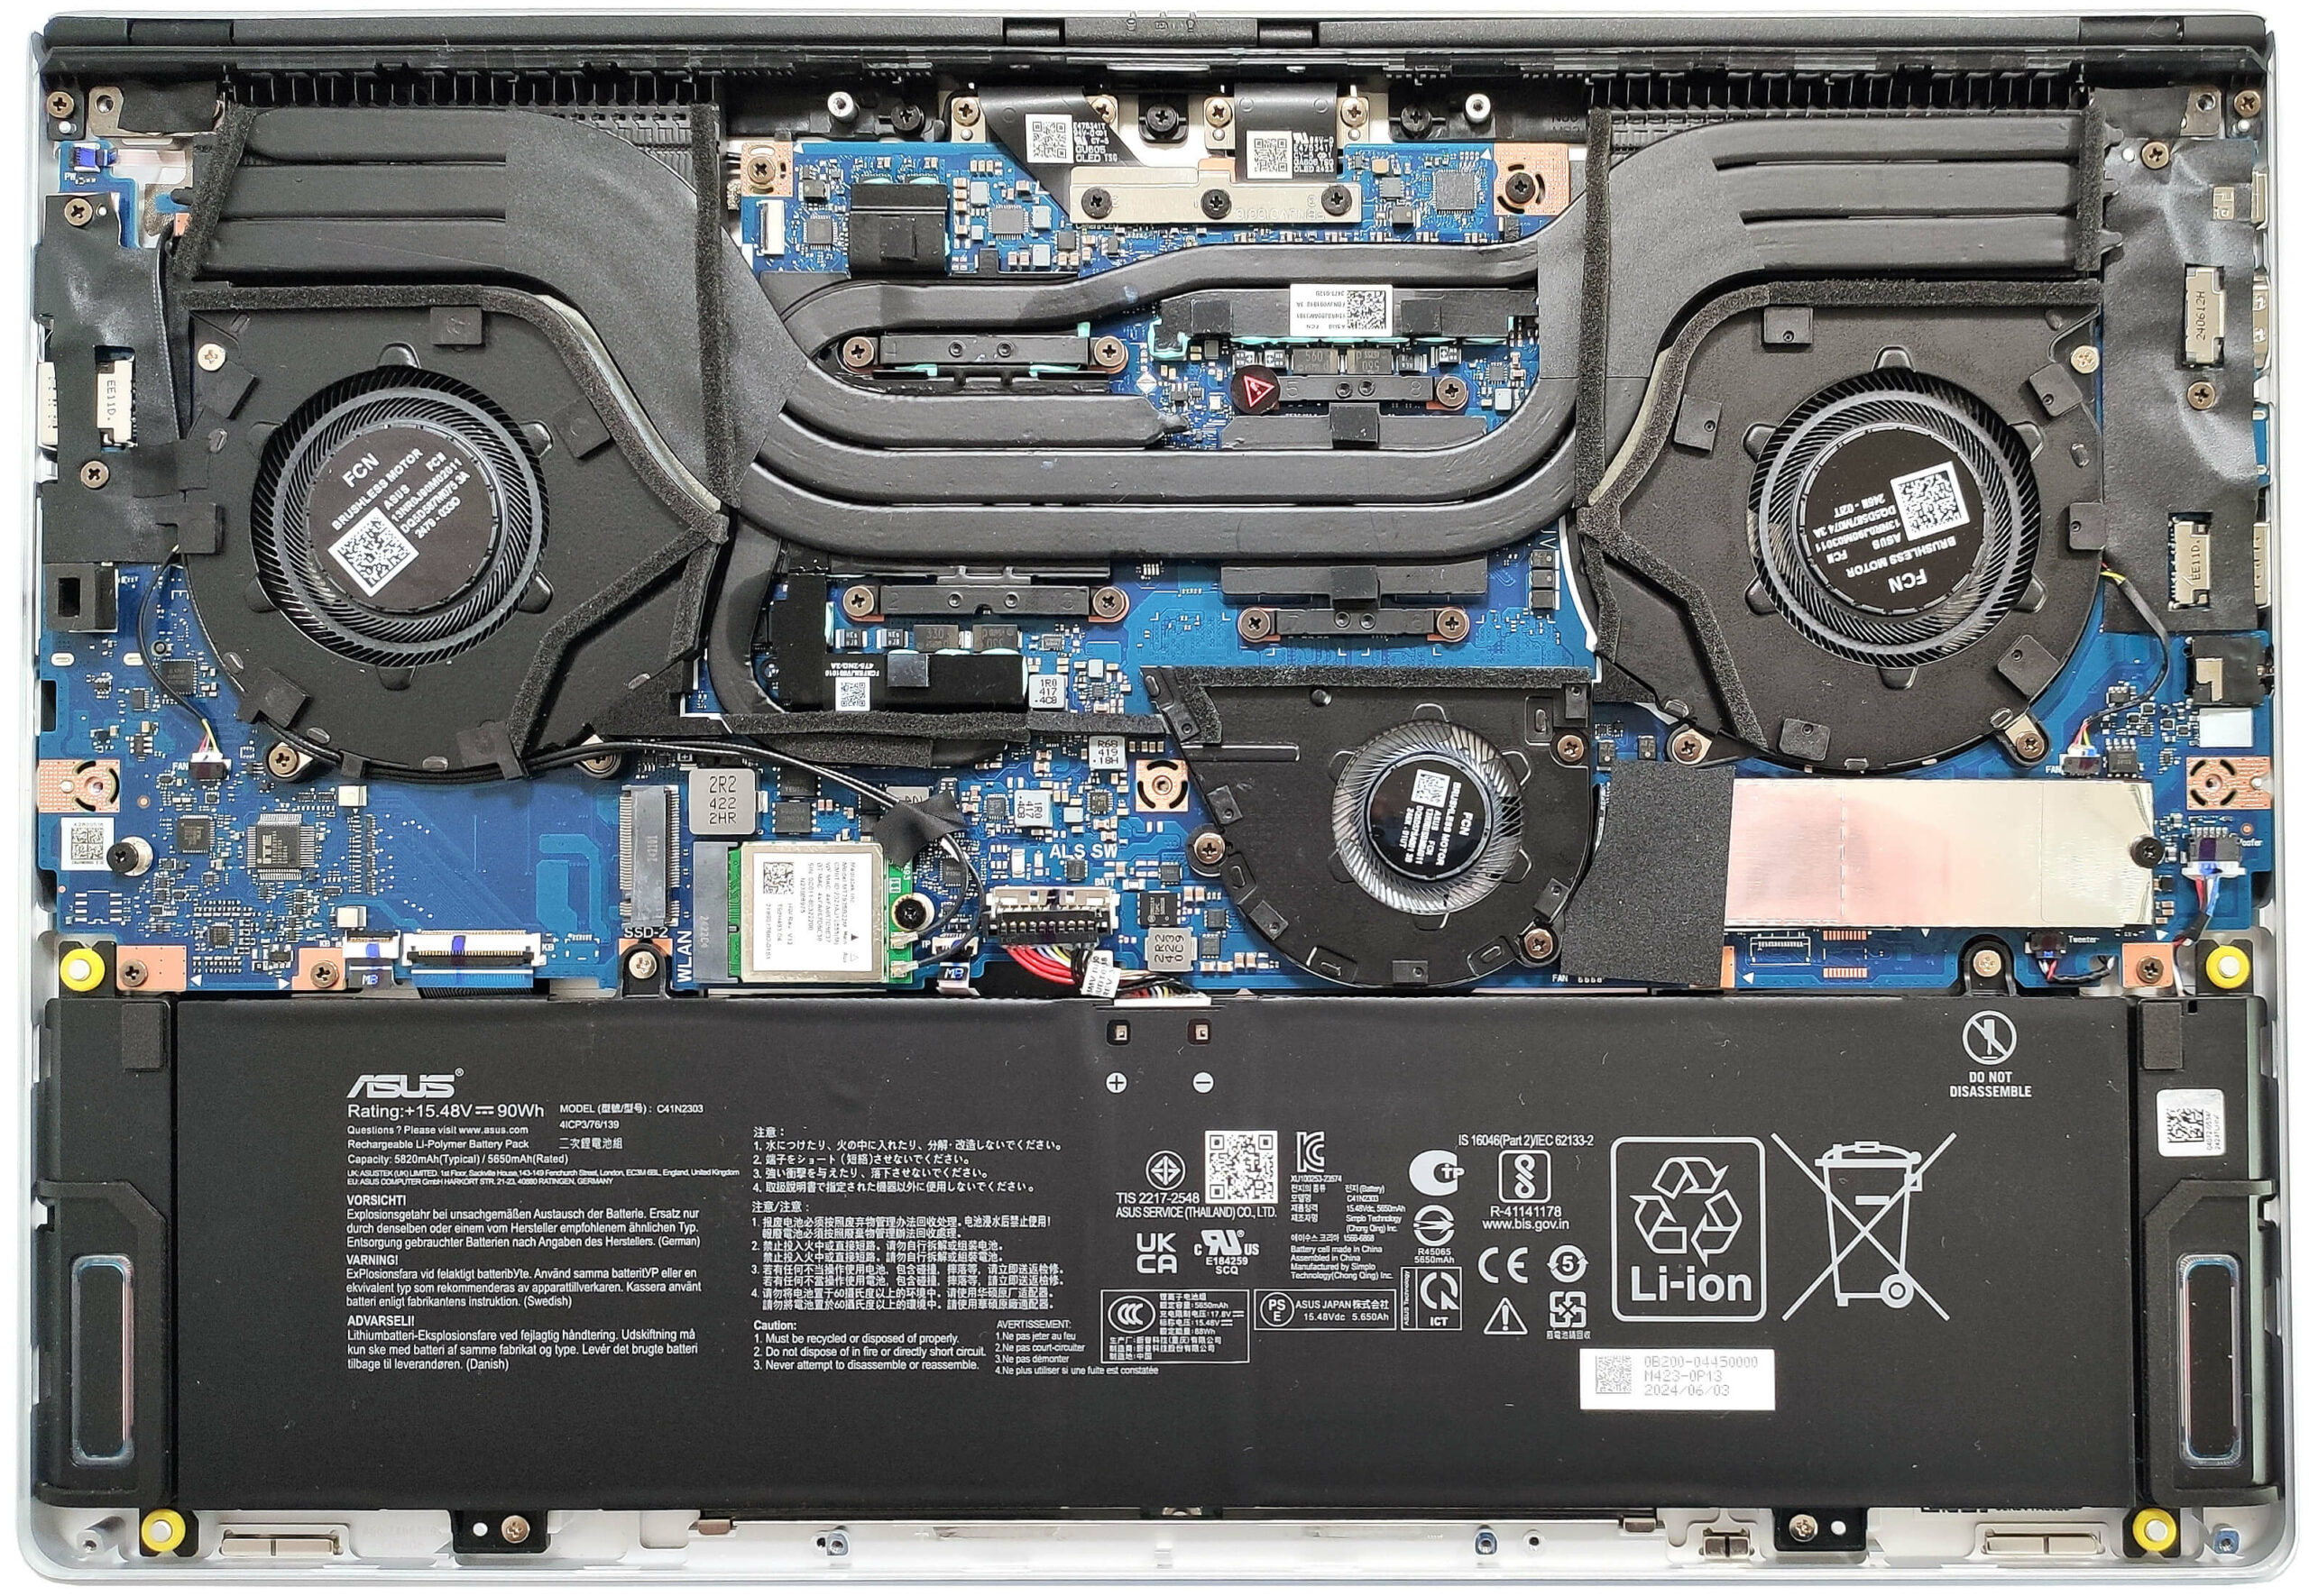
More info: The inside of the bottom plate features a rubberized-like material that protects the battery from scratches and includes three dust filters for the fans, ensuring optimal airflow and protection against debris.
Battery Removal
Caution: Handle the battery with care to avoid damage or injury. Be cautious not to bend the battery, as the touchpad is positioned right below it.
- Remove the plastic shroud on the top side that covers the battery connector.
- Unplug the battery connector from the motherboard by pulling it towards the battery.
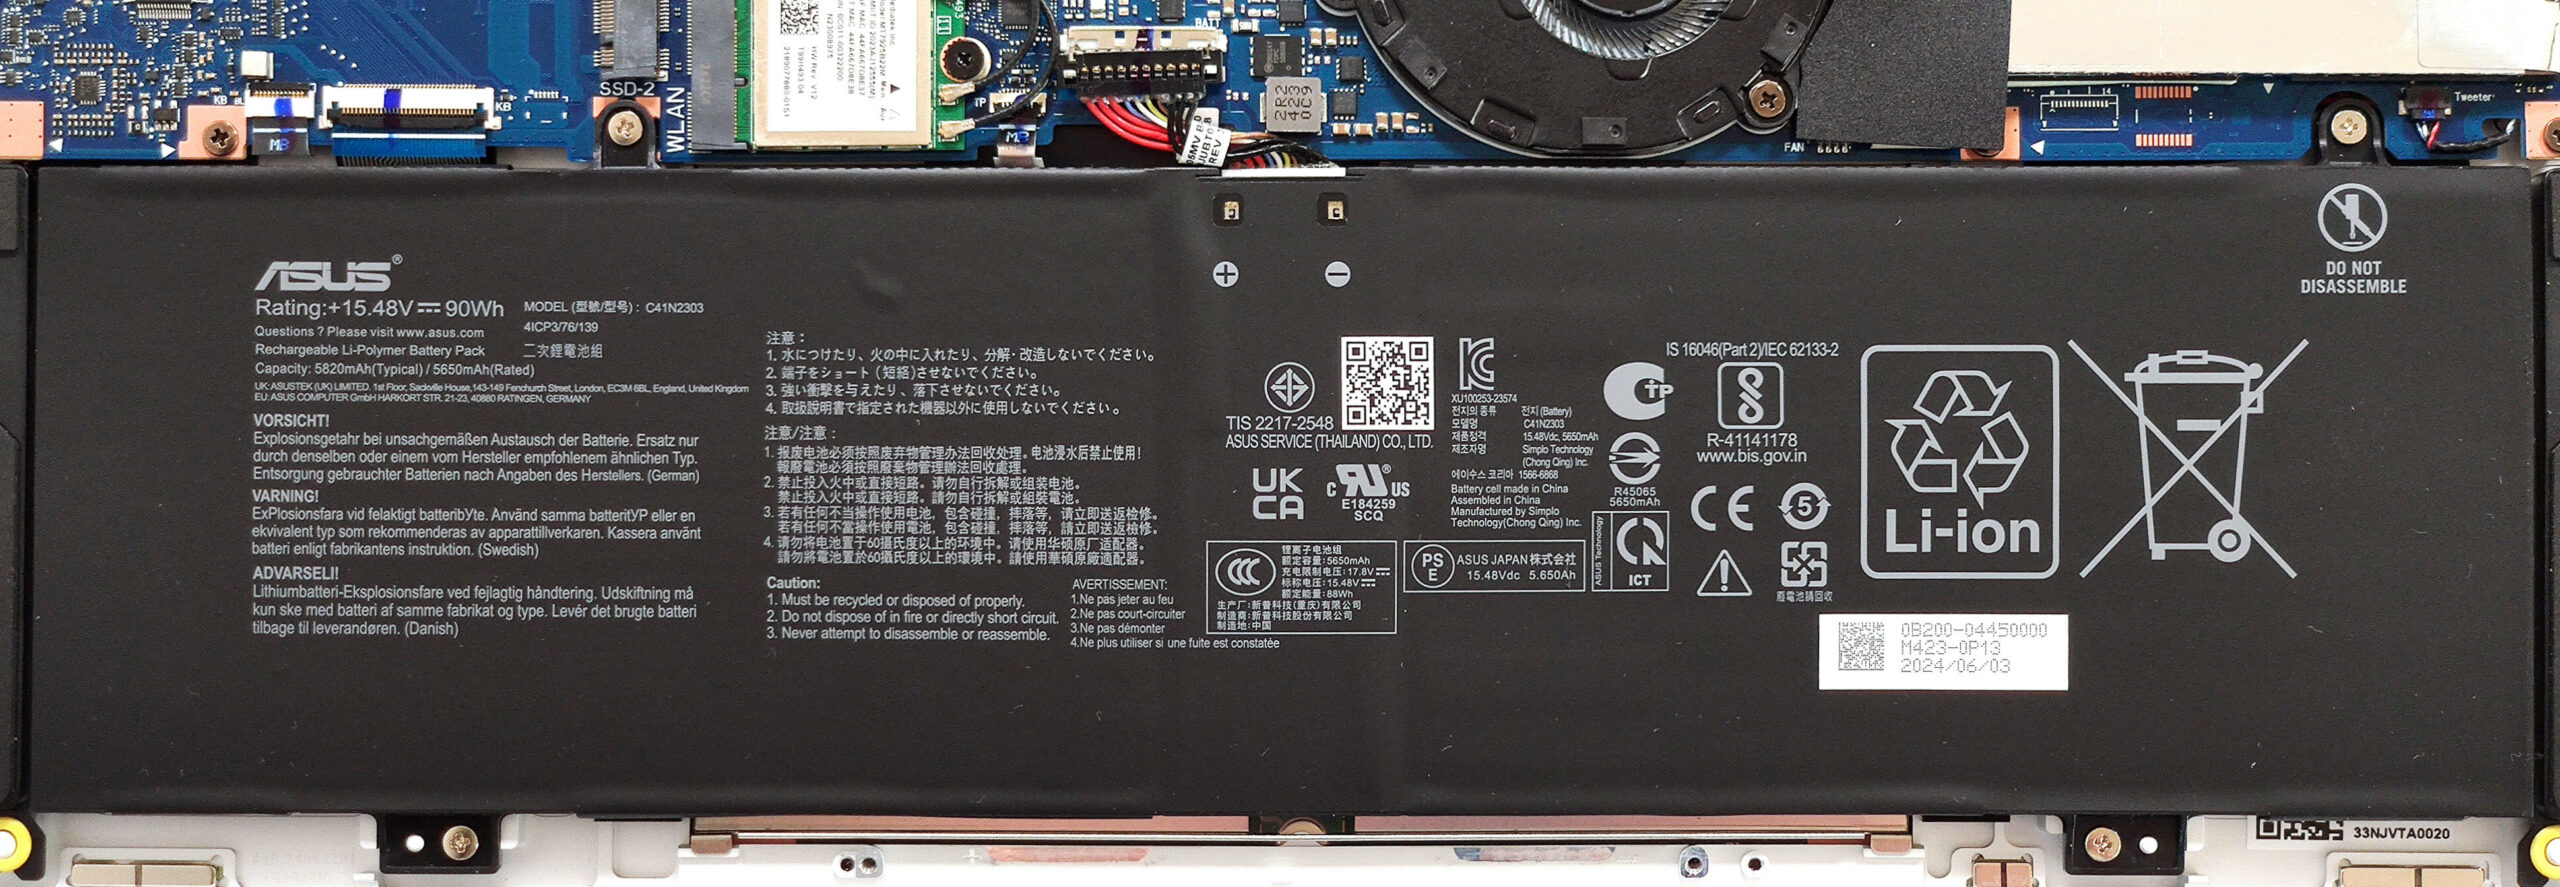
- Undo the four Phillips-head screws that secure the 90Wh battery unit to the base.
- Carefully unglue the battery unit starting from the left side. The double-sided tape on both sides is very sticky, so pull hard without bending the battery.
- Detach the battery from the laptop.
More info: The laptop is equipped with a 90Wh battery, providing approximately 12 hours and 30 minutes of video playback.
You can buy compatible batteries here: Buy from Amazon.com (#CommissionsEarned)
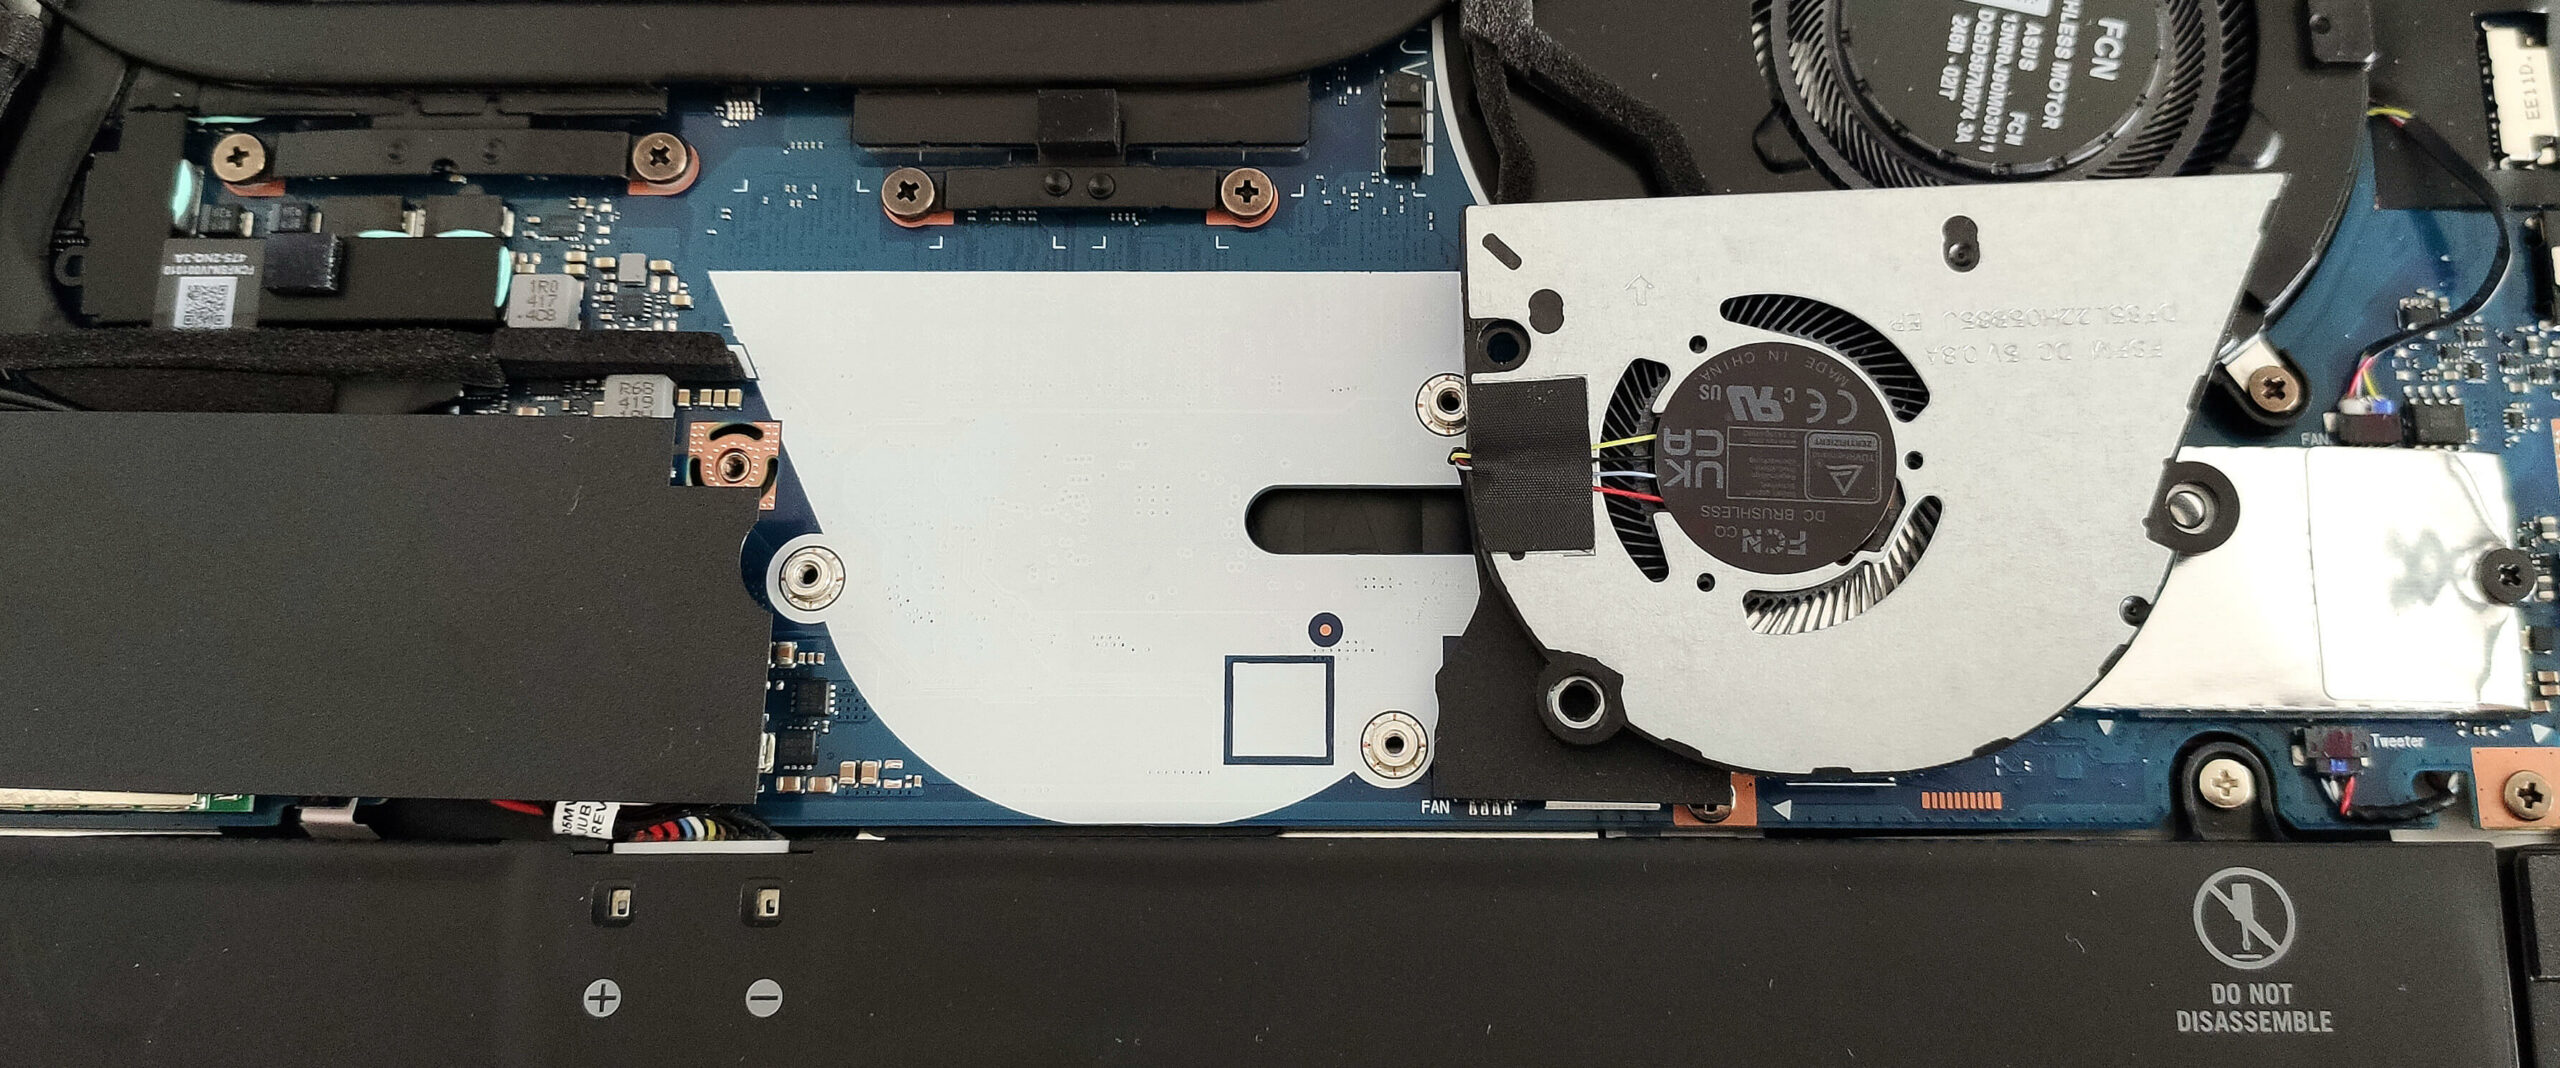
Memory and Storage Upgrade, and Wi-Fi Card Placement
Hint: Ensure you are grounded to prevent static discharge when handling memory modules.
Hint: Handle the SSD with care to avoid any data loss or damage during installation.
More info: This laptop comes with up to 32GB of soldered LPDDR5x-7500MHz RAM in dual-channel mode, providing a future-proof memory capacity. However, the lack of SODIMM slots means the RAM cannot be upgraded.
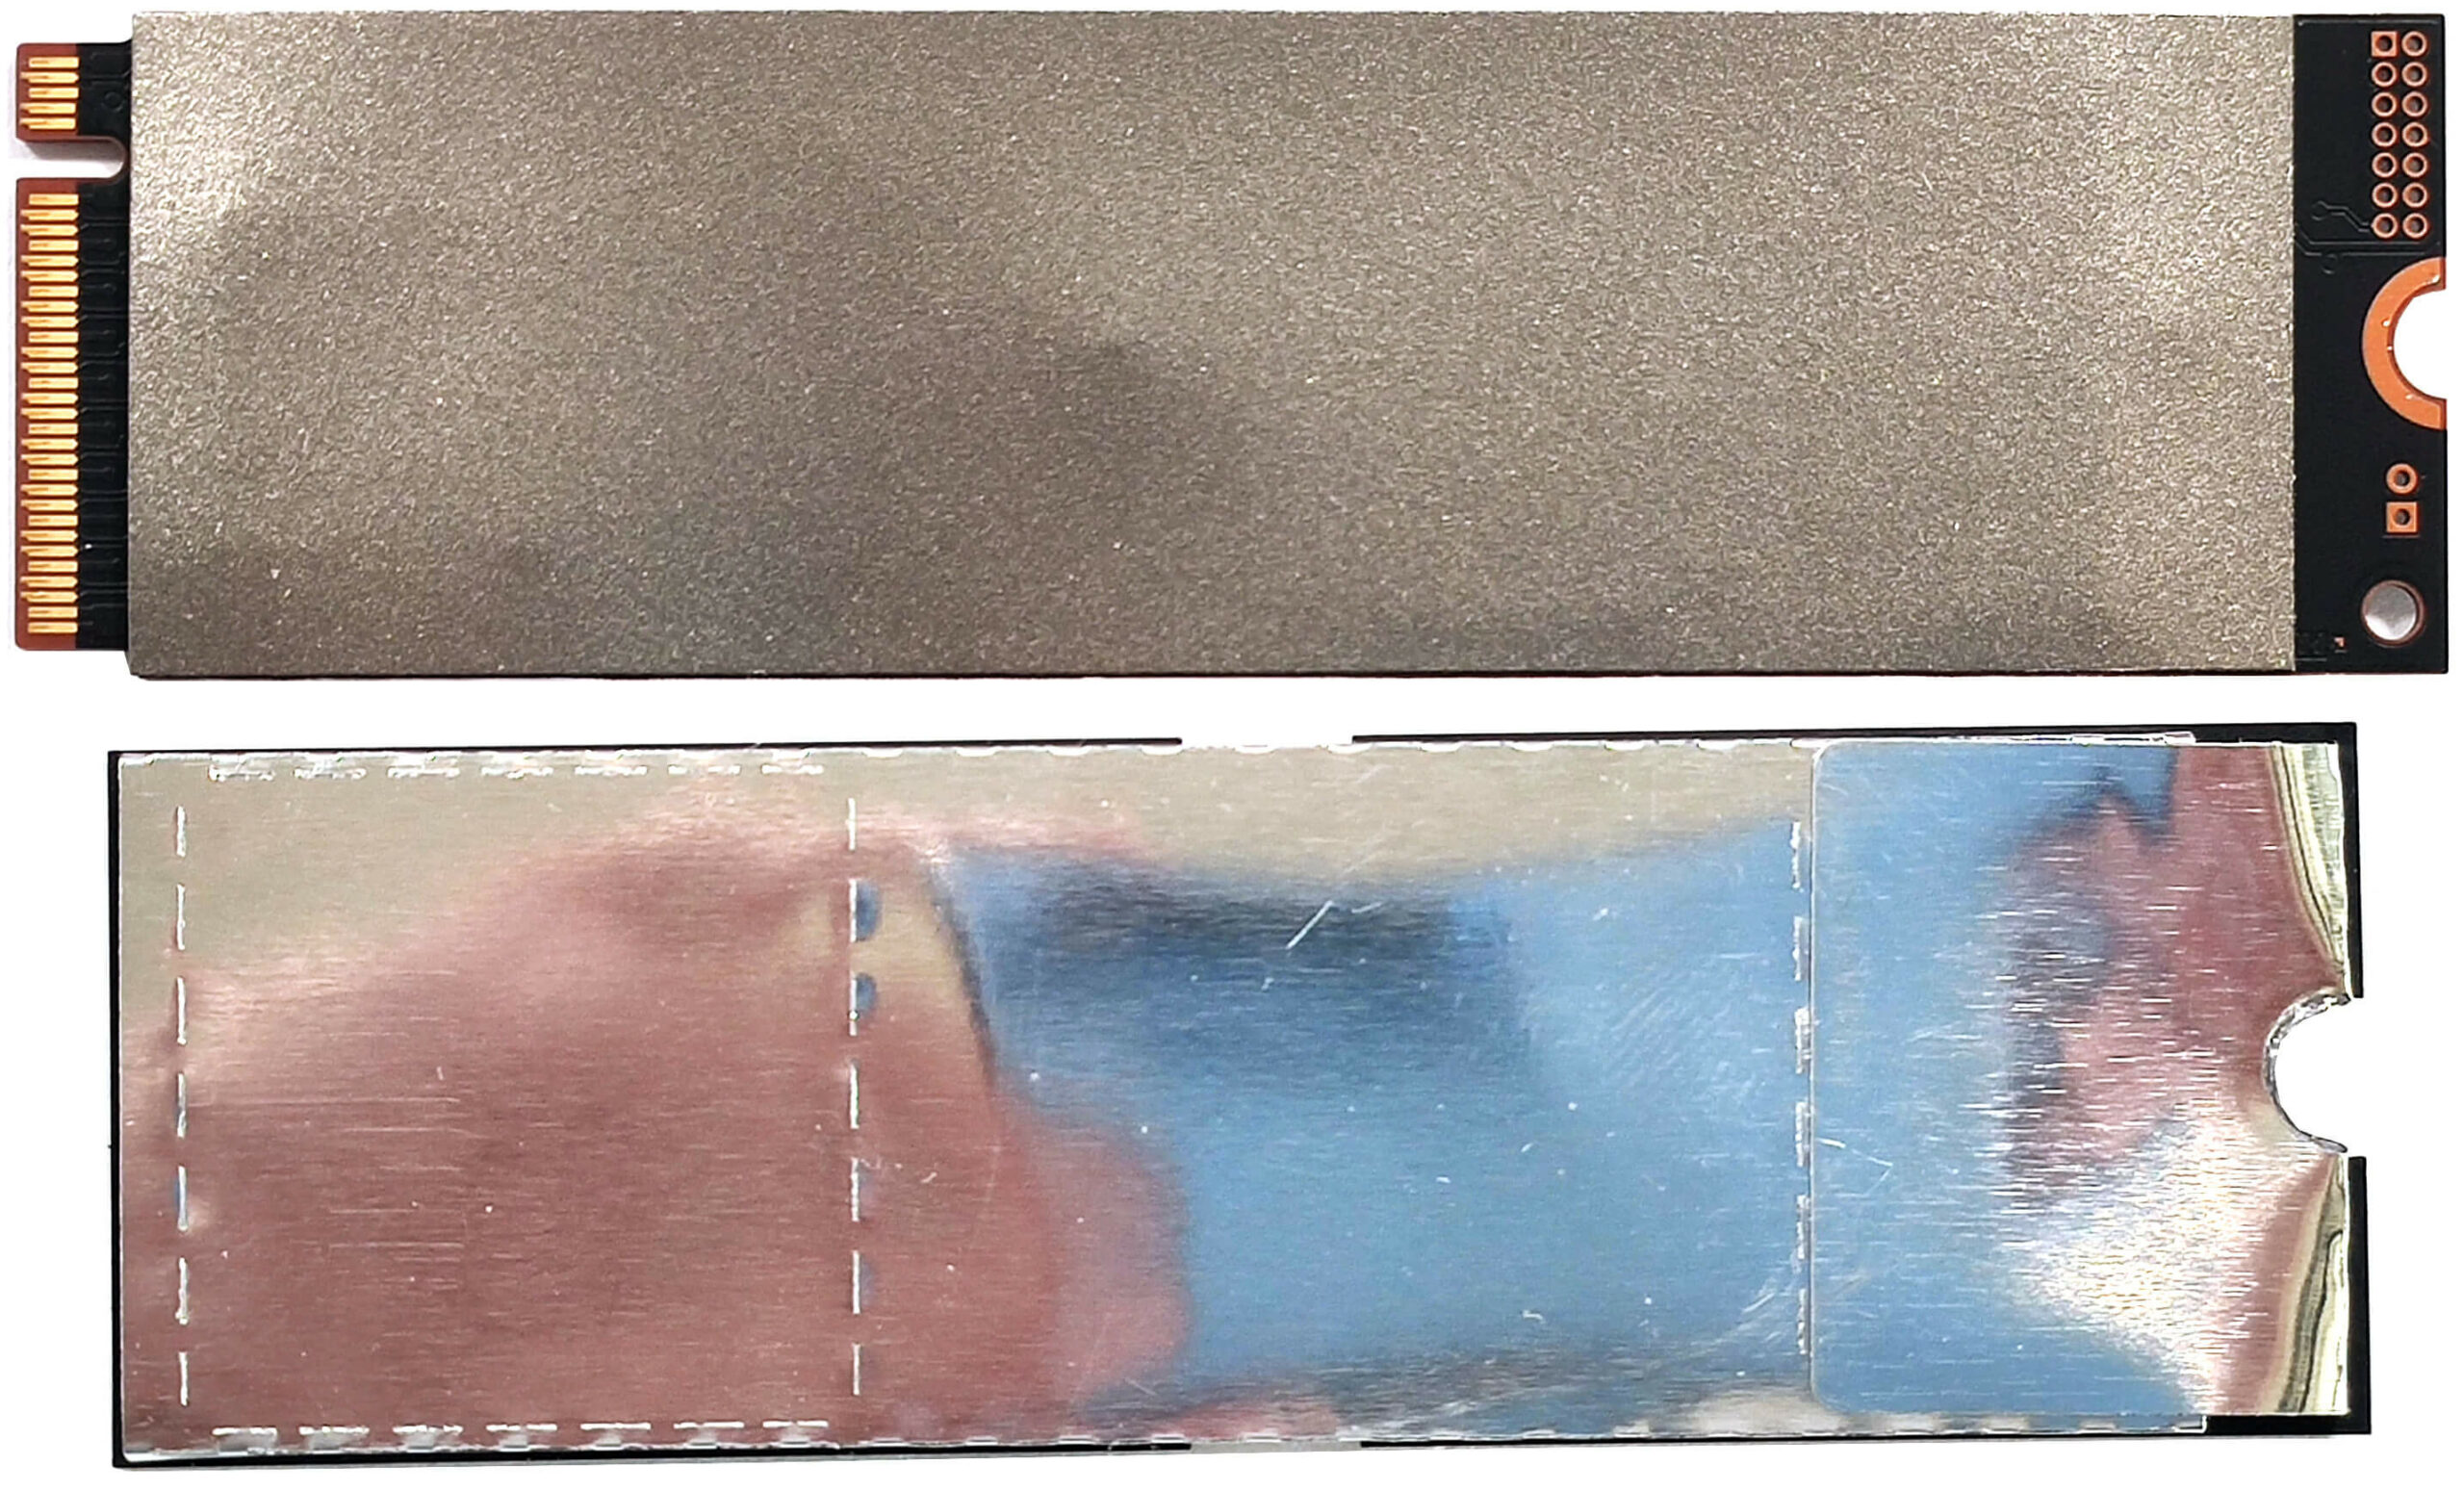
- Locate the two M.2 slots compatible with 2280 Gen 4 SSDs.
- Remove the heat shields covering the SSD slots by carefully lifting the attached fabric handles.
- If installing an M.2 SSD, insert it into the desired slot. The left slot offers PCIe 4.0 x2 lanes, while the right slot offers PCIe 4.0 x4 lanes.
- Secure the new SSD with the provided screws.
- If installing a SATA SSD or HDD, connect it to the SATA slot and secure it accordingly.
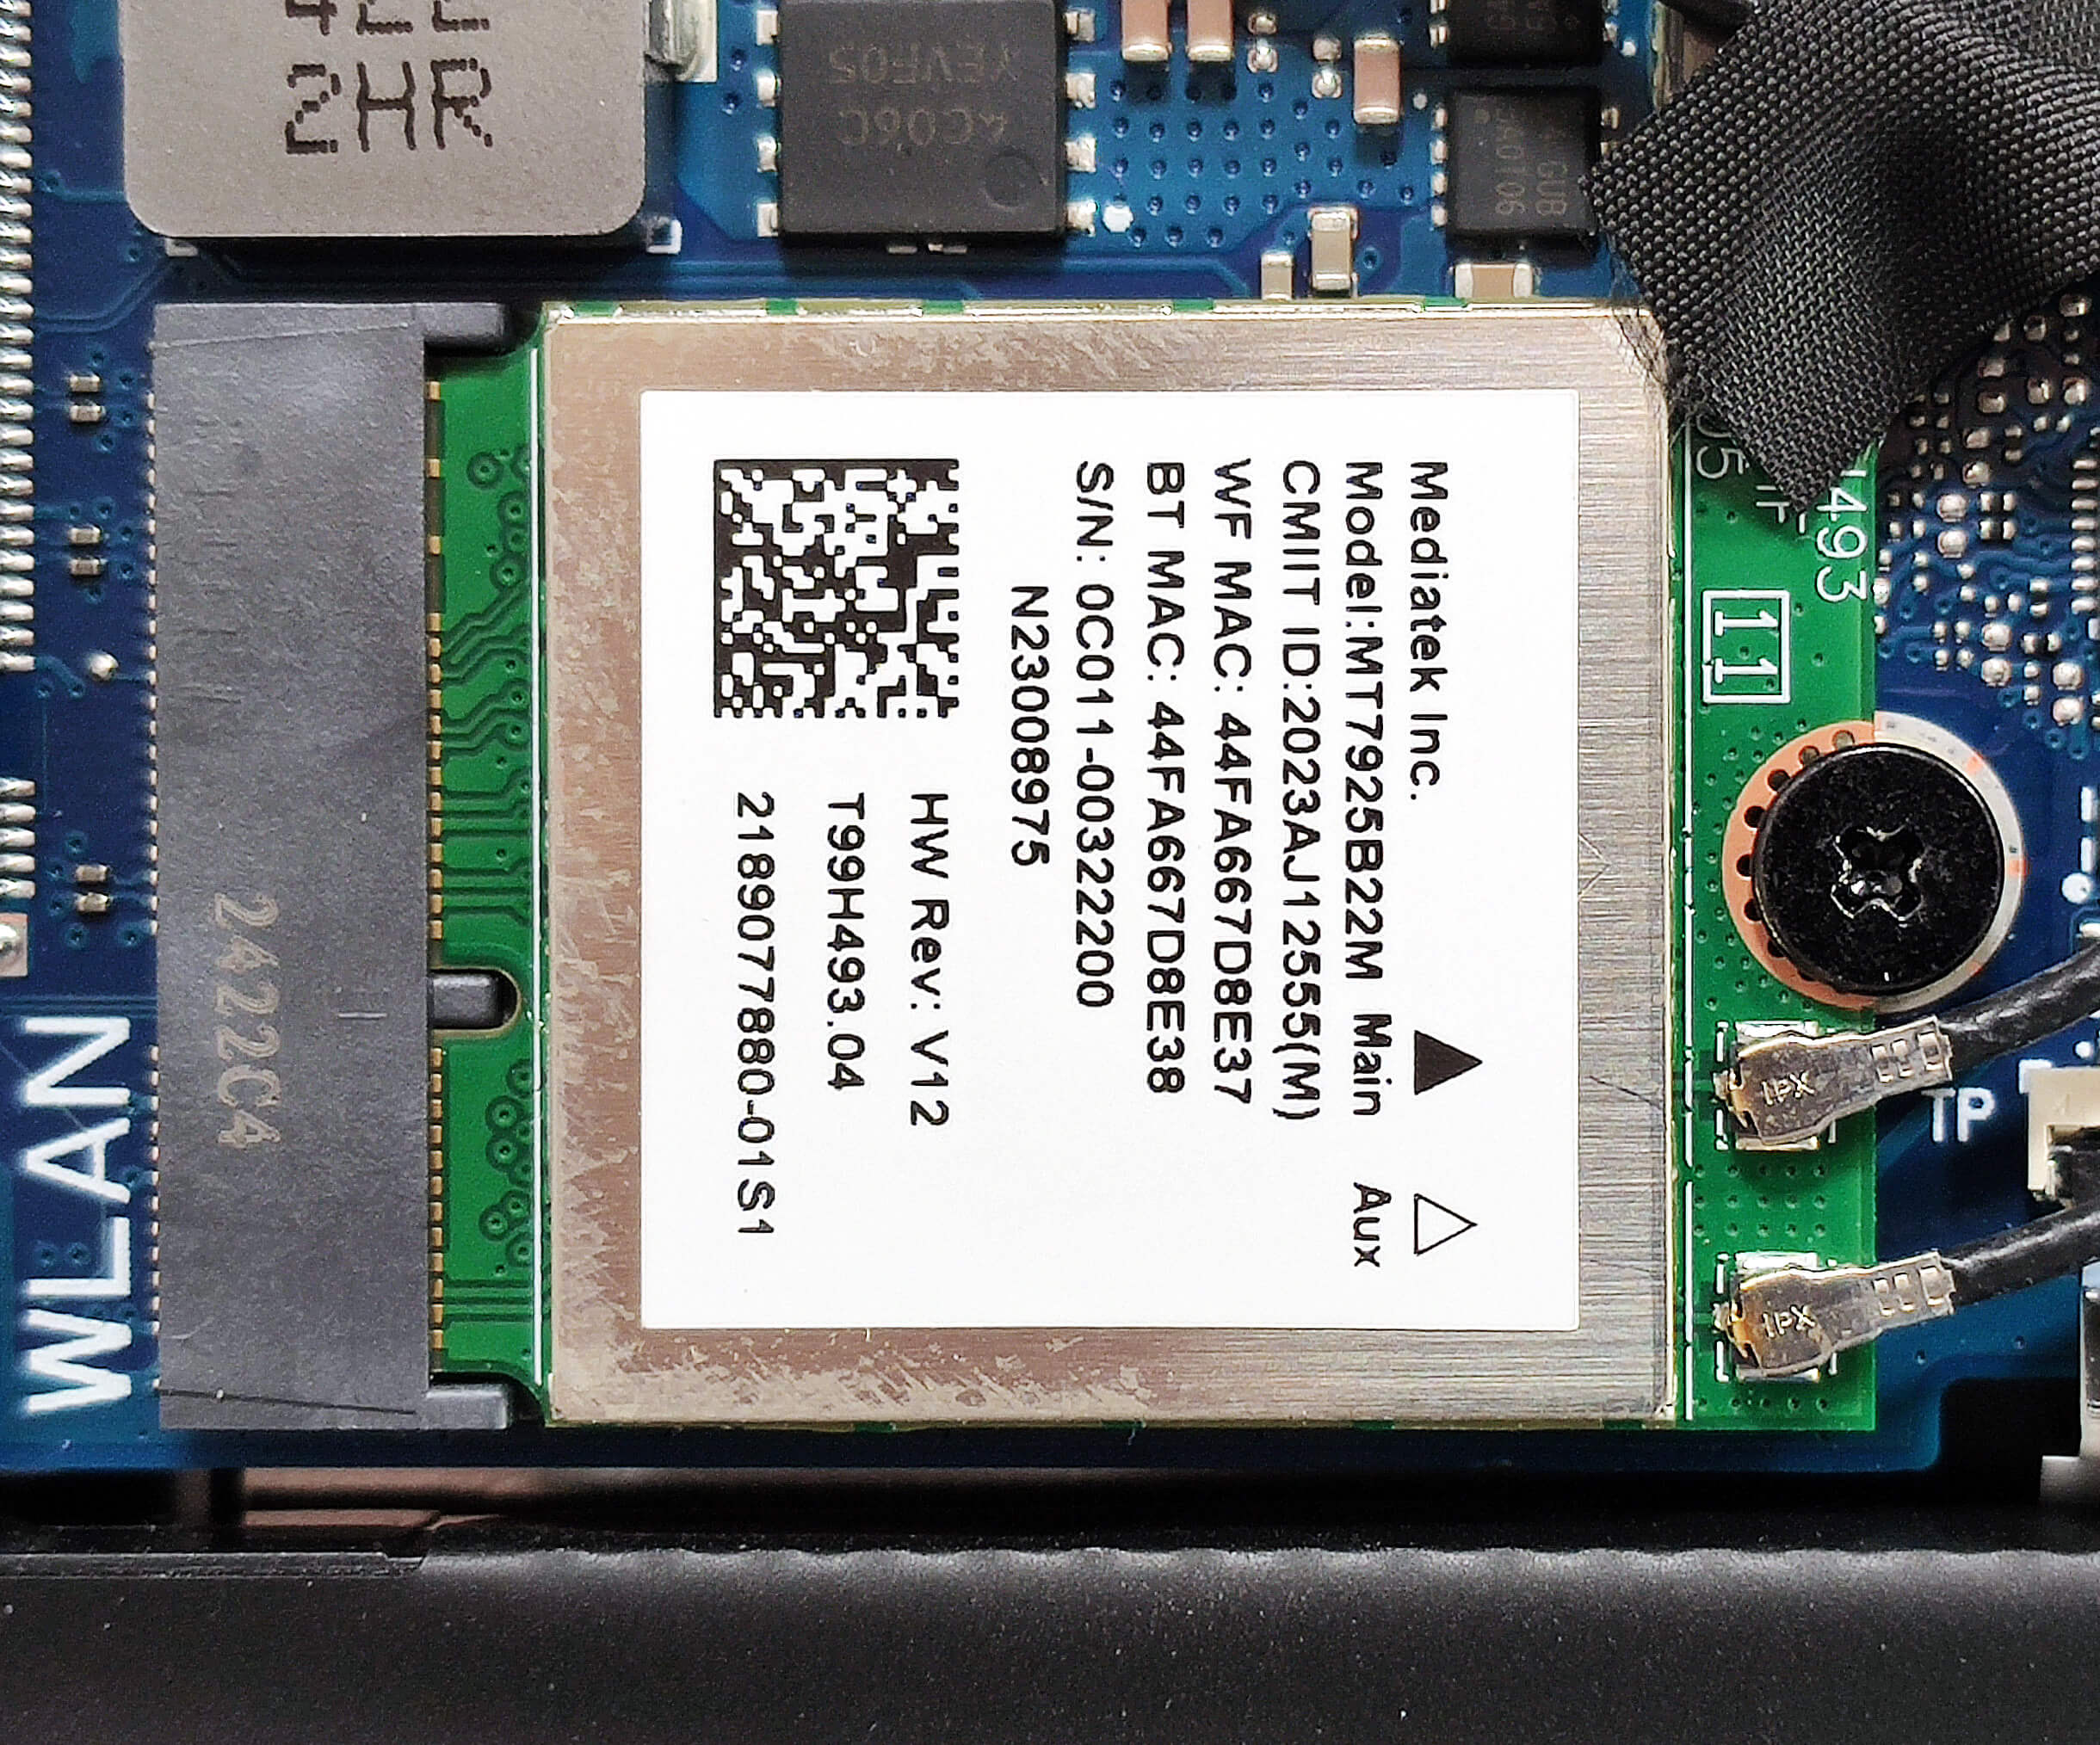
- The Wi-Fi card is placed near the battery connector.
More info: The laptop includes two M.2 slots compatible with 2280 Gen 4 SSDs. The preinstalled NVMe SSD is cooled by a decently sized thermal pad from below. The left M.2 slot offers PCIe 4.0 x2 lanes, and the right slot offers PCIe 4.0 x4 lanes for enhanced storage performance.
Hint: Don’t forget to check out our Top M.2 SSDs Performance Rankings for insights on the best storage options available.
You can buy compatible SSDs here: Buy from Amazon.com (#CommissionsEarned)


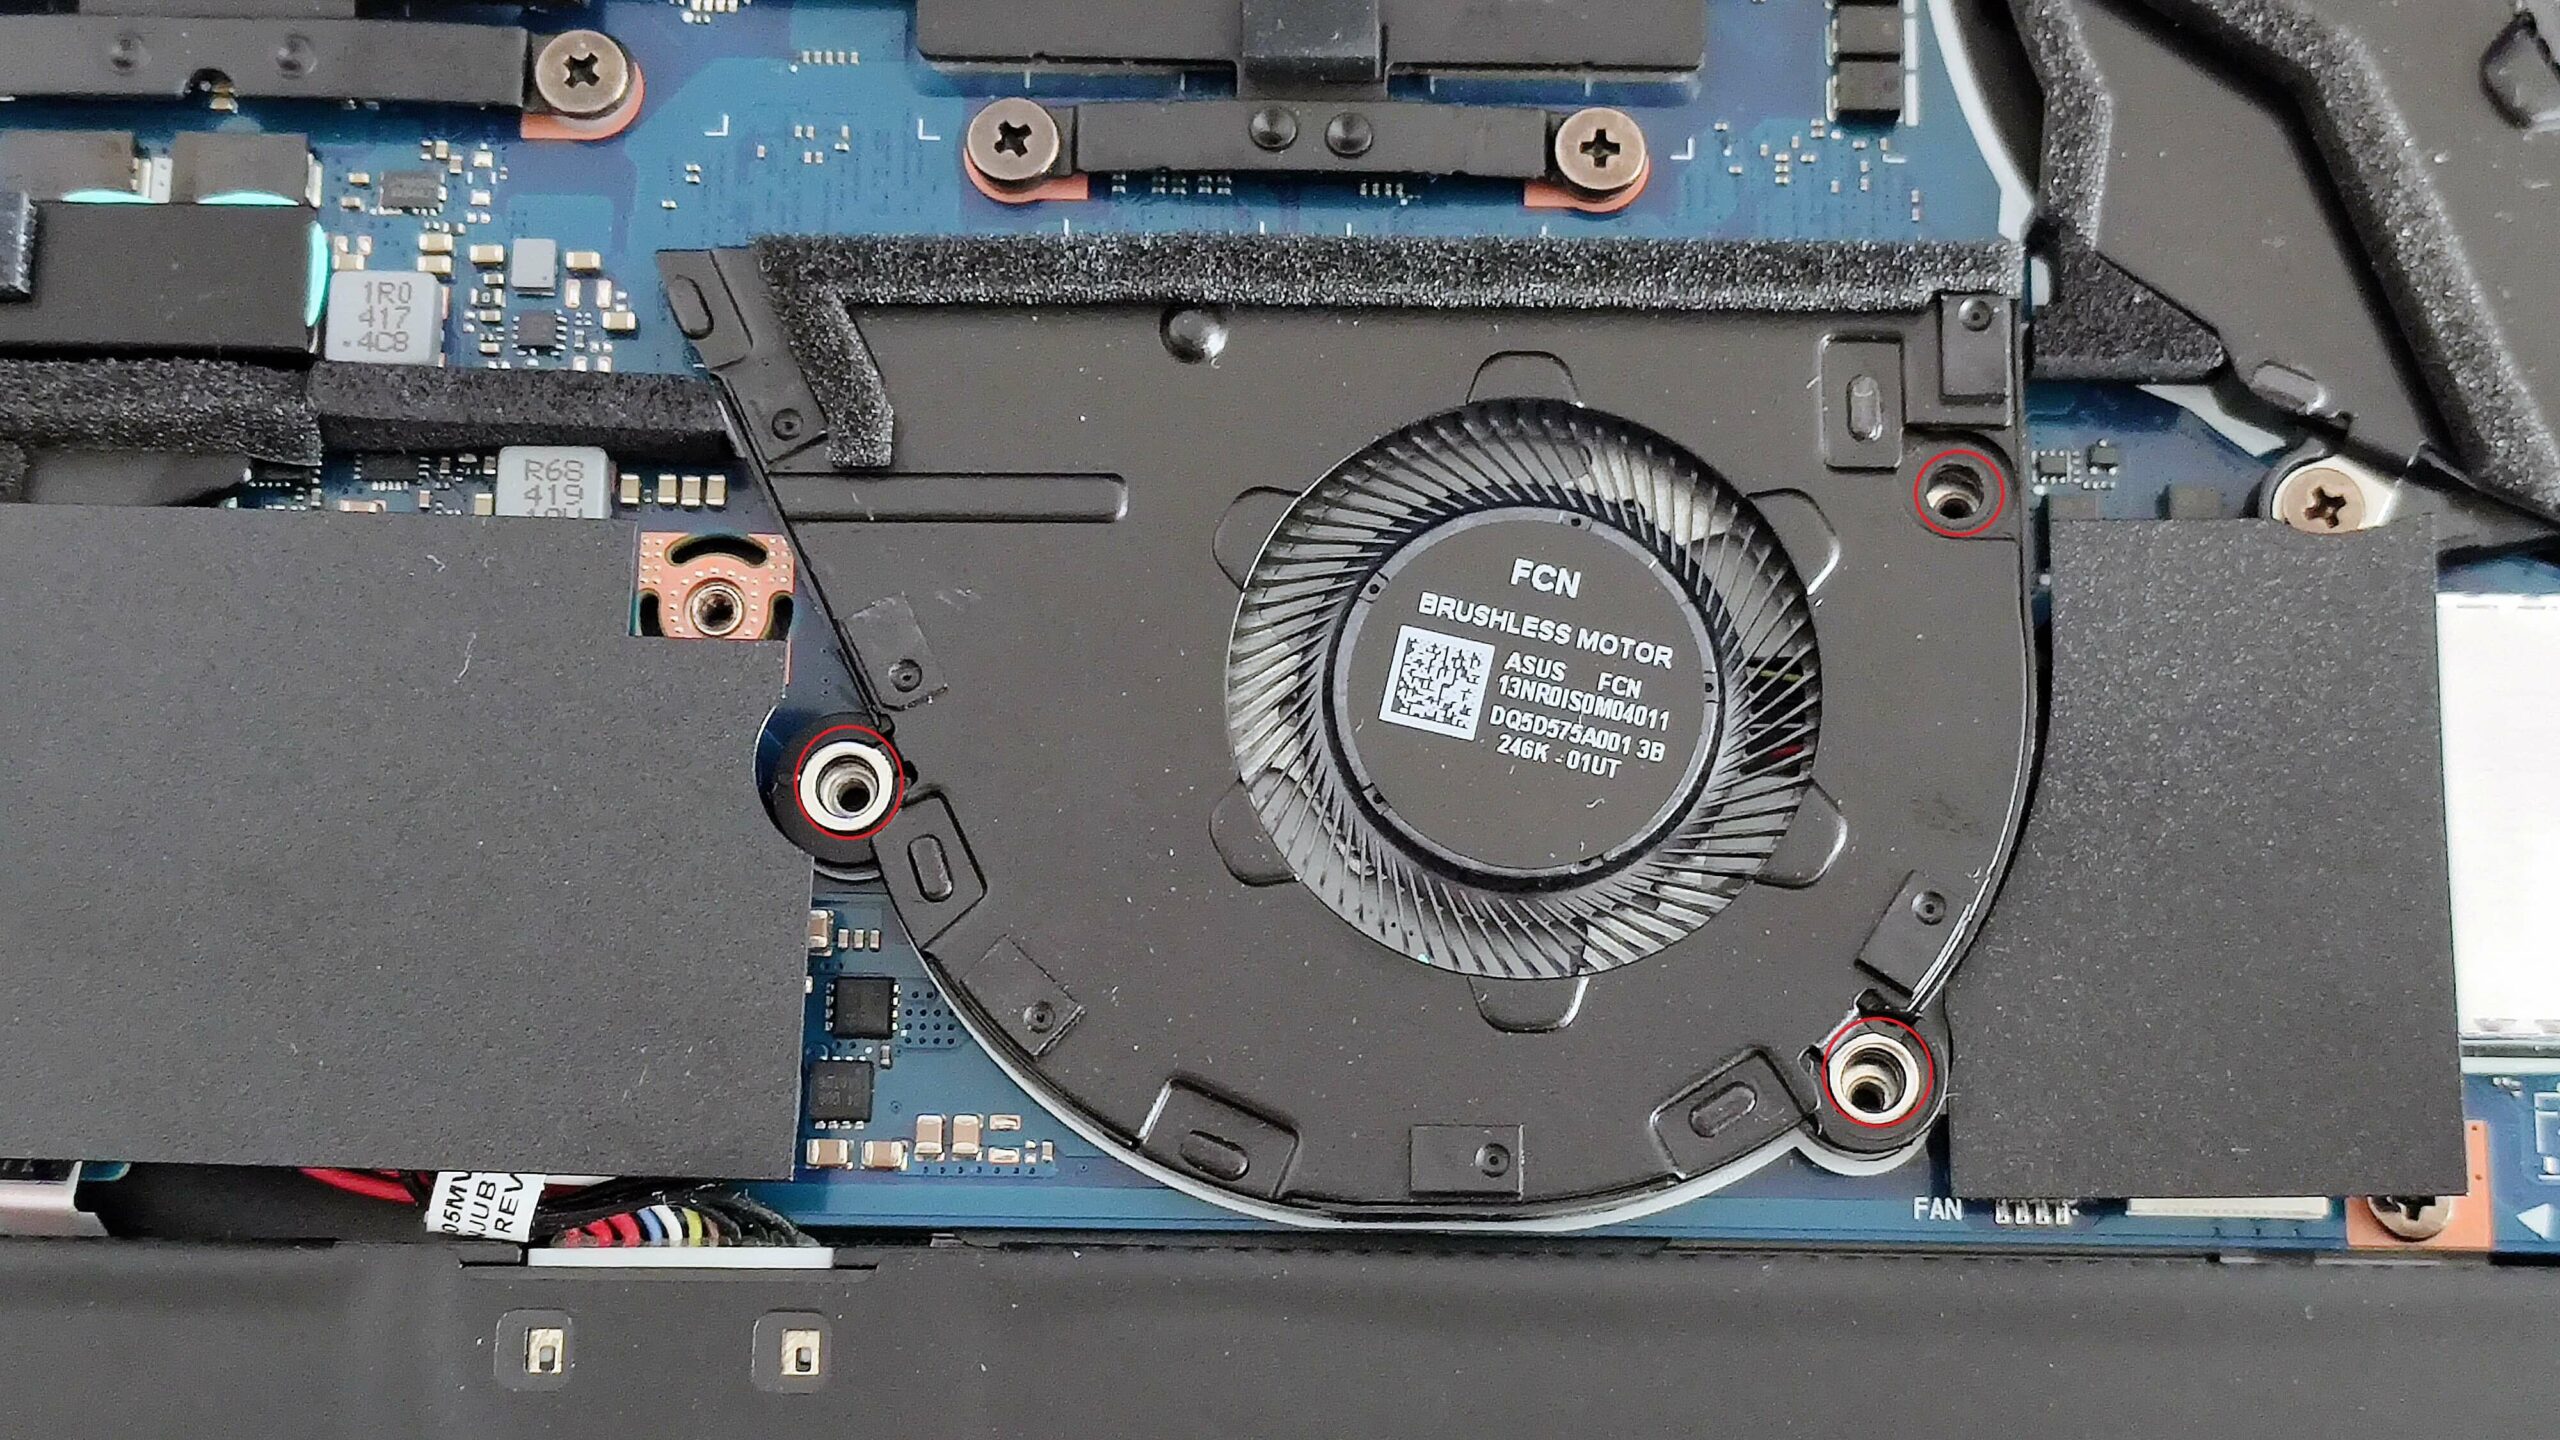
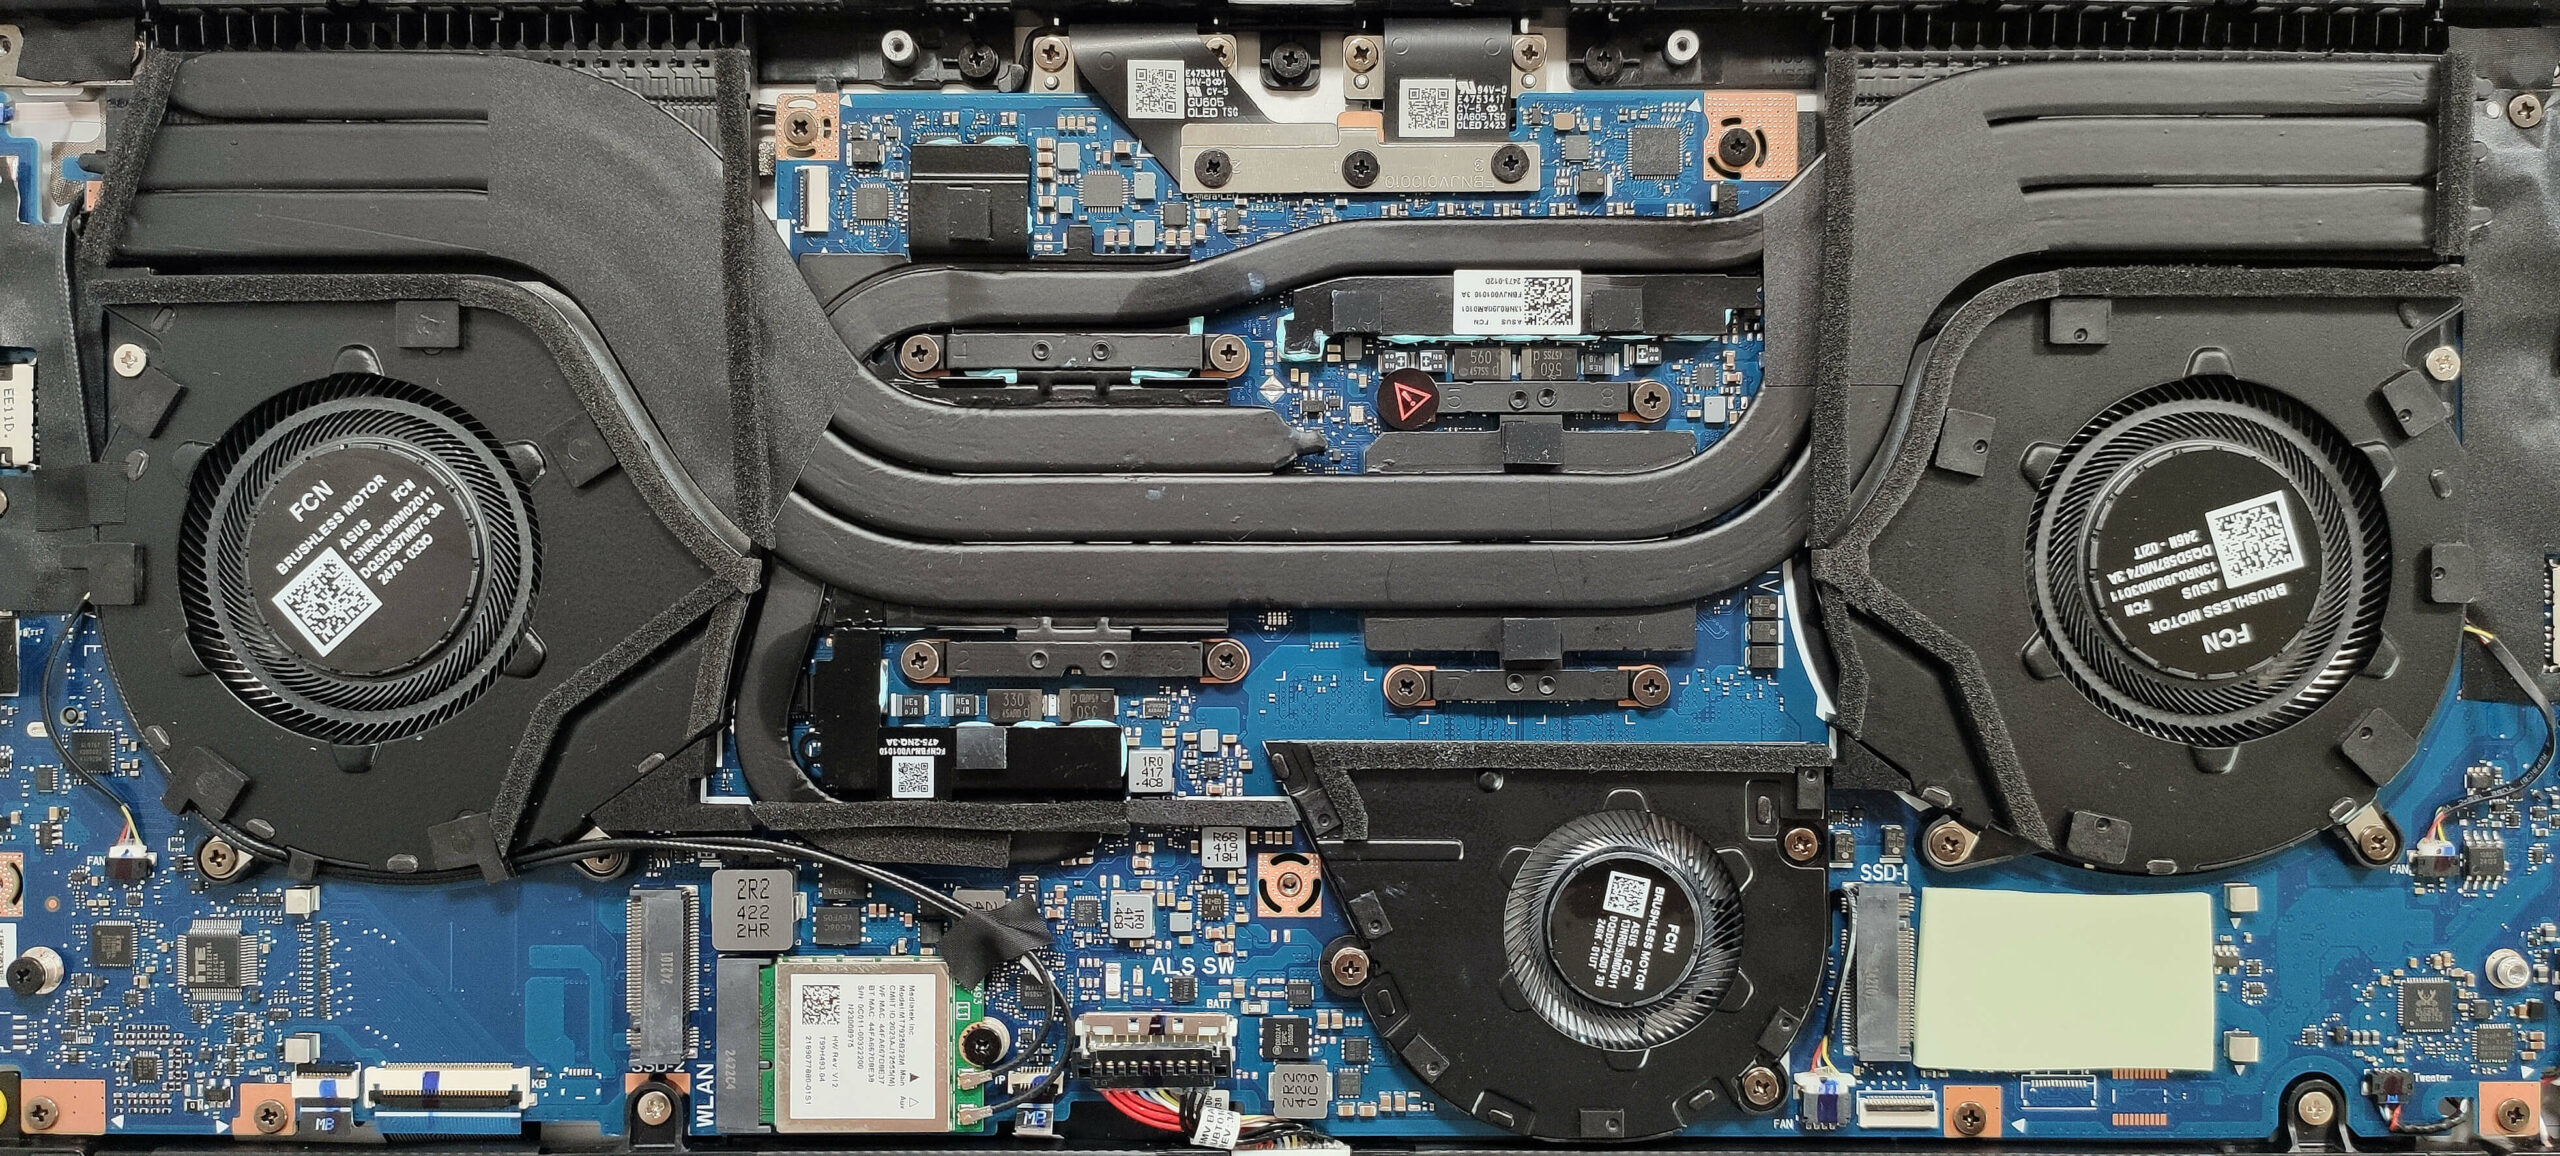
Cooling System Overview
More info: The cooling system comprises a trio of long heat pipes shared between the CPU and the GPU, and a fourth heat pipe solely dedicated to the graphics card. Additionally, there are two top-mounted heat sinks and four heat spreaders of varying sizes to ensure effective thermal management.
- Inspect the single sizable fan to ensure it is free of dust and debris.
- Check the three heat pipes for any signs of wear or damage.
- Verify that the pair of heat sinks are properly seated and unobstructed.
- Ensure the four heat spreaders are securely in place to maintain optimal cooling performance.
ASUS ROG Zephyrus G16 GA605 in-depth review
The ROG Zephyrus G16 GA605 is equipped with the all-new AMD Ryzen AI 9 HX 370 that has a powerful NPU with 50 TOPs. If you order a laptop with the most punchy GPU option you can rely on up to 321 TOPs for AI tasks. This is a very thin notebook and yes, the memory is soldered. The maximum amount here is 32GB LPDDR5x RAM. If you need 64GB memory, you can get the ASUS ProArt P16 (H7606) which boasts a similar design and dimensions. Speaking of which, the Meteor-Lake-based ROG Zephyrus G16 GU605 is the Team Blue sibling of the GA605. Unfortunately, the top-end GPUs like RTX 4080 and RTX 4090 are r[...]

Pros
- 2x M.2 Gen 4 slots + replaceable Wi-Fi card
- Very good CPU performance
- Compact and light (14.9 - 16.4 mm / 1.85 kg)
- Zen 5 CPU
- High processor frequencies and power limits during heavy stress (4.26 GHz / 3.25 GHz P and E-core clock + 76W)
- The RTX 4070 can sustain a stable 105W during gaming
- MUX switch + NVIDIA Advanced Optimus + G-SYNC
- Four USBs + Wi-Fi 7 and Bluetooth 5.4
- OLED display with infinite contacts (SDC41AE)
- 2560 x 1600 resolution + 240Hz refresh rate (SDC41AE)
- Full sRGB and DCI-P3 coverage + good out-of-the-box color-accuracy (SDC41AE)
- 407 nits of max brightness (SDC41AE)
- The Armoury crate app offers tons of customization options
- Comfortable backlit keyboard + precise touchpad
- Long battery life (~12 hours of video)
- The fans don't spin during light loads in "Silent" mode
- Solid metal built
- Well-cooled SSD (Micron 2400E)
- Good audio qiality
Cons
- Soldered RAM + the left M.2 slot is limited to PCIe 4.0 x2
- Pricey
- High CPU temperature in medium and long loads (~92°C / 95°C)
- The display's hotspot on the bottom bezel reaches 61°C
- The real-life gaming performance on sub-Ultra details is a bit lower than expected
- QLC SSD in this price class is a non-optimal decision by the manufacturer


![[May 2026] Amazon Global: Top 10 Best-Selling Gaming Laptops – Budget-Friendly ASUS TUF Gaming A15 Dominates the Market](https://laptopmedia.com/wp-content/uploads/2026/06/Best-Selling-Gaming-Laptops-GLOBAL-Top-10-400x225.jpg)
![[May 2026] Amazon Global: Top 10 Best-Selling Laptops – Apple’s Affordable ‘MacBook Neo’ Takes the Crown Amidst Strong Air and Pro Sales](https://laptopmedia.com/wp-content/uploads/2026/06/Best-Selling-Laptops-GLOBAL-Top-10-400x225.jpg)
![[May 2026] Best-Selling Laptop Brands on Amazon Global – Apple Dominates in Units and Revenue](https://laptopmedia.com/wp-content/uploads/2026/06/GLOBAL-Best-Brands-400x225.jpg)