Inside Acer Predator 21X – disassembly, internal photos and upgrade options
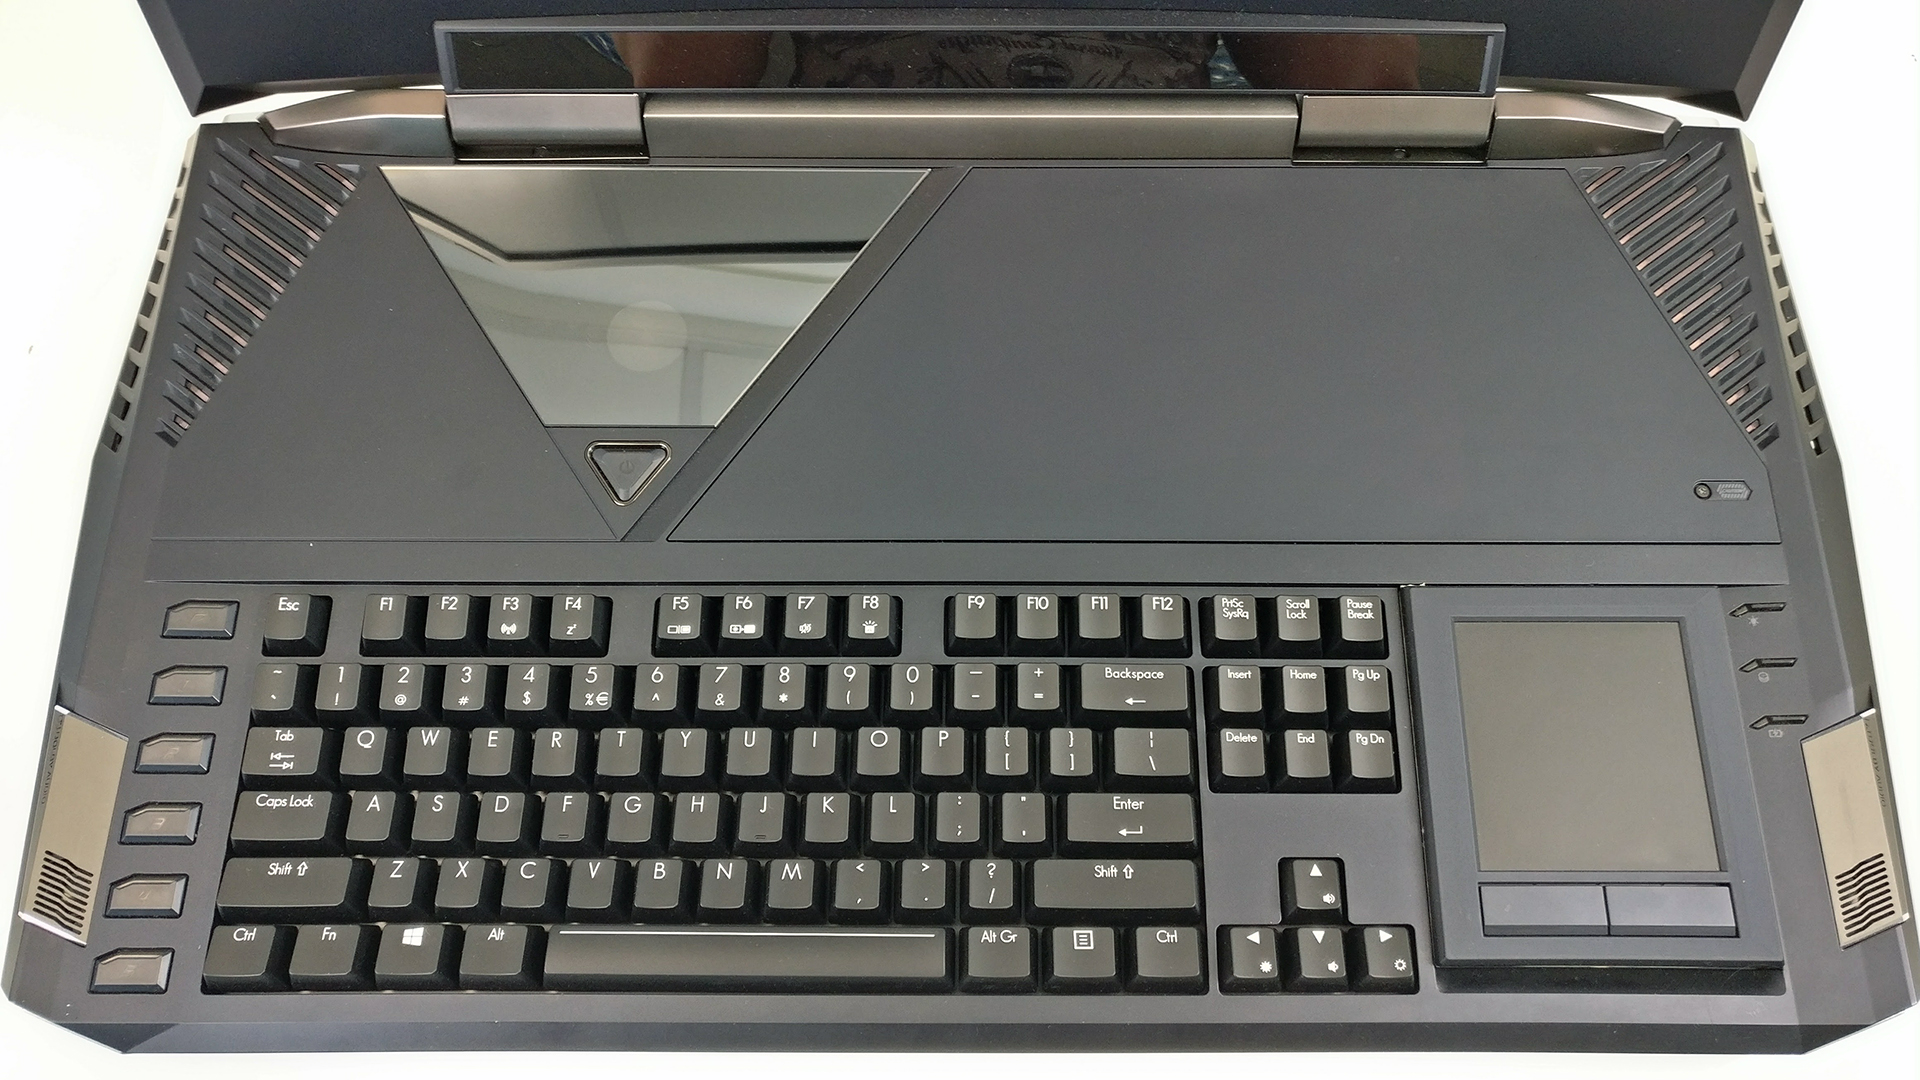
This 21-inch beast of a laptop is really hard to disassemble. In fact, we suspect that it isn’t supposed to be disassembled at all because all of the upgrade options are easily accessible via two service lids. However, we took our time to peek inside and see the wonders of the cooling system that supports an overclockable Core i7-7280HK CPU and two GTX 1080 GPUs working in SLI.
The notebook is going ot launch sometime during the first quarter of this year and will probably pop out here: http://amzn.to/2kI1yxA
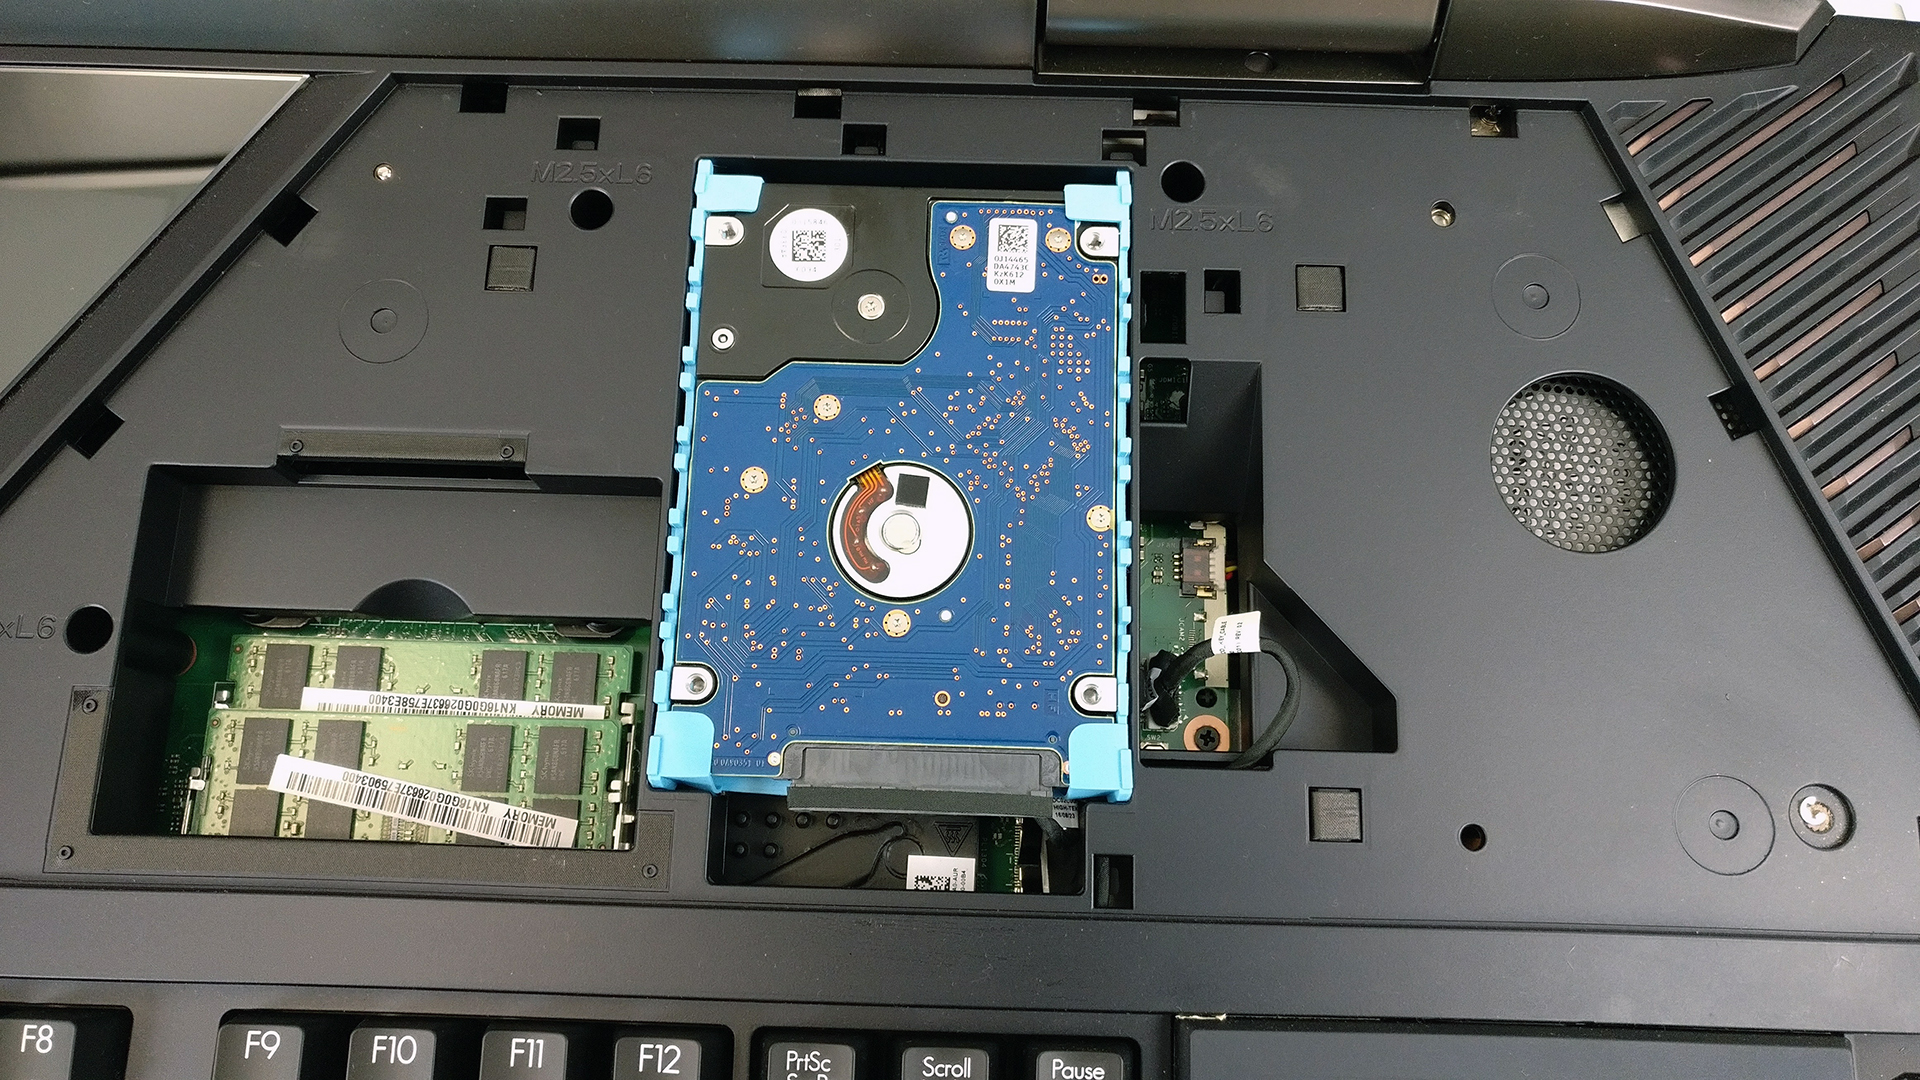
1. Removing the small service lid
Right above the keyboard, you will find a small service hatch held by one screw. Once you unscrew the bolt, a little bit of prying up with a thin plastic tool will do the trick. Once opened, you will find the 2.5-inch drive slot, which in our case is taken by HGST 1TB HDD spinning at 7200 rpm.
You will also see two RAM slots taking up to 32GB (2x 16384MB) DDR4-2400 chips. In our case, the two chips are manufactured by SK Hynix each with 16GB capacity. If you want to install another 64GB of RAM, you will have to open the other maintenance hatch on the bottom.


2. Accessing the M.2 SSD slots and the other two RAM chip slots
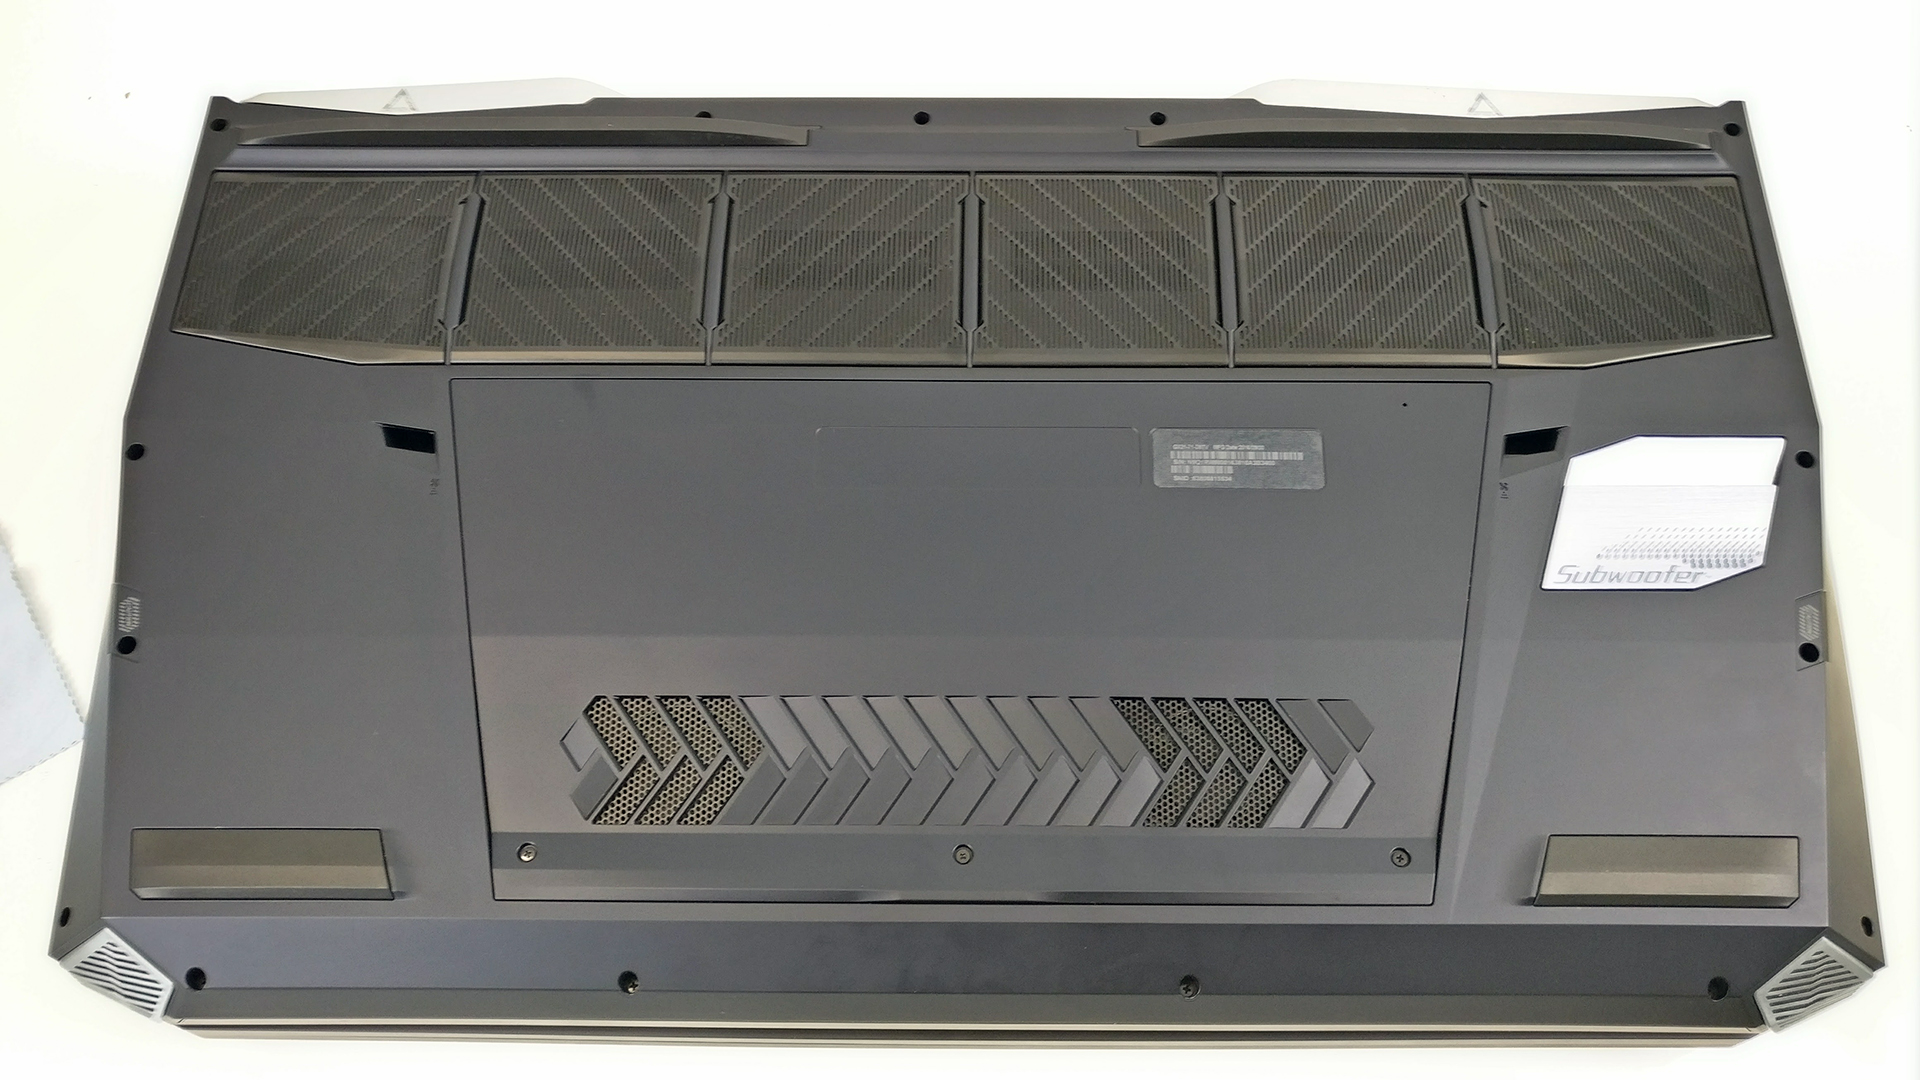
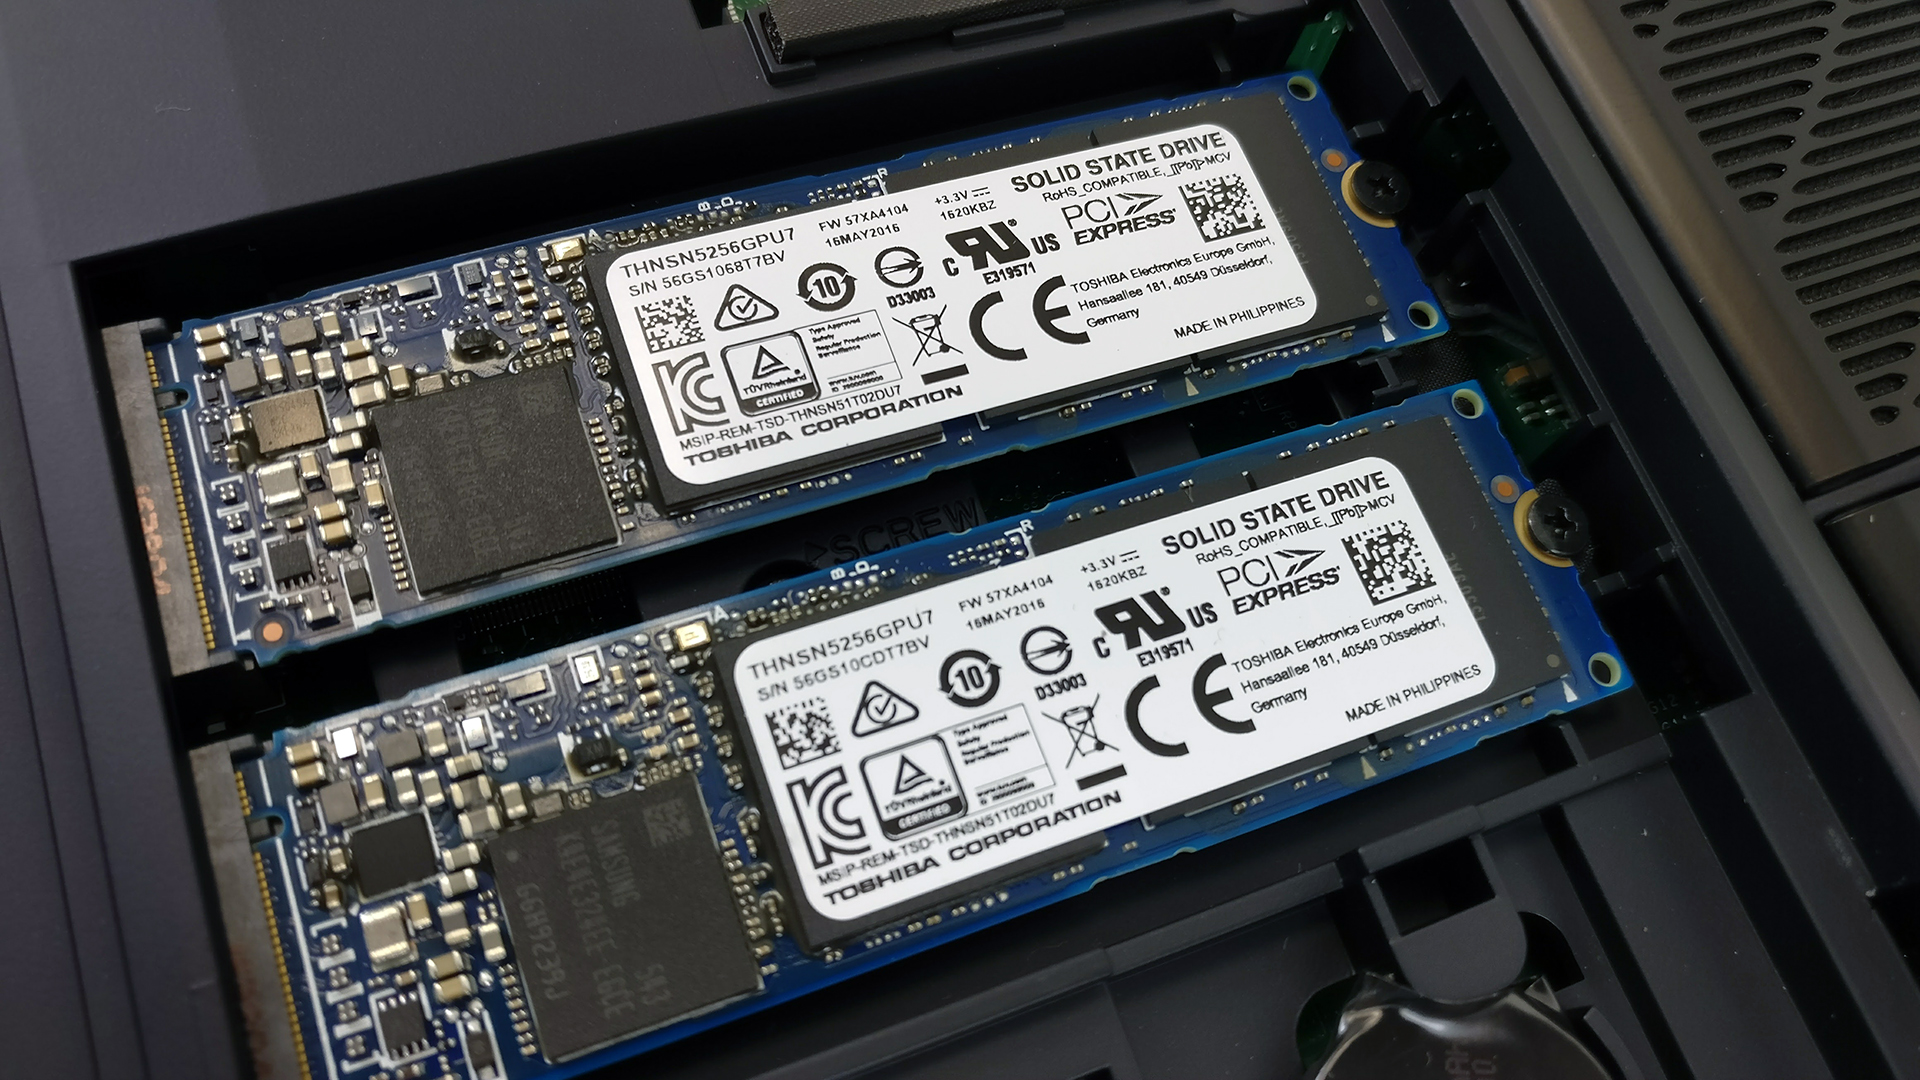
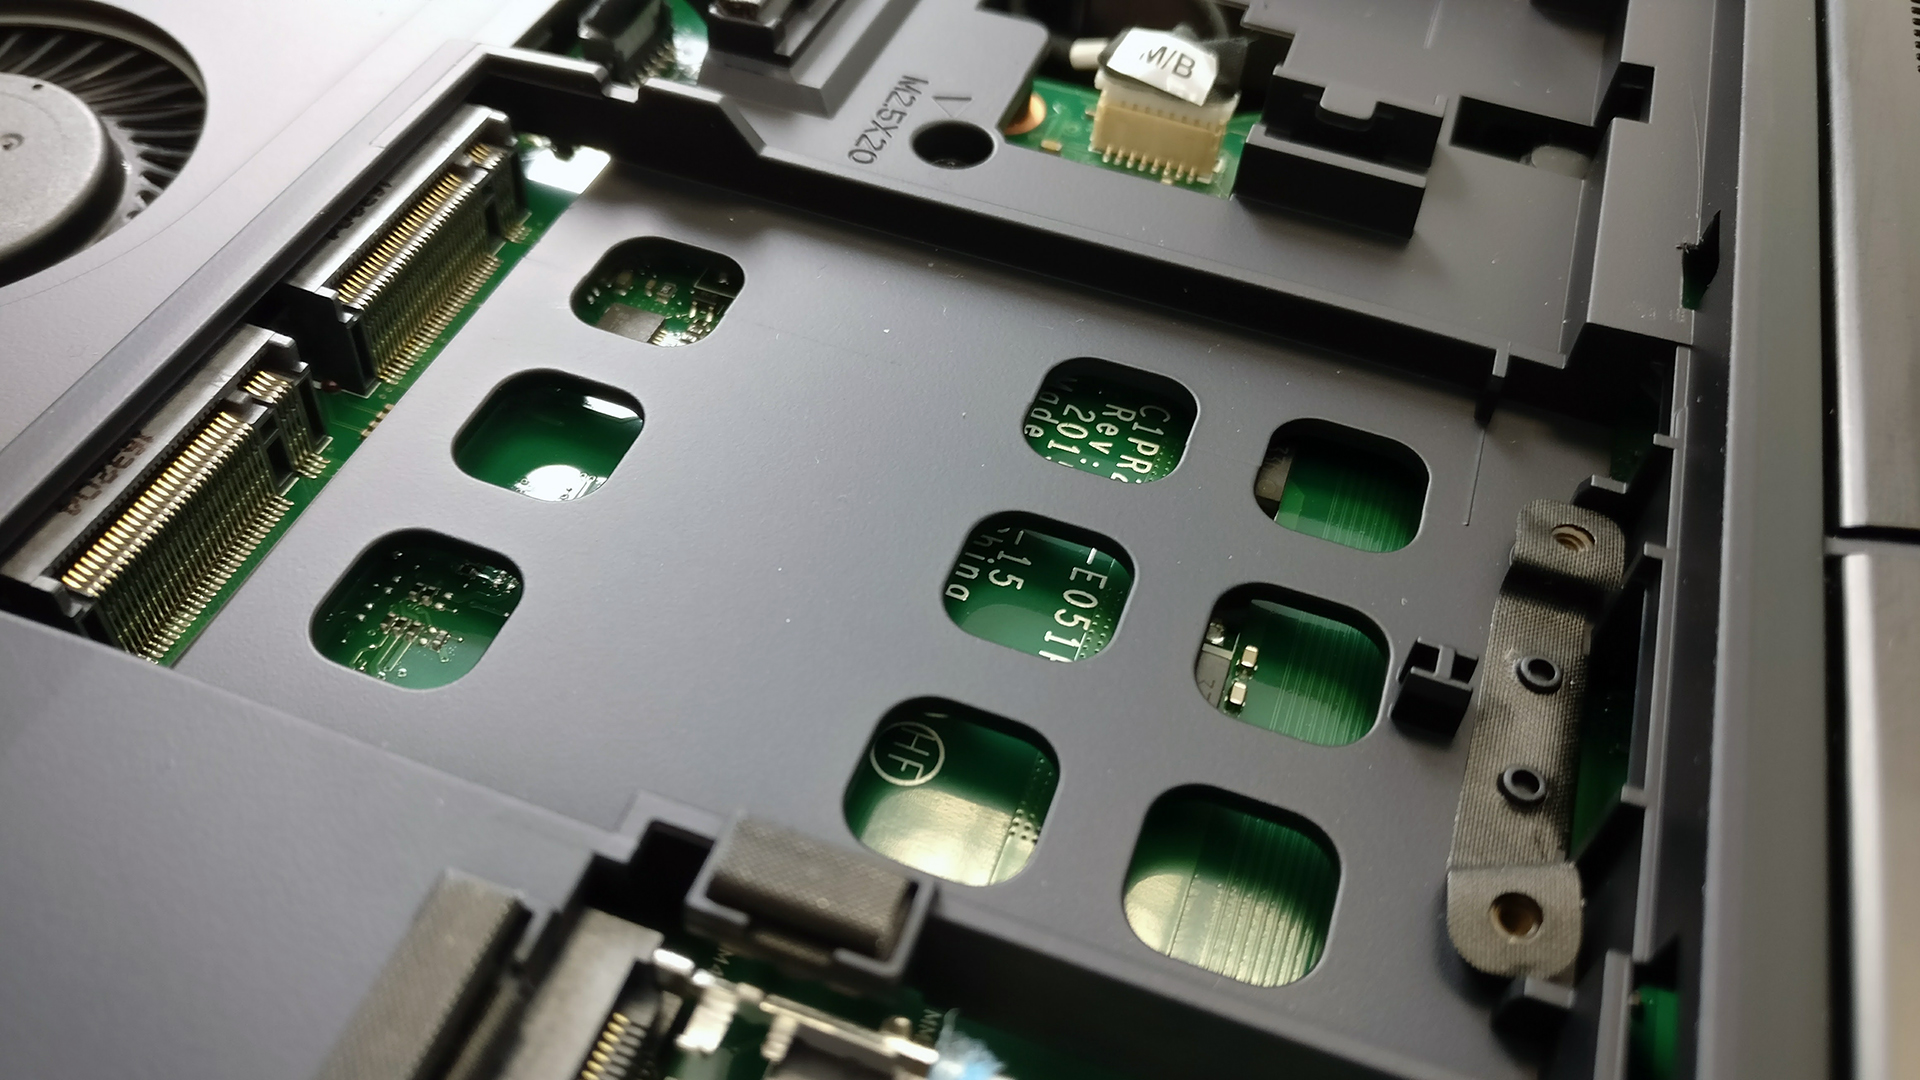
On the bottom of the laptop, you will see another big service lid held by three screws. Once removed, you will find not one, not two but four M.2 SSD connectors along with the other two RAM slots that we’ve talked about.

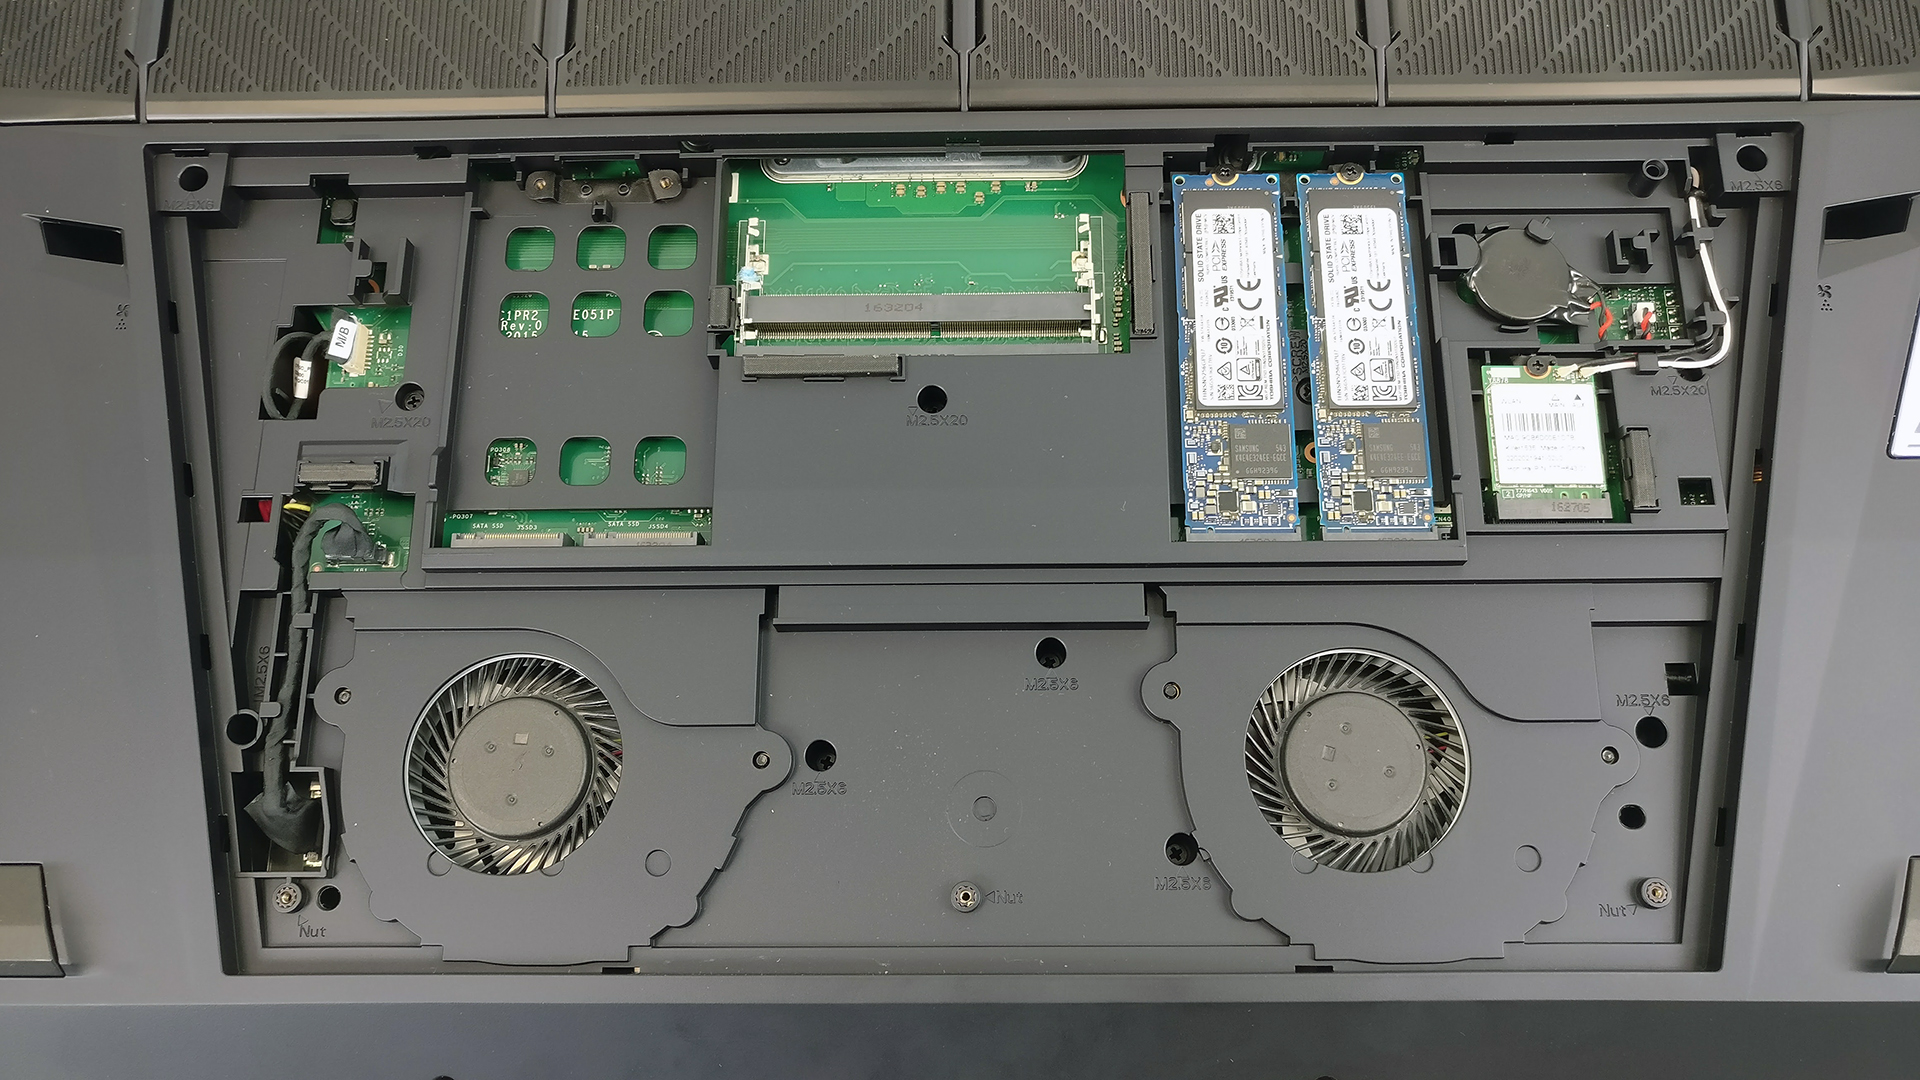
Our unit shipped with two super-fast Toshiba M.2 PCIe NVMe drives working in RAID 0 configuration. We found these in the new Predator series laptops as well. But if this isn’t enough for you, the laptop provides another two M.2 SSD slots with M key connector, again supporting PCIe NVMe drives.
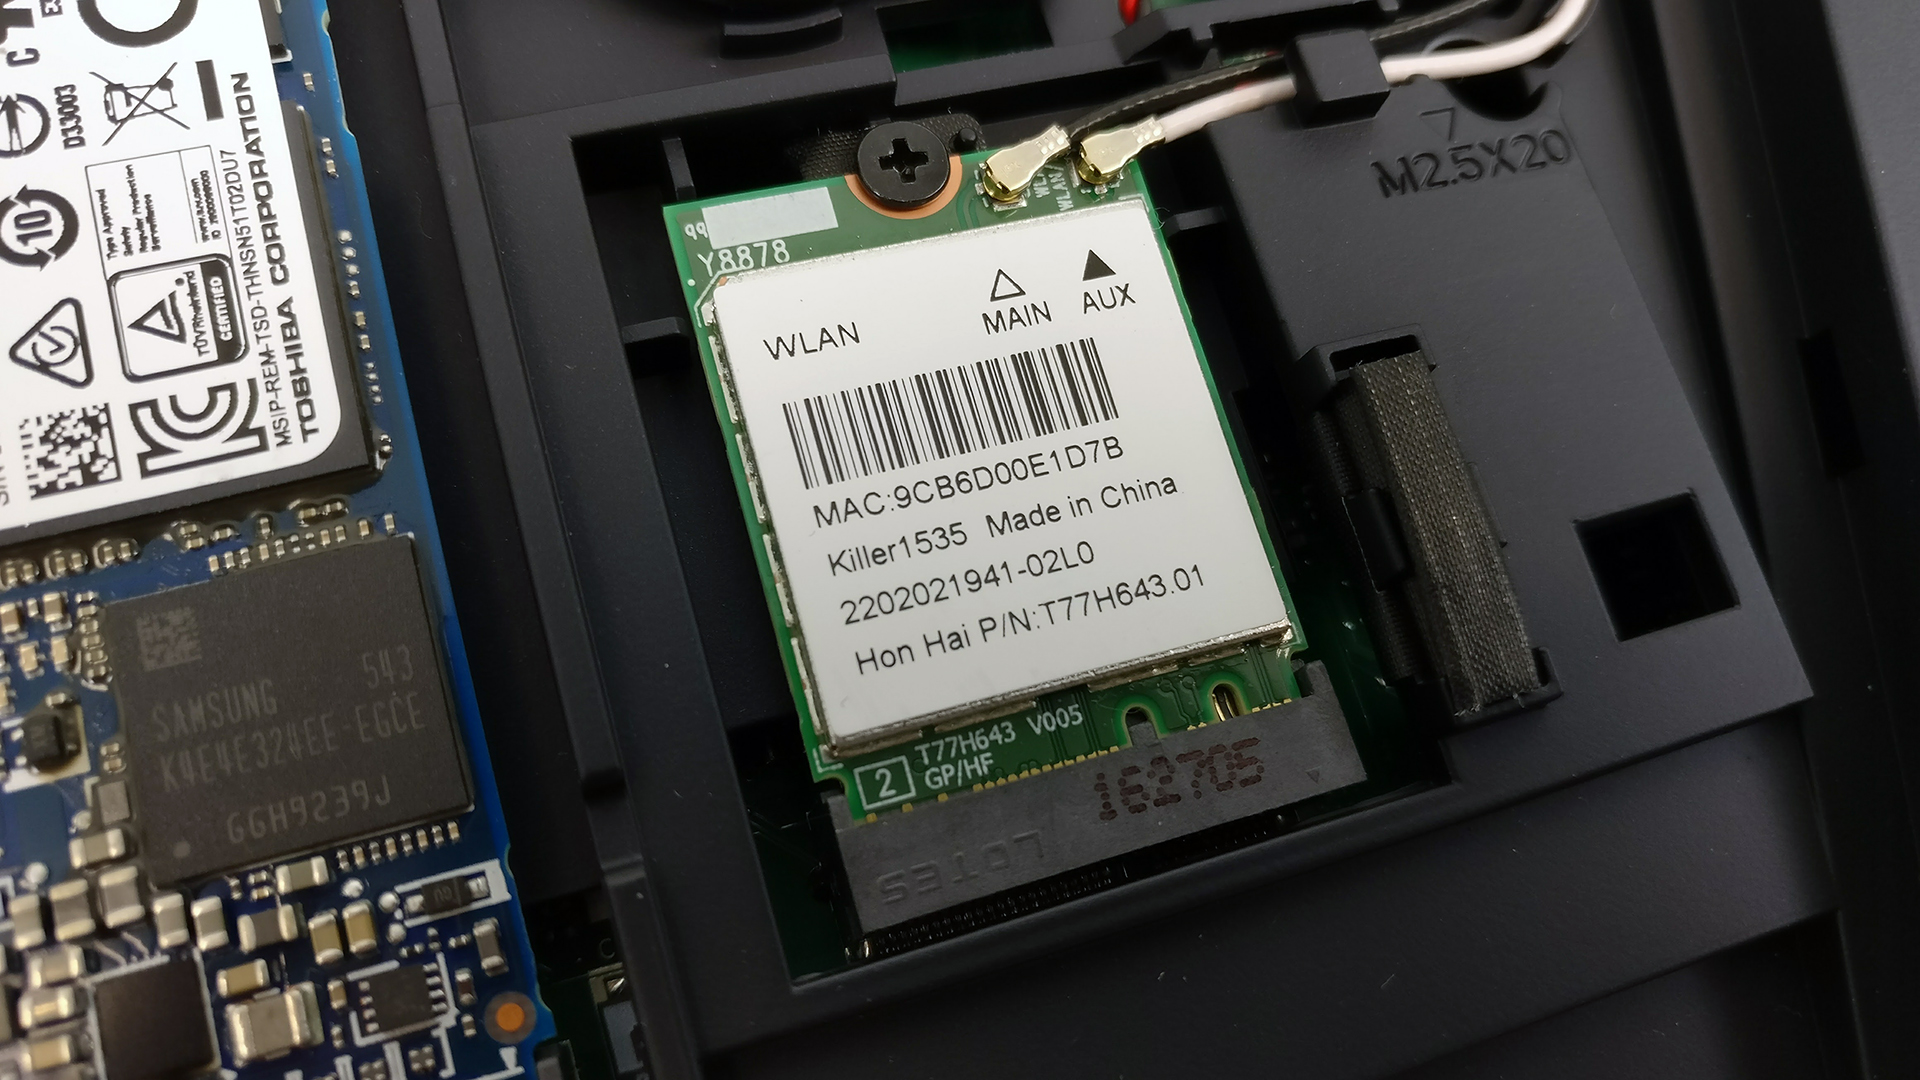
You can also change the Wi-Fi card, if needed, quite easily. It’s a Killer1535 module, which is a common find in modern gaming laptops.
3. Full disassembly
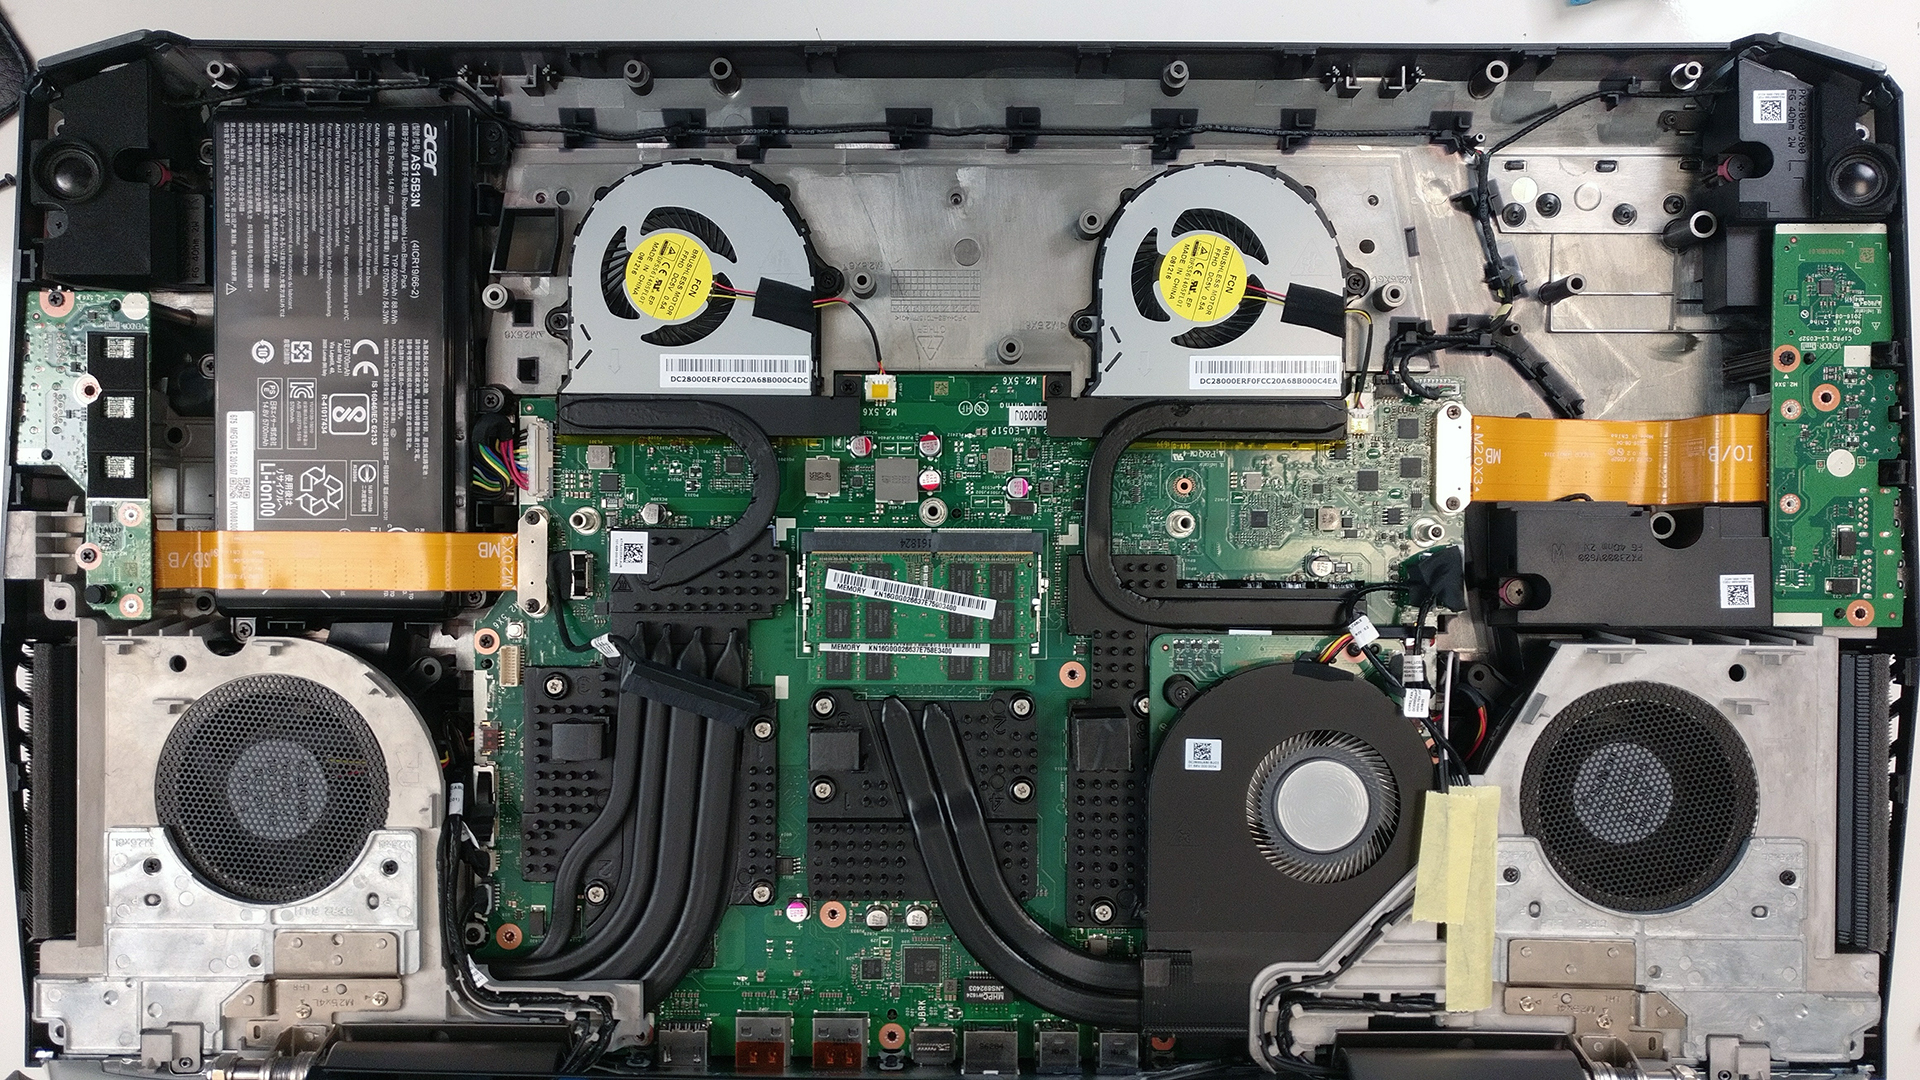
The full disassembly of the notebook is a huge pain. You have to remove all the screws around the bottom part of the chassis and the ones hiding under the maintenance hatch. Once removed, you can proceed by carefully prying up the keyboard tray with a thin plastic tool. Also, watch out for the screen hinges and the curved screen as they get in the way of removing the interior plate.
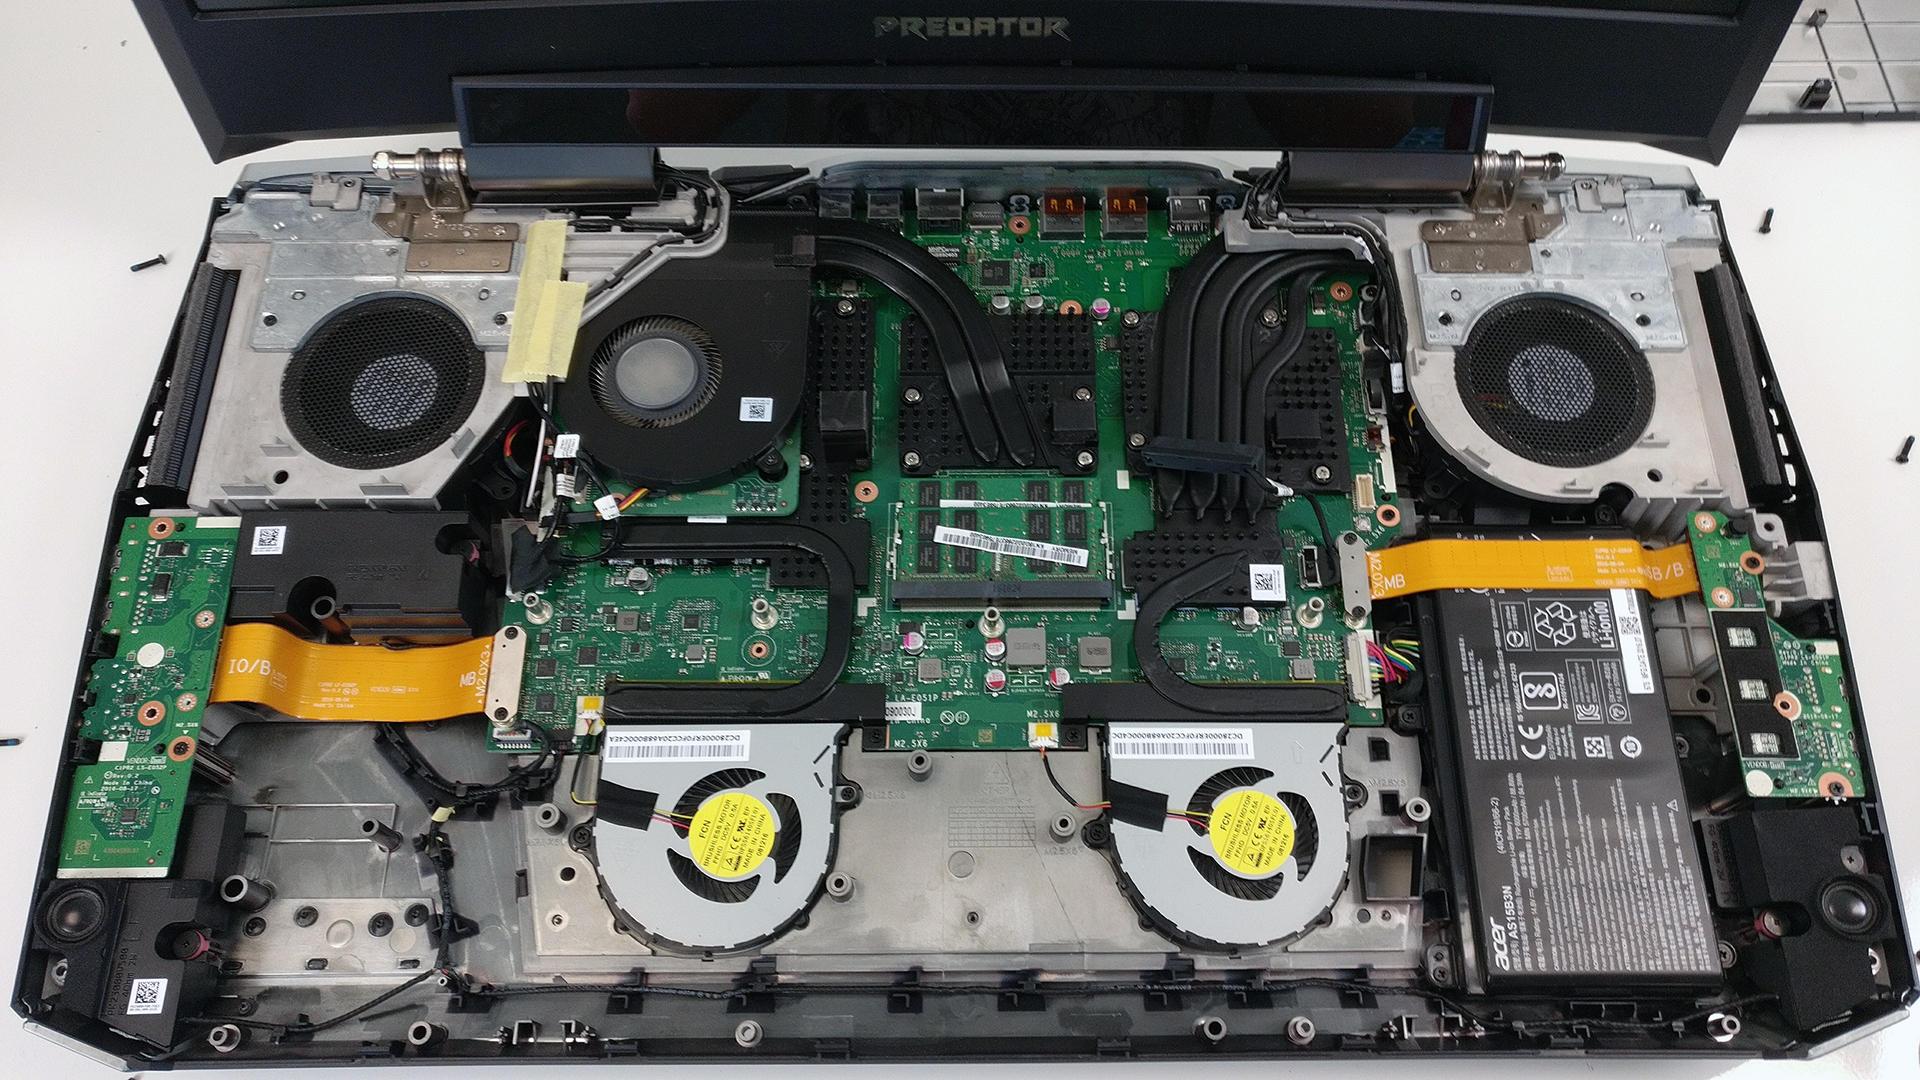
Once removed, you will see all 5 cooling fans and the 88.8Wh battery unit on the right.

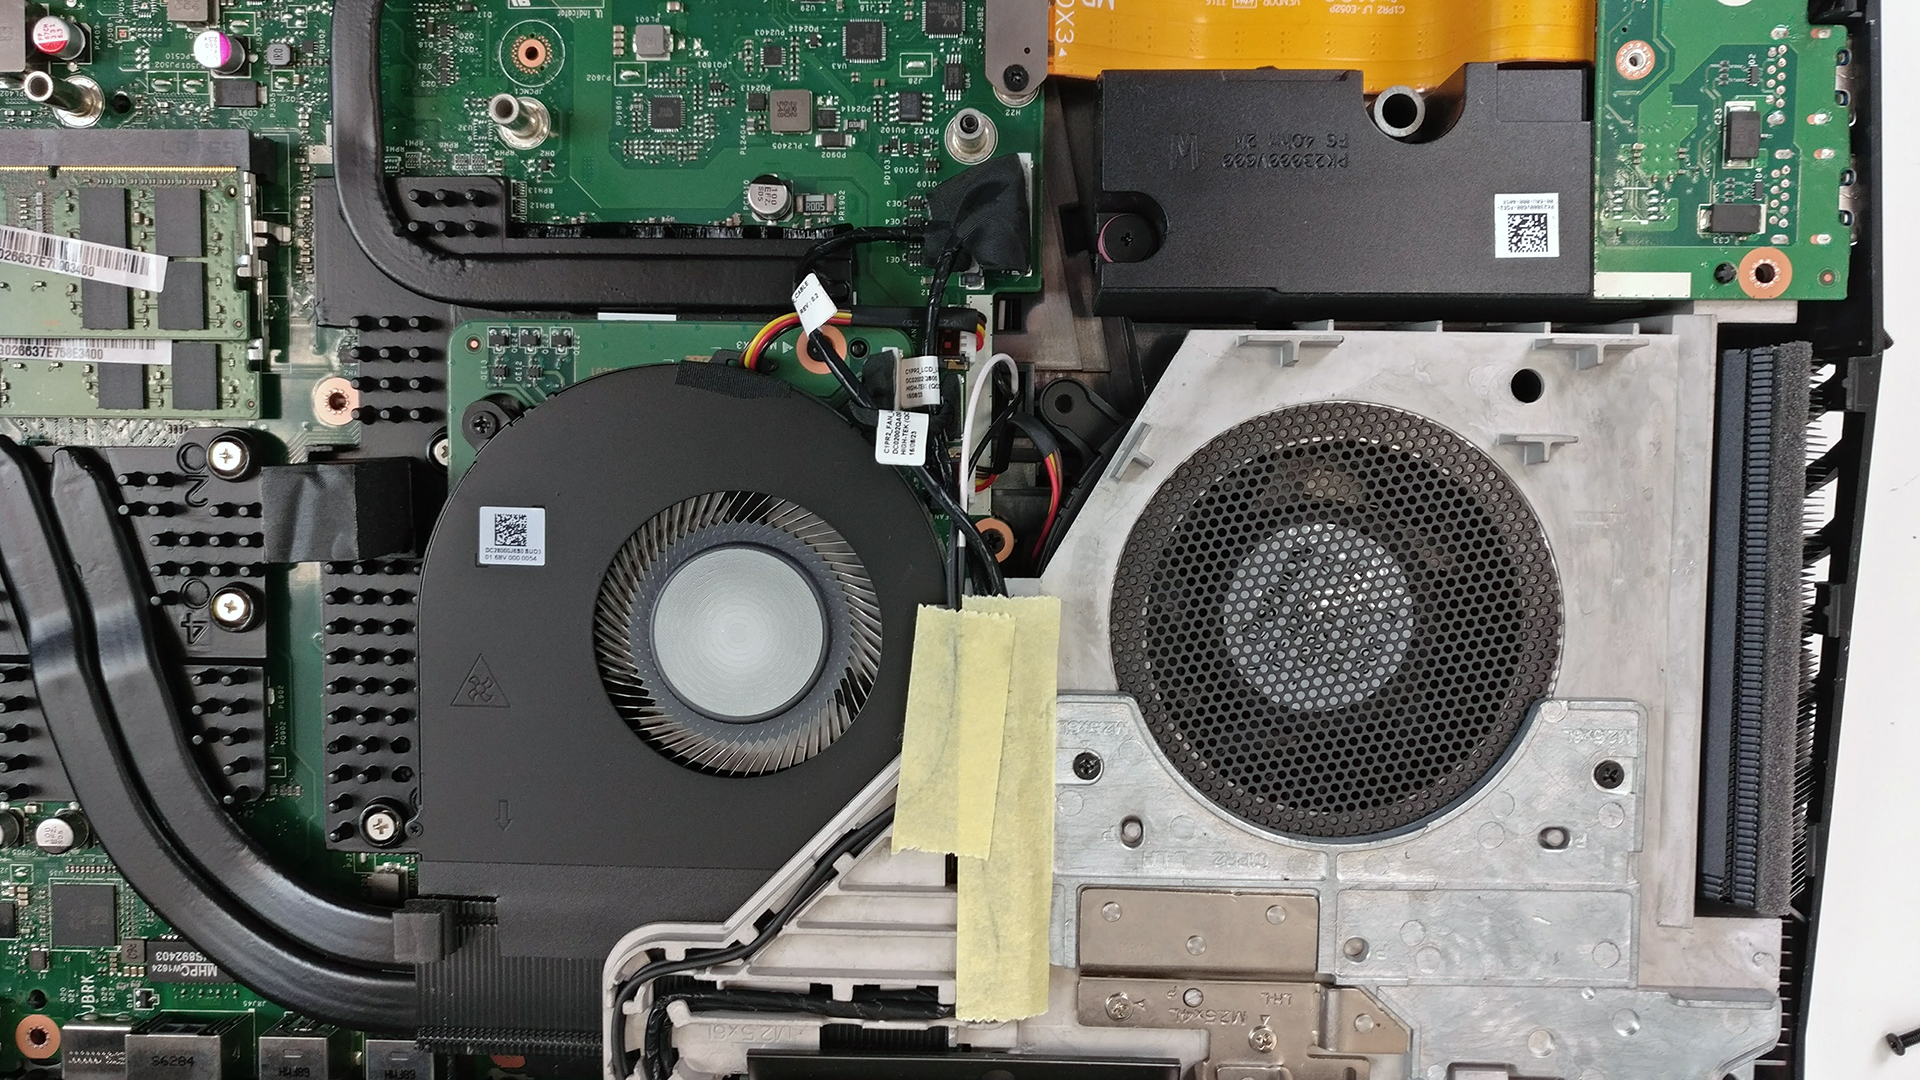
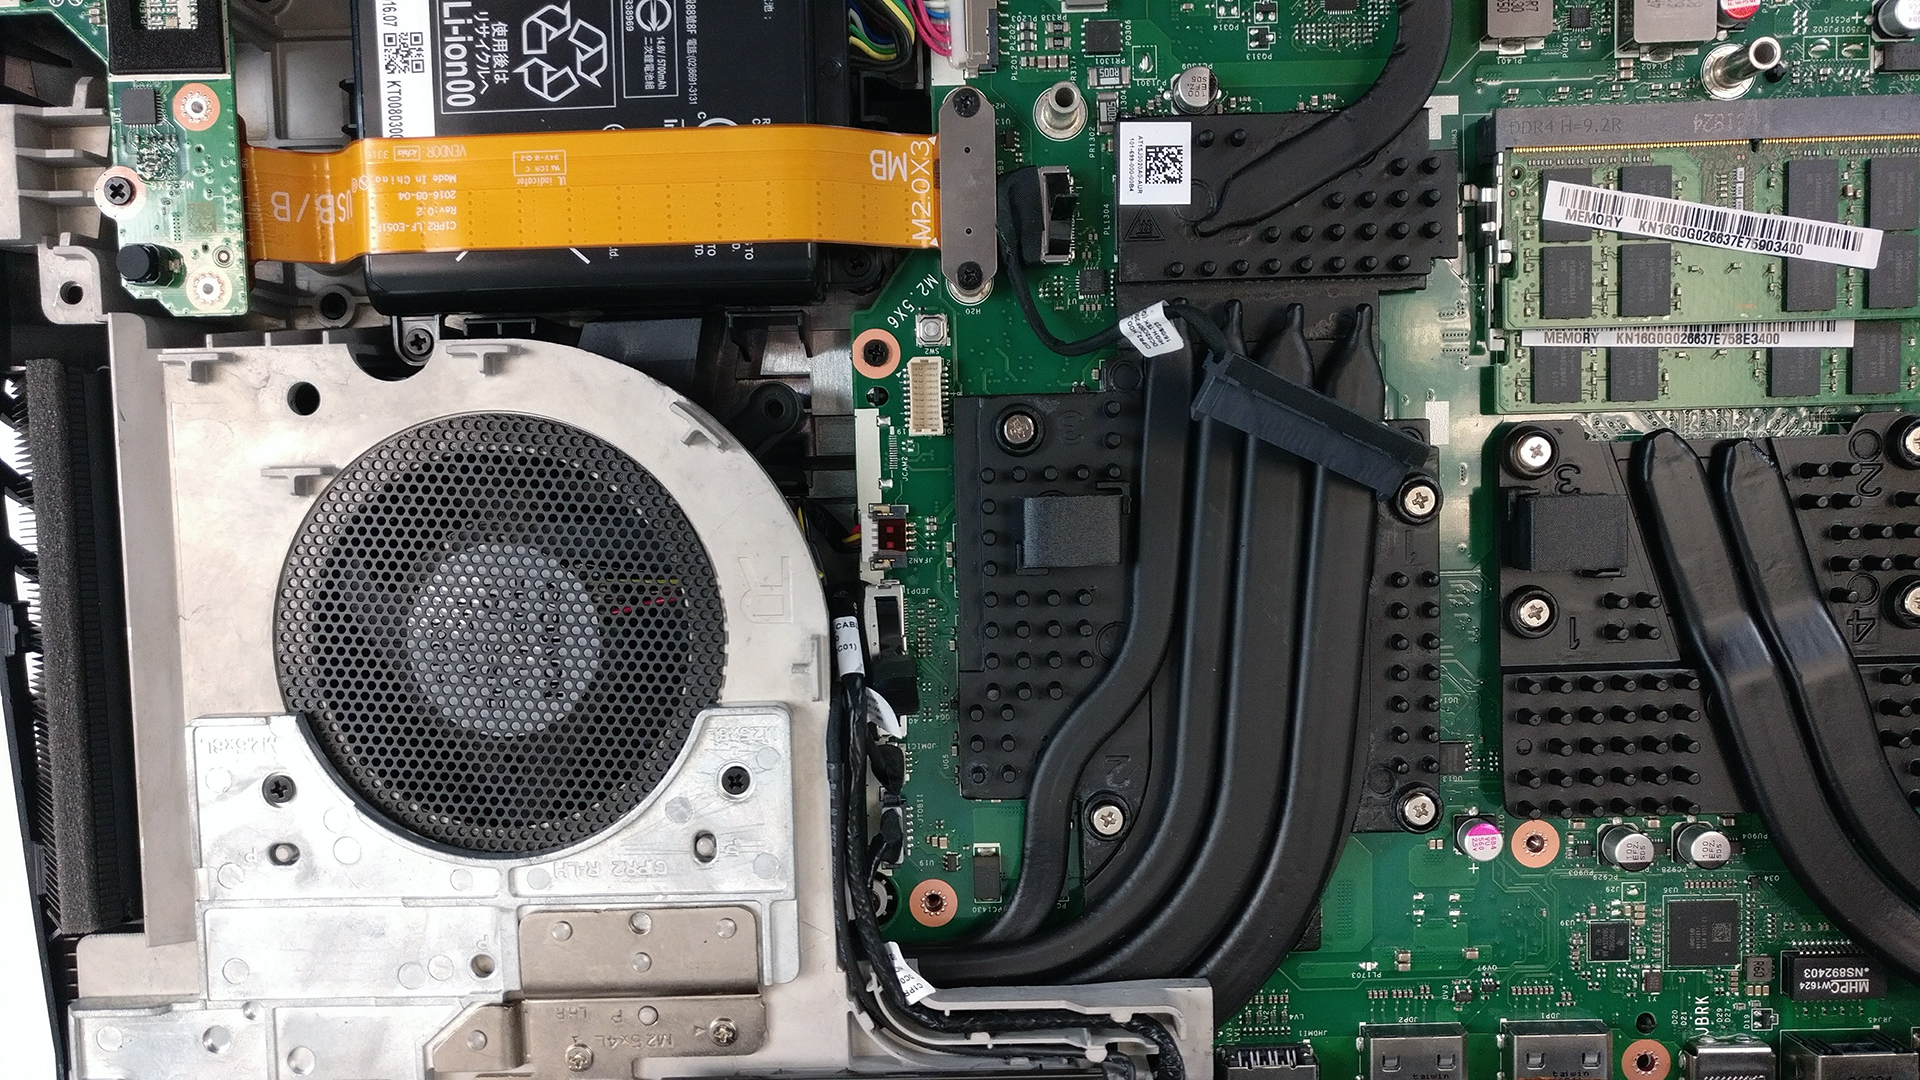
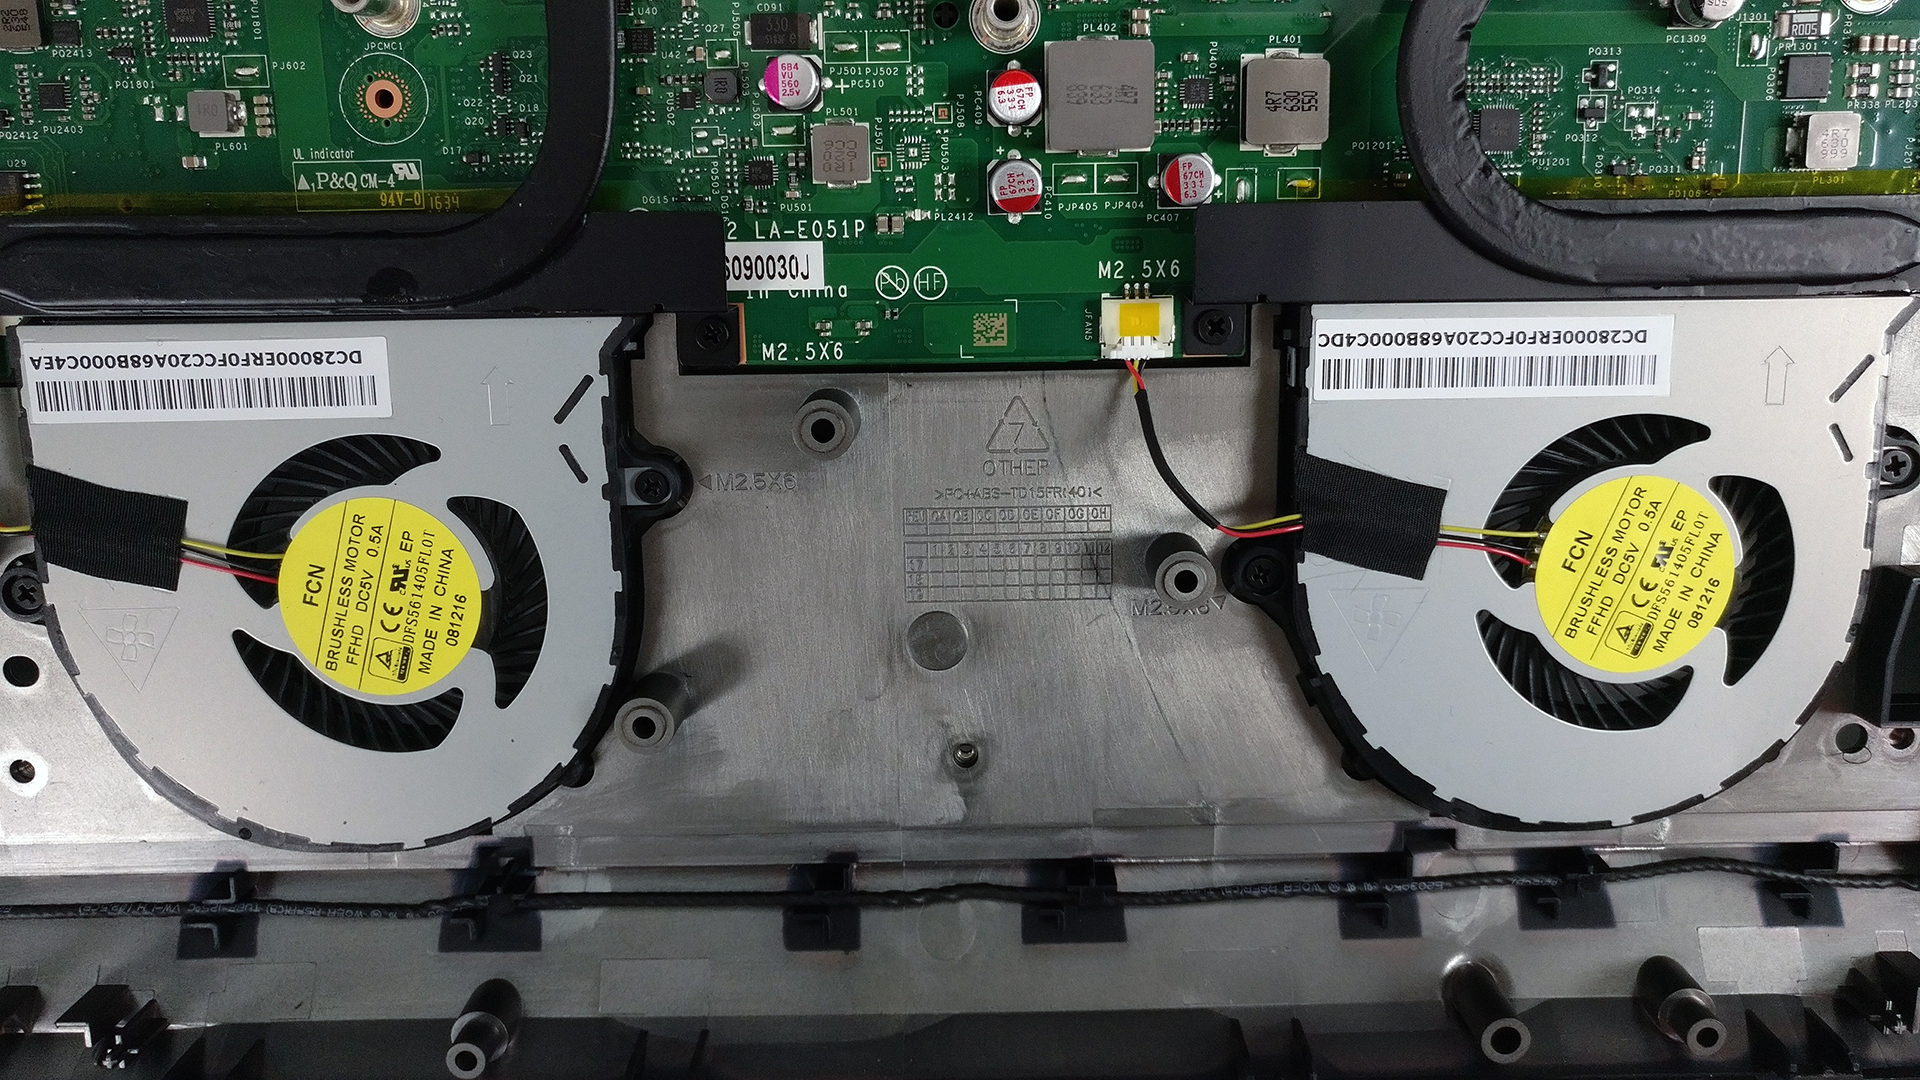
4. Cooling system
To keep the demanding hardware cool during gaming and heavy workload, Acer had to take some extreme measures. For instance, you can see two normal cooling fans on the front which are connected to the heat sinks. The two GPUs, however, rely on three separate cooling fans and a lot of heat pipes. One of the fans is with LED illumination which can be seen right above the keyboard near the power button. Here are a few photos of the fascinating cooling design.


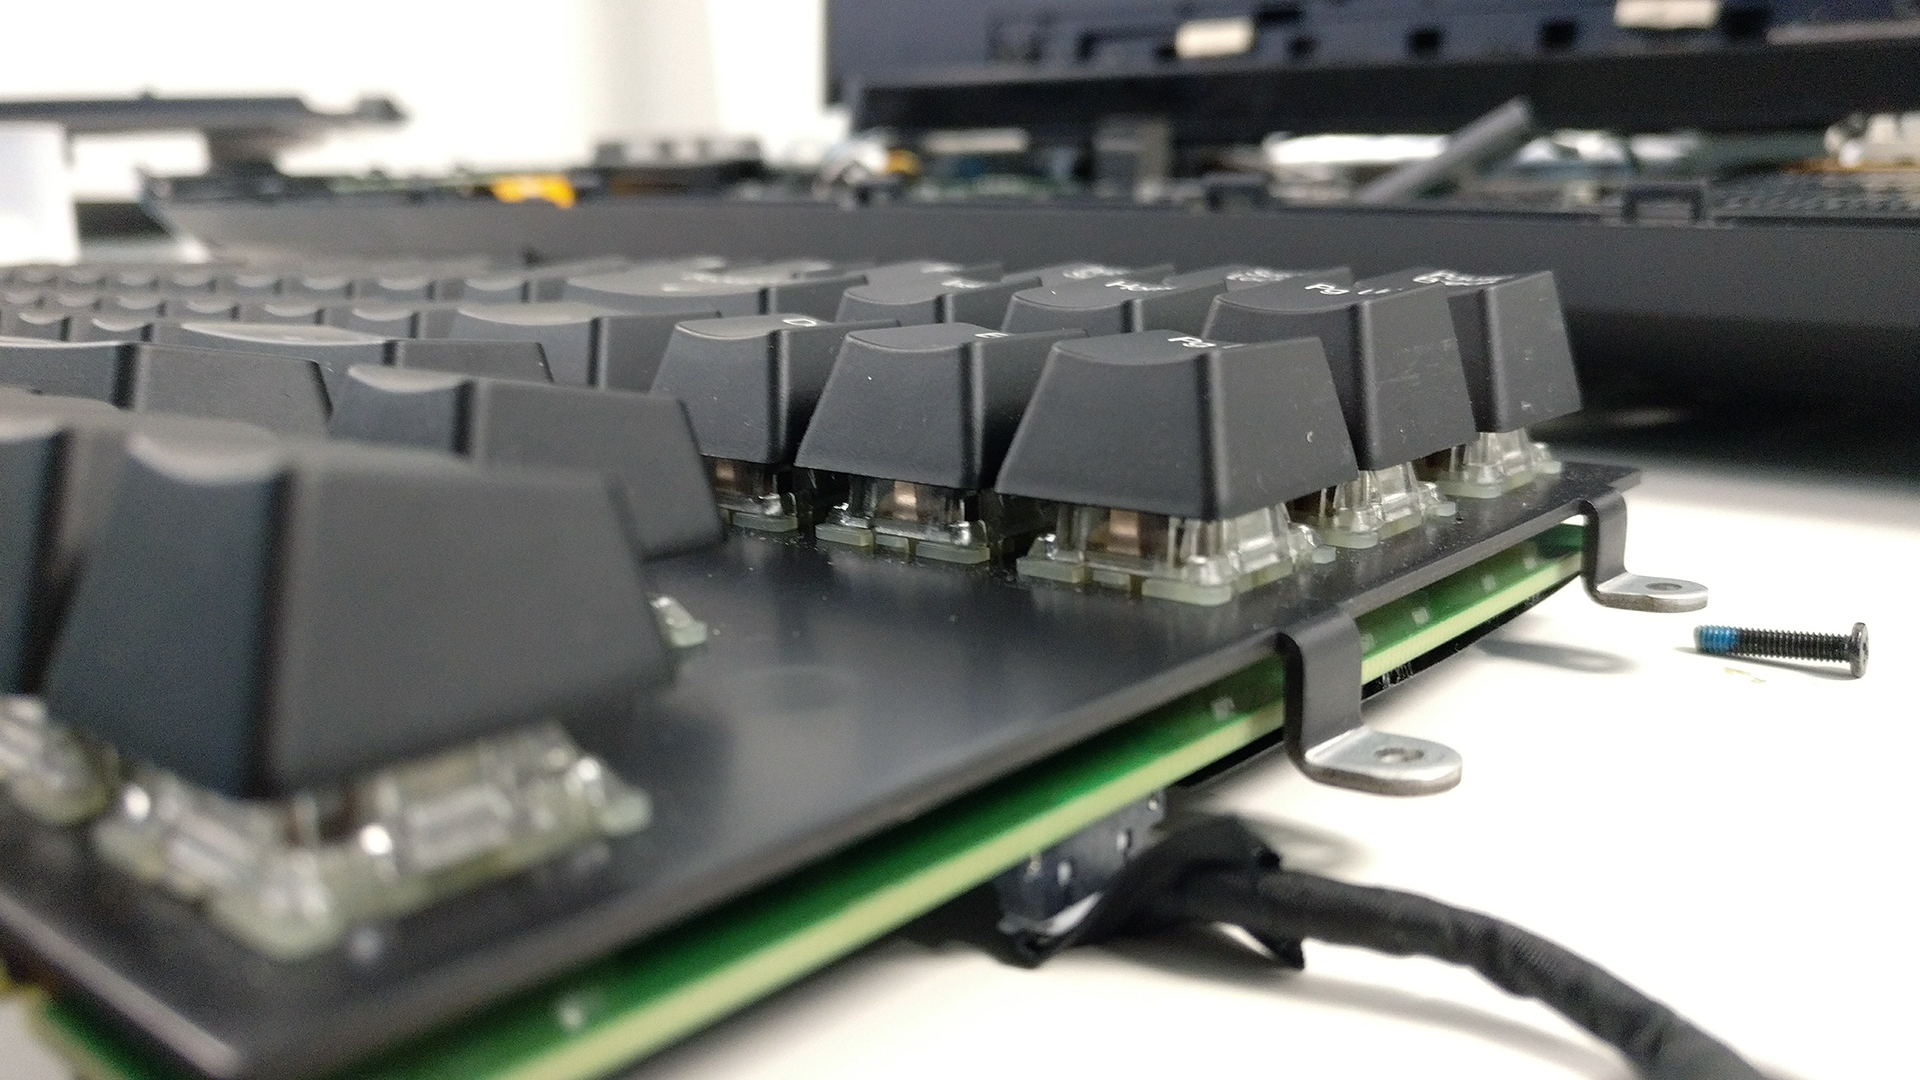
The keyboard can also be removed and cleaned from all the dust that will build up over time. You can also see the base of the Cherry MX Brown switches.


![[June 2026] Best-Selling Laptop Brands on Amazon Global – Apple’s Unrivaled Dominance in Units and Revenue](https://laptopmedia.com/wp-content/uploads/2026/07/GLOBAL-Best-Brands-400x225.jpg)
![[June 2026] Amazon Global: Top 10 Best-Selling Laptops – Apple’s New MacBook Neo Storms to #1, Reshaping the Market with Affordability](https://laptopmedia.com/wp-content/uploads/2026/07/Best-Selling-Laptops-GLOBAL-Top-10-400x225.jpg)
![[June 2026] Amazon Global: Top 10 Best-Selling Gaming Laptops – Acer’s Nitro V 16S AI Dominates Sales, While ASUS Leads Overall Revenue](https://laptopmedia.com/wp-content/uploads/2026/07/Best-Selling-Gaming-Laptops-GLOBAL-Top-10-400x225.jpg)
![[June 2026] Global Ranking of Best-Selling Laptop GPUs on Amazon – NVIDIA RTX 5060 is the Top-Selling Dedicated GPU](https://laptopmedia.com/wp-content/uploads/2026/07/Best-Selling-GPUs-GLOBAL-Top-10-400x225.jpg)
![[June 2026] Global Ranking of Best-Selling Laptop CPUs on Amazon – Apple M5 Dominates, AMD Ryzen 7 260 Gets Solid Premium Share](https://laptopmedia.com/wp-content/uploads/2026/07/Best-Selling-CPUs-GLOBAL-Top-10-400x225.jpg)

hi.is 1080 sli intagrated or discreet vga? can vga is upgradable?