Inside ASUS VivoBook S13 S330 – disassembly and upgrade options
When cost-cutting and innovation meet, interesting sacrifices have to be made. In a laptop that looks quite good on the outside, one can be baffled how old its internals can feel.
Check out all ASUS VivoBook S13 S330 prices and configurations in our Specs System or read more in our In-Depth review.

1. Remove the bottom plate
There are 11 Phillips-head screws and an awful lot of super tight clips that hold the bottom panel of this laptop. Be patient and use a plastic tool for the prying process, so you can minimize the chances of damaging the plate itself.

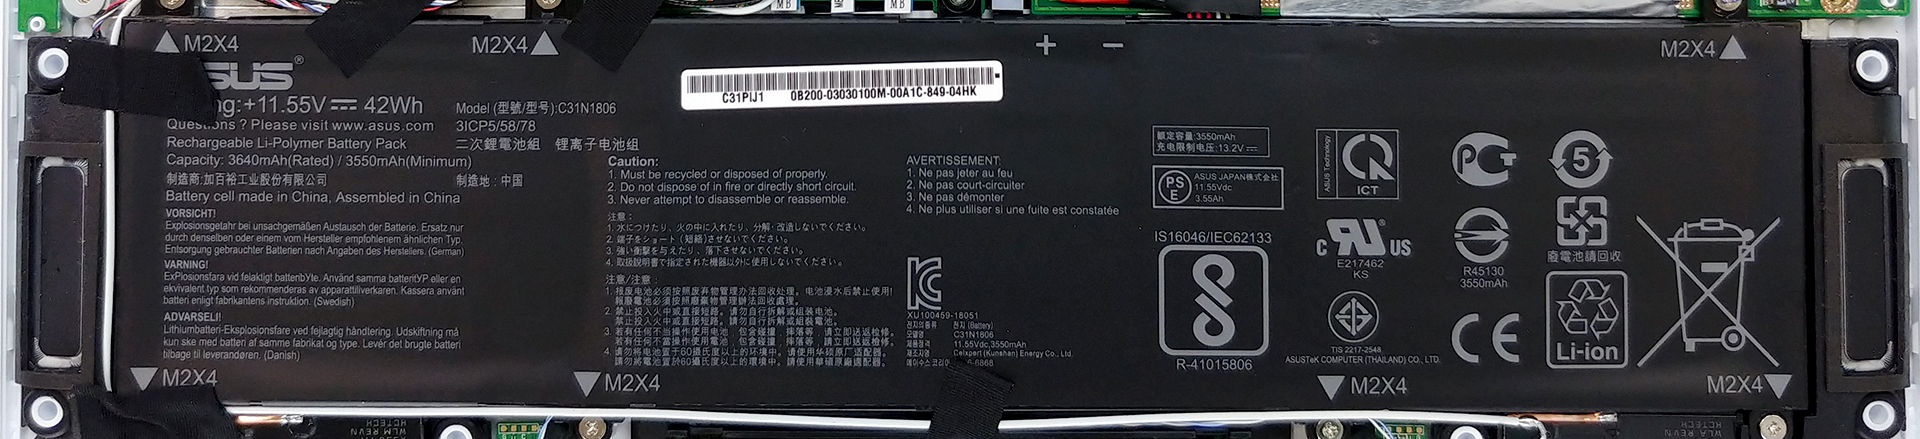
2. Battery
Its battery has a 42Wh capacity and can be removed by unscrewing 7 Phillips-head screws. Traditionally – don’t forget to remove the battery connector before you continue.
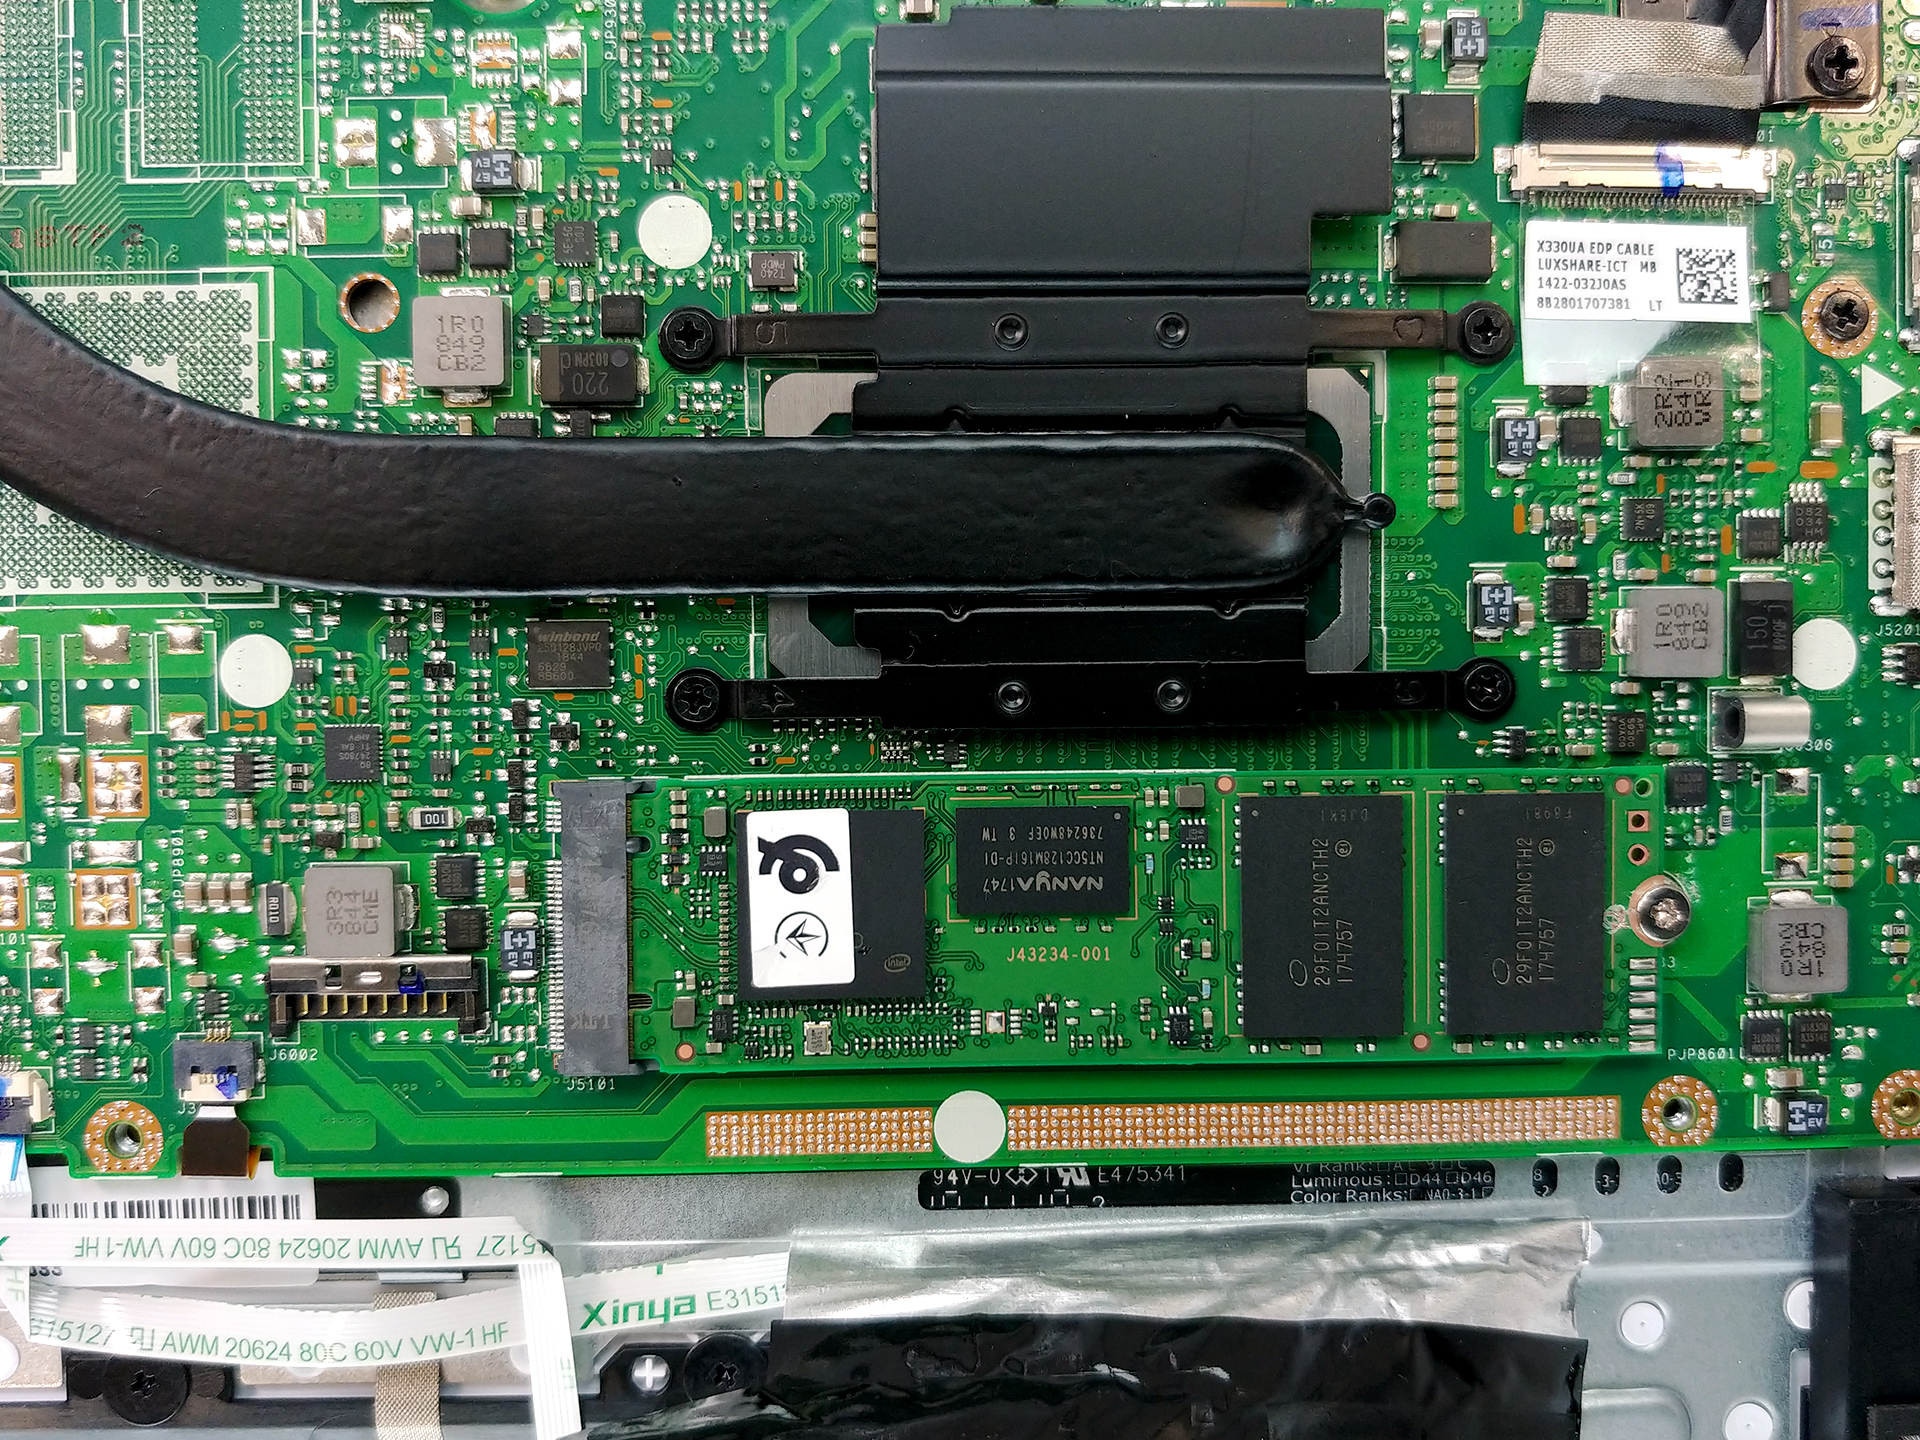
3. Memory and storage
Sadly, the RAM chips here are soldered, so no way to upgrade this department after purchase. On the storage side, however, there is a single SATA M.2 port available.
4. Cooling system
While pretty standard, the cooling of the VivoBook S13 S330 has a thick enough heat pipe and a fan that looks big, relative to the size of the computer, itself.

Check out all ASUS VivoBook S13 S330 prices and configurations in our Specs System or read more in our In-Depth review.