Inside ASUS ZenBook 13 UX325 – disassembly and upgrade options
As with pretty much any ultrabook out there, you shouldn’t expect to see great upgrade options on this machine.
Check out all ASUS ZenBook 13 UX325 prices and configurations in our Specs System or read more in our In-Depth review.

1. Remove the bottom plate
At first glance, only 5 Torx-head screws are holding this laptop’s bottom panel. However, ASUS has hidden two of them beneath the back feet of the laptop. Remove the feet with a sharp plastic tool. Then, undo all of the 7 total screws, and carefully pry the bottom plate.
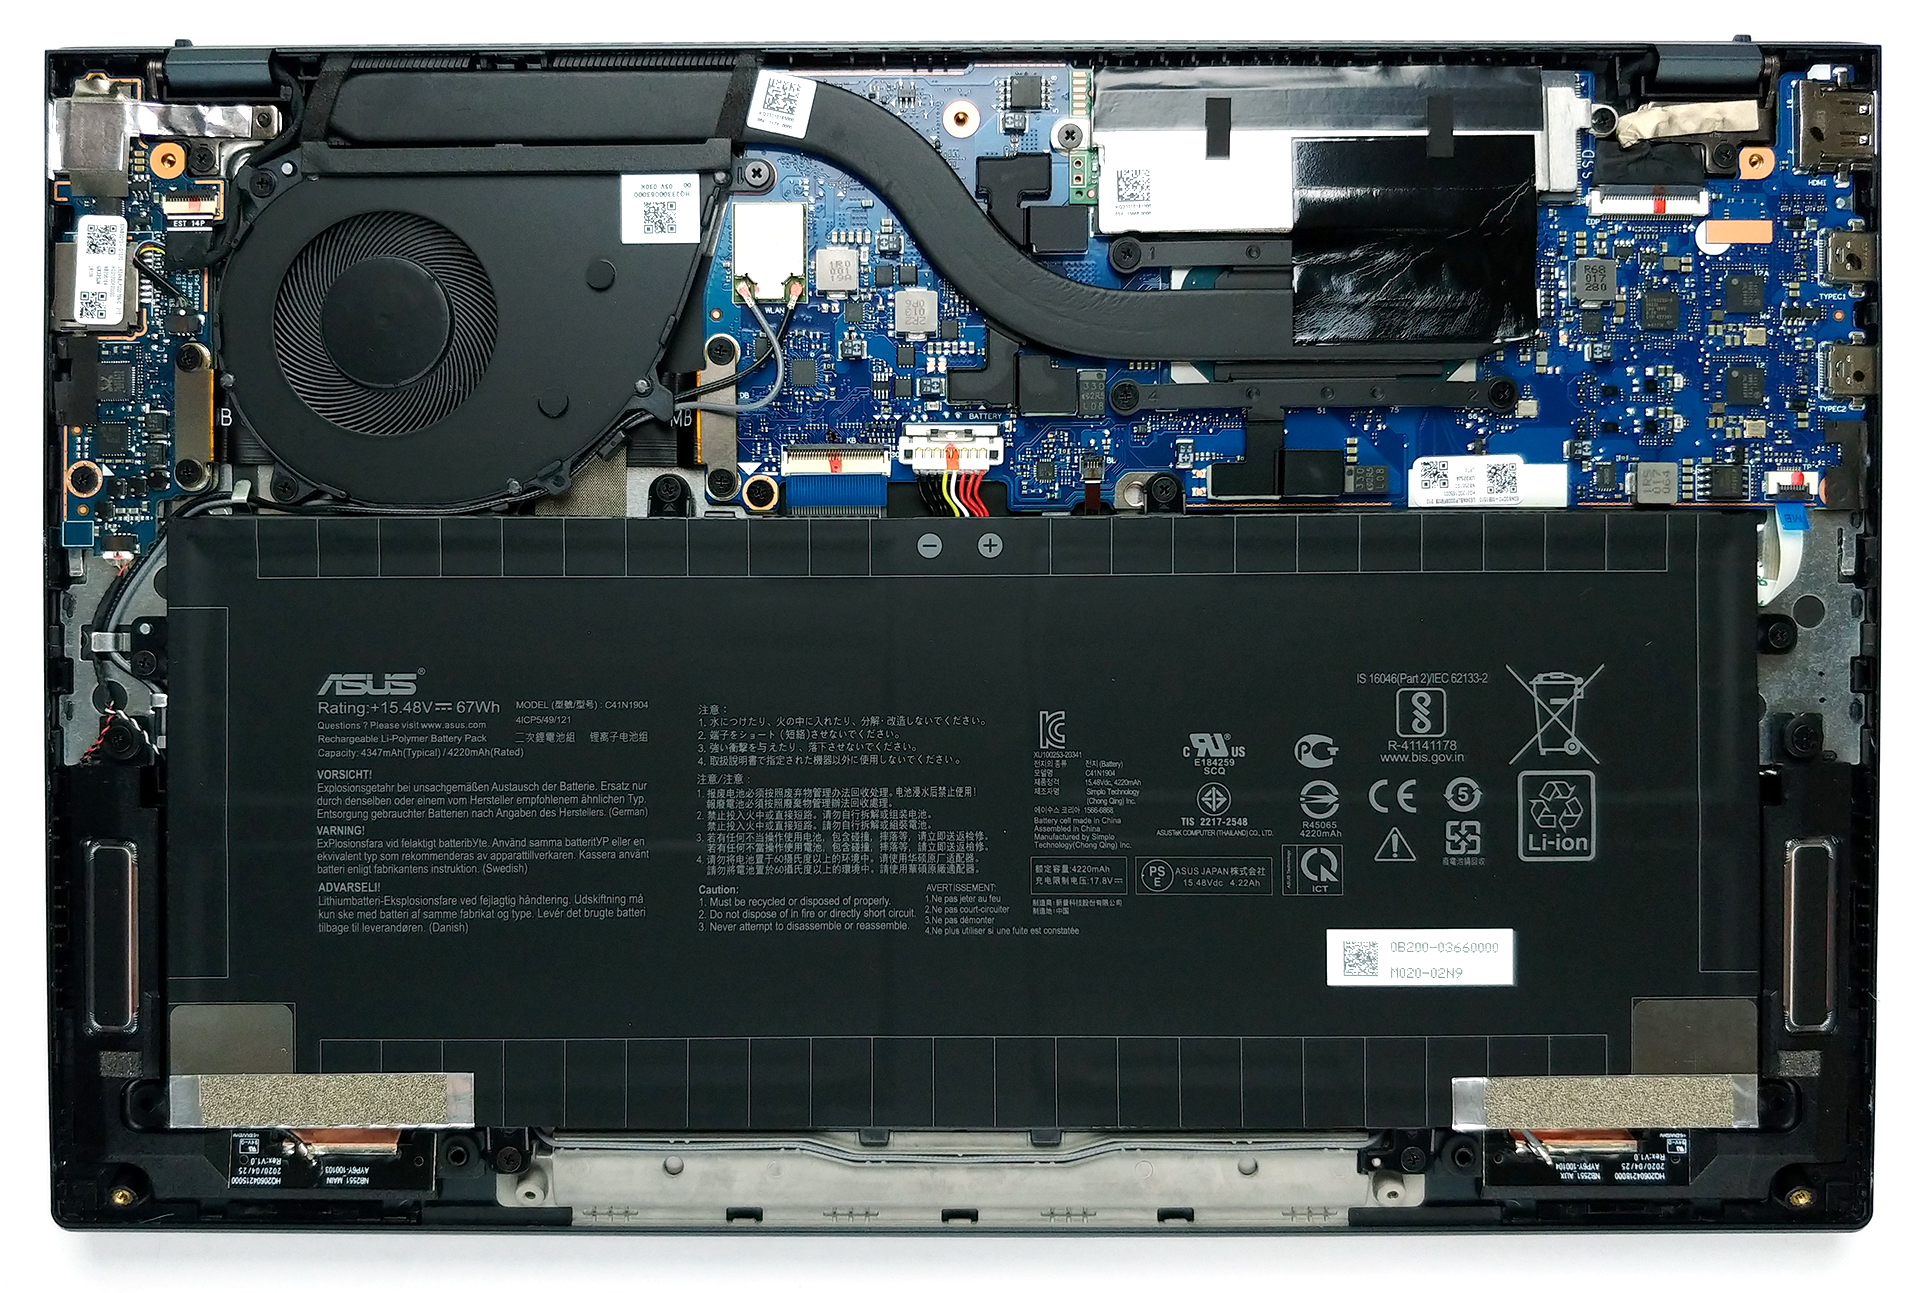
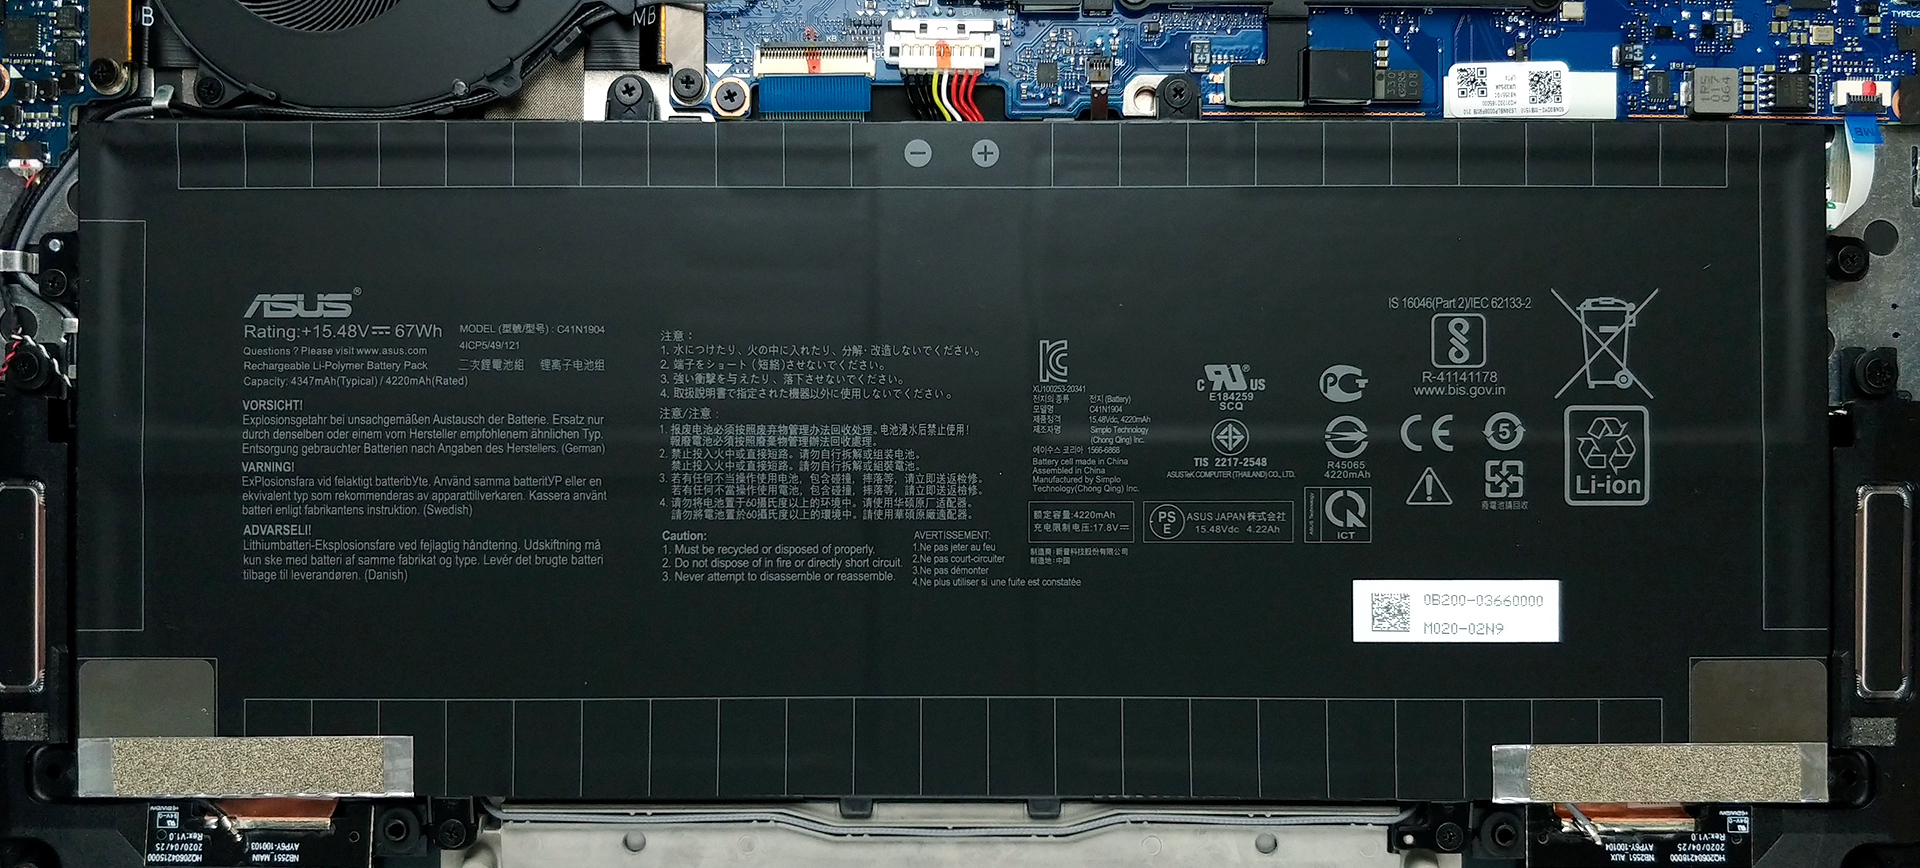
2. Battery
Interestingly, you’ll find a huge 67Wh battery inside of this tiny notebook.
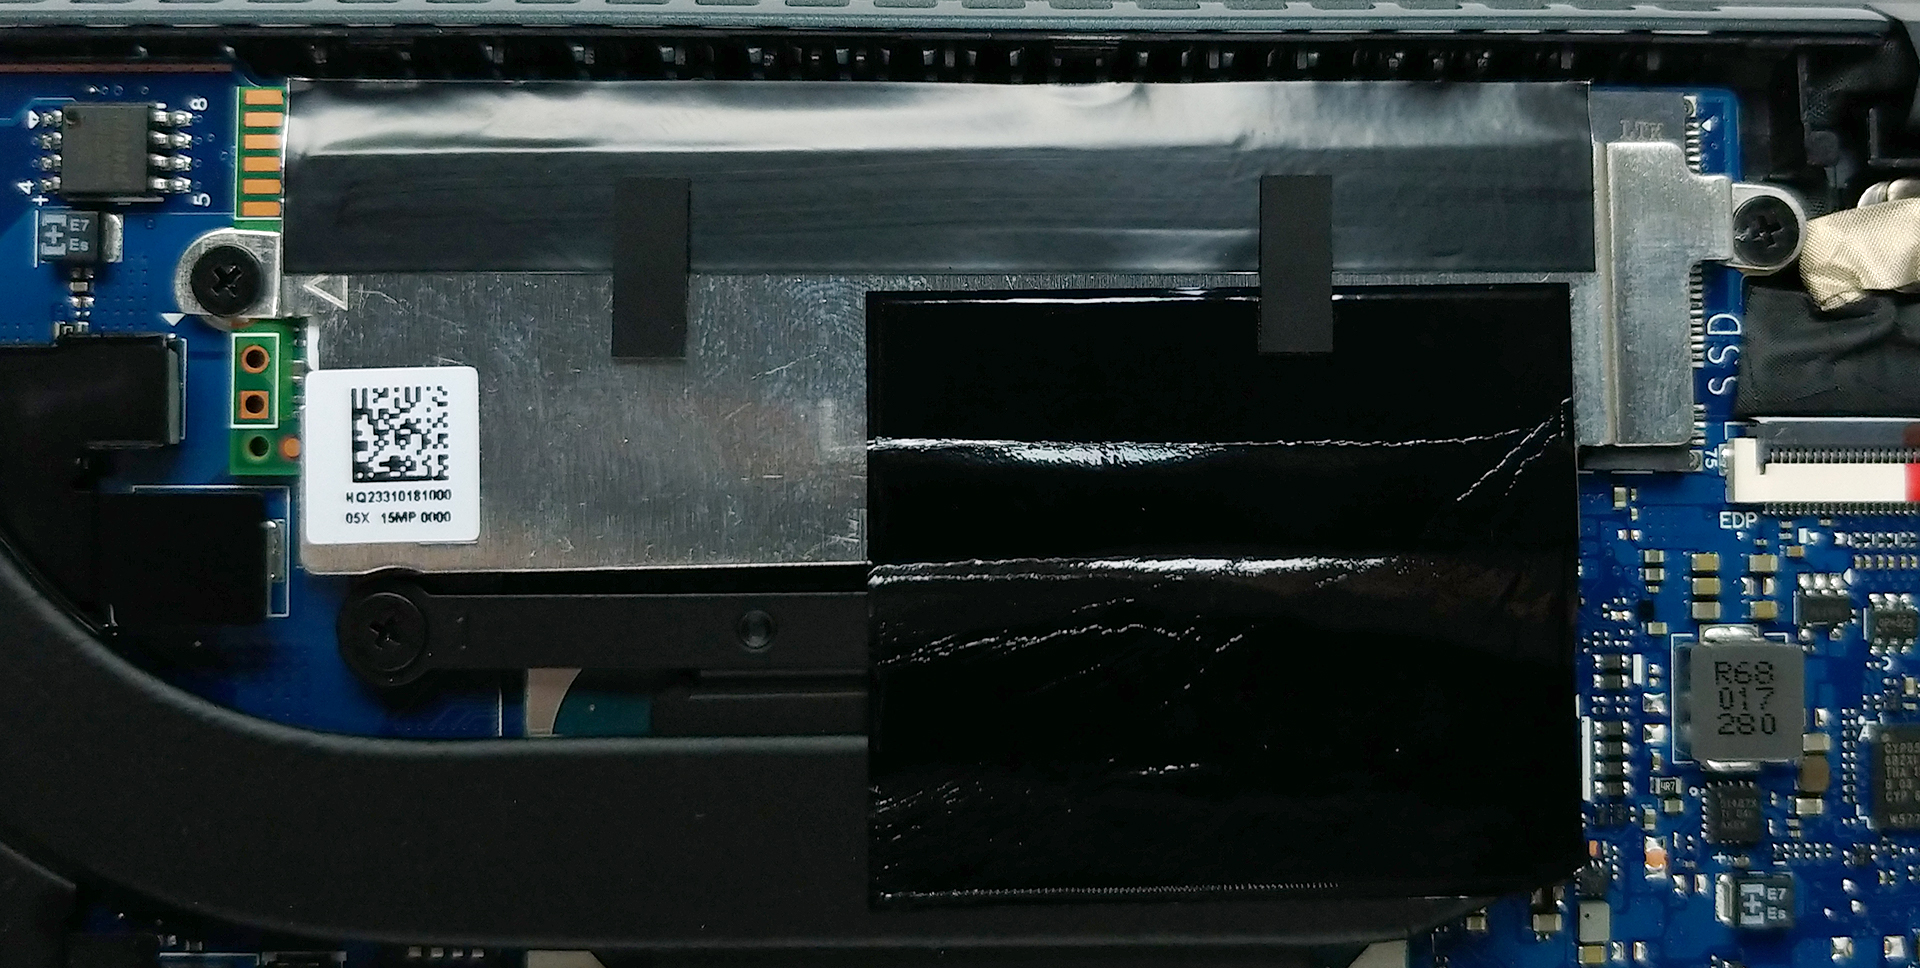
3. Memory and storage
So, memory here is soldered to the motherboard. However, ASUS is offering quite some options, including 8GB, 16GB, and 32GB versions with LPDDR4X memory, working at 3200MHz. Thankfully, there is one storage option for upgrades and it holds M.2 PCIe drives.
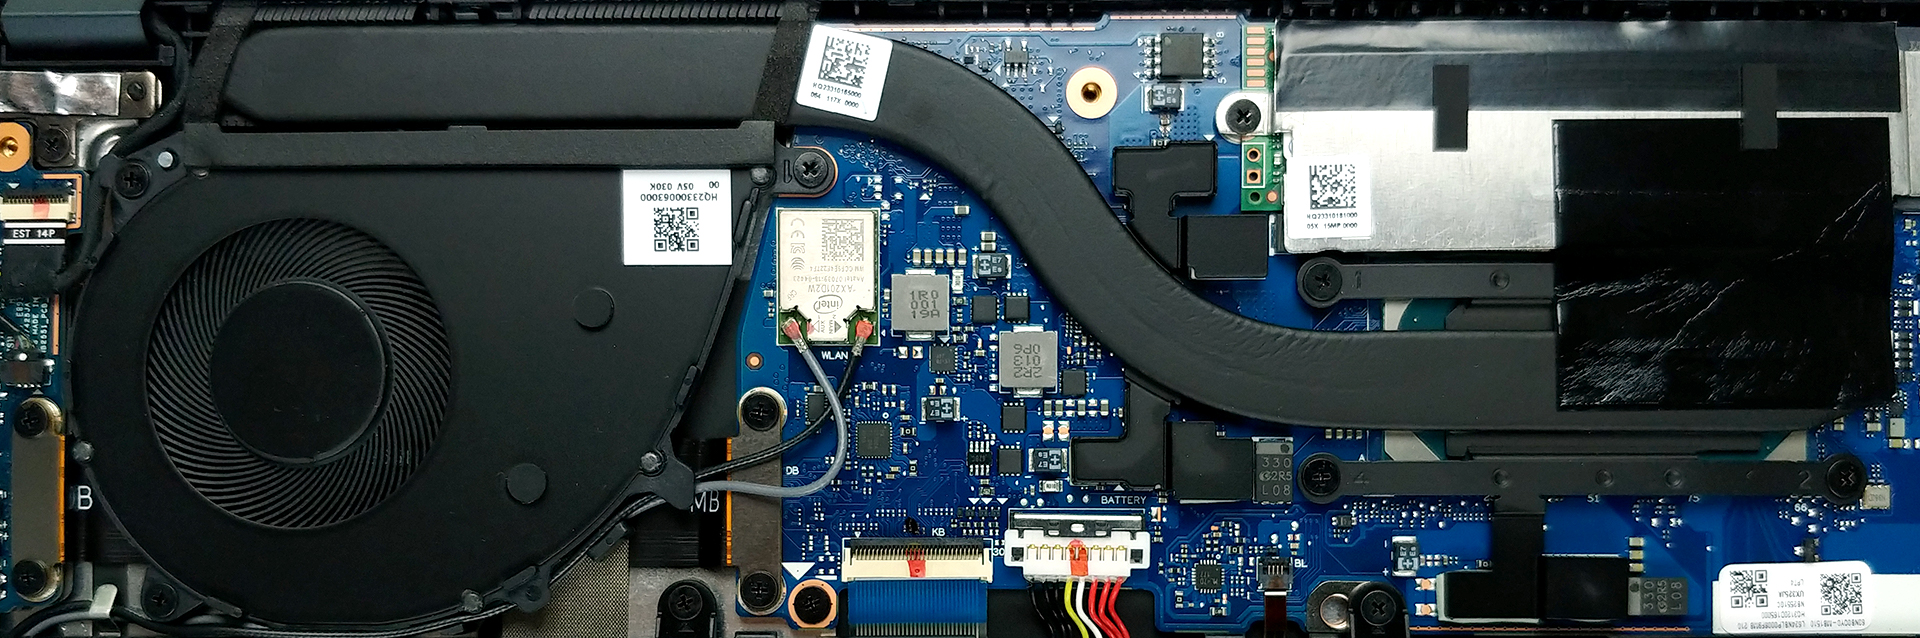
4. Cooling system
The cooling solution here comprises a relatively thick heat pipe and a pretty small fan with a very thin profile.
Check out all ASUS ZenBook 13 UX325 prices and configurations in our Specs System or read more in our In-Depth review.