Inside Lenovo ThinkPad E14 – disassembly and upgrade options
This device is equipped with some exciting features, like the Power button/fingerprint reader combo, which stores the print of your finger upon startup, and then sends it towards the OS for seamless logins. However, how easy it is to maintain and upgrade the ThinkPad E14? Let’s take a look.
Check out all Lenovo ThinkPad E14 prices and configurations in our Specs System or read more in our In-Depth review.

1. Remove the bottom plate
This device’s bottom plate is held up in a place by 7 Phillips-head screws. Fortunately for clumsy people like us, they stay attached to the panel even after you undo them, so it would be particularly hard to lose them. So, after that, you need to pry the plate with a plastic tool, and you should be able to easily lift it away from the chassis.

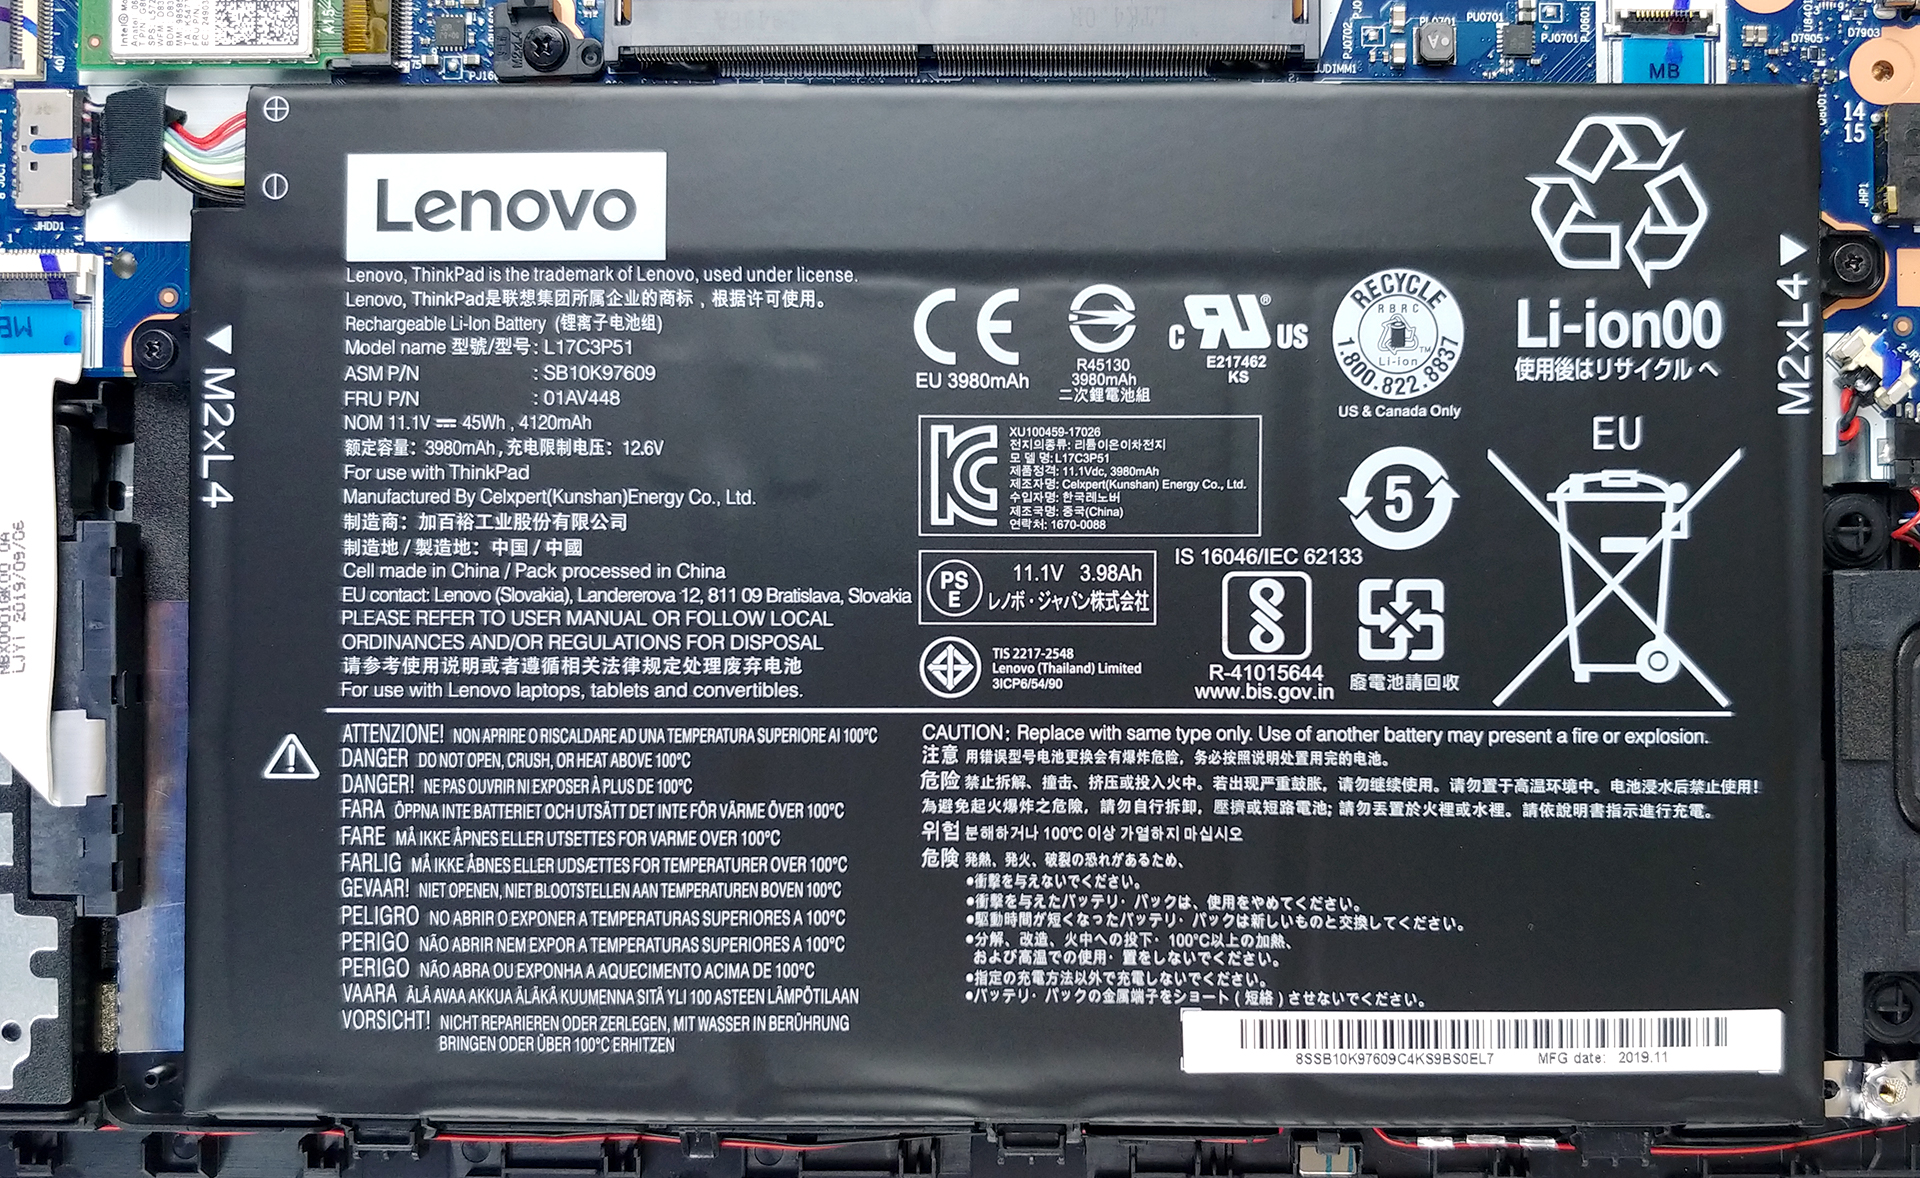
2. Battery
Last, but not least – there is the same 45Wh battery, we found on the ThinkPad E15, so we expect a slightly better battery life here.
3. Memory and storage
Upgradability-wise, there is only one RAM SODIMM slot, which supports up to 16GB of DDR4 memory, working at 2666 MHz. In terms of storage, there is a 2.5-inch SATA drive bay, as well as an M.2 slot, which supports both SATA and PCIe x4 drives – not bad for a 14-incher.
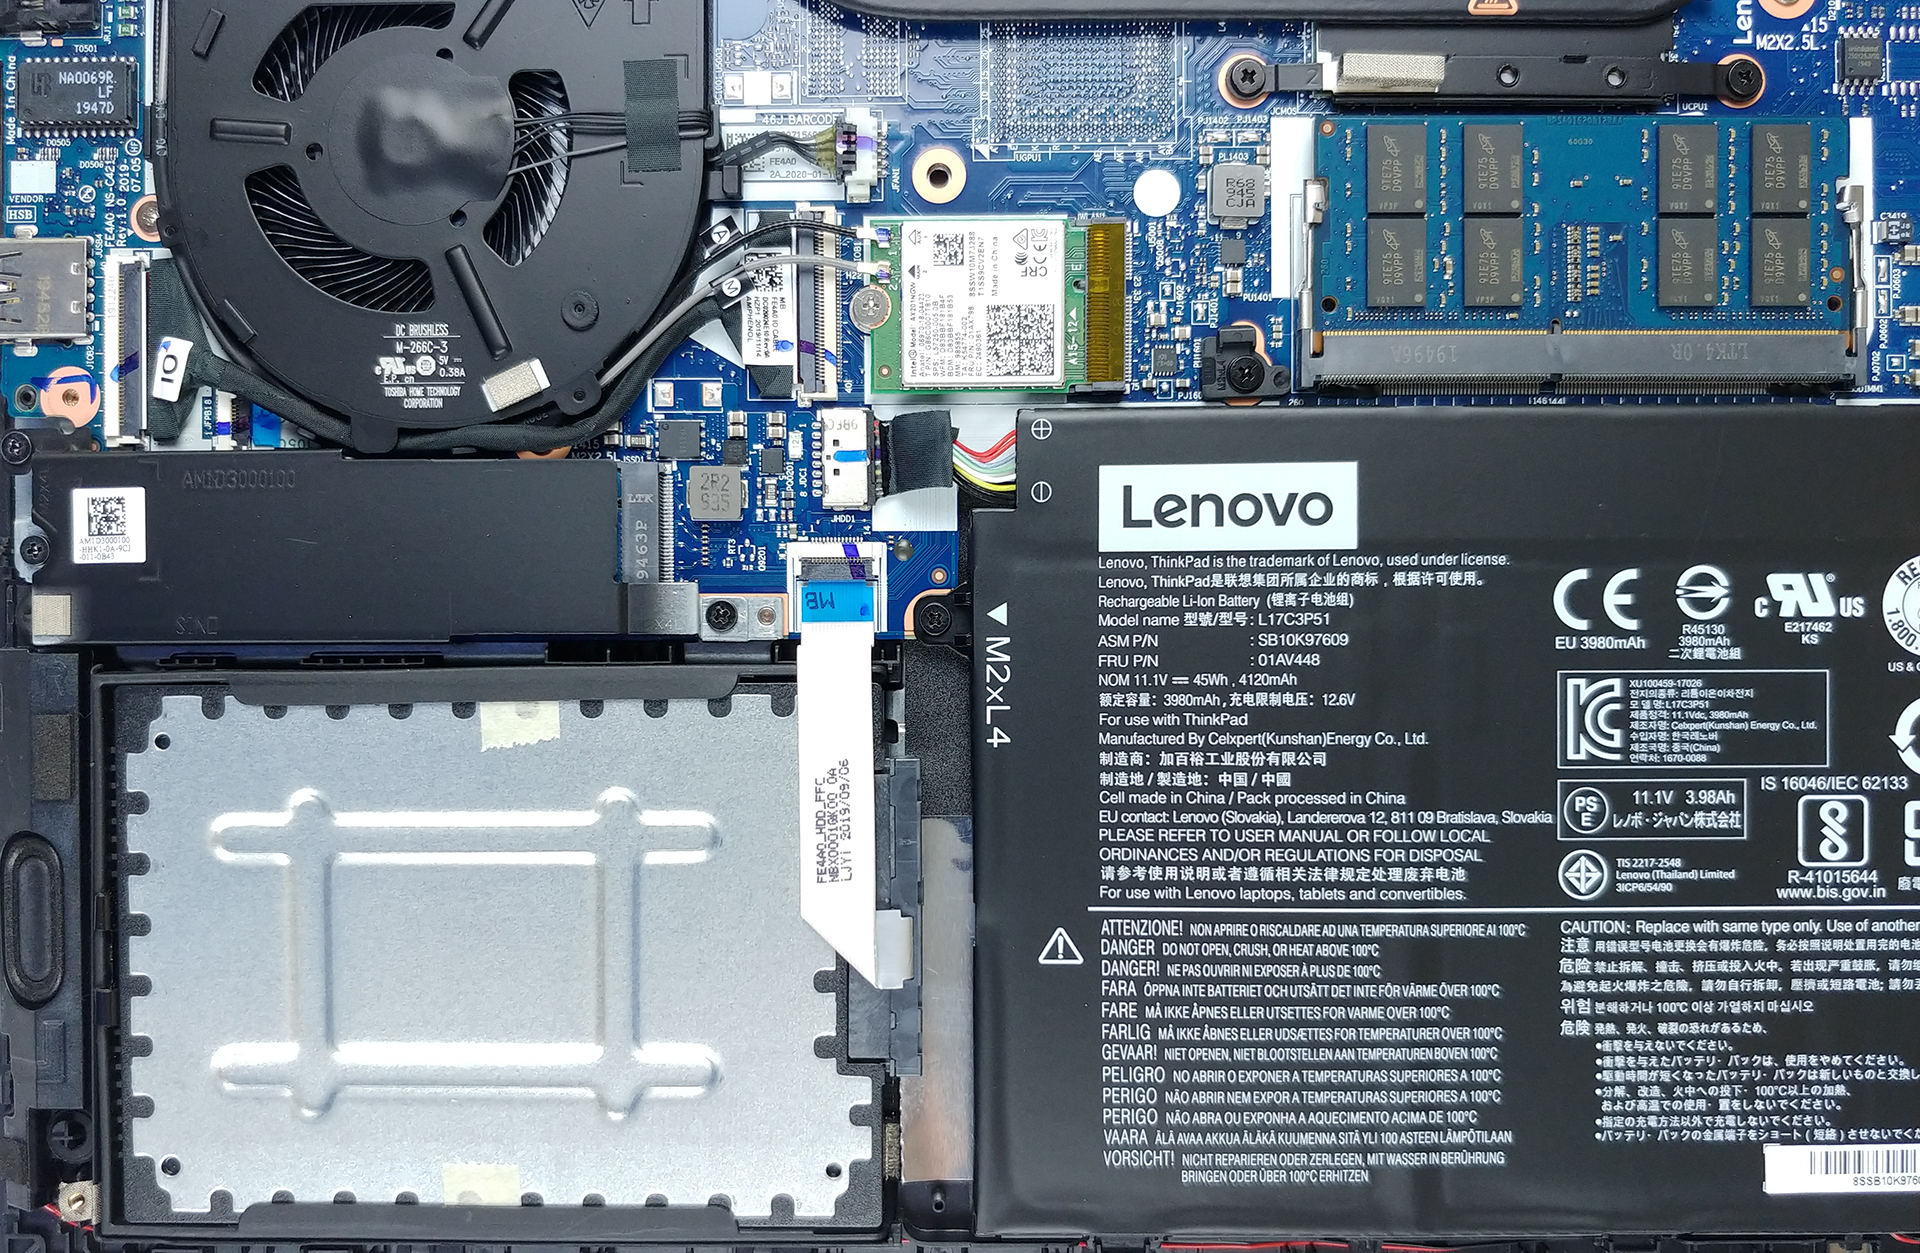
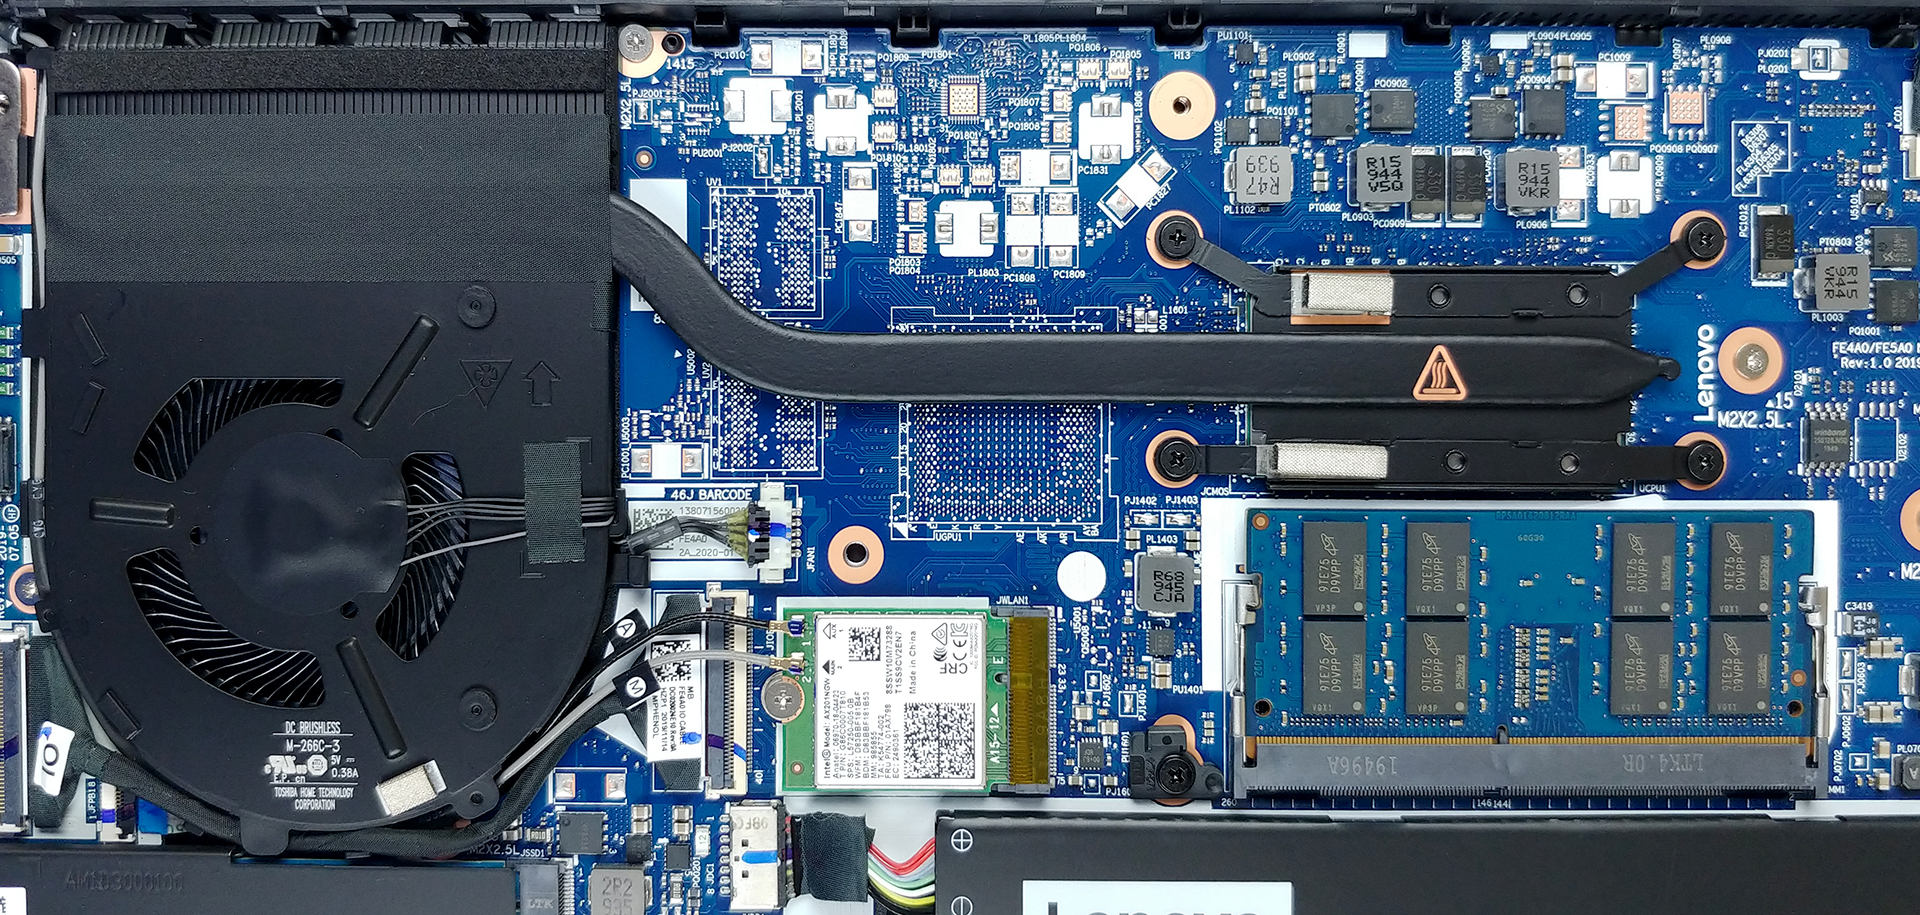
4. Cooling system
Expectedly, Lenovo wasn’t really generous with the cooling setup of this notebook. There is a single, thin heat pipe, cooling the Core i7-10510U in our case.
Check out all Lenovo ThinkPad E14 prices and configurations in our Specs System or read more in our In-Depth review.


![[June 2026] Best-Selling Laptop Brands on Amazon Global – Apple’s Unrivaled Dominance in Units and Revenue](https://laptopmedia.com/wp-content/uploads/2026/07/GLOBAL-Best-Brands-400x225.jpg)
![[June 2026] Amazon Global: Top 10 Best-Selling Laptops – Apple’s New MacBook Neo Storms to #1, Reshaping the Market with Affordability](https://laptopmedia.com/wp-content/uploads/2026/07/Best-Selling-Laptops-GLOBAL-Top-10-400x225.jpg)
![[June 2026] Amazon Global: Top 10 Best-Selling Gaming Laptops – Acer’s Nitro V 16S AI Dominates Sales, While ASUS Leads Overall Revenue](https://laptopmedia.com/wp-content/uploads/2026/07/Best-Selling-Gaming-Laptops-GLOBAL-Top-10-400x225.jpg)
![[June 2026] Global Ranking of Best-Selling Laptop GPUs on Amazon – NVIDIA RTX 5060 is the Top-Selling Dedicated GPU](https://laptopmedia.com/wp-content/uploads/2026/07/Best-Selling-GPUs-GLOBAL-Top-10-400x225.jpg)
![[June 2026] Global Ranking of Best-Selling Laptop CPUs on Amazon – Apple M5 Dominates, AMD Ryzen 7 260 Gets Solid Premium Share](https://laptopmedia.com/wp-content/uploads/2026/07/Best-Selling-CPUs-GLOBAL-Top-10-400x225.jpg)

Can i put the hdd on this laptop?