Inside MSI GF65 Thin 10Sx – disassembly and upgrade options
MSI is usually doing a very good job, providing its notebooks with options for upgrades. Take a look.
Check out all MSI GF65 Thin 10Sx prices and configurations in our Specs System or read more in our In-Depth review.


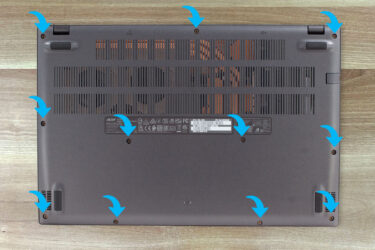
1. Remove the bottom plate
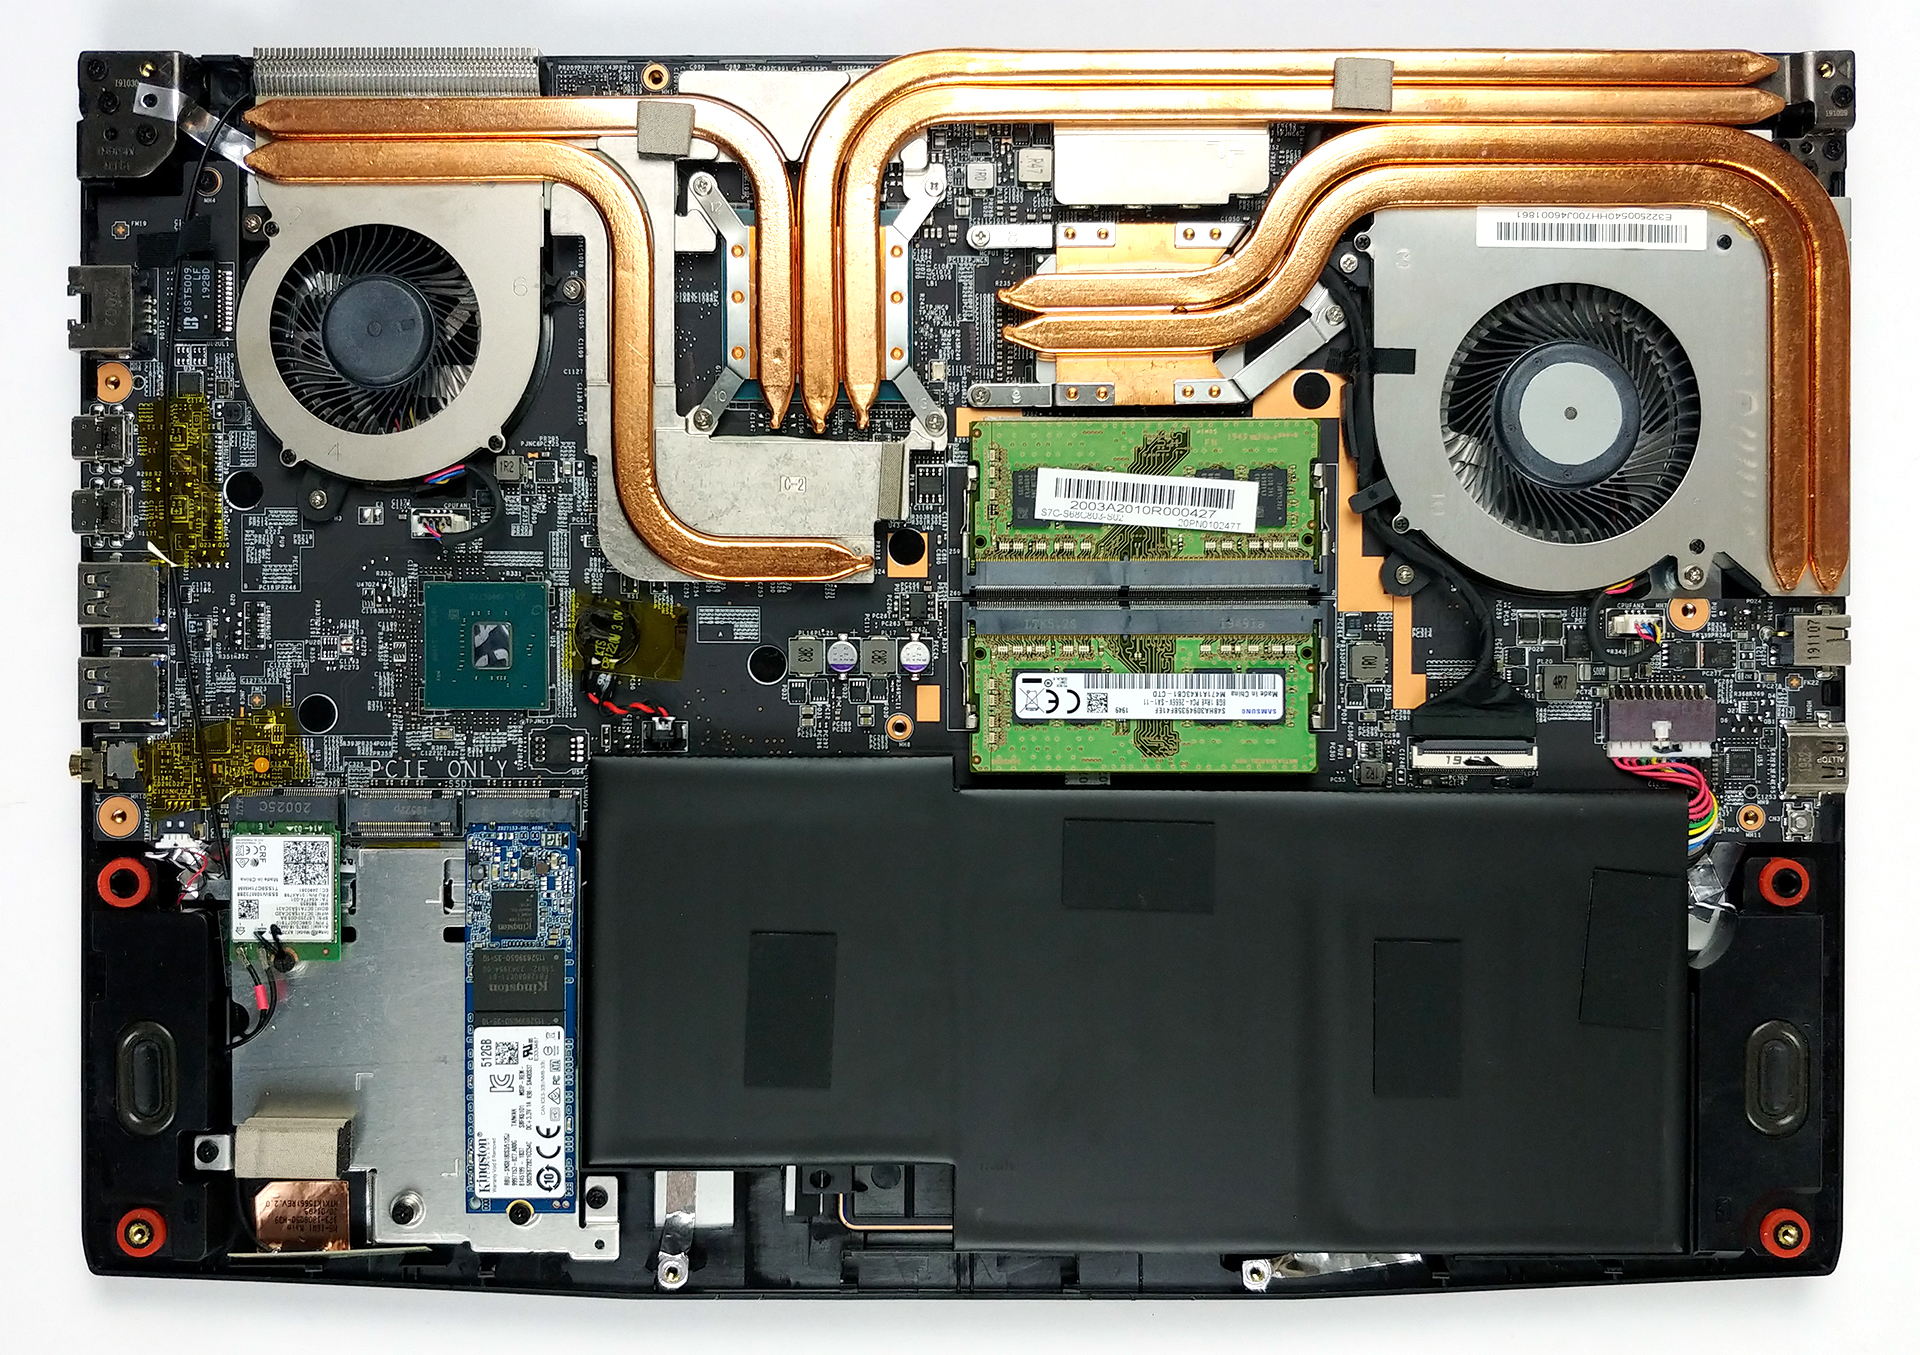
In order to get inside of this notebook, you need to undo 12 Phillips-head screws. Afterwards, you have to pry the bottom panel with a plastic tool. You can start from the front, and work away around the device, leaving the left side for the end.
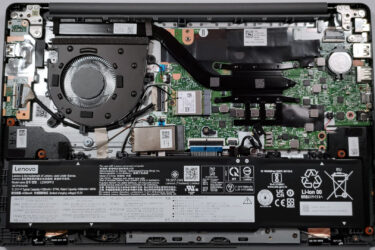
2. Battery
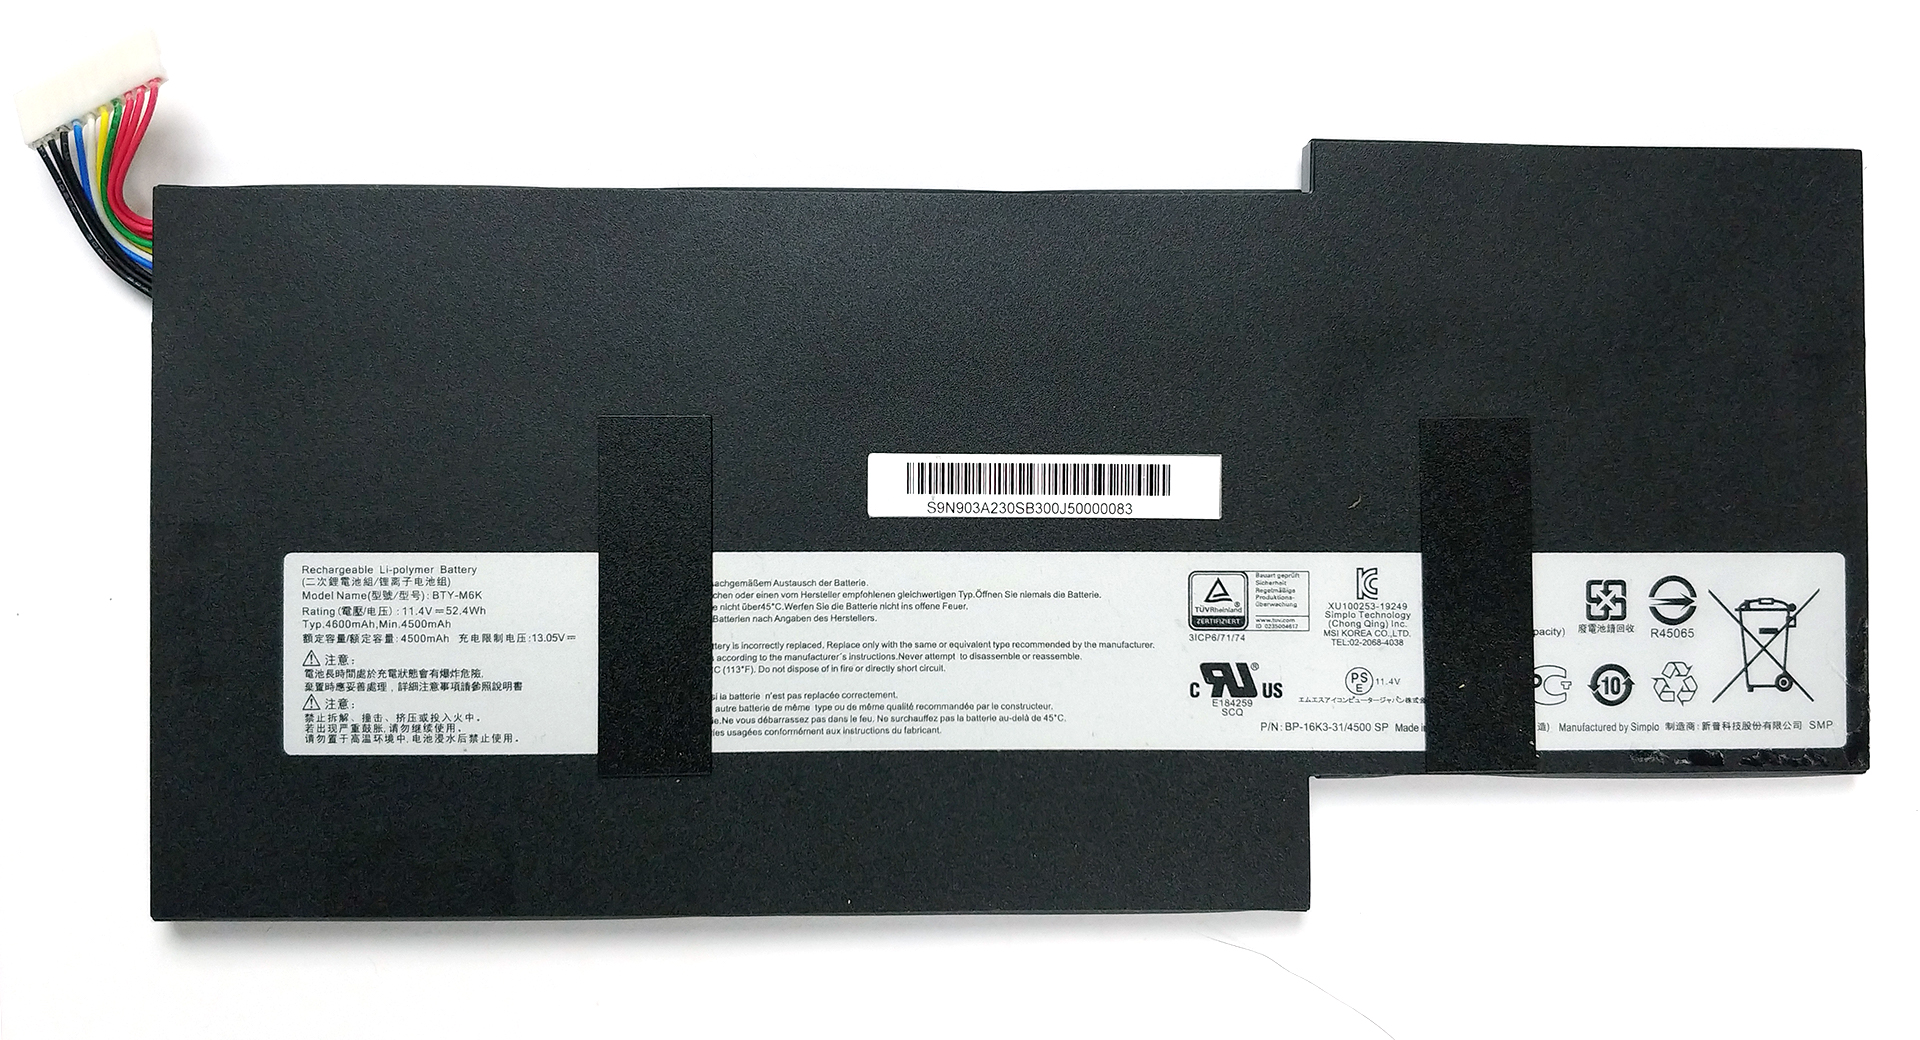
First things first – there is the 52Wh battery pack, which is glued to the chassis. Thankfully, the glue is more like double-sided tape, and taking off the unit is not very difficult, whatsoever.
3. Memory and storage
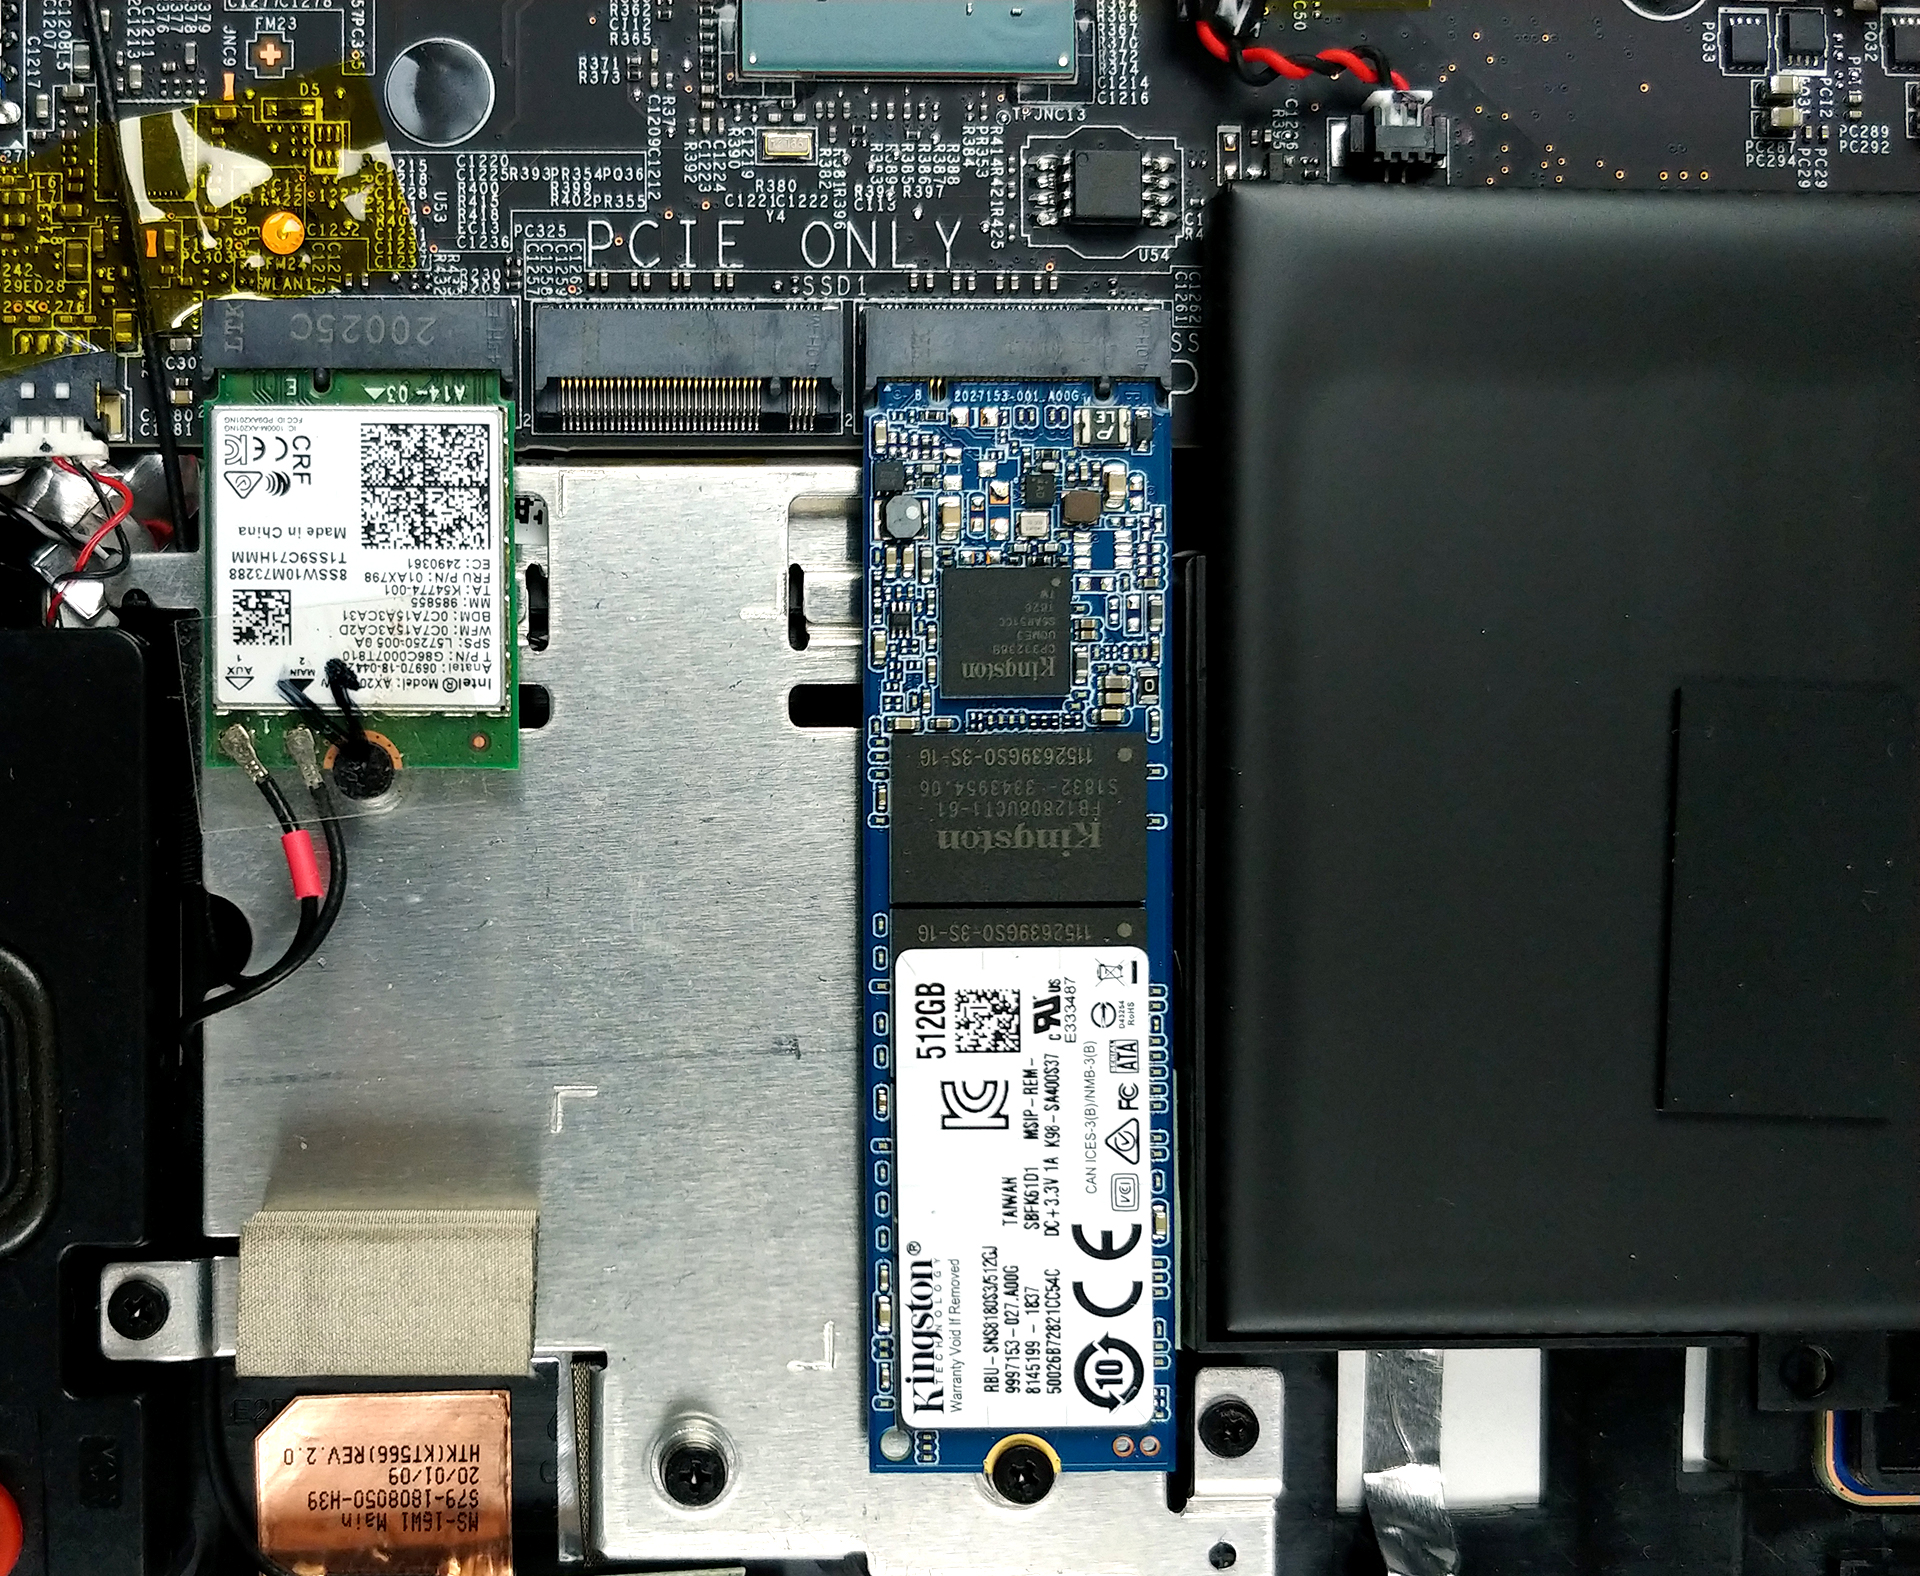
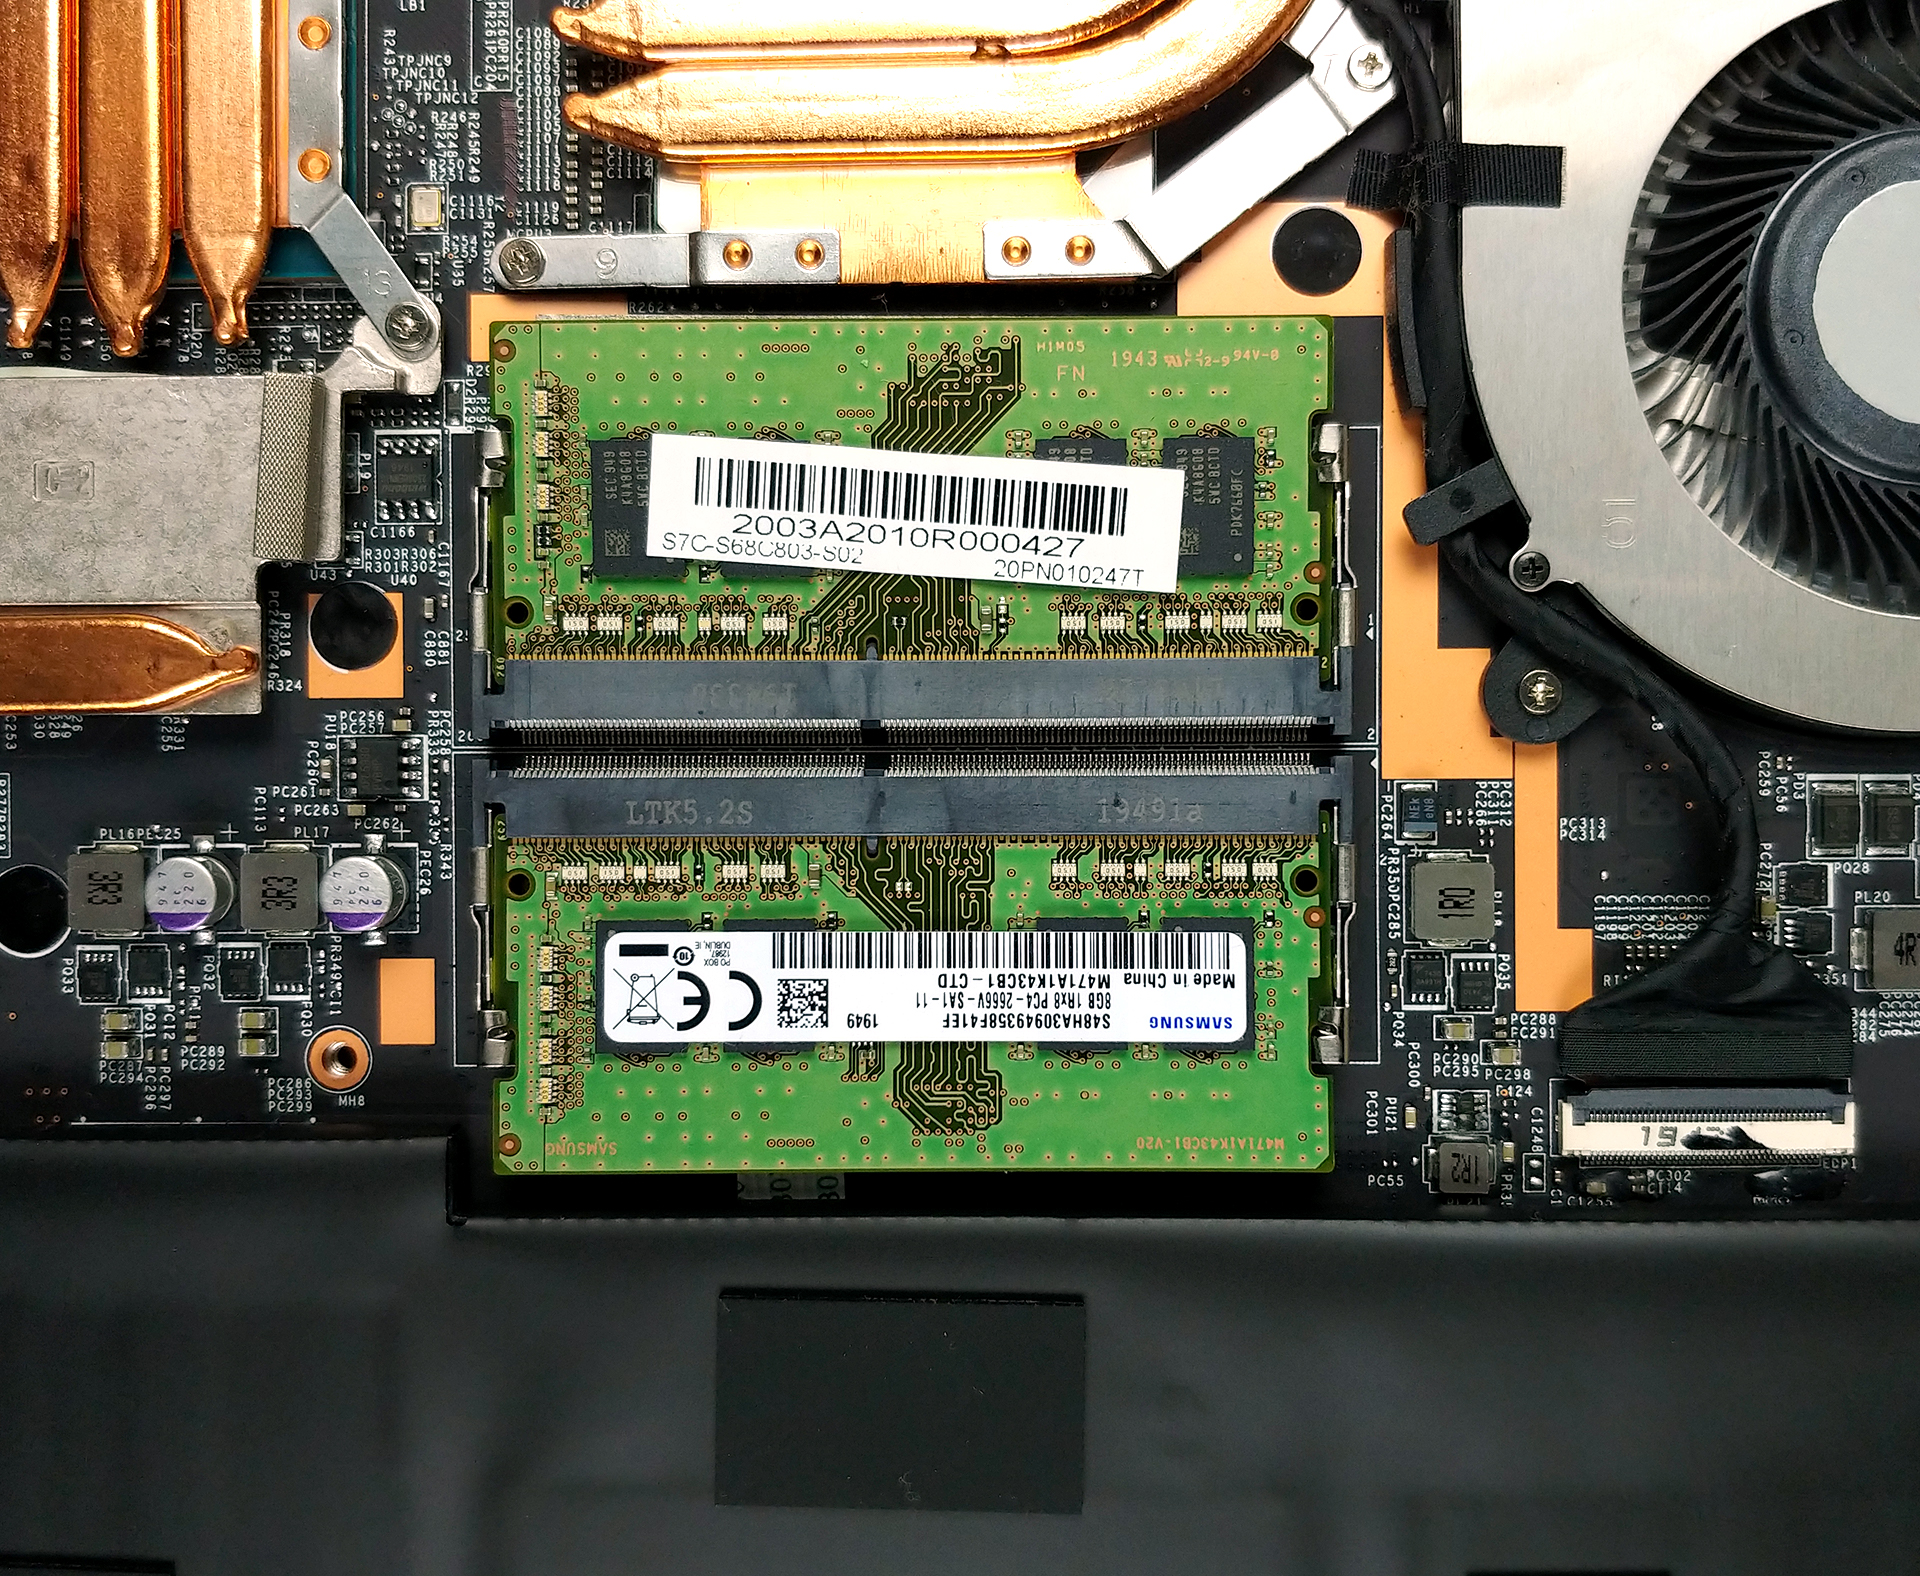
In terms of upgrades, you can put up to 64GB of DDR4 memory in total in dual-channel mode. Storage-wise, there are two M.2 drive slots. One of them can hold PCIe drives only, while the other can utilize both PCIe and SATA drives.
4. Cooling system
As usual, MSI likes to show off its heat pipes, so they left them in the natural copper color. Here, you can see two heat pipes cooling the CPU alone, and three dedicated to the GPU. There is an additional one for the graphics memory, while two of the GPU heat pipes are passing through the VRMs.

Check out all MSI GF65 Thin 10Sx prices and configurations in our Specs System or read more in our In-Depth review.


which one can have a sata drive
The one that is not in use.
are you sure its not the one, the disc is in?
can i add hdd?
No,just SSD.
Would I be able to upgrade the battery?
Can you upgrade the gpu in this computer
How will I put the sata ssd? the available slot is still for pcie form factor
can i add nvme ?
can you upgrade the cpu?