How to open Lenovo ThinkPad P1 Gen 6 – disassembly and upgrade options
Step 1: Accessing the Internal Components
- Power off the Lenovo ThinkPad P1 Gen 6 and place it on a soft, clean surface to avoid damage.
- Undo the 7 captive Phillips-head screws on the back of the laptop. These screws remain attached to the bottom panel, reducing the risk of loss.
- Use a pry tool to gently lift the bottom panel, starting from the top corners or the zone behind the hinge, to expose the internal components.
Hint: Proceed with care to avoid damaging the clips or the laptop casing.
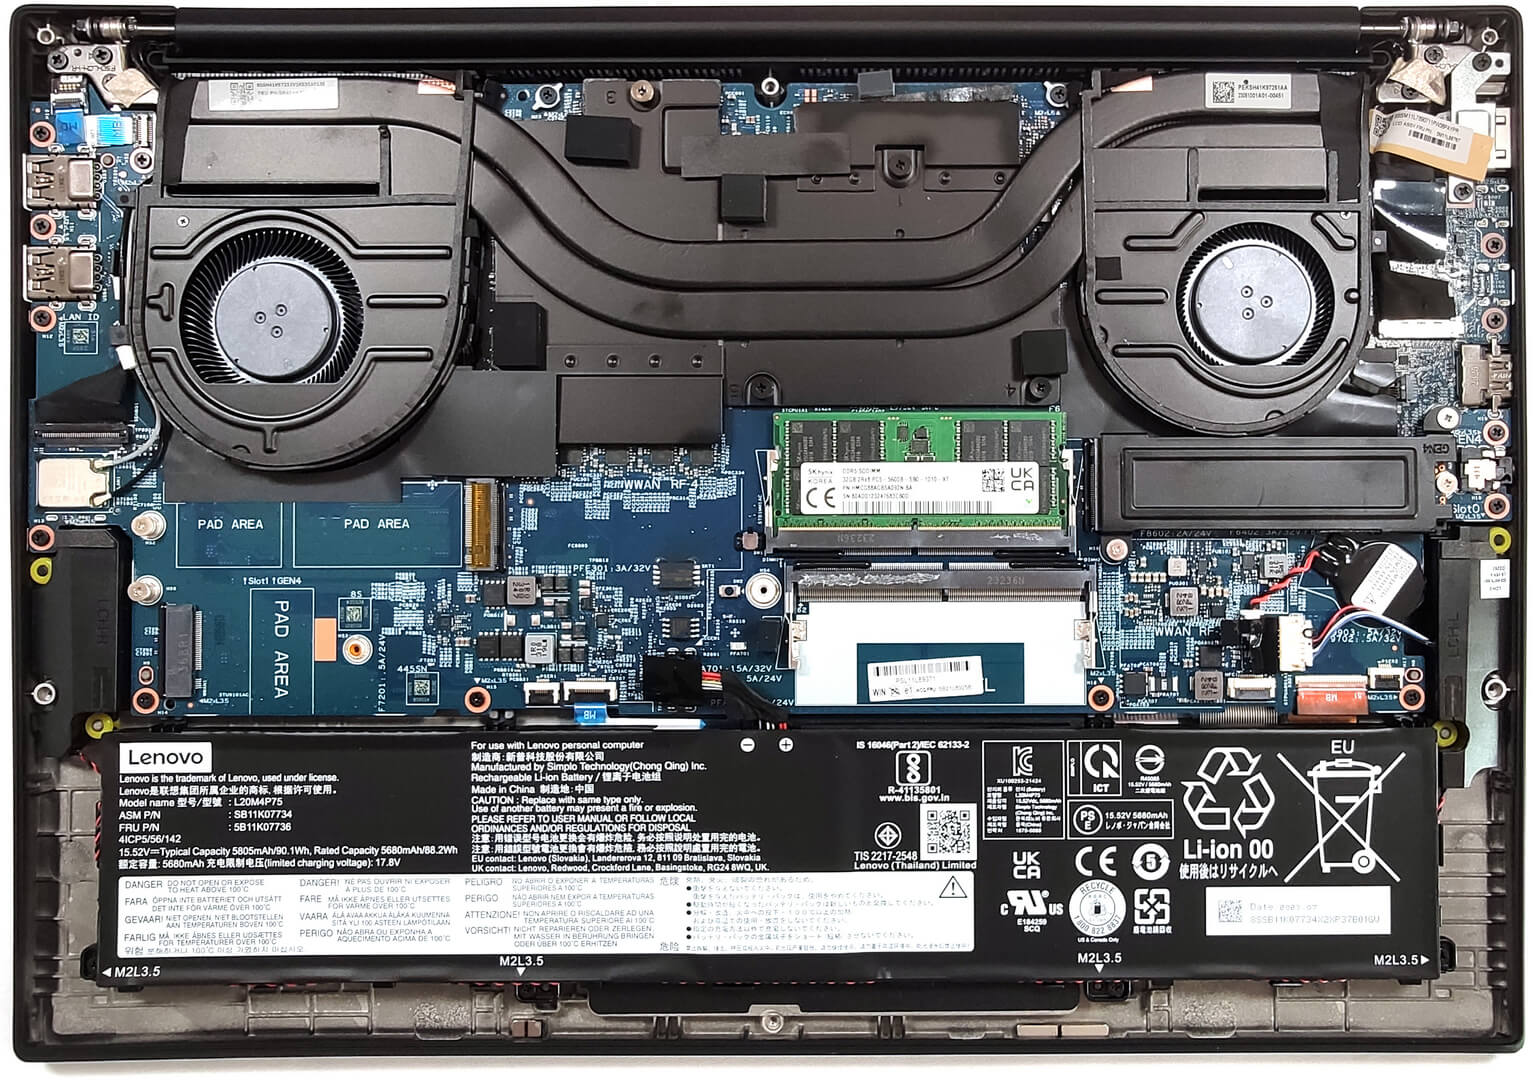
Step 2: Removing the Battery
- Disconnect the battery by pulling out its connector from the motherboard.
- Remove the 4 Phillips-head screws securing the battery to the laptop’s chassis.
- Carefully untangle the speaker cables from around the battery housing before removing the battery.
Caution: Be gentle when handling the battery and its connector to avoid any damage.
More info: The 90.1Wh battery provides up to 14 hours and 17 minutes of web browsing, or 10 hours of video playback. To maximize battery life, enable “Hybrid Graphics” mode in the BIOS for iGPU use away from the charger.

Memory Upgrades
- Identify the two SODIMM slots available for memory upgrades.
- These slots support up to 96GB of DDR5-5600MHz RAM, allowing for dual-channel configuration for enhanced performance.
Hint: Ensure compatibility of the memory modules to utilize the full potential of dual-channel mode.
You can buy DDR5 RAM modules here: Buy from Amazon.com (#CommissionsEarned)
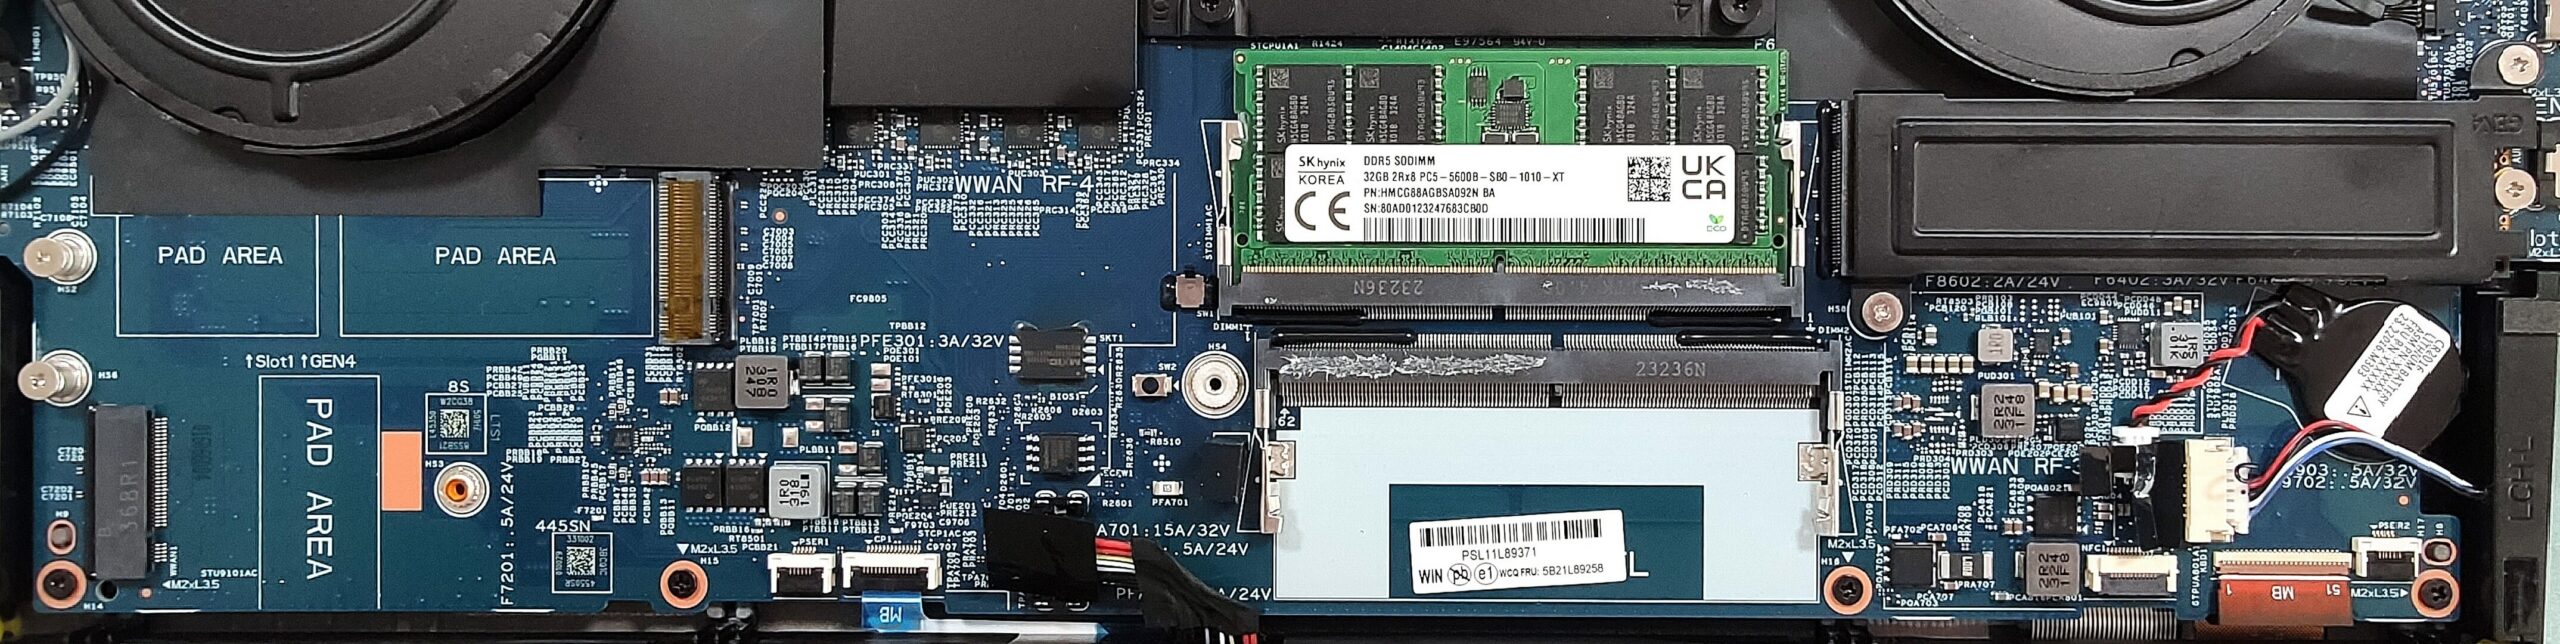
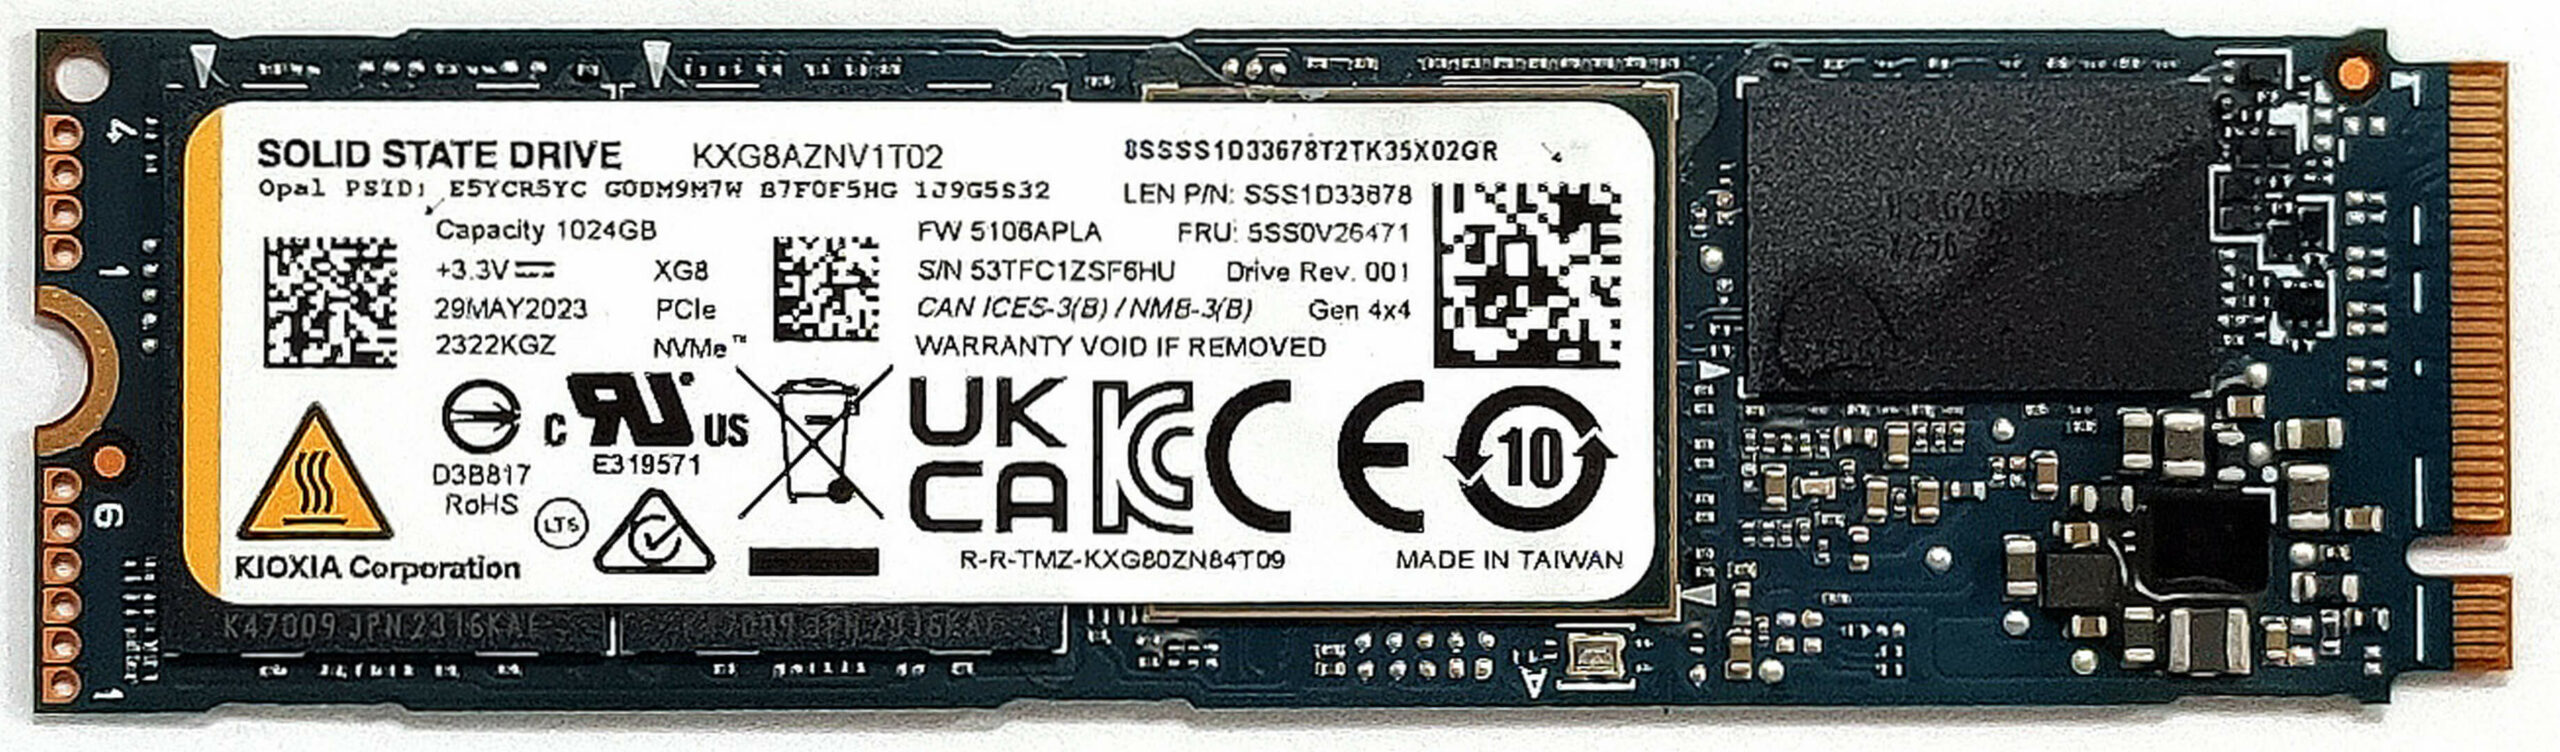
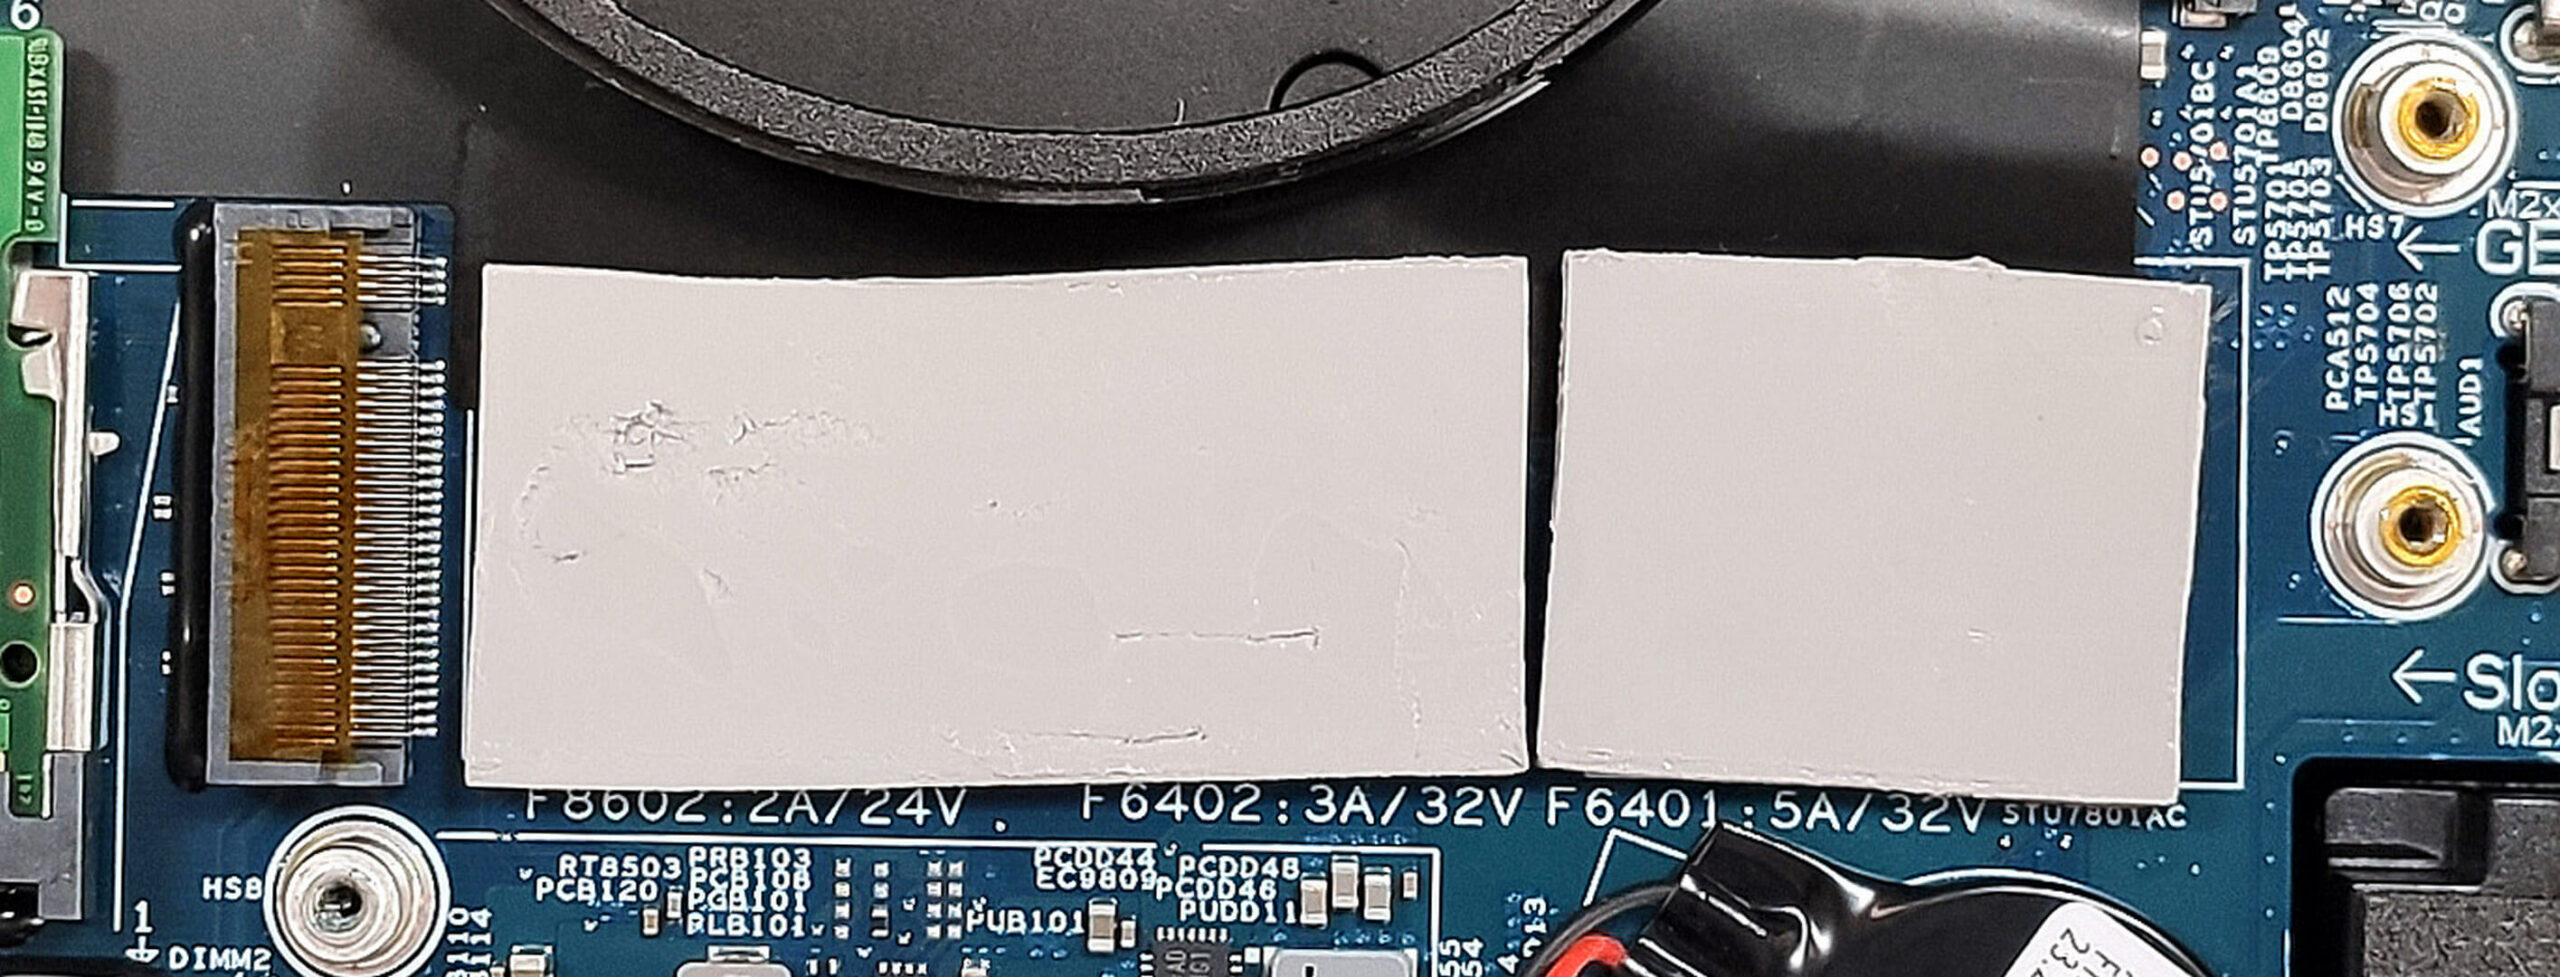
Storage Upgrades
- Locate the M.2 slot(s) for SSD upgrades. Models with NVIDIA RTX A1000 or RTX 2000 Ada Generation GPUs feature two Gen 4 M.2 slots supporting RAID 0 and 1, whereas more powerful GPU models have a single Gen 4 M.2 slot.
- Check for the presence of a WWAN slot above the battery for optional LTE connectivity, offering additional expansion possibilities.
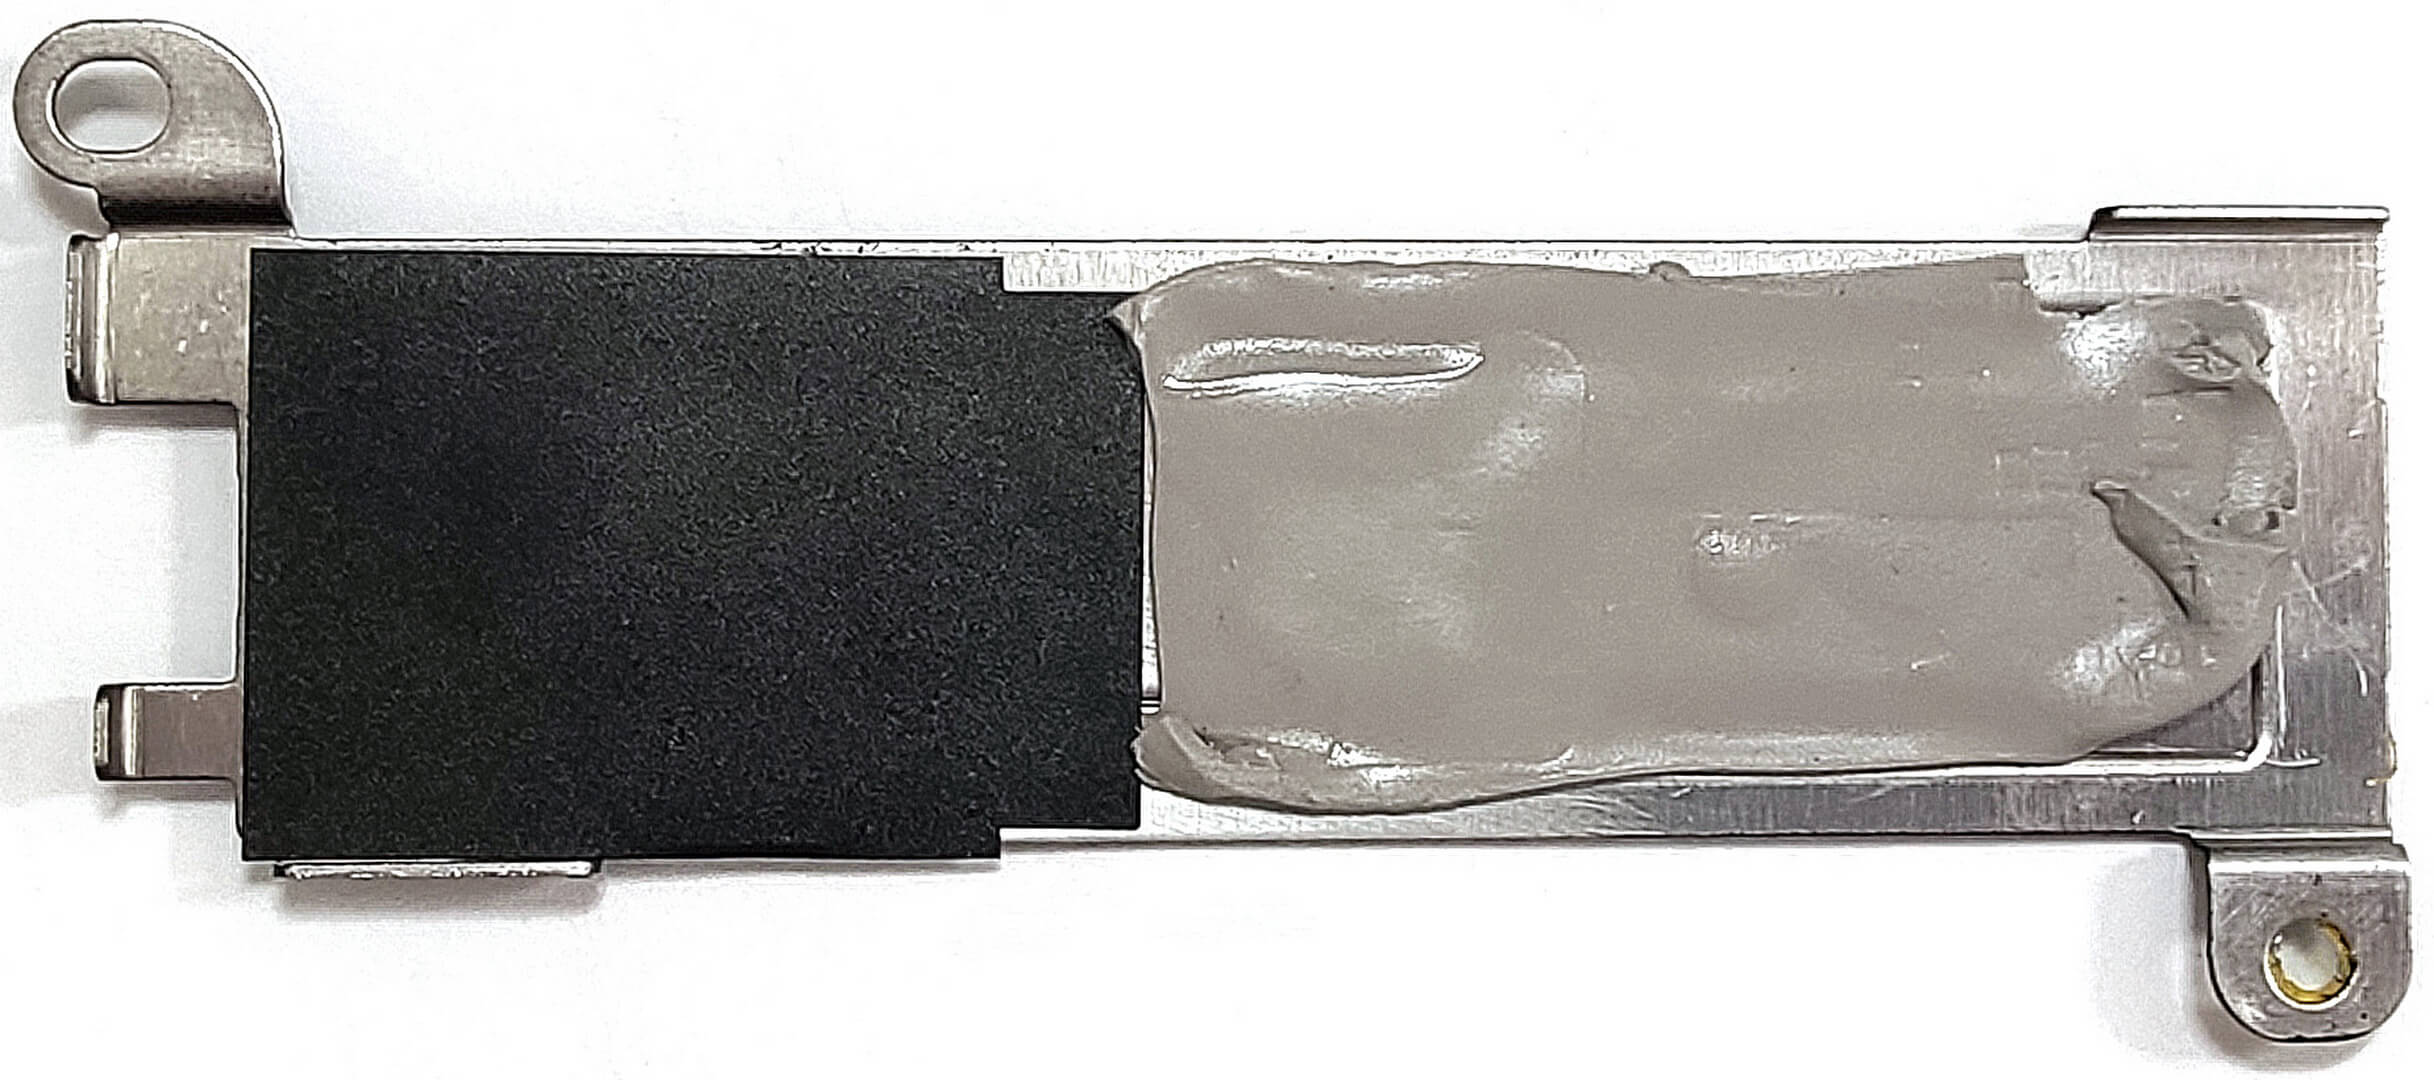
- Ensure the preinstalled NVMe SSD is properly cooled with a metal plate that includes a thermal pad on the inside, alongside two more cooling pads beneath the SSD.
You can buy Gen 4 M.2 SSD modules here: Buy from Amazon.com (#CommissionsEarned)
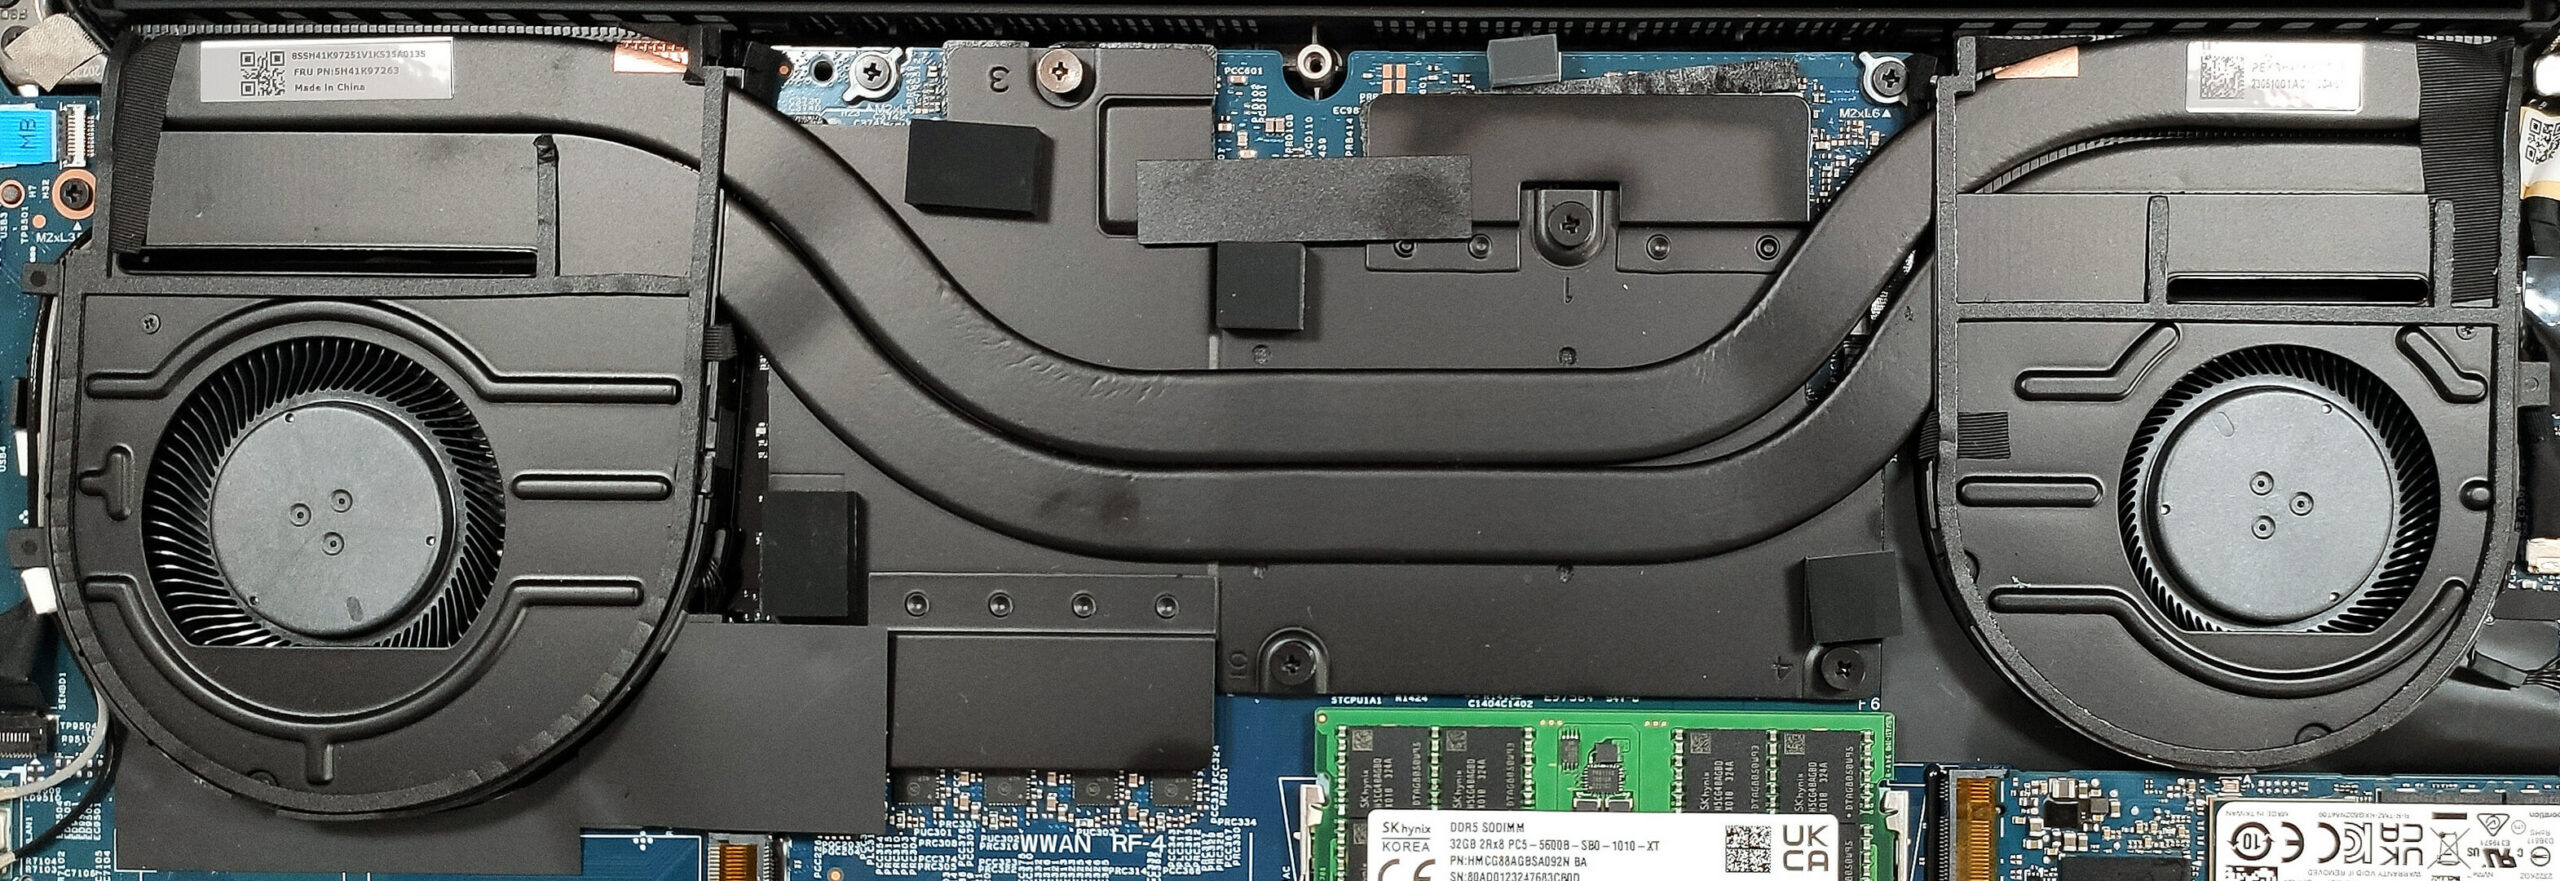
Step 3: Examining the Cooling System
- Inspect the cooling system, which includes two fans, two thick heat pipes shared between the CPU and GPU, a pair of heat sinks, and two large heat spreaders.
More info: This robust cooling solution is designed to efficiently dissipate heat, ensuring the laptop maintains optimal performance even under heavy loads.