How to open Dell Pro Max 16 (MC16250) – disassembly and upgrade options
Before you start: Shut the laptop down completely, disconnect the charger and all peripherals, and hold the power button for a few seconds to discharge residual power. Work on a clean, non-conductive surface and, if possible, use an anti-static wrist strap.
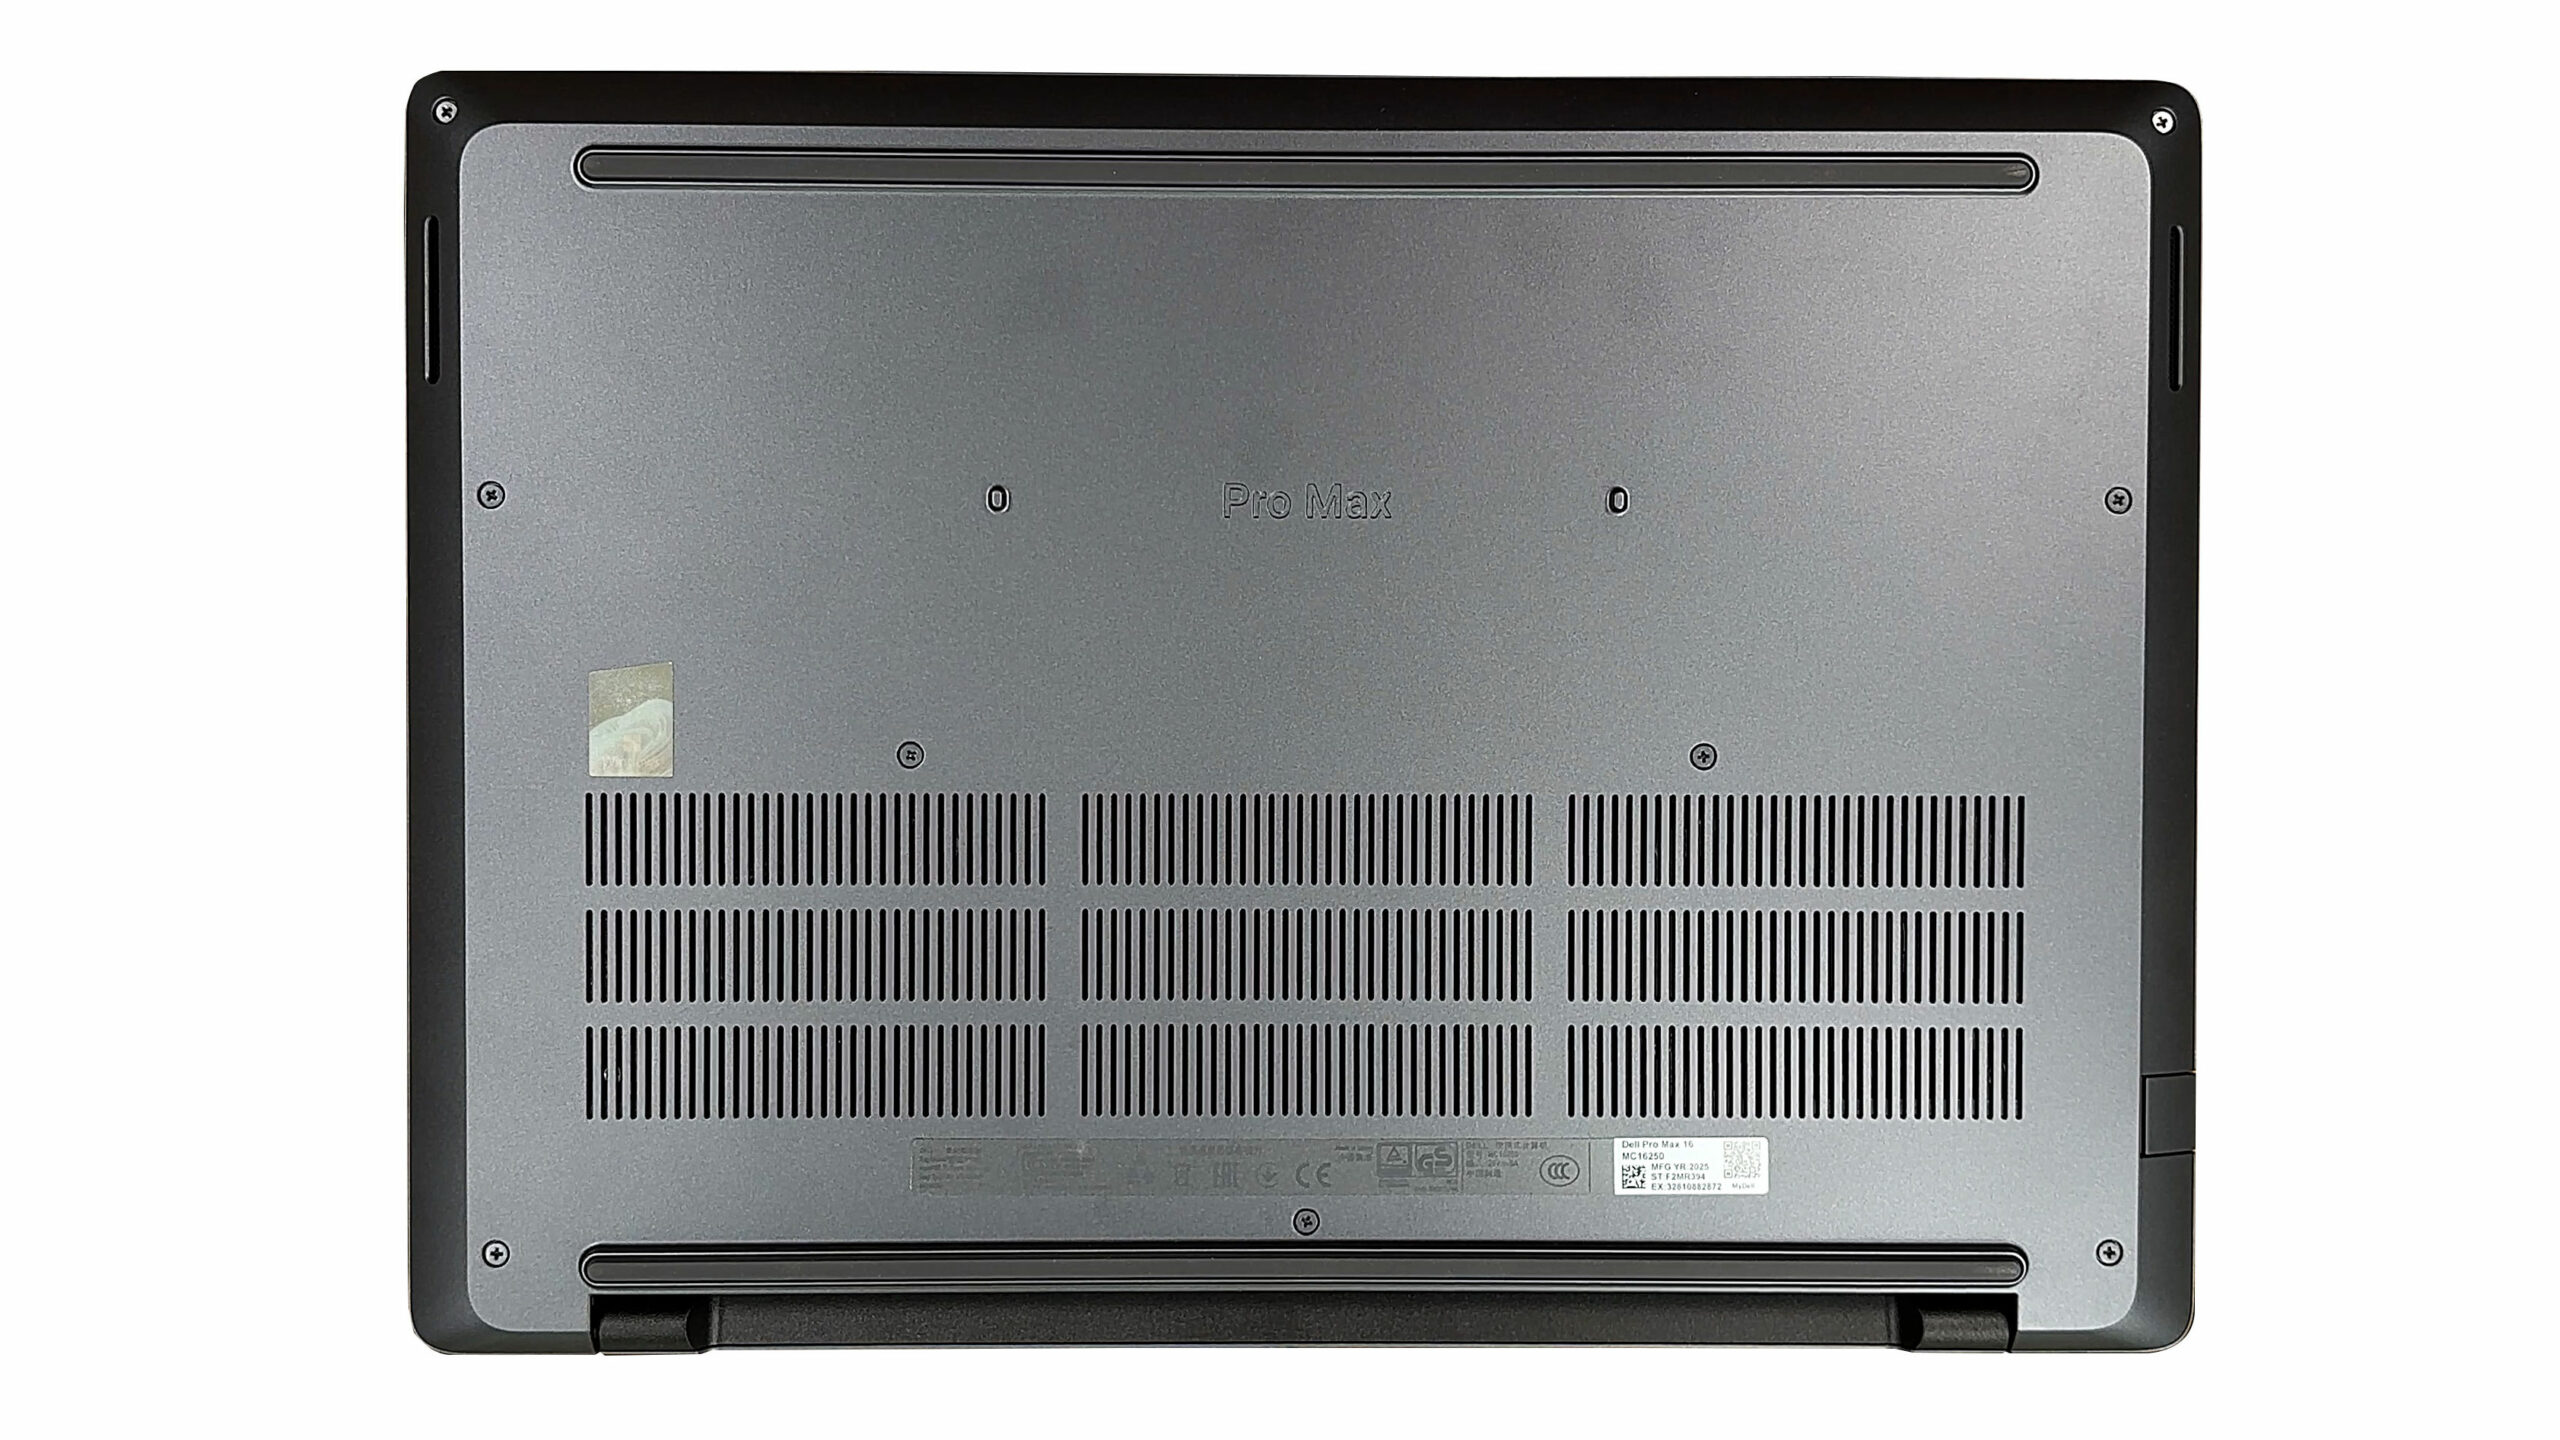
Opening the bottom panel
- Place the laptop upside down with the rear vents facing away from you.
- Undo the nine captive Phillips-head screws that secure the bottom panel. They will remain attached to the cover, so just make sure each one is fully loosened.
- Insert a thin plastic pry tool between the chassis and the bottom plate near one of the side edges.
- Gently twist the tool to release the first clip, then work your way around the perimeter, popping the line of sturdy clips on the sides and front.
- Finish at the hinge side; once all clips are released, lift the bottom panel away and set it aside.
Caution: Avoid metal tools and don’t bend the aluminum panel excessively—stiff clips can deform the cover if you force it.
Battery removal and replacement
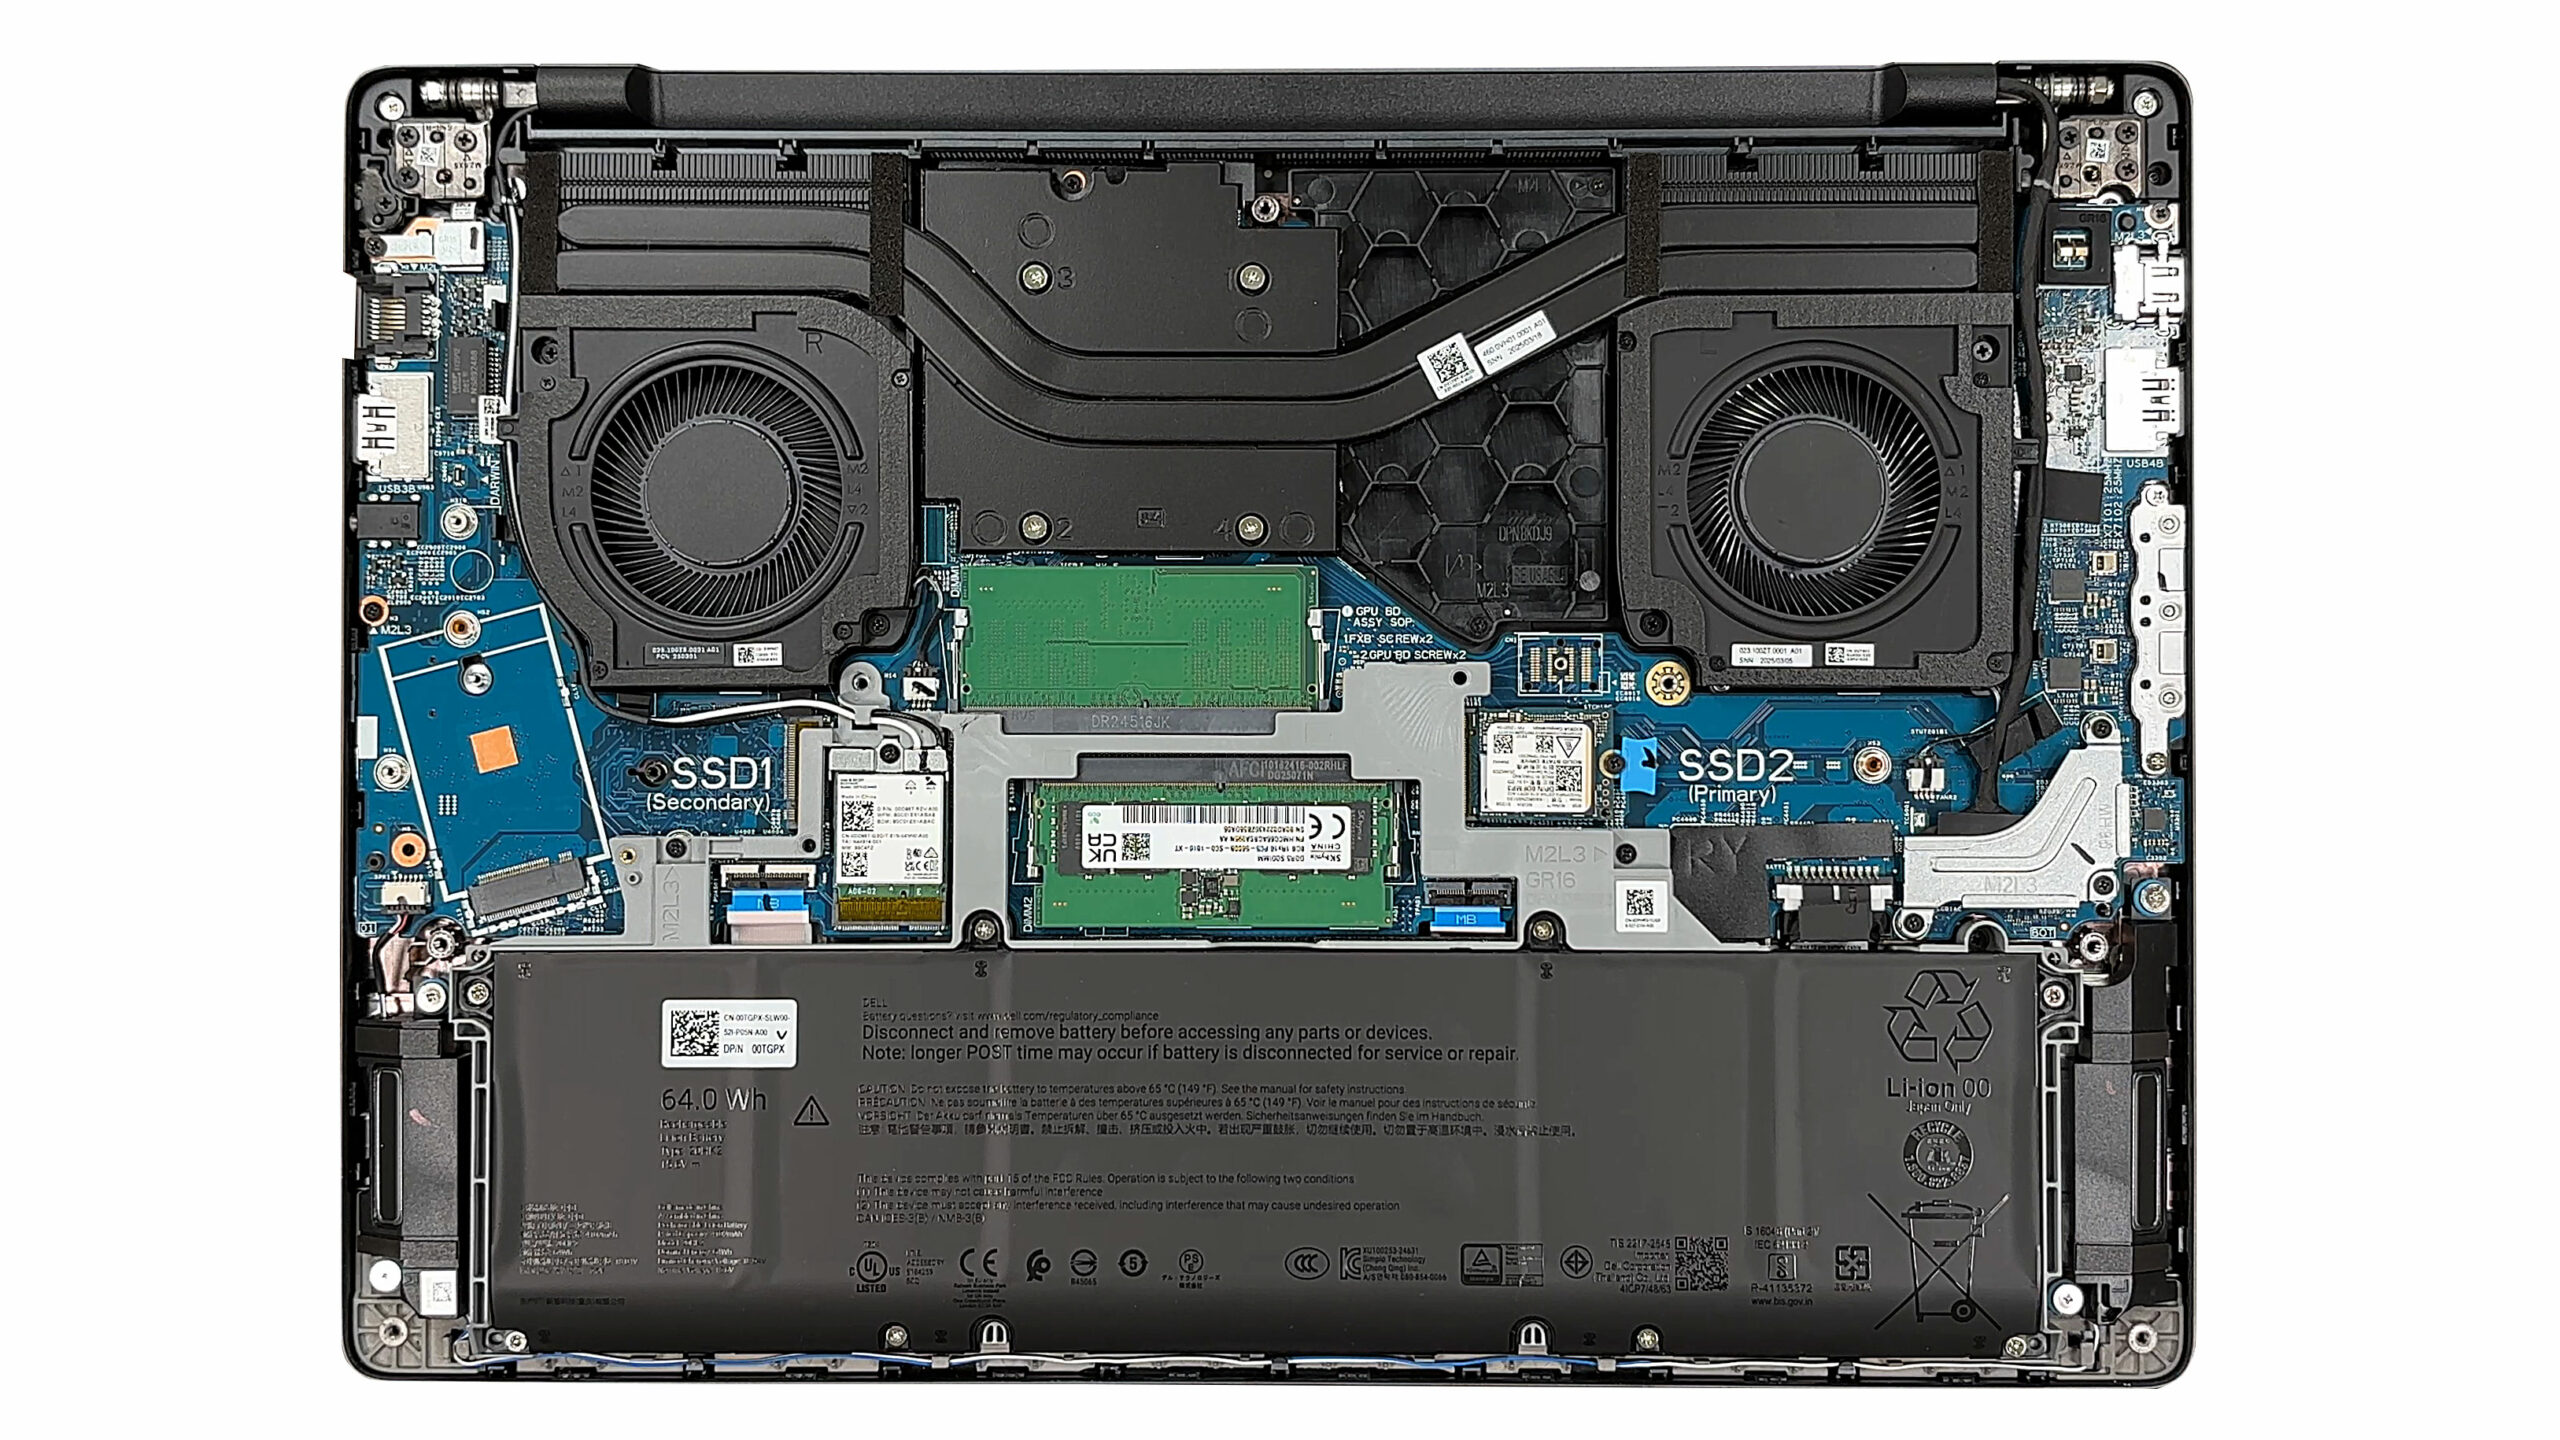
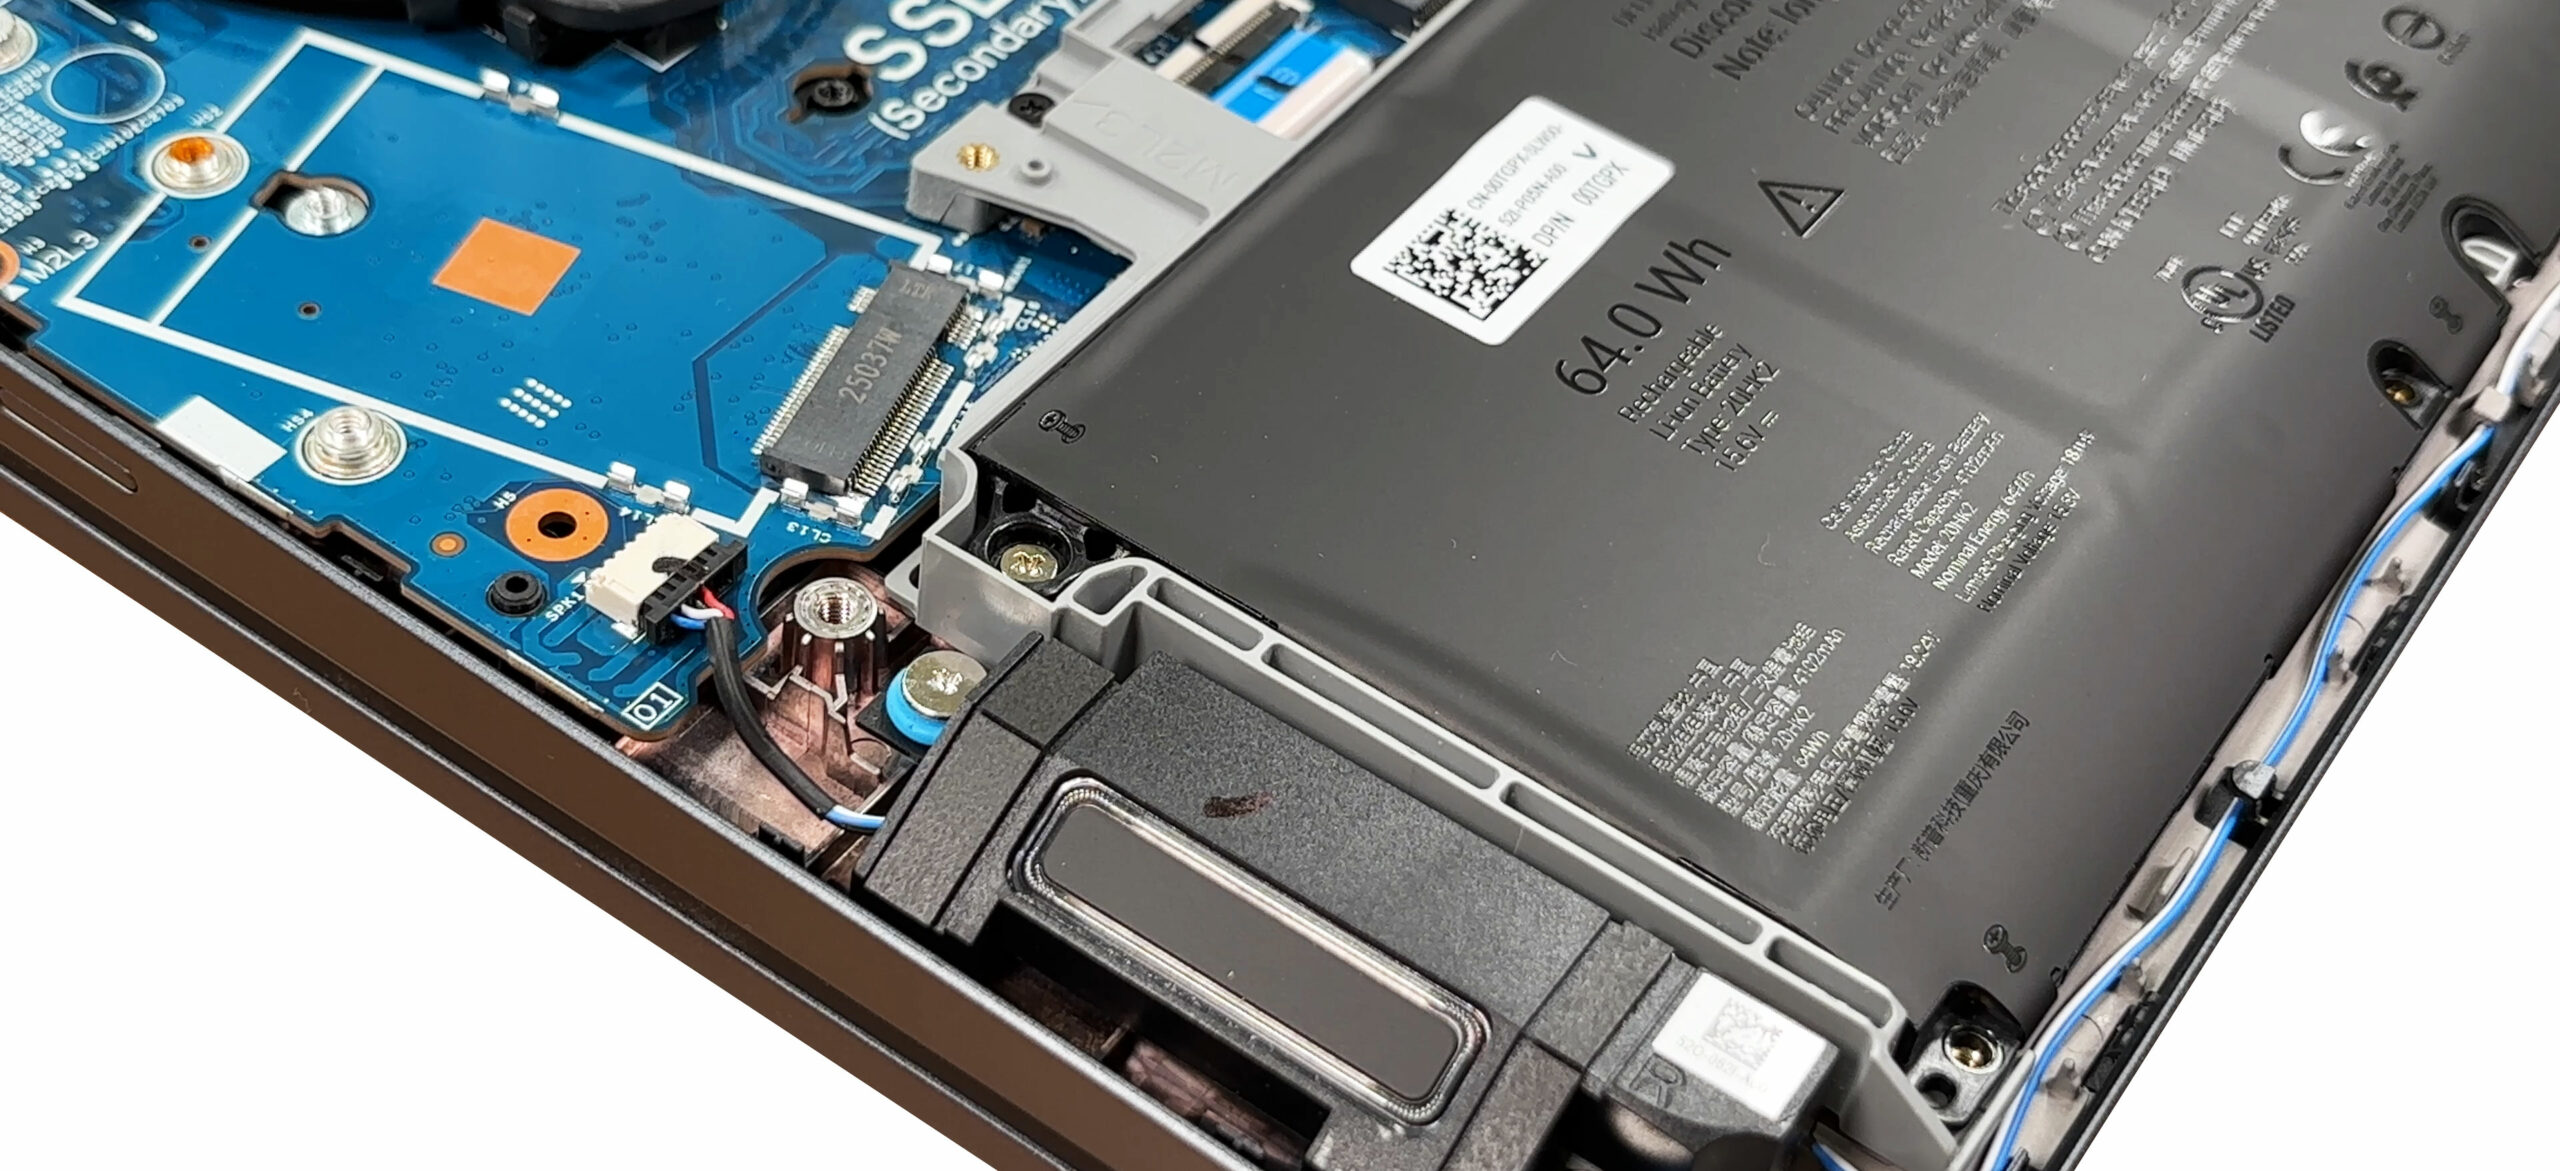
- Inside, locate the slender battery pack spanning the palm-rest area at the bottom of the chassis.
- Identify the battery connector near the center. Grip the plastic housing and pull it straight up (vertical pull) to disconnect it from the motherboard.
- Undo the eight screws that secure the battery to the chassis and keep track of their positions.
- Lift the battery out of its bay, taking care not to snag any nearby speaker or antenna cables.
- When installing a replacement, position the new pack flat in the tray, reinstall all screws, and firmly reconnect the battery cable so it sits fully seated in the socket.
More info on battery options: The standard pack is a 64Wh Li-ion unit. Dell also offers a 96Wh option that uses the same footprint but is thicker, so always verify the exact part number and physical clearance before ordering an upgrade.
Memory (RAM) upgrade options
- The system memory is located under a silver retention shield in the center of the motherboard.
- Carefully lift or unclip the shield to expose the two DDR5 SO-DIMM slots.
- The factory configuration in our unit uses 2×8GB SK hynix modules rated at DDR5-6400.
- According to Dell, you can install up to 2×32GB modules, for a total of 64GB in dual-channel mode.
- To remove a module, push the two side clips outward; the SO-DIMM will spring up at an angle. Slide it straight out of the slot.
- To install new RAM, insert the module at the same angle, ensuring the notch matches the key in the slot, then press it down until both clips snap into place.
- Reinstall the metal shield so it sits flat and doesn’t press unevenly on the modules.
You can buy DDR5 RAM modules here: Buy from Amazon.com.au (#CommissionsEarned)
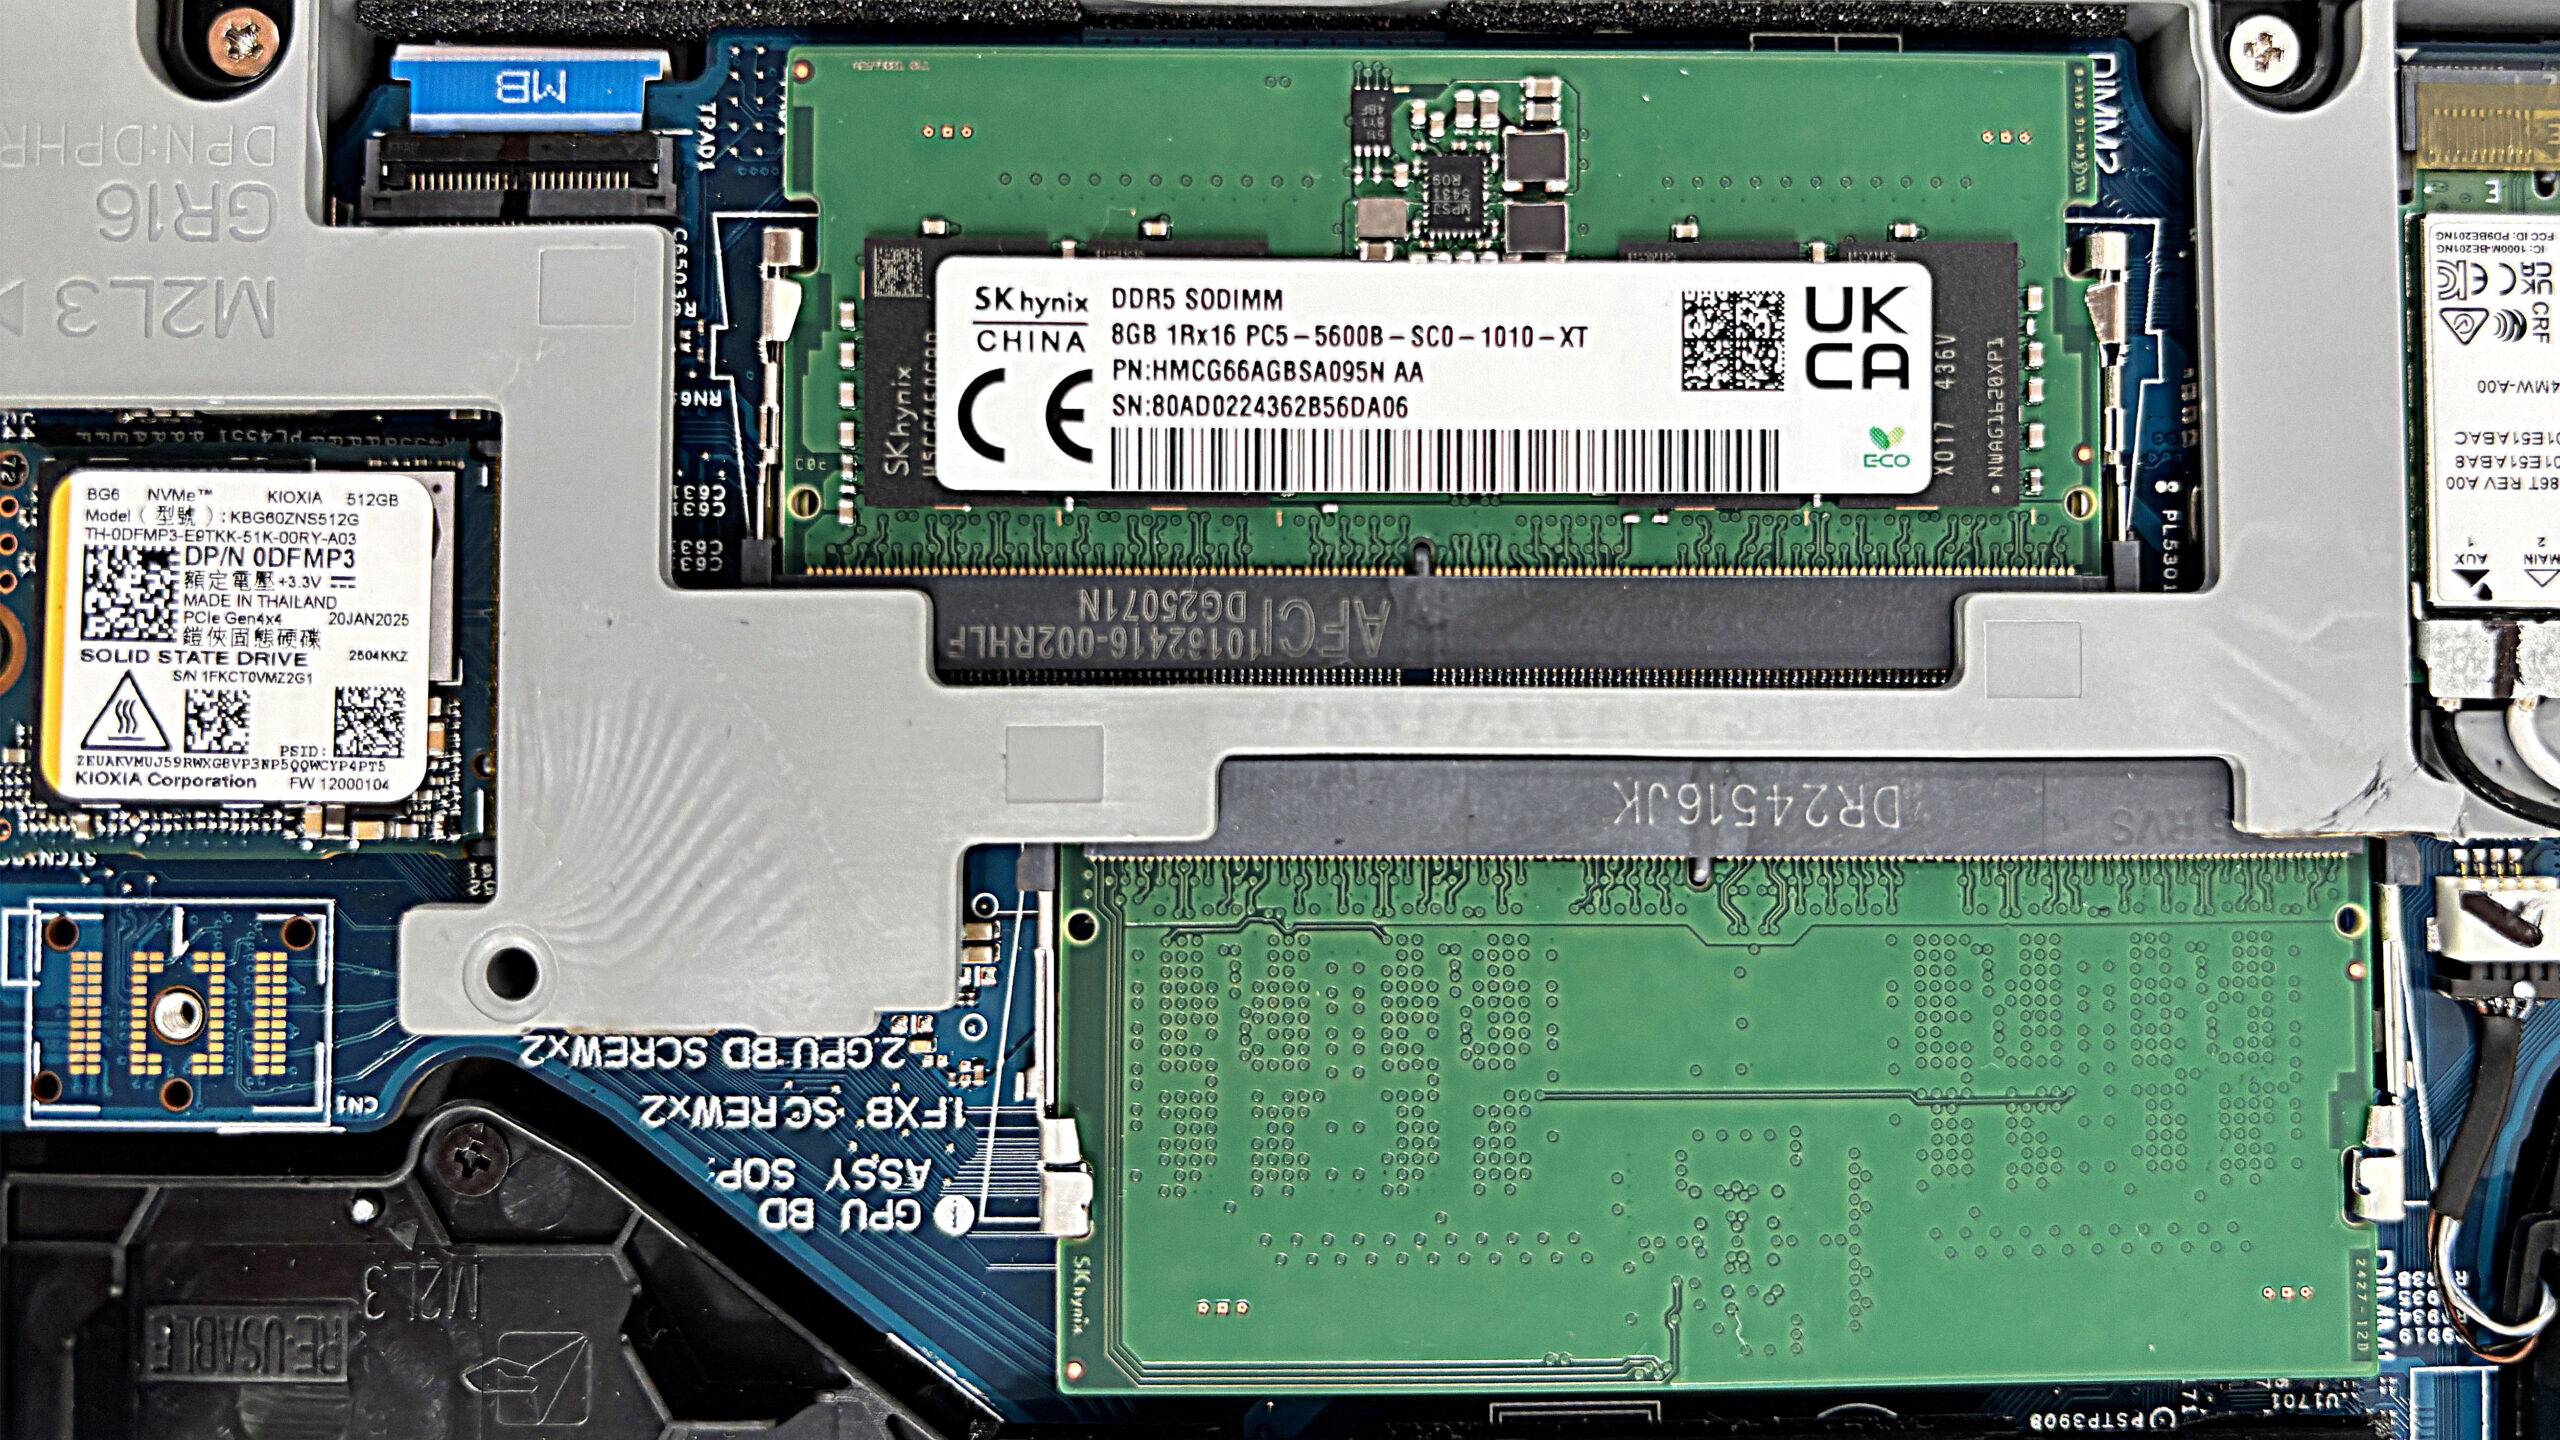
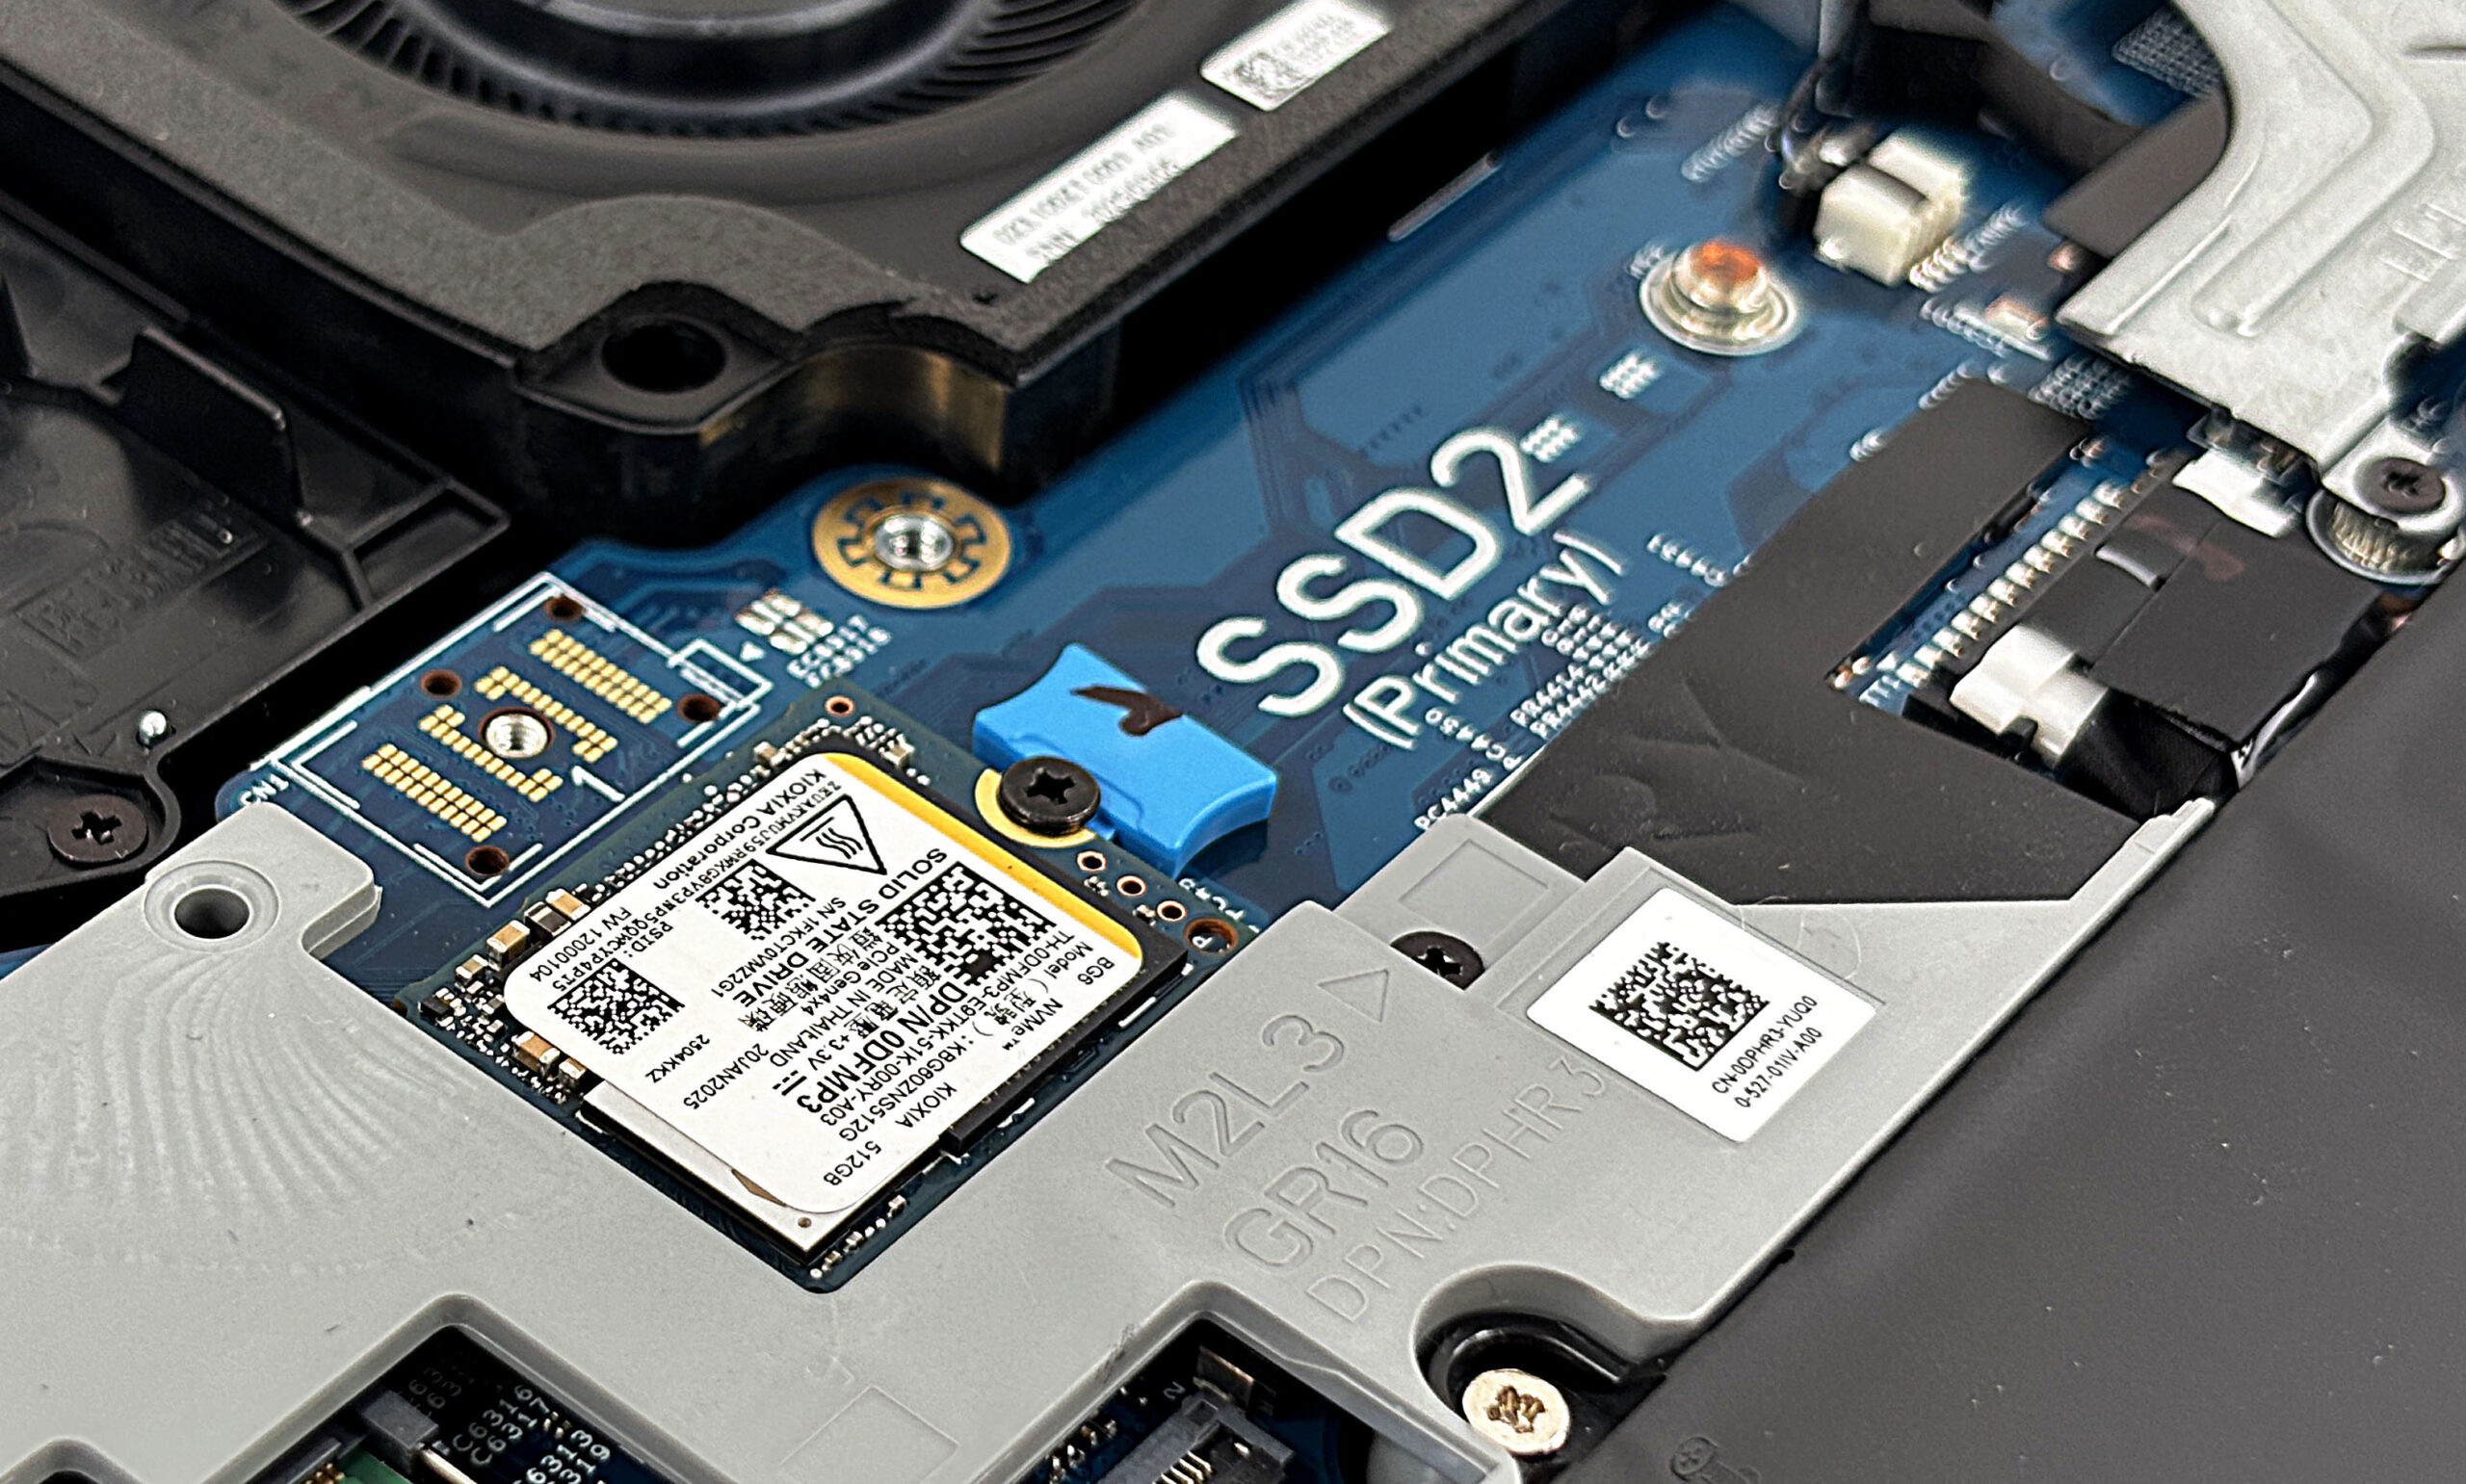
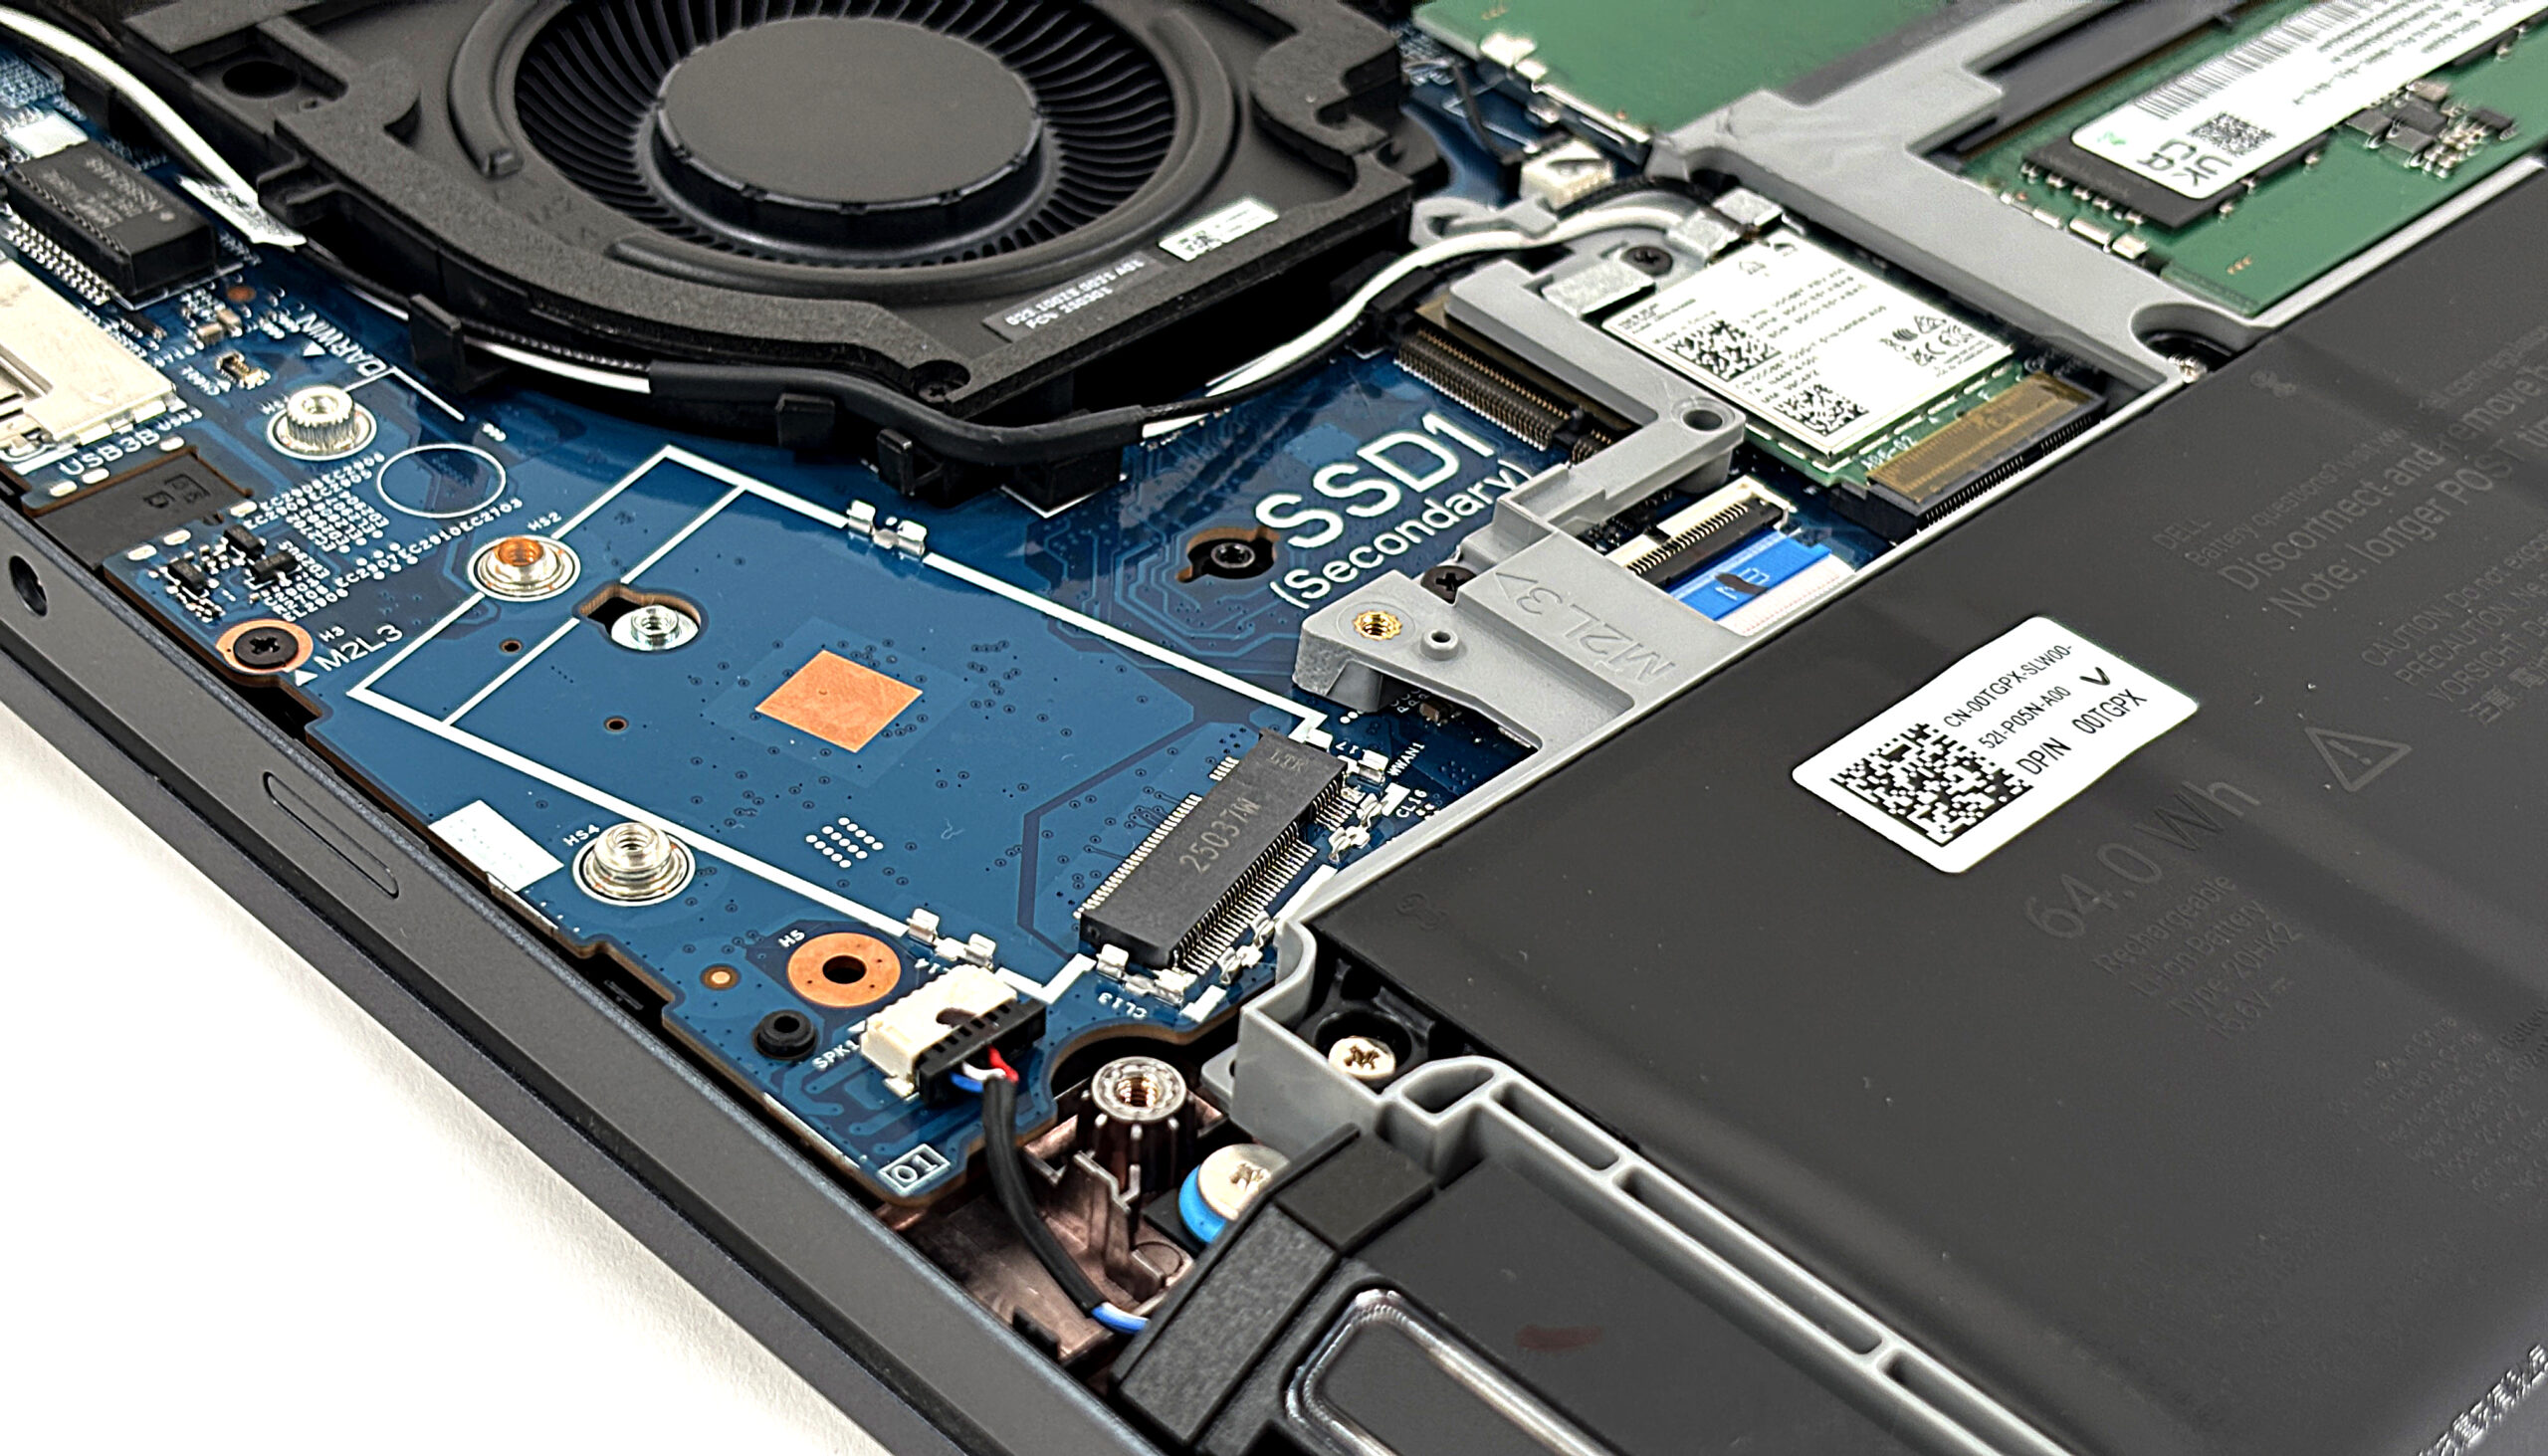
Storage upgrade options
- The Dell Pro Max 16 offers two NVMe slots for SSDs:
- Primary slot (right side): accepts full-size M.2 2280 PCIe 4.0 x4 drives.
- Secondary slot (left side): PCIe 4.0 x4 as well, but this bay doubles as the WWAN slot and is physically limited to 2230 modules when a 5G modem is installed.
- To upgrade the primary SSD, remove its single mounting screw; the drive will pop up at an angle.
- Slide the SSD out of the connector. Install the new 2280 drive by inserting it at the same angle, pushing it fully into the slot, then pressing it down and securing it with the screw.
- For the secondary bay, confirm whether a WWAN (5G) module is installed. If it is:
- Only 2230-size SSDs can be used alongside the modem due to space constraints.
- If no WWAN card is present, you can use a 2230 SSD as documented for this slot.
- Reapply any EMI shields or thermal pads that were covering the SSDs to ensure proper cooling and signal integrity.
You can buy NVMe SSDs here: Buy from Amazon.com.au (#CommissionsEarned)
You can buy compact SSDs here: Buy from Amazon.com.au (#CommissionsEarned)
Hint: Consider reviewing our Top M.2 SSDs Performance Rankings to select the best storage solution for your needs.
Wireless and WWAN modules
- The main Wi-Fi card is installed in an M.2 socket and is secured with a single screw and two antenna leads (Main and Aux).
- Depending on configuration, you may find either an Intel Wi-Fi 6E AX211 card or the newer Intel Wi-Fi 7 BE201 module.
- To replace the Wi-Fi card, disconnect the antenna leads by lifting them straight up with a plastic tool, undo the screw, and slide the card out of the slot.
- Insert the new card at an angle, press it down, secure it with the screw, and reconnect the antennas to their labeled posts.
- The secondary M.2 bay can host a MediaTek T700 5G WWAN module in supported configurations. Always check Dell’s compatibility list and regional regulations before adding mobile broadband.
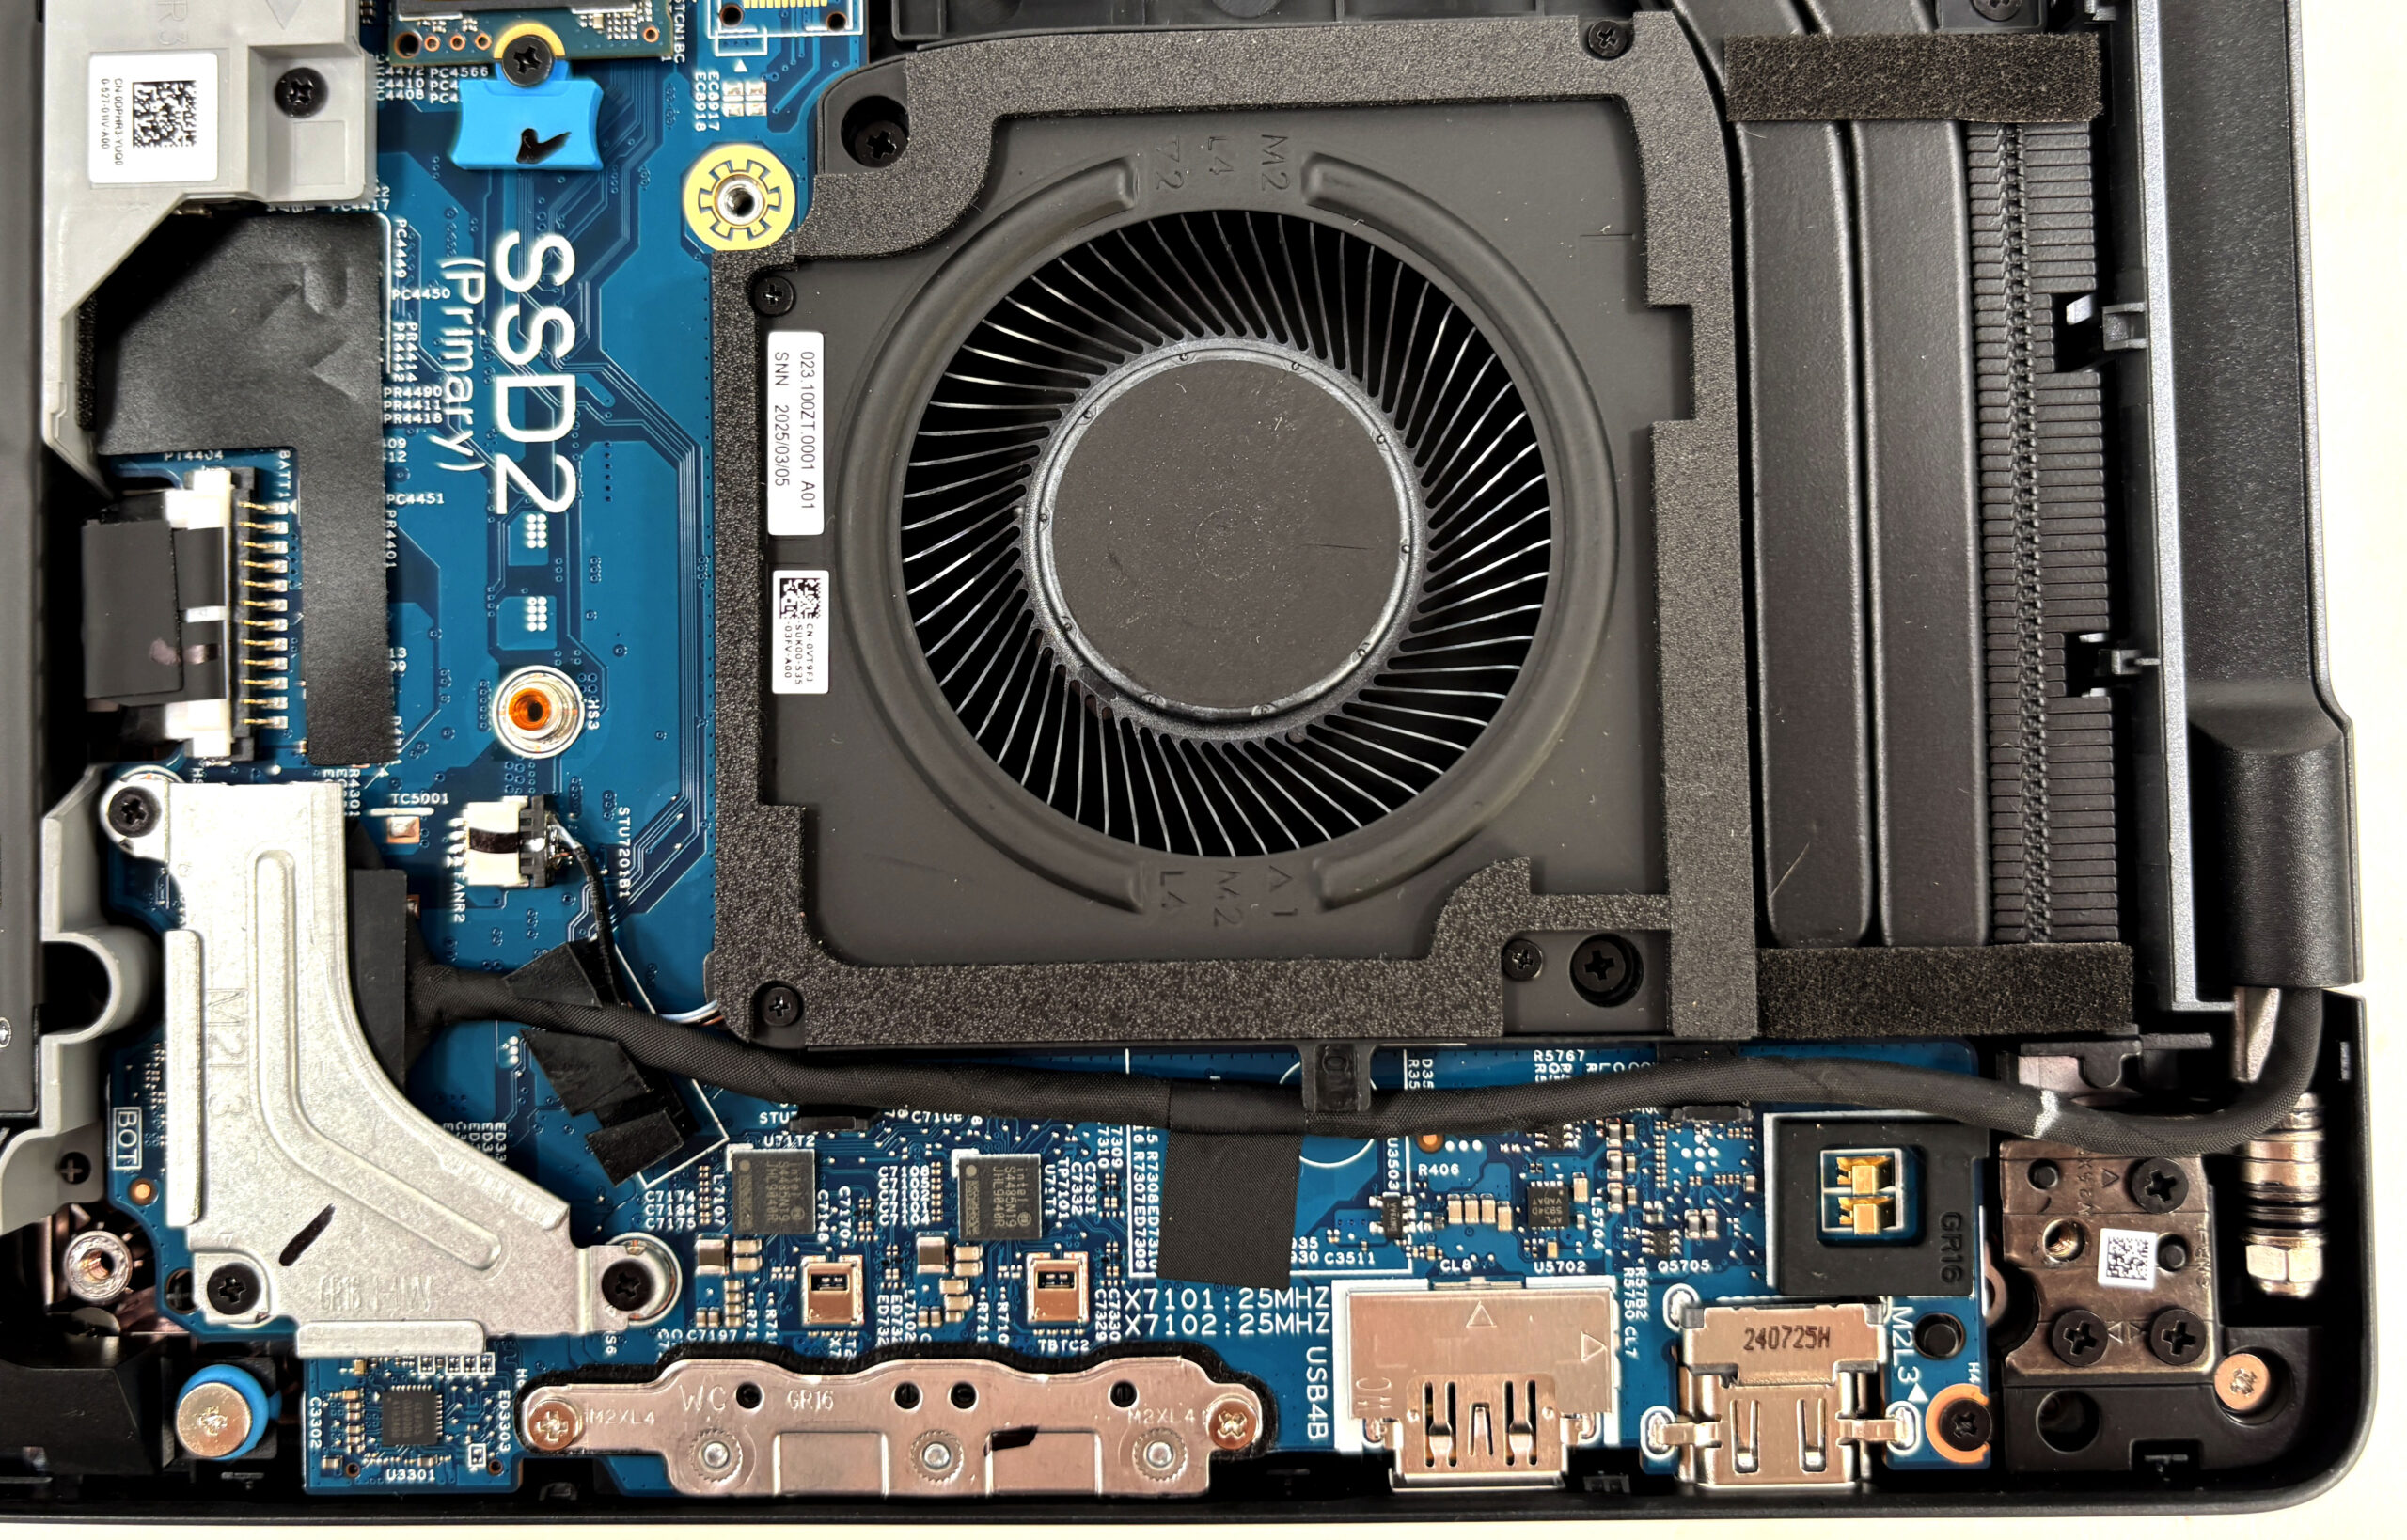
Cooling system and maintenance
- Dell uses a dual-fan, dual-heat-pipe array that spans the entire motherboard.
- Two radial blowers push air through fin stacks at the rear, while a pair of thick copper pipes draw heat from the CPU and GPU into a vapor-chamber-style cold plate.
- Foam seals around the heatsinks and VRM area keep airflow directed through the fins instead of recirculating inside the chassis.
- For routine cleaning, disconnect the battery first. Then, hold each fan in place and use short bursts of compressed air through the rear and side vents to clear dust from the fins.
- If a fan needs replacing, disconnect its cable from the motherboard, remove the mounting screws, lift the fan out, and install the new unit in the same orientation before reconnecting.
Reassembly tips
- Before closing the laptop, verify that:
- The battery connector is firmly seated.
- RAM modules are fully locked in their slots and the shield is reinstalled.
- All SSDs, Wi-Fi/WWAN cards, and fan cables are properly secured.
- Place the bottom panel back on the chassis, aligning all edges and port cutouts.
- Press gently around the perimeter until every clip snaps back into place.
- Retighten the nine captive Phillips screws; snug is enough—avoid overtightening.
- Power on the system and check in BIOS/Windows that your new RAM and storage are detected and that fans operate normally.
An exploded overview:
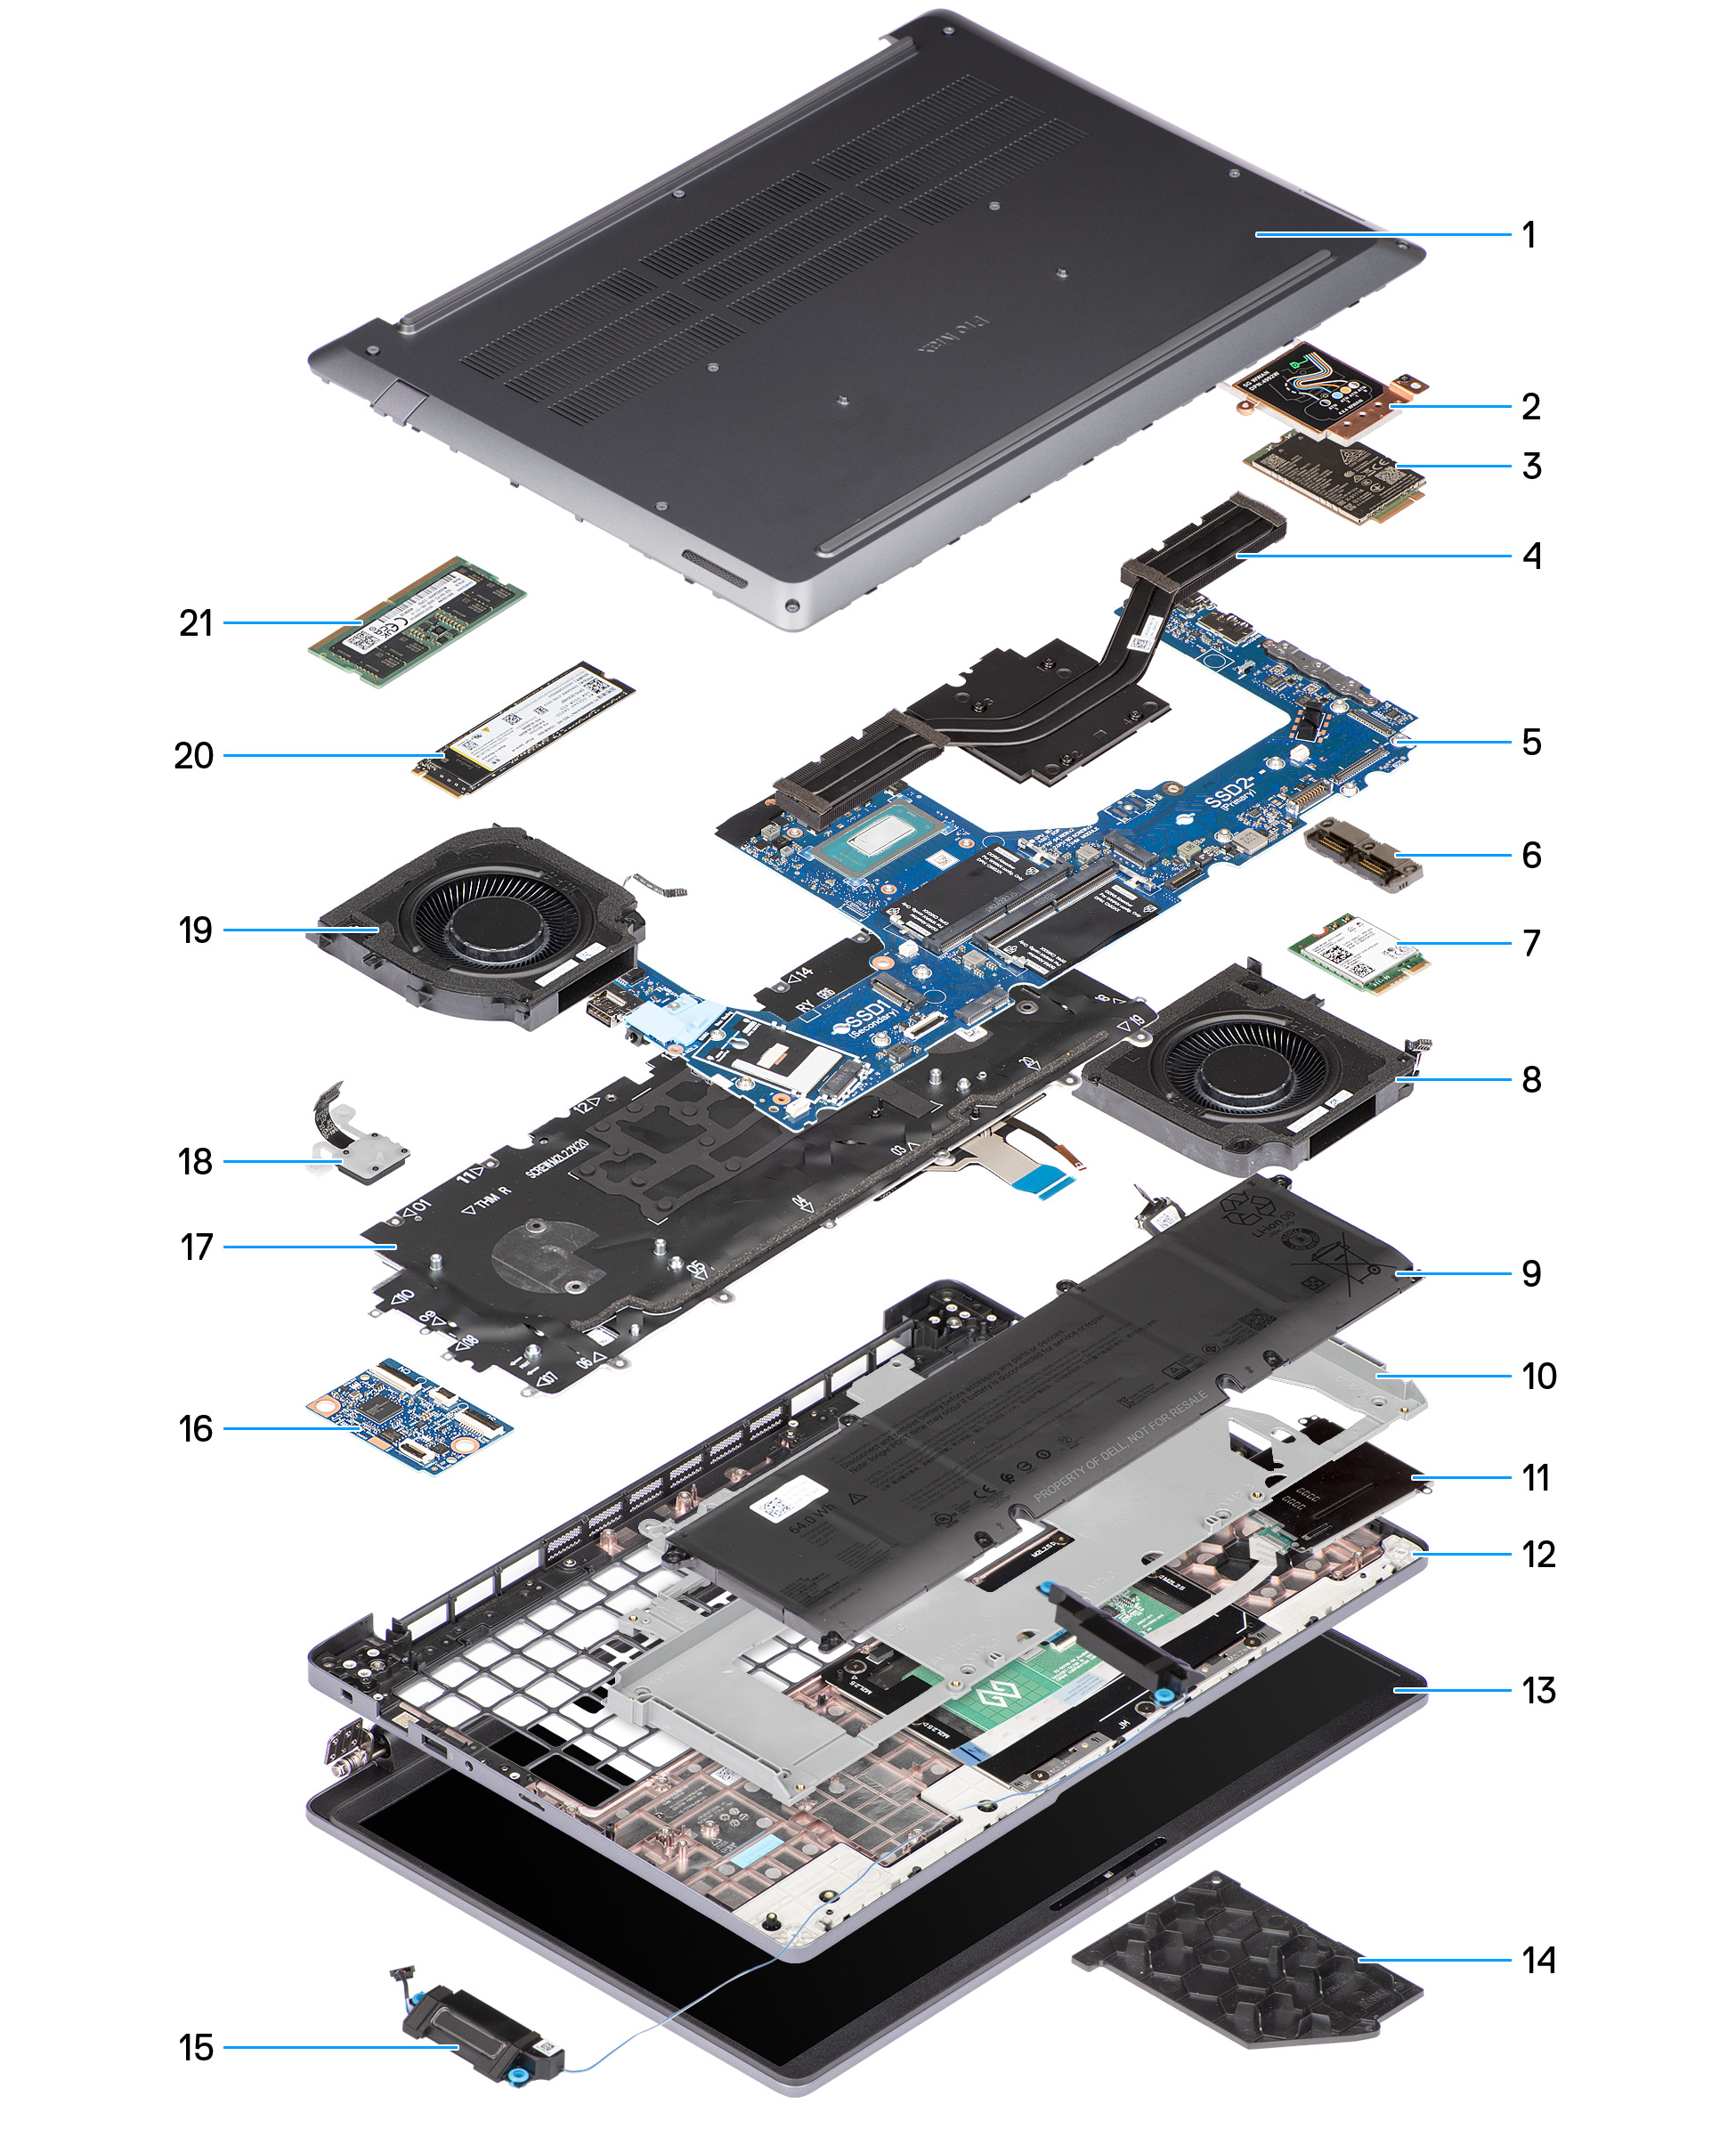
| Dell Pro Max 16 (MC16250) components | |||
|---|---|---|---|
| 1. Base cover | 2. WWAN-module shield | 3. WWAN module | 4. Heat sink |
| 5. System board | 6. USB Type-C module | 7. Wireless card | 8. Left/Video fan |
| 9. Battery | 10. Battery frame | 11. Palm-rest assembly | 12. Display assembly |
| 13. GPU filler | 14. Speakers | 15. USH board | 16. Keyboard assembly |
| 17. Power button (fingerprint) | 18. Right/Processor fan | 19. Solid state drive | 20. Memory module |
More info: Dell’s exploded view lists all major components as separate FRUs, including the base cover, WWAN shield and module, heatsink, system board, USB-C daughterboard, Wi-Fi card, left/right fans, battery and battery frame, speakers, keyboard, fingerprint power button, SSD, and memory modules. This modular design means most high-wear parts can be replaced individually without swapping the entire motherboard or chassis.
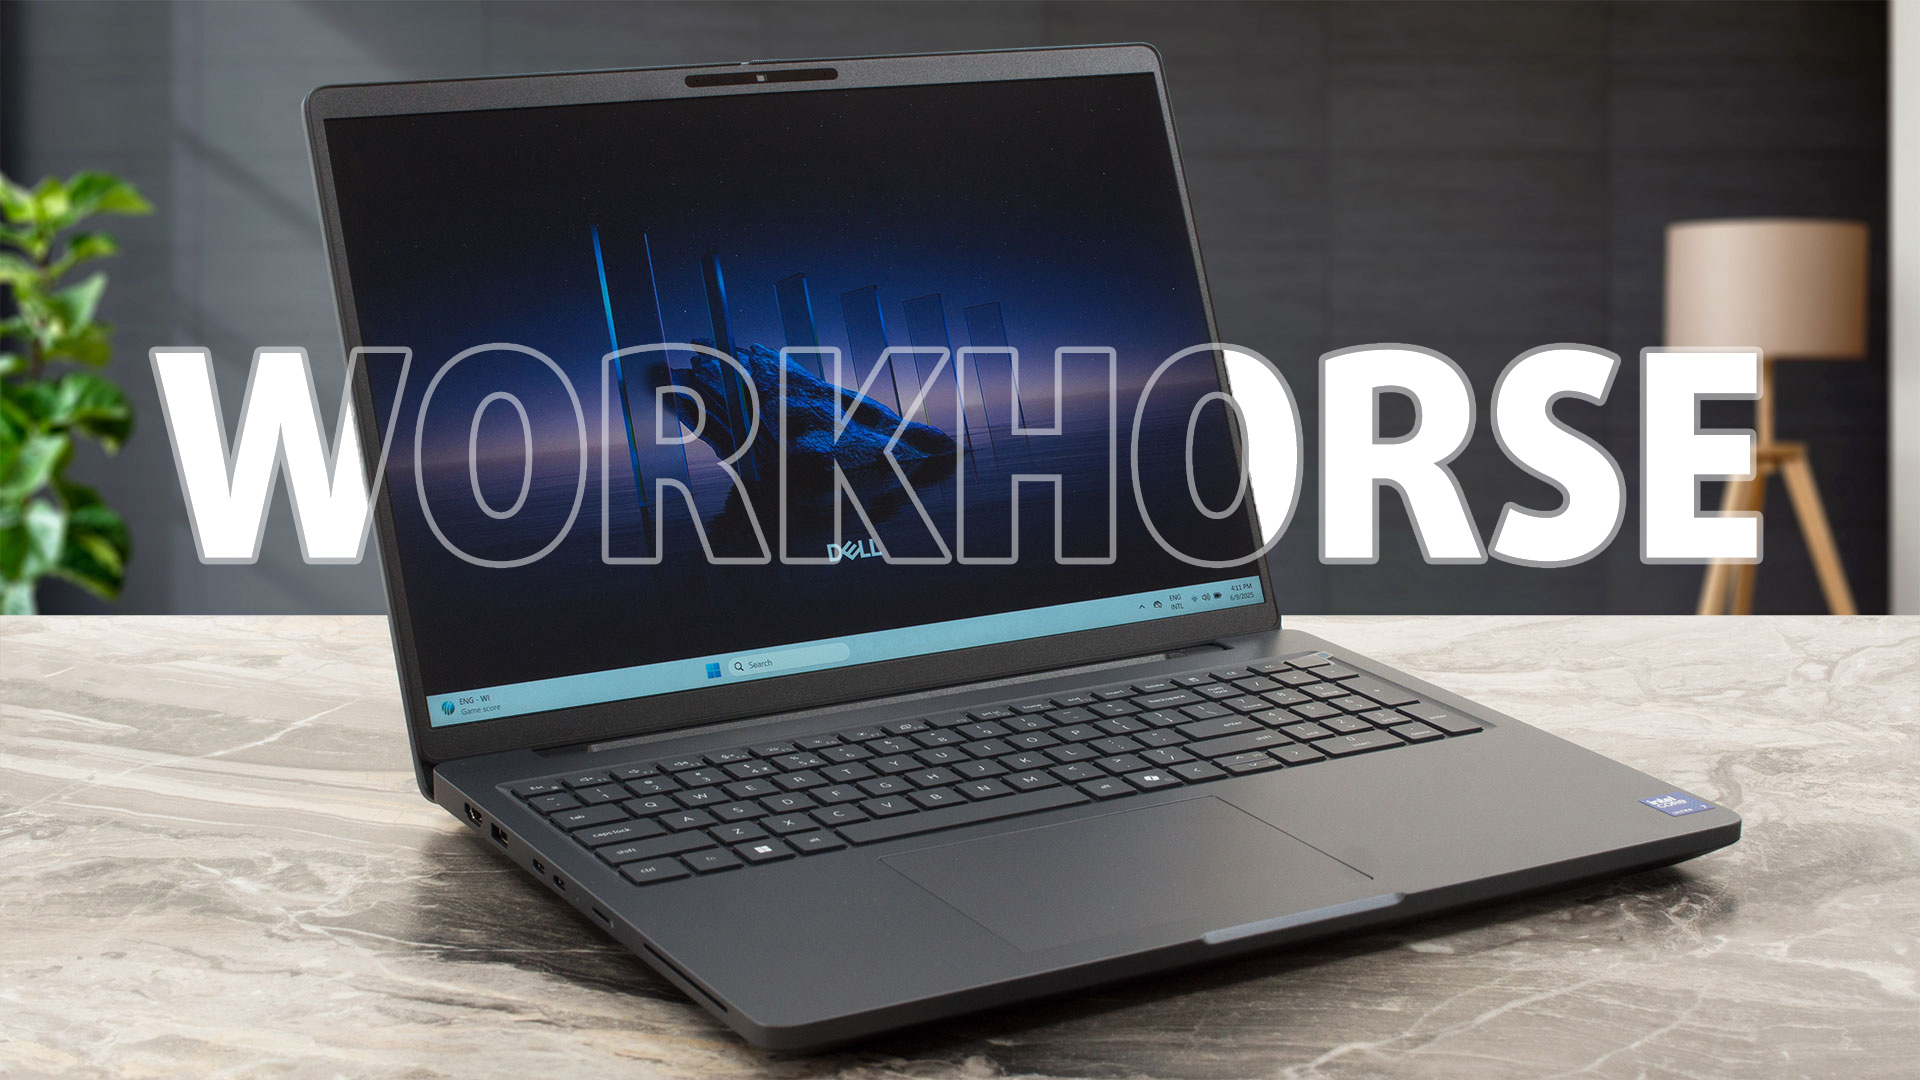
Dell Pro Max 16 (MC16250) in-depth review
In a world of soldered RAM and sealed chassis, the Dell Pro Max 16 (MC16250) feels like a breath of fresh air for professionals. It's a serious, no-nonsense workstation that prioritizes function and longevity over fleeting trends. With a robust magnesium build, a fantastic keyboard, and a level of upgradeability that is becoming increasingly rare, it aims to be the ultimate reliable partner for the modern workforce. But does this focus on practicality come at the cost of excitement? We put it to the test to see if this workhorse has enough power to match its pro-grade features.You can [...]
Pros
- Excellent upgradeability with two RAM slots and two M.2 slots
- Premium, durable build quality with 90% recycled magnesium
- Great sustained CPU performance for heavy workloads
- PWM-free display is comfortable for all-day use
- Comprehensive port selection including Thunderbolt 4 and Ethernet
- Impressive battery life (10+ hours), even with the 64Wh battery variant
Cons
- Base model display has poor color coverage (52% sRGB)
- No dedicated charging port; uses a side USB-C port
- CPU runs hot with high initial temperature spikes
- Secondary M.2 slot is limited to 2230 size (shared with WWAN)


![[May 2026] Amazon Global: Top 10 Best-Selling Gaming Laptops – Budget-Friendly ASUS TUF Gaming A15 Dominates the Market](https://laptopmedia.com/wp-content/uploads/2026/06/Best-Selling-Gaming-Laptops-GLOBAL-Top-10-400x225.jpg)
![[May 2026] Amazon Global: Top 10 Best-Selling Laptops – Apple’s Affordable ‘MacBook Neo’ Takes the Crown Amidst Strong Air and Pro Sales](https://laptopmedia.com/wp-content/uploads/2026/06/Best-Selling-Laptops-GLOBAL-Top-10-400x225.jpg)
![[May 2026] Best-Selling Laptop Brands on Amazon Global – Apple Dominates in Units and Revenue](https://laptopmedia.com/wp-content/uploads/2026/06/GLOBAL-Best-Brands-400x225.jpg)


Can you please make a video tutorial on how to add a second M.2 SSD to the laptop?