How to open Lenovo Yoga 7a 2-in-1 (16″, Gen 11) – disassembly and upgrade options
Step 1: Removing the bottom panel
- Power off the laptop and place it on a soft, clean surface.
- Undo the 7 Torx T5 screws securing the bottom plate.
- Use a thin plastic pry tool to release the clips around the perimeter.
- Lift the bottom cover away from the chassis.
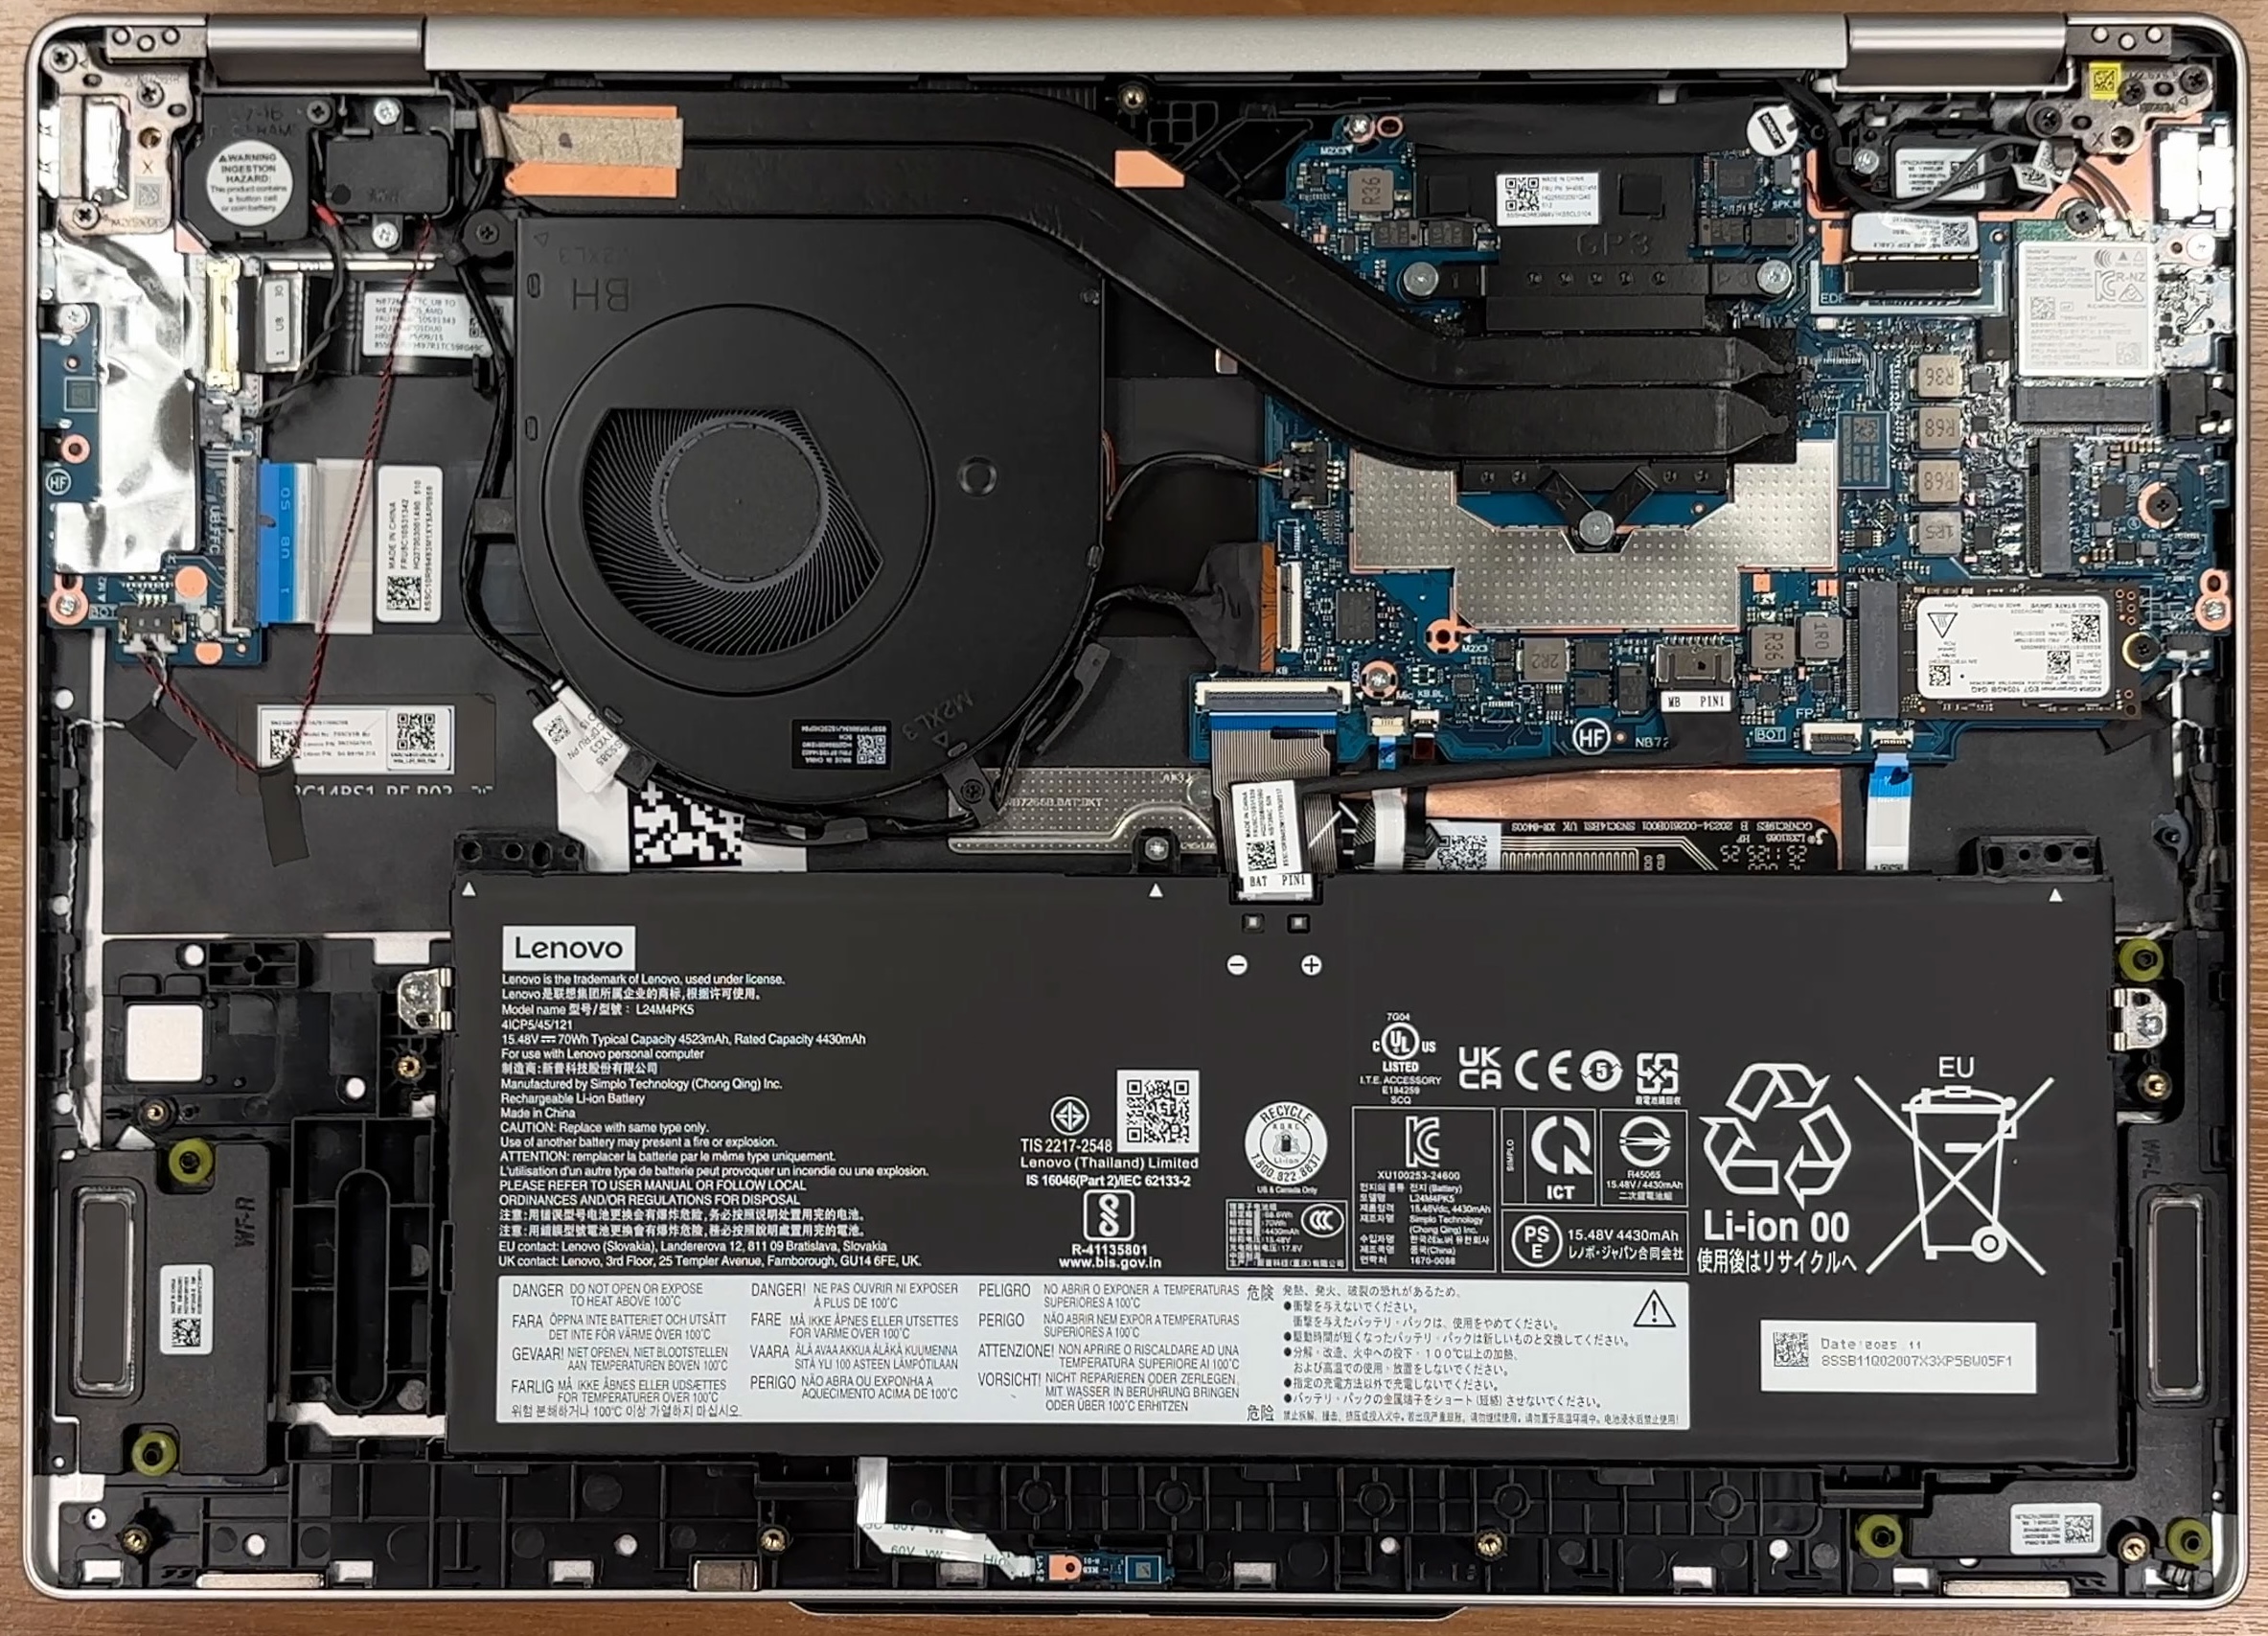
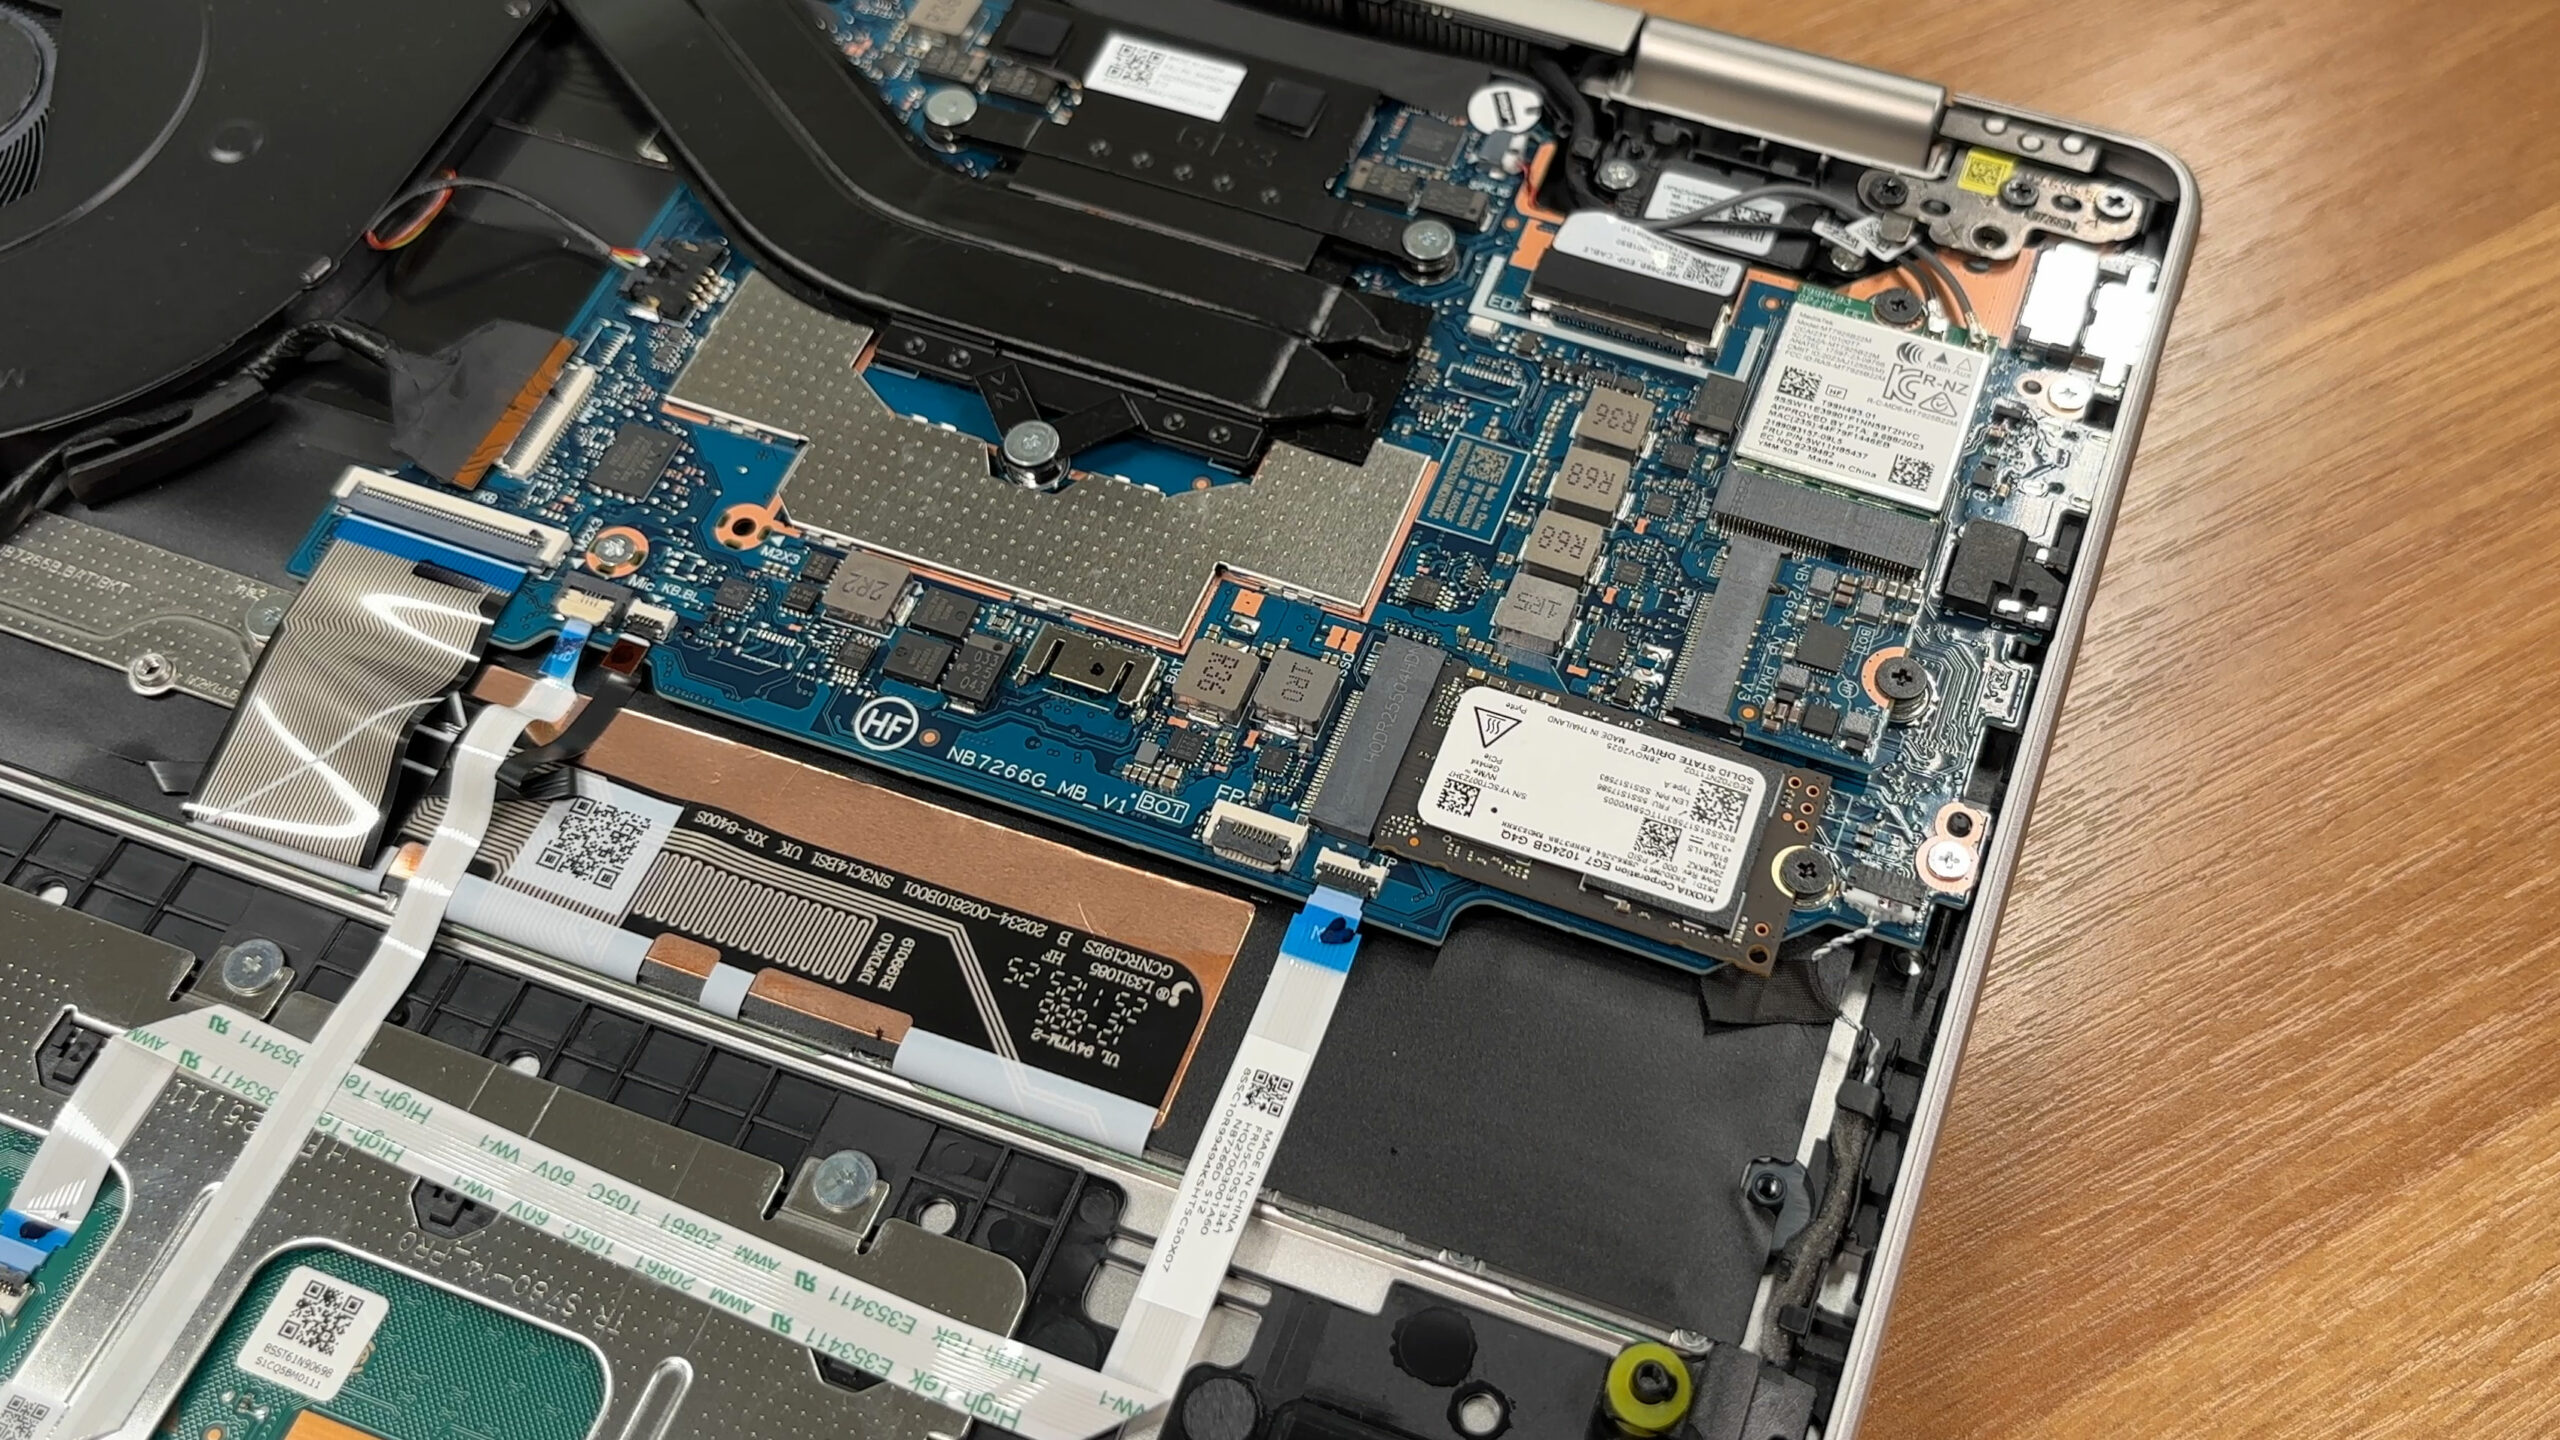
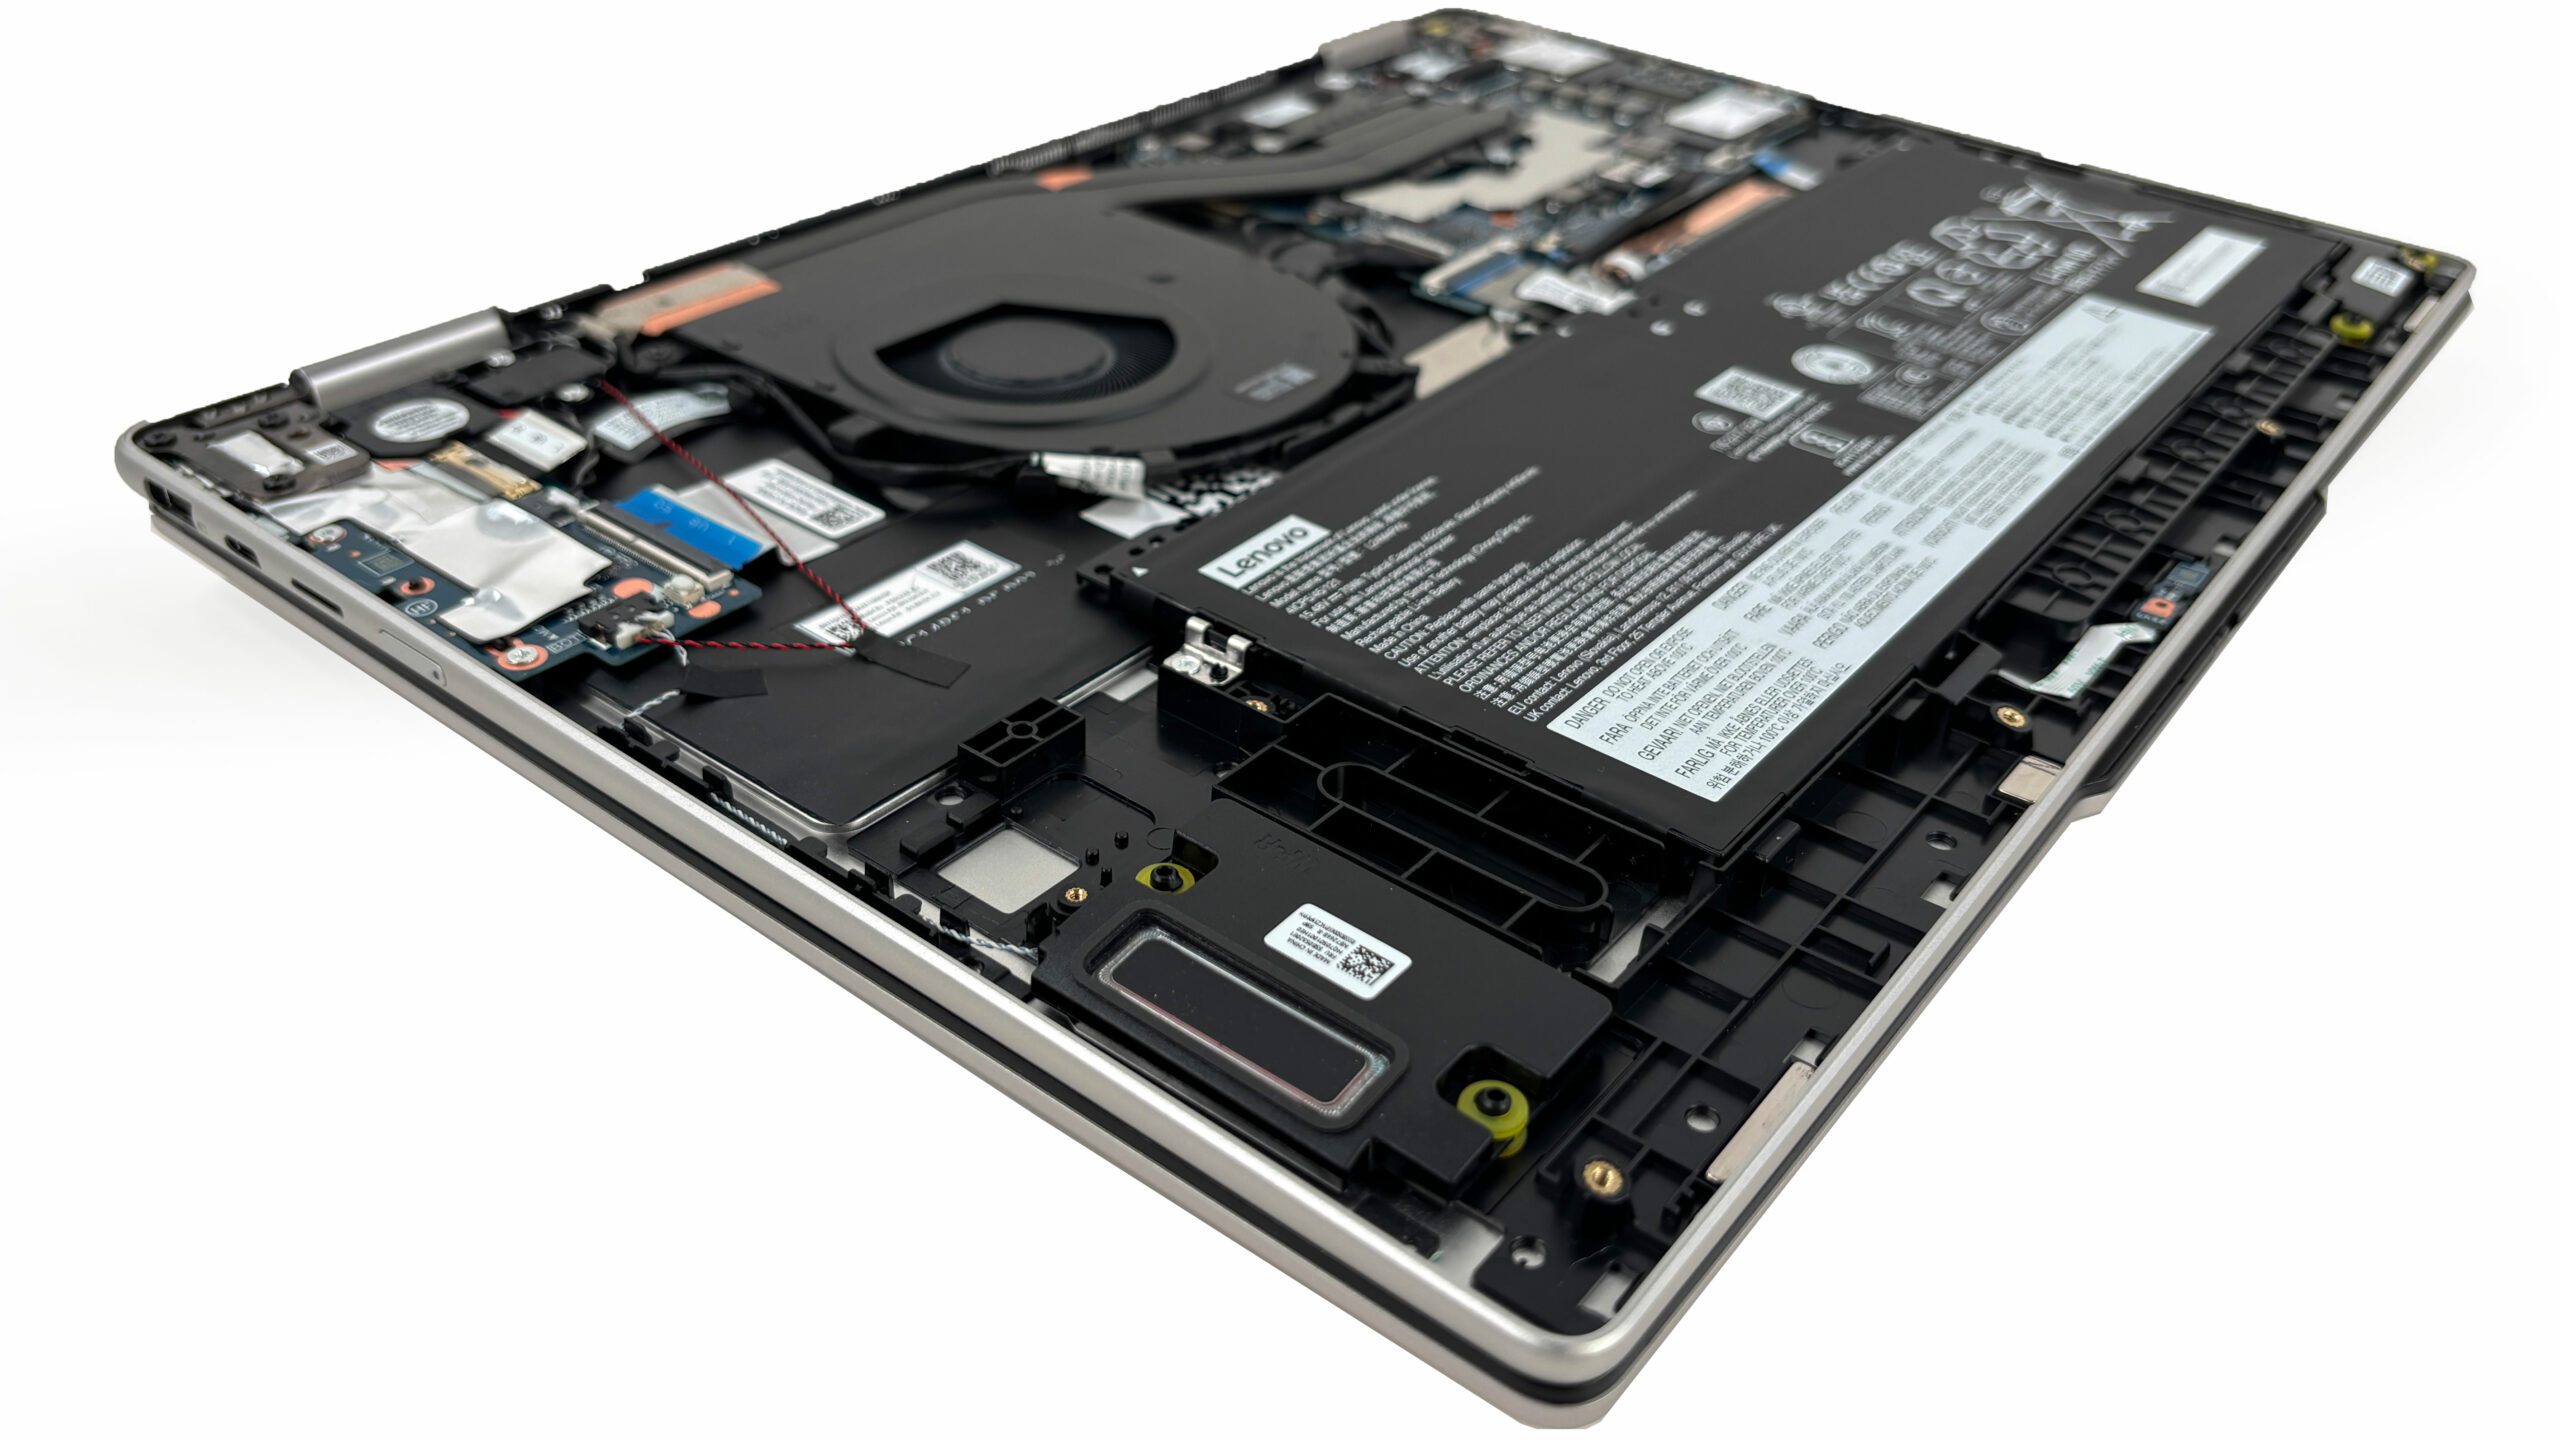
More info: Once inside, the layout is clean and easy to understand, with the battery at the front, the cooling system across the upper half, and the upgradeable modules grouped on the right side.
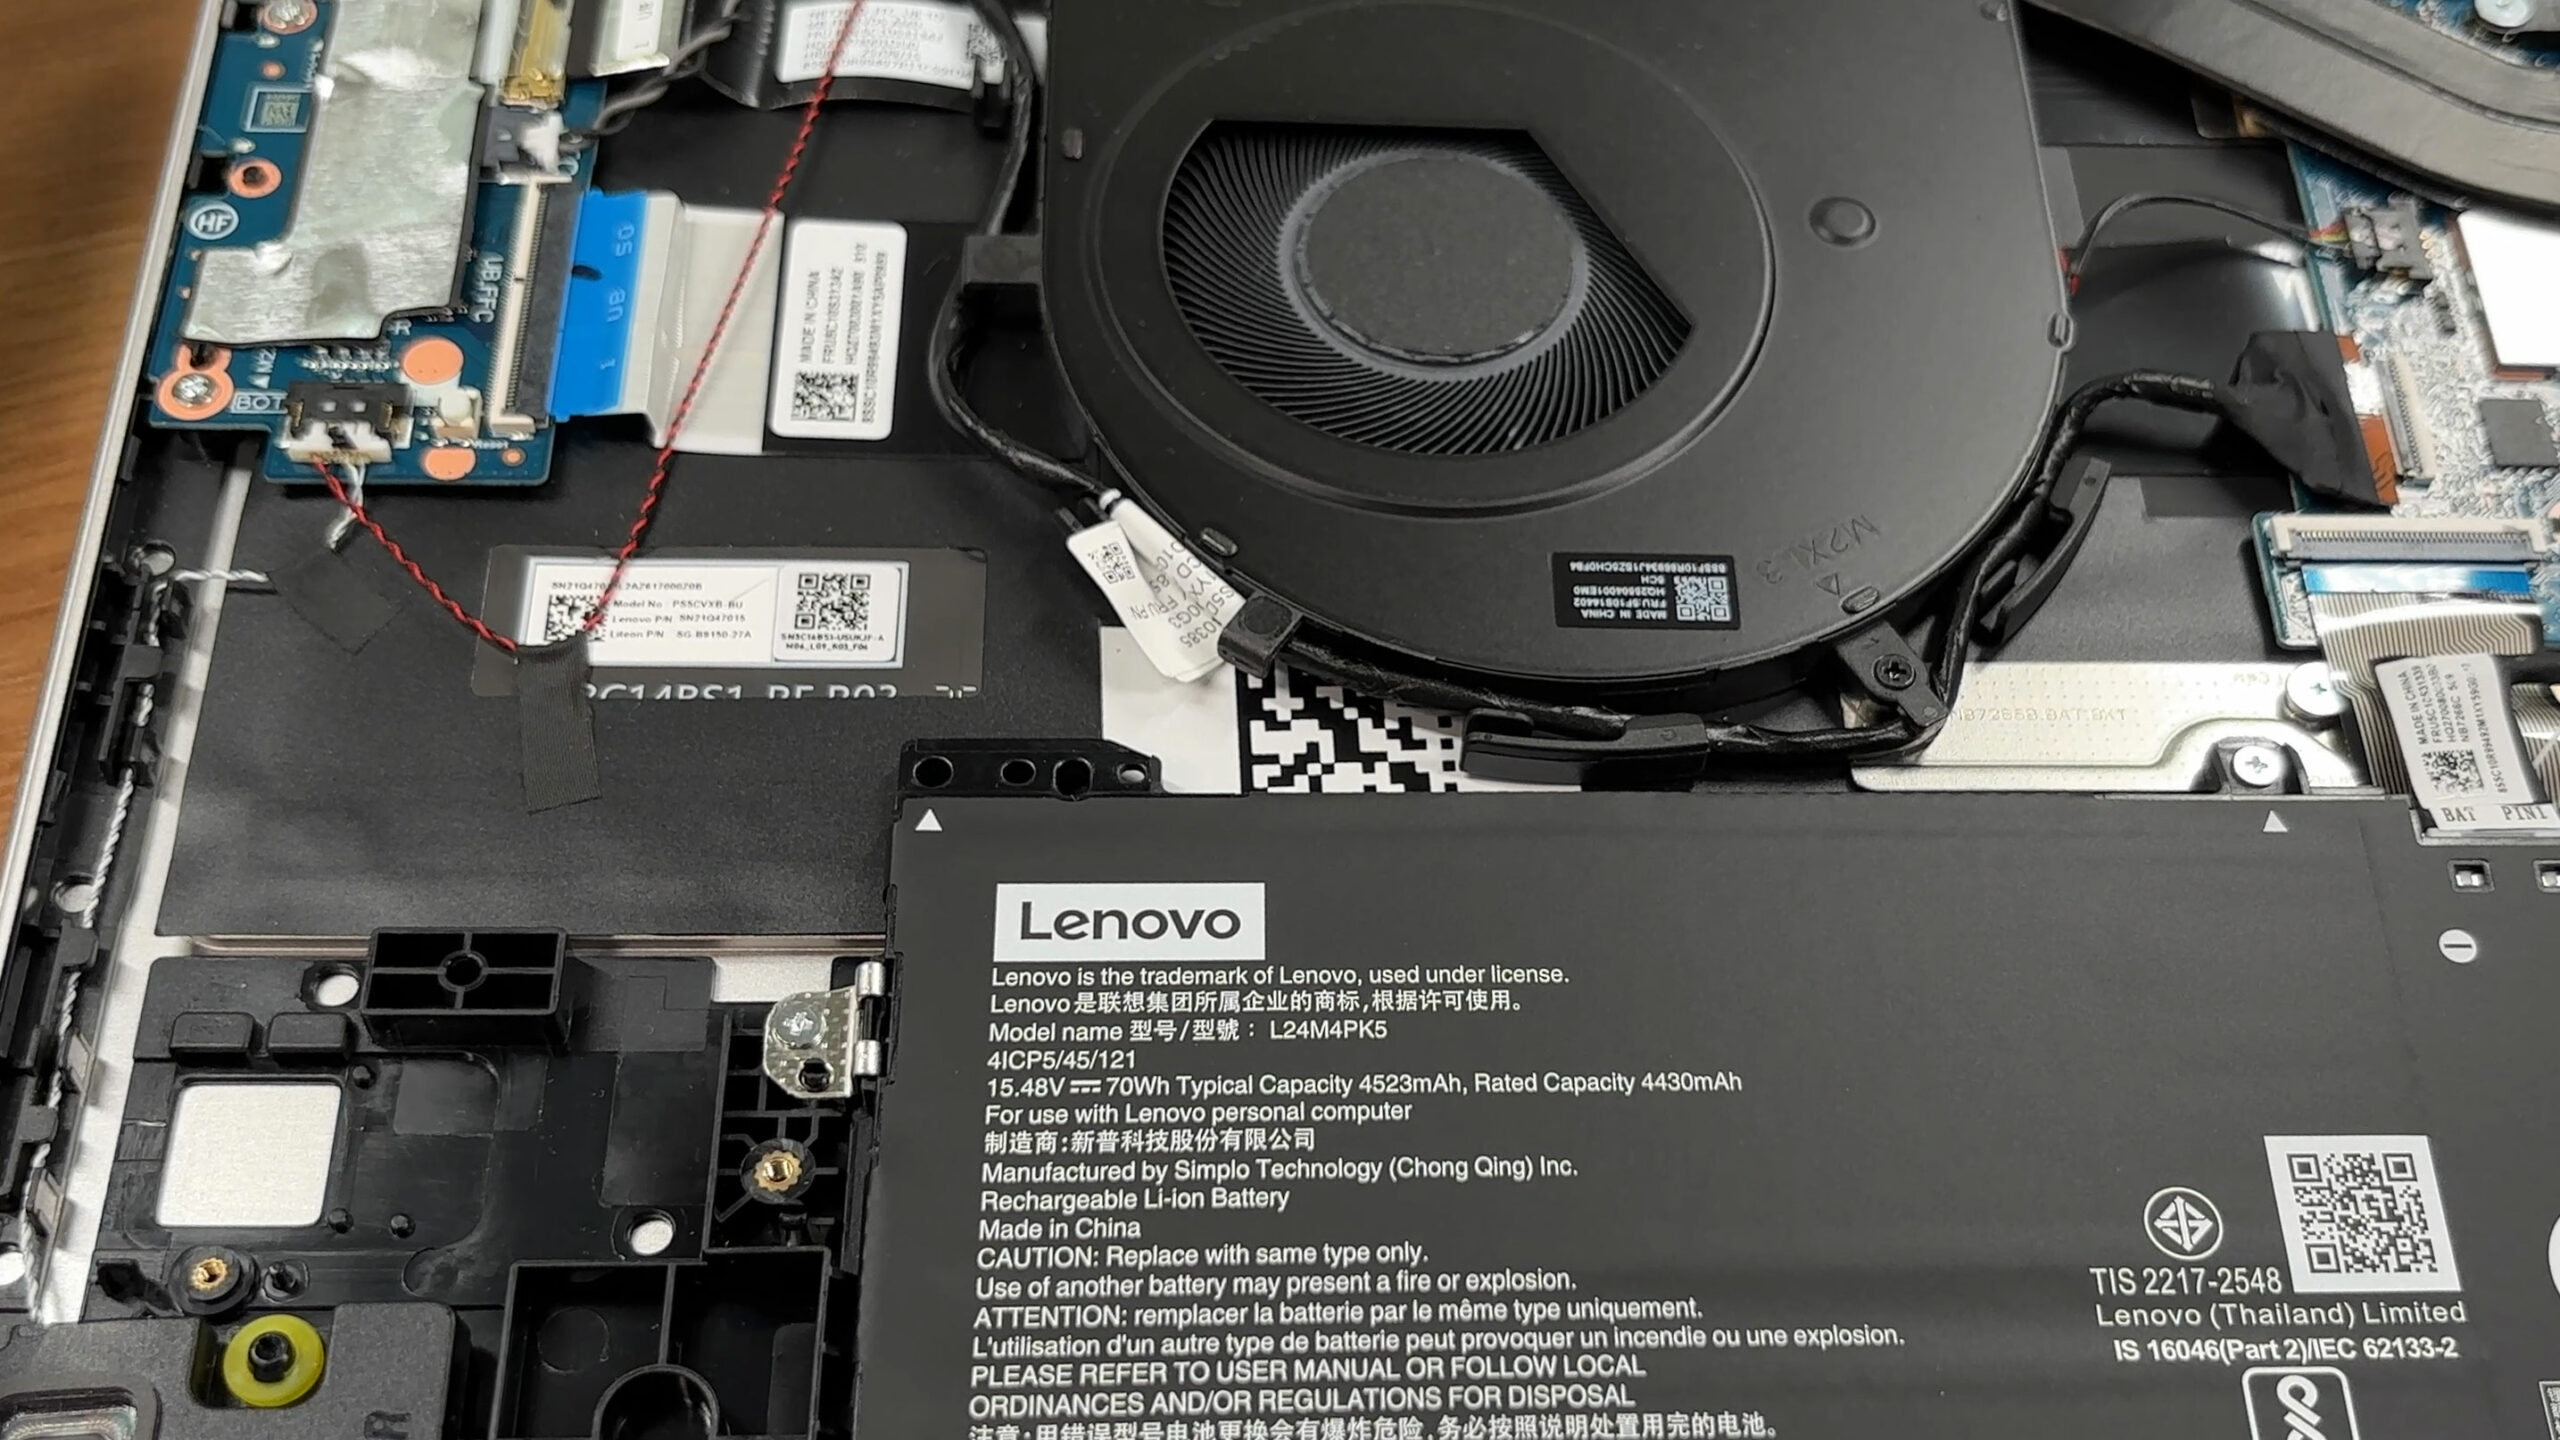
Step 2: Battery removal
- Disconnect the battery cable from the motherboard before touching any other internal component.
- Undo the 3 screws securing the 70Wh battery pack.
- Lift the battery out of the chassis carefully.
More info: The battery is not heavily buried or glued in place, which makes future replacement relatively simple.
Step 3: Memory Upgrade
- The memory is soldered directly to the motherboard.
- There are no SODIMM slots, so RAM upgrades are not possible after purchase.
- Our reviewed configuration comes with 32GB of LPDDR5X-8000 memory in dual-channel mode.
More info: The 32GB configuration is also the maximum officially listed for this model, so choosing the right RAM capacity at purchase is important.
Step 4: Storage Upgrade
- The laptop has a single M.2 slot for 2242 PCIe 4.0 x4 NVMe SSDs.
- Lenovo rates the slot for drives up to 2TB.
- Our configuration comes with a 1TB Kioxia EG7 SSD installed.
- To upgrade the storage, remove the existing 2242 SSD and replace it with a compatible higher-capacity model.
You can buy M.2 2242 NVMe SSDs here: Buy from Amazon.com.au (#CommissionsEarned)
Hint: Don’t forget to check out our Top M.2 SSDs Performance Rankings for insights on the best storage options available.
Step 5: Cooling system overview
- The cooling system uses one fan, a substantial heatpipe assembly, and a wide rear heatsink near the hinge area.
- The processor is positioned under the cooling module.
- The fan is easy to reach once the bottom cover is removed, which makes routine dust cleaning straightforward.
More info: The Wi-Fi card is modular and sits next to the SSD. Our unit uses a Wi-Fi 7 solution with Bluetooth 5.4 support, so replacement is possible if needed.
More info: Overall, the Lenovo Yoga 7a 2-in-1 (16″, Gen 11) is easy to service for cleaning, battery replacement, SSD swaps, and Wi-Fi card replacement, but the soldered memory and single short M.2 slot limit its long-term upgrade potential.
Lenovo Yoga 7a 2-in-1 (16", Gen 11) in-depth review
The Lenovo Yoga 7a 2-in-1 (16", Gen 11) aims to bring flagship luxury to the masses. Dressed in a sophisticated, fingerprint-resistant "Seashell" aluminum chassis, it looks and feels like a laptop that should cost significantly more. With its expansive, vibrant OLED display and the versatility of a 360-degree hinge, it’s designed to be a centerpiece for both creativity and entertainment. But achieving this premium aesthetic at a more accessible price point inevitably means compromises must be made behind the scenes. We dive deep to find out if its restrictive upgrade options and middling[...]
Pros
- Stunning 2.8K 120Hz OLED display with perfect colors
- Exceptional, tank-like all-aluminium build quality
- Finish is highly resistant to fingerprints
- PWM-free display is great for eye comfort
- Comfortable keyboard and smooth glass trackpad
- Physical privacy shutter for the webcam
Cons
- Soldered RAM with no upgrade options
- Only one M.2 slot, limited to the short 2242 format
- Battery life is underwhelming compared to rivals
- Highly reflective glossy screen
- No USB4 or Thunderbolt support


![[May 2026] Global Ranking of Best-Selling Laptop GPUs on Amazon – Apple Dominates with 45% Share, Sweeps Top 3 Spots; NVIDIA’s RTX 5060 Leads the Dedicated GPU Pack](https://laptopmedia.com/wp-content/uploads/2026/06/Best-Selling-GPUs-GLOBAL-Top-10-400x225.jpg)
![[May 2026] Global Ranking of Best-Selling Laptop CPUs on Amazon – Apple Crushes Competition with 45.2% Market Share, M5 Dominates](https://laptopmedia.com/wp-content/uploads/2026/06/Best-Selling-CPUs-GLOBAL-Top-10-400x225.jpg)
![[May 2026] Amazon Germany: Top 7 Best-Selling Gaming Laptops – Lenovo Legion 5i Crowned Champion Amidst Fierce Mid-Range Competition](https://laptopmedia.com/wp-content/uploads/2026/06/Best-Selling-Gaming-Laptops-DE-Top-10-1-400x225.jpg)
![[May 2026] Amazon Italy: Top 10 Best-Selling Laptops – Apple MacBook Neo Reigns Supreme, Premium Models Capture Dominant Revenue Share](https://laptopmedia.com/wp-content/uploads/2026/06/Best-Selling-Laptops-IT-Top-10-400x225.jpg)
![[May 2026] Best-Selling Laptop Brands on Amazon Italy – Apple Dominates Across All Metrics](https://laptopmedia.com/wp-content/uploads/2026/06/IT-Best-Brands-400x225.jpg)