Inside Dell XPS 13 7390 – disassembly and upgrade options
This is the first XPS laptop after Dell decided to switch up their numerical – that way the XPS 9380 has a successor that is not called the XPS 13 9390, but the XPS 13 7390. Let’s see if something changed on the inside, though.
Check out all Dell XPS 13 7390 prices and configurations in our Specs System or read more in our In-Depth review.
1. Remove the bottom plate
There are only 8 Torx-head screws that keep you from the insides of this machine. After you unscrew them, you should start prying very, very carefully. Keep in mind that the material is super fragile around the USB Type-C ports.
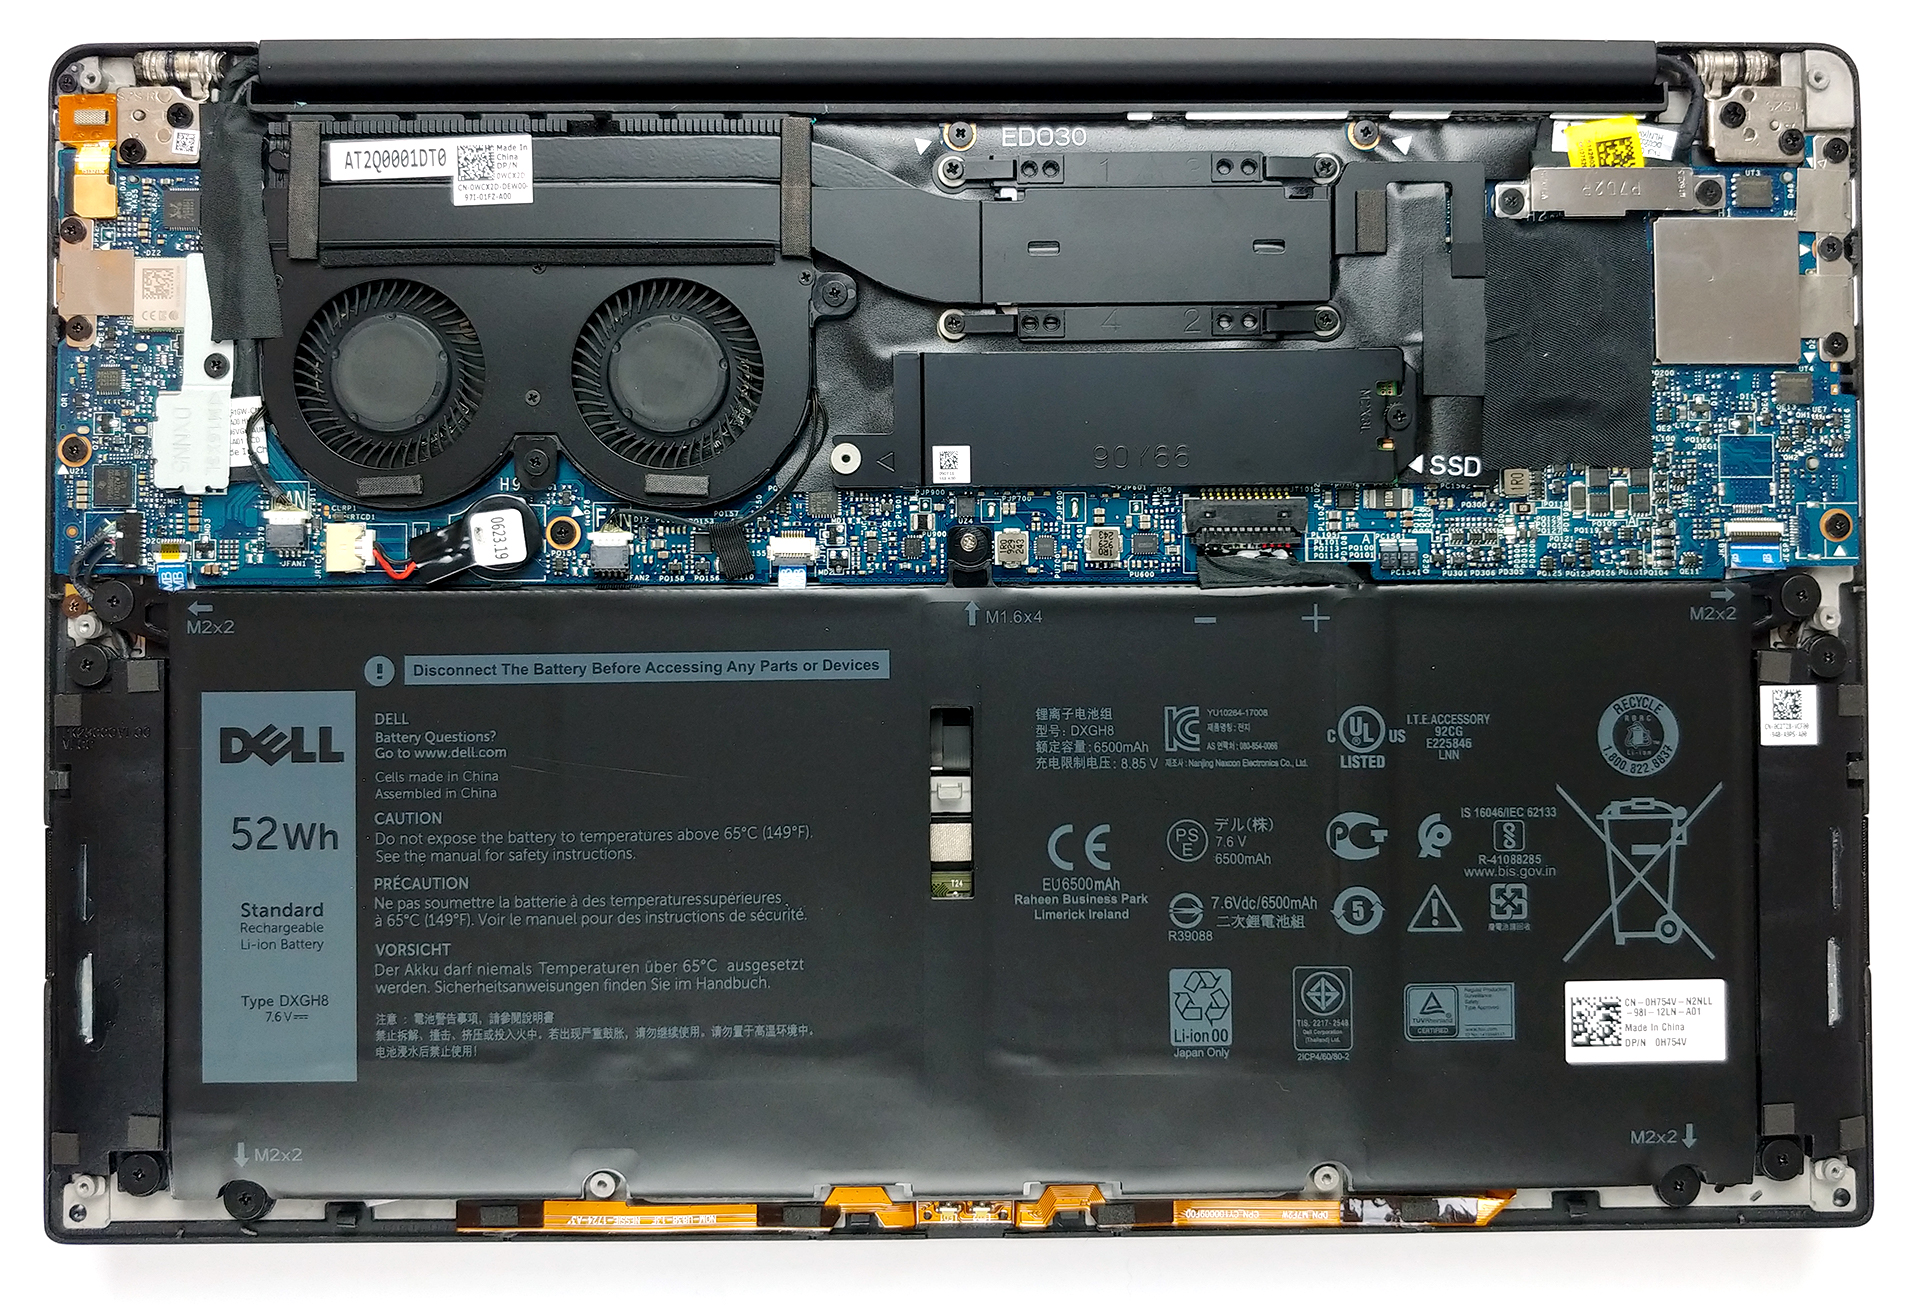
2. Battery
Before you start, unplug the battery connector. This could save you a lot of money, trust us! The battery itself is a 52Wh unit and can be removed by unscrewing 5 Phillips-head screws (one of them has a super tiny head, in contrast to the other).

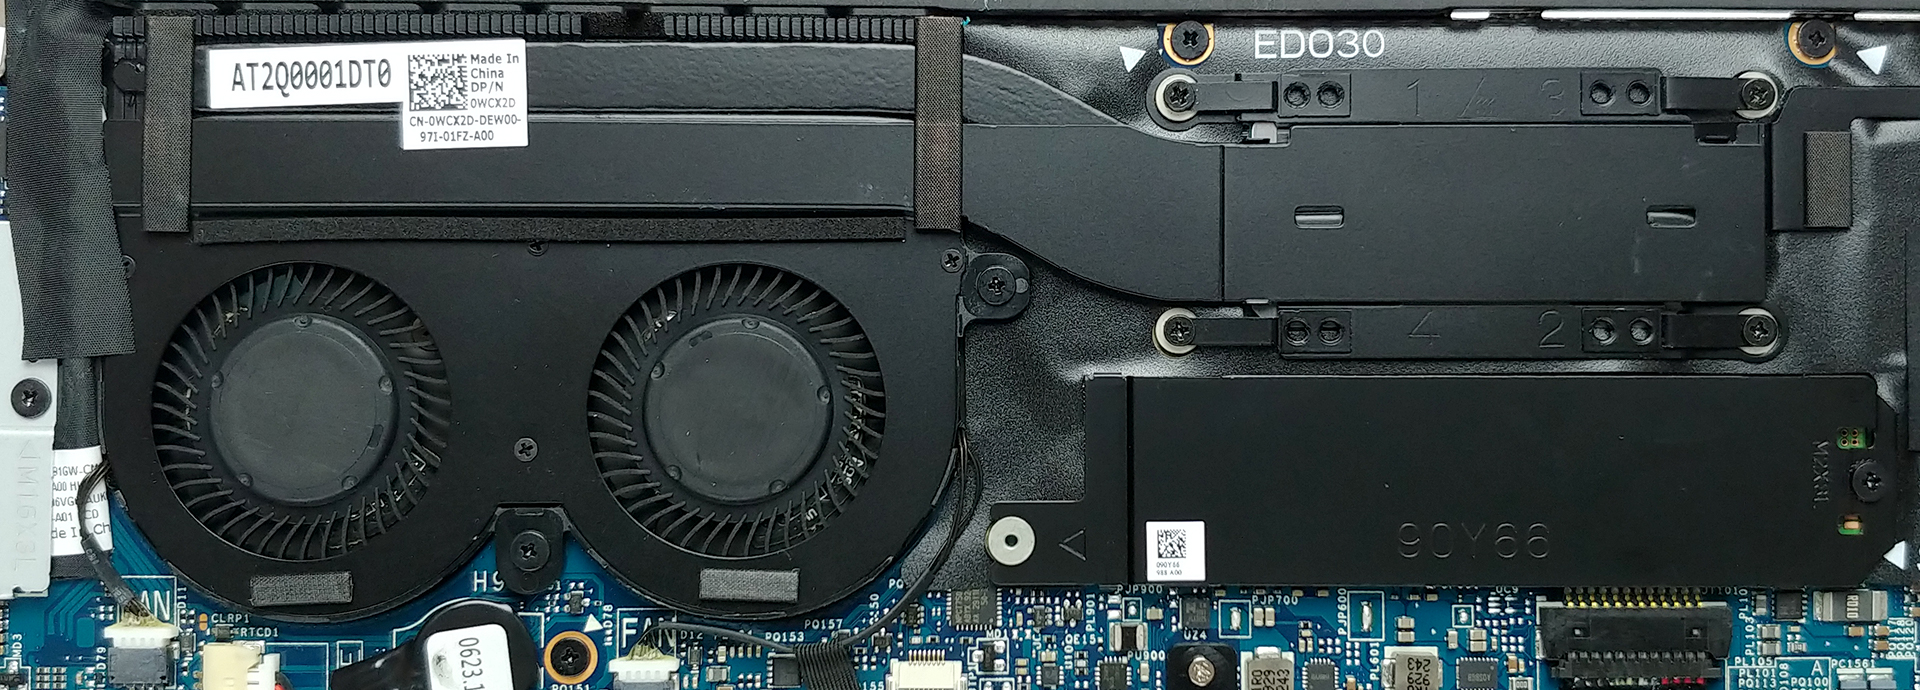
3. Cooling and storage
While unchanged from last year, the cooling solution of this notebook seems to work incredibly good with the Core i7-10510U, and pushes it to a desktop-like performance, both in short-termed tasks, and in long term ones, as well. Just below the two heat pipes, you are going to see the M.2 slot. It supports up to 2TB of PCIe x4 drives.
Check out all Dell XPS 13 7390 prices and configurations in our Specs System or read more in our In-Depth review.


![[June 2026] Best-Selling Laptop Brands on Amazon Global – Apple’s Unrivaled Dominance in Units and Revenue](https://laptopmedia.com/wp-content/uploads/2026/07/GLOBAL-Best-Brands-400x225.jpg)
![[June 2026] Amazon Global: Top 10 Best-Selling Laptops – Apple’s New MacBook Neo Storms to #1, Reshaping the Market with Affordability](https://laptopmedia.com/wp-content/uploads/2026/07/Best-Selling-Laptops-GLOBAL-Top-10-400x225.jpg)
![[June 2026] Amazon Global: Top 10 Best-Selling Gaming Laptops – Acer’s Nitro V 16S AI Dominates Sales, While ASUS Leads Overall Revenue](https://laptopmedia.com/wp-content/uploads/2026/07/Best-Selling-Gaming-Laptops-GLOBAL-Top-10-400x225.jpg)
![[June 2026] Global Ranking of Best-Selling Laptop GPUs on Amazon – NVIDIA RTX 5060 is the Top-Selling Dedicated GPU](https://laptopmedia.com/wp-content/uploads/2026/07/Best-Selling-GPUs-GLOBAL-Top-10-400x225.jpg)
![[June 2026] Global Ranking of Best-Selling Laptop CPUs on Amazon – Apple M5 Dominates, AMD Ryzen 7 260 Gets Solid Premium Share](https://laptopmedia.com/wp-content/uploads/2026/07/Best-Selling-CPUs-GLOBAL-Top-10-400x225.jpg)
