Dell XPS 13 (9360) – disassembly, internal photos and upgrade options
We already did an article like this when the previous Skylake generation was released and it seems that things didn’t change that much since then. The newer Kaby Lake XPS 13 (9360) notebook offers the same upgrade options, design and it’s just as easy to access the hardware you are looking for. However, there a few changes that need to be considered when buying the refreshed XPS 13.
You can find some of the available configuration: http://amzn.to/2gElpvA
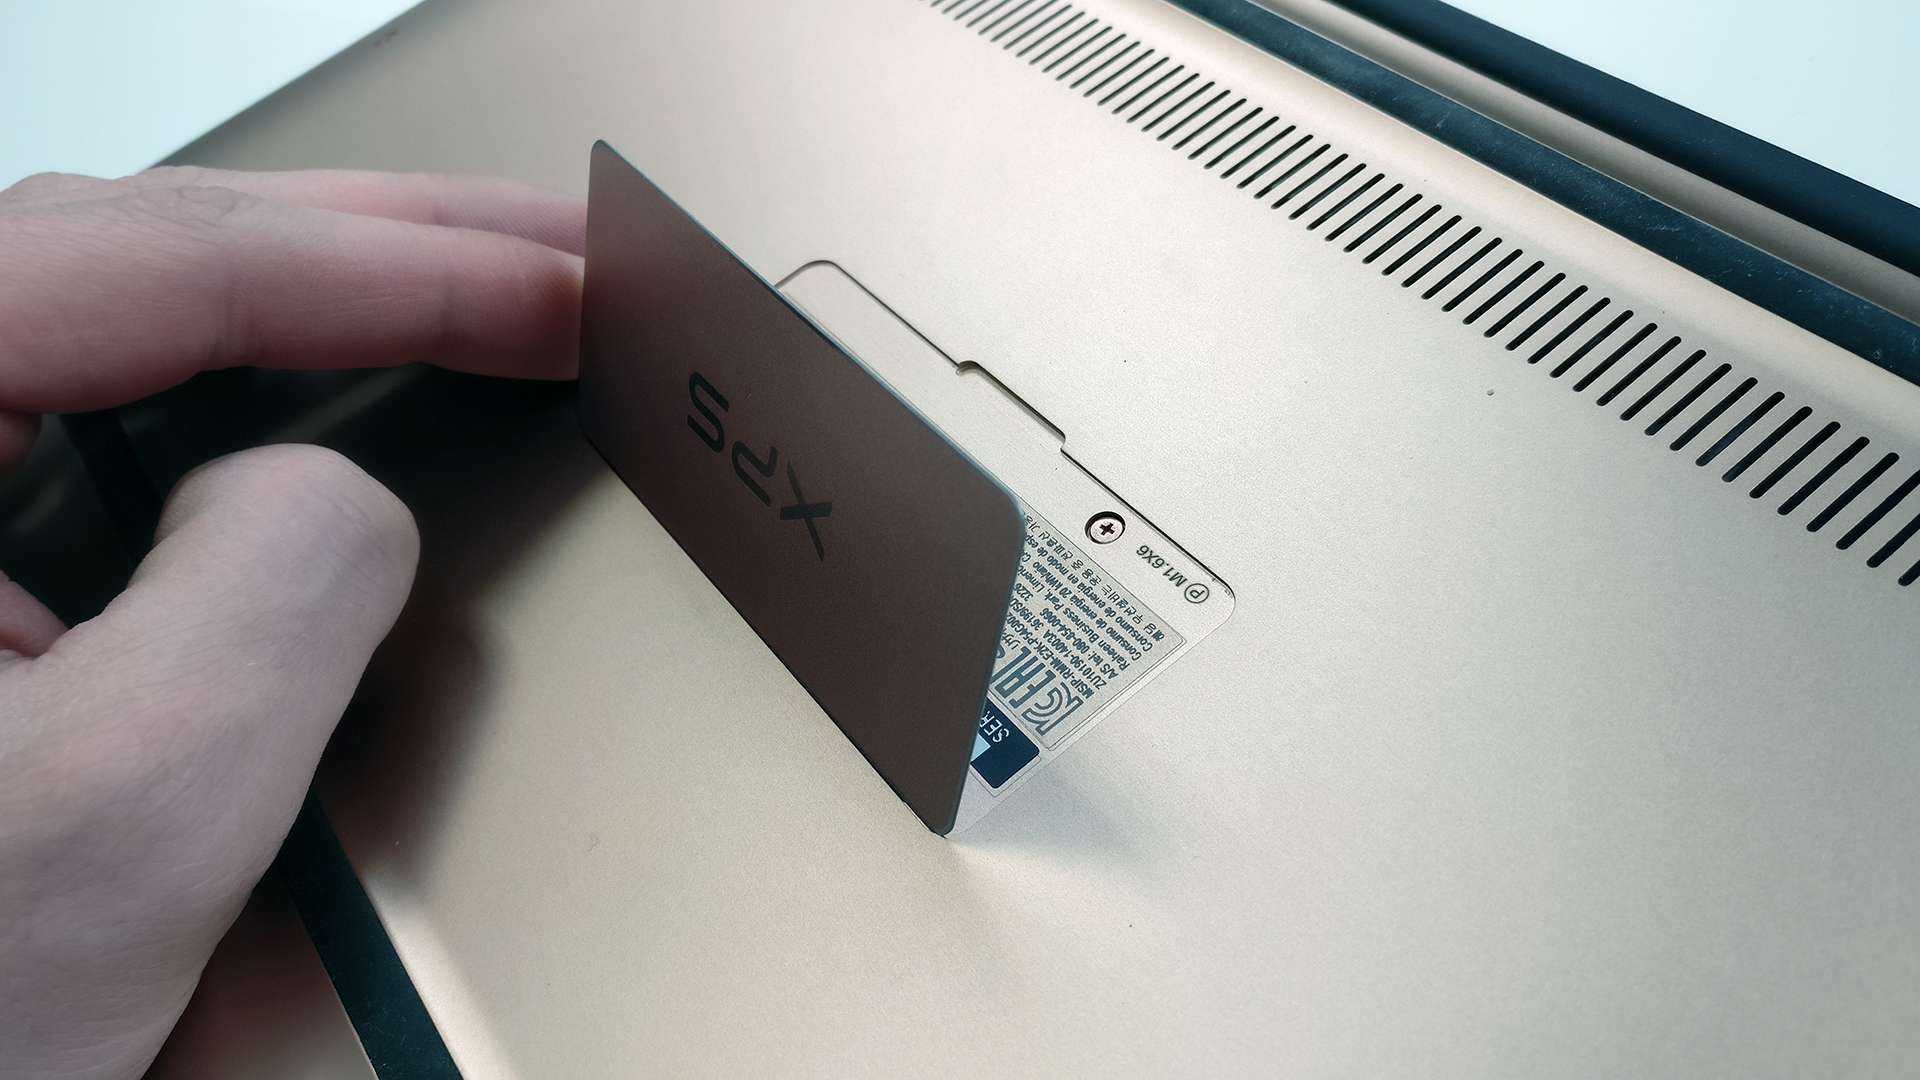
1. Removing the bottom cover
The bottom plate can be easily removed once you unscrew all the bolts around the edges. Also, don’t forget to remove the one hiding under the XPS logo cap as shown in the photos below.

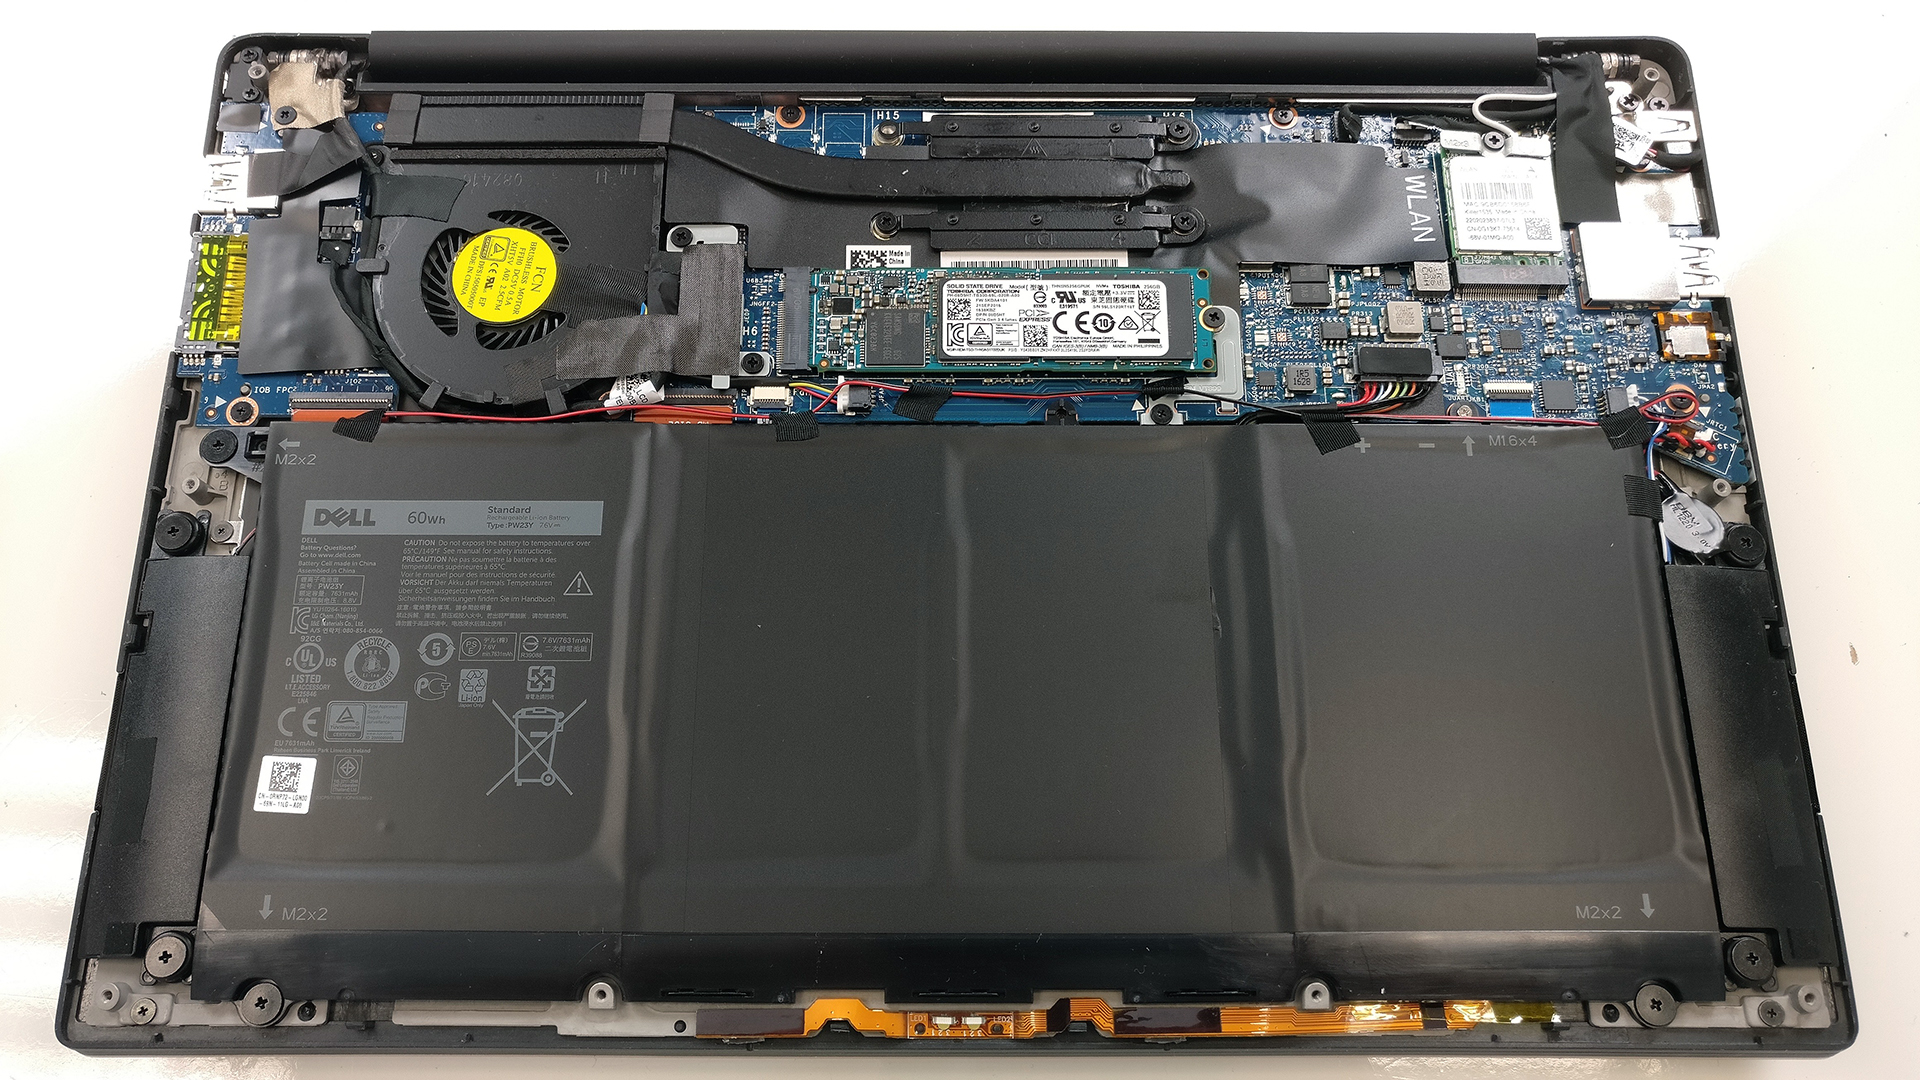
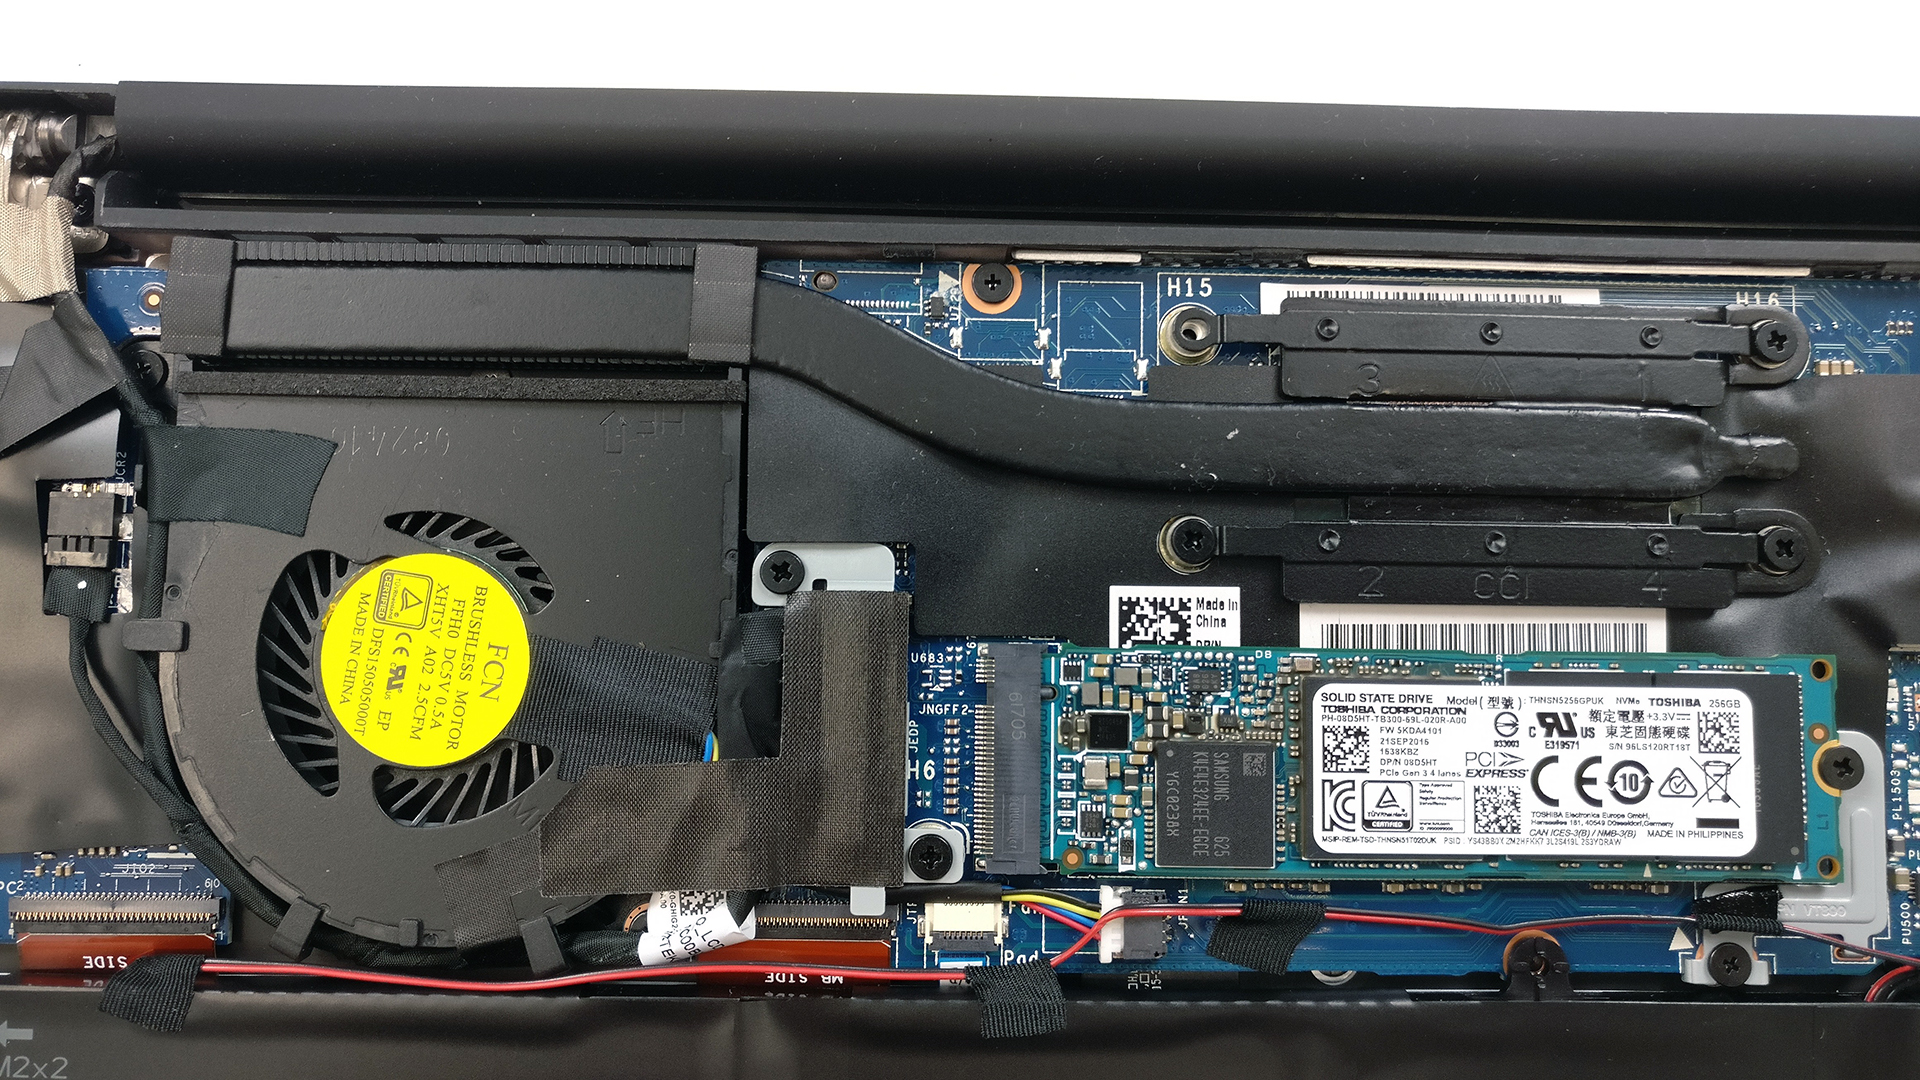
2. Battery, Wi-Fi card and storage
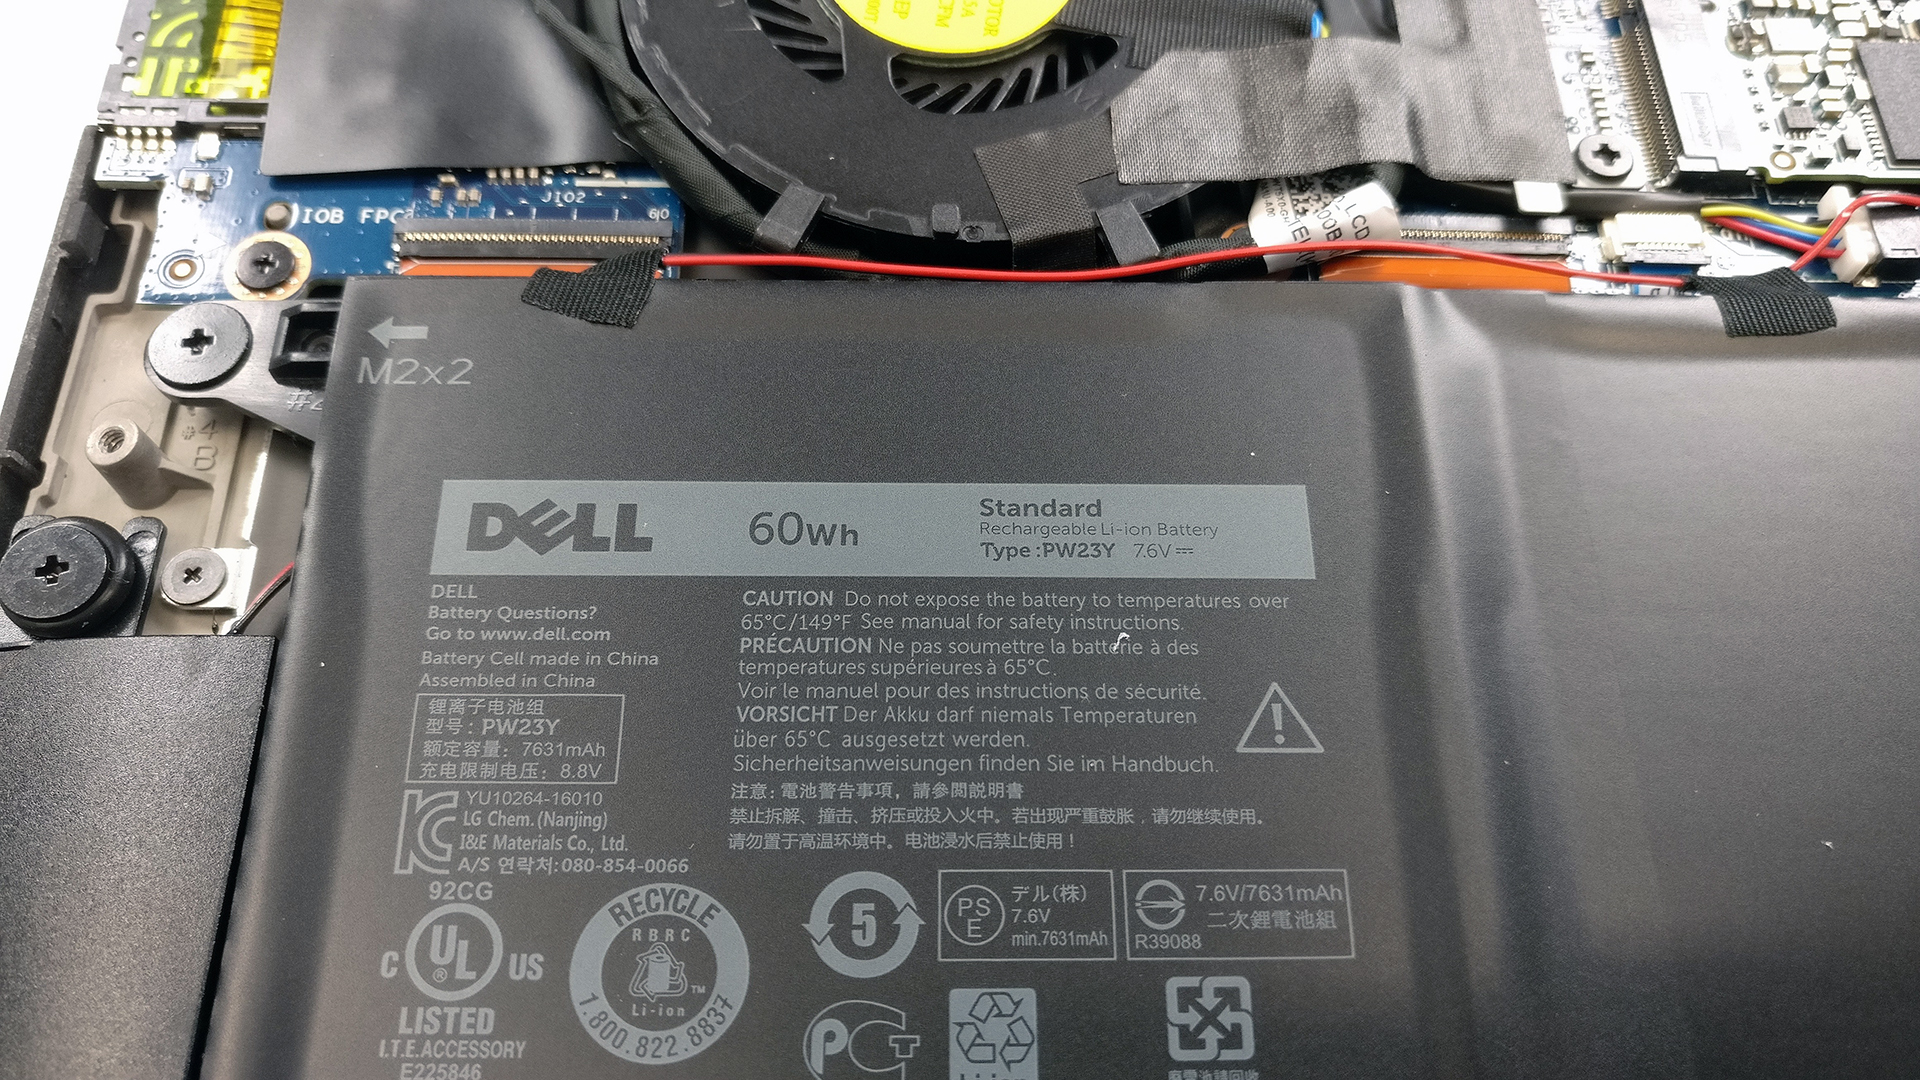
As you can see, the most of the internal space is taken by the huge 60Wh battery, which has been upgraded from a 56Wh unit.
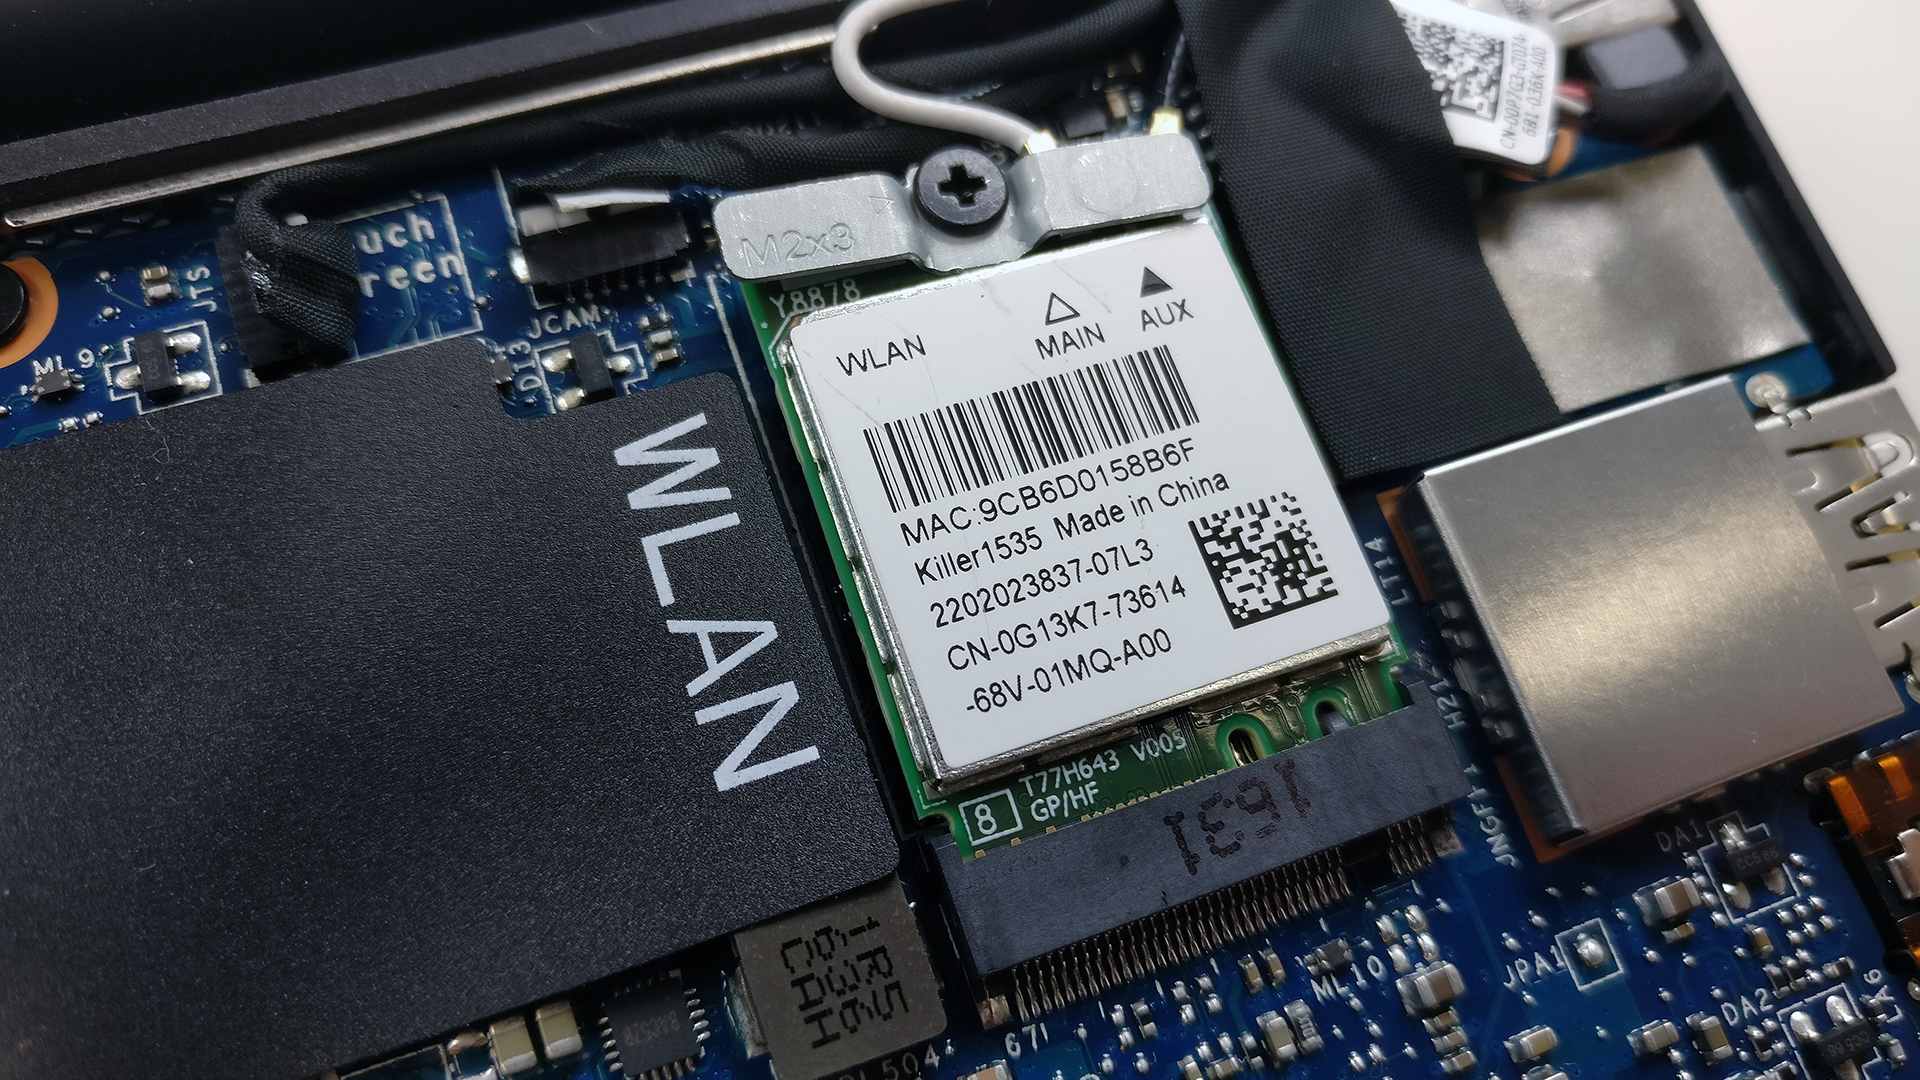
The Wi-Fi module is located in the upper right corner and it’s hard to miss the WLAN lettering.
And finally the storage. It still uses an M.2 PCIe NVMe drive but instead of relying on Samsung sticks – like the last generation – this time around the OEM chose to incorporate Toshiba SSDs. According to our tests, they are slightly faster than their Samsung counterparts and are probably less expensive to the OEMs as they gain popularity. We saw this M.2 SSD in the ASUS ROG G752VS, Acer Predator 15 and Predator 17.

As far as RAM is concerned, it’s again soldered to the motherboard and needs to be accessed by flipping the whole motherboard around.
3. Cooling system
The cooling system is quite simple. It consists of just one small heat pipe connecting the chip to the cooling fan and leading the hot air out of the chassis via the main vent between the base and the screen hinge. It turned out to be effective enough to support the system even under heavy load but more on that in our full review.
You can find some of the available configuration: http://amzn.to/2gElpvA


![[2026年6月] 亚马逊全球畅销笔记本电脑品牌——苹果在销量和营收方面均占据无可匹敌的统治地位](https://laptopmedia.com/wp-content/uploads/2026/07/GLOBAL-Best-Brands-400x225.jpg)
![[2026年6月] 亚马逊全球:笔记本电脑销量前十名——苹果新款MacBook Neo强势登顶,以亲民价格重塑市场格局](https://laptopmedia.com/wp-content/uploads/2026/07/Best-Selling-Laptops-GLOBAL-Top-10-400x225.jpg)
![[2026年6月] 亚马逊全球:十大畅销游戏笔记本电脑——宏碁Nitro V 16S AI销量领跑,华硕总营收居首](https://laptopmedia.com/wp-content/uploads/2026/07/Best-Selling-Gaming-Laptops-GLOBAL-Top-10-400x225.jpg)
![[2026年6月] 亚马逊全球畅销笔记本电脑显卡排行榜——NVIDIA RTX 5060 位居专用显卡销量榜首](https://laptopmedia.com/wp-content/uploads/2026/07/Best-Selling-GPUs-GLOBAL-Top-10-400x225.jpg)
![[2026年6月] 亚马逊全球畅销笔记本电脑CPU排行榜——苹果M5占据主导地位,AMD锐龙7 260在高端市场占据稳固份额](https://laptopmedia.com/wp-content/uploads/2026/07/Best-Selling-CPUs-GLOBAL-Top-10-400x225.jpg)

did you remove 1 screw from the heatsink or it come like this ?
It came off like this. Strange, I didn’t even notice there’s a screw missing from the heat sink.
A bottom plate prob holds it on
Is RAM upgradable?
Unfortunately, no. It says that in the article.
Hi! My 9360’s screen (1080p one in my case) got damaged and since I’m probably going to replace the screen anyway, I wondered whether it would be possible to replace it with the QHD touchscreen. Are the digitizer connectors on motherboard of the non-touch version and does the QHD version have the same connector(s)? My configuration is core i7 7500U, 8GB RAM and 256GB drive. Thanks!
how to XPS 13 9360 ram update
english difficult eh?
The spelling is correct, the grammar needs improving but it’s intelligible. Stop being an intolerant bigot.
Agreed 100% abt the bigot statement. Glad to see you take a strong stand.
Disk is labelled “Pcie Gen3 4 lanes” so this laptop supports an M key m2 ssd, is that correct?
Yes, of course.
has anyone upgraded their ssd drive? i just picked up the 13.3 xps laptop with a 128gb drive…i want to upgrade it and found some directions online but would like feedback from someone before doing so.
I know this thread is old but I have upgraded the SSD. Fairly easy but you will need an external USB drive enclosure and AEOMI Backupper software – bootable. You can install to your current drive in windows and create the bootable drive there. Need to do it on a USB flash drive NOT an SD card. Then go into the BIOS and change settings on drive setup configuration from RAID to AHCI. When you reboot the pc, F12 gets you into boot options where you will choose the USB drive and boot AEOMI Backupper. From there you can clone… 阅读更多 »