如何打开戴尔 Precision 16 7680 – 拆卸和升级选项
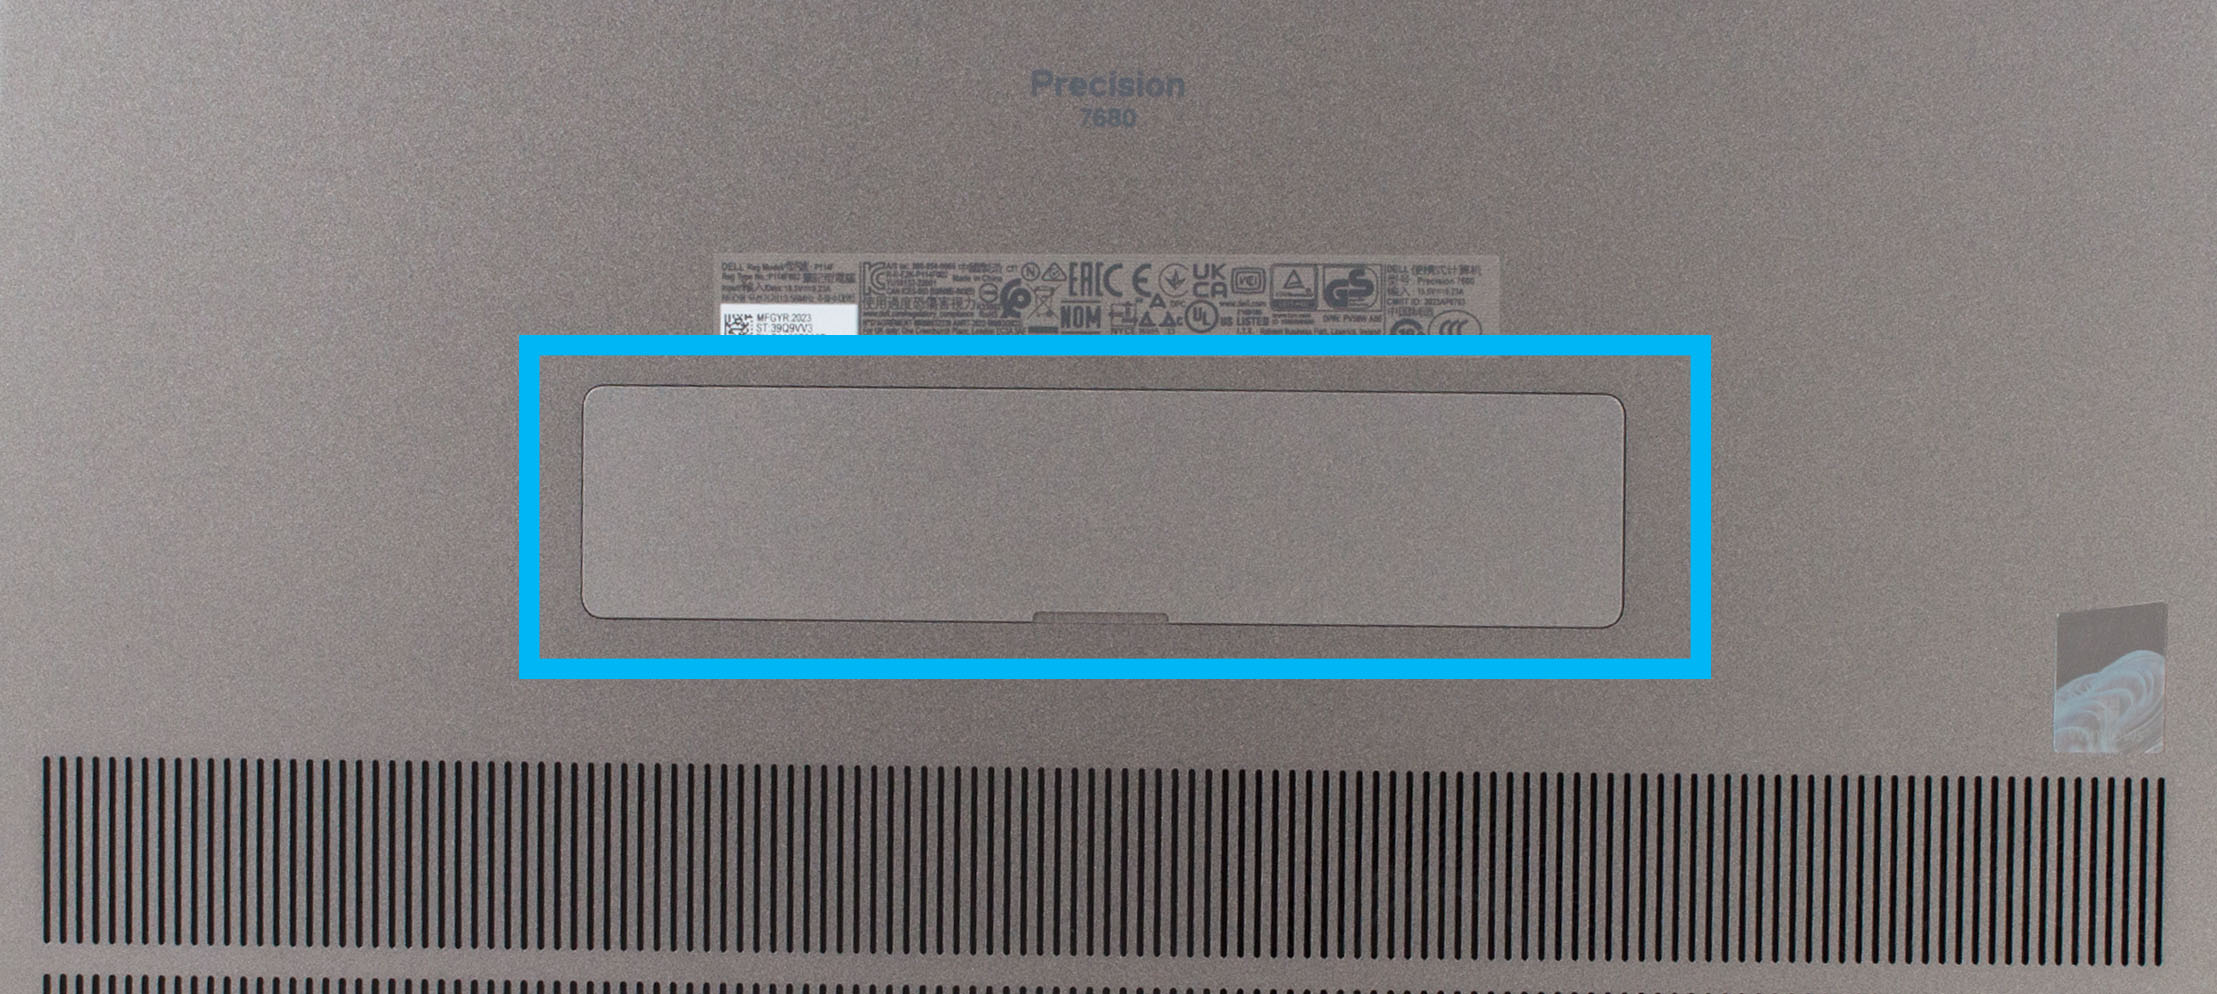
1.打开维修盖
– 笔记本电脑配有一个指定的维修盖,可用于快速访问。
– 只需将其打开,即可访问其中一个 M.2 PCIe x4 插槽。
2.拆下底部面板
– 首先,确保设备电源关闭并与任何电源断开连接。
– 使用螺丝刀拧下六颗十字头螺钉。
– 使用塑料工具轻轻撬动底部面板。从边缘开始向四周撬。
– 小心地将面板从机箱上抬起。

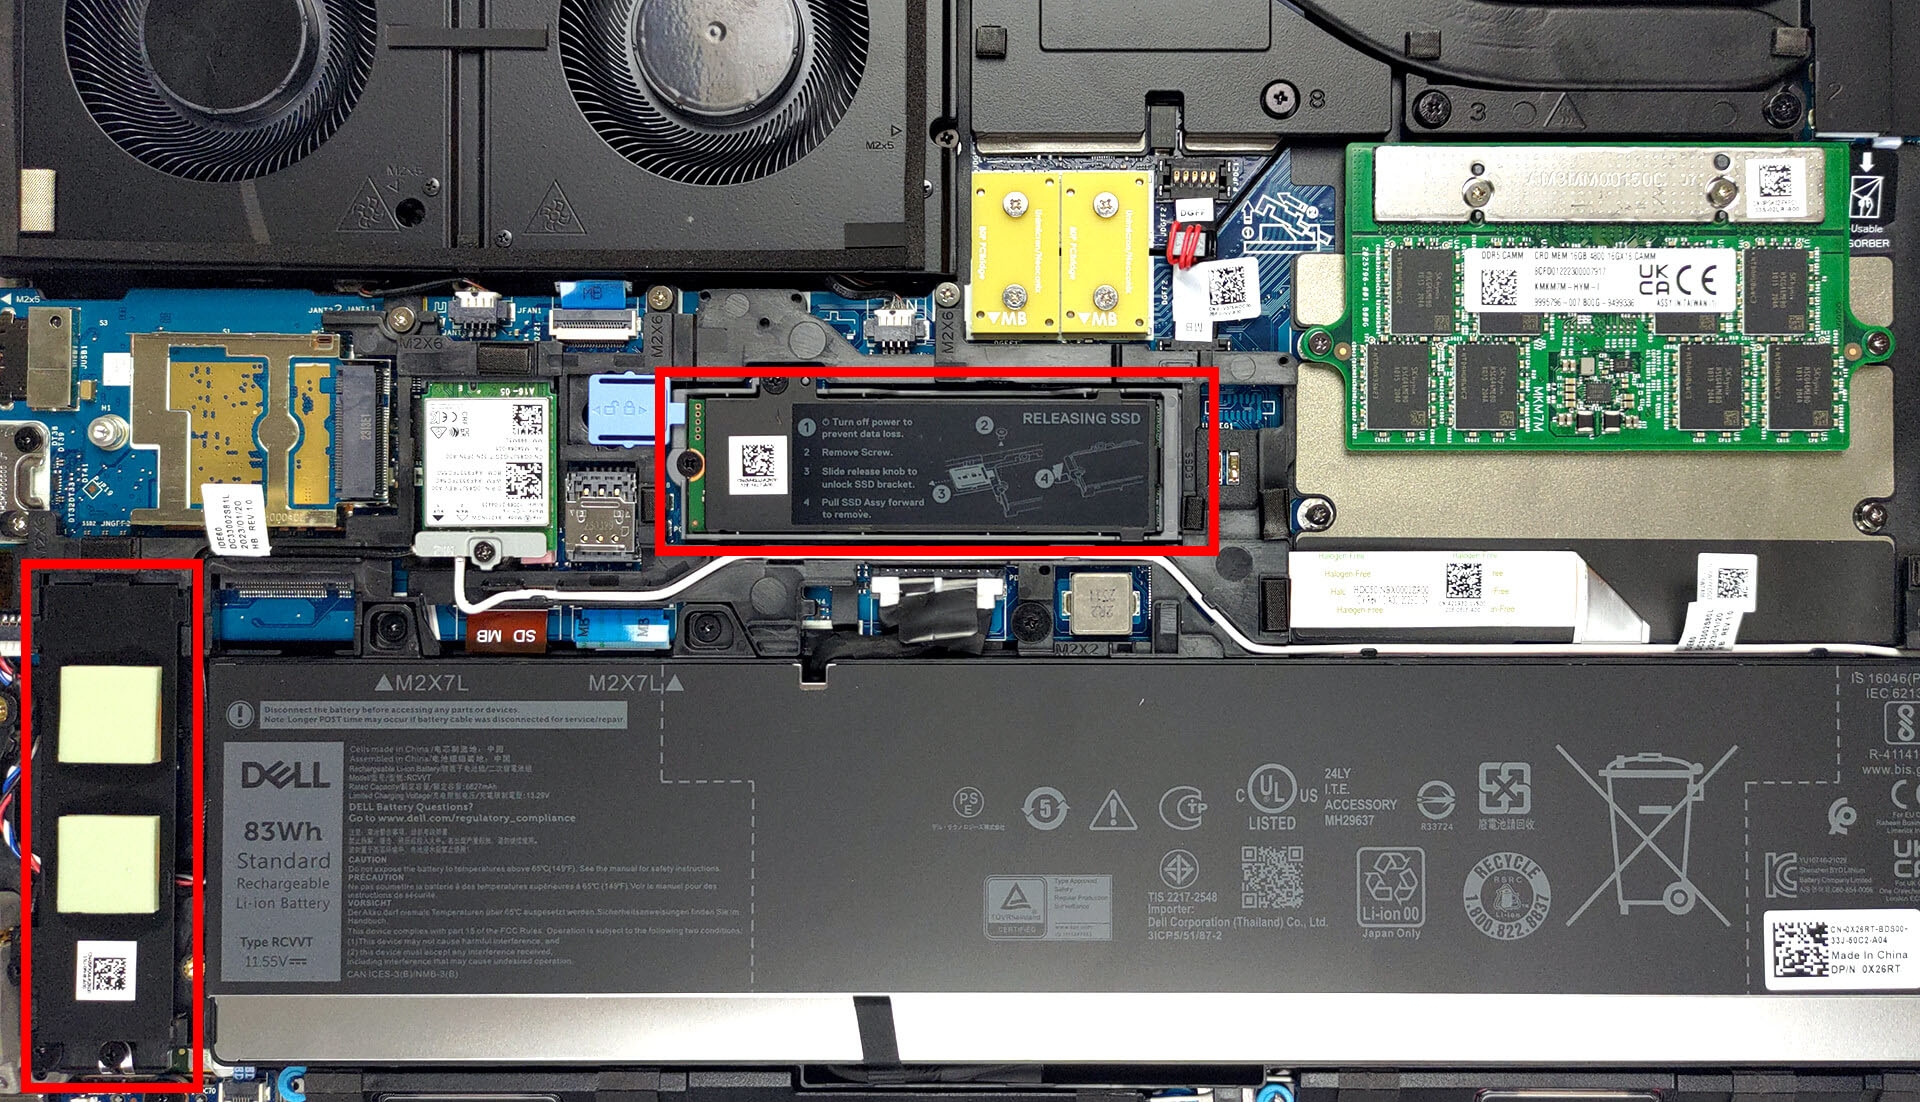
3.拆卸电池
– 首先从主板上拔下电池连接器。
– 然后,卸下固定 83Wh 电池组的三颗十字螺丝。
– 从电池盒中提起并取出电池。

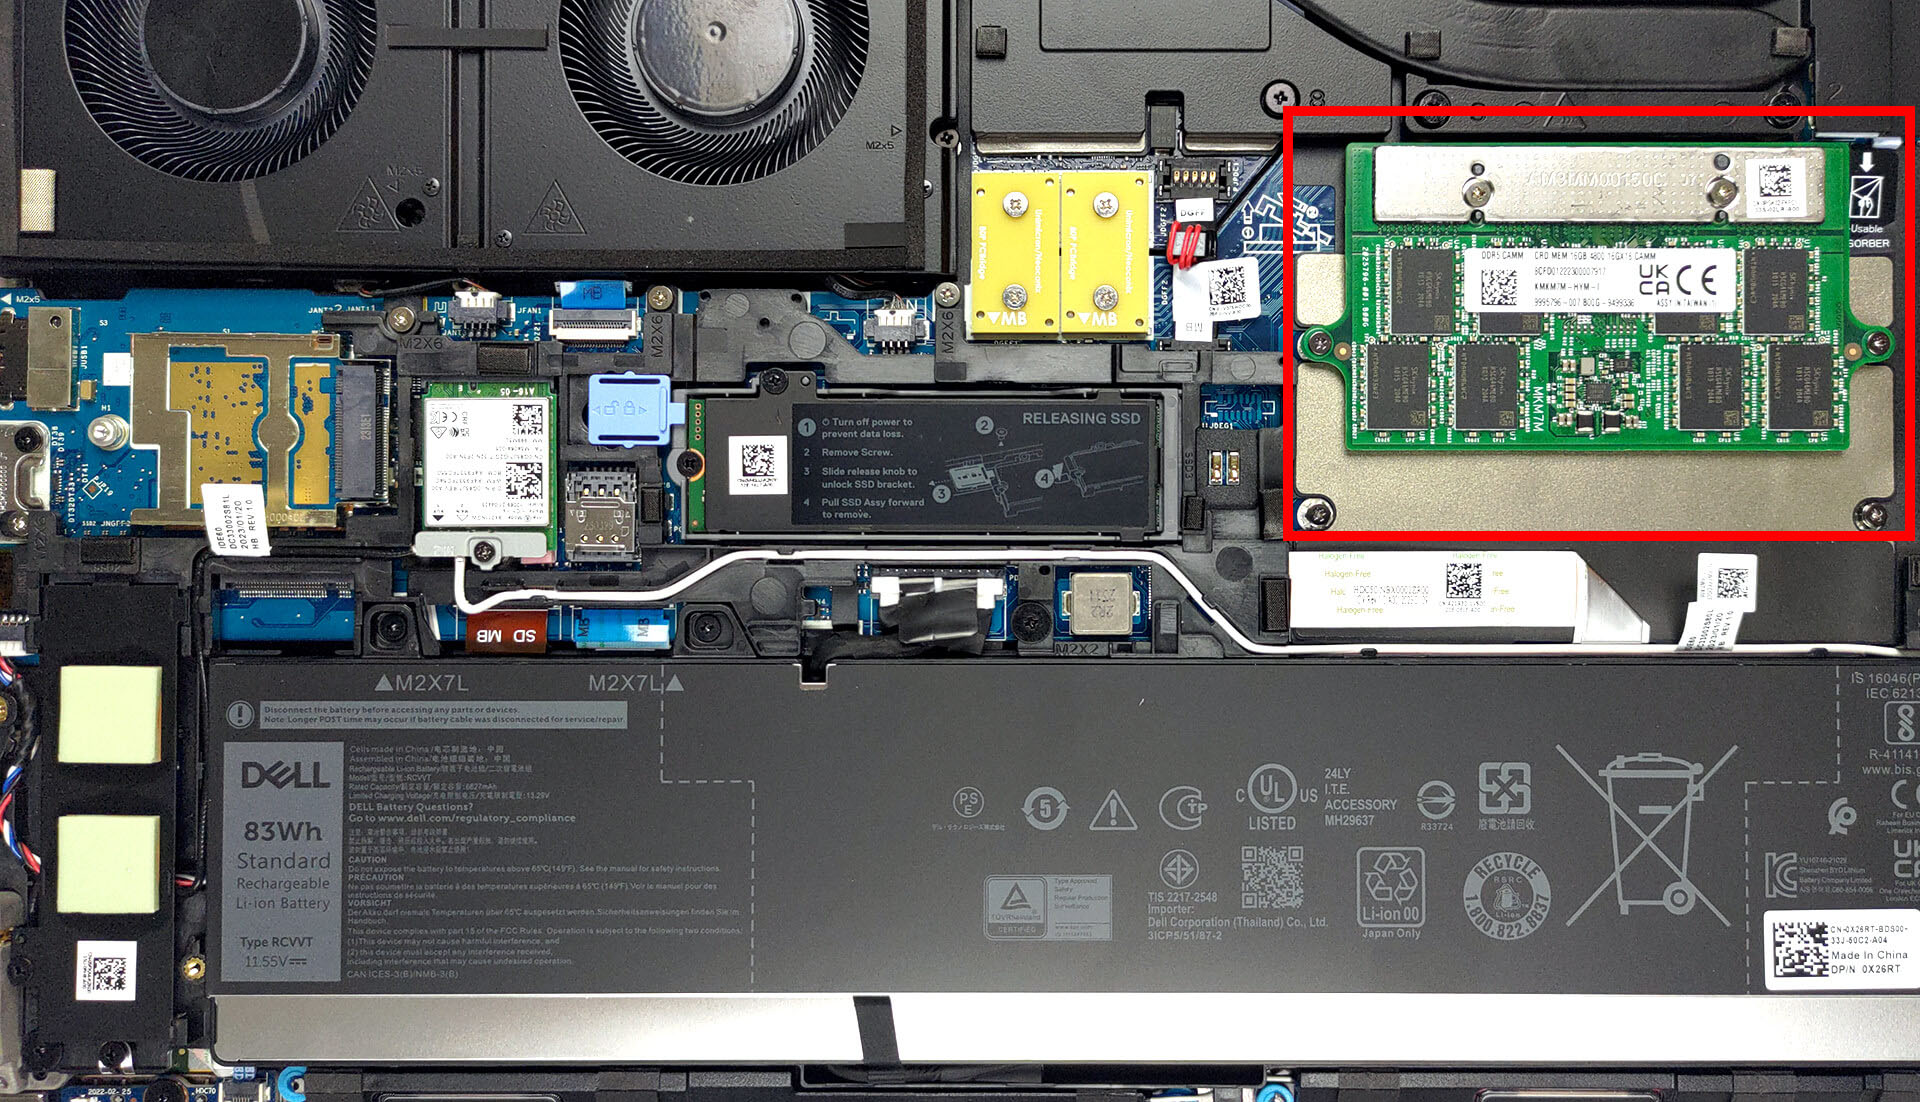
4.访问和升级内存
– 设备采用新的 CAMM 内存,更加紧凑。
– 不过,升级内存稍有难度。内存由四颗螺丝固定。请注意,其中两颗螺丝还将 CAMM 连接器模块固定在系统板上。
– 这款笔记本电脑提供了灵活性,因为如果你选择传统内存,同样的连接器可用于连接 SODIMM 适配器。
5.升级存储
– Dell Precision 16 7680 提供两个 M.2 PCIe x4 插槽用于存储扩展。
– 两个插槽均支持第4代固态硬盘,并兼容RAID。
您可以在这里购买第 4 代 M.2 固态硬盘模块:Buy from Amazon.cn (#CommissionsEarned)
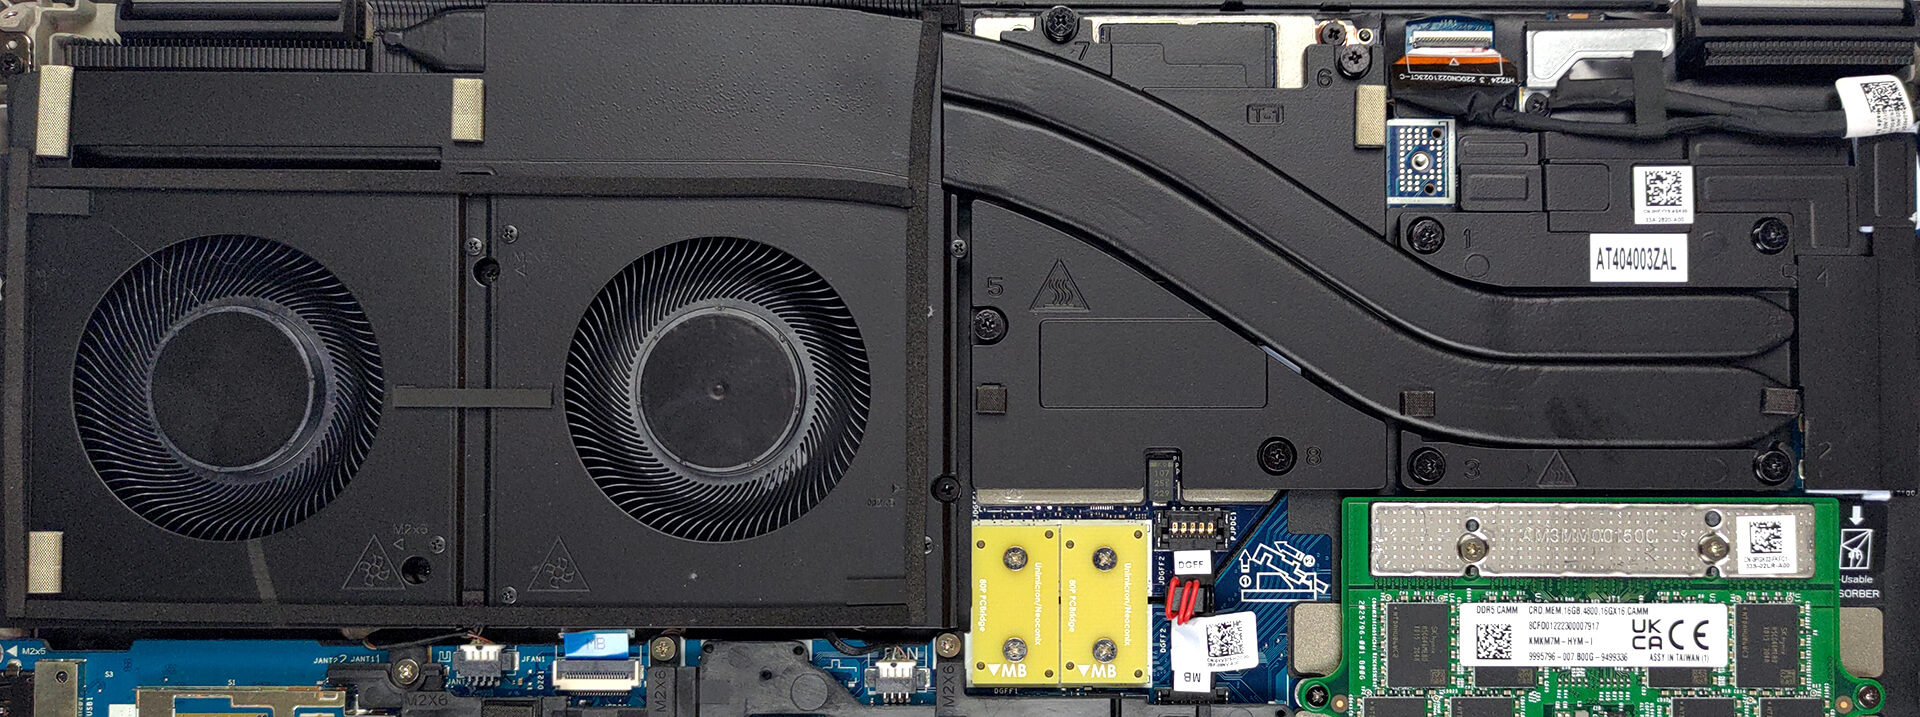
6.冷却系统概述
– 散热系统设计精良,可处理设备强大组件产生的热量。
– CPU 和 GPU 共用两根热管,将热量导入大型散热器。
– 两个大风扇帮助散热片散热。
– 此外,VRM 和显存有专门的散热片来管理它们的散热性能。
注意:请务必小心操作内部组件,确保不要施加过大的力或压力。
要重新组装笔记本电脑,请按照相反的顺序执行以下步骤。确保所有连接器都已重新正确连接,螺丝都已牢牢拧紧。
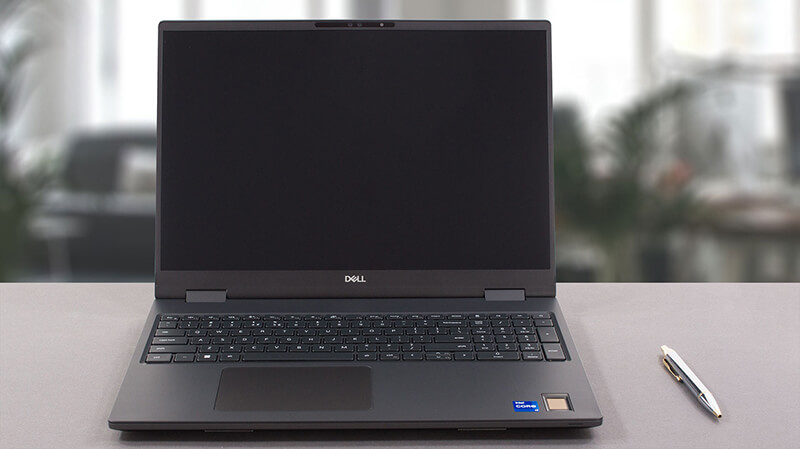
Dell Precision 16 7680 深入审查
In the modern laptop world, there are ordinary notebooks, gaming devices, and then there are workstations. They range from the least expensive thing that will get the job done, to a mini powerhouse that is easily comparable to a desktop system.Today, we have one such notebook, which is called the Dell Precision 16 7680. It comes with a 16-inch display, and contrary to what we expected, is not that bulky. Oftentimes, when someone needs a powerful machine for work, they settle for a gaming machine, because it is similarly powerful, but comes at a far more convincing price tag.However, c[...]
优点
- Up to 128GB of DDR5 (CAMM) + two M.2 slots
- Capable hardware
- Fingerprint reader + optional IR face recognition and 5G connectivity
- SD card reader + 2x Thunderbolt 4 + HDMI 2.1
- Packs good security features
- Great spill-resistant keyboard and touchpad
弊端
- High price
- Horrendous battery life
- Gets really warm even on idle