Inside Acer Aspire 3 (A317-32) – disassembly and upgrade options
Even though this is not the most powerful laptop on the market, it is very tempting to get it just to have something at home that you can take from the desk and watch a movie in the kitchen or in the bed.
Check out all Acer Aspire 3 (A317-32) prices and configurations in our Specs System or read more in our In-Depth review.
1. Remove the bottom plate
As a device that has an optical drive option, first, you need to remove it, in order to access the rest of the internals. This is extremely easy to do – just unscrew the appropriate middle screw, and you should be able to pull it away. After that, there are 12 more Phillips-head screws left for removal, and then you need to pry the panel with a plastic tool.
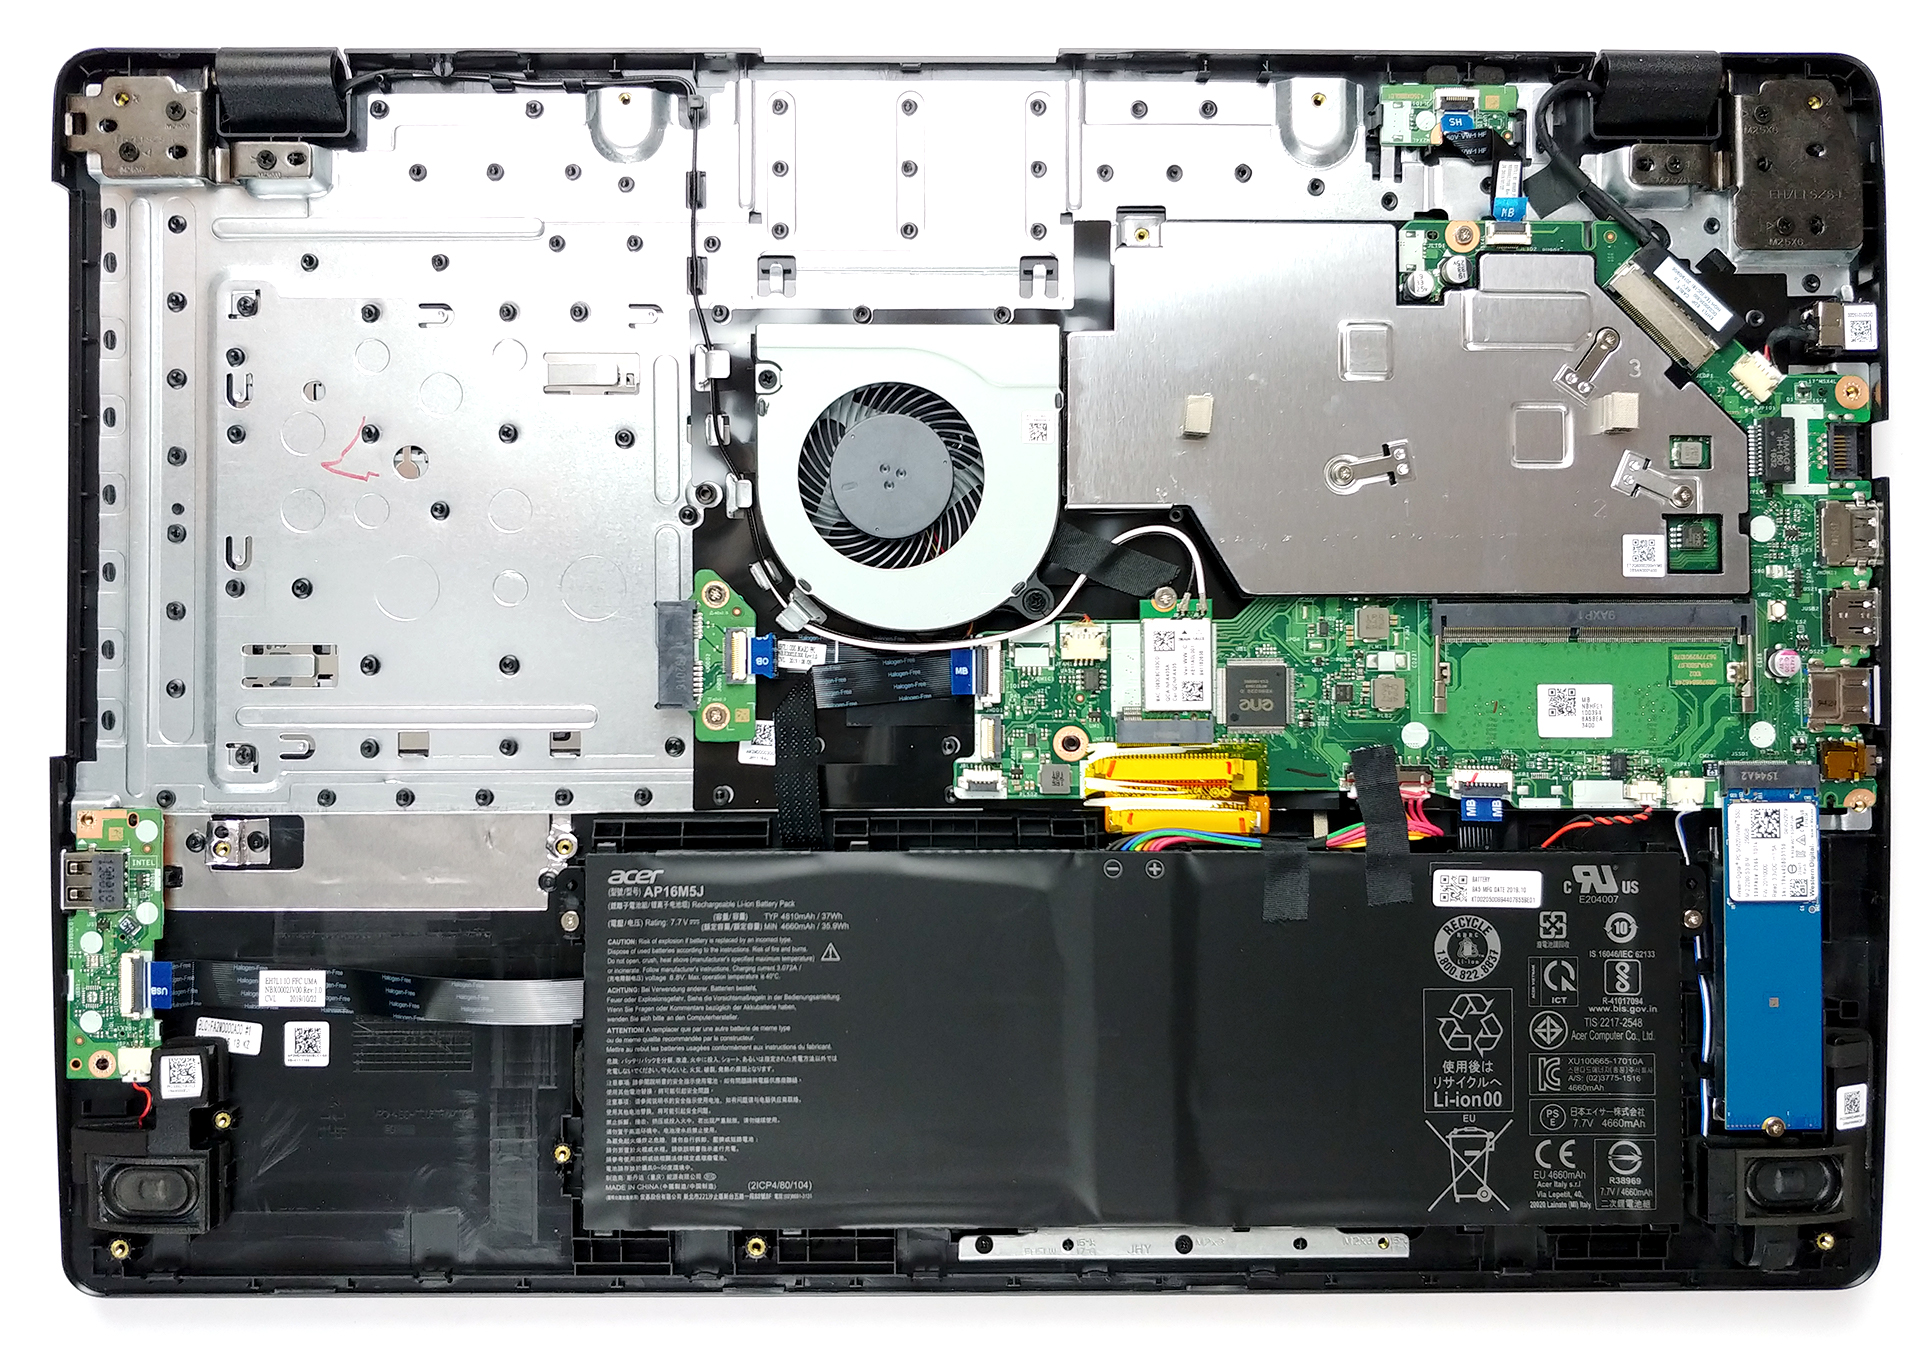
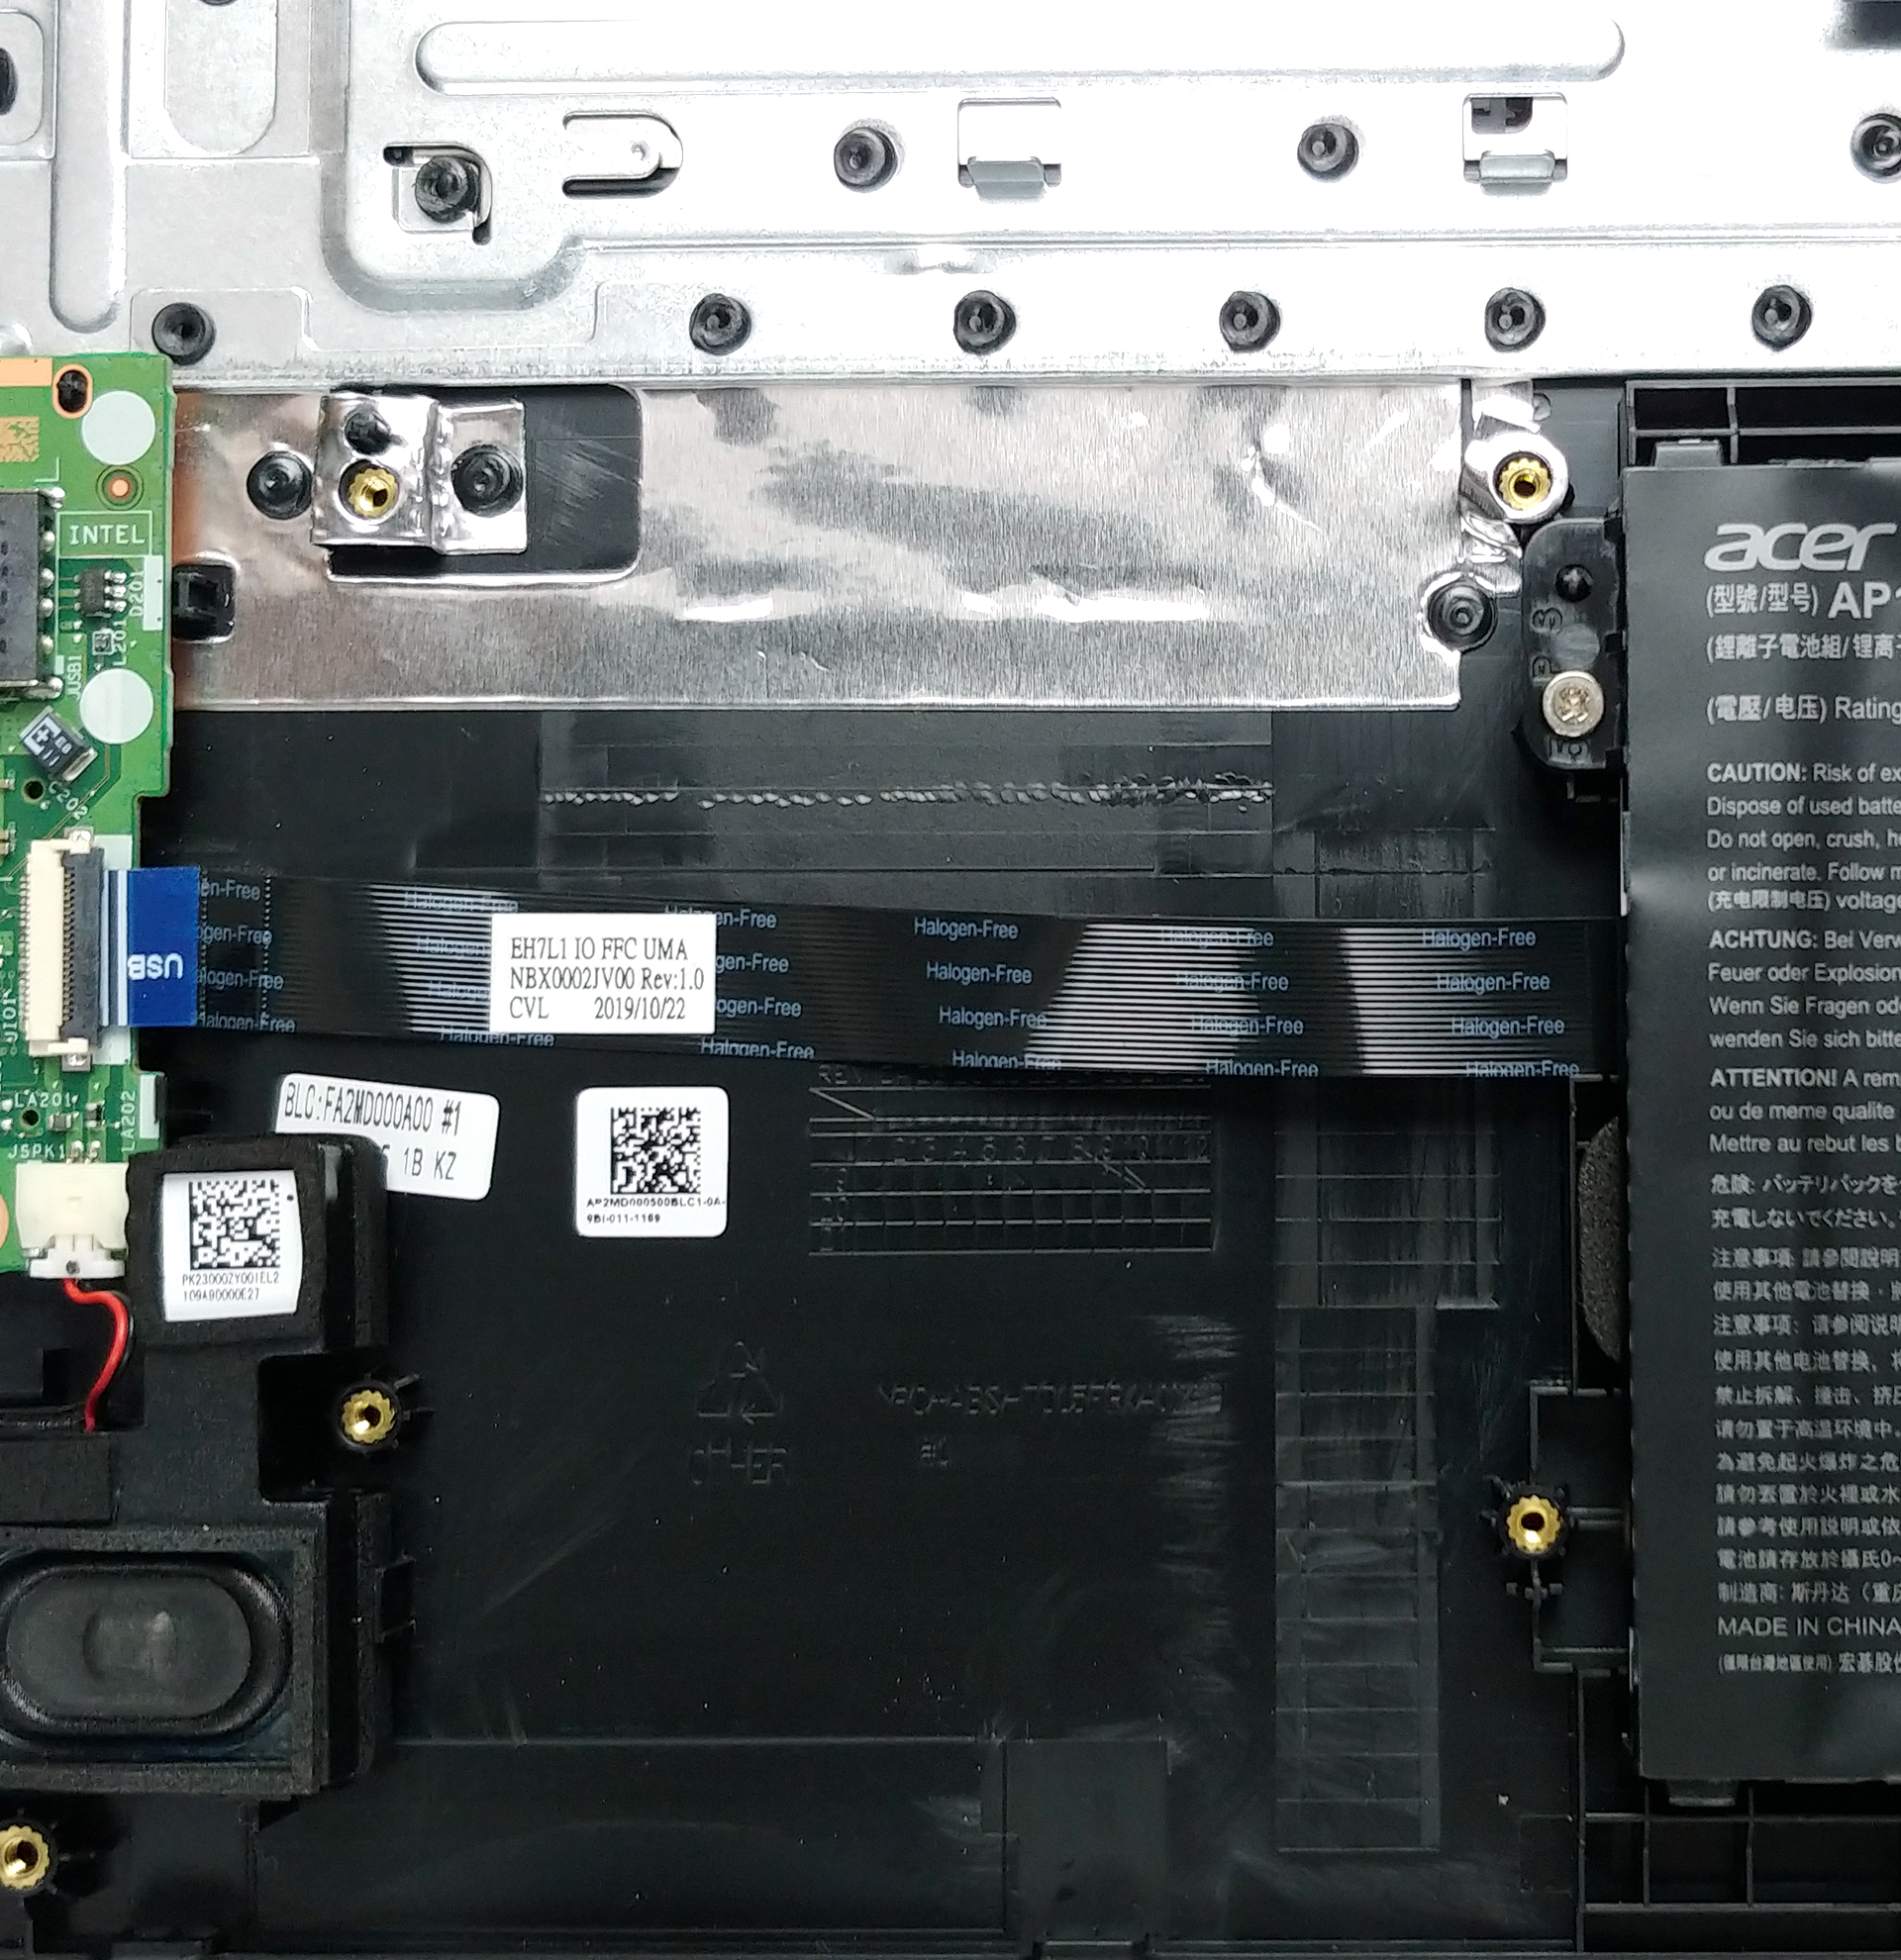
2. Battery
Sadly, the Aspire 3 (A317-32) is equipped with a rather small 37Wh unit.

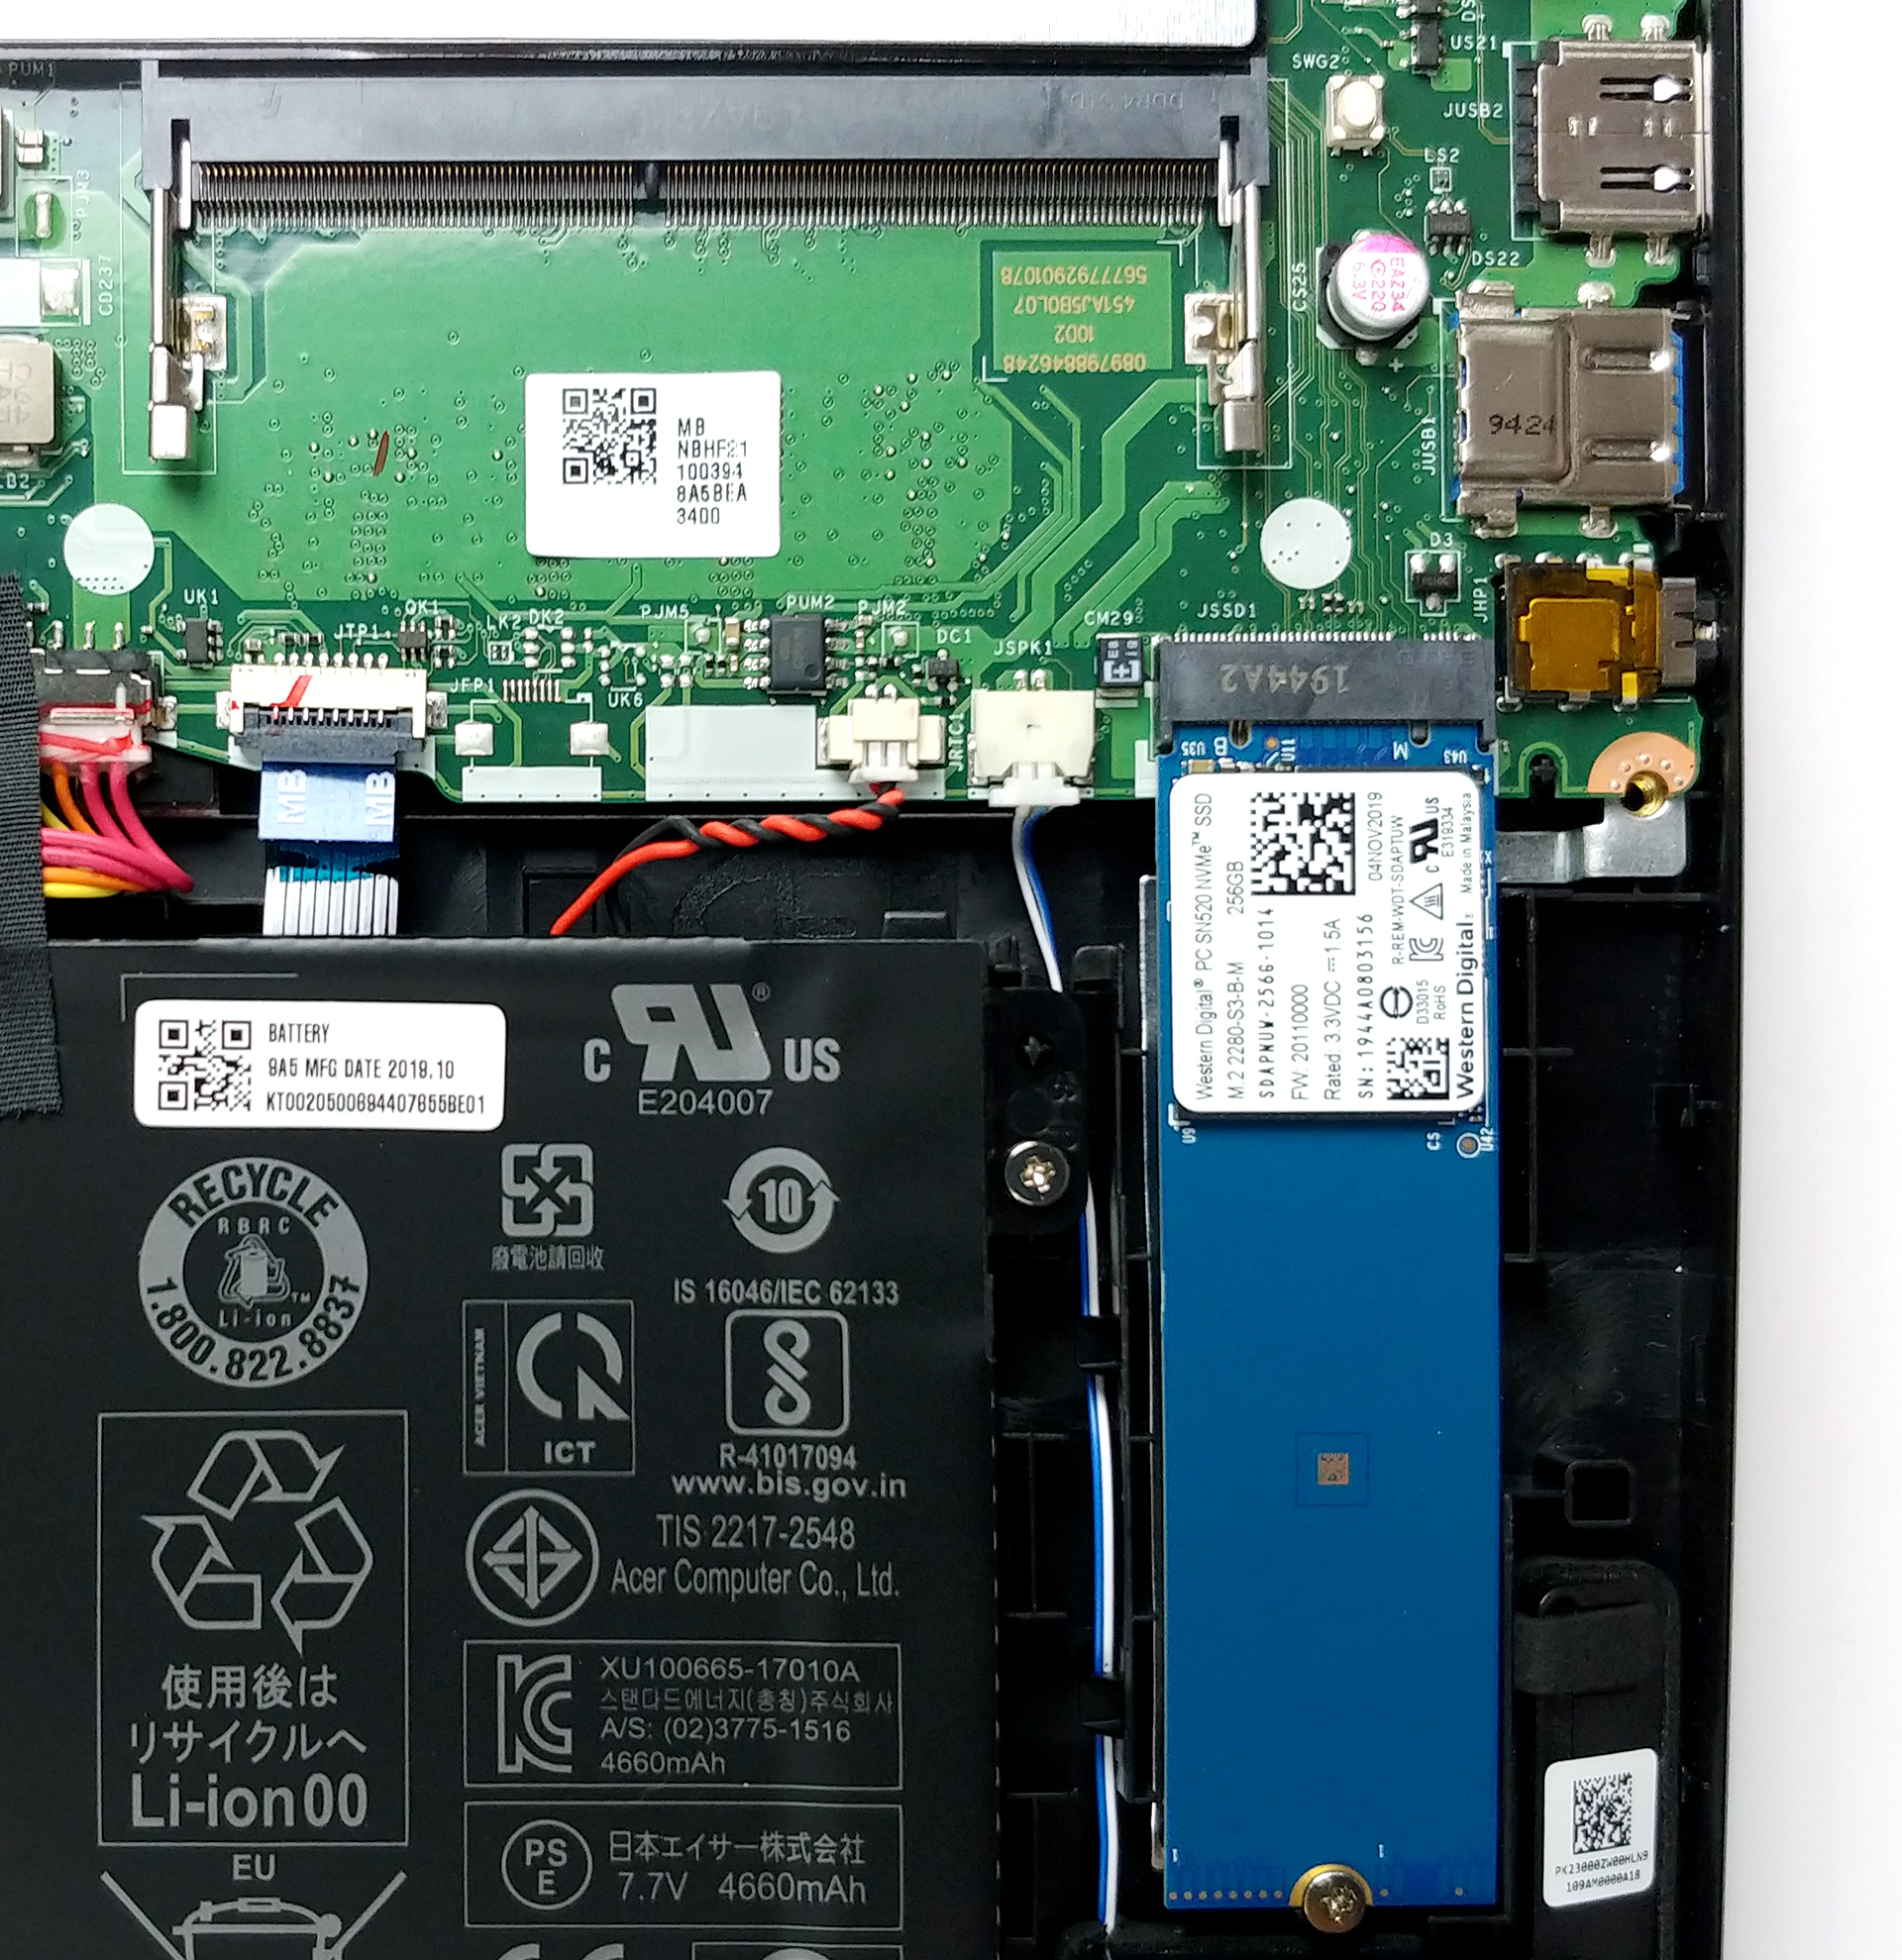
3. Memory and storage
This device comes with 4GB of RAM soldered to the motherboard and a single SODIMM slot for expansion. Just beneath it, you can see the M.2 NVMe-enabled slot, while there is space for a 2.5″ SATA drive on the left side of the battery.
4. Cooling system
Inside, we saw a similarly bizarre cooling solution, to the one on the smaller Aspire 3 – A315-34. Even though it looks weird, the purpose of the fan is to spin the air inside of the chassis, so that it can drive away the heat from the heat spreader.

Check out all Acer Aspire 3 (A317-32) prices and configurations in our Specs System or read more in our In-Depth review.