Innenleben des HP 255 G9 – Demontage und Aufrüstmöglichkeiten
Wie üblich ist diese Serie etwas schwer zu öffnen, aber dafür wird man im Inneren reichlich belohnt.
Sehen Sie sich alle Preise und Konfigurationen des HP 255 G9 in unserem Specs System an oder lesen Sie mehr in unserem ausführlichen Testbericht.
1. Entfernen Sie die Bodenplatte
Um an die Innereien des Notebooks zu gelangen, müssen Sie zwei Kreuzschlitzschrauben lösen. Entfernen Sie dann die beiden Gummifüße und lösen Sie die restlichen Kreuzschlitzschrauben. Danach öffnen Sie den Deckel und heben die Bodenplatte vorsichtig mit einem Kunststoffwerkzeug ab.
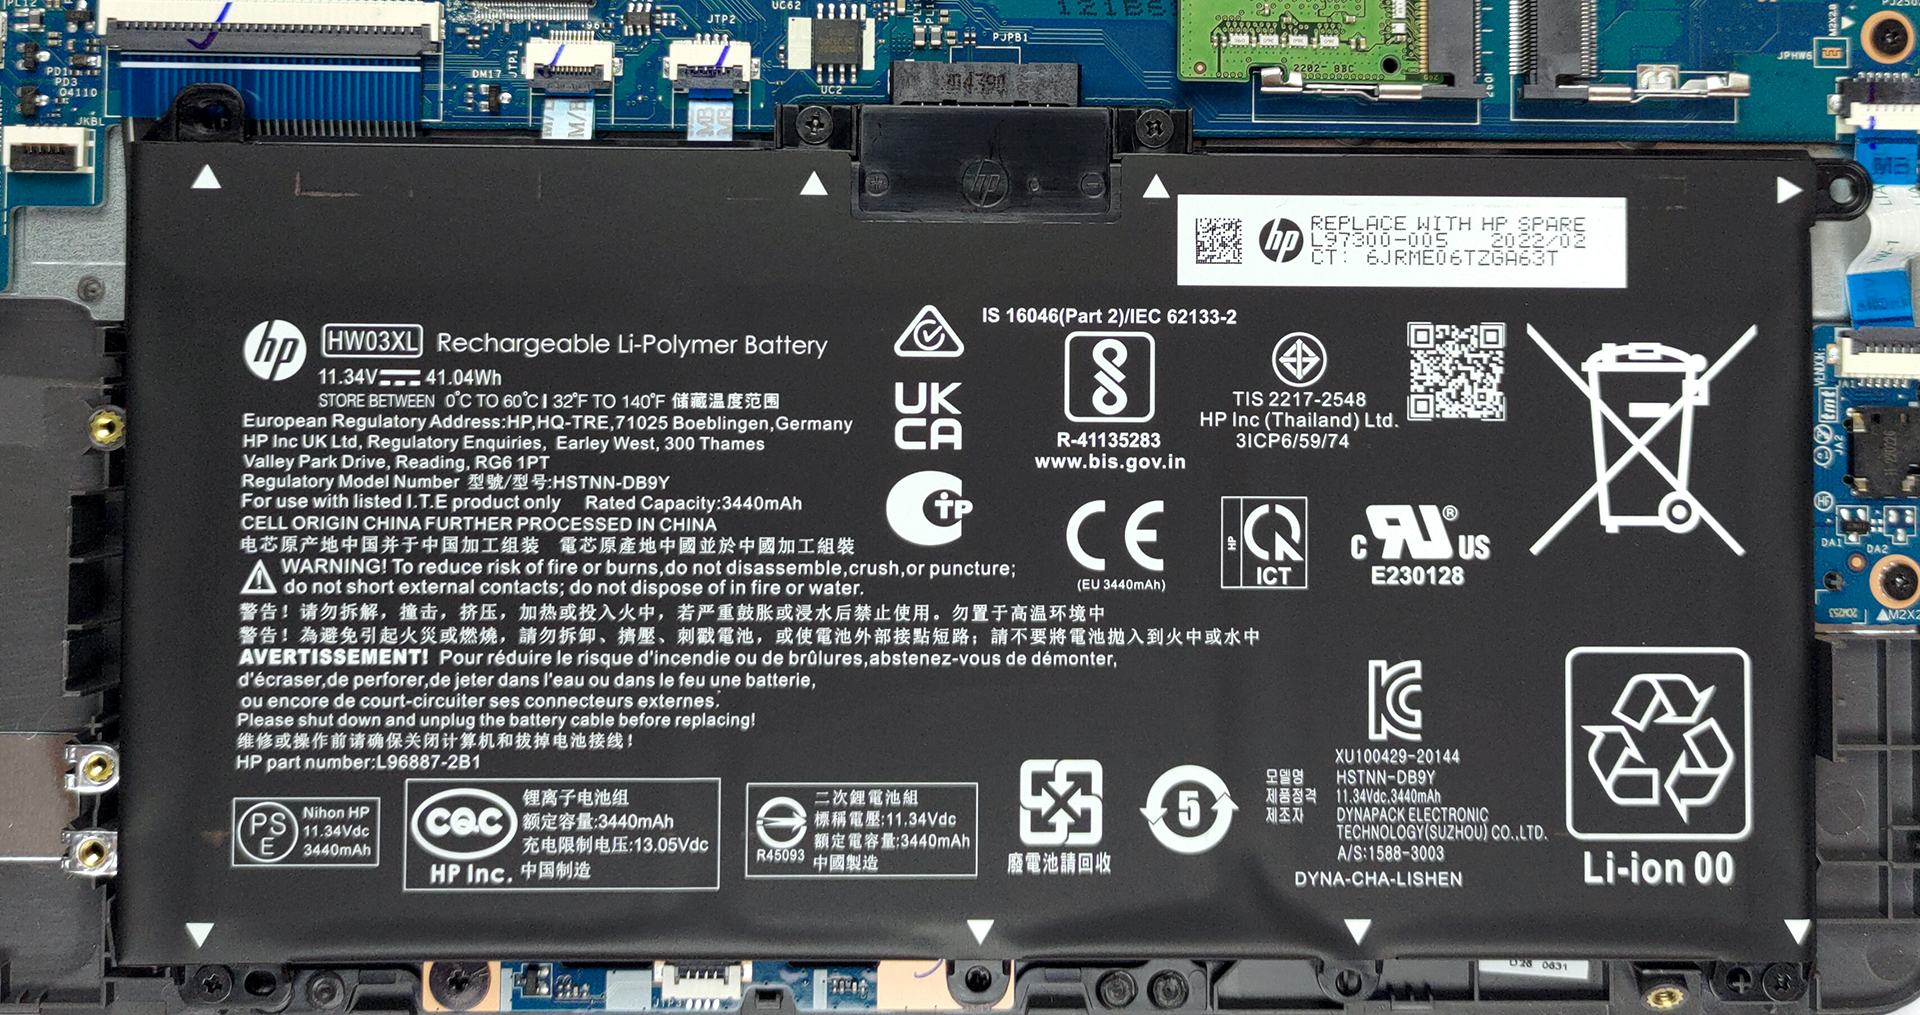
2. Akku
Im Inneren finden Sie einen sehr vertrauten 41-Wh-Akku. Er reicht für 10 Stunden und 30 Minuten Webbrowsing oder fast 8 Stunden Videowiedergabe. Um ihn herauszunehmen, entfernen Sie die vier Kreuzschlitzschrauben, mit denen er am Gehäuse befestigt ist.
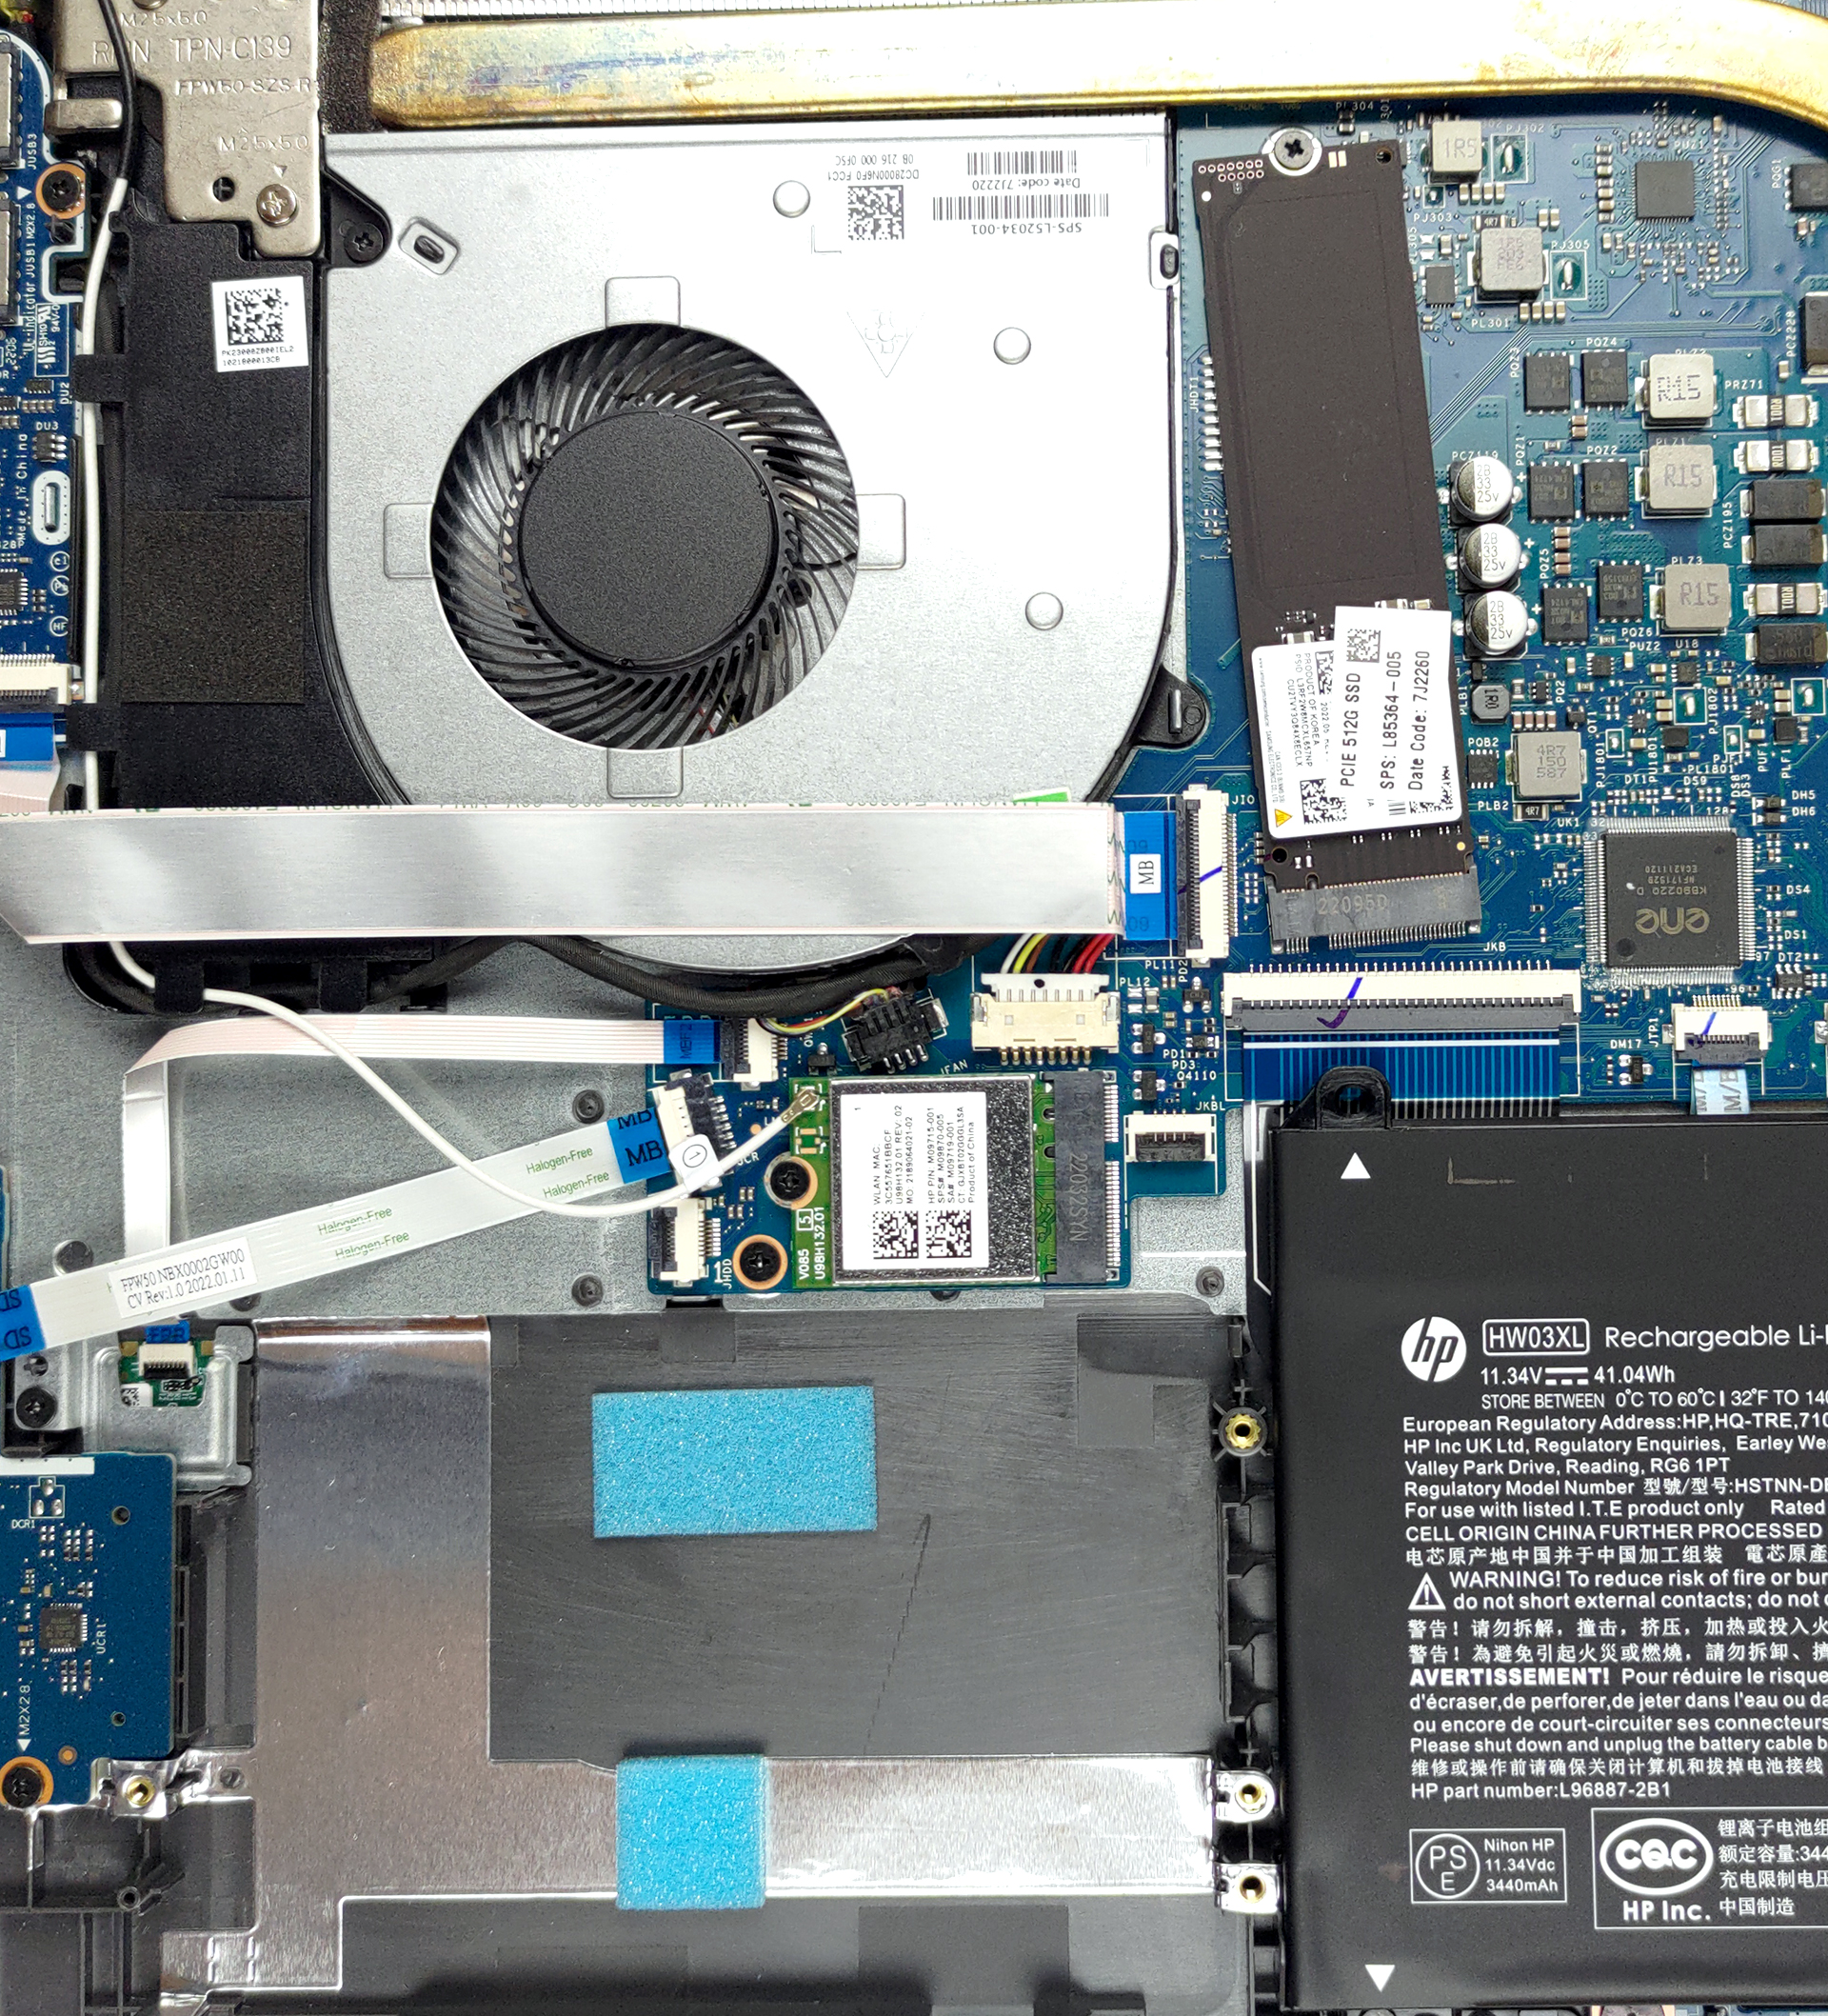
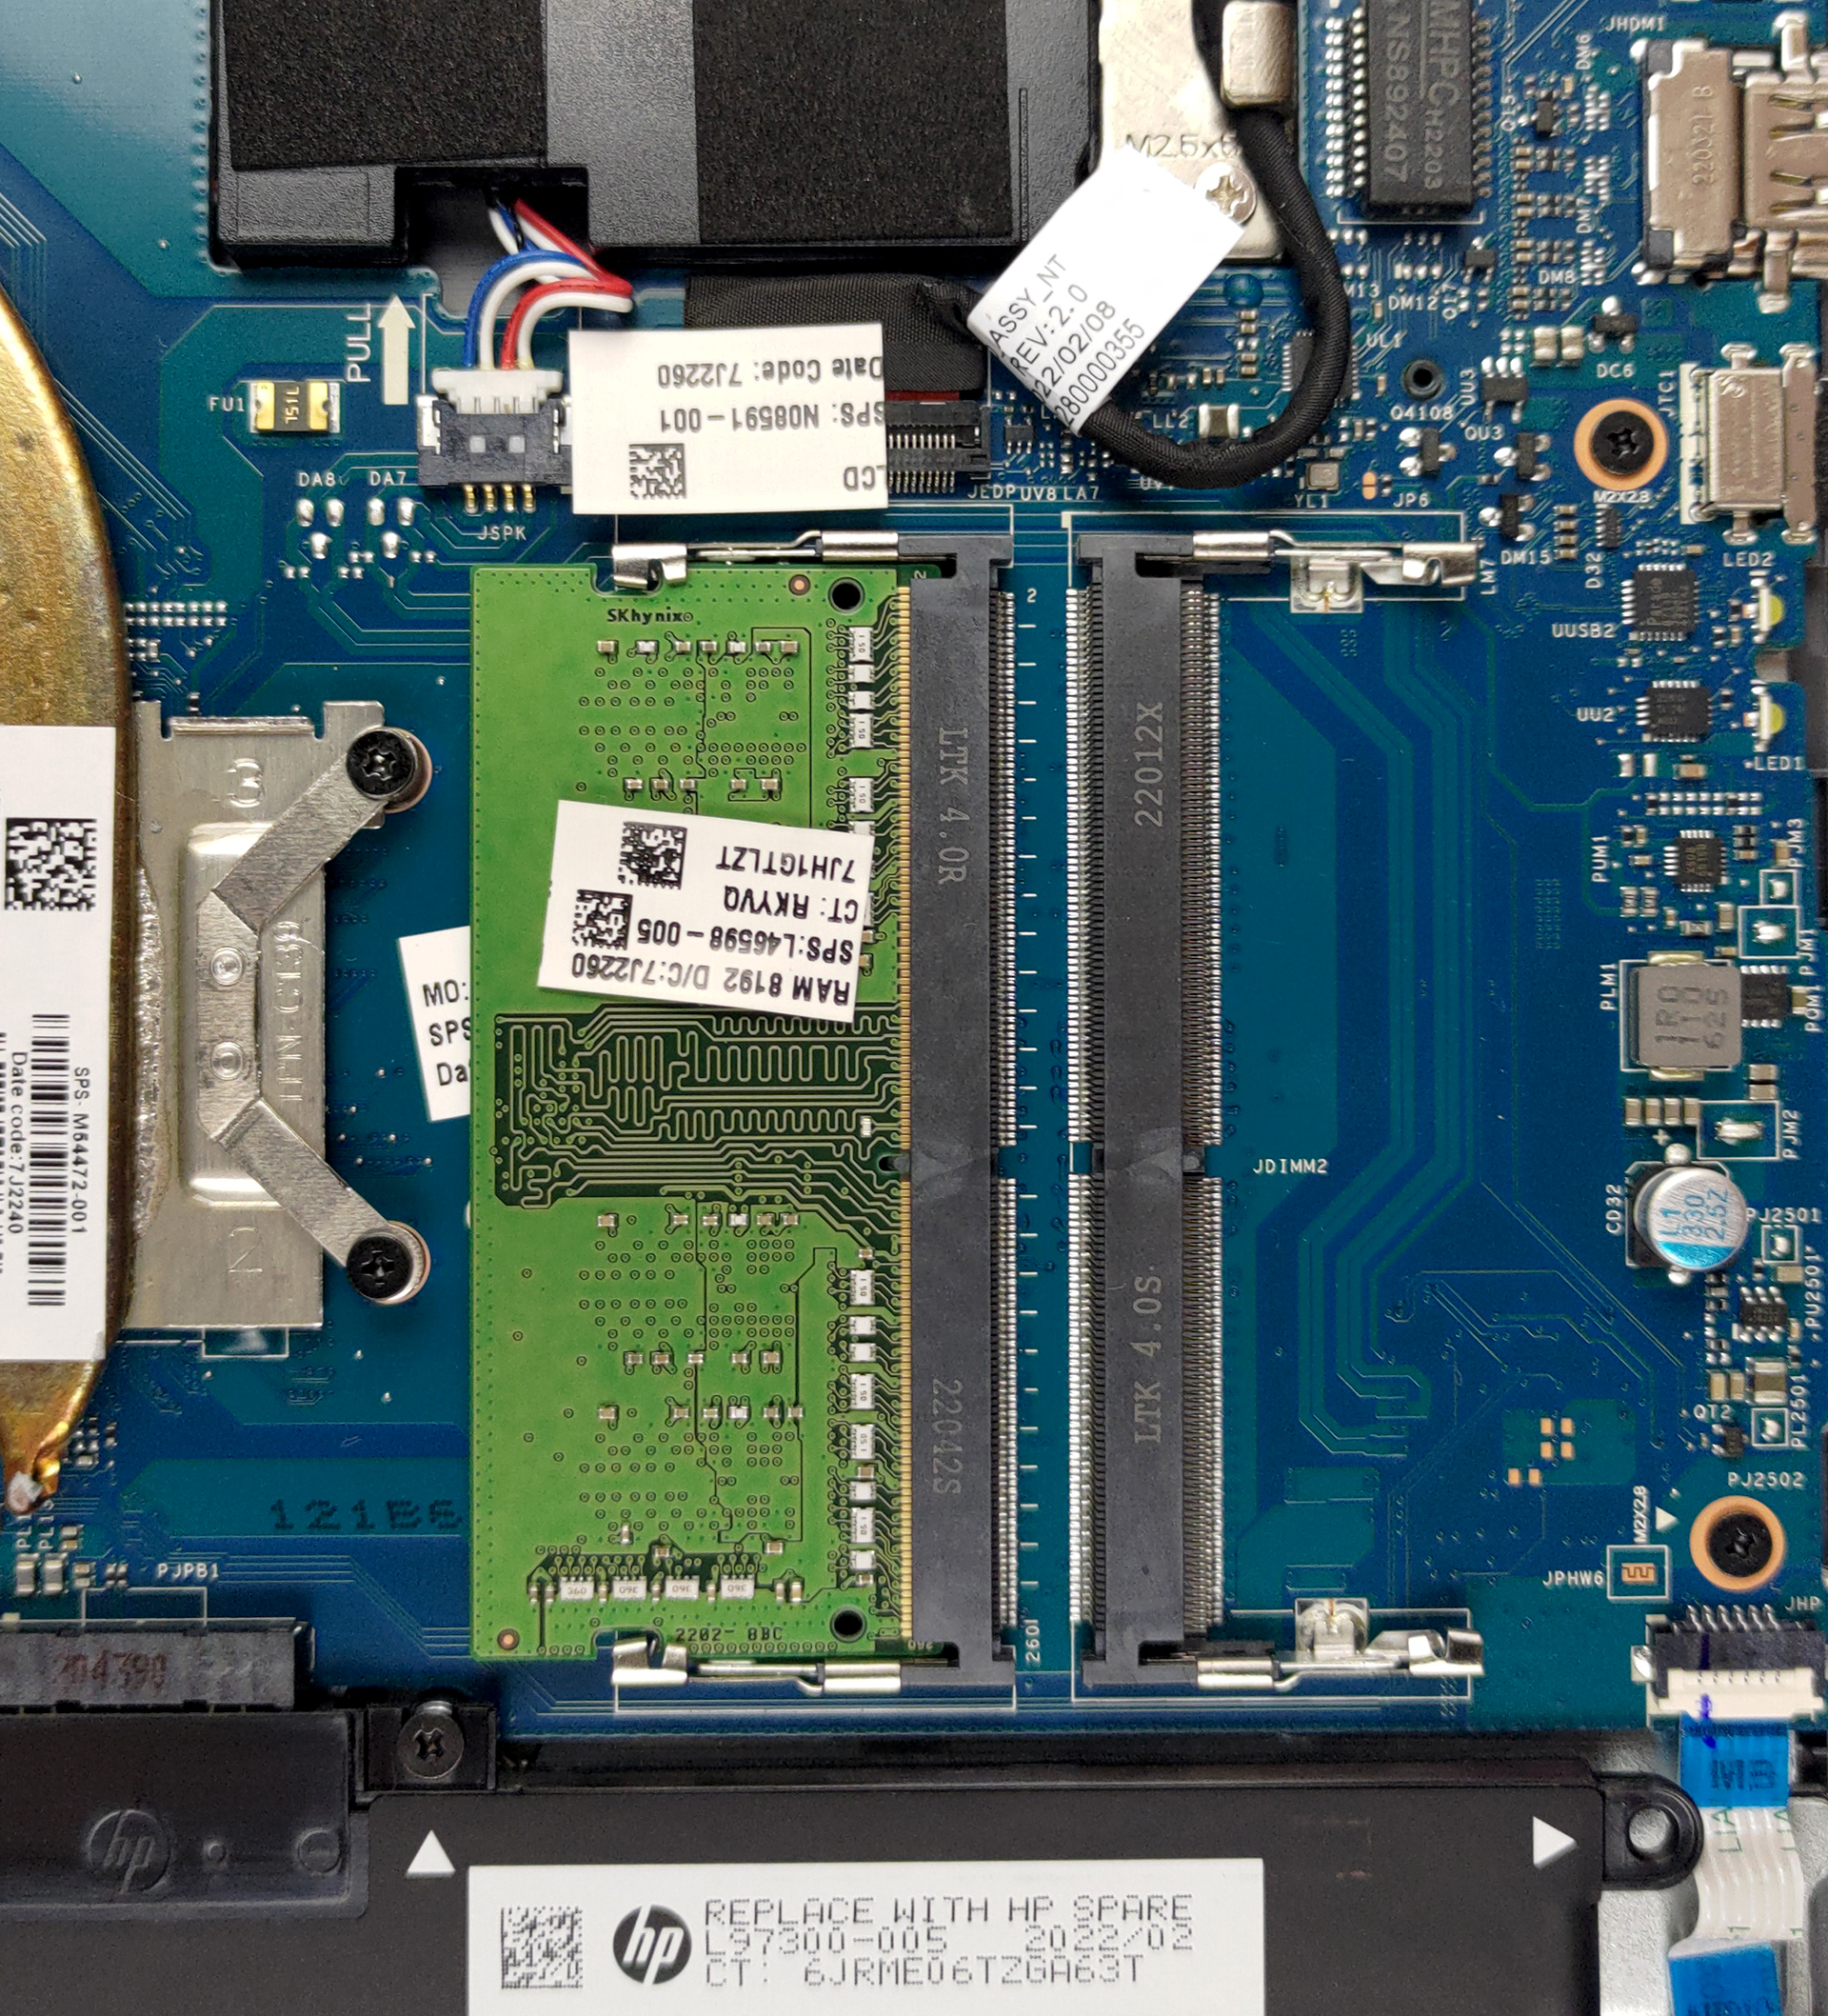
3. Arbeitsspeicher und Speicher
Was den Arbeitsspeicher betrifft, so gibt es zwei SODIMM-Steckplätze, die mit insgesamt bis zu 32 GB DDR4-Speicher arbeiten. Was den Speicher betrifft, so gibt es einen M.2-PCIe-x4-Steckplatz für Gen-3-SSDs und einen 2,5-Zoll-SATA-Laufwerksschacht ohne das erforderliche Befestigungsmaterial.
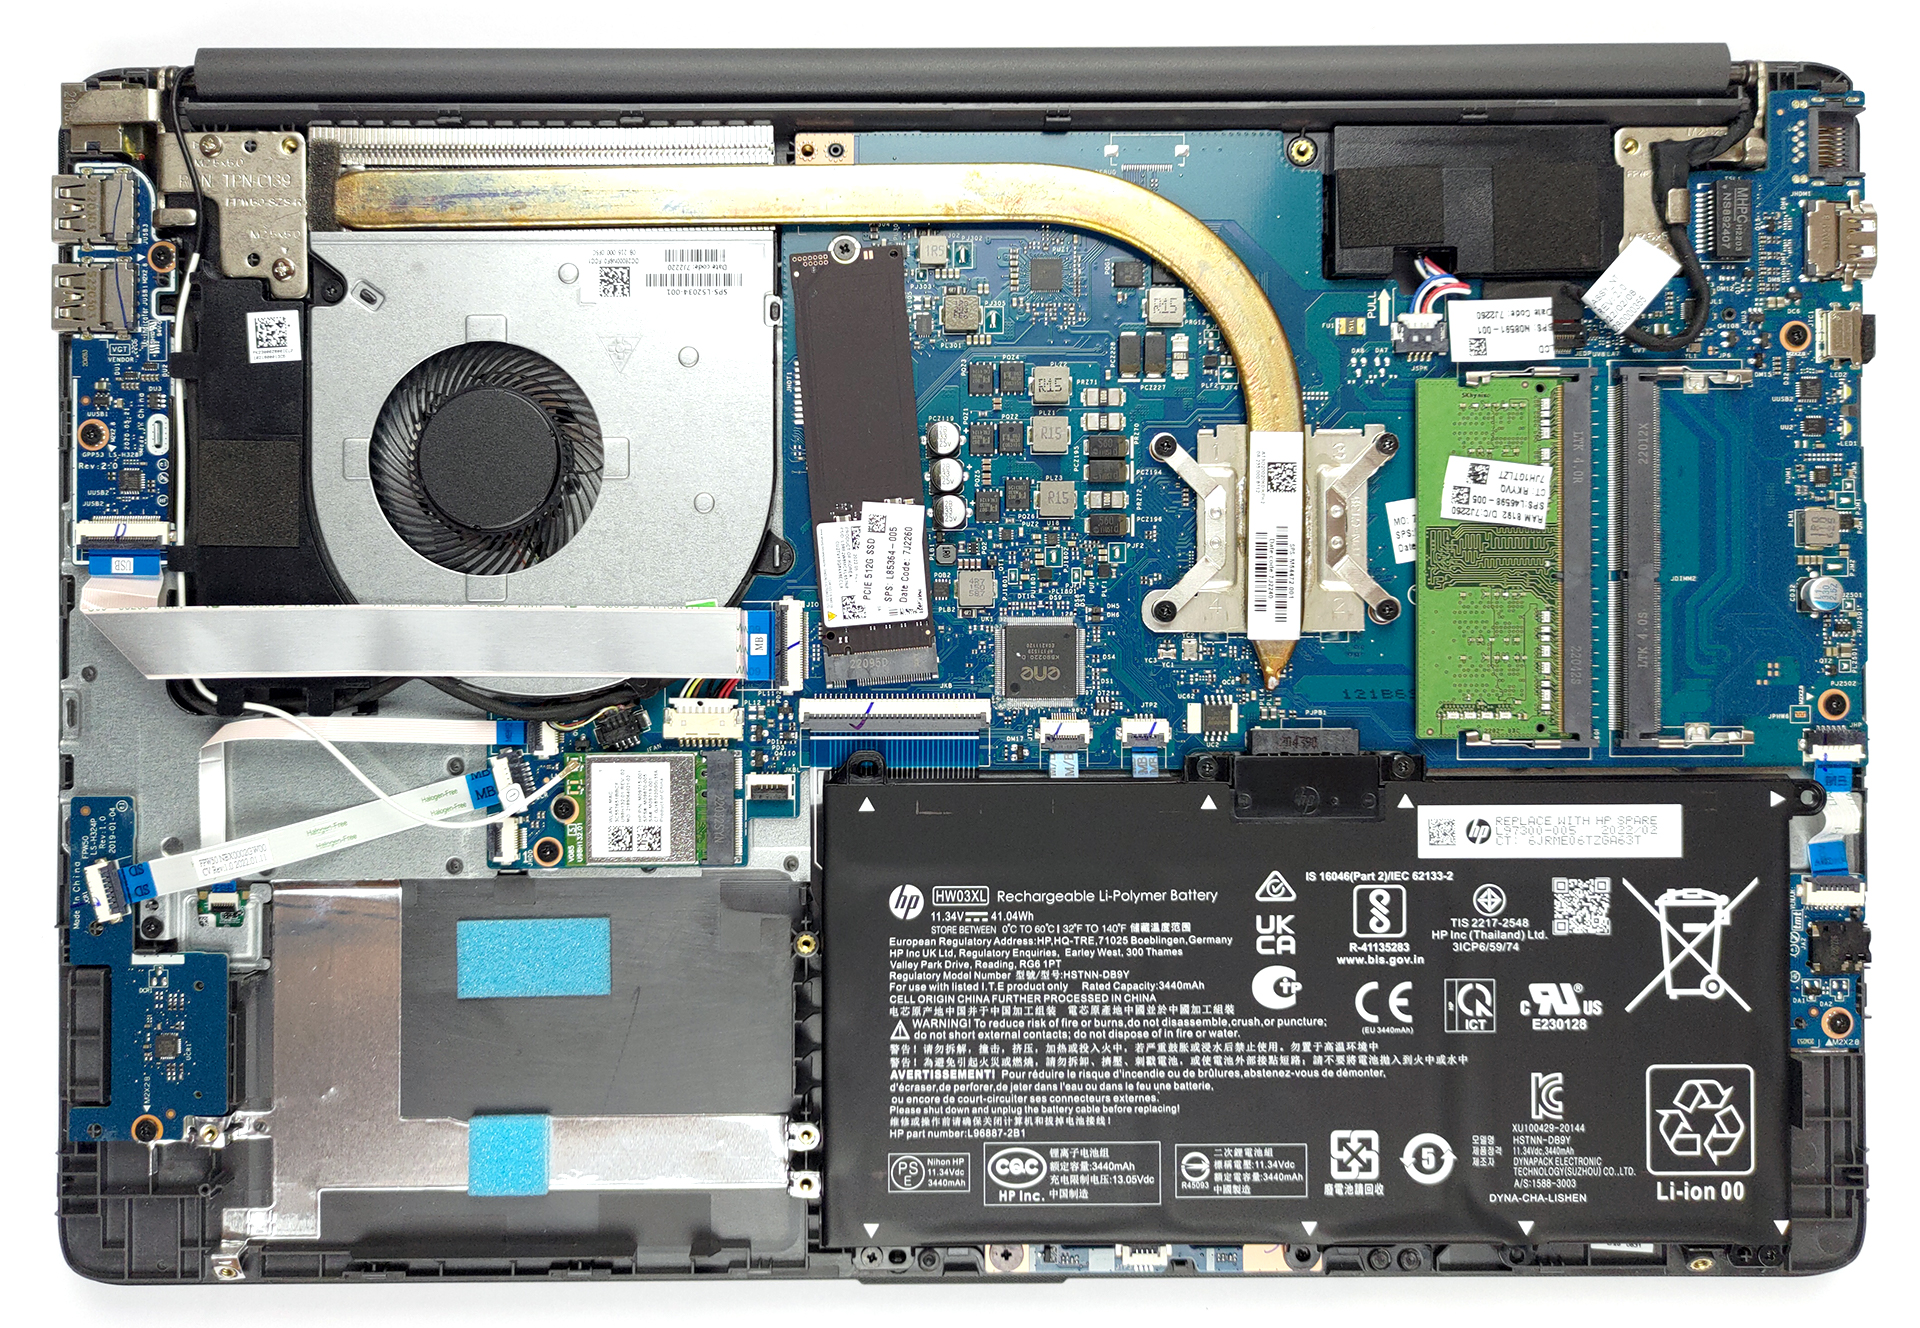
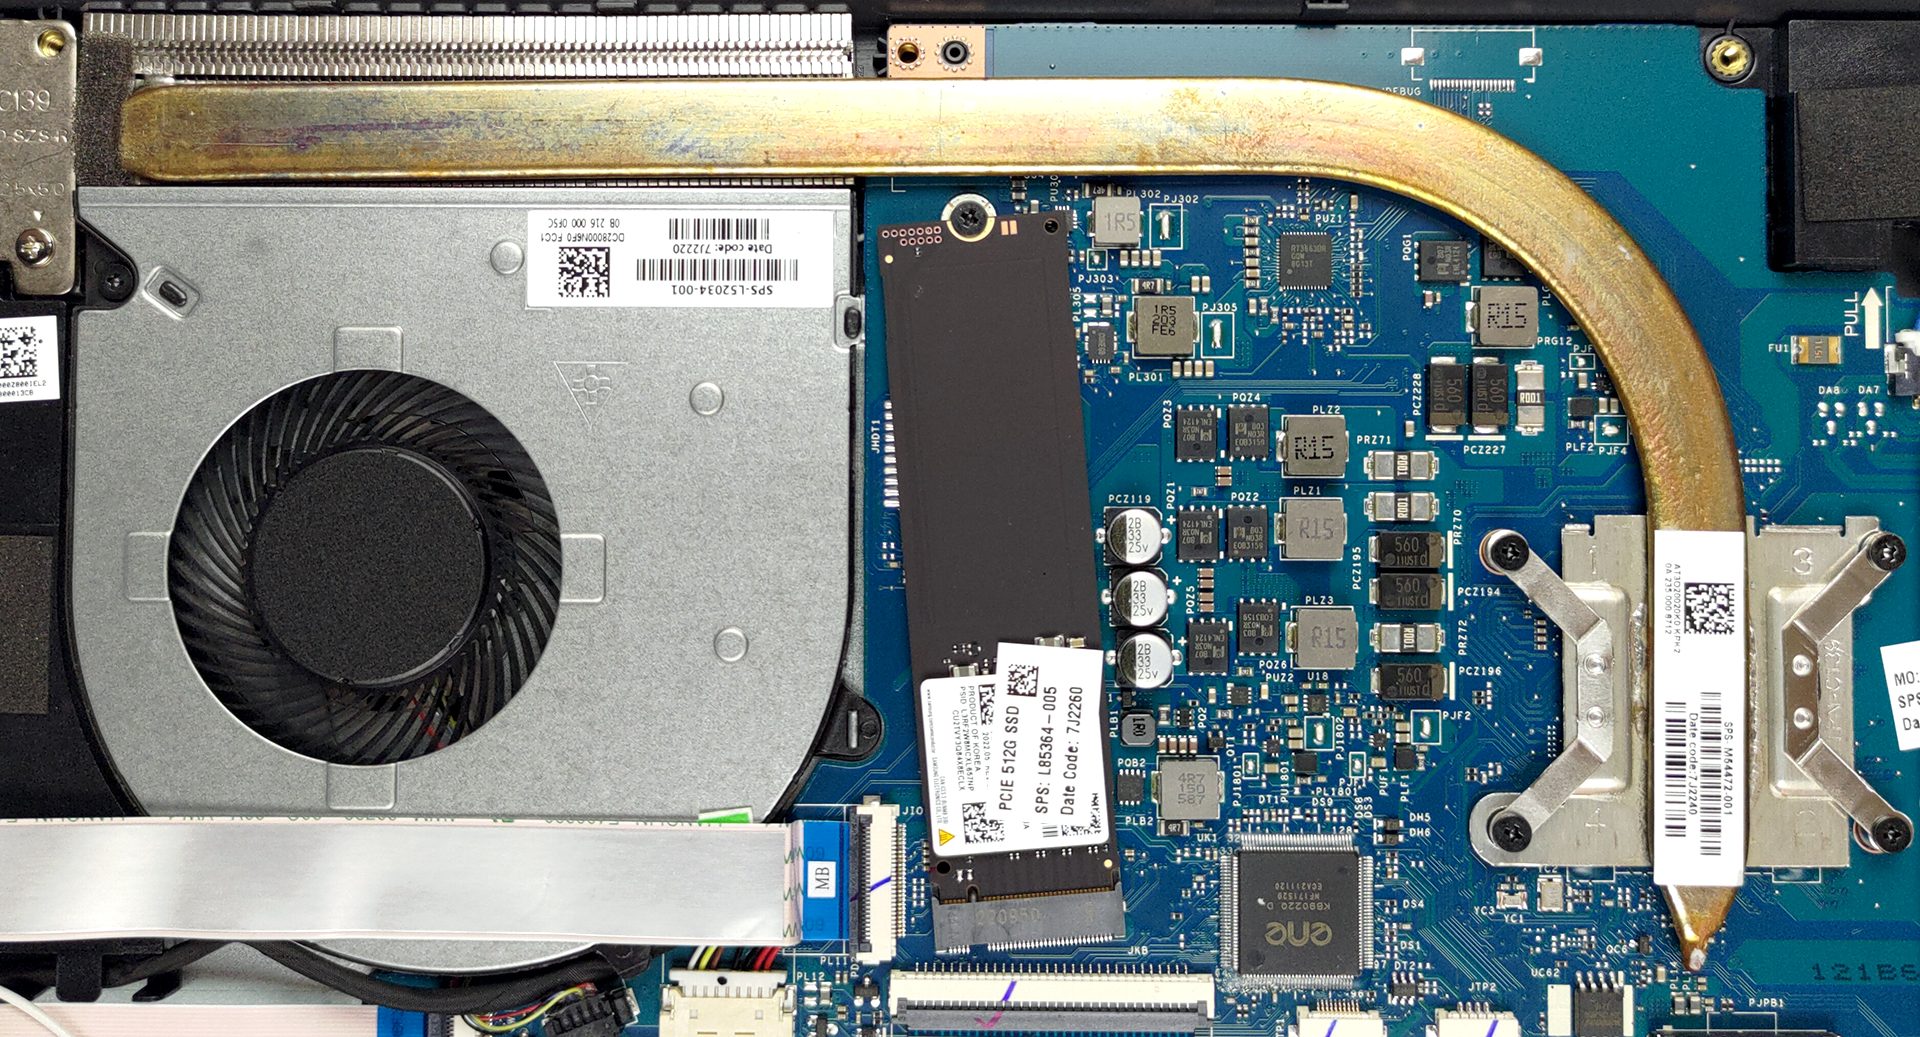
4. Das Kühlsystem
Was die Kühlung anbelangt, so verfügt der Laptop über eine Heatpipe, die mit einem ziemlich großen Kühlkörper verbunden ist, wo ein mittelgroßer Lüfter die Wärme wegbläst.
Alle Preise und Konfigurationen des HP 255 G9 finden Sie in unserem Specs System oder lesen Sie mehr in unserem ausführlichen Testbericht.
HP 250 G9 / 255 G9 gründliche Überprüfung
Hot out of the oven comes the HP 255 G9. It is a laptop suitable for the home and the office (or the home office), as it features pretty capable hardware at a price, which is almost unbeatable in its class.But what is its class? Well, it comprises notebooks like the Dell's Vostro 15 3525, Lenovo's V15, or Acer's Aspire 3. As a rule of thumb, budget-friendly devices require a lot of compromises, especially if you want to get decent-enough hardware.Of course, this is the case here. Knowing that AMD's RDNA2 graphics architecture will make the Ryzen 6000U processors more expensive, HP pic[...]
Profis
- Low price
- 2x SODIMM + 1x M.2 PCIe x4 + 1x 2.5-inch SATA drive bay
- SD card slot
- No PWM (AUO AUO499F)
- Good cooling and power efficiency
- Comfortable keyboard
- Fingerprint reader
Nachteile
- Covers only 50% of sRGB (AUO AUO499F)
- Narrow viewing angles and low contrast ratio (AUO AUO499F)
- USB Type-C is only used for data transfer
- Plastic build
- Touchpad buttons are slightly uncomfortable


How to Install Additional SATA hdd on this
Hi for all users!
I have an HP 255 G9 (6A1A7EA) laptop.
The sh*tty HP manufacturer does not provide a SATA cable with this laptop!
Therefore, you have to order a SATA cable “LS-H323P” on AliExpress or Ebay.
I bought it for 12 EUR.
The “LS-H323P” can be used in HP 255 G8 and HP 255 G9 laptops.
NOT good for HP 255 G10 laptop.
With this cable solution you can connect inside in laptop maximum a 2TB SATA HDD or SATA SSD.
F*ck HP manufacturer for this issue!
Greetings from Serbia and Happy warez/hacking/modding!
Please tell us how to install additional sata ssd on this laptop