How to open Acer Predator Triton 14 (PT14-51) – disassembly and upgrade options
LaptopMedia.com
Guides
How to open Acer Predator Triton 14 (PT14-51) – disassembly and upgrade options
| 0
#CommissionsEarned
Step 1: Accessing the Internal Components
- Ensure the Acer Predator Triton 14 (PT14-51) is powered off and placed on a soft, clean surface to prevent scratches or damage.
- Remove the 9 Torx-head screws from the bottom of the laptop.
- Start prying the bottom panel off from the front or carefully raise it while holding the two plastic vents on the back to pop it up.
Hint: Be gentle during this process to avoid damaging the internal clips or the laptop casing.

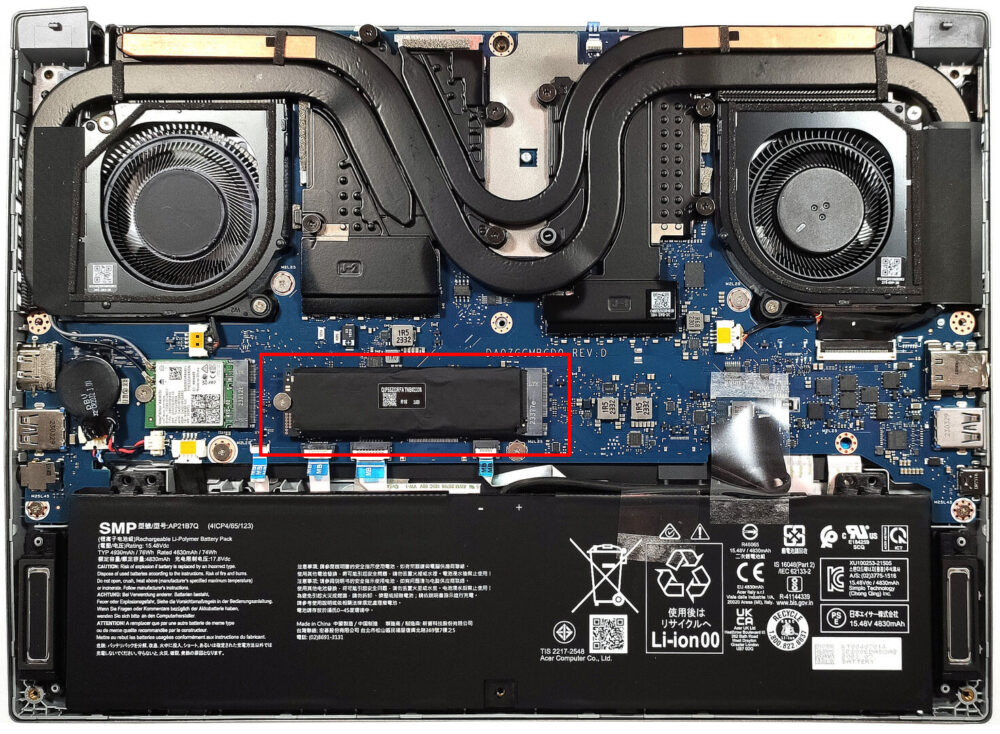
Step 2: Removing the Battery
- Disconnect the battery by detaching its connector from the motherboard.
- Lift the 76Wh battery away from its dedicated socket within the chassis. No screws are needed for this step.
Caution: Handle the battery carefully to avoid any potential damage.
More info: The 76Wh battery offers up to 6 hours and 40 minutes of web browsing or 5 hours and 53 minutes of video playback, suitable for moderate use.

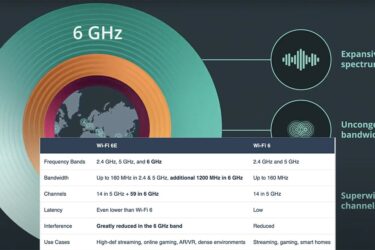
Memory
The Acer Predator Triton 14 comes with soldered 32GB of LPDDR5-6000 MHz RAM, providing ample memory for demanding applications and multitasking.
Storage Upgrade
- Identify the single M.2 slot compatible with Gen 4 SSDs for storage upgrades.
- Choose and buy a new drive if needed. Don’t forget to check out our Top M.2 SSDs Performance Rankings
You can buy Gen 4 M.2 SSD modules here: Buy from Amazon.co.uk (#CommissionsEarned)


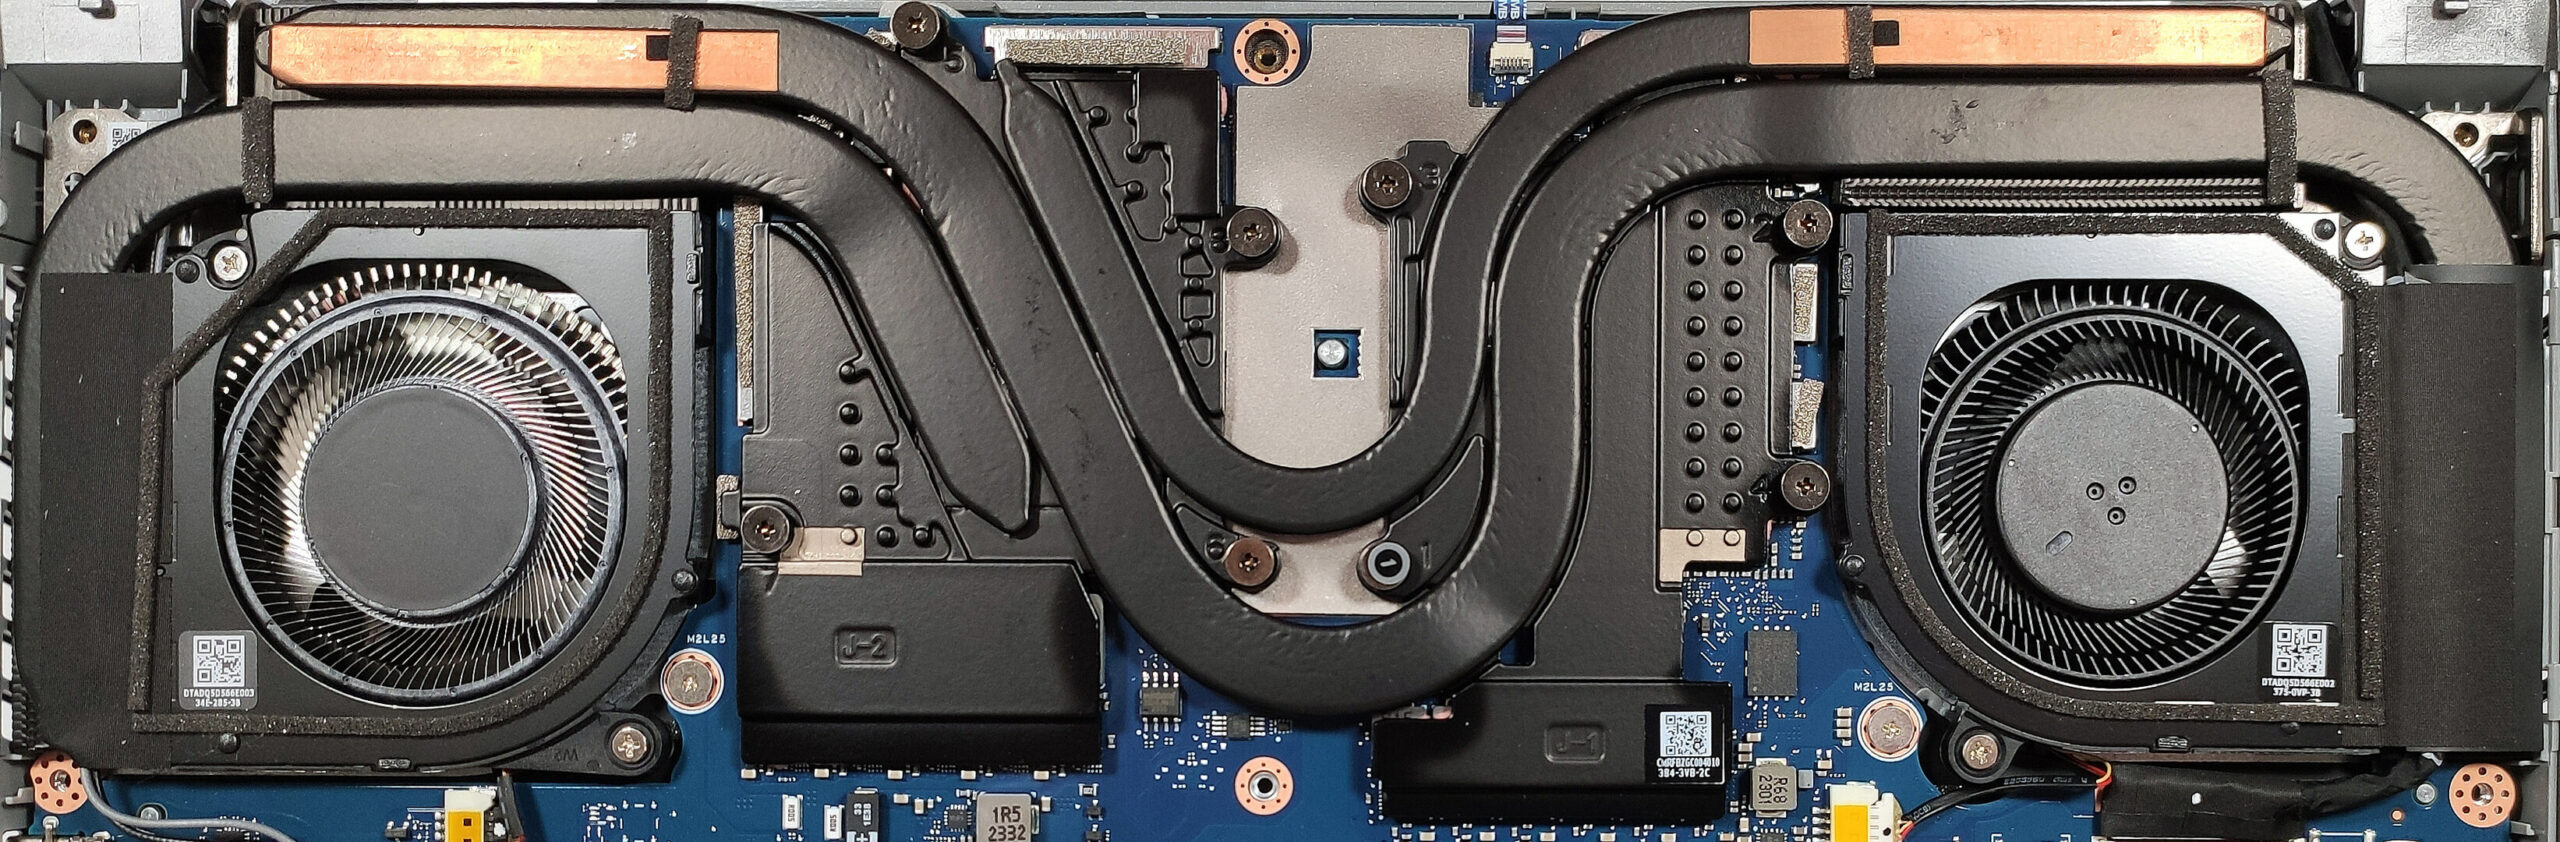
Examining the Cooling System
Review the cooling system, which includes two fans, three heat pipes, four heat sinks, and two large heat spreaders, designed to efficiently manage the thermal output of the device’s powerful hardware.
#CommissionsEarned
Subscribe
0 Comments