How to open Acer Predator Helios 3D 15 SpatialLabs Edition (PH3D15-71) – disassembly and upgrade options

Step 1: Accessing the Internal Components
- Power off your laptop and place it on a soft, clean surface to avoid scratching or damage.
- Undo the 11 Torx-head screws securing the bottom panel of the laptop.
- Carefully hold the two exhaust vents on the back and lift away the bottom panel from the chassis to expose the internal components.
Hint: Keep the screws in a safe place to avoid losing any.
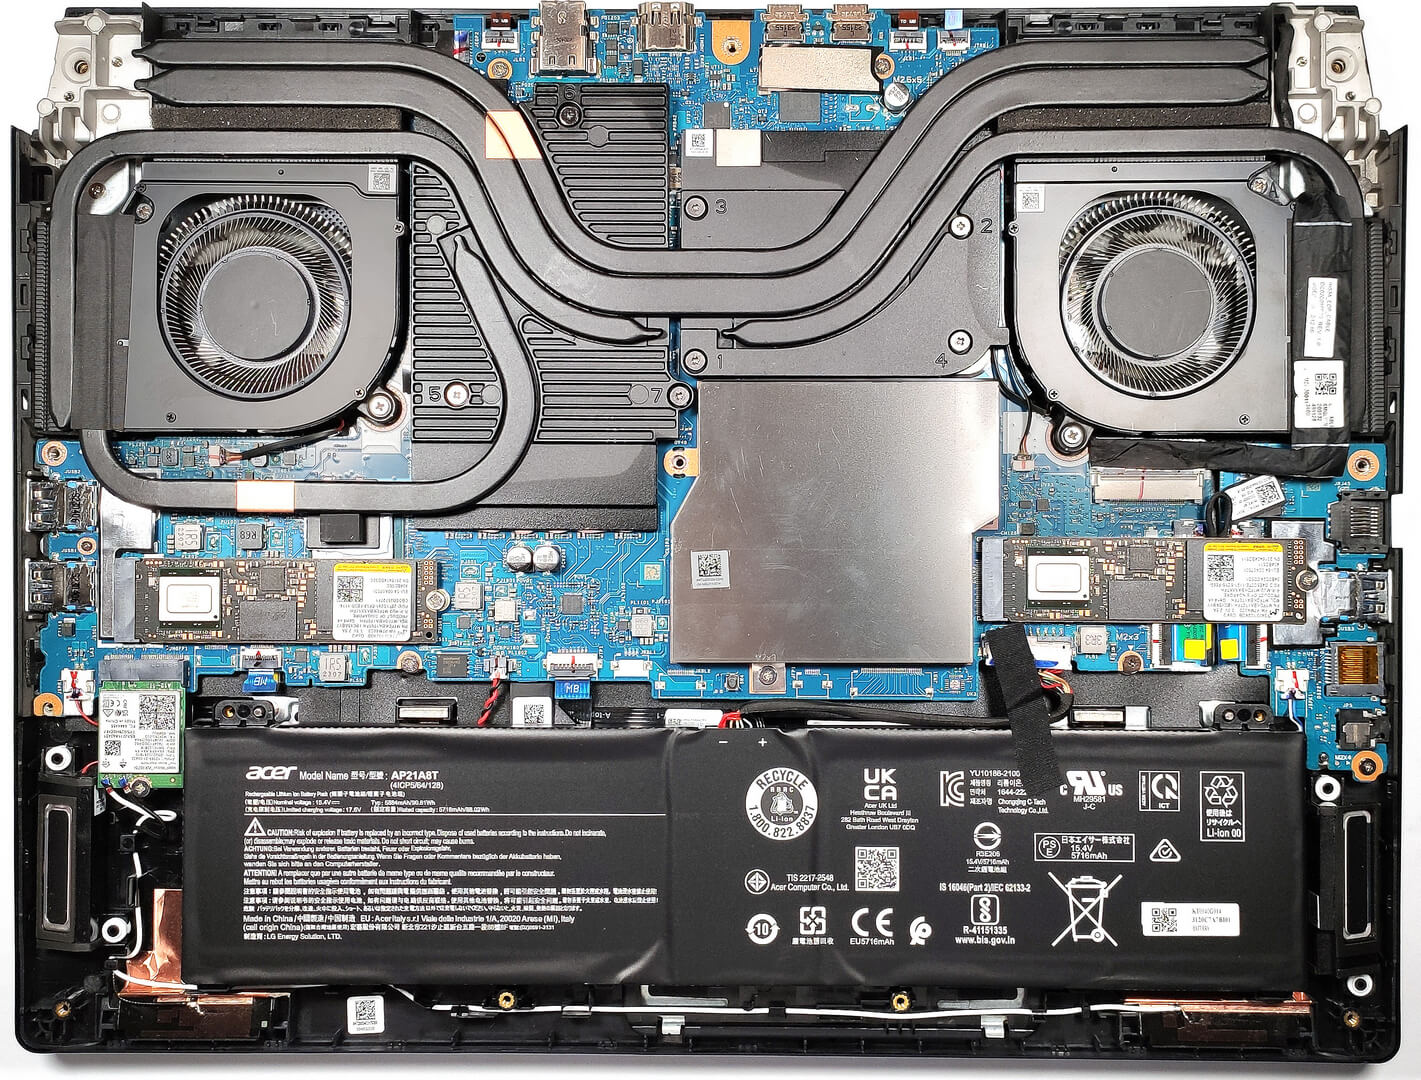
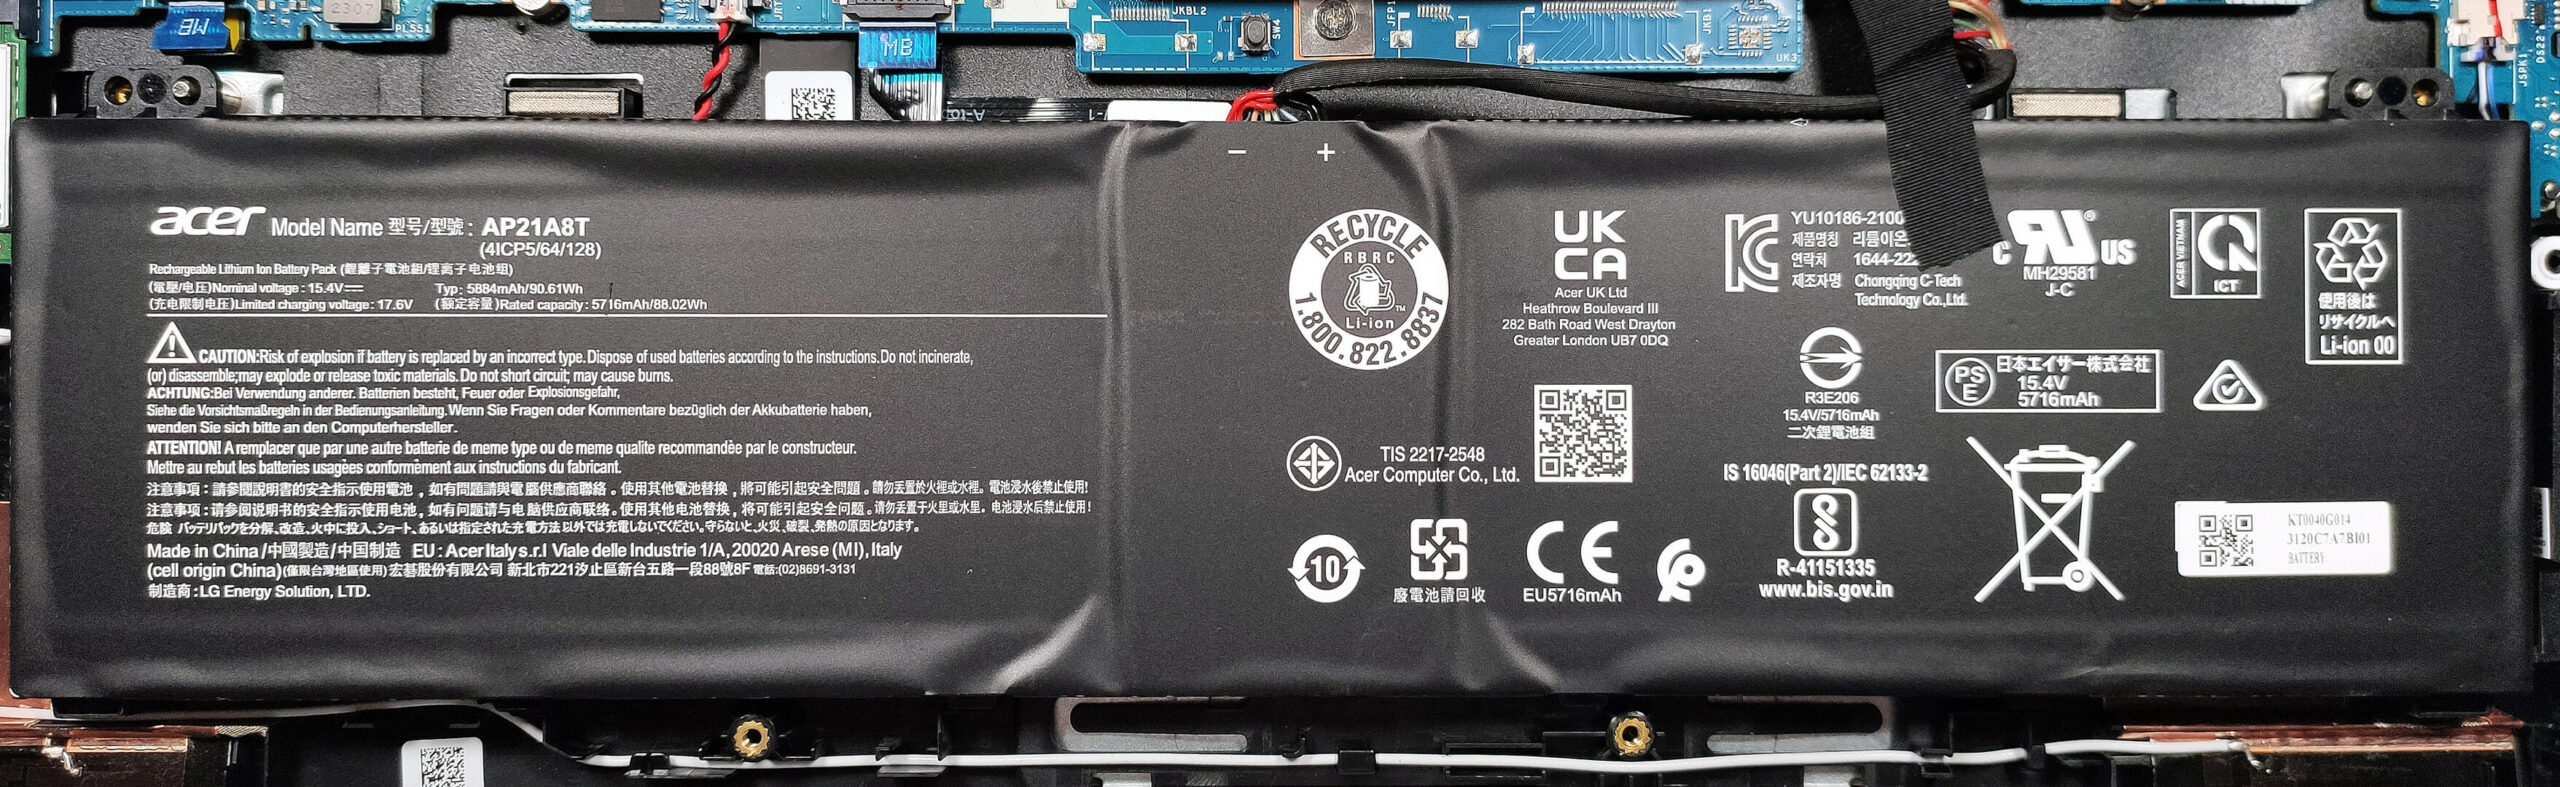
Step 2: Removing the Battery
- Locate the battery inside the laptop.
- Unplug the battery connector from the mainboard to disconnect the power.
- Remove the battery from its dedicated socket inside the bottom plate. No screws are needed to be removed for this step.
Caution: Be gentle when unplugging the battery to avoid damaging the connector.
More info: The battery is a 90.61 Wh unit capable of 3 hours and 8 minutes of web browsing or 2 hours and 56 minutes of video playback.
Step 3: Upgrading Memory
- Locate the metal shroud covering the memory modules.
- Remove the screw securing the metal shroud and lift it up with a plastic tool.
- Upgrade or replace the DDR5-5600MHz RAM SODIMMs as needed.
More info: The Acer Predator Helios 3D 15 SpatialLabs Edition (PH3D15-71) supports up to 32GB of DDR5-5600MHz RAM in dual-channel.
You can buy DDR5 RAM modules here: Buy from Amazon.co.uk (#CommissionsEarned)
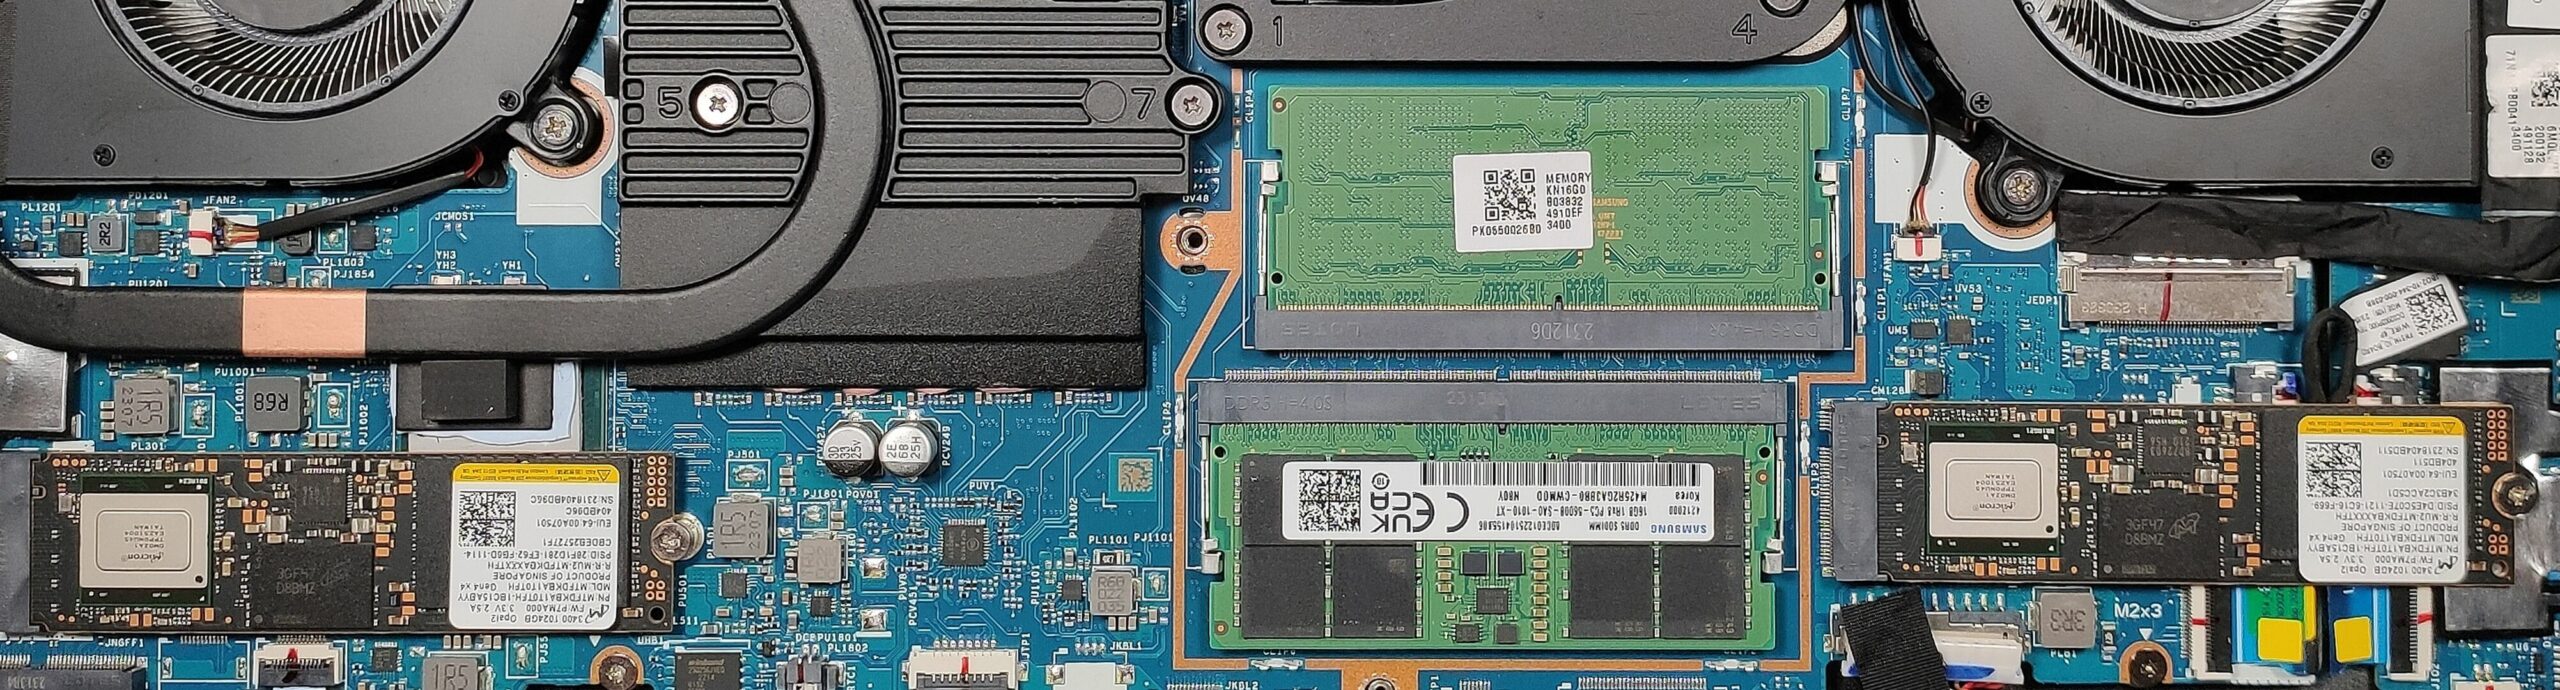
Step 4: Upgrading Storage
- Identify the M.2 slots on the motherboard, compatible with Gen 4 SSDs.
- Upgrade or add new Gen 4 M.2 SSDs as necessary, taking advantage of the RAID 0 configuration for improved performance.
Hint: Ensure the SSDs are properly cooled with the thermal pad, especially the one below the GPU chip and the chipset.
You can buy Gen 4 M.2 SSD modules here: Buy from Amazon.co.uk (#CommissionsEarned)


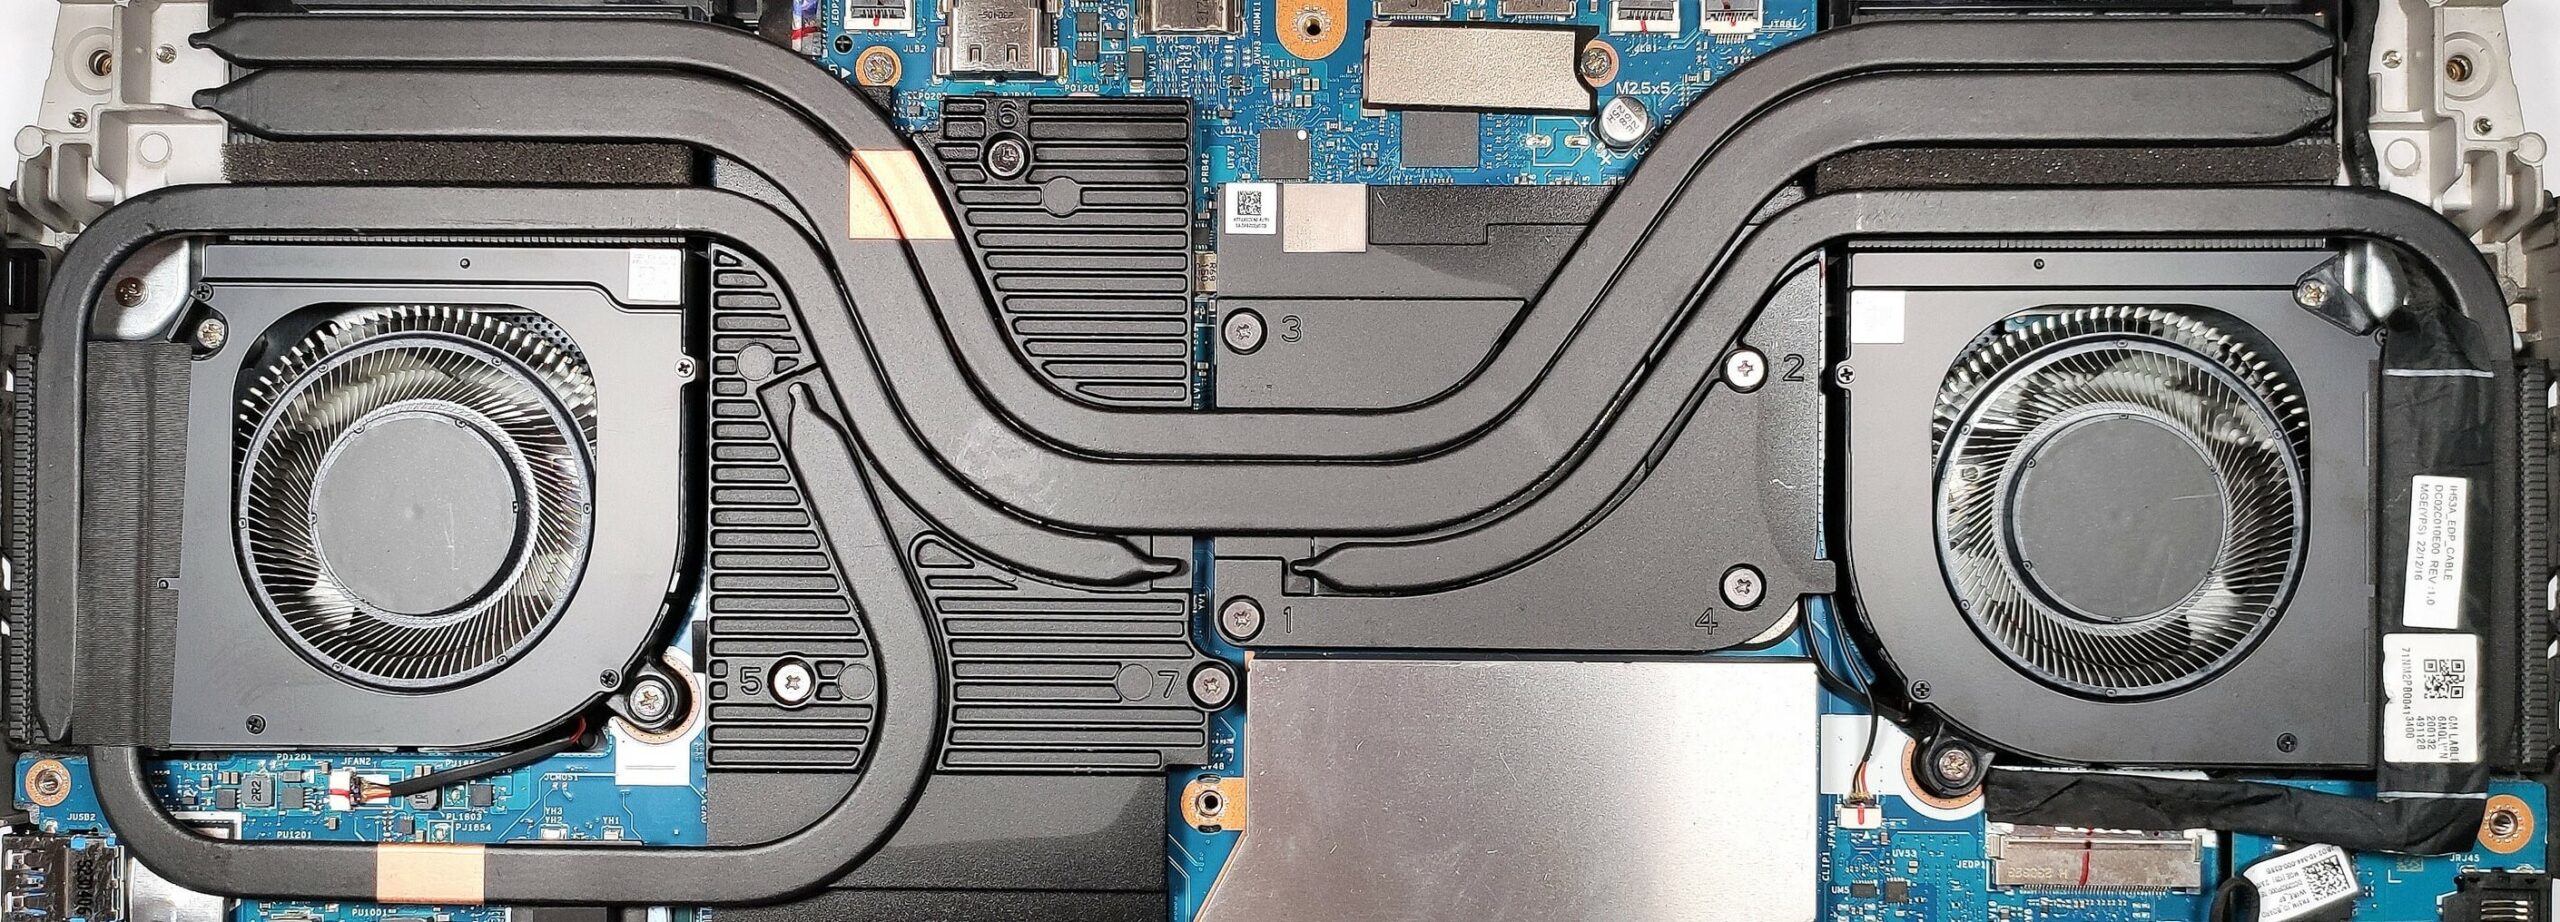
Step 5: Examining the Cooling System
- Observe the cooling system configuration, including the two fans, multiple heat pipes, heat sinks, and the application of liquid metal on the CPU die.
- Note the positioning of the thermal pads for the SSDs’ controllers on the inside of the bottom panel.
Caution: Do not tamper with the liquid metal application on the CPU die unless you are experienced with its application.
More info: Acer has implemented an advanced cooling system to manage the heat from the CPU and GPU efficiently, featuring liquid metal on the CPU die for enhanced thermal conductivity.