Inside ASUS ROG G752 – disassembly, internal photos and upgrade options
ASUS’ new flagship ROG G752 is in our lab and the first thing we wanted to do is a full disassembly. The latter gave us answers about the build quality, the design of the cooling system and the upgrade options. The first one wasn’t as impressive, the second one seems just like its predecessor while the upgrade options were a big surprise here. There’s a significant update to that. Check it out…
All the available configurations and prices can be found at Amazon.com.
1. Removing the service cover
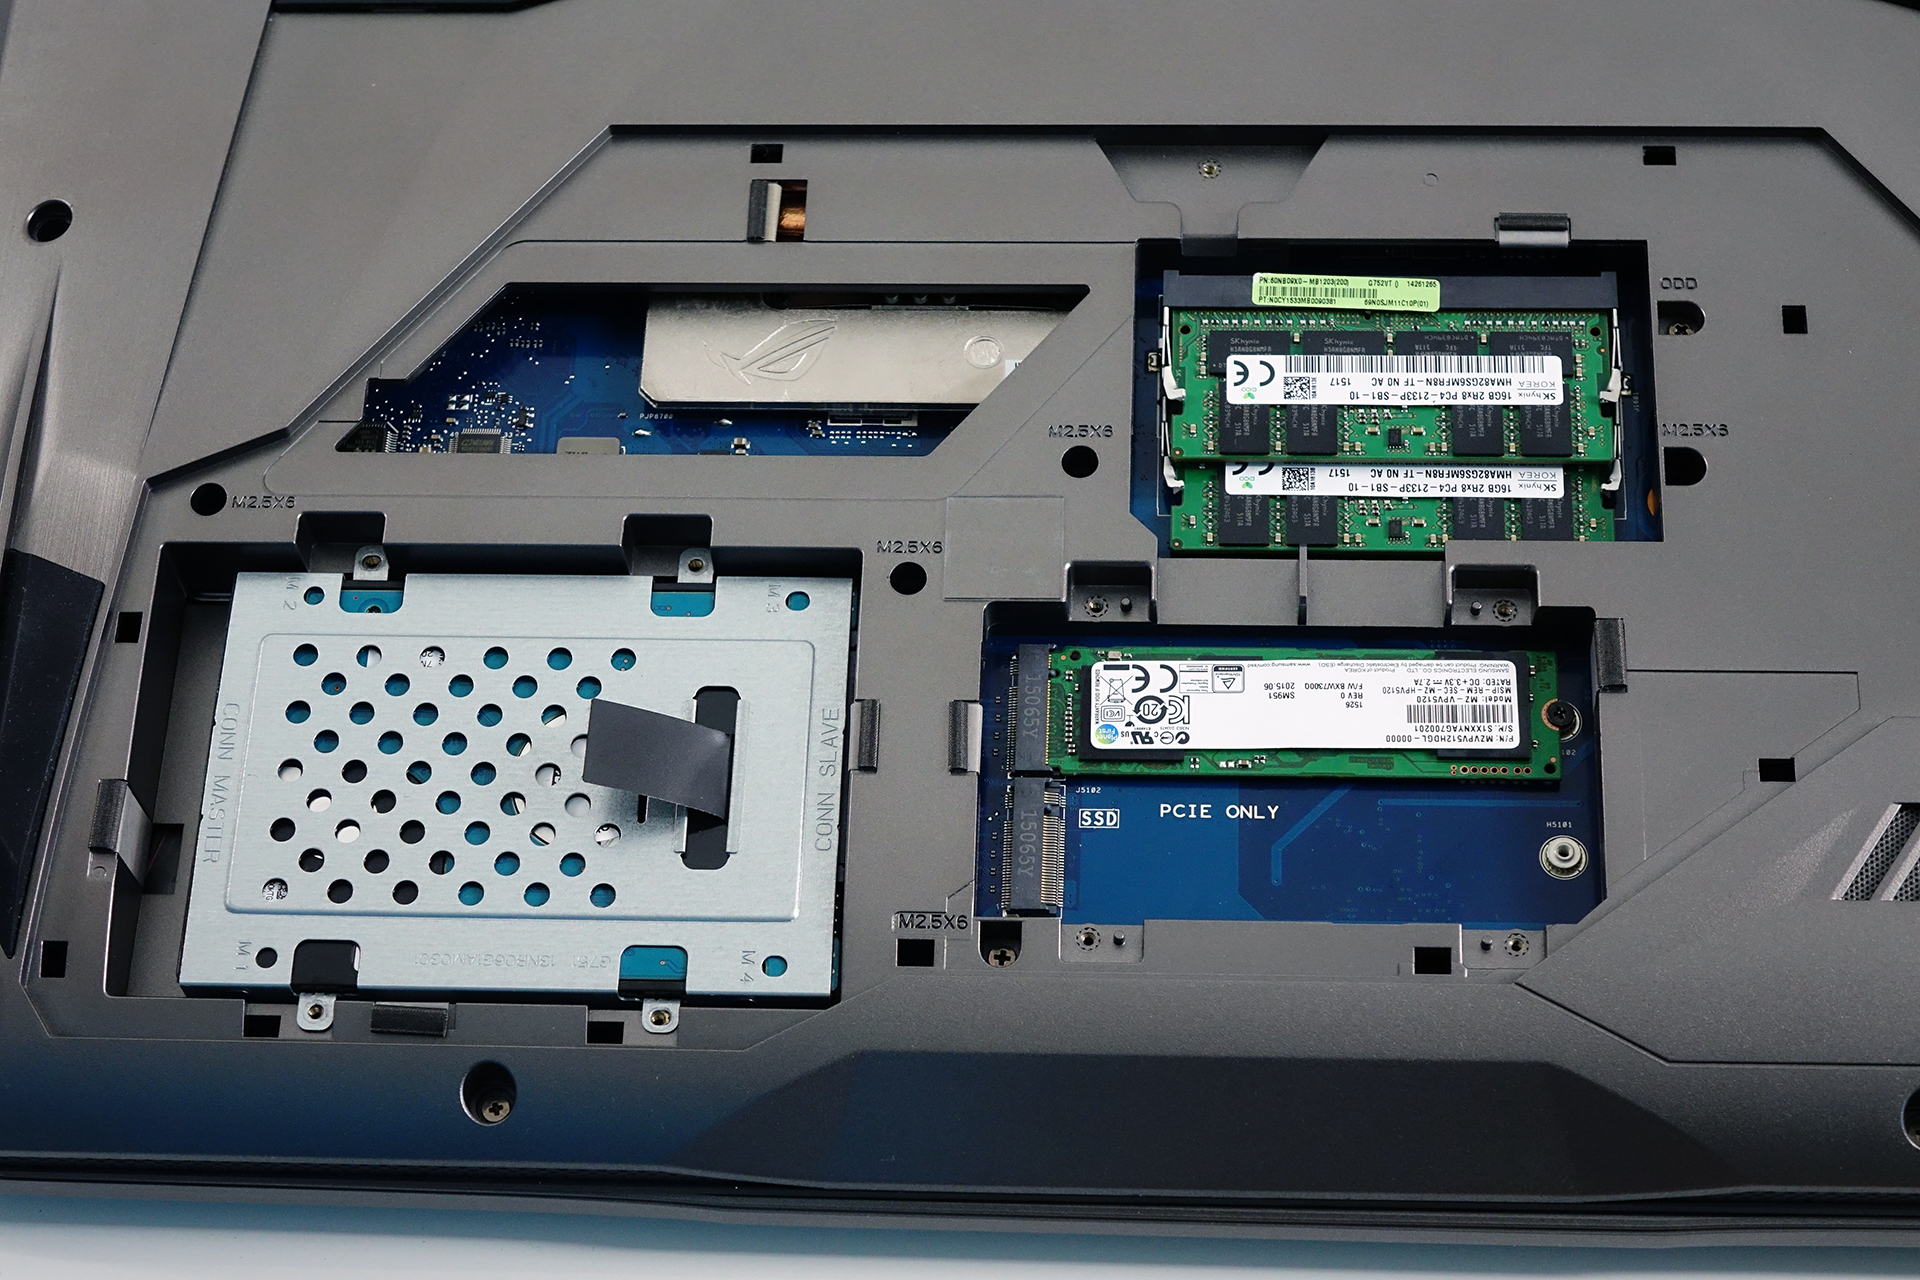
Just like most of the notebooks from this class and its predecessor, the G752 offers easy access to the most common upgrade options like RAM and storage. The cover is removed when unscrewing the bolt that hides under the silicon cap in the middle.


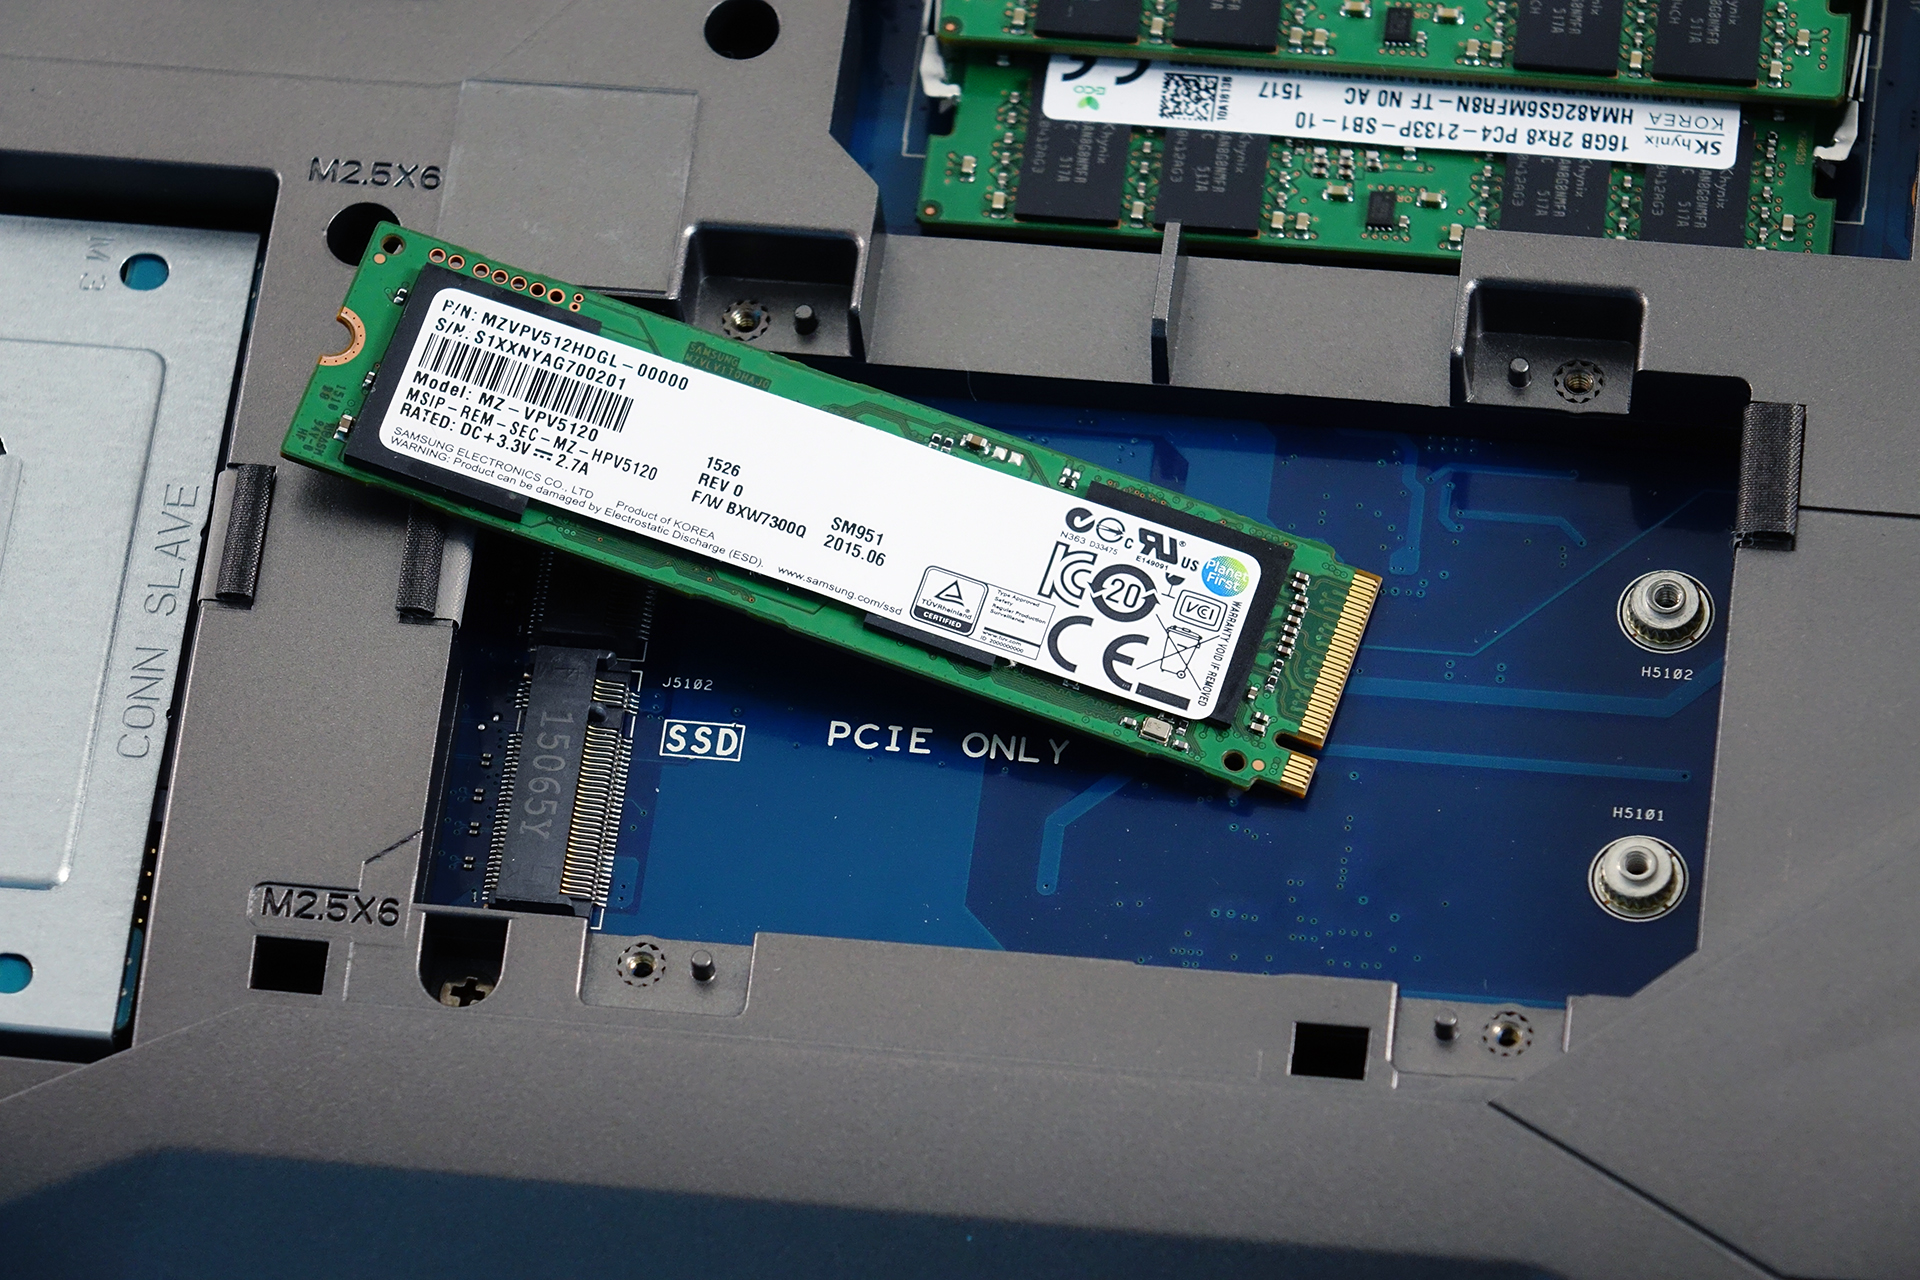
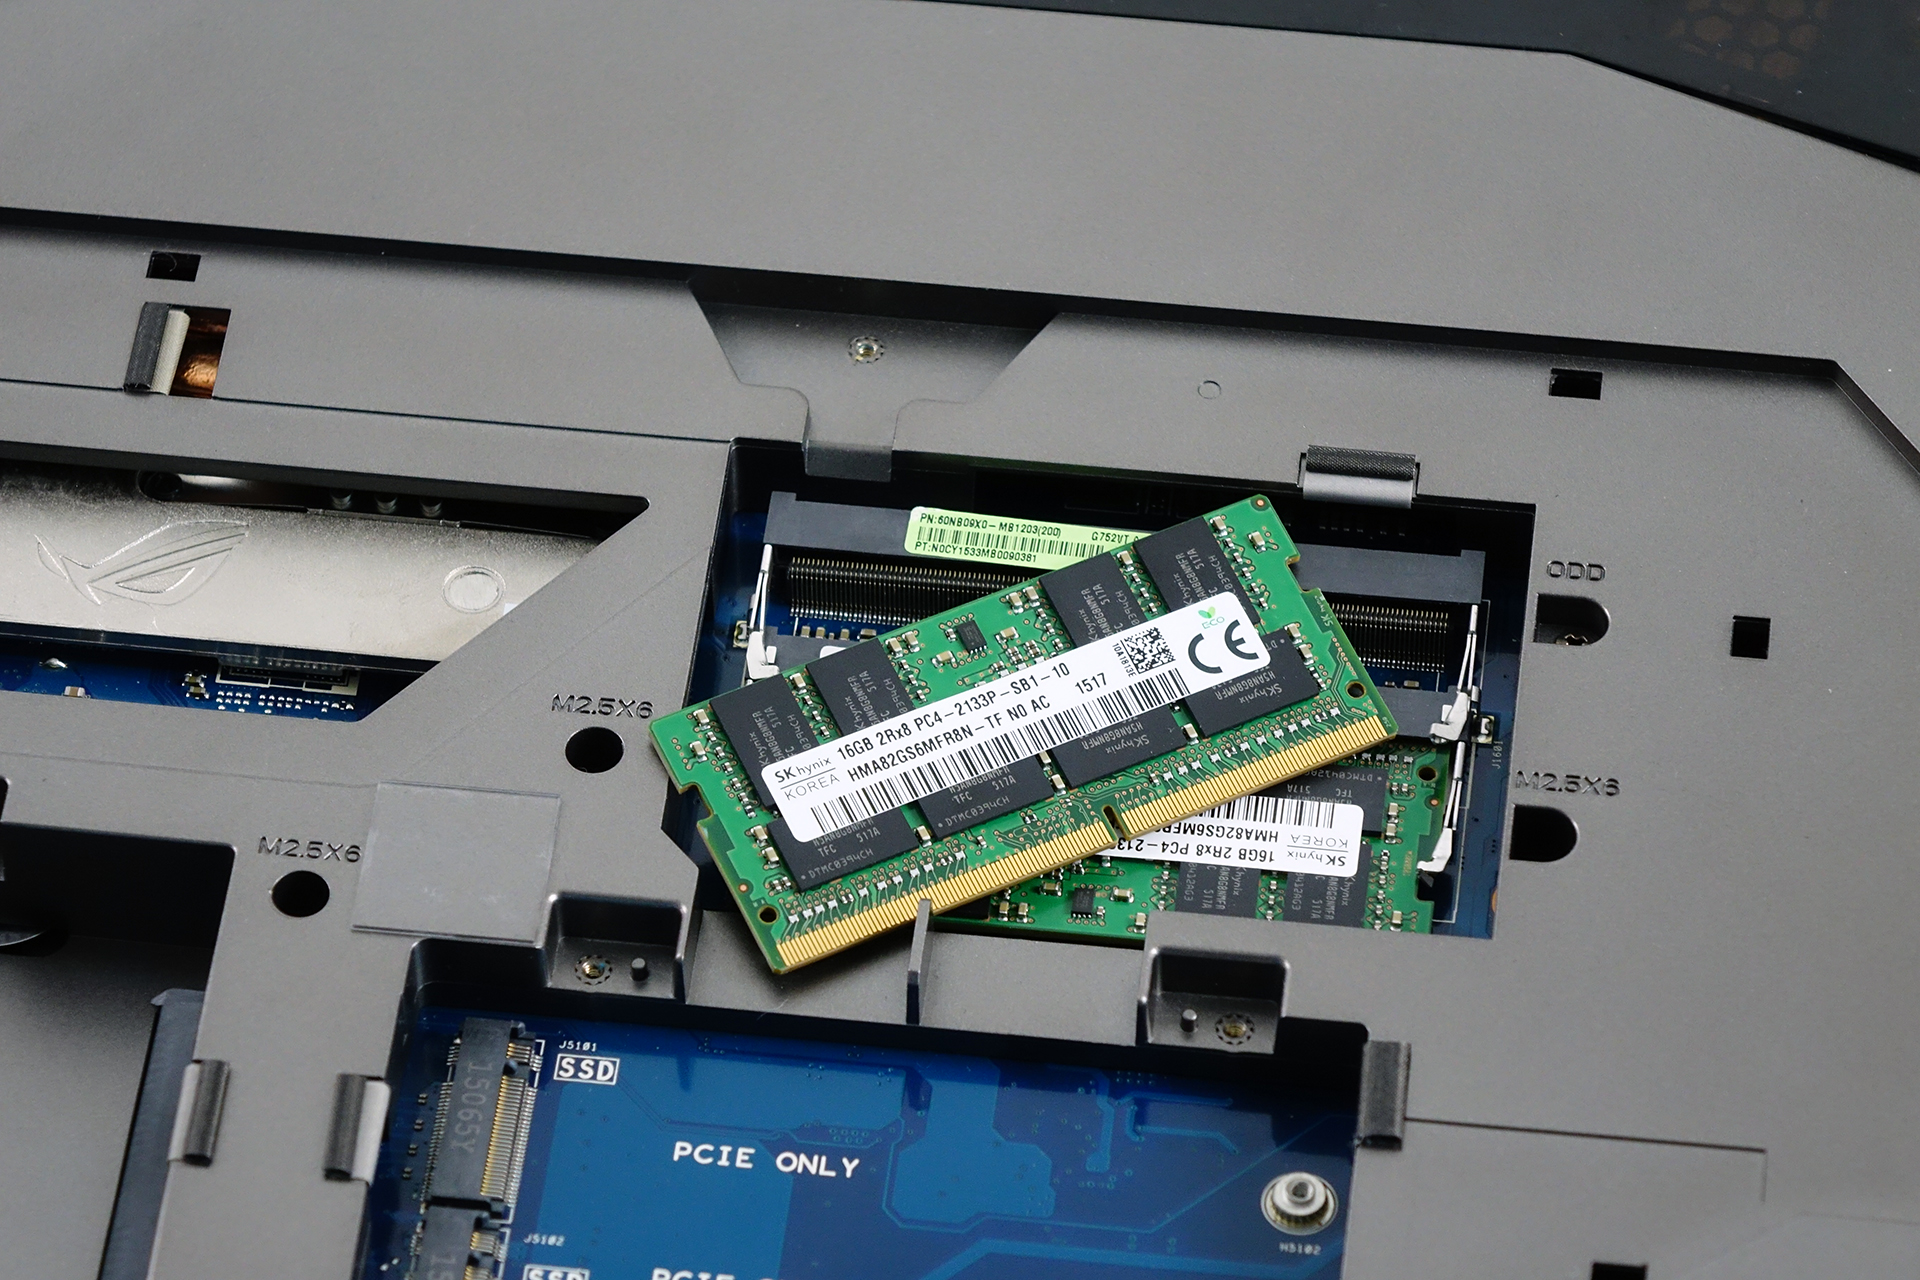
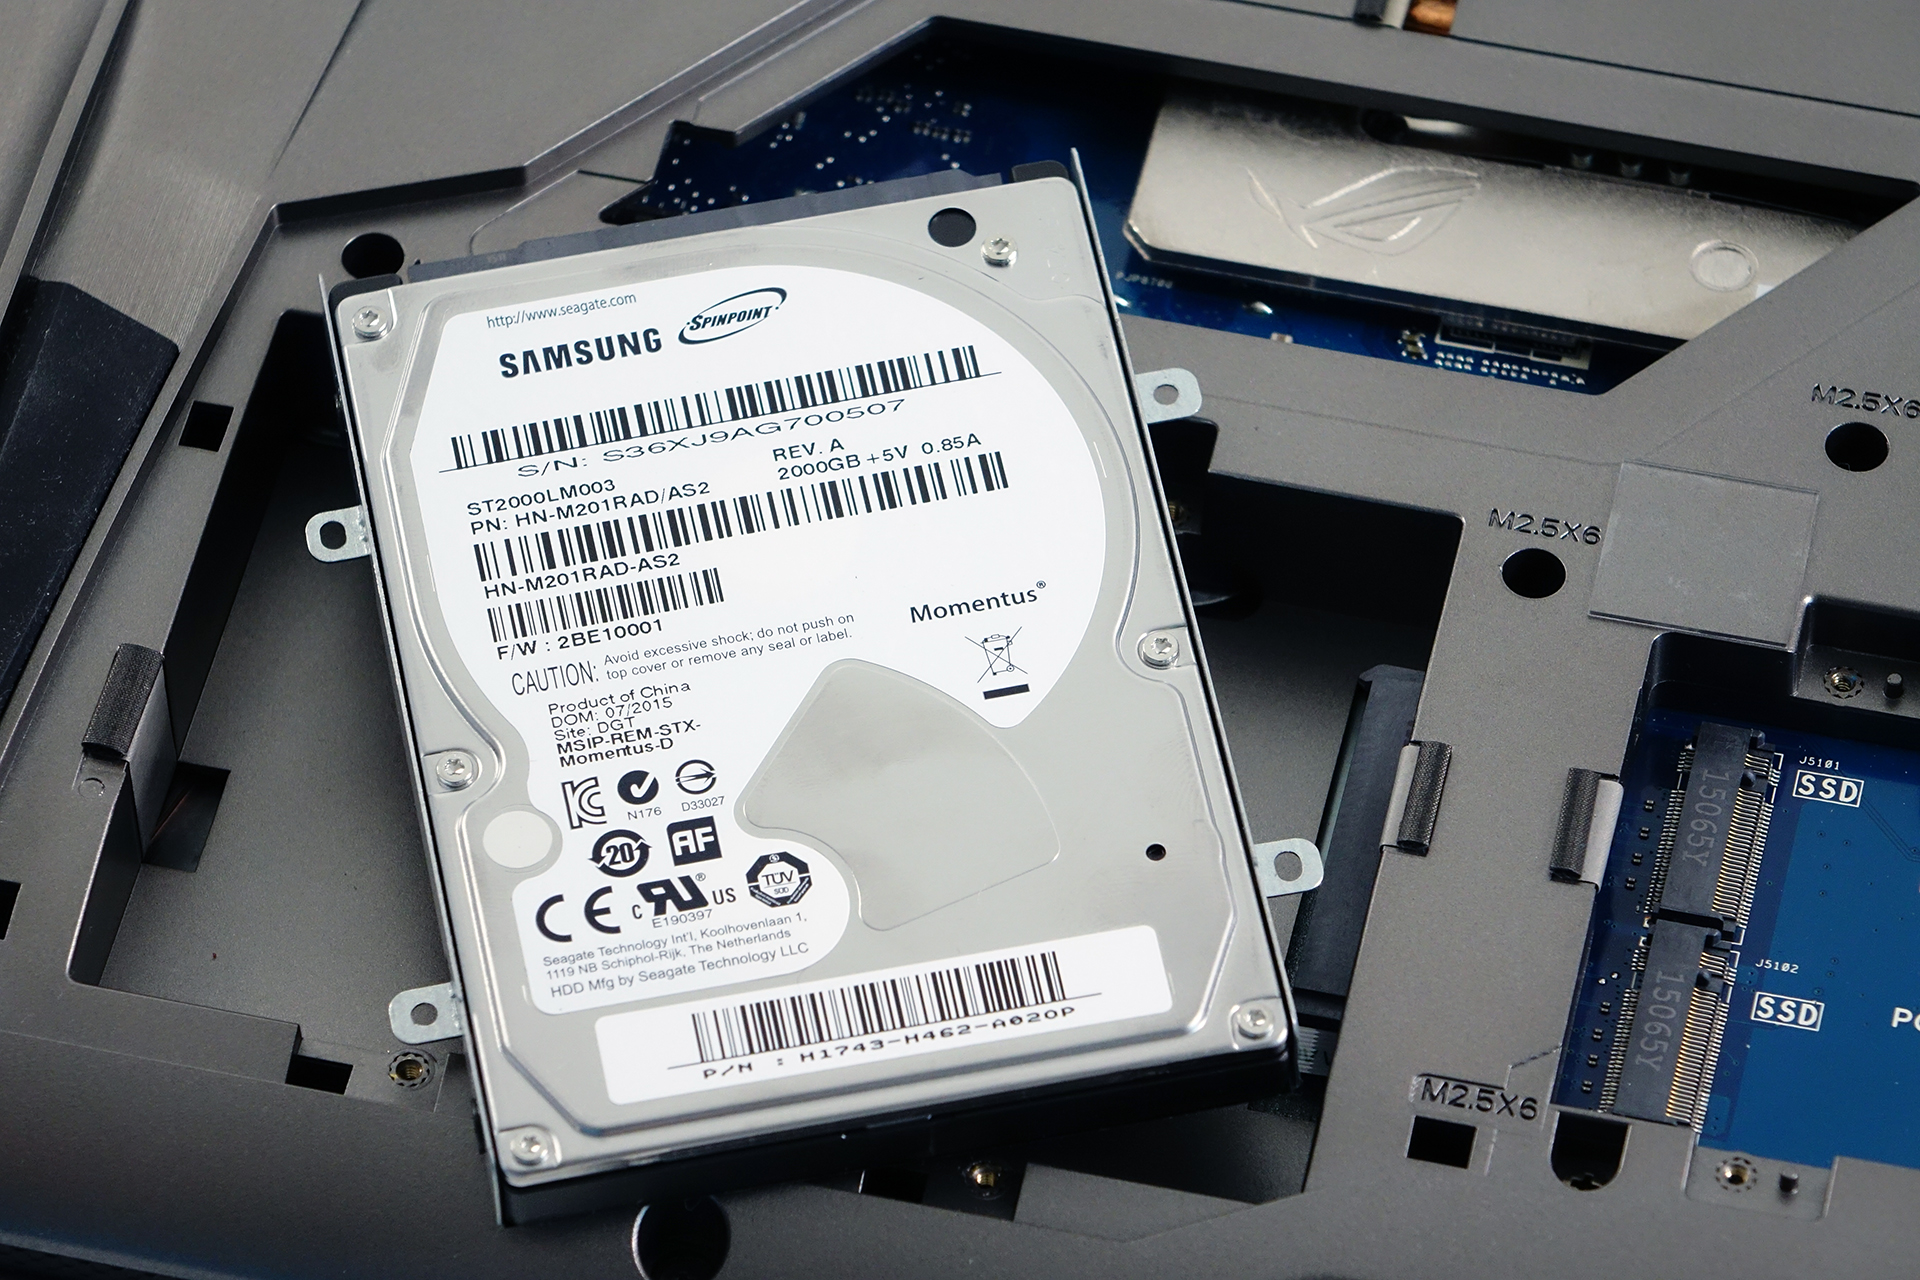
When removed, you can proceed with messing around with the two RAM slots, 2.5-inch HDD and the two M.2 PCIe slots. Note that since this notebook supports up to 64GB of DDR4 memory, the other two chips are located on the other side of the motherboard so full disassembly is required. Anyway, we found a 2.5-inch Samsung Spinpoint 2TB HDD, two 16GB DDR4-2133MHz RAM chips by SKhynix. As for the M.2 slots, one of them is occupied by an OEM version of the Samsung’s EVO M.2 NVMe PCIe SSDs with M-edge key connector, 2280 standard. And the other one, you can insert one of your choice but unfortunately, the motherboard doesn’t support RAID 0 configuration which is a bit of a letdown. In contrary, the Alienware 15 R2 and the new 17-inch variant support RAID 0 setups.
2. Removing the bottom cover
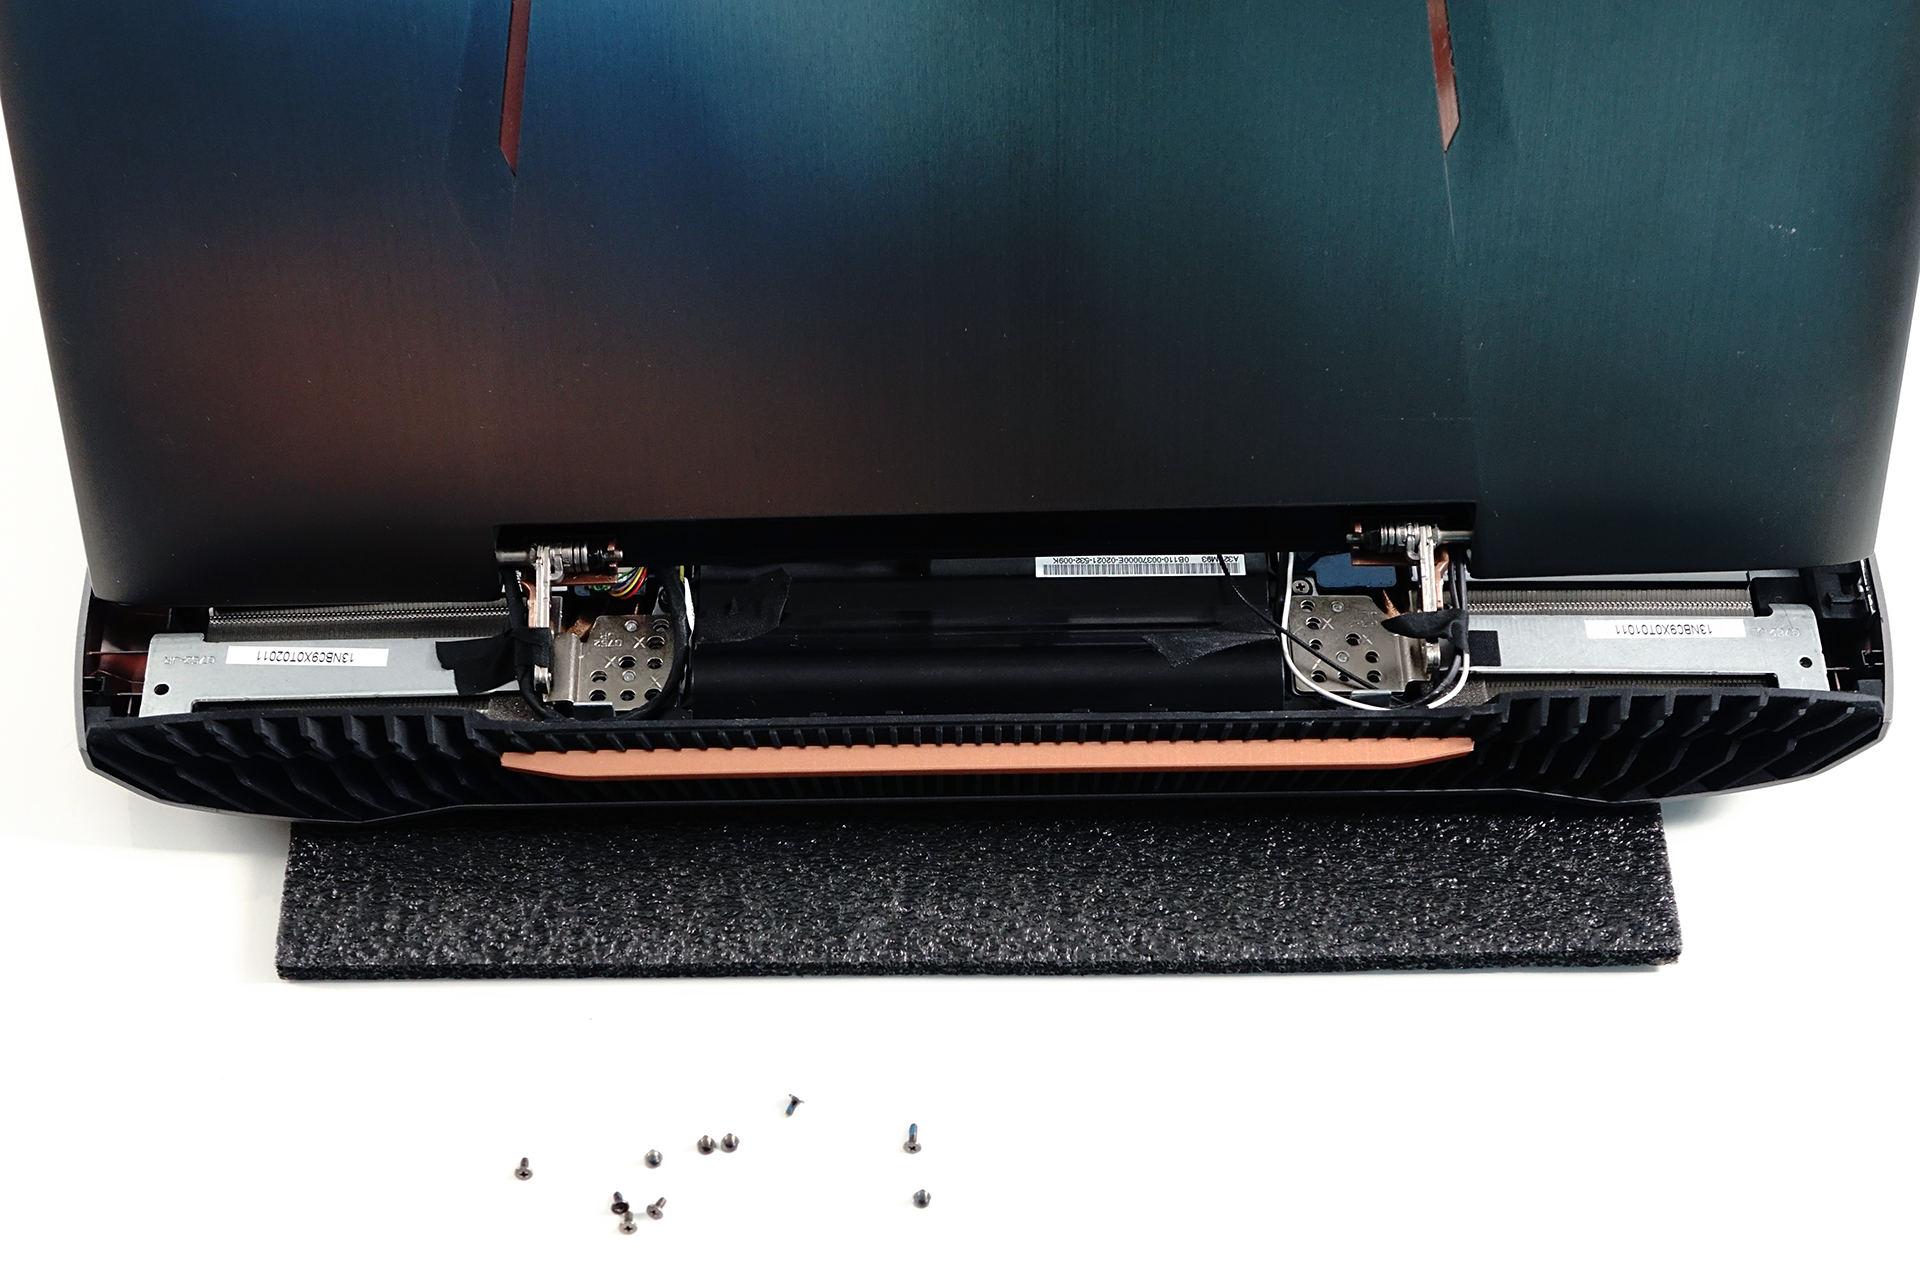
After all the screws are removed around the bottom piece, get out the optical drive and unscrew the three bolts that hide underneath. Then proceed with removing the aluminum cover that’s behind the screen hinges – it comes off without any hassle and makes it easier for you to pry up the keyboard tray that needs to be removed.

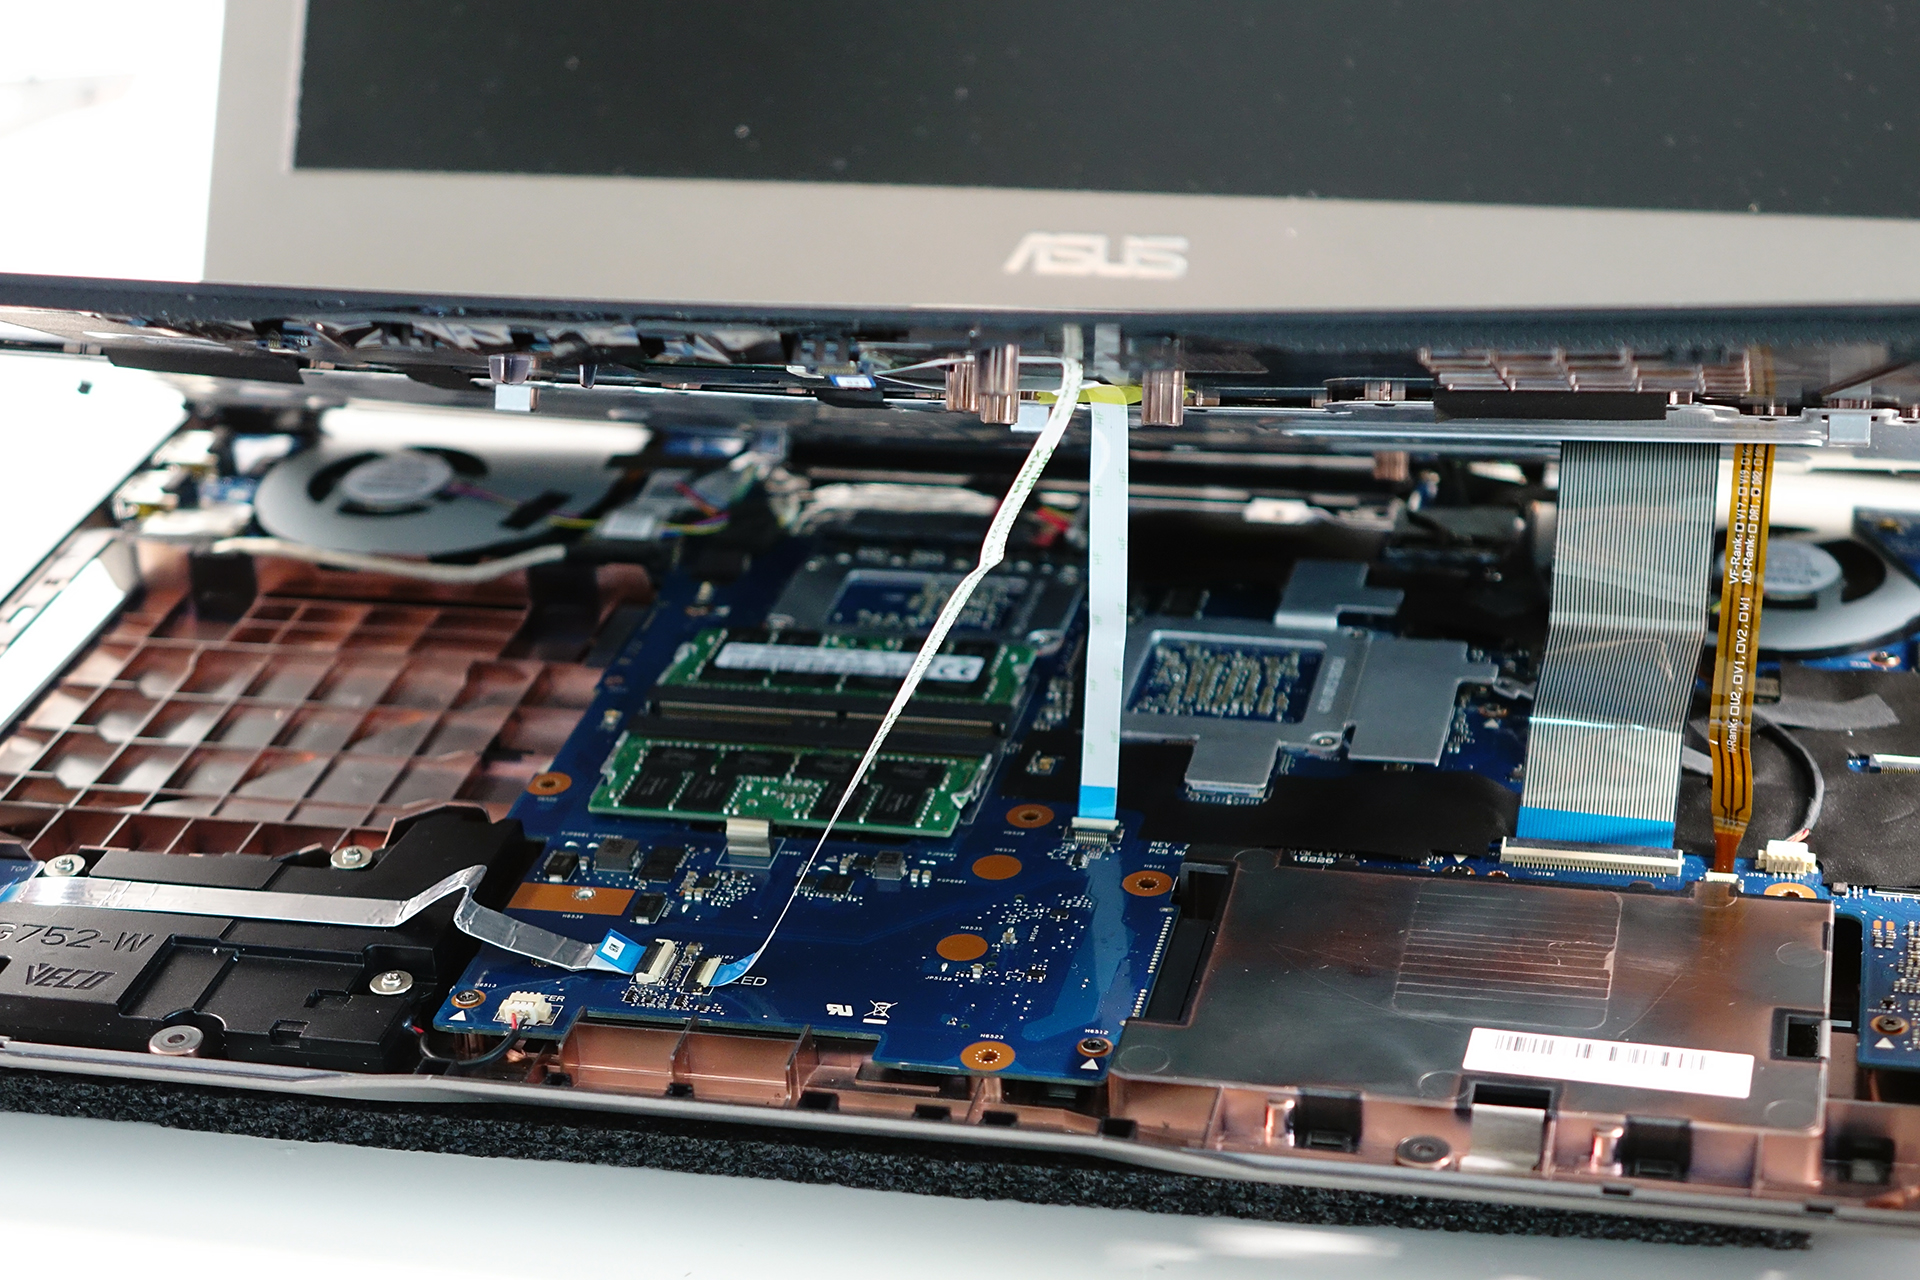
When you are done with that, lift up the keyboard tray and watch out for all the attached cables and as you can see from the image below, there is a handful of them. You will also easily distinguish the rest of the RAM chip slots, which in our case are occupied.

3. Removing the motherboard
Here comes the tricky part. It’s practically the same as the Alienware notebooks and its G751 predecessor. Removing the screws around the motherboard won’t be enough. You will also need to remove the whole screen.
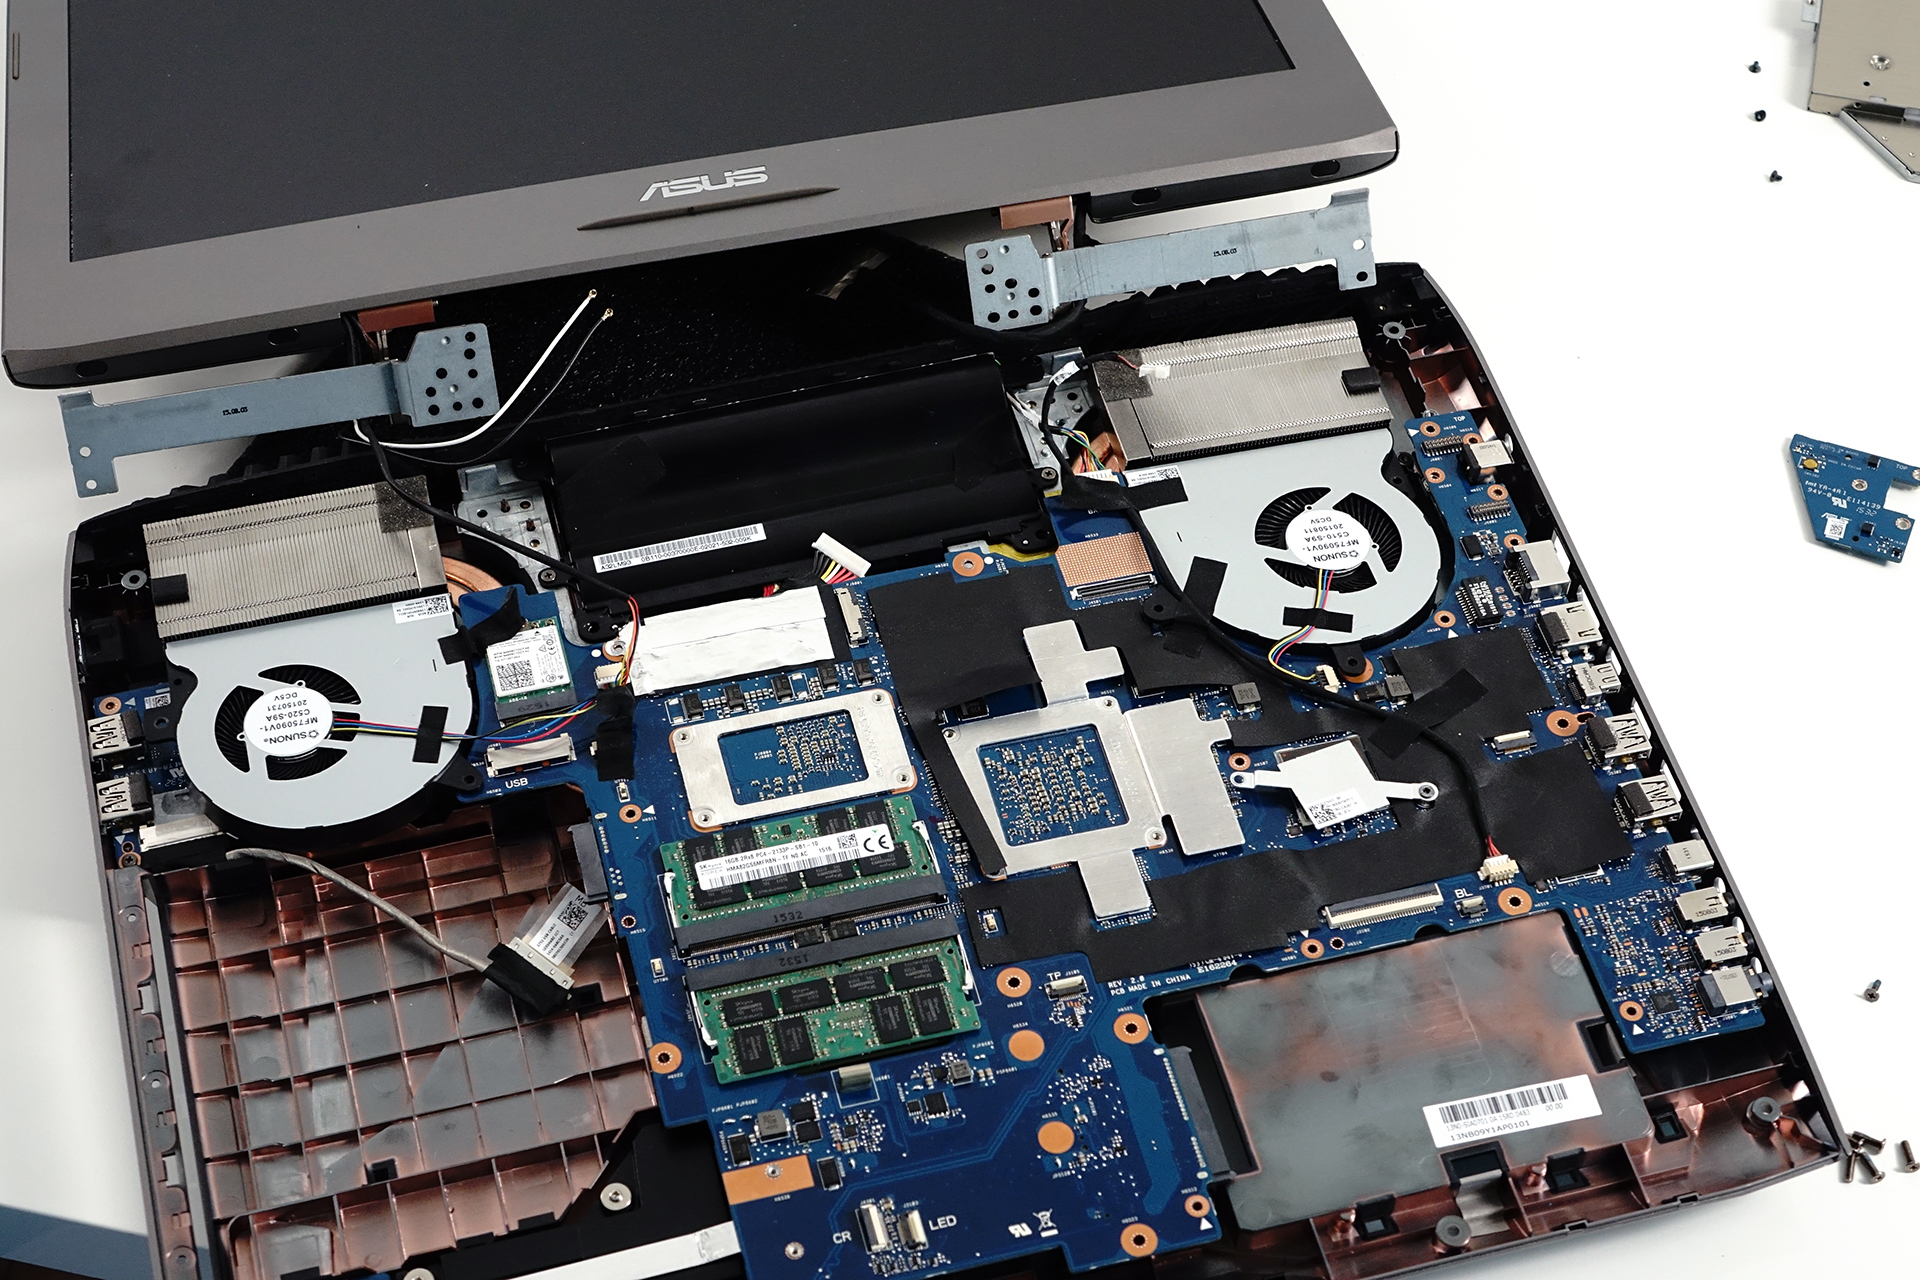
To do so, unscrew all the bolts that are shown on the image below and don’t forget the ones on the sides (left and right near the loudspeakers). Also, before detaching the display make sure you’ve disconnected the Wi-Fi antennas.

When the display has been removed, you can proceed with the battery, which is 6-cell unit rated at 66Wh and it’s a step down from last year’s G751 with 88Wh. And, of course, you can remove the motherboard as well. You can see the design of the cooling system below. No significant changes have been done since the G751 but why should there be any changes when the cooling system is good? Don’t fix anything that’s not broken, right?
All the available configurations and prices can be found at Amazon.com.


![[June 2026] Best-Selling Laptop Brands on Amazon Global – Apple’s Unrivaled Dominance in Units and Revenue](https://laptopmedia.com/wp-content/uploads/2026/07/GLOBAL-Best-Brands-400x225.jpg)
![[June 2026] Amazon Global: Top 10 Best-Selling Laptops – Apple’s New MacBook Neo Storms to #1, Reshaping the Market with Affordability](https://laptopmedia.com/wp-content/uploads/2026/07/Best-Selling-Laptops-GLOBAL-Top-10-400x225.jpg)
![[June 2026] Amazon Global: Top 10 Best-Selling Gaming Laptops – Acer’s Nitro V 16S AI Dominates Sales, While ASUS Leads Overall Revenue](https://laptopmedia.com/wp-content/uploads/2026/07/Best-Selling-Gaming-Laptops-GLOBAL-Top-10-400x225.jpg)
![[June 2026] Global Ranking of Best-Selling Laptop GPUs on Amazon – NVIDIA RTX 5060 is the Top-Selling Dedicated GPU](https://laptopmedia.com/wp-content/uploads/2026/07/Best-Selling-GPUs-GLOBAL-Top-10-400x225.jpg)
![[June 2026] Global Ranking of Best-Selling Laptop CPUs on Amazon – Apple M5 Dominates, AMD Ryzen 7 260 Gets Solid Premium Share](https://laptopmedia.com/wp-content/uploads/2026/07/Best-Selling-CPUs-GLOBAL-Top-10-400x225.jpg)

I already upgraded from 16 GB memory (4×4 GB) to 24 GB (replacing 2×4 GB with 2×8 GB). I plan to do another upgrade and I’m thinking about trying to replace the left 2×4 GB with 2×16 GB Modules. The “official” memory-limit given by ASUS specs is 32 GB RAM. But I think it’s only because when the Notebook has been sold there were no 16 GB RAM modules (for the “public” market available). I know some mainboards inofficially support more than the specs told you… I used 6 GB RAM in my old ACER Aspire 7720G even it officially… Read more »
I have the ASUS ROG G752VY-GC299T and it has a Intel i7-6820HK, nVidia 980M GTX with 8GB VRAM and 64GB of RAM at 2133MHz.
Maximum for this motherboard and this CPU is 64GB, not 32GB.
Even in my first laptop, a Toshiba Satellite X205-S9349, the maximum RAM state is 4GB (DDR2, 667MHz) but after many many years of ownership I tried booting with 8GB (DDR2, 800MHz) and it booted just fine. No issues. So don’t trust the maximum supported, because it will support more.
Is it possible to upgrade the nvidia from 970m to 1060?
No, changing the CPU and GPU is impossible with 99% of the notebooks on the market.
Look again Rossen they have a MXM video card spot i am here to find out if it is a mxm3.0a or 3.0b before I buy a new card for it as for the 1060 fuck that shit my system is so erratic that it destroyed the recovery partition twice! I looked into all the errors and it is linked to bad drives on the 1060
Is it possible to change the CPU from 6700 to 7700?
I have the ASUS ROG GL752VW-DH71
I need to replace the battery. It just died after a year.
I cannot see where to find the battery here? I googled further and found 2 different batteries. Si, I have to open the laptop to make sure.
ty, very well made, does anyone knows for a fact, the left side (facing the monitor) fan is for cpu or gpu?
Godo post.
I just had to replace the Keyboard in my 752. The only issue I have with ASUS design specs on this laptop is how they install the keyboard into the frame. There are plastic retention pins that you can not remove to pull out the keyboard and input pad. You literally have to pry it off which breaks or mangles most of these pins. Luckily most of the pins remain partially intact so you can line the keyboard back in and then you just have to tape it down against these pins. Other than this the machine is built quite… Read more »
I have a g752vs with a a broken display. are the other g752 display models compatible with VS model?
I own this laptop and the CPU is no longer supported i wonder if i can put a newer cpu on it to bypass this or is this just on borrowed time