Inside ASUS VivoBook 15 F515 – disassembly and upgrade options
Building this device, ASUS has made some questionable decisions. Take a look at the cooling for instance.
Check out all ASUS VivoBook 15 F515 prices and configurations in our Specs System or read more in our In-Depth review.
1. Remove the bottom plate
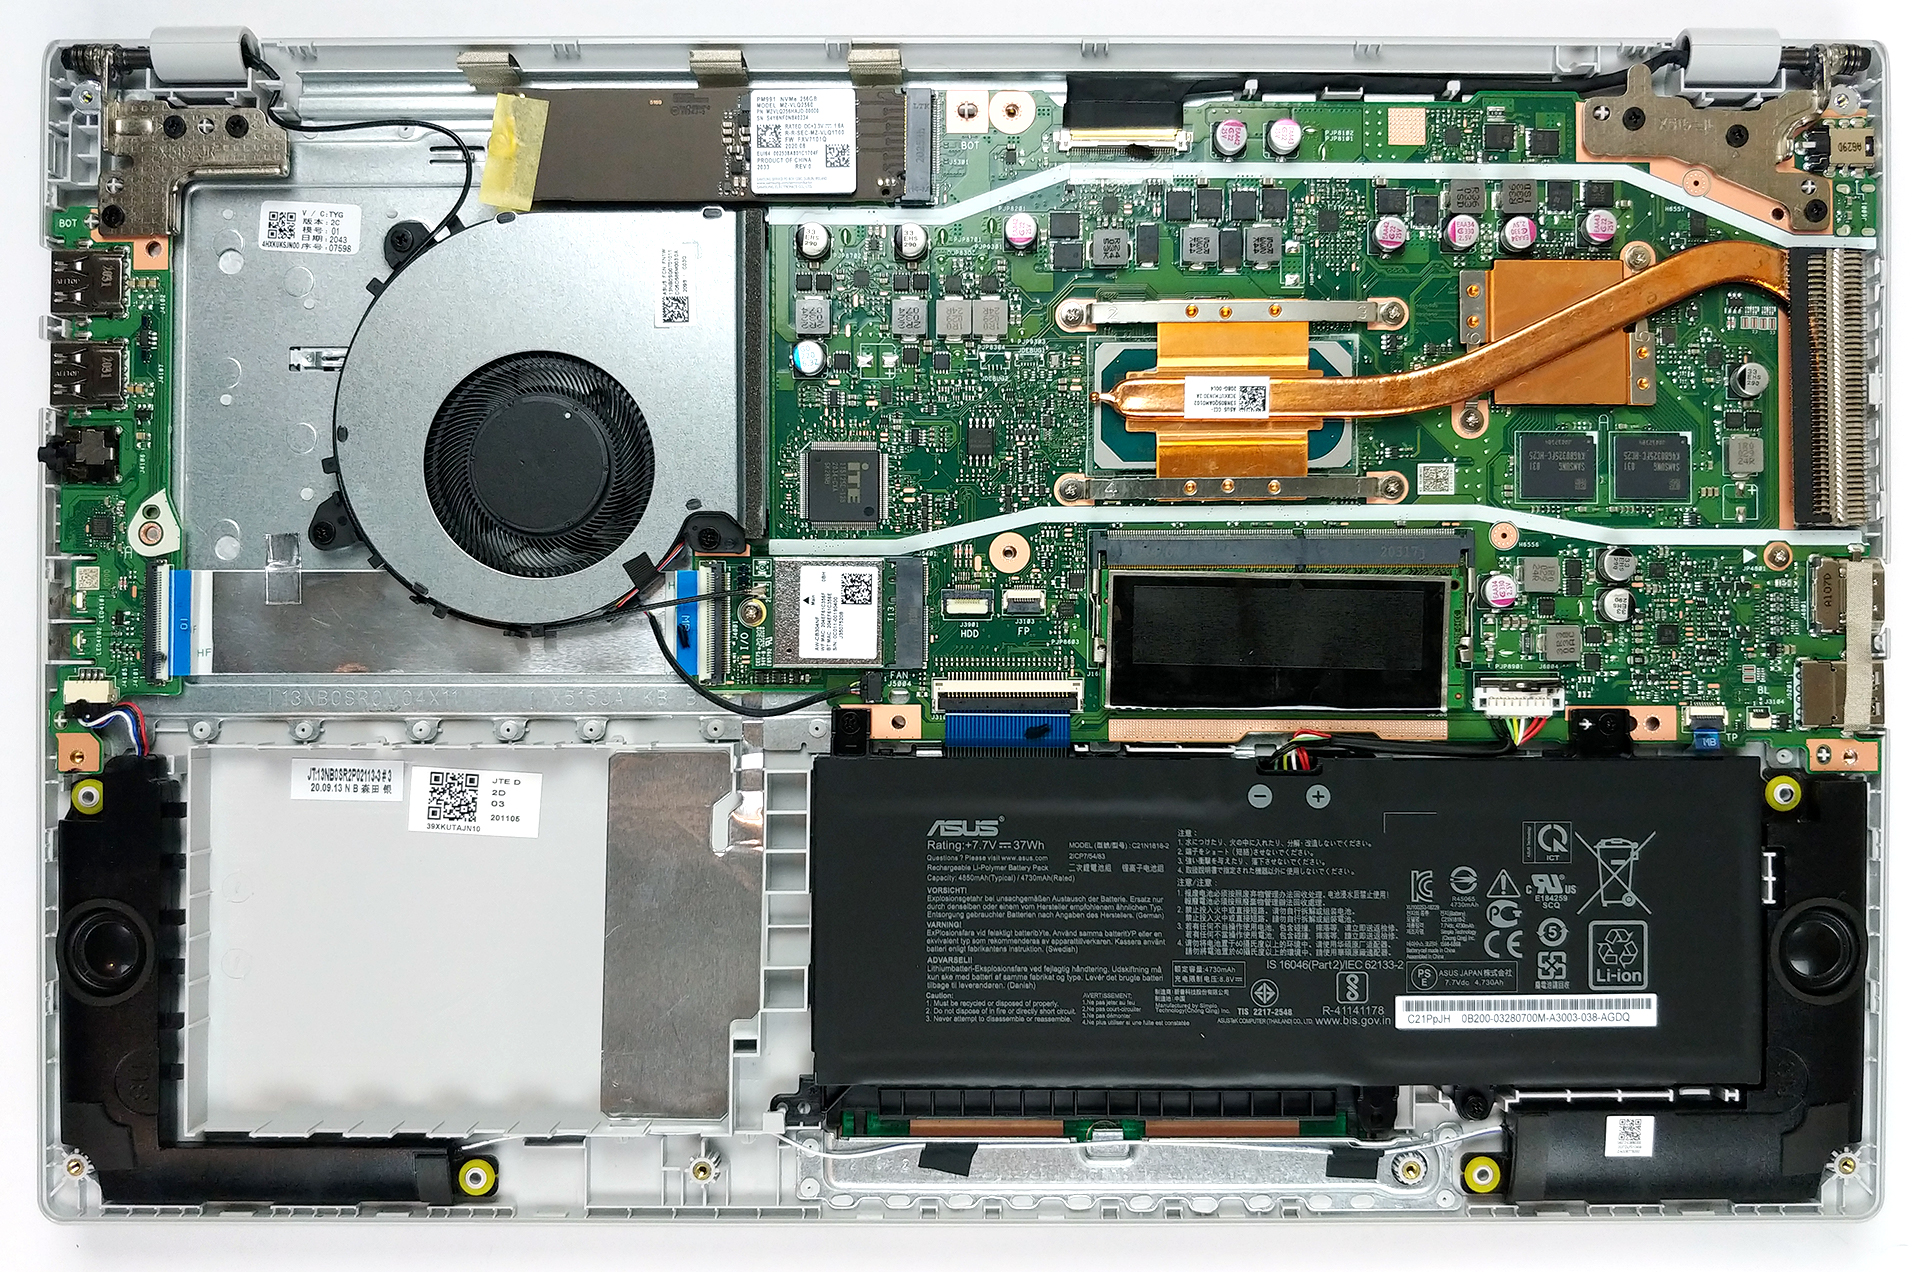
To get inside of the laptop, you need to undo 10 Phillips head screws. Then, pop the bottom panel, starting the prying process from the front edges.
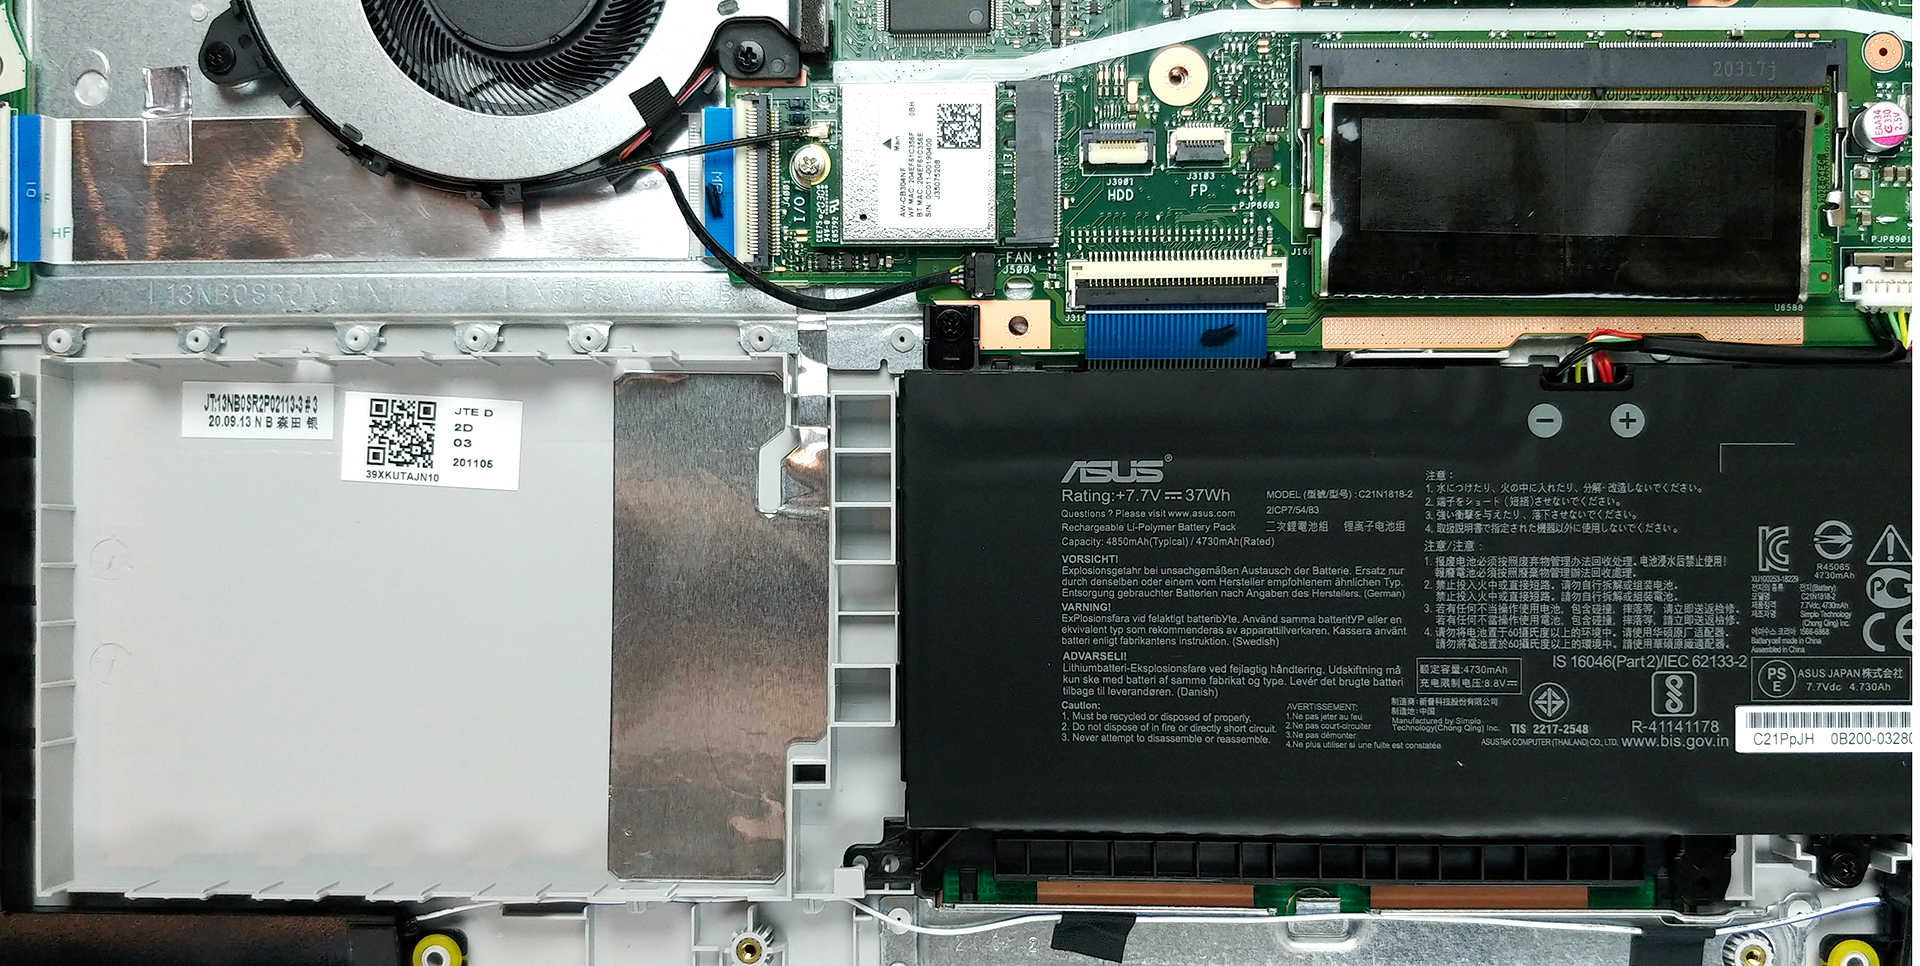
2. Battery
Lastly, the laptop relies on a modest 37Wh battery pack, when it’s not plugged into the wall.

3. Memory and storage
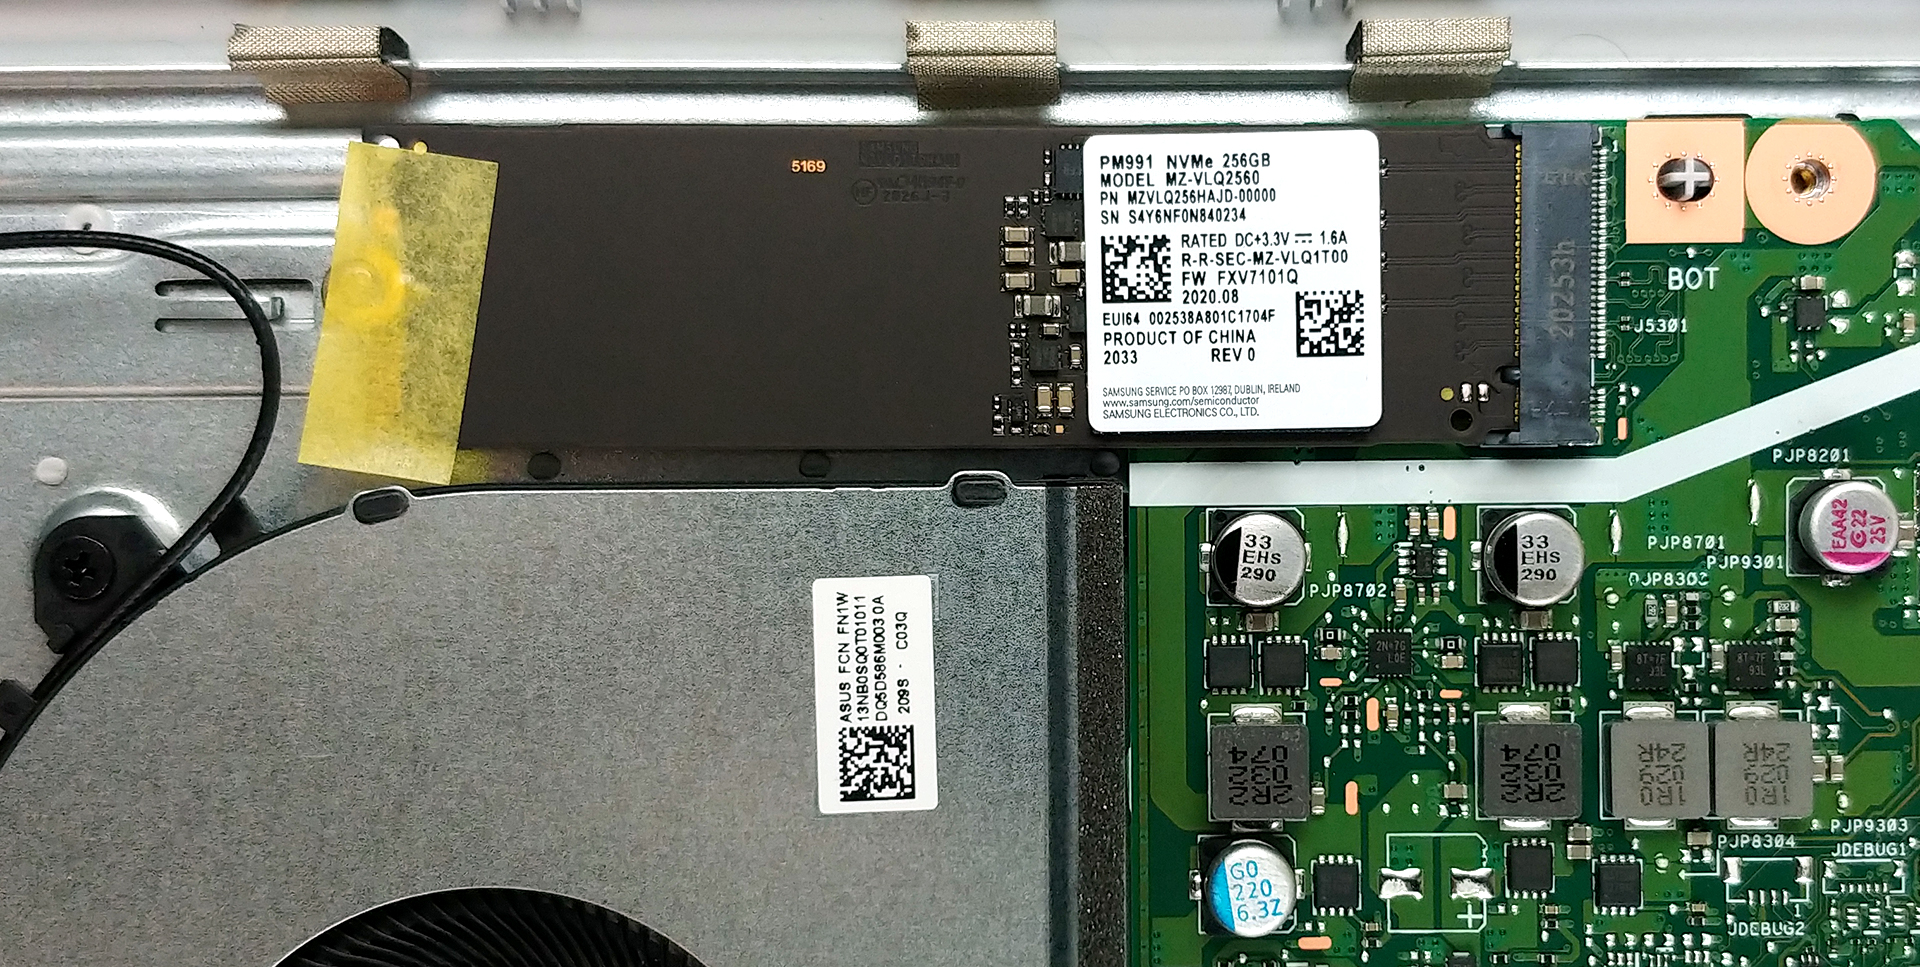
As far as the memory goes, there are 4GB of DDR4 RAM soldered to the motherboard. Additionally, you have the option to upgrade it via the single SODIMM slot, which fits up to 16GB of DDR4 memory. Storage-wise, you have one M.2 slot, allegedly supporting PCIe x2 drives, and one 2.5-inch drive bay.
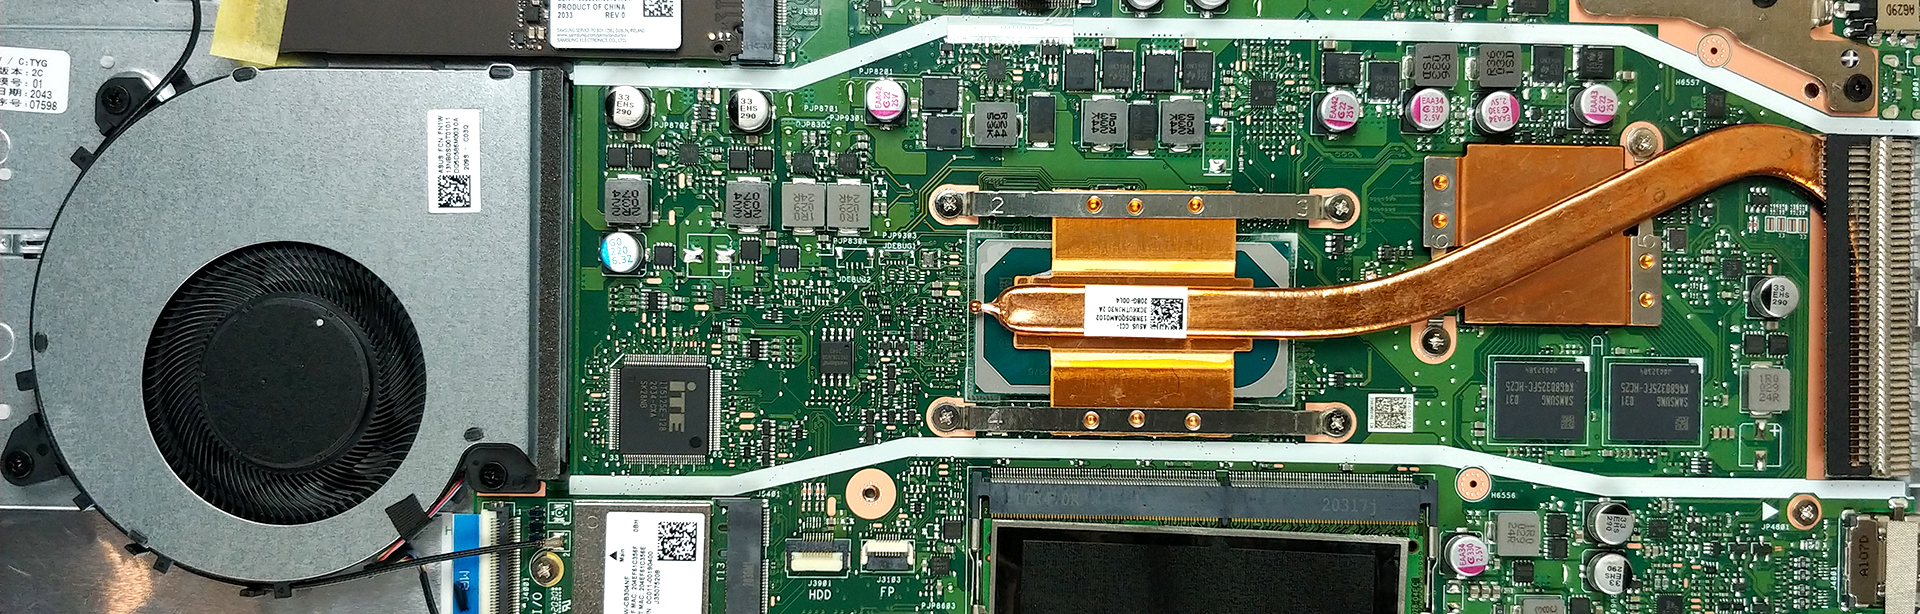
4. Cooling system
After you lift the panel away, you will see an extraordinary cooling solution. Interestingly, it still features a heat pipe, that cools both the CPU and the GPU, and ends up at a heat sink on the side of the device. However, instead of the conventional fan location, just behind the heat sink, it is located far away from it. There are two plastic walls on the bottom panel, which channel the air towards the heat sink. On the bright side, it takes some heat away directly from the heat pipe, the chips the video memory, and the VRMs. Sadly, though, this means that air that is no longer cool reaches the heat sink and the thermal efficiency of the entire setup is compromised.
Check out all ASUS VivoBook 15 F515 prices and configurations in our Specs System or read more in our In-Depth review.


![[2026年6月] 亚马逊全球畅销笔记本电脑品牌——苹果在销量和营收方面均占据无可匹敌的统治地位](https://laptopmedia.com/wp-content/uploads/2026/07/GLOBAL-Best-Brands-400x225.jpg)
![[2026年6月] 亚马逊全球:笔记本电脑销量前十名——苹果新款MacBook Neo强势登顶,以亲民价格重塑市场格局](https://laptopmedia.com/wp-content/uploads/2026/07/Best-Selling-Laptops-GLOBAL-Top-10-400x225.jpg)
![[2026年6月] 亚马逊全球:十大畅销游戏笔记本电脑——宏碁Nitro V 16S AI销量领跑,华硕总营收居首](https://laptopmedia.com/wp-content/uploads/2026/07/Best-Selling-Gaming-Laptops-GLOBAL-Top-10-400x225.jpg)
![[2026年6月] 亚马逊全球畅销笔记本电脑显卡排行榜——NVIDIA RTX 5060 位居专用显卡销量榜首](https://laptopmedia.com/wp-content/uploads/2026/07/Best-Selling-GPUs-GLOBAL-Top-10-400x225.jpg)
![[2026年6月] 亚马逊全球畅销笔记本电脑CPU排行榜——苹果M5占据主导地位,AMD锐龙7 260在高端市场占据稳固份额](https://laptopmedia.com/wp-content/uploads/2026/07/Best-Selling-CPUs-GLOBAL-Top-10-400x225.jpg)
