How to open Acer Nitro 16 (AN16-72) – disassembly and upgrade options

Step 1: Opening the Laptop
- Turn off the Acer Nitro 16 (AN16-72) and place it on a soft surface to prevent scratches.
- Remove the 11 Phillips-head screws from the bottom panel of the laptop.
- Carefully lift the backside by holding the two plastic exhausts. Use a thin plastic tool to gently pry open the left side, the bottom, and around the Ethernet port areas.
Caution: Be extra careful near the LAN connector to avoid breaking the plate.
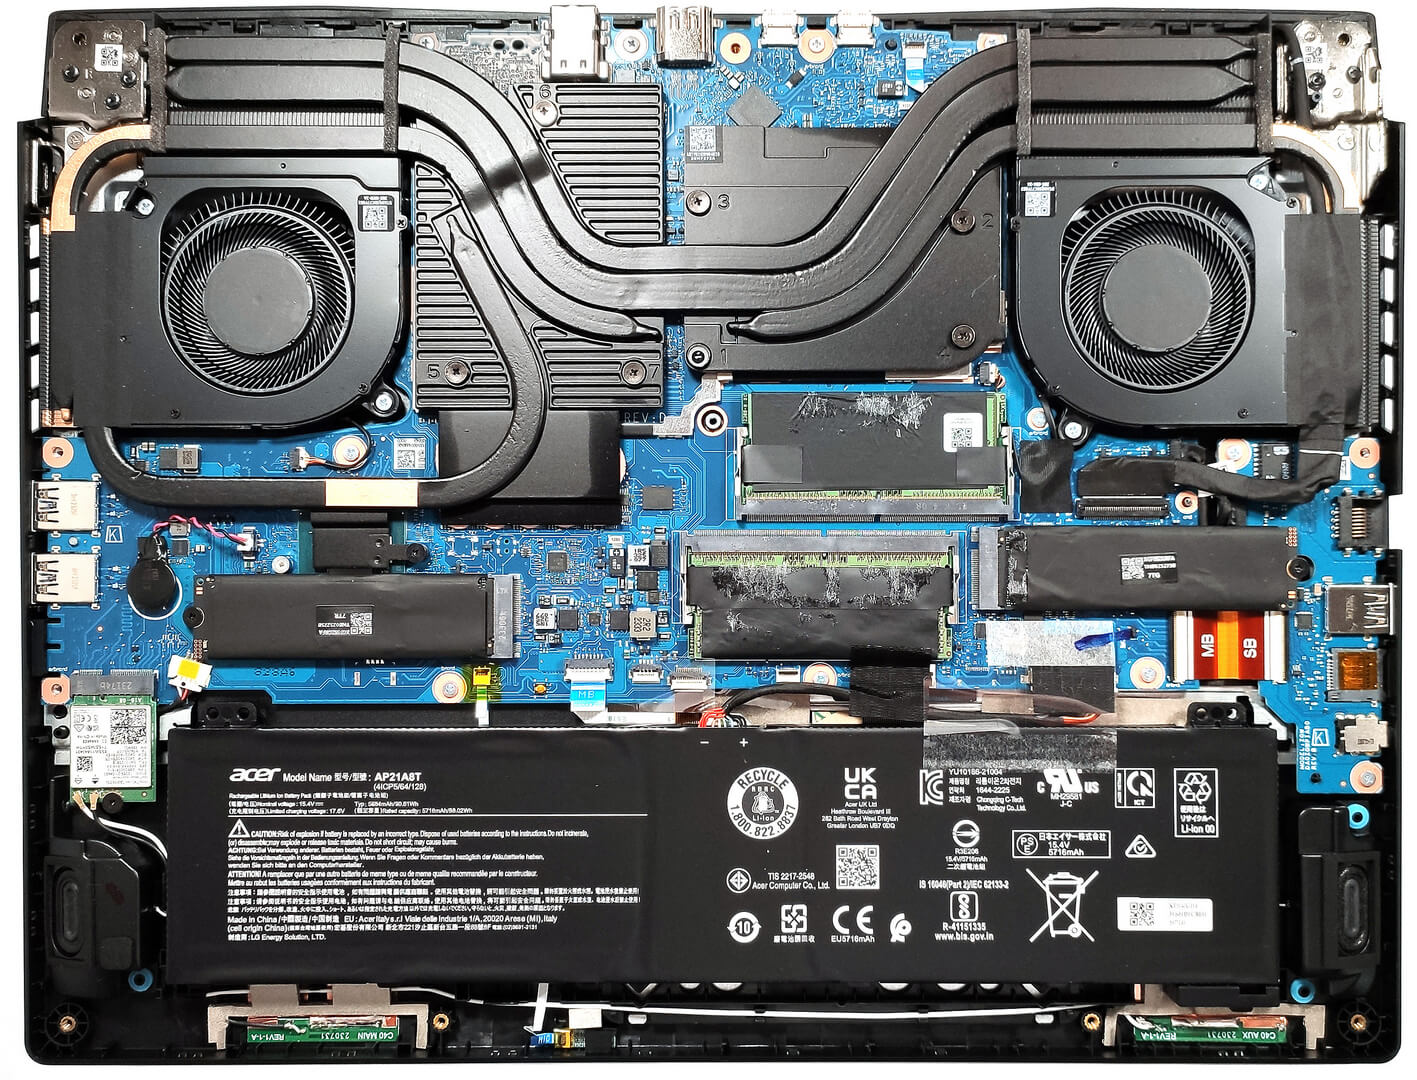
Step 2: Removing the Battery
- Detach the battery connector from the mainboard to disconnect the power.
- Lift the 90.61Wh battery away from the chassis. It isn’t physically screwed to the base, relying instead on a dedicated socket and soft padding for fixation.
More info: The battery provides up to 7 hours and 9 minutes of web browsing or 5 hours and 53 minutes of video playback.


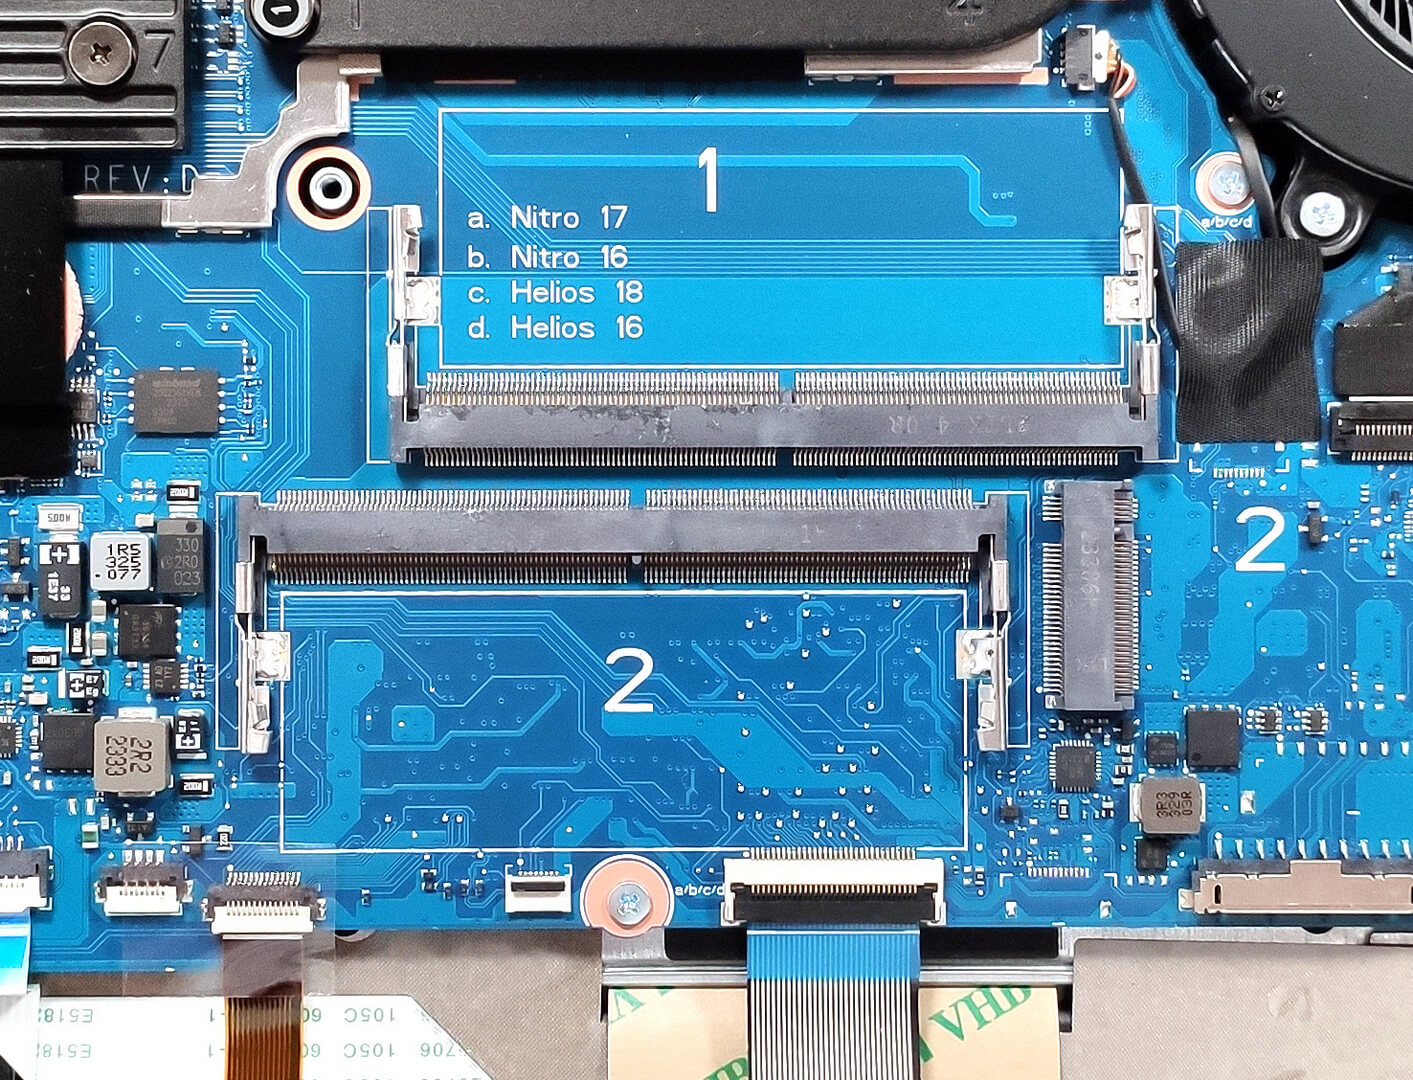
Memory Upgrade
- Locate the two SODIMM slots which support up to 32GB of DDR5-5600MHz RAM in dual-channel mode.
- Note that each memory module is equipped with a dedicated thermal pad for additional cooling.
Hint: Upgrading the RAM can significantly boost your laptop’s performance, especially for gaming or heavy multitasking.
You can buy DDR5 RAM modules here: Buy from Amazon.com (#CommissionsEarned)

Storage Upgrade
Identify the two M.2 slots designed for 2280 Gen 4 SSDs. This setup allows for significant storage expansion and speed enhancement, especially when SSDs are configured in RAID 0.
You can buy Gen 4 M.2 SSDs here: Buy from Amazon.com (#CommissionsEarned)


Step 3: Examining the Cooling System
Observe the cooling system, which includes two fans and multiple heat pipes (two shared between the processor and the video card, one additional for the CPU, and two more dedicated to the GPU), as well as two large metal plates and four heat sinks.