How to open Lenovo Yoga Pro 9i (14, Gen 8) – disassembly and upgrade options
Step 1: Opening the Lenovo Yoga Pro 9i (14, Gen 8)
- Ensure the Lenovo Yoga Pro 9i (14, Gen 8) is powered off and placed on a soft, clean surface to prevent scratches or damage.
- Remove the five Torx-head screws from the bottom of the laptop.
- Use a plastic tool to pry open the bottom panel or carefully lift the plate by holding the central part to pop it up.
Hint: Be cautious when lifting the panel to avoid damaging any internal components or the clips holding the panel in place.
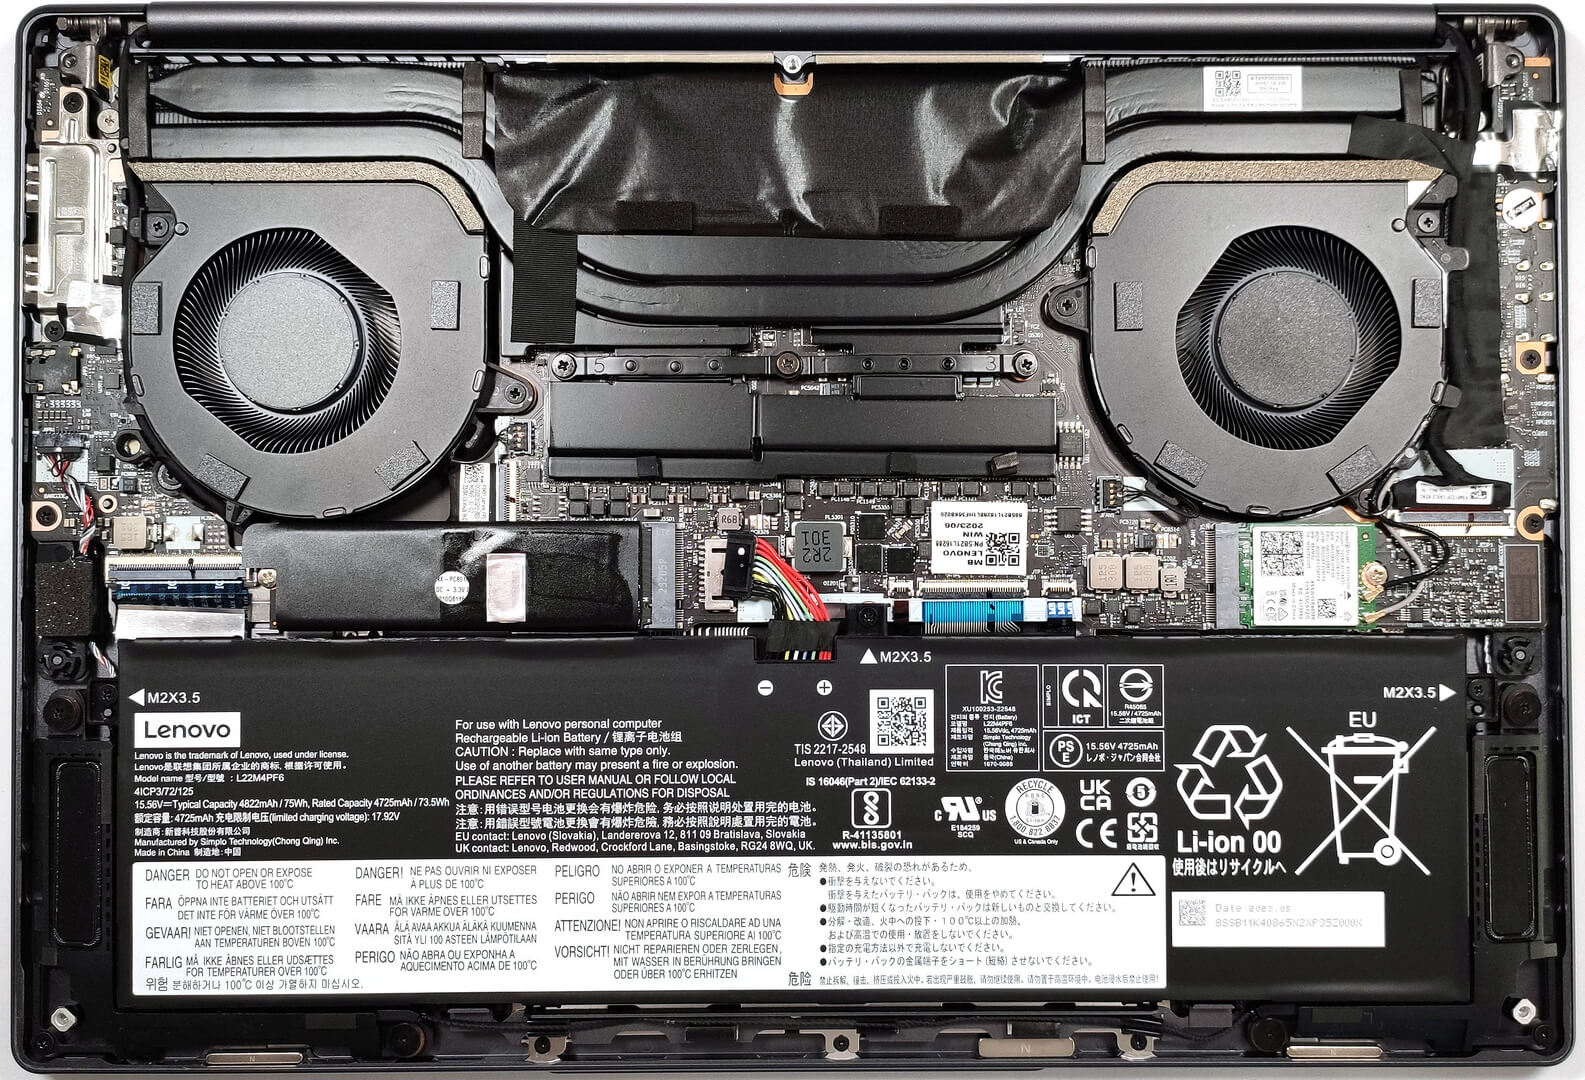
Step 2: Battery Removal
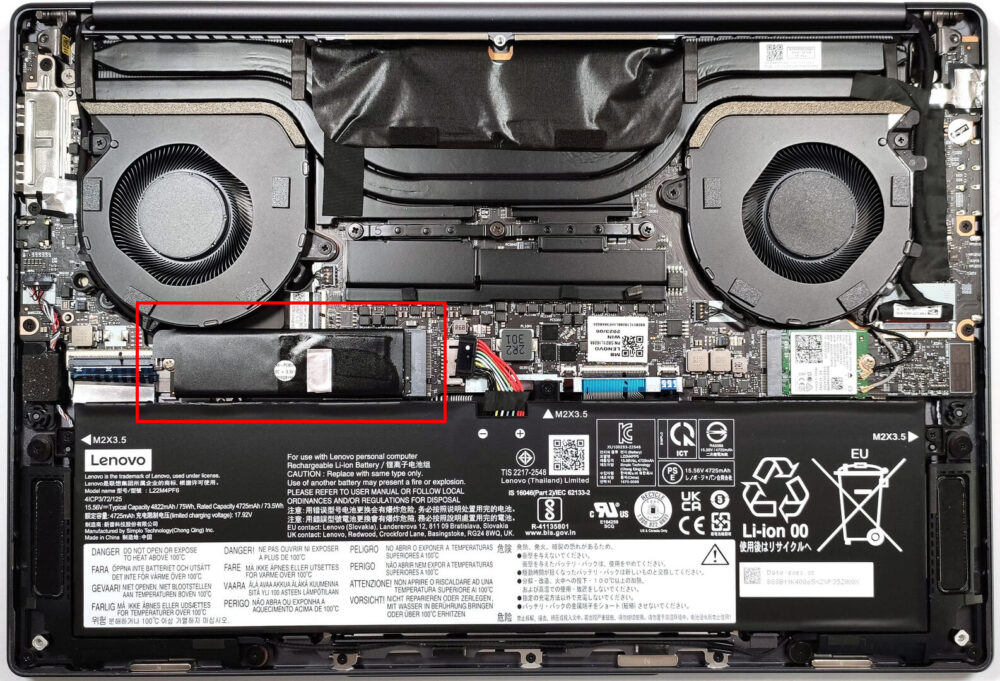
- Disconnect the battery by pulling out its connector from the motherboard.
- Remove the 3 Phillips-head screws securing the 75Wh battery, then carefully lift it away from the chassis.
More info: The 75Wh battery offers up to 7 hours and 9 minutes of web browsing or 6 hours and 15 minutes of video playback, providing decent battery life for a high-end laptop.

Memory Overview
The Lenovo Yoga Pro 9i features soldered LPDDR5x-6400MHz RAM, with a maximum capacity of 64GB in dual-channel mode, ensuring high performance and future-proofing for demanding applications and multitasking.
Storage Upgrade
- Identify the single M.2 slot compatible with 2280 Gen 4 SSDs for storage expansion or upgrades.
- Upgrading the SSD can significantly improve storage capacity and performance, enhancing overall system responsiveness and load times.
Hint: Don’t forget to check out our Top M.2 SSDs Performance Rankings for insights on the best storage options available.
You can buy Gen 4 M.2 SSD modules here: Buy from Amazon.com (#CommissionsEarned)
Cooling System Overview
The cooling system includes two fans, two heat pipes shared between the CPU and the GPU, two heatsinks, and a variety of heat spreaders, designed to efficiently manage heat and maintain optimal performance under load.