Inside ASUS ROG Strix SCAR 17 G732 – disassembly and upgrade options
One of the upgradability kings – the ROG Strix SCAR 17 G732.
Check out all ASUS ROG Strix SCAR 17 G732 prices and configurations in our Specs System or read more in our In-Depth review.
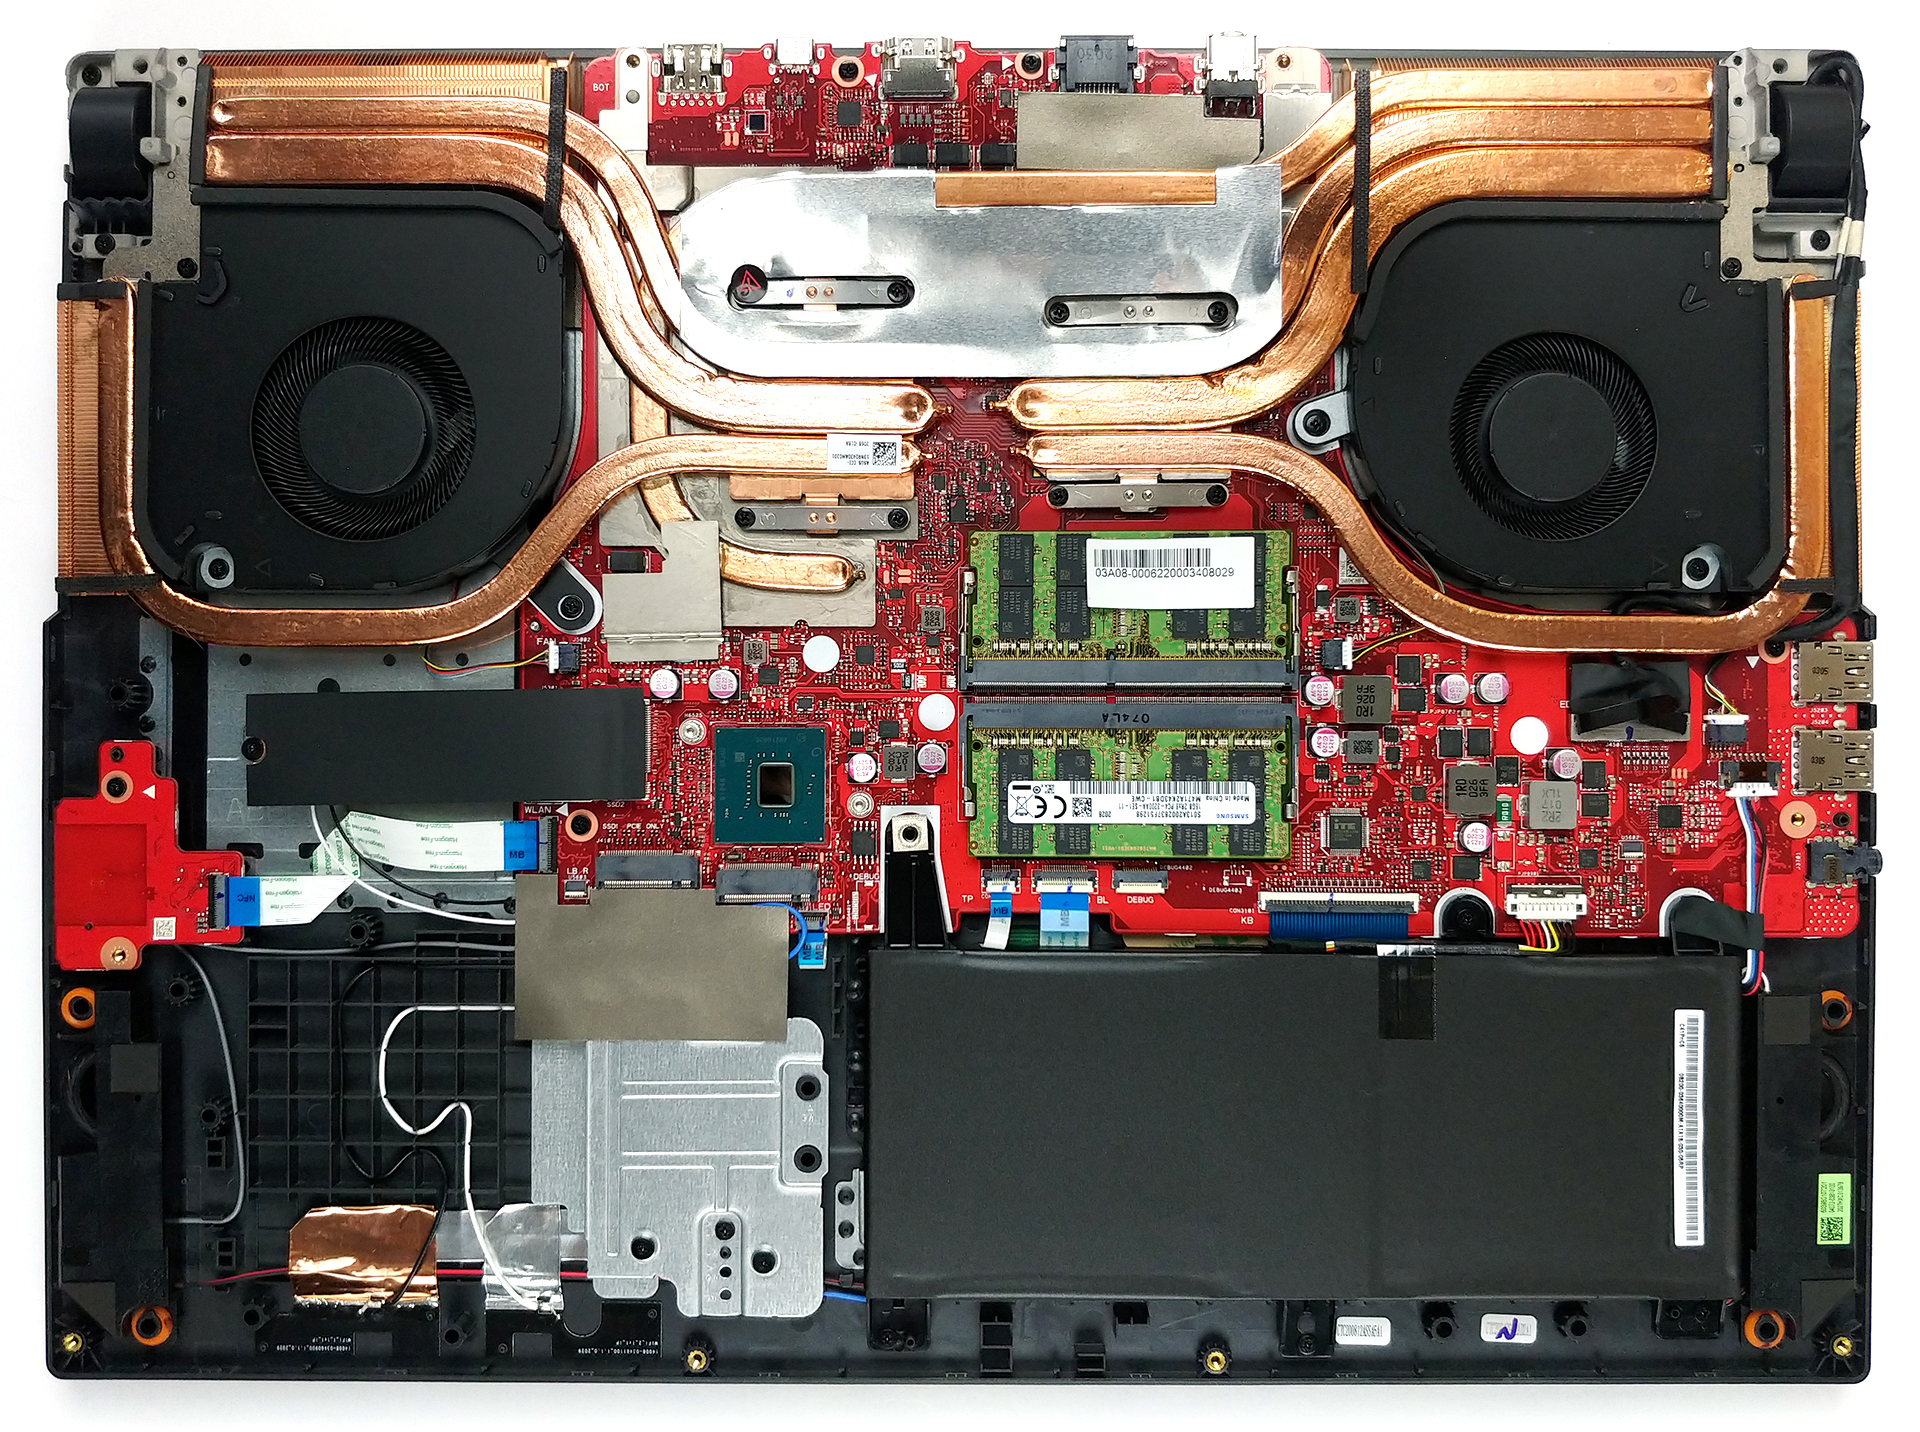
1. Remove the bottom plate
11 Phillips-head screws are holding the bottom panel in place. Ultimately, the one at the bottom right corner remains attached to the plate and lifts it slightly, so you can start prying from there. Then, before you completely remove the panel, lift it gently and unplug the LED ribbon cables from the motherboard.
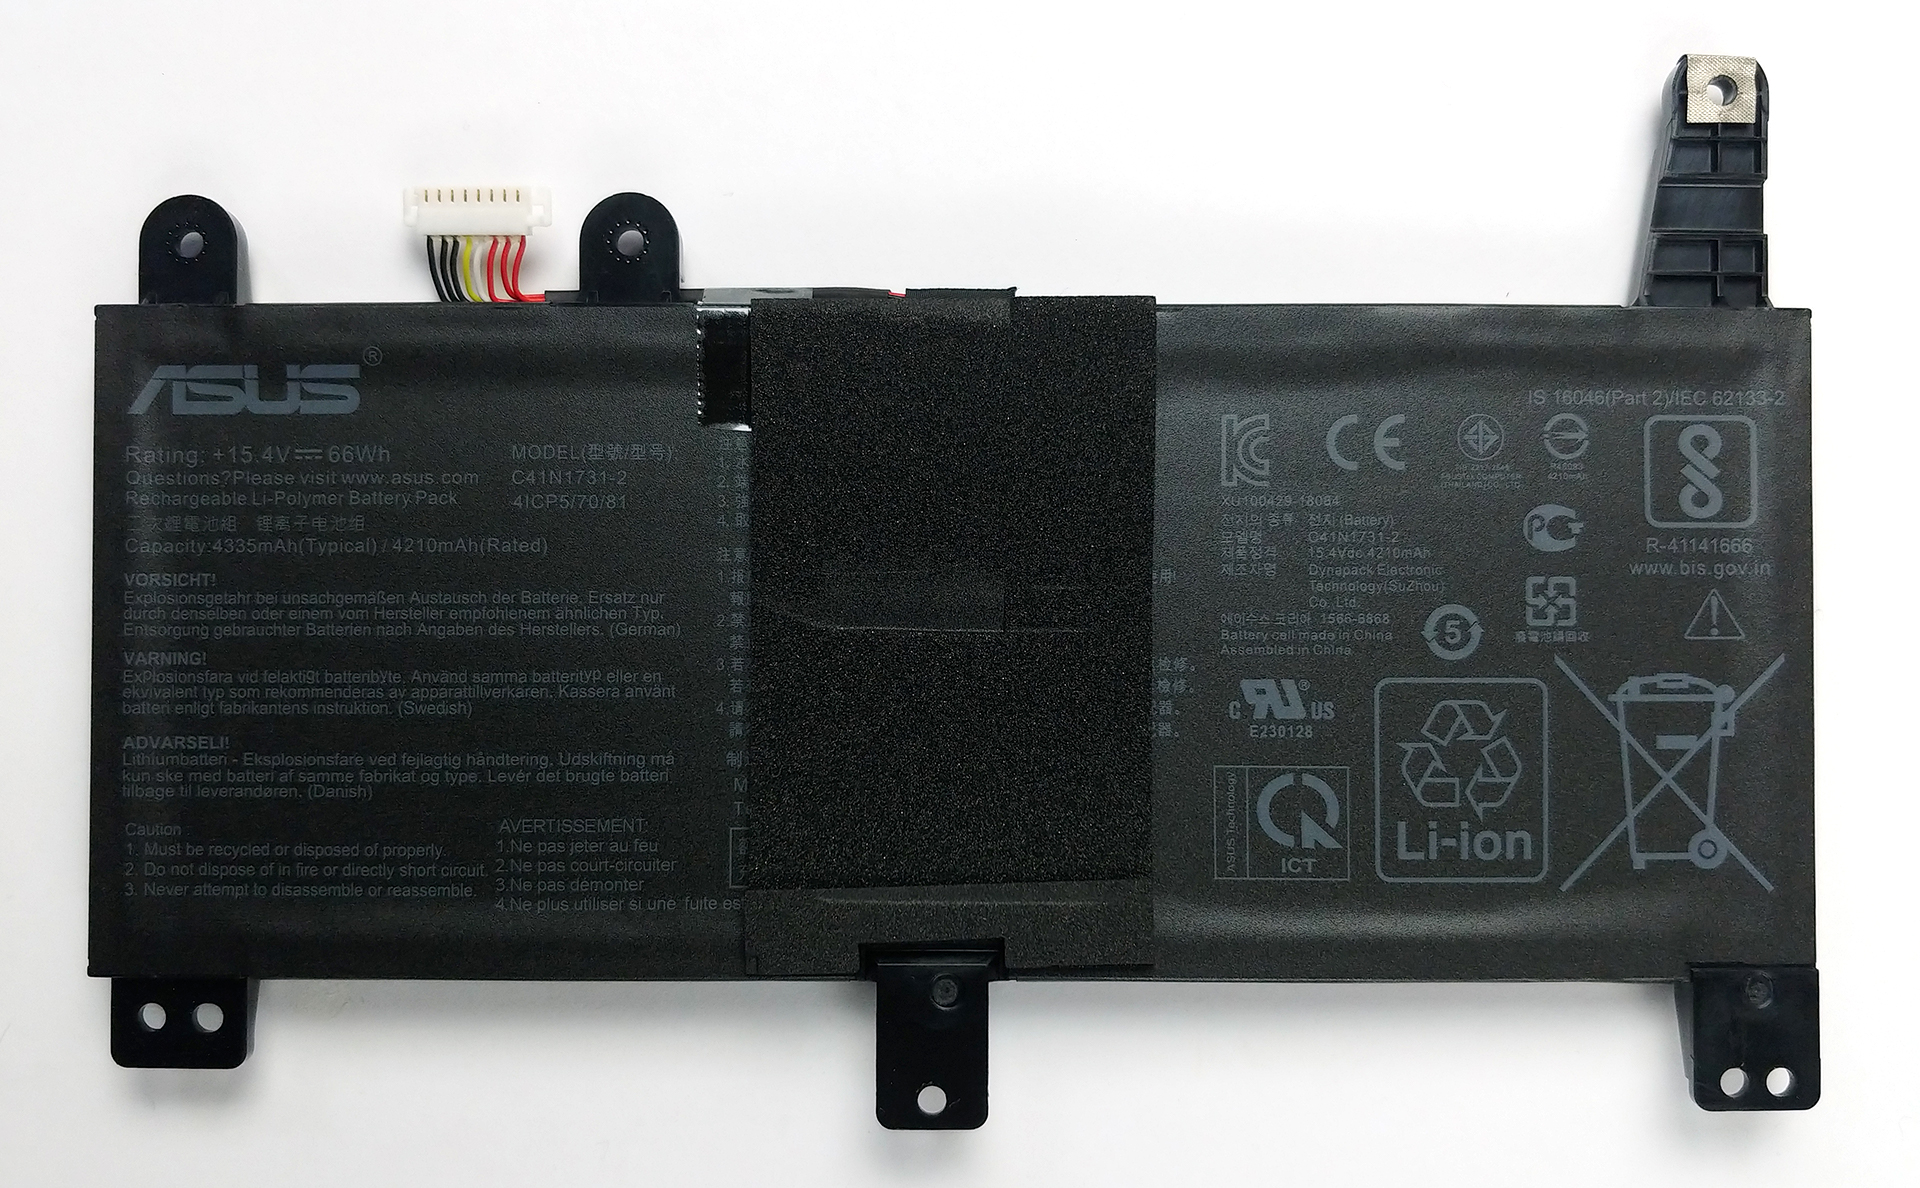
2. Battery
Here, the battery is a relatively small 66Wh unit.
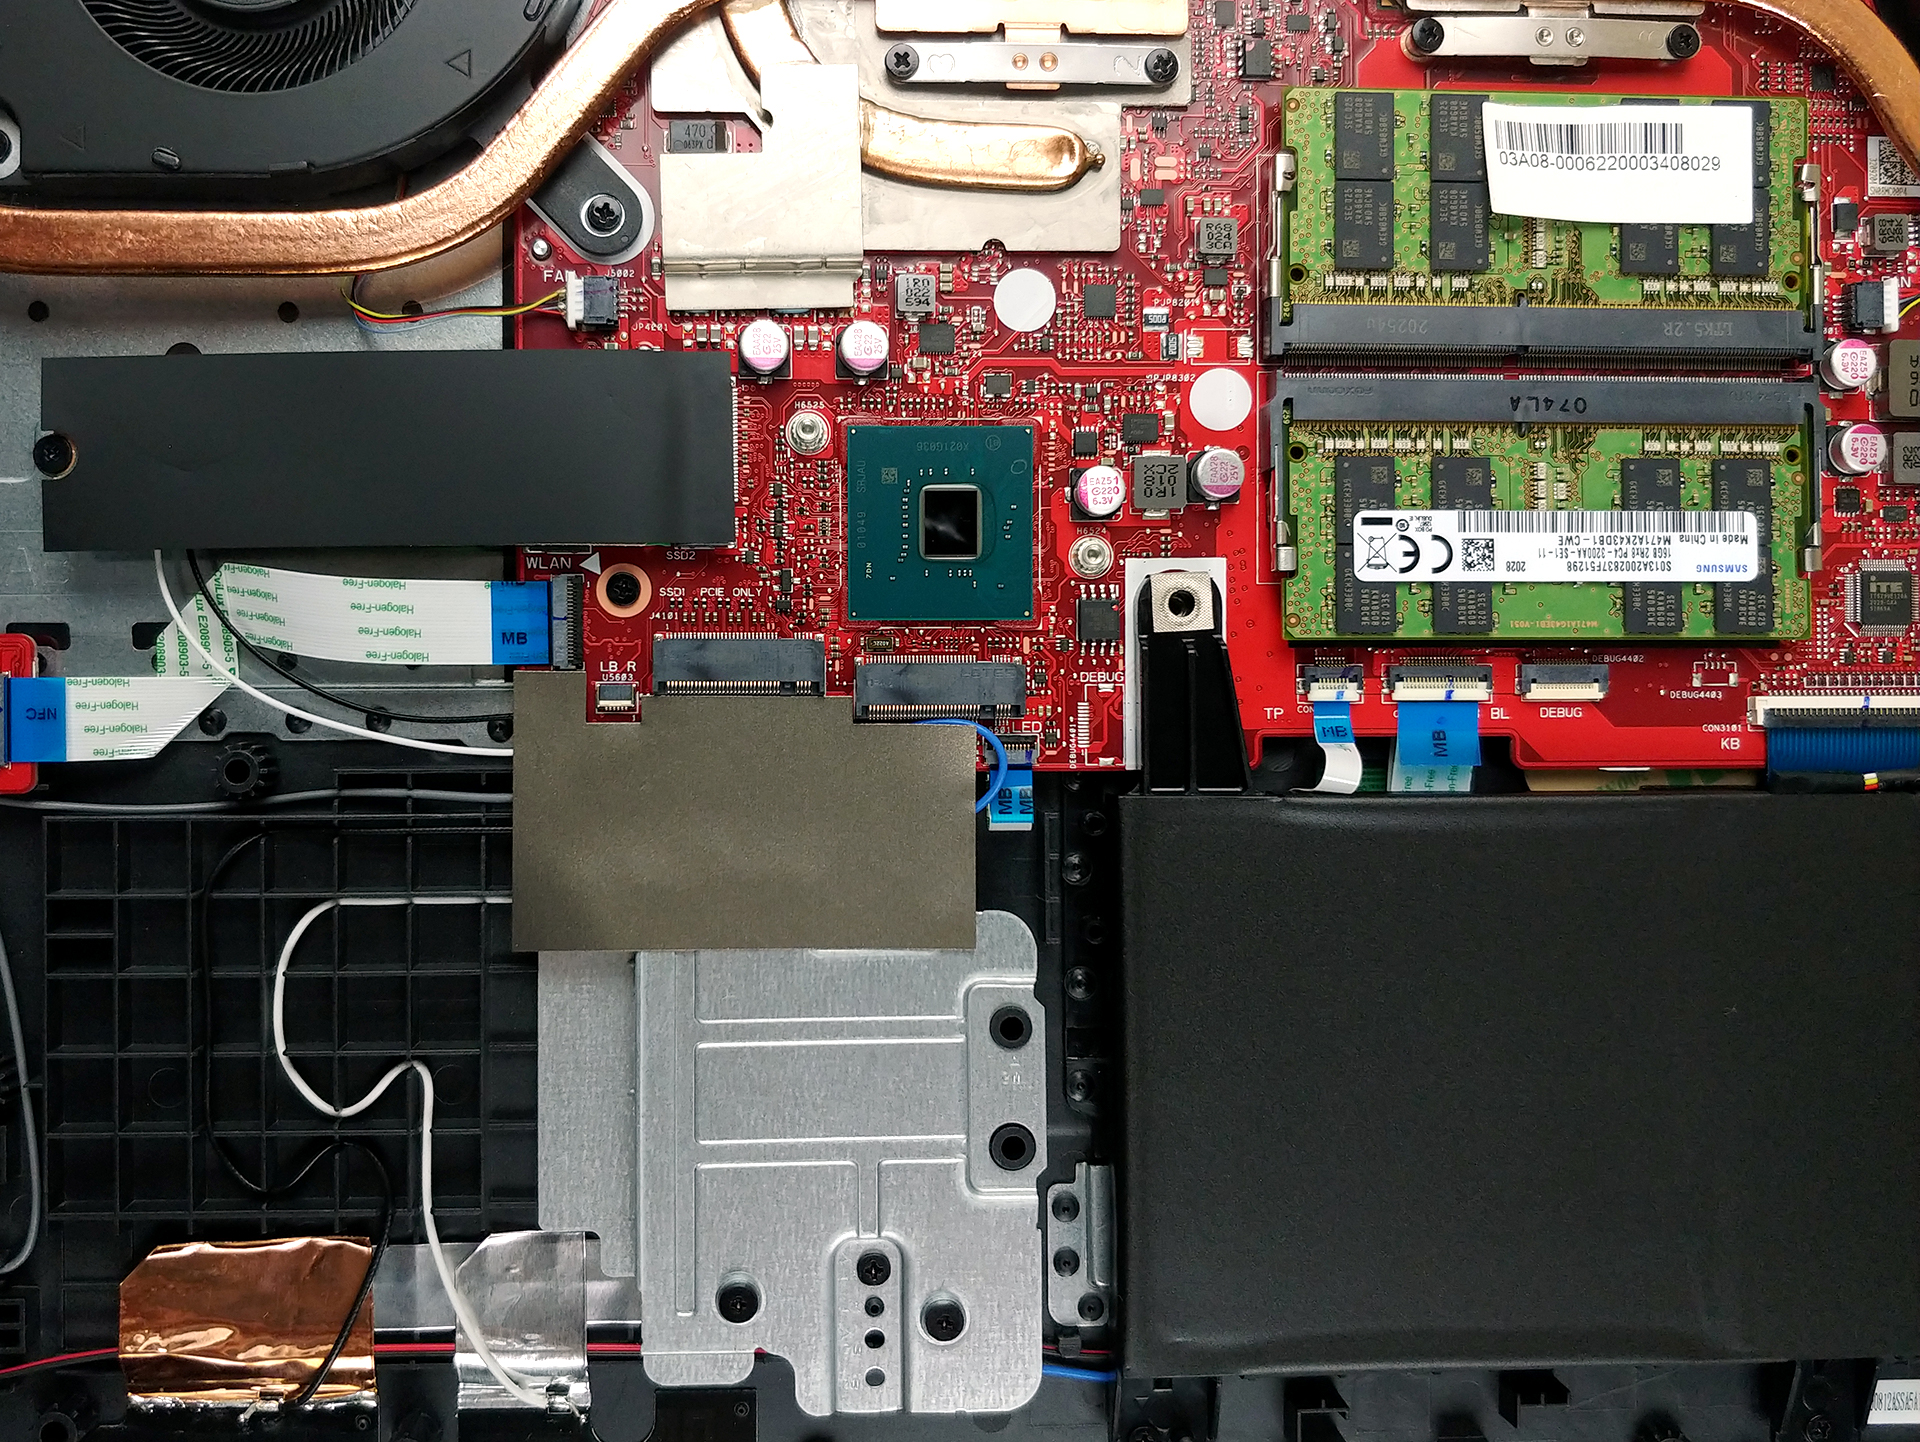
3. Memory and storage
Upgradability-wise, there are two RAM SODIMM slots, that should be able to fit up to 64GB of DDR4 memory. Also, there are as many as three M.2 PCIe x4 slots with RAID 0 support.
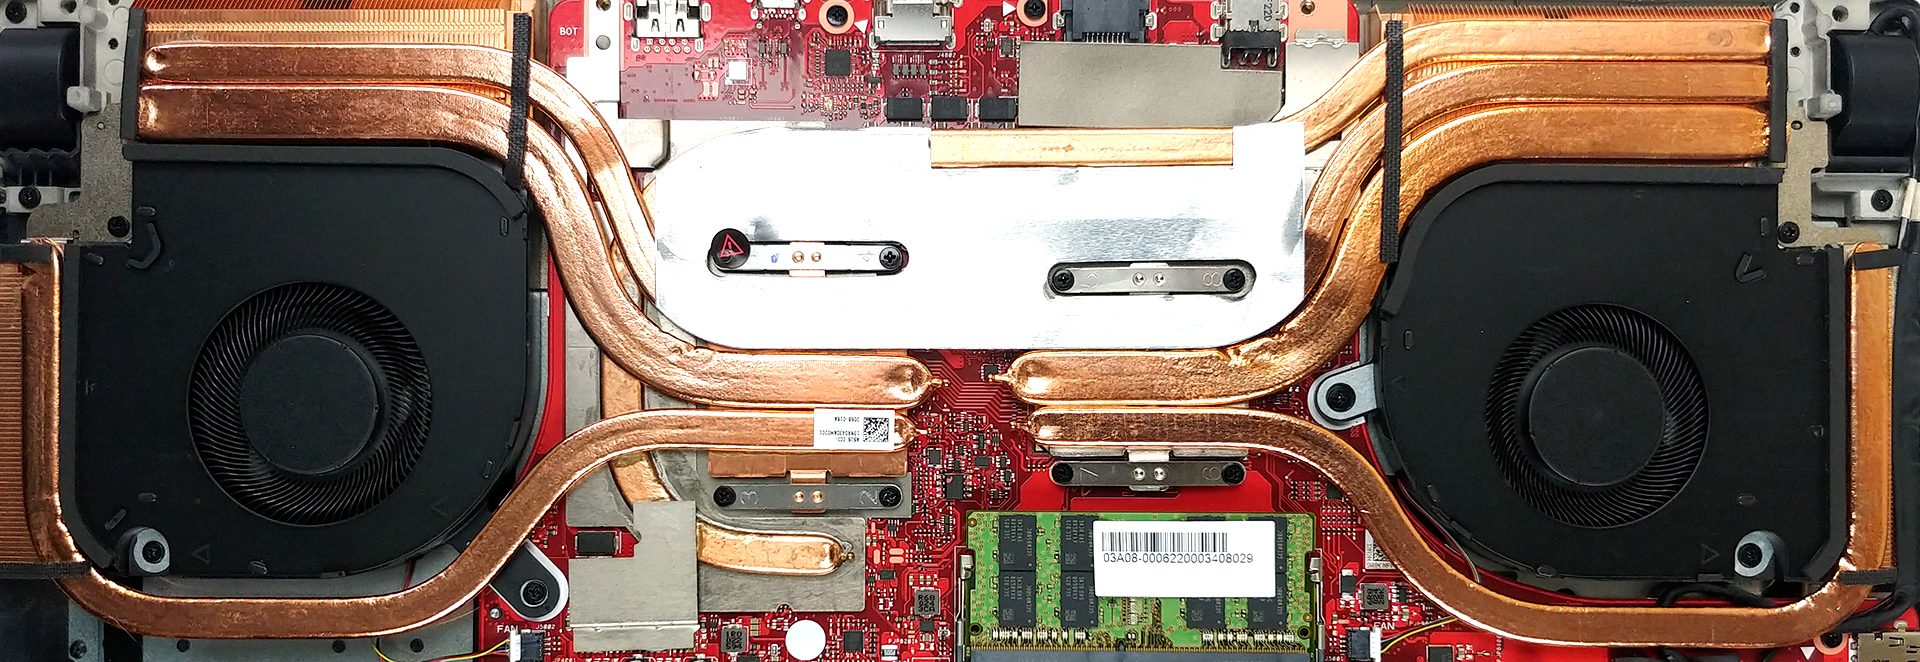
4. Cooling system
In terms of cooling, we have 6 heat pipes, and they cool, the CPU, the GPU, all VRMs, and the graphics memory. Not bad, whatsoever.
Check out all ASUS ROG Strix SCAR 17 G732 prices and configurations in our Specs System or read more in our In-Depth review.


![[June 2026] Best-Selling Laptop Brands on Amazon Global – Apple’s Unrivaled Dominance in Units and Revenue](https://laptopmedia.com/wp-content/uploads/2026/07/GLOBAL-Best-Brands-400x225.jpg)
![[June 2026] Amazon Global: Top 10 Best-Selling Laptops – Apple’s New MacBook Neo Storms to #1, Reshaping the Market with Affordability](https://laptopmedia.com/wp-content/uploads/2026/07/Best-Selling-Laptops-GLOBAL-Top-10-400x225.jpg)
![[June 2026] Amazon Global: Top 10 Best-Selling Gaming Laptops – Acer’s Nitro V 16S AI Dominates Sales, While ASUS Leads Overall Revenue](https://laptopmedia.com/wp-content/uploads/2026/07/Best-Selling-Gaming-Laptops-GLOBAL-Top-10-400x225.jpg)
![[June 2026] Global Ranking of Best-Selling Laptop GPUs on Amazon – NVIDIA RTX 5060 is the Top-Selling Dedicated GPU](https://laptopmedia.com/wp-content/uploads/2026/07/Best-Selling-GPUs-GLOBAL-Top-10-400x225.jpg)
![[June 2026] Global Ranking of Best-Selling Laptop CPUs on Amazon – Apple M5 Dominates, AMD Ryzen 7 260 Gets Solid Premium Share](https://laptopmedia.com/wp-content/uploads/2026/07/Best-Selling-CPUs-GLOBAL-Top-10-400x225.jpg)

Would this be pushed to 128Gb of ram? Theoretically