Inside Dell Inspiron 15 7590 – disassembly and upgrade options
One of the classy laptops that may well suit you better even than an XPS 7590.
Check out all Dell Inspiron 15 7590 prices and configurations in our Specs System or read more in our In-Depth review.
1. Remove the bottom plate
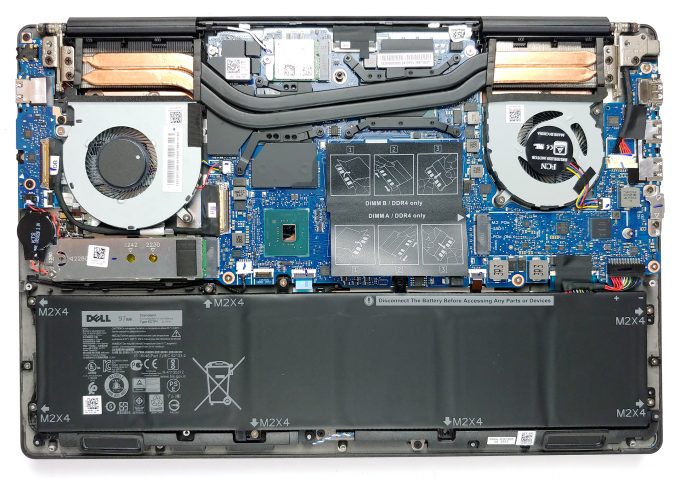
There are 8 Phillips-head screws holding the bottom plate in place. After you unscrew them you only have to pop the panel with a plastic pry tool, or a guitar pick.
2. Battery
Last but not least, perhaps the most interesting feature of the device – its 97Wh battery that stands just shy of the 100Wh limit of air travel.
3. Memory and storage
There are two RAM DIMMs that fit up to 32GB of DDR4 memory with speeds of up to 2666 MHz. More impressively, the laptop is equipped with a duo of M.2 PCIe x4 slots that support RAID 0 configuration. Additionally, one of them can be fitted with a SATA drive, if you fancy.
4. Cooling system
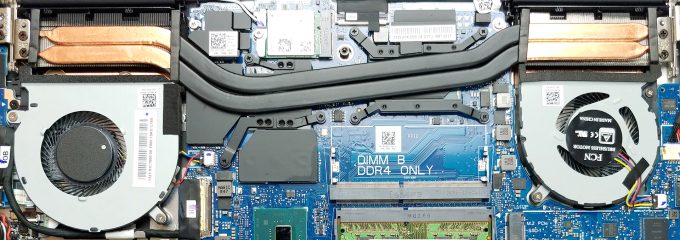
As far as the cooling goes, there are two rather thin heat pipes that cool both the CPU and the GPU. A bit conservative, but honestly, all of the laptops that feature this type of hardware have similar solutions.
Check out all Dell Inspiron 15 7590 prices and configurations in our Specs System or read more in our In-Depth review.


