Inside Dell Latitude 14 7400 – disassembly and upgrade options
Dell has a good tradition of making its premium Latitude devices extremely easy to disassemble. Let’s find out if the Latitude 14 7400 is continuing this newborn tradition.
Check out all Dell Latitude 14 7400 prices and configurations in our Specs System, or read our In-Depth review.
1. Remove the bottom plate
Short answer – yes, it is. There are 8 Phillips-head screws that mount the bottom plate in place. However, all eight of them actually stay attached to the panel after you unscrew them so you don’t lose them. After that, just pop the bottom panel with a plastic tool, starting near the SIM card tray.
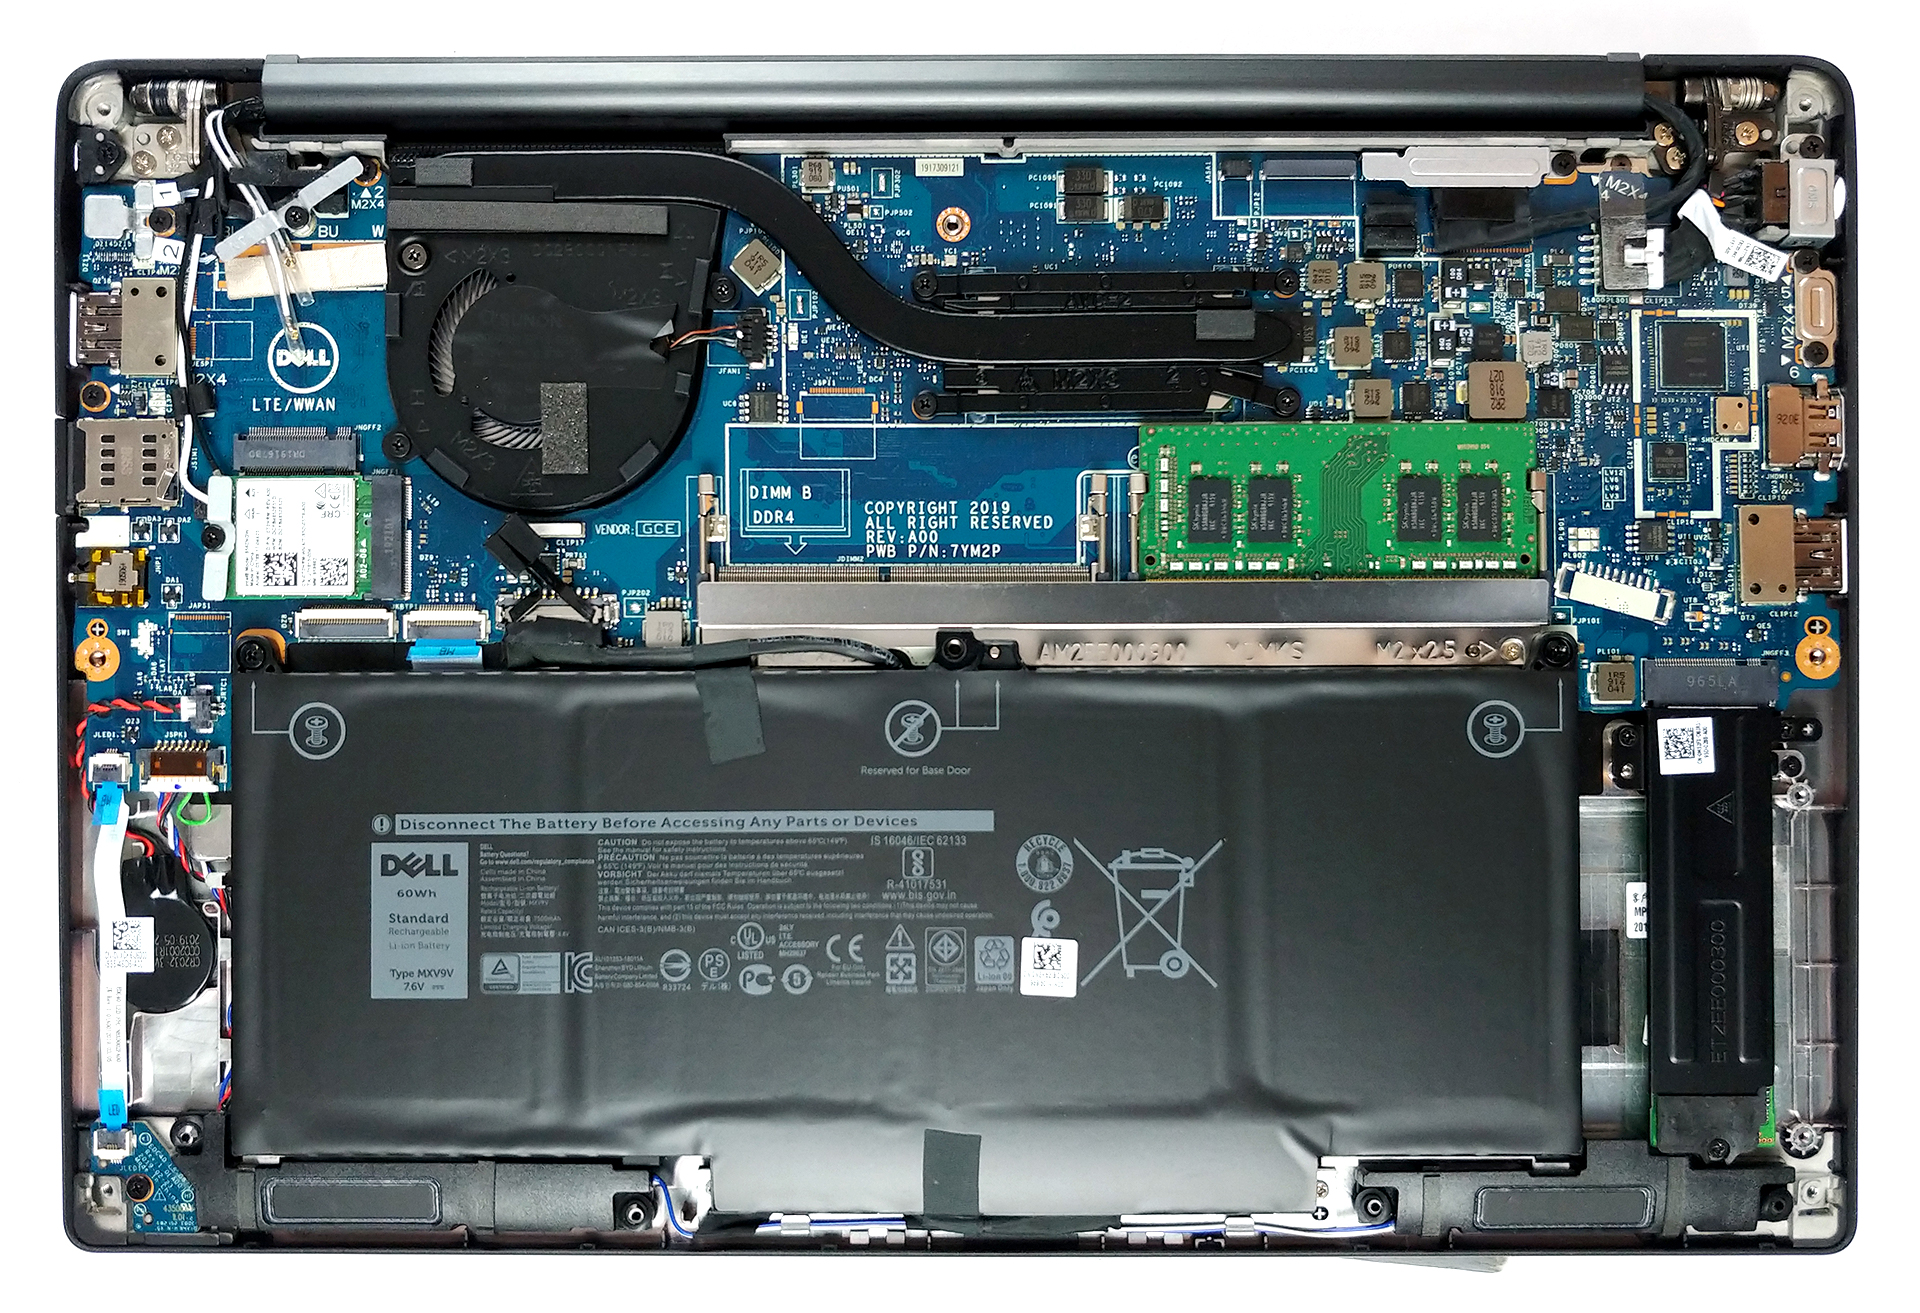
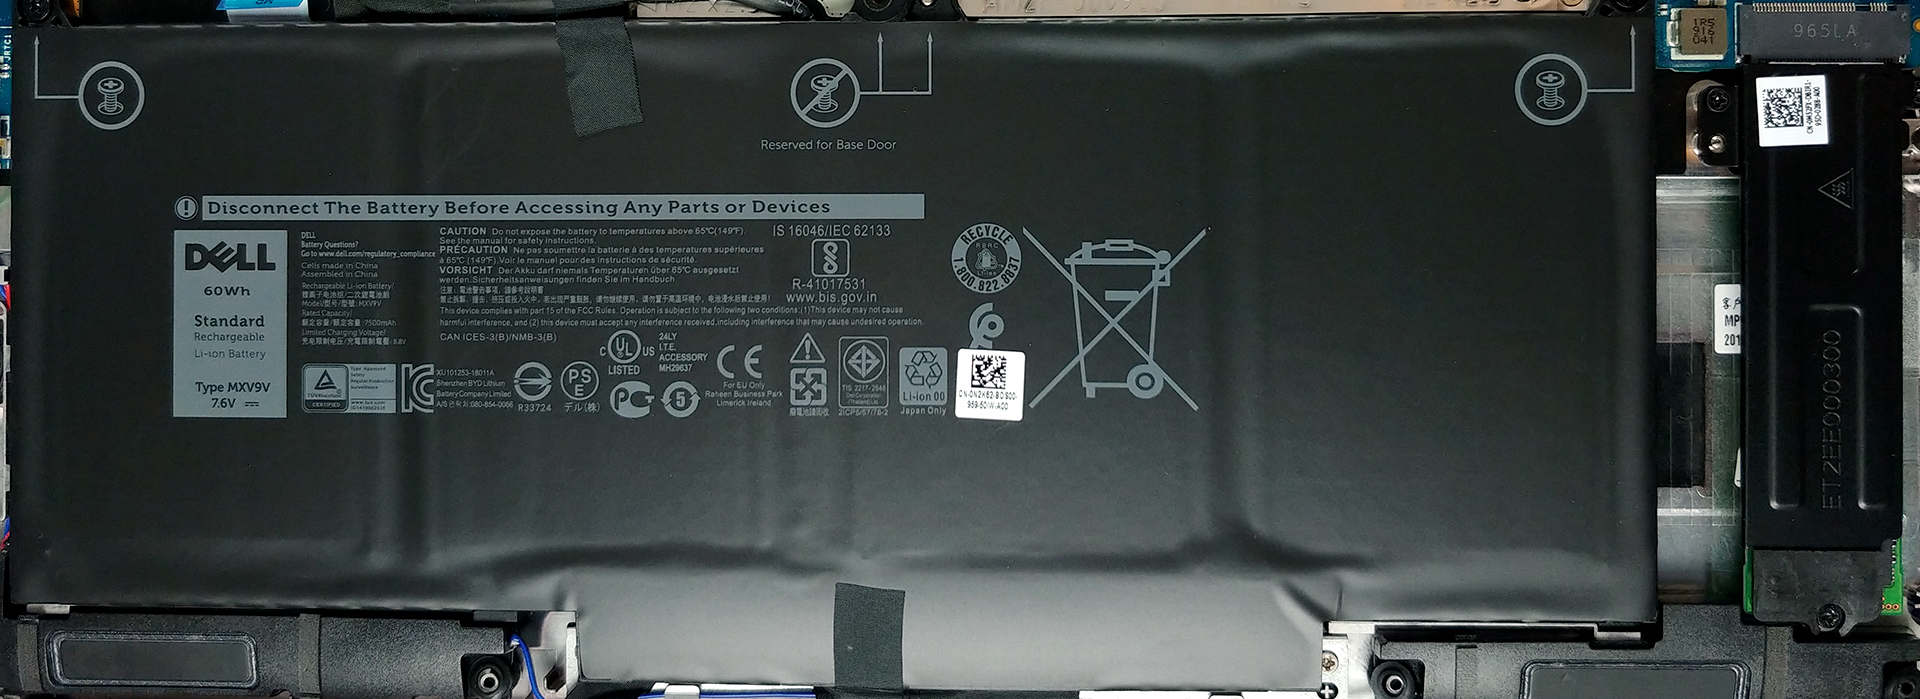
2. Battery and storage
The Latitude 14 7400 is equipped with a 60Wh battery pack, which actually managed to put it in the first place in our Battery Life chart. If you want to remove it, though, you can do so by unscrewing two Phillips head screws. It’s interesting that its screws also stay attached when you unscrew them. When you take a look slightly to the right, you’ll see the M.2 NVMe slot that has yet three more screws, holding the cooling bracket on top. To our surprise, they also stayed attached to their plate, when we unscrewed them.
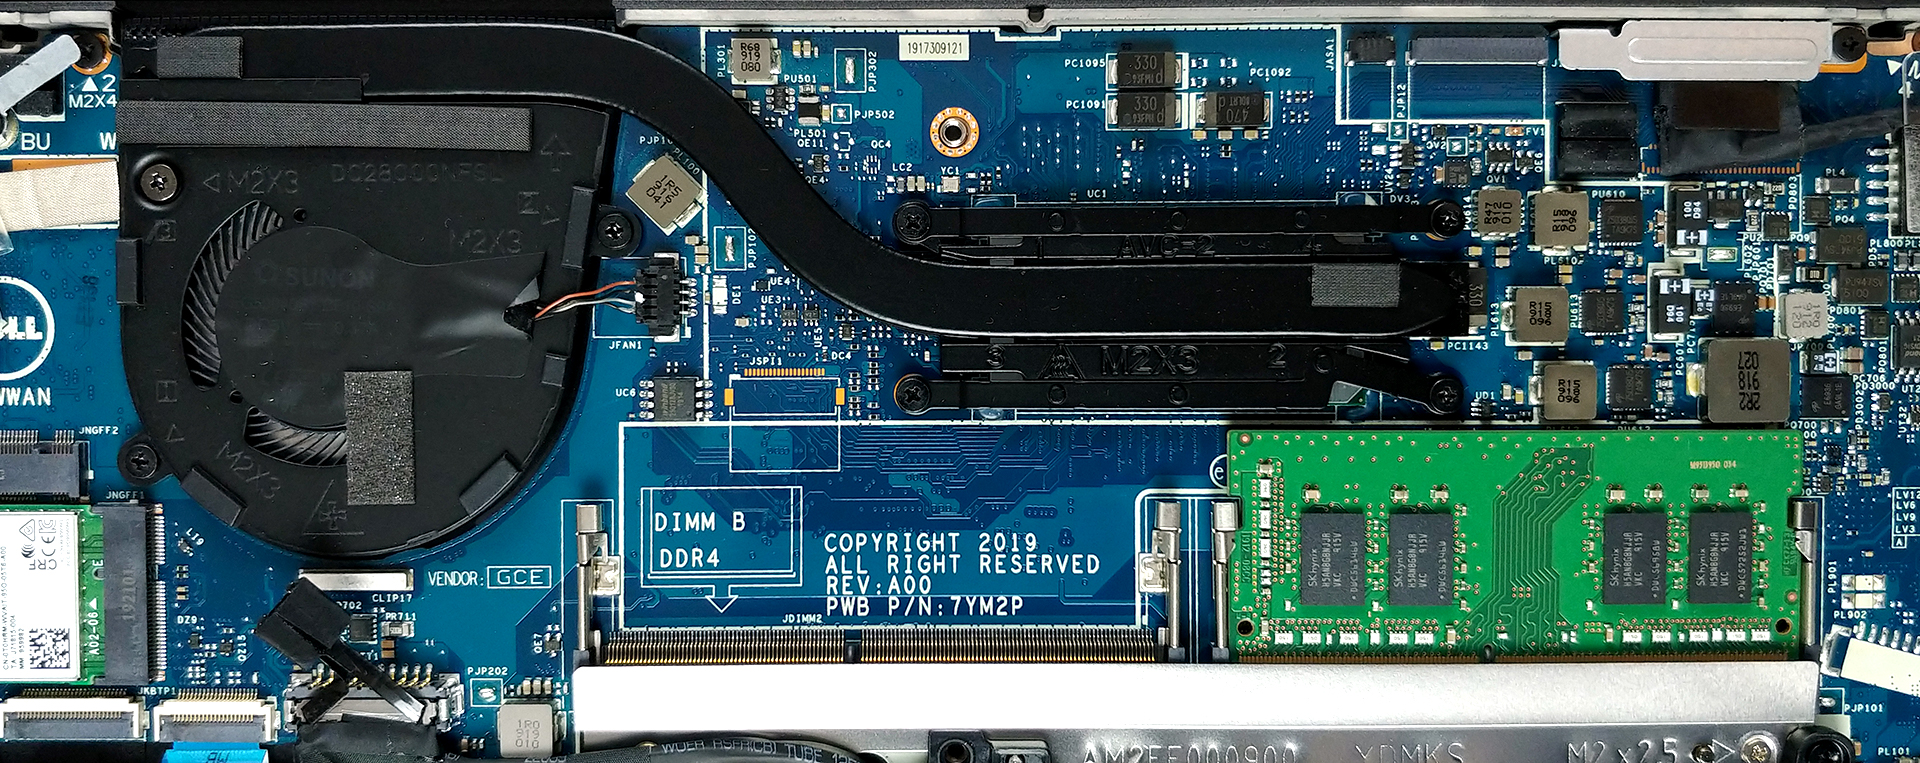
3. Cooling and memory
Let’s put it straight, this laptop is not a champ in temperature measurement by any means, but we can’t complain, because Dell used the good old single heat pipe – single fan solution. On the other side, there are two RAM DIMMs that let you expand the memory up to 32GB of DDR4.
Check out all Dell Latitude 14 7400 prices and configurations in our Specs System, or read our In-Depth review.


![[June 2026] Best-Selling Laptop Brands on Amazon Global – Apple’s Unrivaled Dominance in Units and Revenue](https://laptopmedia.com/wp-content/uploads/2026/07/GLOBAL-Best-Brands-400x225.jpg)
![[June 2026] Amazon Global: Top 10 Best-Selling Laptops – Apple’s New MacBook Neo Storms to #1, Reshaping the Market with Affordability](https://laptopmedia.com/wp-content/uploads/2026/07/Best-Selling-Laptops-GLOBAL-Top-10-400x225.jpg)
![[June 2026] Amazon Global: Top 10 Best-Selling Gaming Laptops – Acer’s Nitro V 16S AI Dominates Sales, While ASUS Leads Overall Revenue](https://laptopmedia.com/wp-content/uploads/2026/07/Best-Selling-Gaming-Laptops-GLOBAL-Top-10-400x225.jpg)
![[June 2026] Global Ranking of Best-Selling Laptop GPUs on Amazon – NVIDIA RTX 5060 is the Top-Selling Dedicated GPU](https://laptopmedia.com/wp-content/uploads/2026/07/Best-Selling-GPUs-GLOBAL-Top-10-400x225.jpg)
![[June 2026] Global Ranking of Best-Selling Laptop CPUs on Amazon – Apple M5 Dominates, AMD Ryzen 7 260 Gets Solid Premium Share](https://laptopmedia.com/wp-content/uploads/2026/07/Best-Selling-CPUs-GLOBAL-Top-10-400x225.jpg)
