How to open Acer Swift Edge (SFE16-44) – disassembly and upgrade options

Opening the Device
Hint: Ensure the laptop is powered off and disconnected from any power source before starting.
- Undo the ten Torx-head screws on the bottom panel of the laptop.
- Use a lever tool to pop the two areas behind the hinges.
- Pry the back using a thin plastic tool and work your way around the sides and the front.
- Once the rear end is lifted, tilt the panel slightly and lift it off the base.
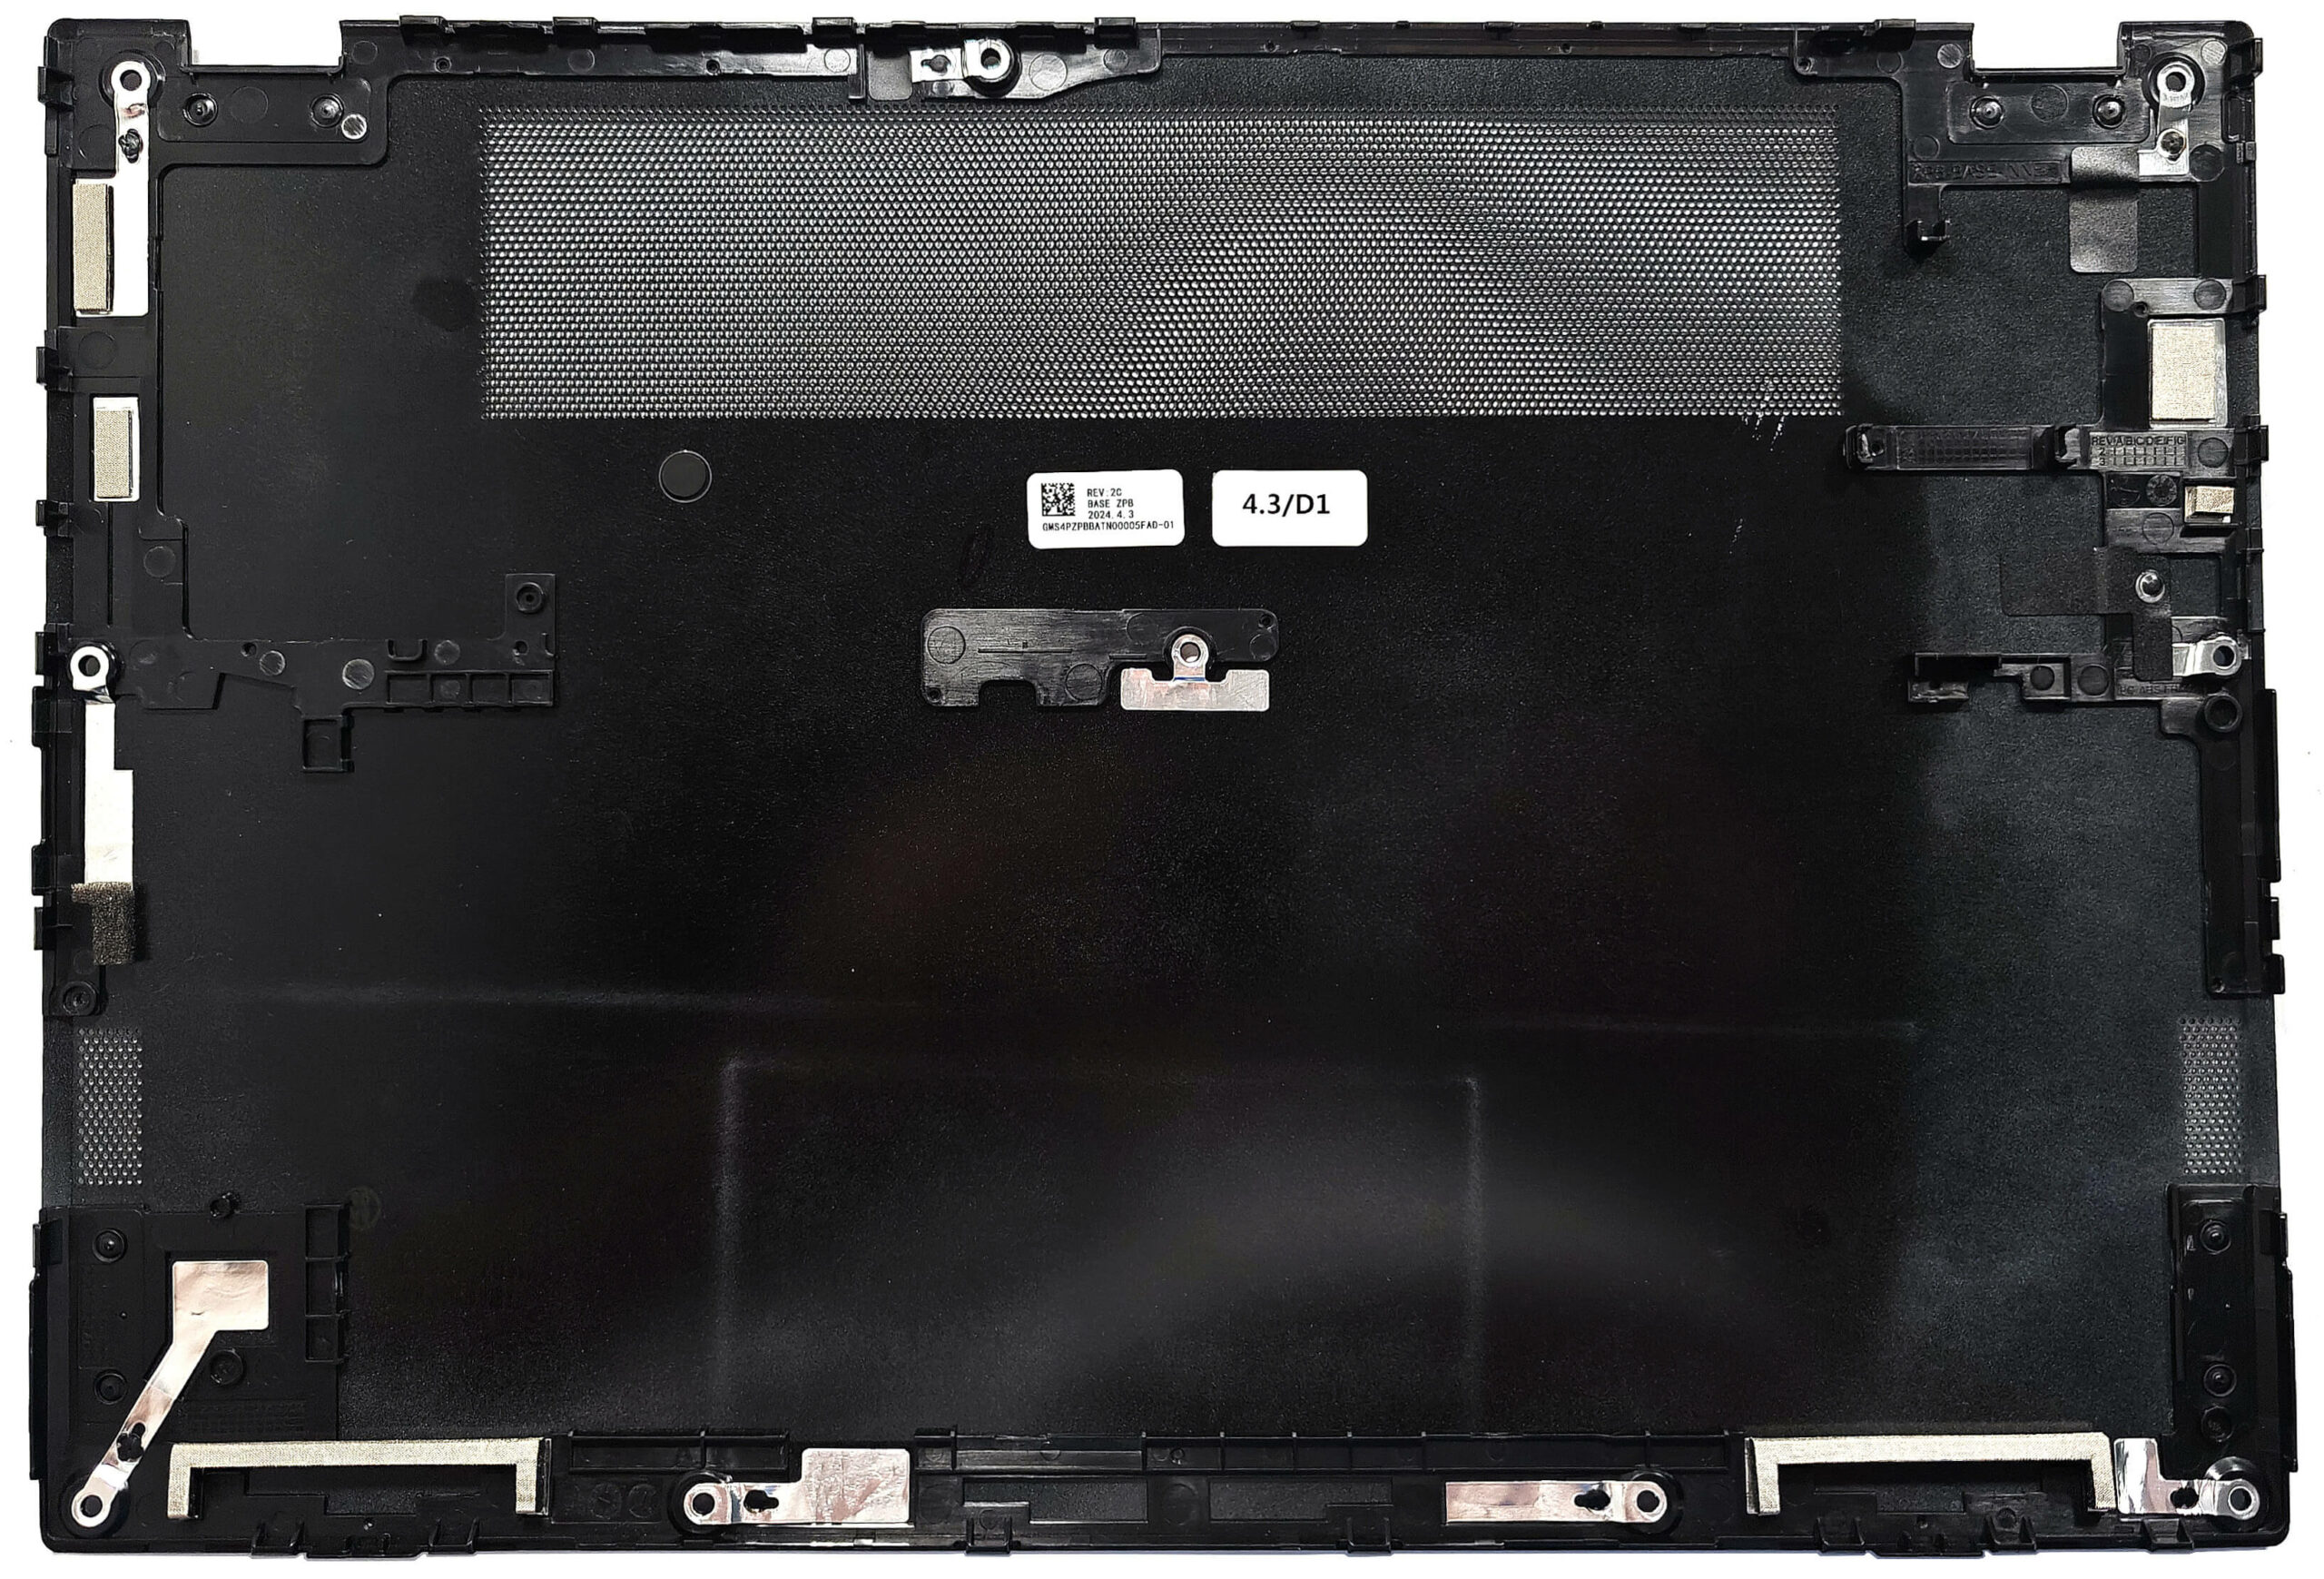
More info: The inside of the bottom panel features dust filters for the ventilation grills, ensuring optimal airflow and protection against debris.
Battery Removal
Caution: Handle the battery with care to avoid damage or injury. Wear gloves to prevent electrical zaps.
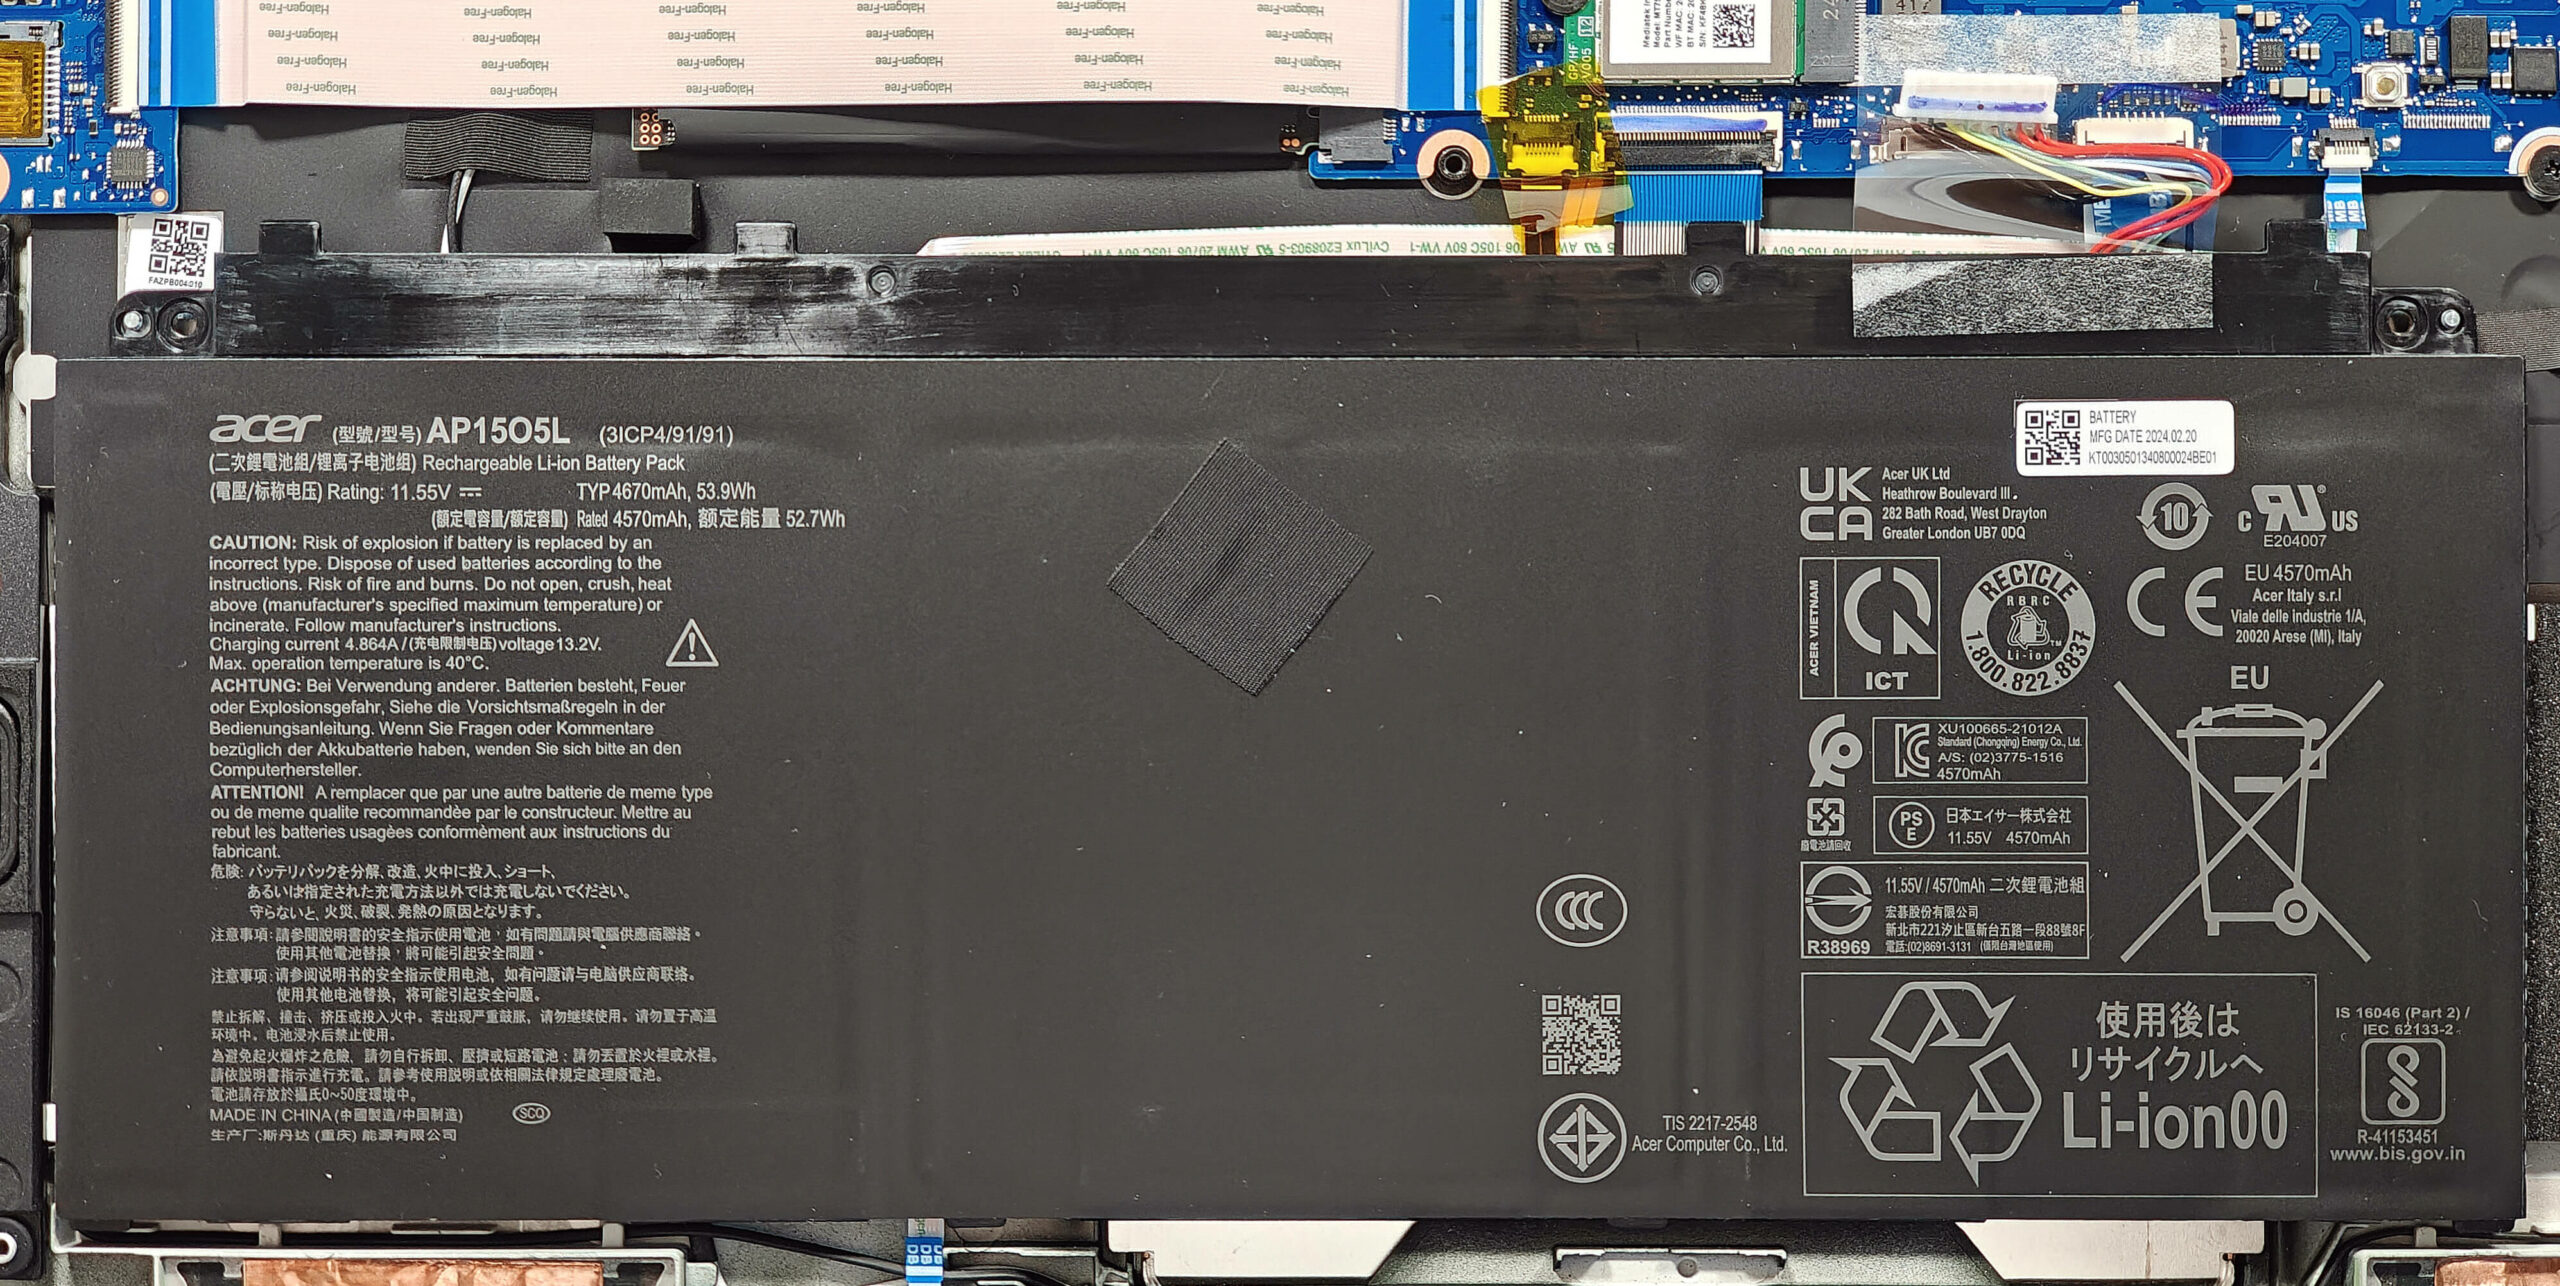
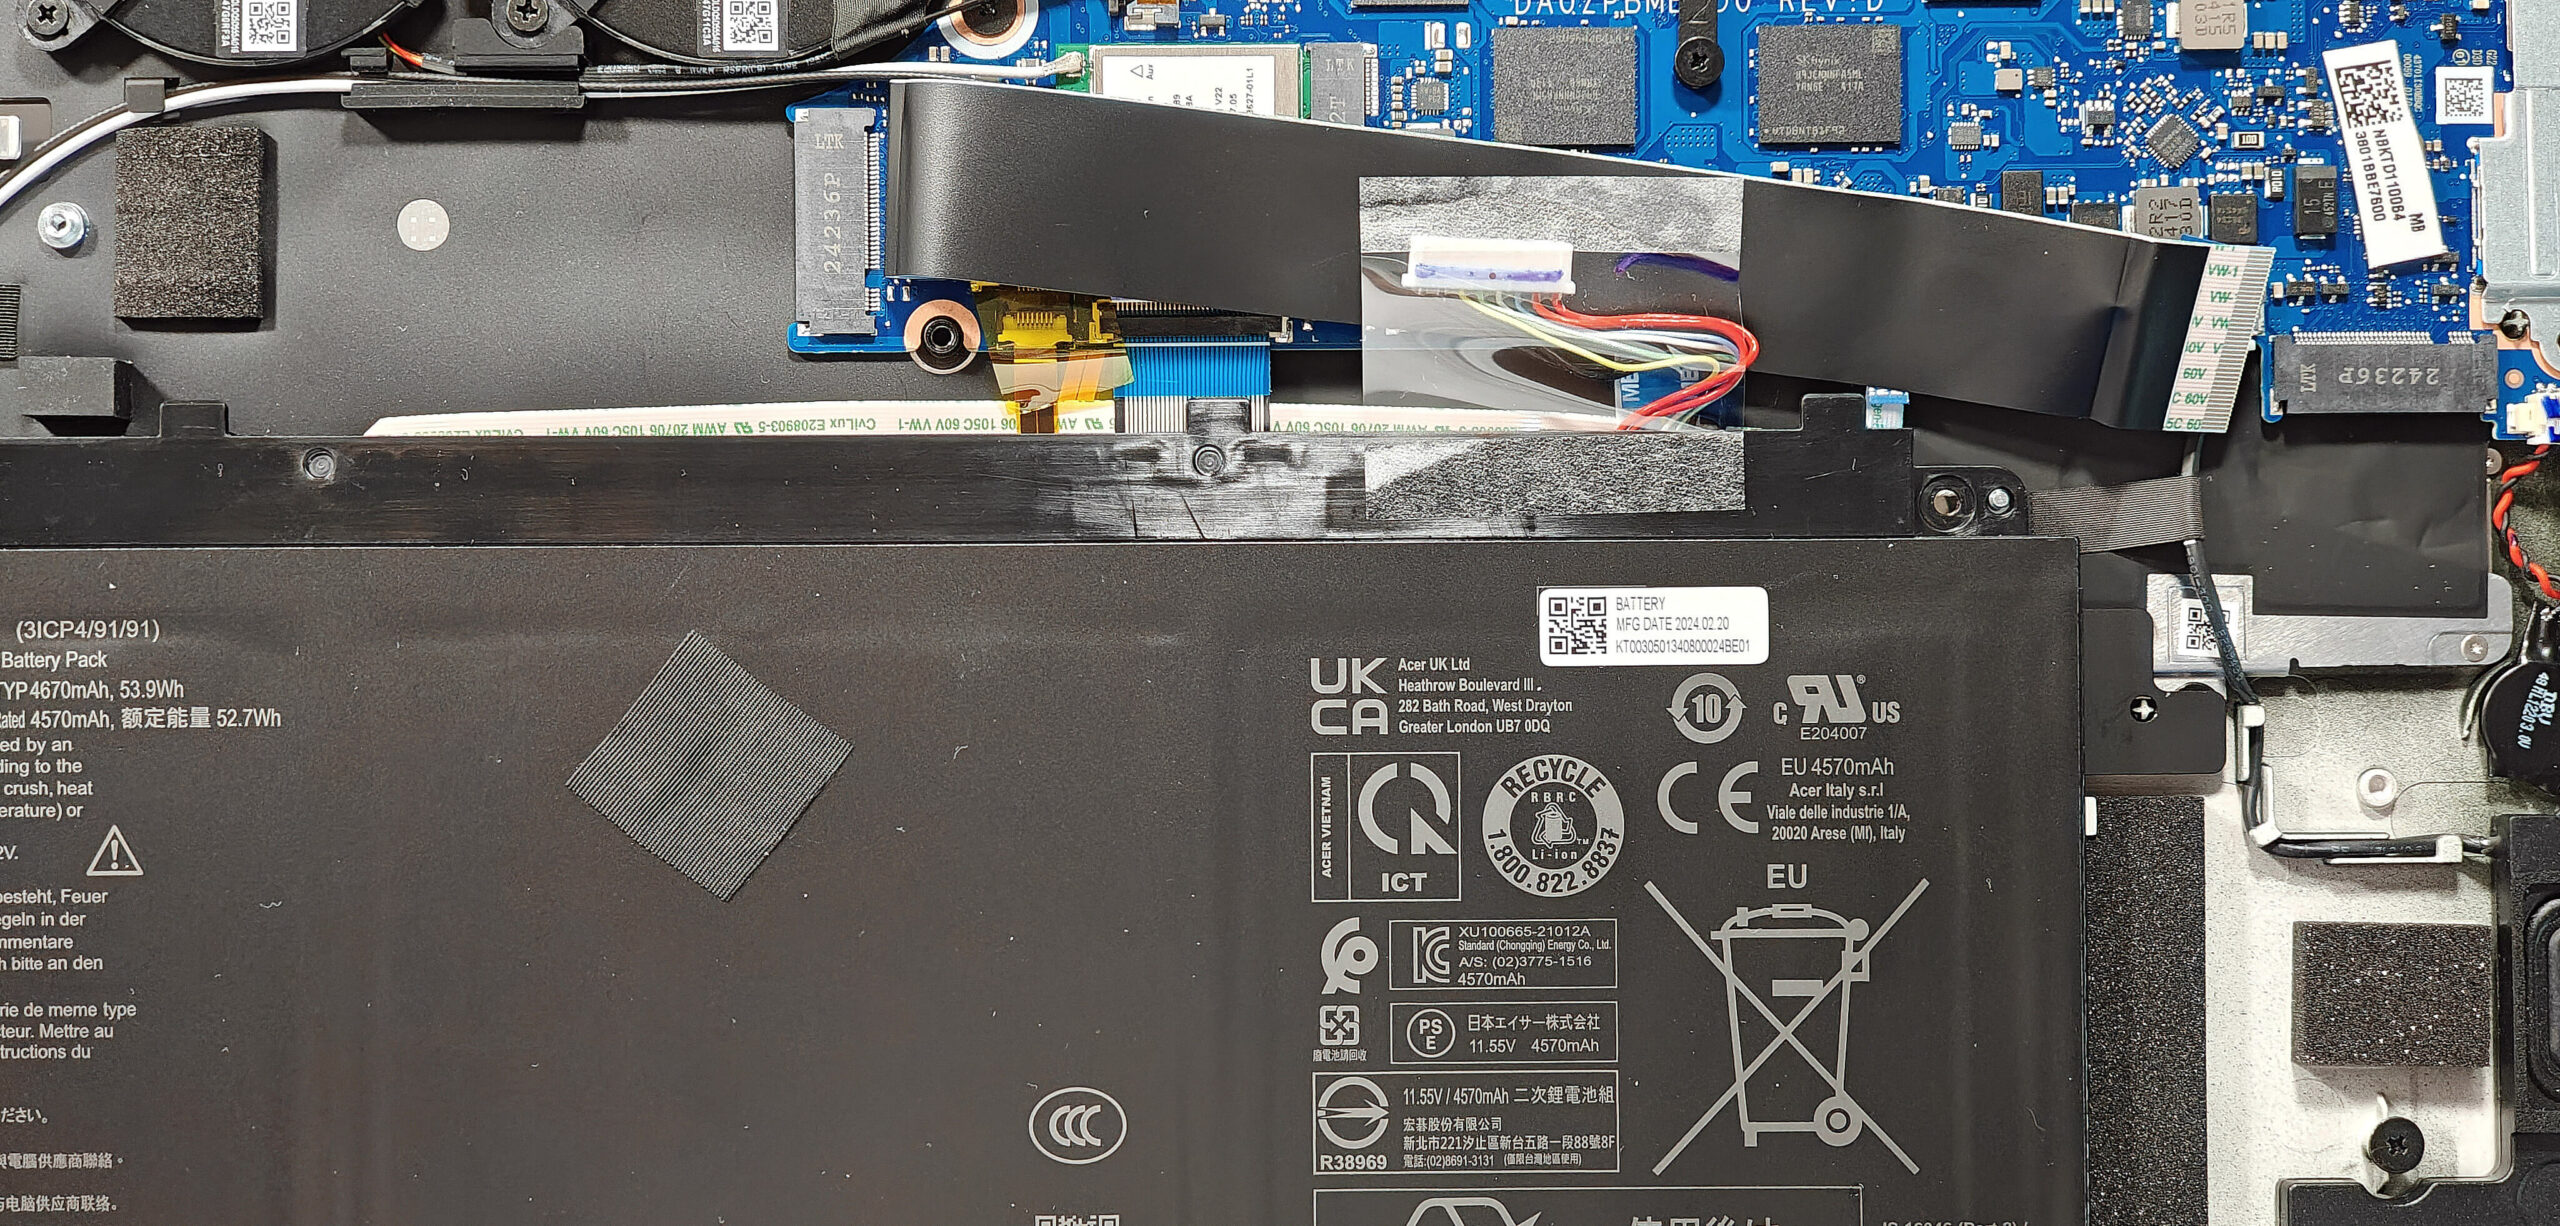
- Unplug the connector from the motherboard by pulling it to the left with a plastic tool.
- Undo the five Phillips-head screws that secure the 54Wh battery unit to the chassis.
- Carefully detach the battery unit from the laptop, ensuring not to bend it as it is hard glued to the base and feels flexible.
More info: The laptop is equipped with a 54Wh battery, providing approximately 5 and a half hours of video playback.
You can buy compatible batteries here: Buy from Amazon.com.au (#CommissionsEarned)
Memory Upgrade
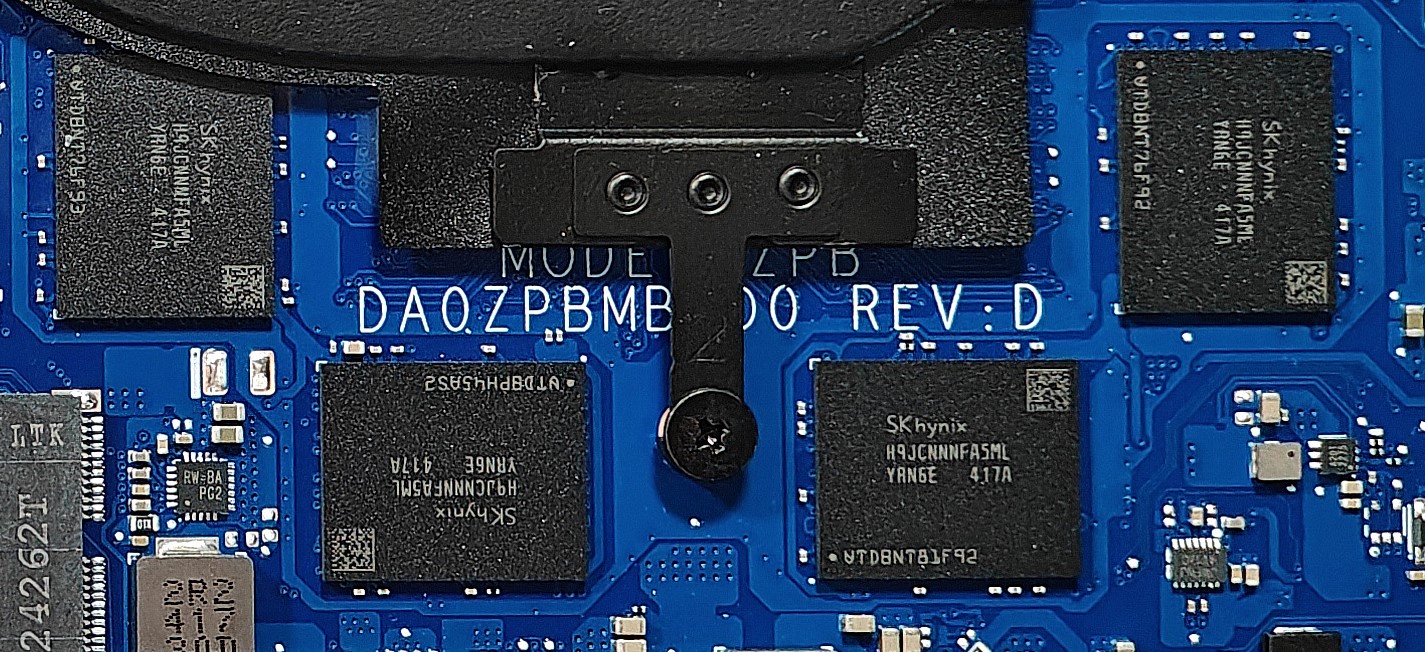
Note: The memory is soldered and not user-upgradable.
More info: This laptop comes with up to 32GB of LPDDR5-6400MHz RAM in dual-channel mode, which should be sufficient for most users.
Storage Upgrade
Hint: Handle the SSD with care to avoid any data loss or damage during installation.
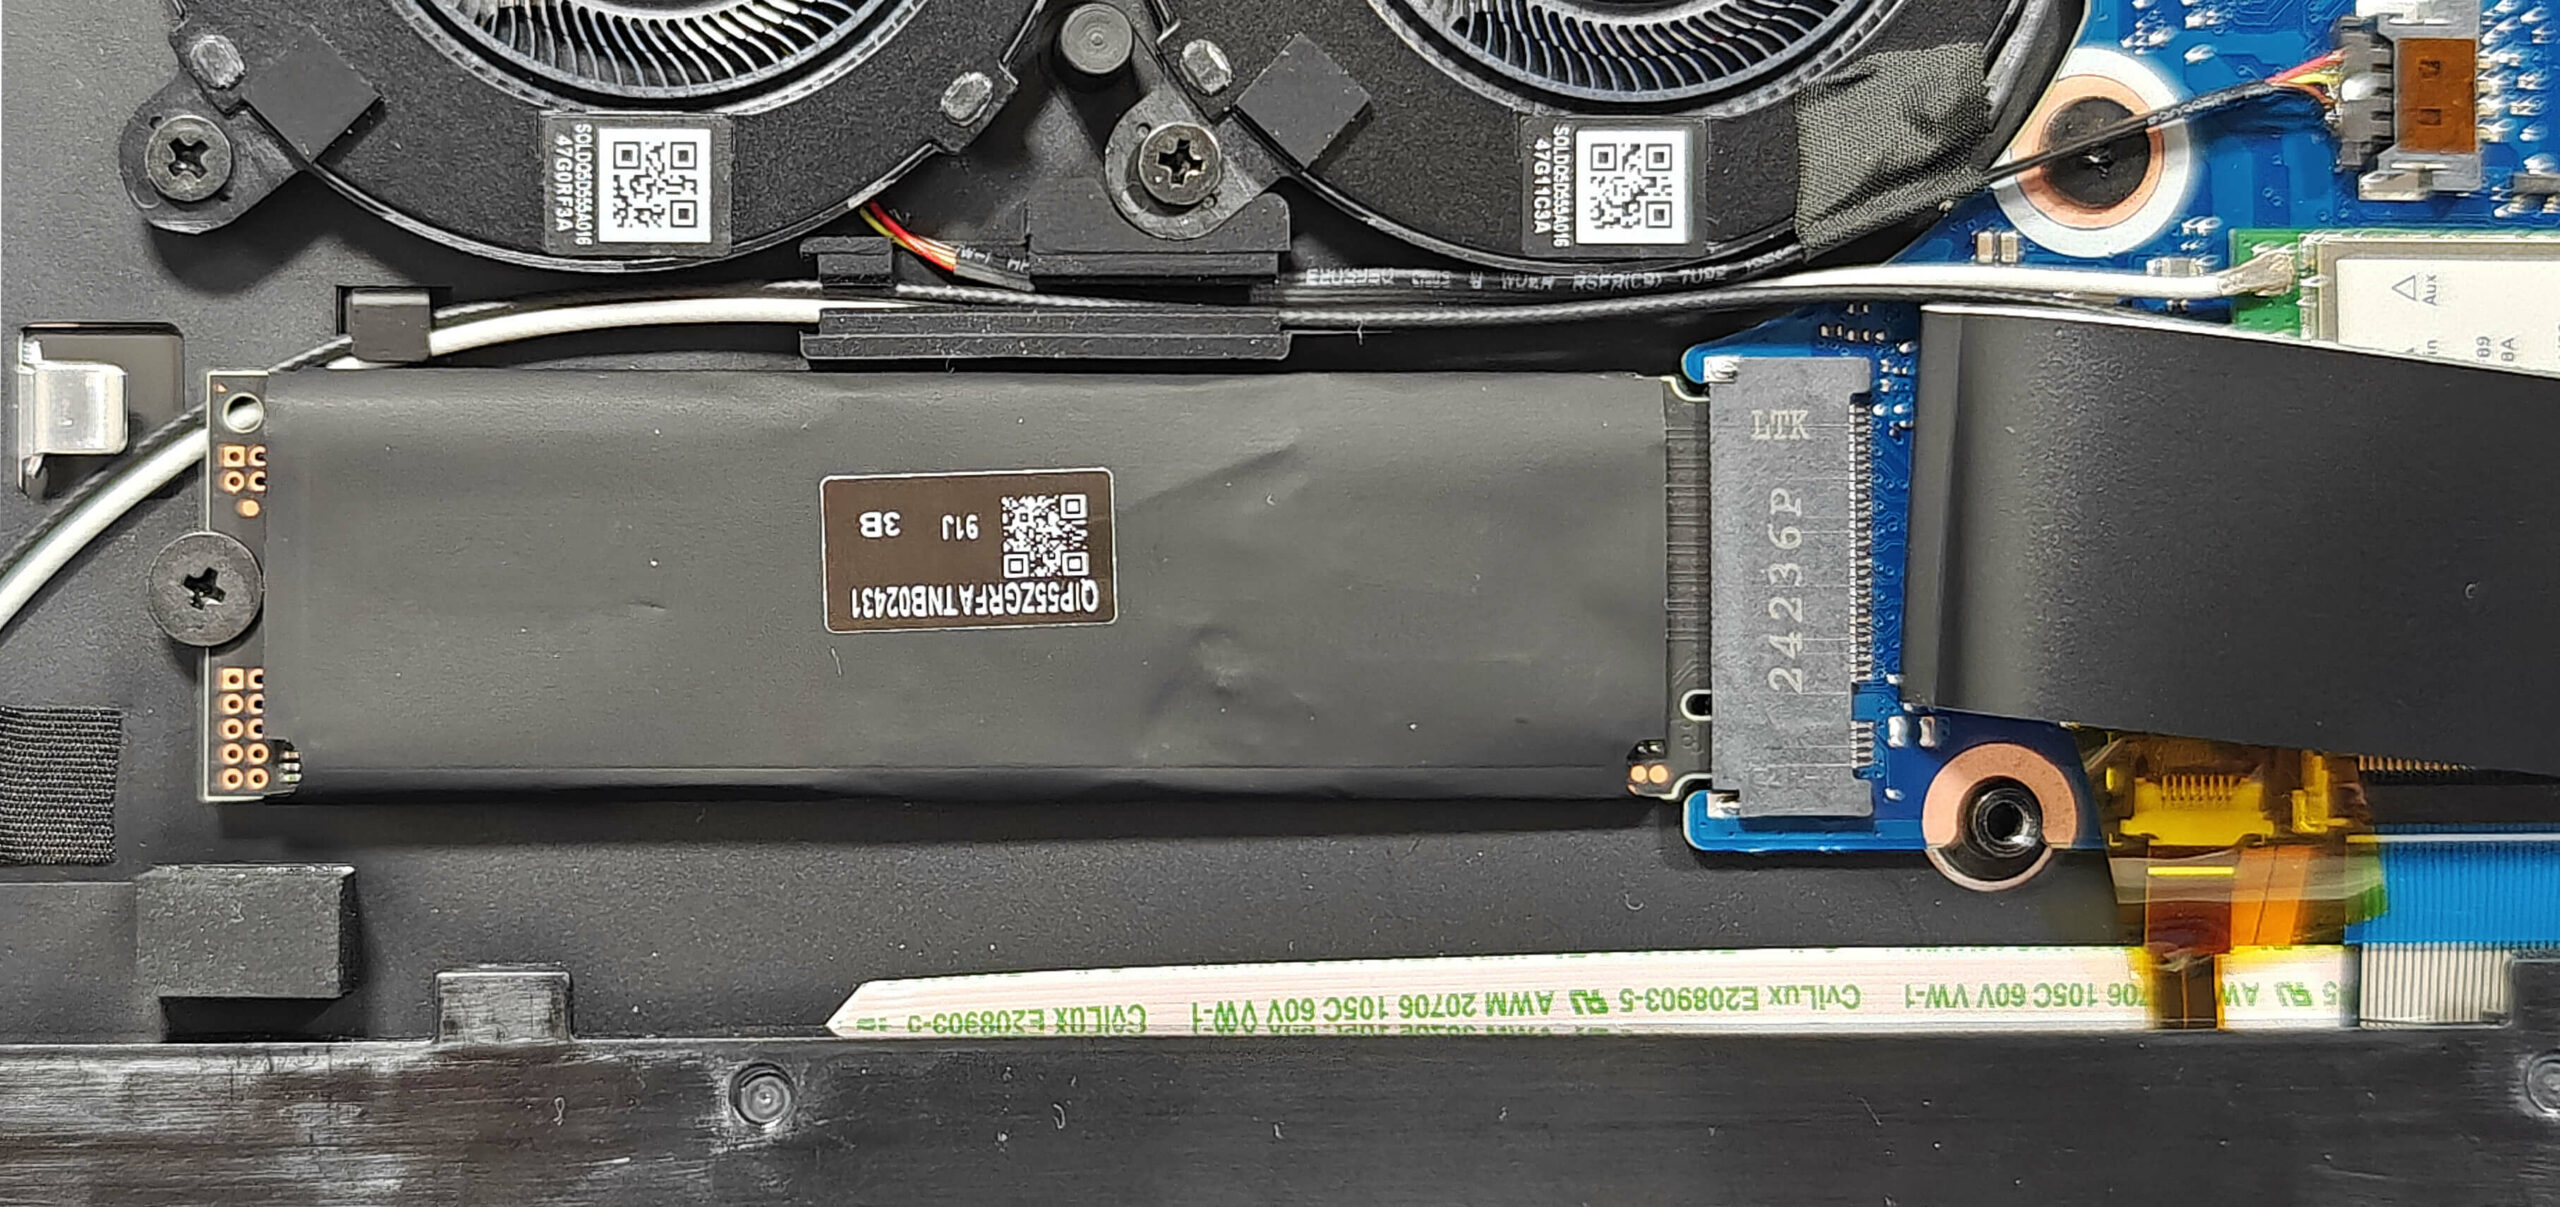
- Locate the two M.2 slots compatible with 2280 Gen 4 SSDs.
- The M.2 slot above the battery is hidden underneath a ribbon connector. Gently disconnect the ribbon connector to reach the NVMe SSD covered with a heat shield.
- Remove the metal shield covering the SSD by undoing the single Phillips-head screw.
- Lift the rubber element on the right to access the screw securing the SSD.
- Undo the single screw that holds the NVMe SSD unit fixed to the base.
- Slide the metal shield to the left and lift it away from the chassis.
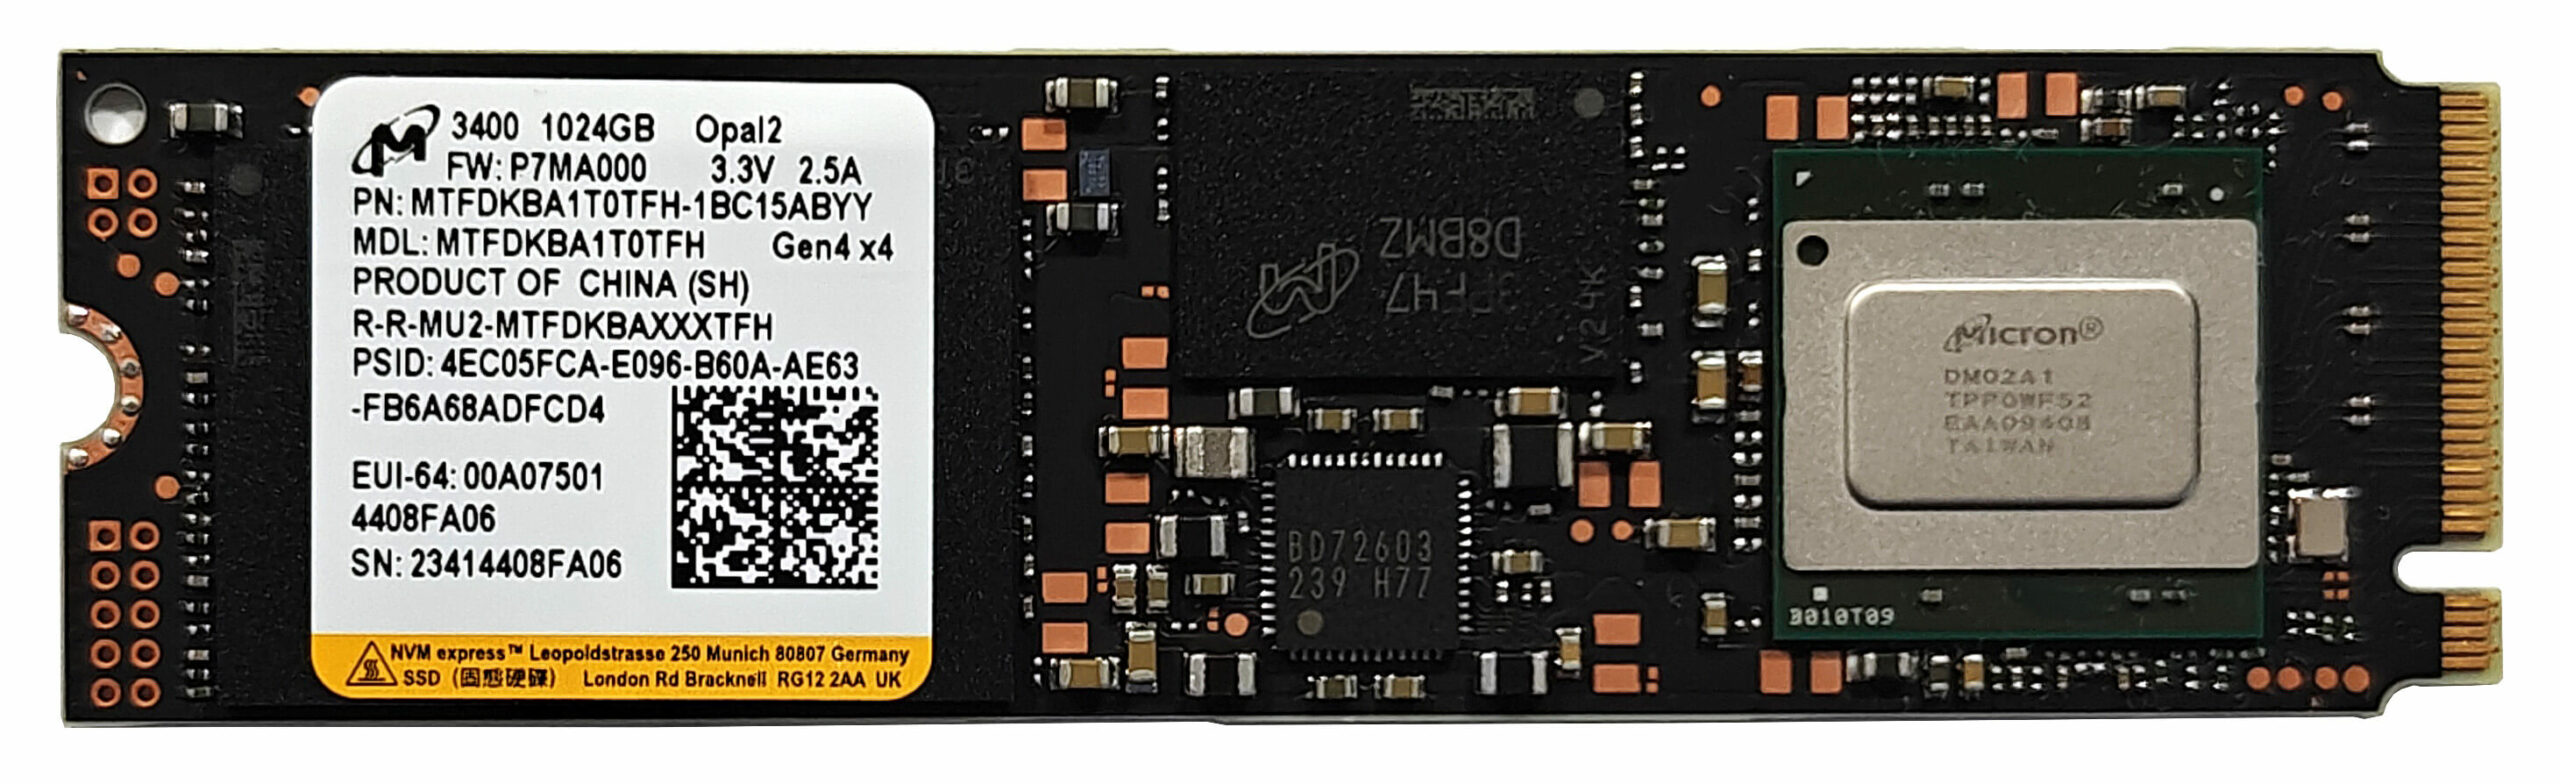
- Insert the new Gen 4 M.2 SSD into the slot and secure it with the screw.
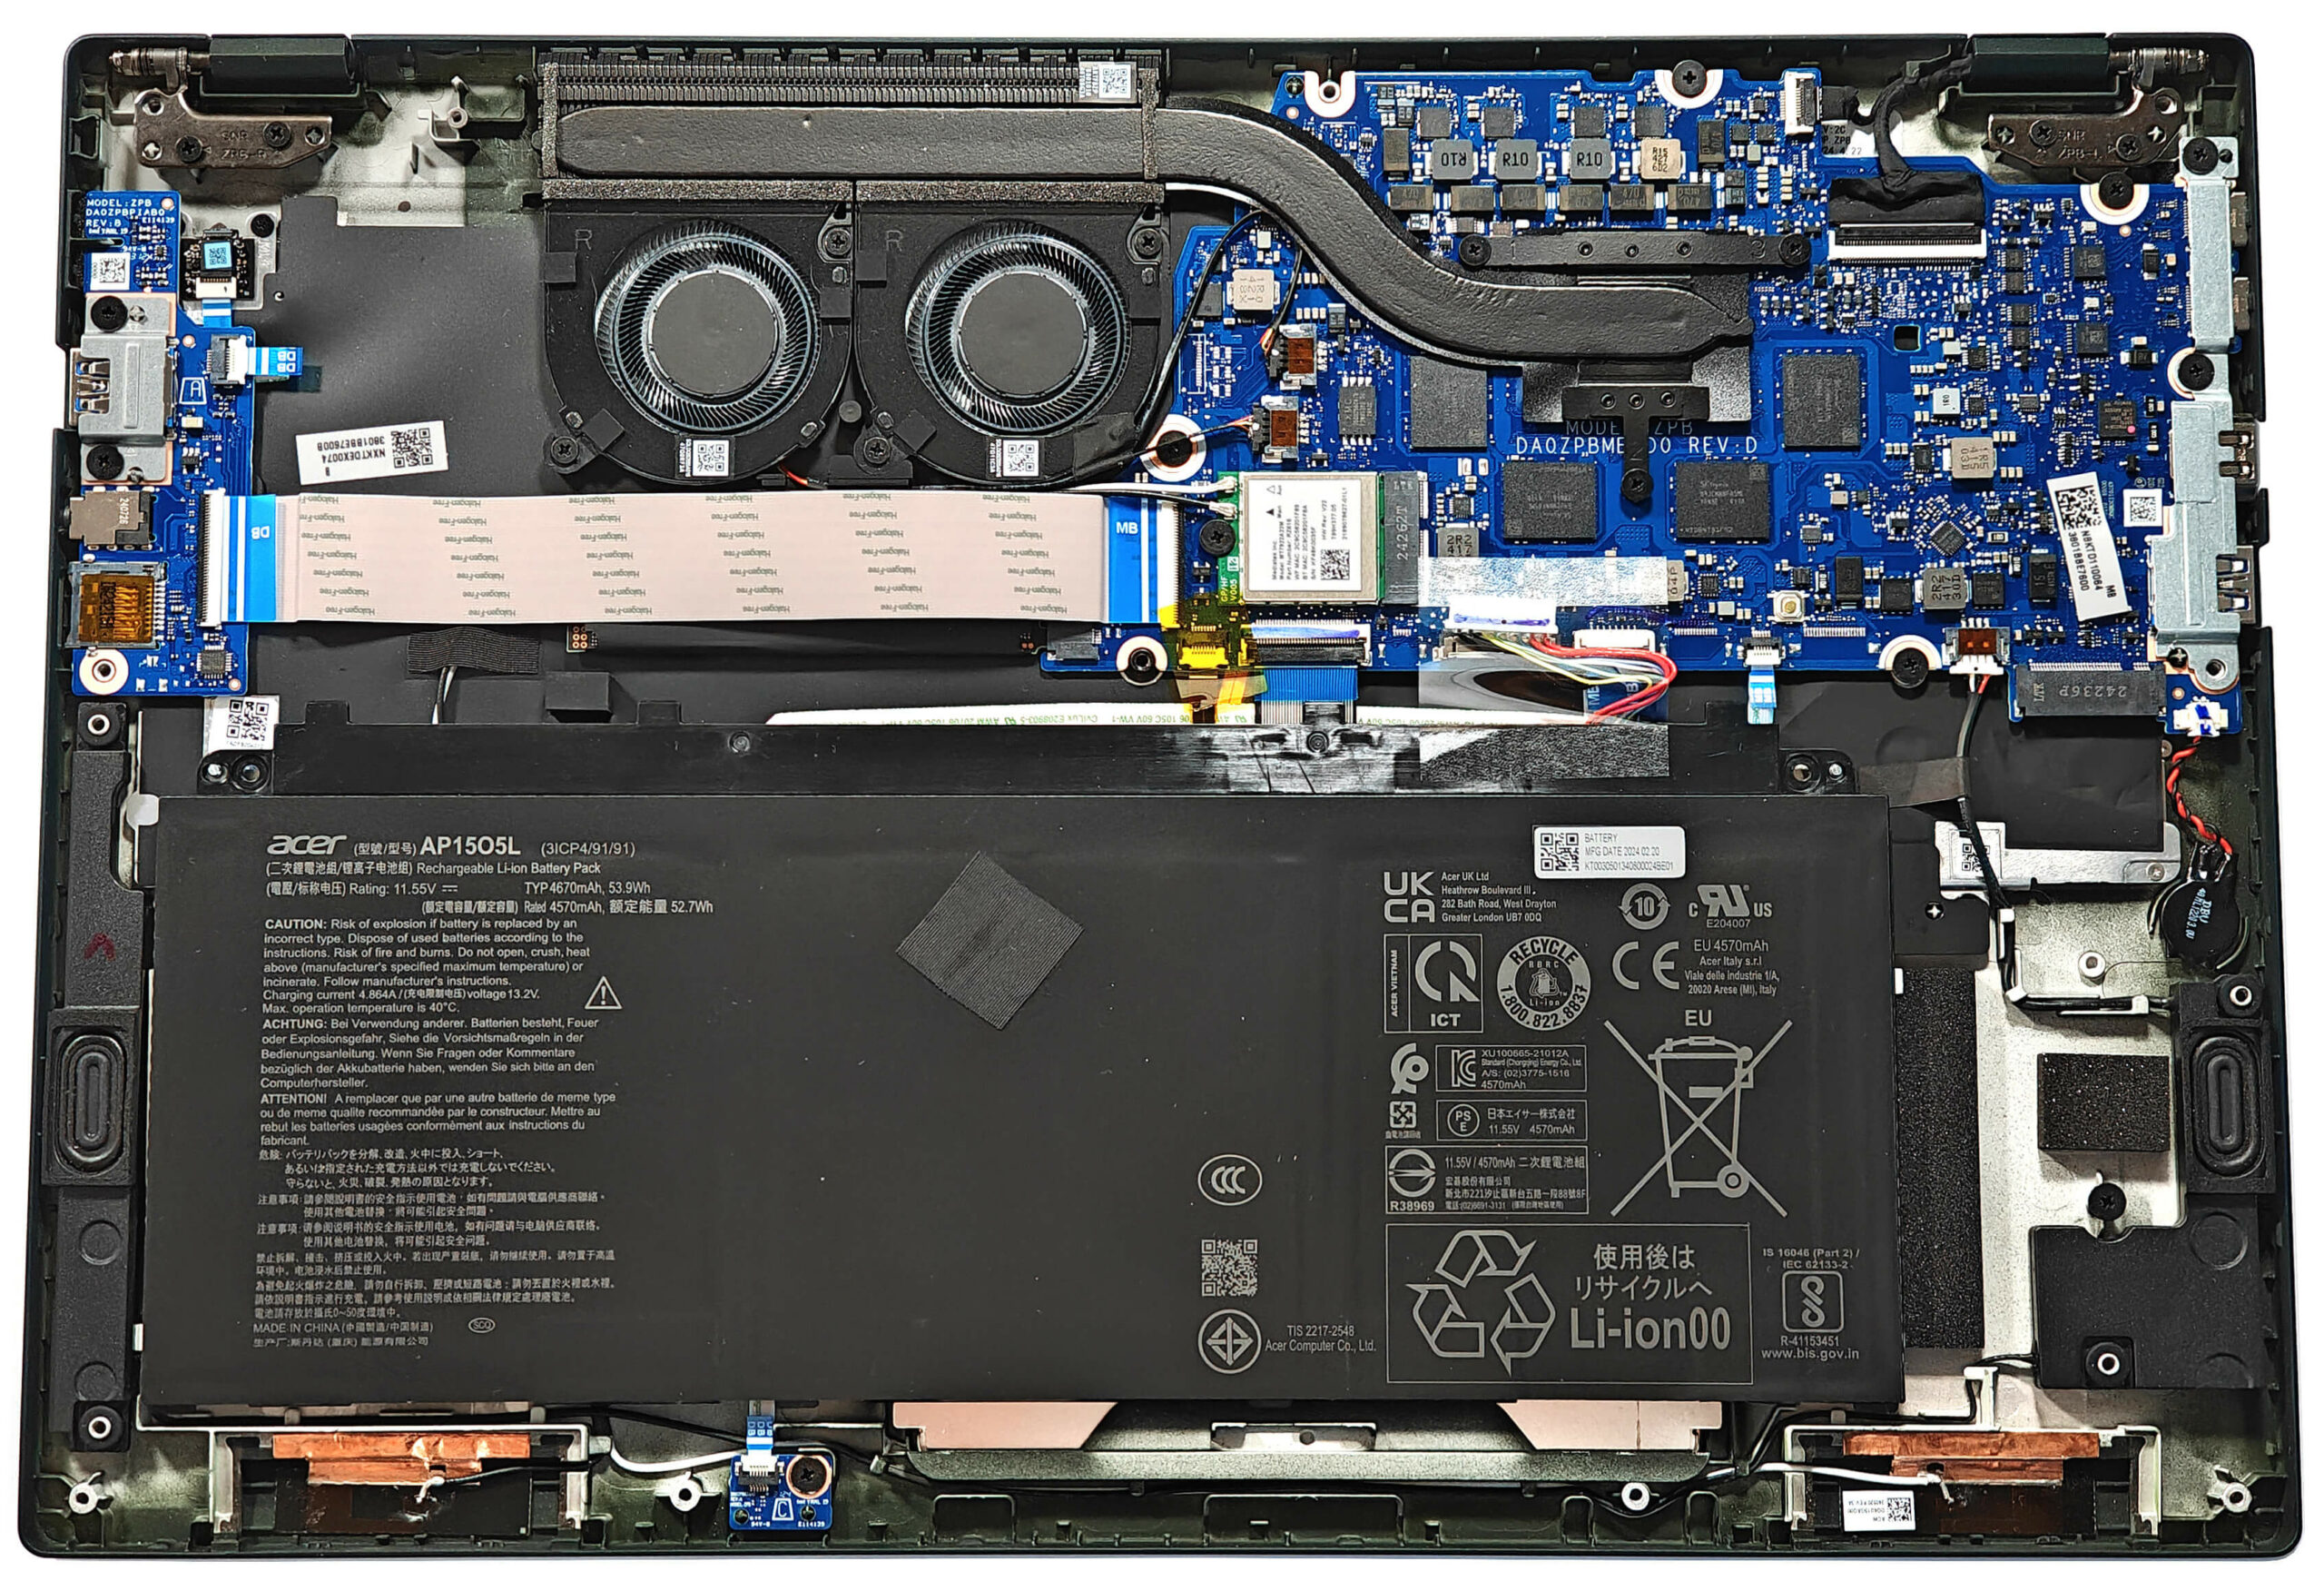
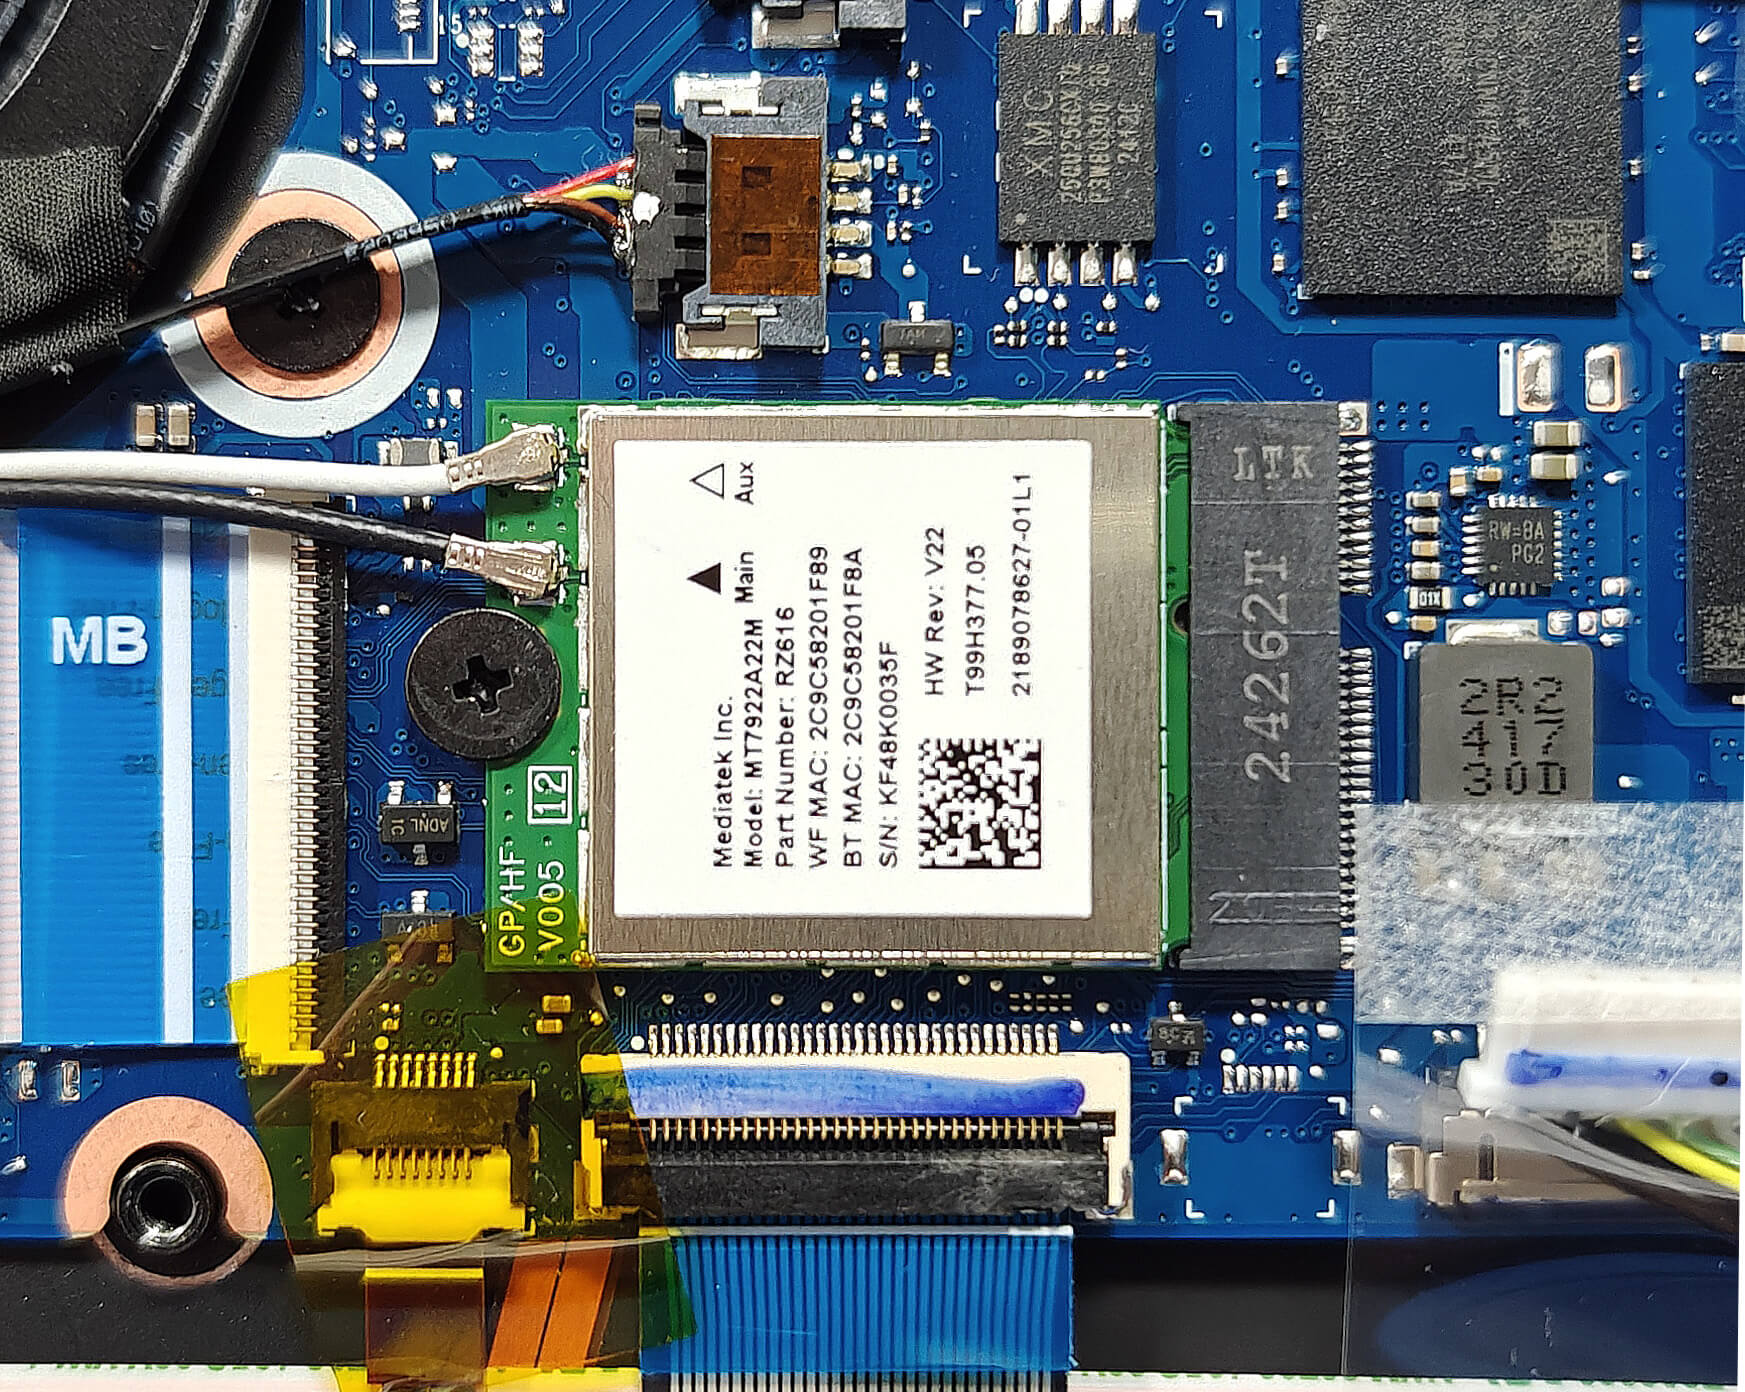
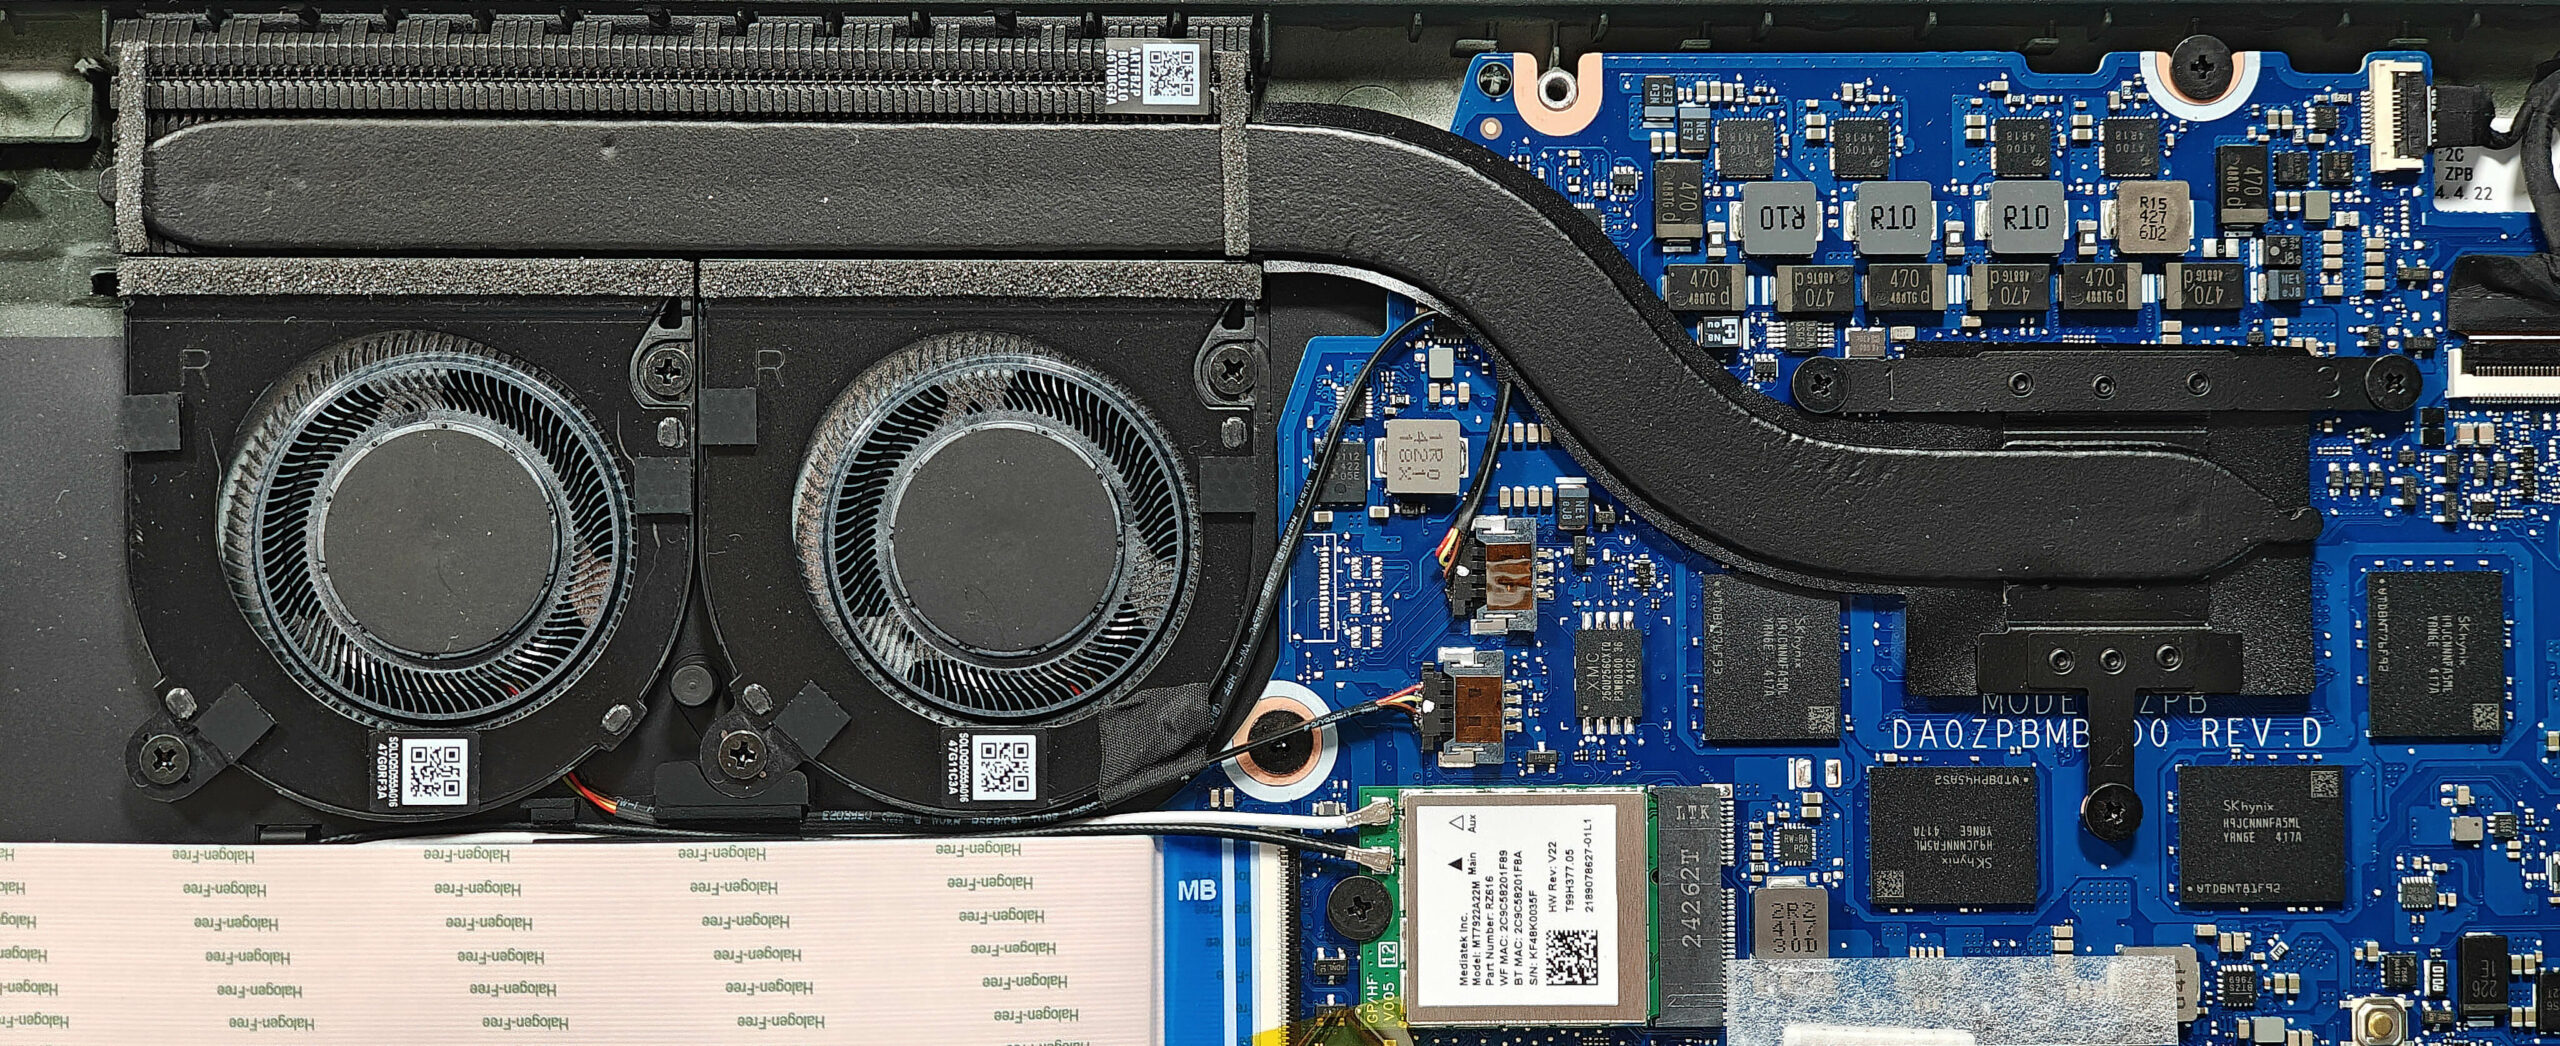
More info: The laptop includes two M.2 slots compatible with 2280 Gen 4 SSDs. The preinstalled NVMe SSD is covered with a heat shield and cooled by a small thermal pad on top. Although the cooling pad below the preinstalled NVMe isn’t optimally placed, it has been fixed. The replaceable Wi-Fi card is located on the left of the memory chips.
Hint: Don’t forget to check out our Top M.2 SSDs Performance Rankings for insights on the best storage options available.
You can buy compatible SSDs here: Buy from Amazon.com.au (#CommissionsEarned)
Wi-Fi Card
More Info: The replaceable Wi-Fi card is on the left of the memory chips.
Cooling System Overview
More info: The cooling system is basic, comprising two small fans, one heat pipe, a decently big top-mounted heat sink, and a heat spreader to ensure effective thermal management.
- Inspect the two small fans to ensure they are free of dust and debris.
- Check the single heat pipe for any signs of wear or damage.
- Verify that the decently big top-mounted heat sink is properly seated and unobstructed.
- Ensure that the heat spreader is securely in place to maintain optimal cooling performance.
Acer Swift Edge 16 (SFE16-44) in-depth review
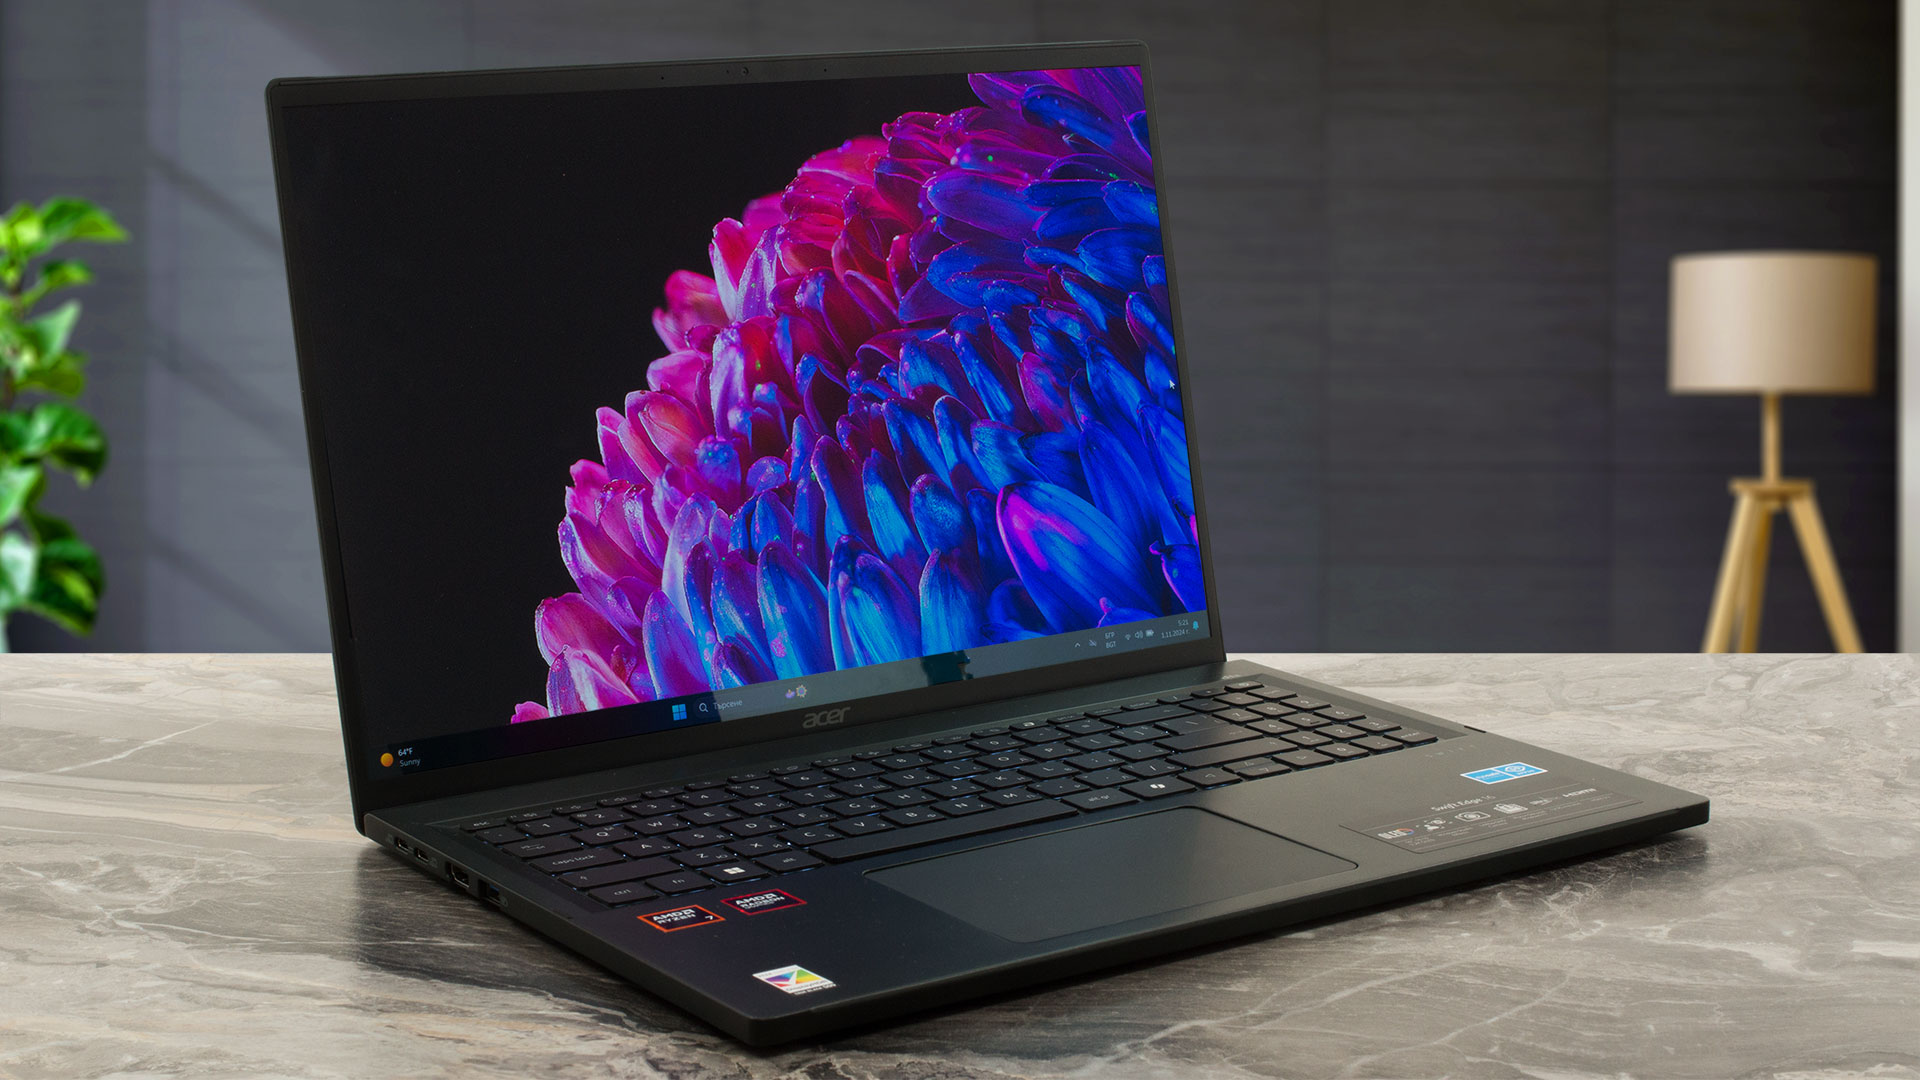
Compared to its predecessor, the Acer Swift Edge (SFE16-44) looks like a mild refresh. The new-gen model relies on the 8040 series 28W AMD Zen 4 Hawk Point-U CPUs which are nearly identical to their 7040 siblings without counting the slightly clocked NPU unit of the new chips. The RAM is still soldered which isn't surprising given how thin and light this laptop is. The port selection remains good with its four USB connectors. Again, Wi-Fi 7 is on board but as an option.The display is the same as the one of the SFE16-43 model. It continues to be the star of the show. It's a color-accurate 1[...]
Pros
- 100% sRGB and DCP-P3 coverage + improved color accuracy with our "Design and Gaming" profile (SDC418D)
- Infinite contrast ratio (SDC418D)
- 605 nits of max brightness in HDR mode and 394 nits of peak brightness while viewing SDR content (SDC418D)
- Light and thin magnesium alloy chassis (1.23 kg / 12.95 mm)
- Lid with a lever design
- Fingerprint reader
- 1440p Web camera
- 2x USB4 ports + MicroSD card reader
- 2x M.2 slots + replaceable Wi-Fi card
- Wi-Fi 7 (option)
- Good comfort under load considering the thin build
- Fast SSD (Micron 3400)
- Up to 32GB of LPDDR5 RAM
- Feels fast for work, despite the hindered clocks
Cons
- Soldered memory
- Low CPU clocks, especially in long CPU stress
- Average battery battery life (~ 5 hours and a half of videos)
- PWM usage (SDC418D)
- The battery is glued to the base
 Author: Dimitar Stalev

![[June 2026] Best-Selling Laptop Brands on Amazon Global – Apple’s Unrivaled Dominance in Units and Revenue](https://laptopmedia.com/wp-content/uploads/2026/07/GLOBAL-Best-Brands-400x225.jpg)
![[June 2026] Amazon Global: Top 10 Best-Selling Laptops – Apple’s New MacBook Neo Storms to #1, Reshaping the Market with Affordability](https://laptopmedia.com/wp-content/uploads/2026/07/Best-Selling-Laptops-GLOBAL-Top-10-400x225.jpg)
![[June 2026] Amazon Global: Top 10 Best-Selling Gaming Laptops – Acer’s Nitro V 16S AI Dominates Sales, While ASUS Leads Overall Revenue](https://laptopmedia.com/wp-content/uploads/2026/07/Best-Selling-Gaming-Laptops-GLOBAL-Top-10-400x225.jpg)
![[June 2026] Global Ranking of Best-Selling Laptop GPUs on Amazon – NVIDIA RTX 5060 is the Top-Selling Dedicated GPU](https://laptopmedia.com/wp-content/uploads/2026/07/Best-Selling-GPUs-GLOBAL-Top-10-400x225.jpg)
![[June 2026] Global Ranking of Best-Selling Laptop CPUs on Amazon – Apple M5 Dominates, AMD Ryzen 7 260 Gets Solid Premium Share](https://laptopmedia.com/wp-content/uploads/2026/07/Best-Selling-CPUs-GLOBAL-Top-10-400x225.jpg)