How to open Lenovo Legion 9i Gen 8 (16, Intel) – disassembly and upgrade options

Step 1: Accessing the Internal Components
- Ensure the Lenovo Legion 9i Gen 8 (16, Intel) is powered off and placed on a soft, clean surface to prevent scratches or damage.
- Remove the 8 Phillips-head screws from the bottom of the laptop.
- Use a thin prying tool to gently pop the bottom panel off, starting from the back. Avoid prying the front side; instead, carefully raise the plate until you hear a slight click, indicating it’s safe to lift it away from the chassis.
Hint: Proceed with care to avoid damaging the internal clips or the laptop casing.
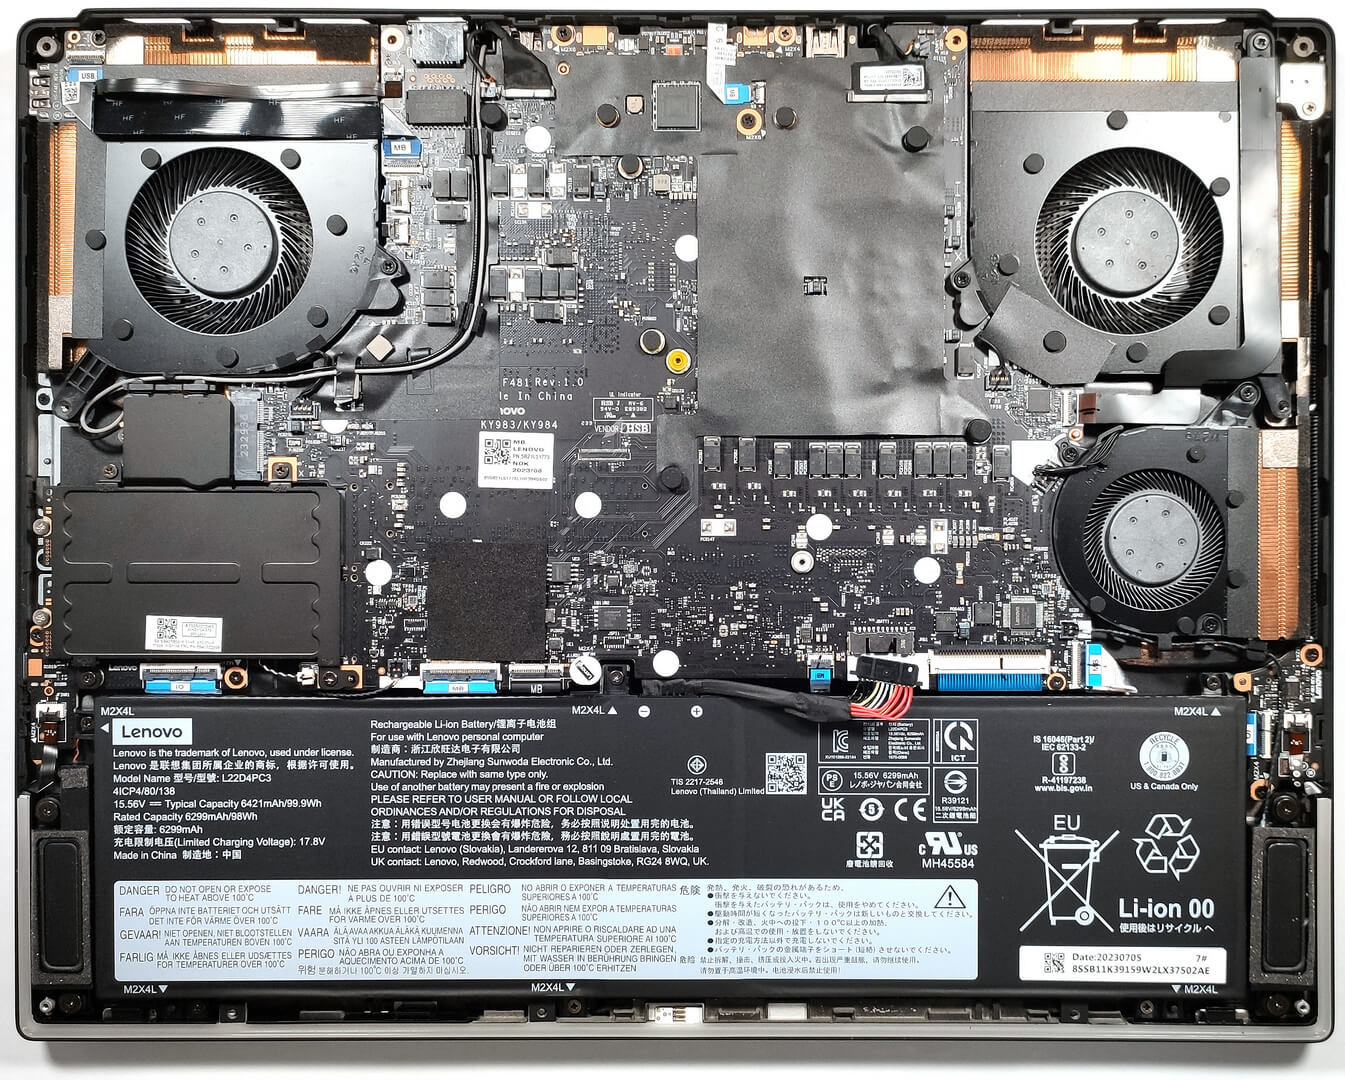
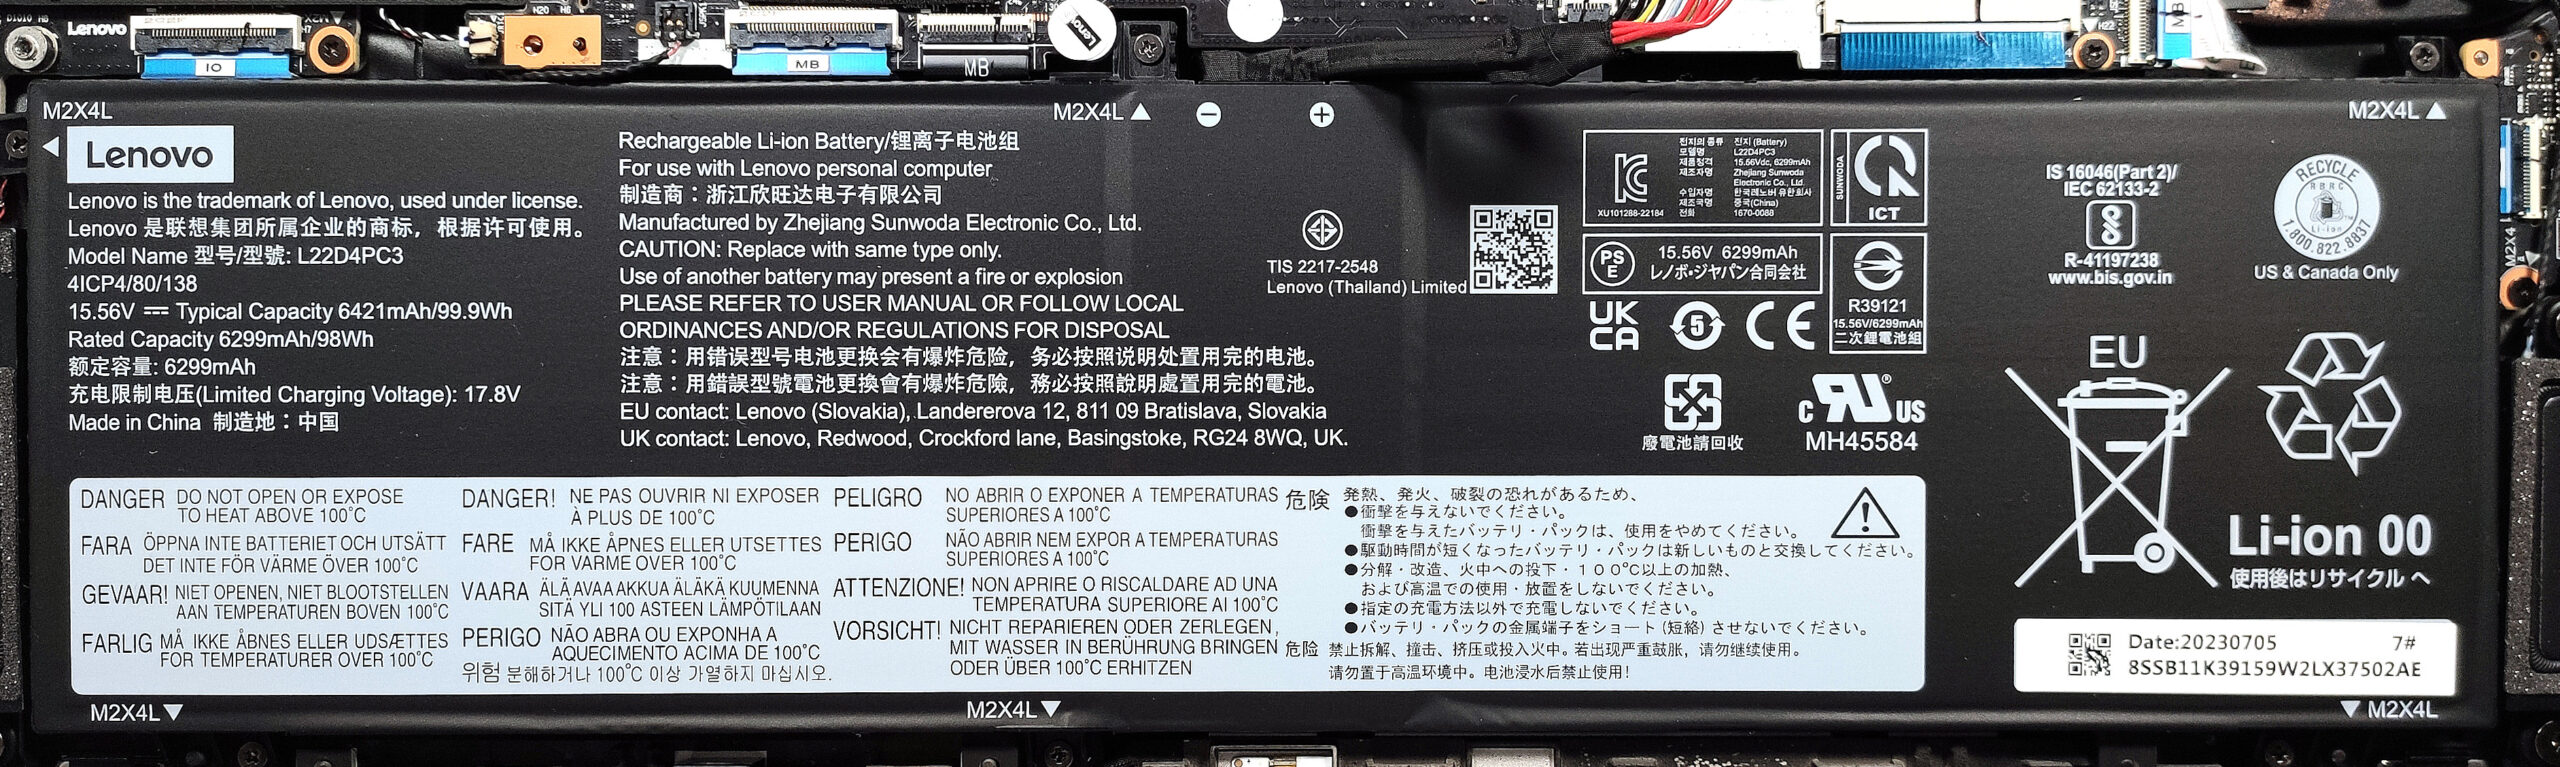
Step 2: Removing the Battery
- Disconnect the battery by pulling out its connector from the motherboard.
- Remove the six Phillips-head screws securing the battery to the laptop’s chassis, then lift the 99.99Wh battery away from the device.
Caution: Handle the battery and its connector with care to avoid any damage.
More info: The 99.99Wh battery provides around 4 hours and 21 minutes of web browsing or video playback, showcasing the substantial power consumption of the laptop’s high-performance components.
Memory Upgrade
- Note that due to the inverted motherboard design, the RAM slots are located on the opposite side. The laptop supports up to 32GB of DDR5-6400MHz RAM or 64GB of DDR5-5600MHz RAM in dual-channel mode.
More info: While accessing the RAM may require additional disassembly due to the inverted motherboard, upgrading the memory can significantly enhance performance for gaming and professional applications.
You can buy DDR5 RAM modules here: Buy from Amazon.com (#CommissionsEarned)
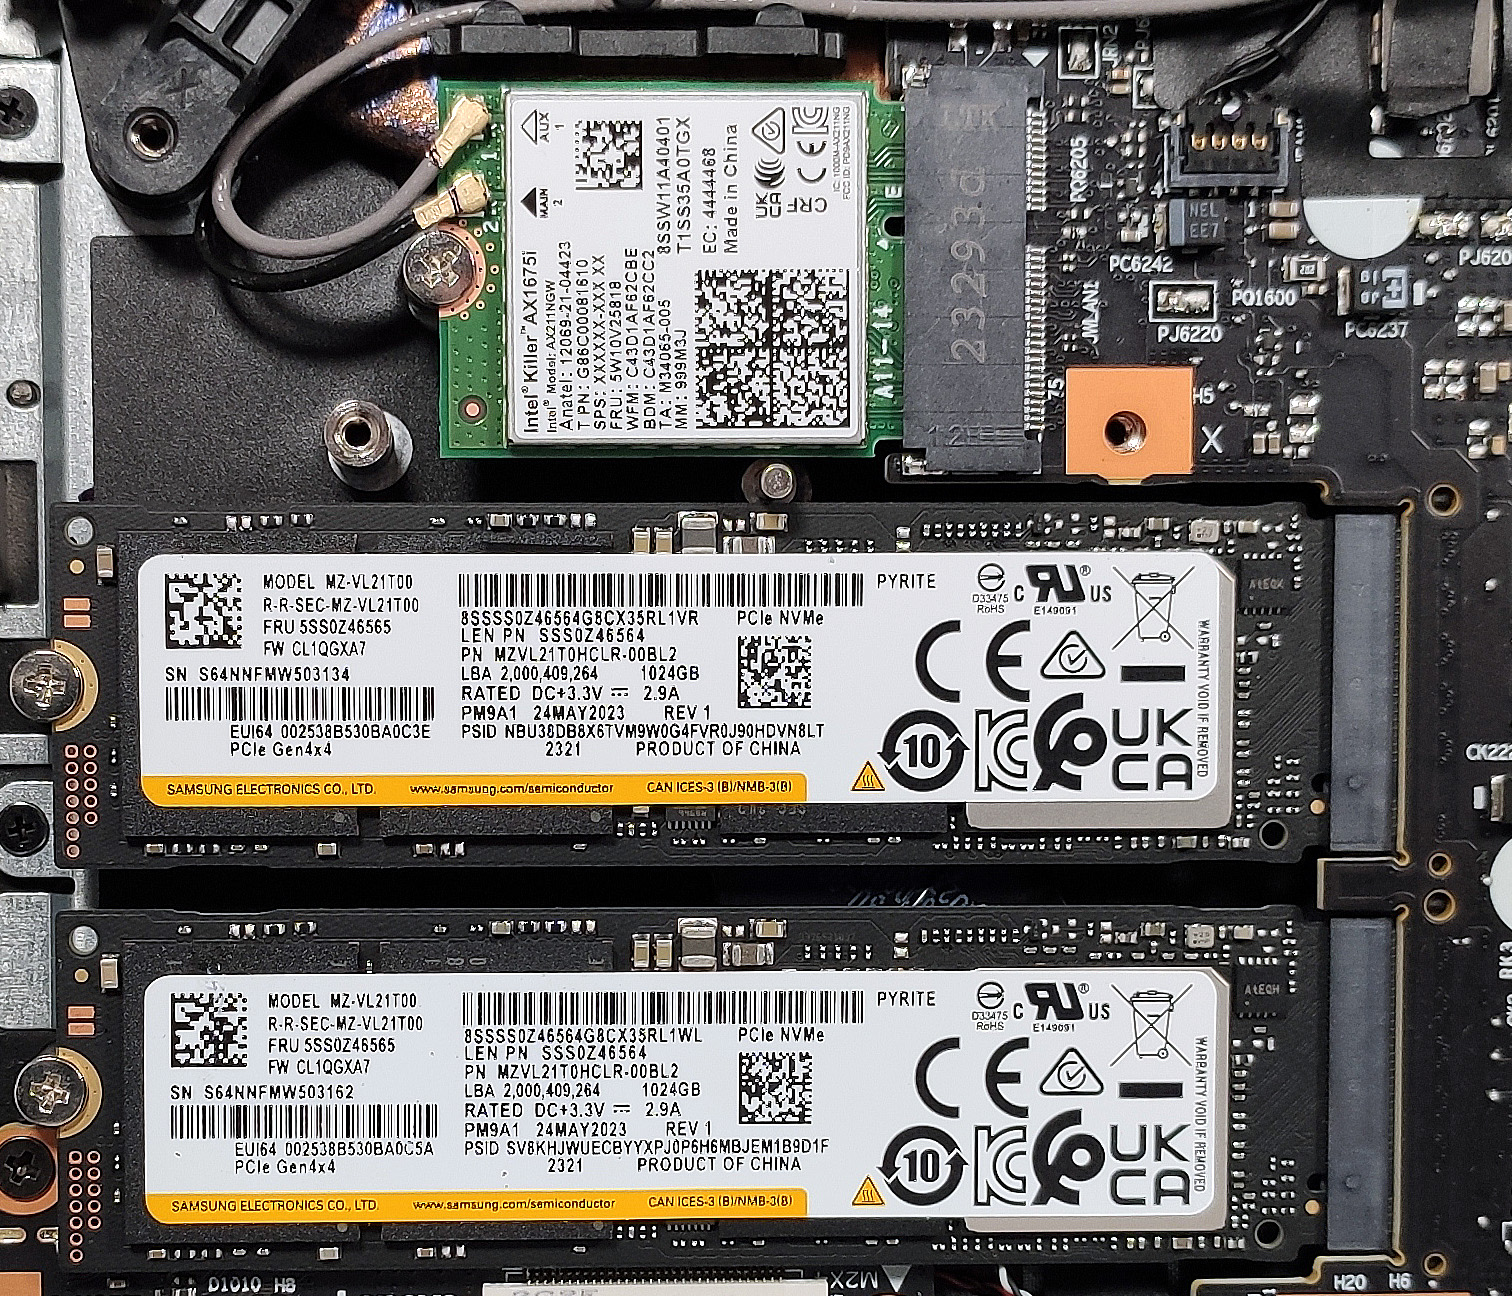
Storage Upgrade
- Locate the SSD section beneath the metal plate. This area houses two M.2 slots compatible with Gen 4 SSDs and supports RAID 0 configuration. Remember to manage the thermal pads for the NVMe SSDs and the Wi-Fi card when upgrading.
More info: Upgrading to faster Gen 4 SSDs or utilizing RAID 0 can greatly improve storage speed and capacity, enhancing the laptop’s overall performance.
You can buy Gen 4 M.2 SSD modules here: Buy from Amazon.com (#CommissionsEarned)
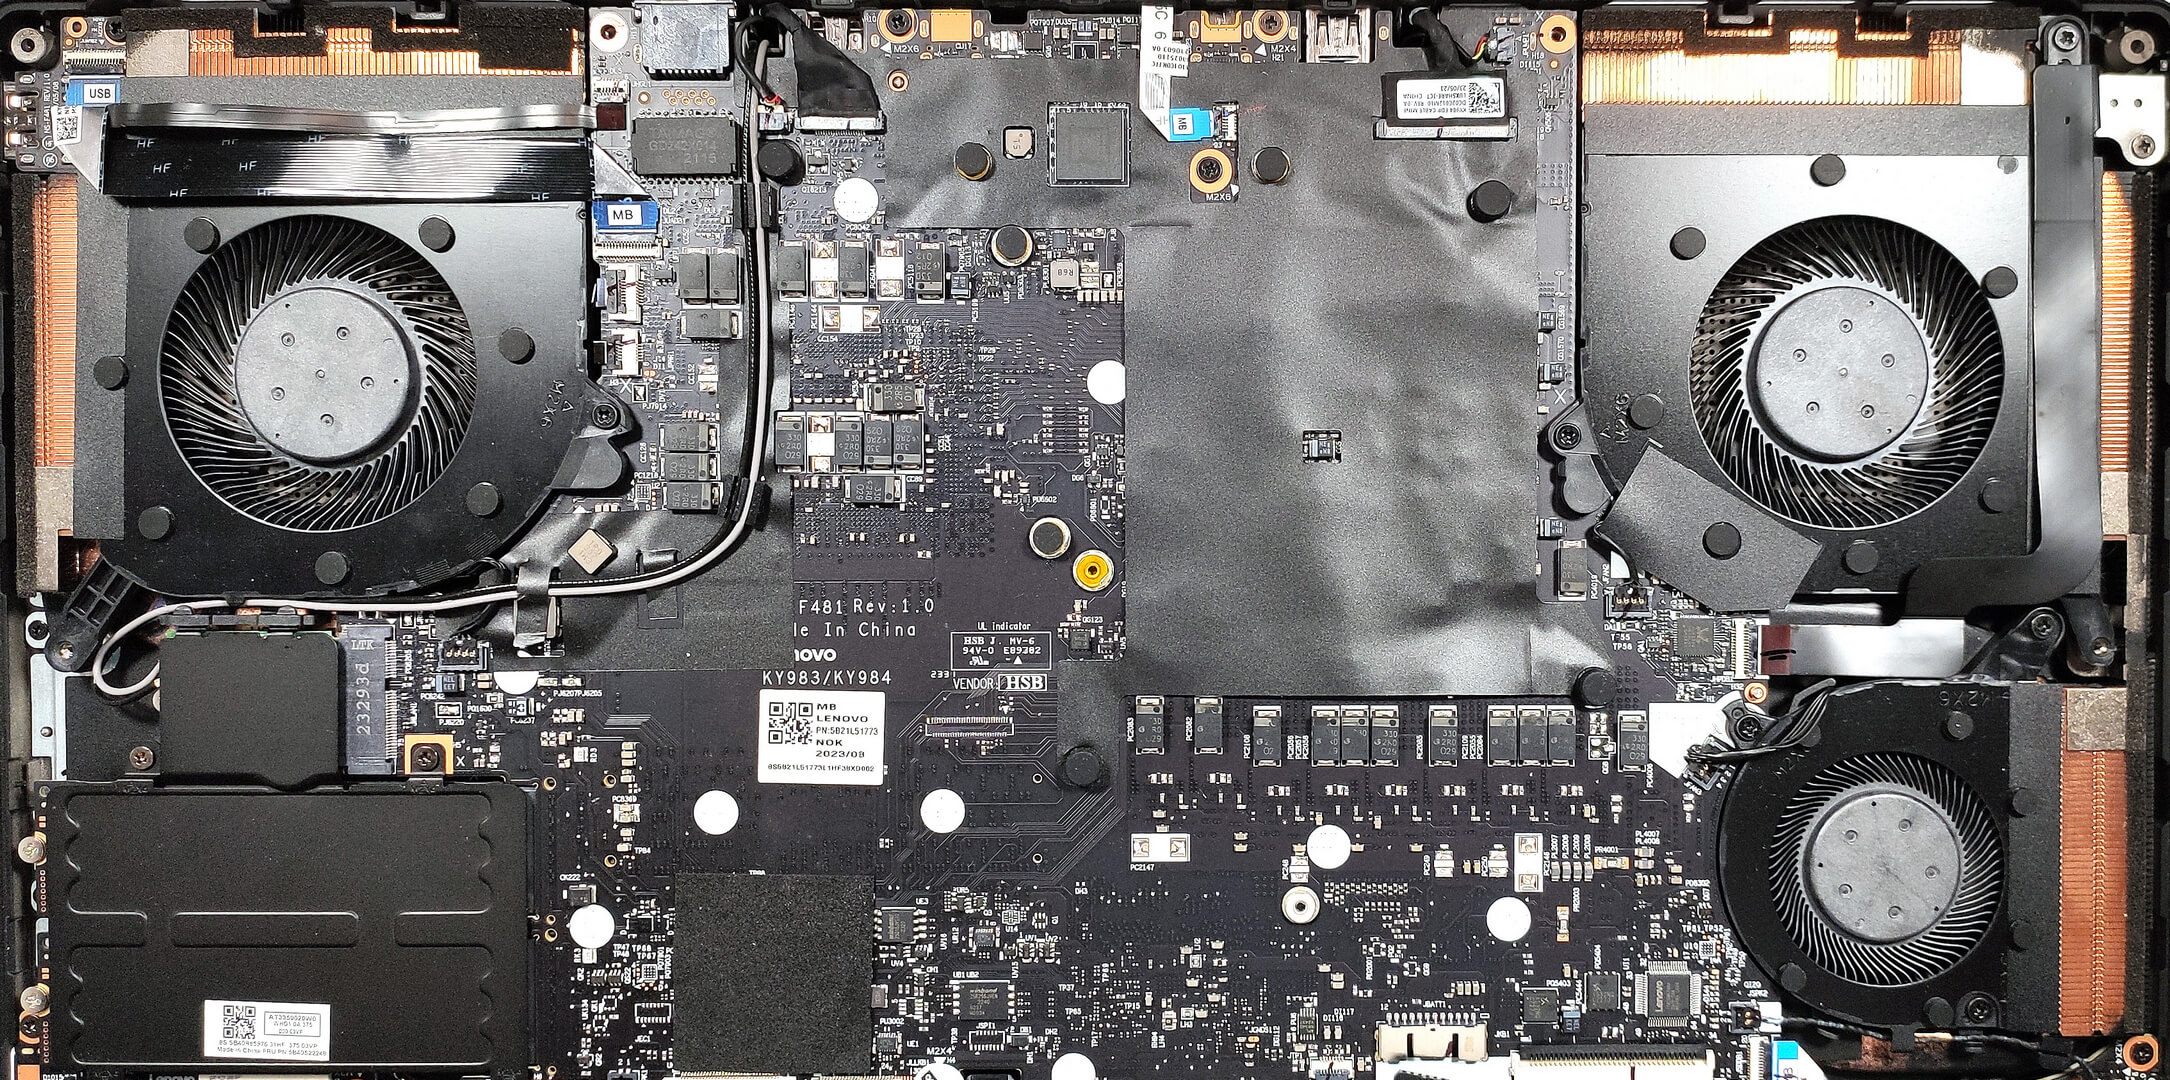
Step 3: Examining the Cooling System
- Inspect the hybrid Legion Coldfront thermal system, which integrates liquid and air cooling. The visible components include three fans and five heat sinks, with additional parts of the cooling system located on the reverse side of the motherboard.
More info: This advanced cooling solution efficiently manages thermal output, ensuring optimal performance under heavy loads, with the liquid cooling feature specifically designed to activate under extreme conditions.