How to open Acer TravelMate P4 (TMP413-51) – disassembly and upgrade options
| 0
#CommissionsEarned

Step 1: Accessing the Internal Components
- Ensure the Acer TravelMate P4 (TMP413-51) is powered off and placed on a soft, clean surface to prevent scratches or damage.
- Remove the 9 Torx-head screws from the bottom of the laptop.
- Use a plastic tool to gently pry the panel off, starting from the front and working your way around the sides.
Hint: Be careful when prying to avoid damaging the internal clips or the laptop casing.
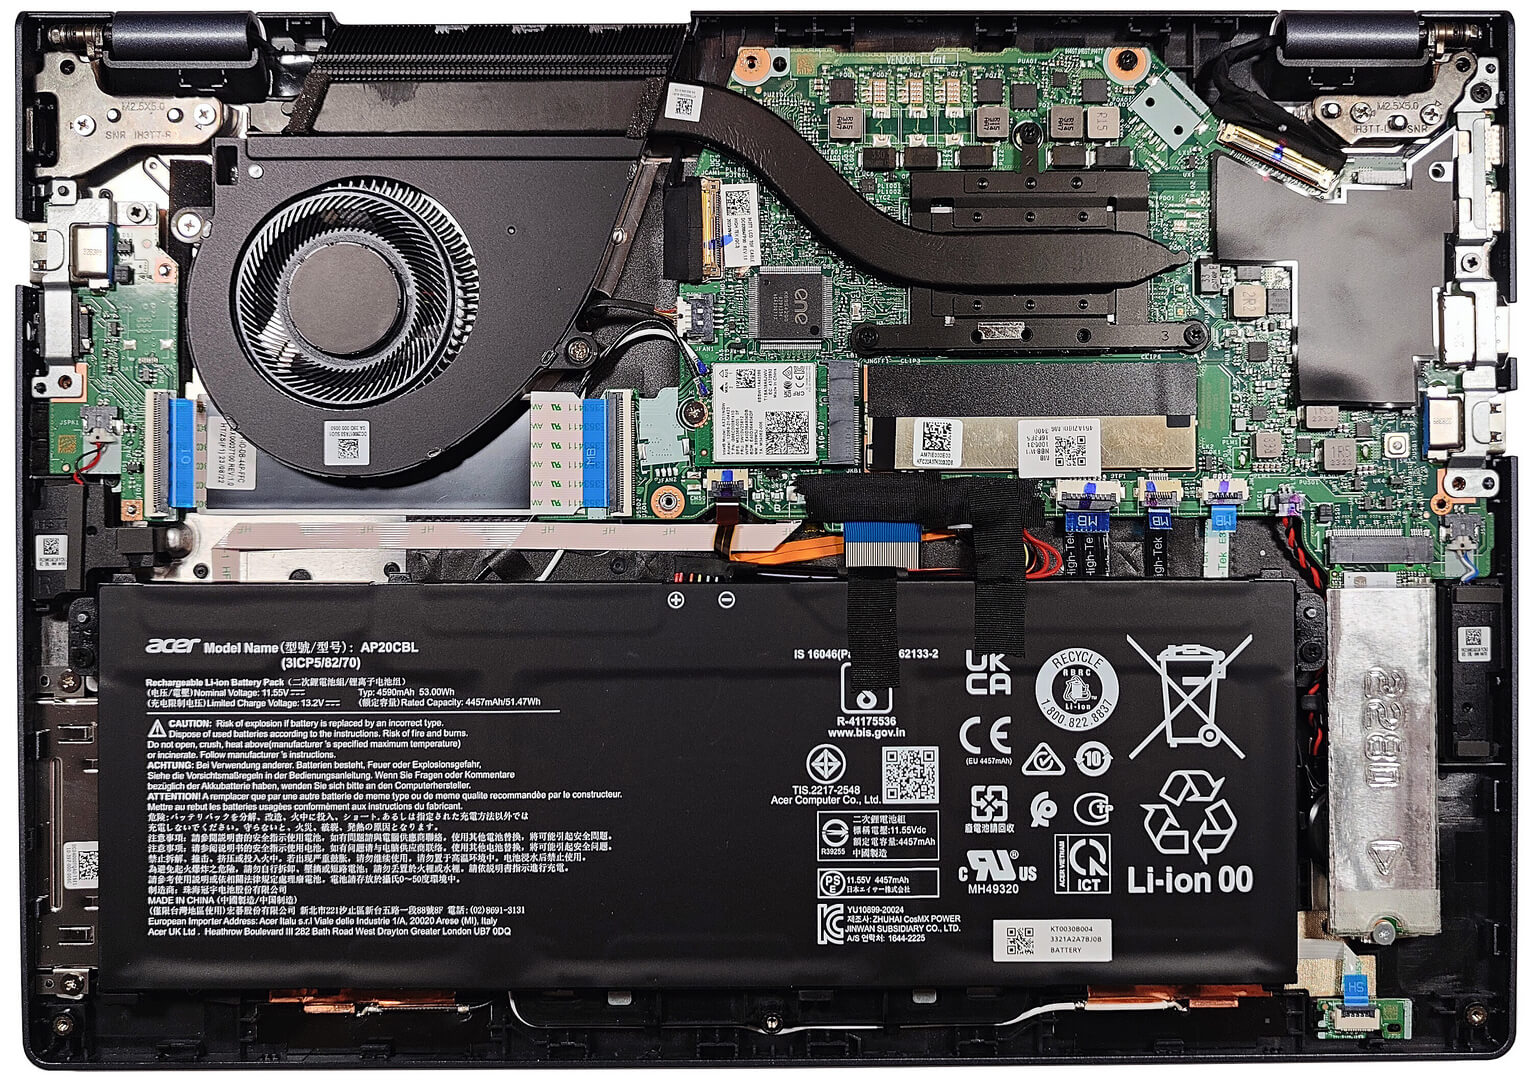
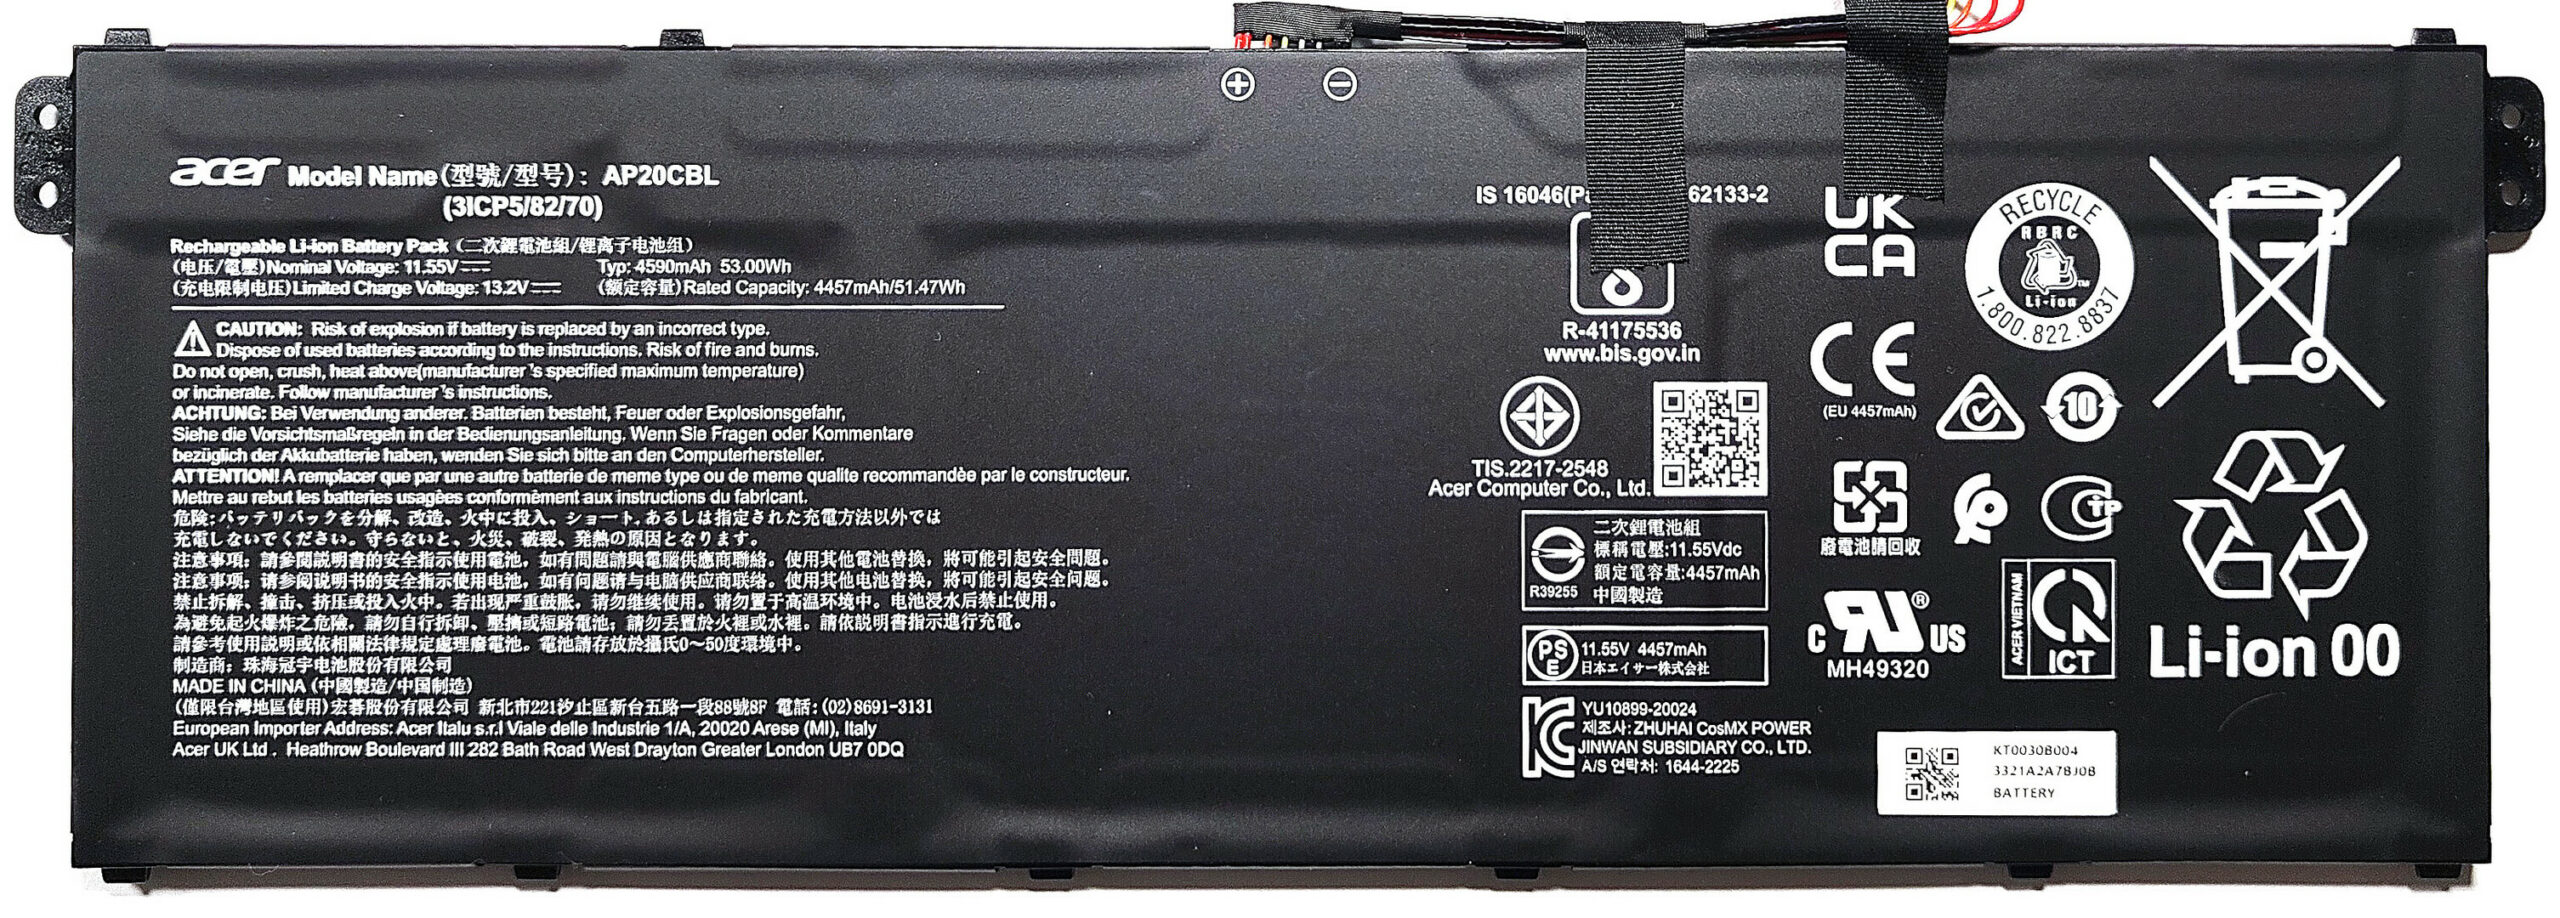
Step 2: Removing the Battery
- Disconnect the battery by pulling out its connector from the motherboard.
- Remove the two Philips-head screws securing the battery to the chassis, then lift the 53Wh battery away from the device.
Caution: Handle the battery and its connector with care to avoid any damage.
More info: The 53Wh battery offers up to 12 hours and 30 minutes of web browsing, or 9 hours and 5 minutes of video playback, providing solid battery life for extended use. An optional 56Wh model offers slightly more capacity.
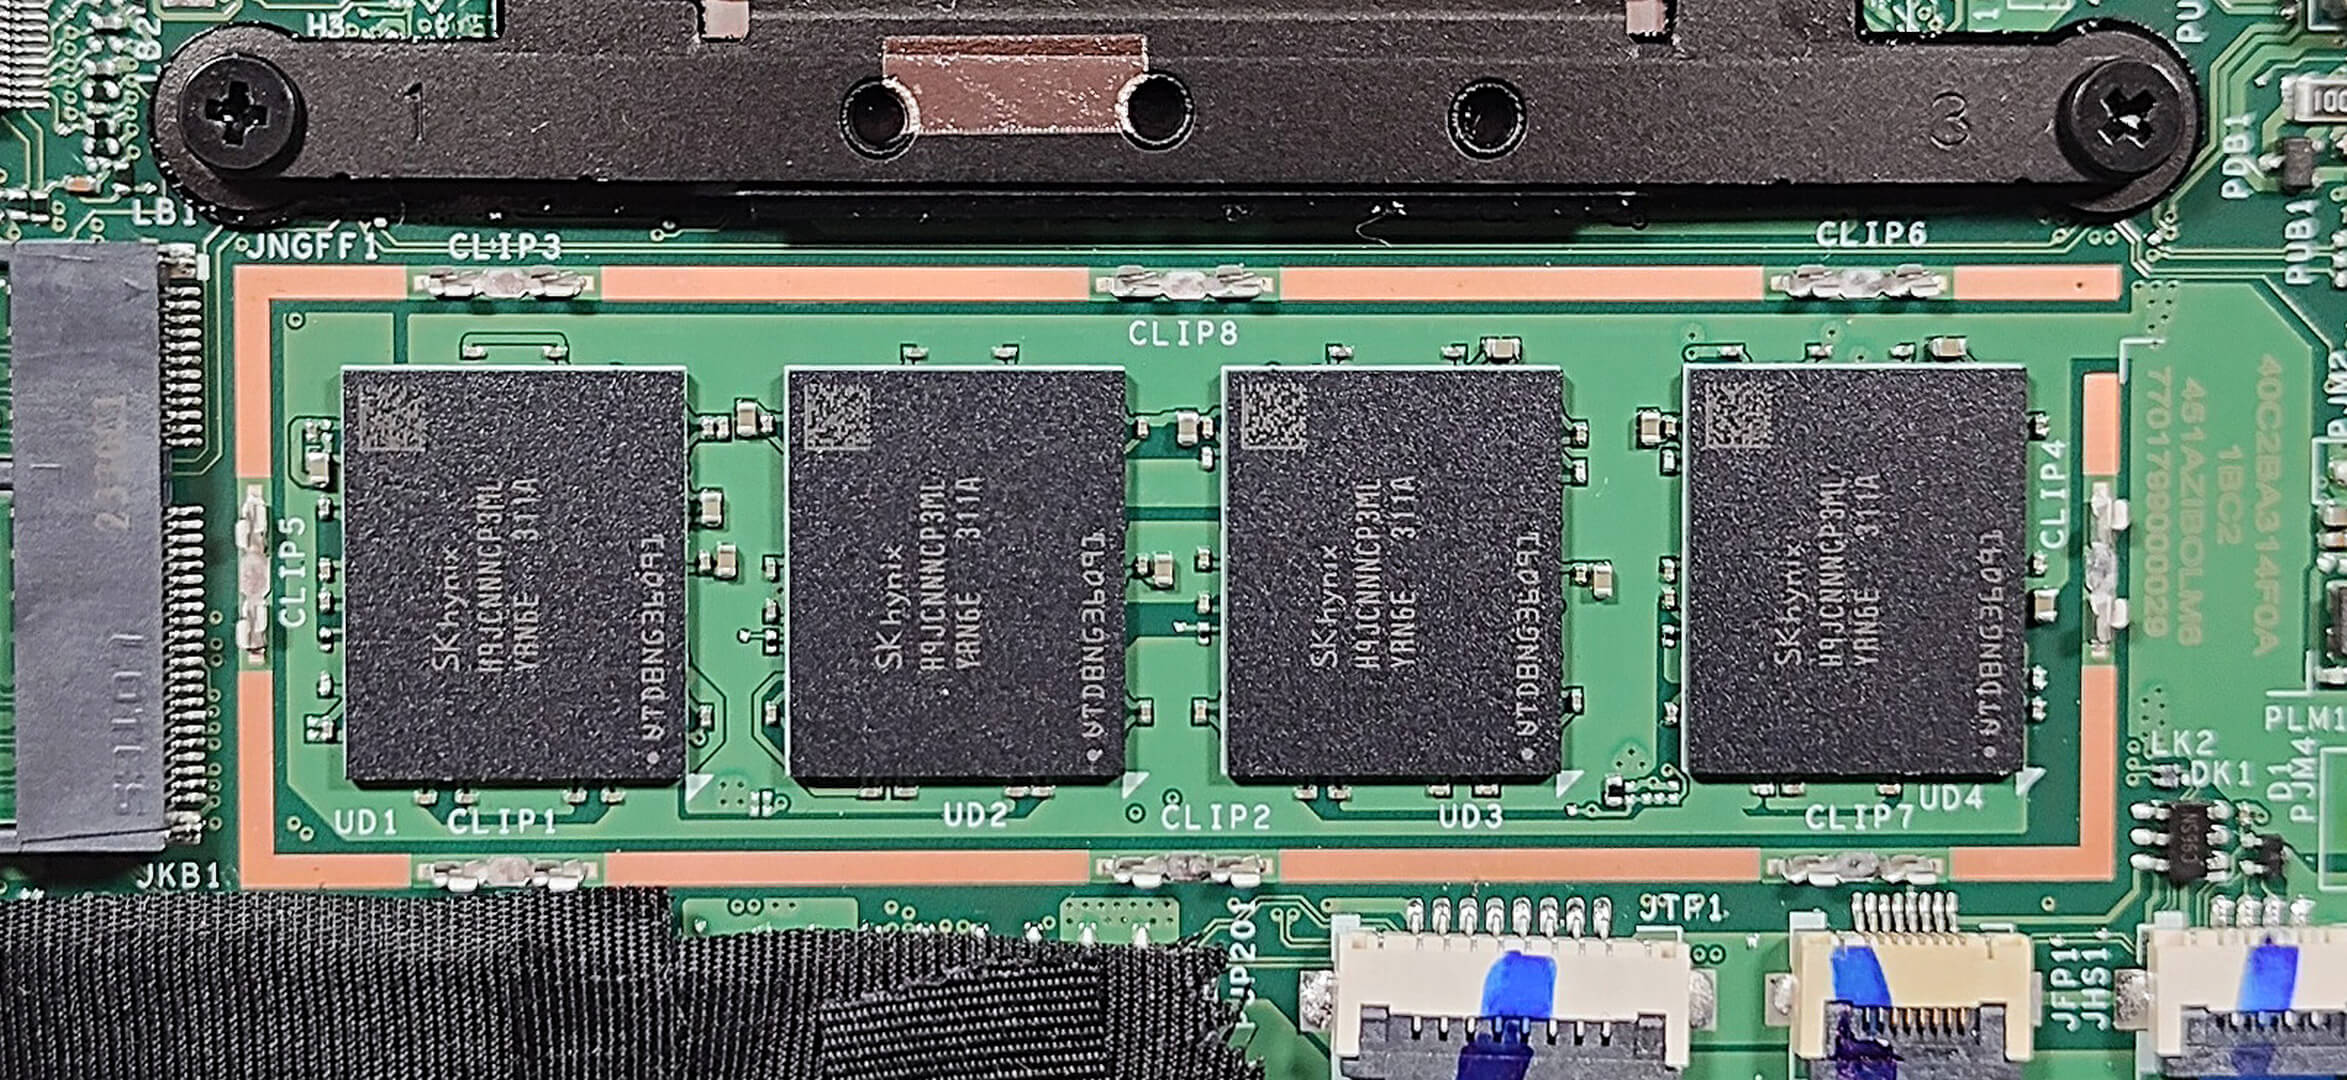
Memory
- The laptop comes with soldered 32GB of LPDDR5-4800MHz RAM, providing high-speed performance in dual-channel mode for efficient multitasking and productivity.
More info: While the memory is not upgradeable due to its soldered nature, 32GB of LPDDR5 RAM is ample for most professional and computing needs, ensuring future-proofing.
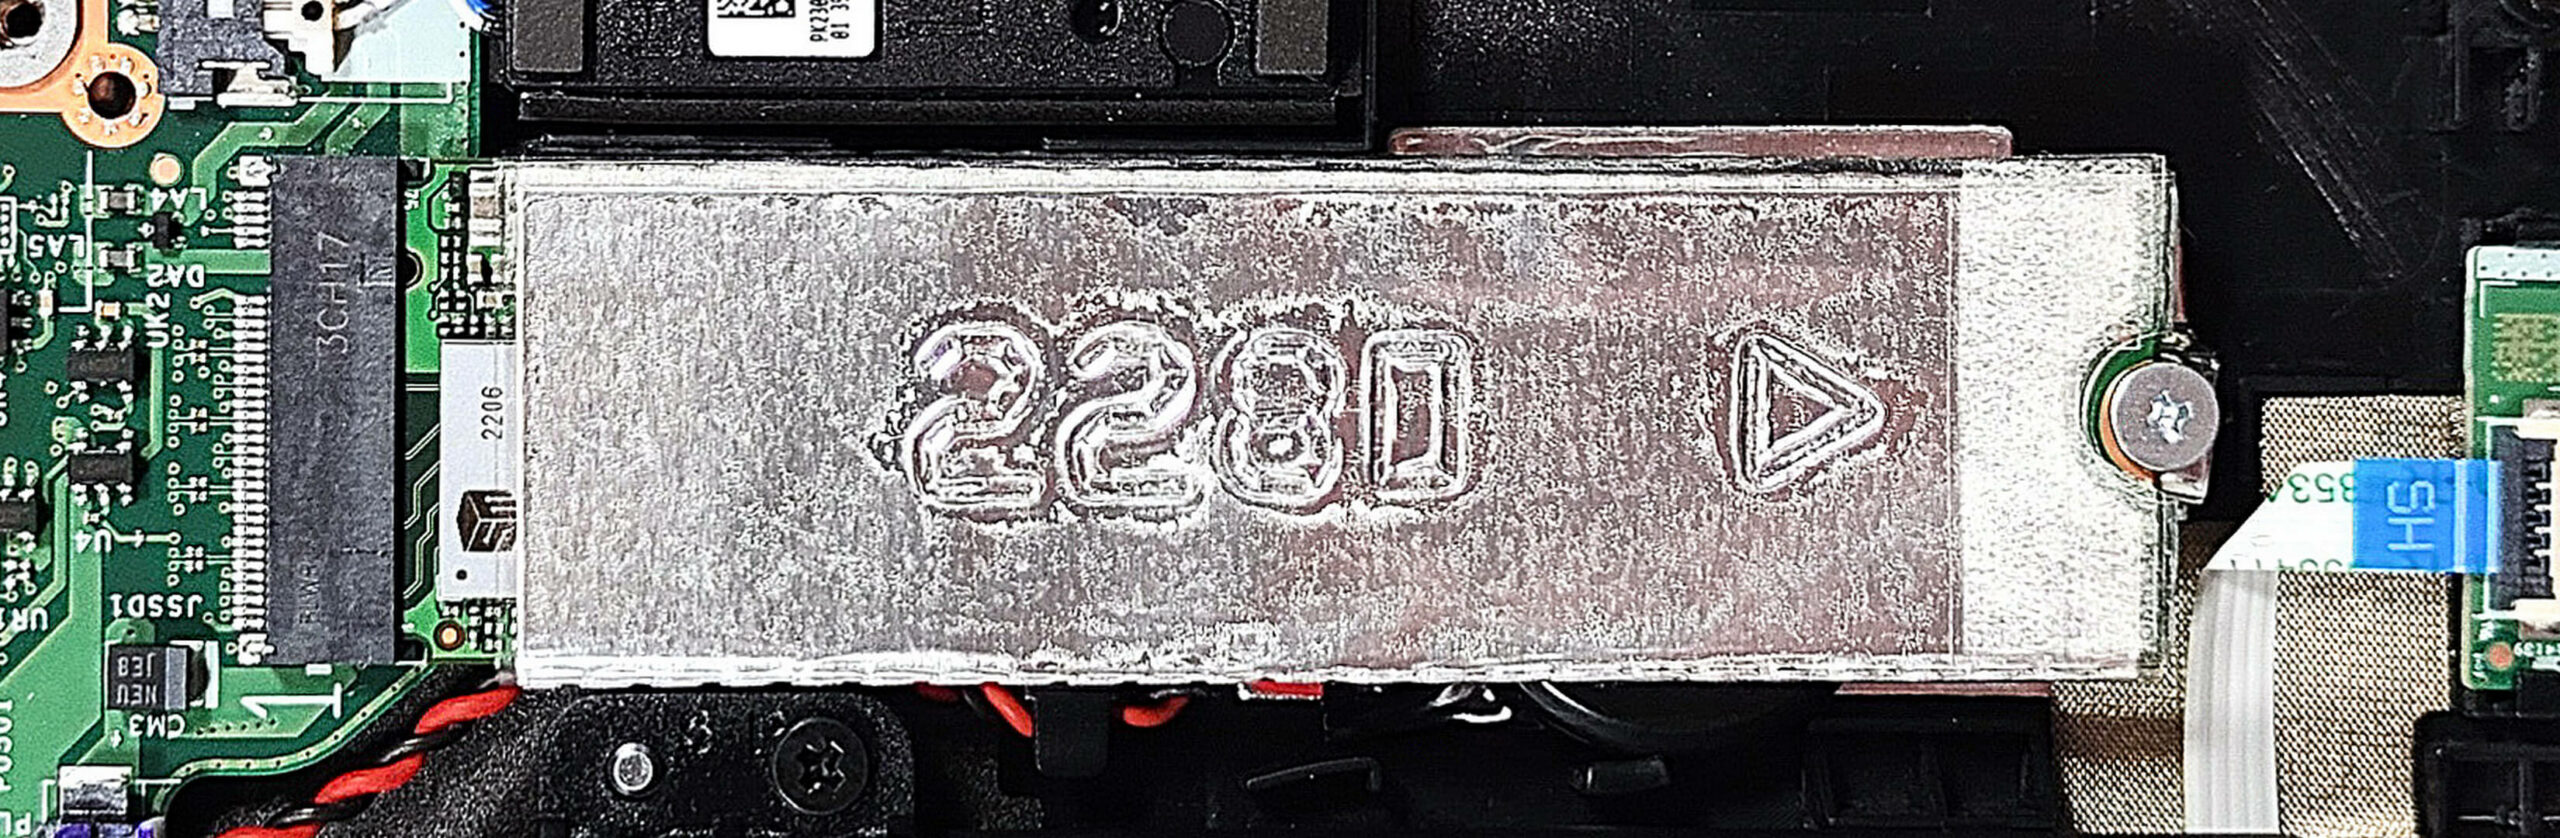
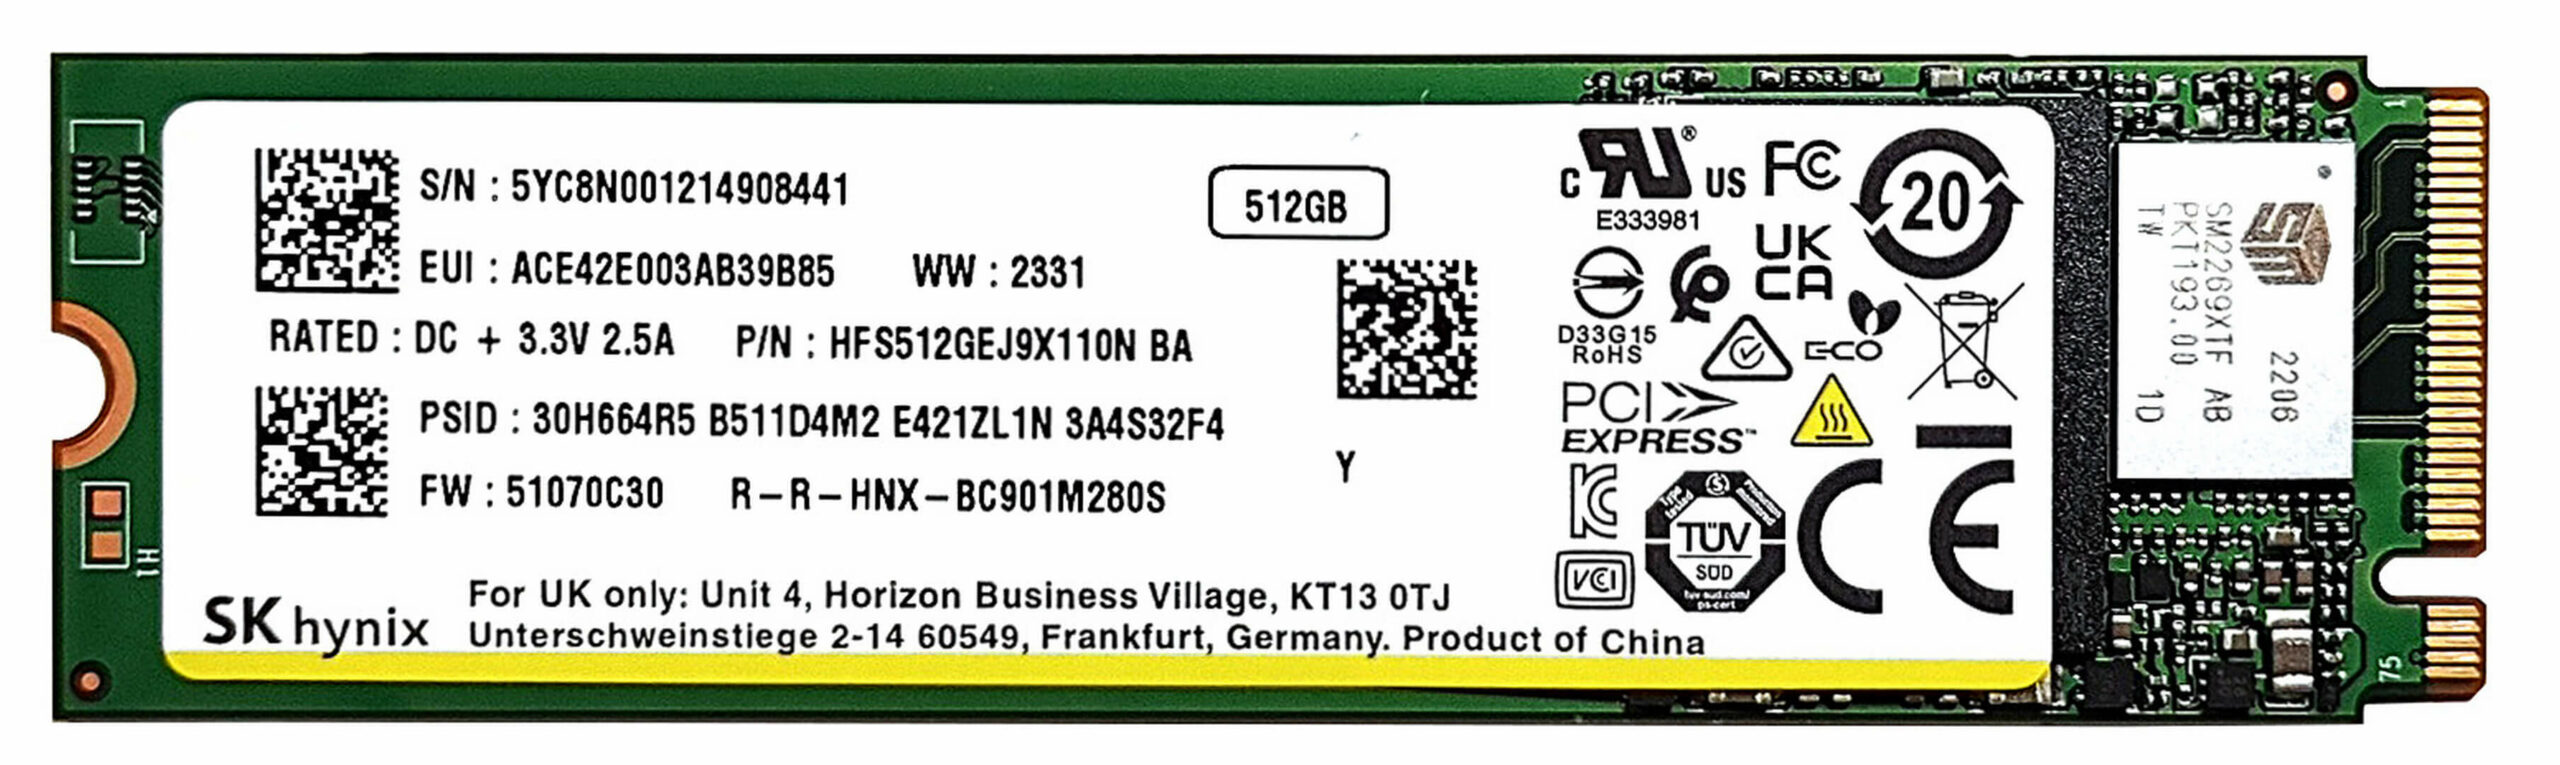
Storage Upgrade
- Locate the single M.2 slot on the motherboard that supports 2280 Gen 4 SSDs for high-speed storage solutions.
- Upgrade or add a new NVMe SSD as needed to expand storage capacity or improve overall system responsiveness and load times.
You can buy Gen 4 M.2 SSD modules here: Buy from Amazon.com (#CommissionsEarned)
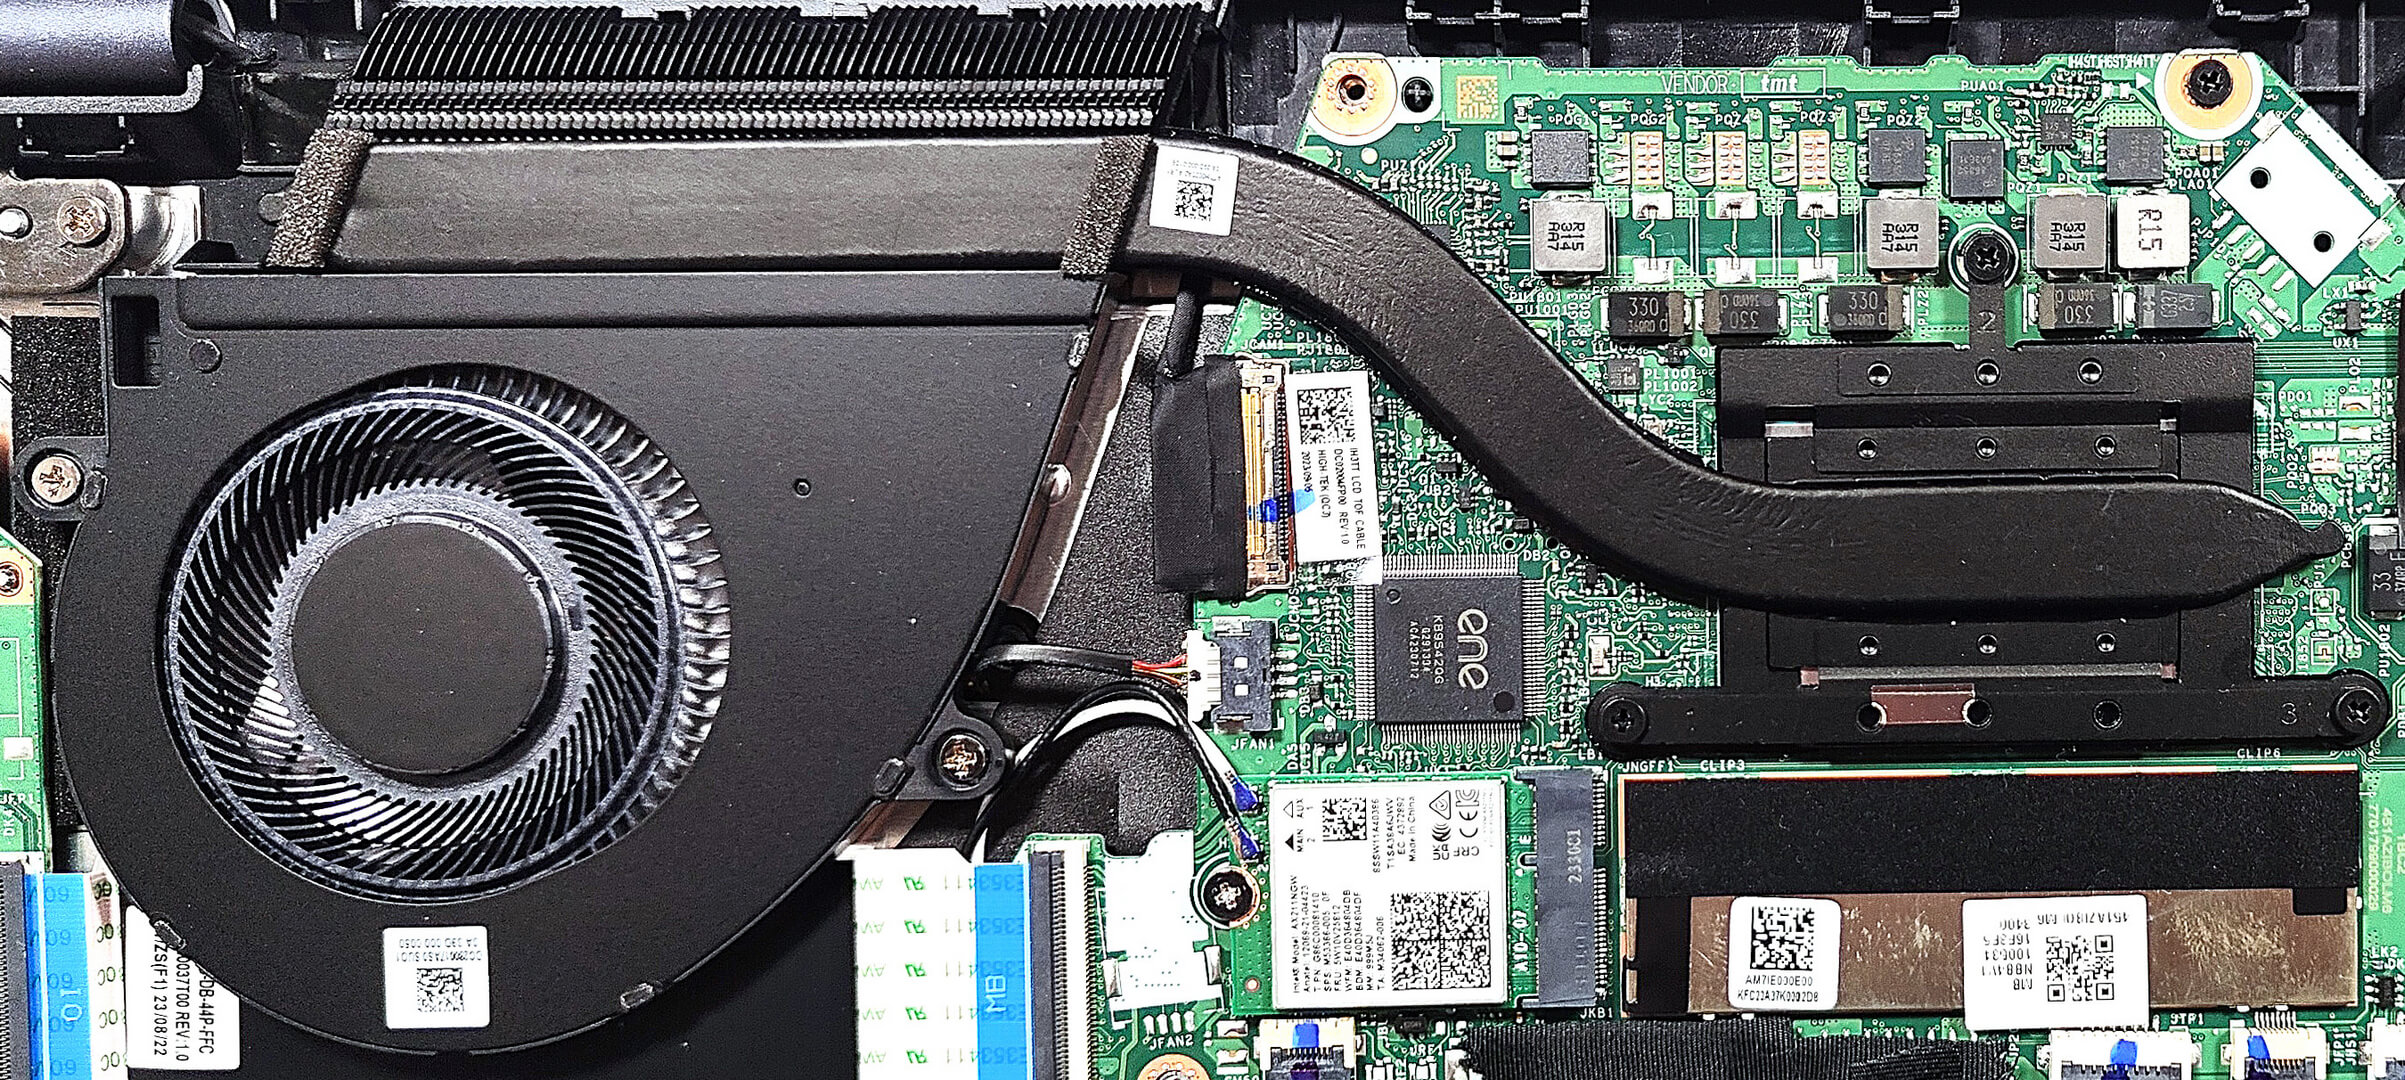
Step 3: Examining the Cooling System
- Review the cooling system, which includes one fan, a single heat pipe, a heat sink, and a heat spreader, designed to efficiently manage the thermal output of the laptop.
#CommissionsEarned
Subscribe
0 Comments