How to open HP ZBook Firefly 16 G10 – disassembly and upgrade options

Opening the Laptop
- Undo the 5 captive Phillips-head screws on the bottom panel of the laptop.
- Pry the bottom panel starting from one of the top corners, near the hinge, using a plastic pry tool.
- Carefully continue to pop the bottom plate away from the chassis, working your way around the edges.
Caution: Be gentle to avoid damaging the internal components or the clips that hold the bottom panel in place.
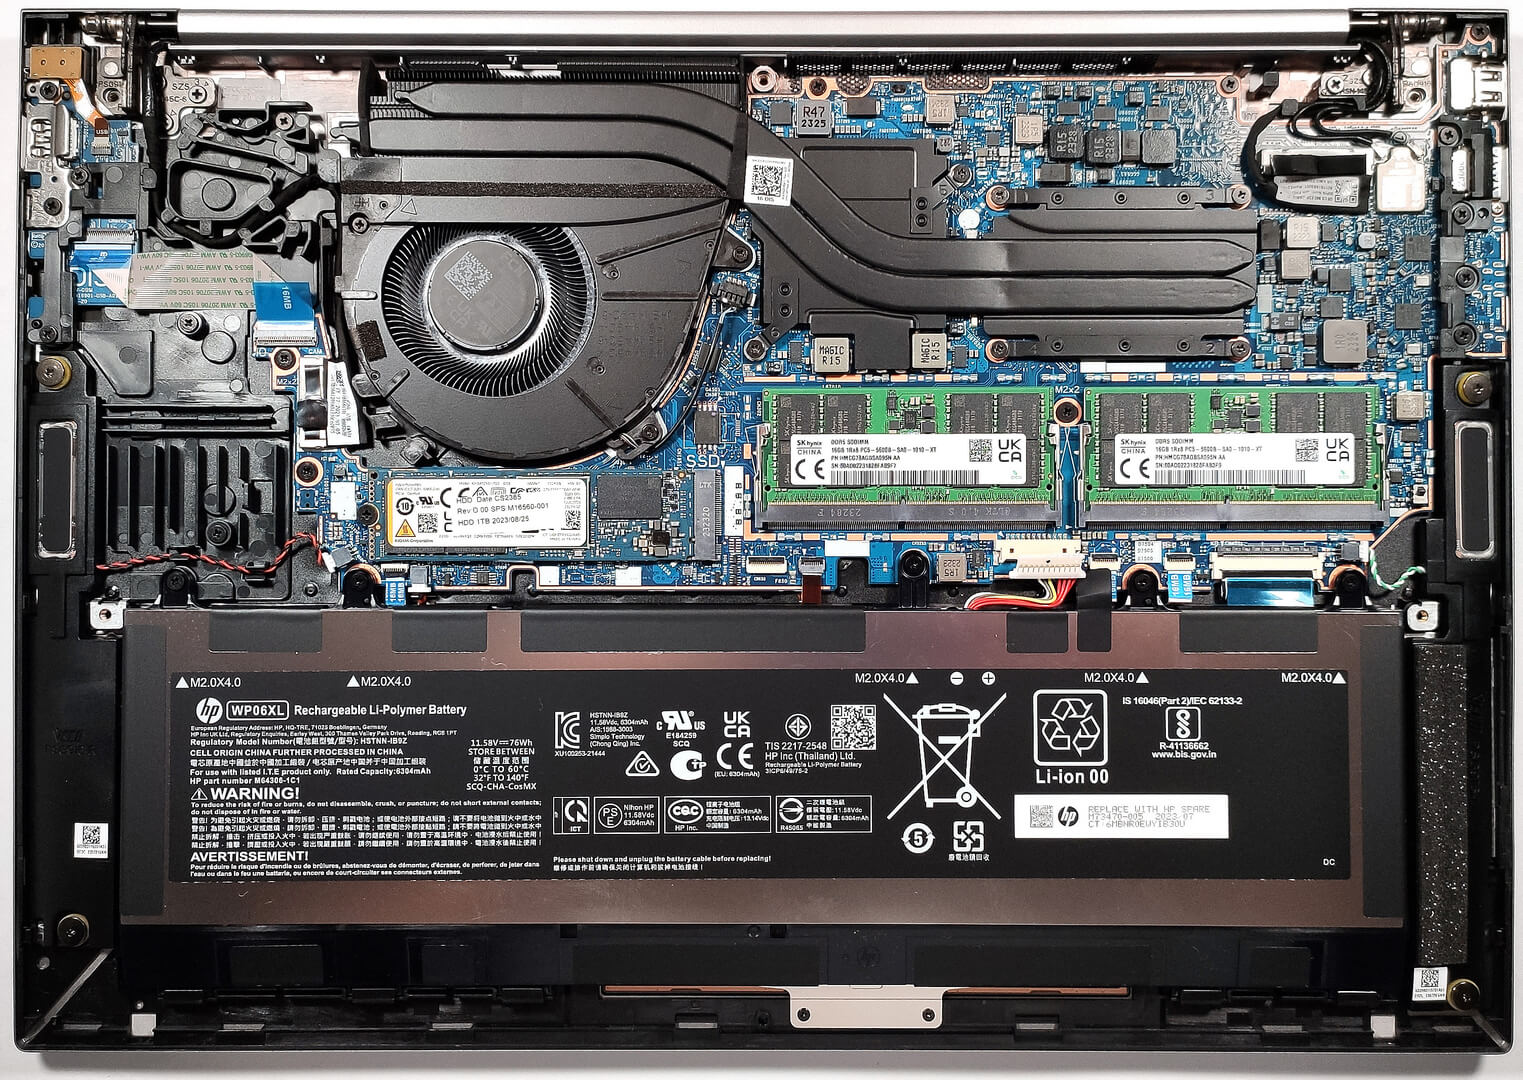
Removing the Battery
- Disconnect the battery connector from the mainboard by gently pulling it out with a plastic tool.
- Undo the five Phillips-head screws that secure the battery to the chassis.
- Lift the battery out of its compartment.
More info: Our model is equipped with the optional 76Wh battery, capable of 25 hours of web browsing or 11 hours and 40 minutes of video playback.

Upgrading the RAM
- Locate the metal plate covering the SODIMM slots and remove it.
- Eject the existing RAM modules by gently pulling the clips on each side of the RAM stick outward. The RAM will pop up and can be pulled out.
- Insert the new DDR5-5200MHz RAM modules into the slots at an angle, then push down until the clips lock them in place.
You can buy DDR5 RAM modules here: Buy from Amazon.com (#CommissionsEarned)
More info: The laptop supports up to 64GB of DDR5-5200MHz memory in dual-channel mode. Although the memory sticks are rated at 5600MHz, they operate at 5200MHz.
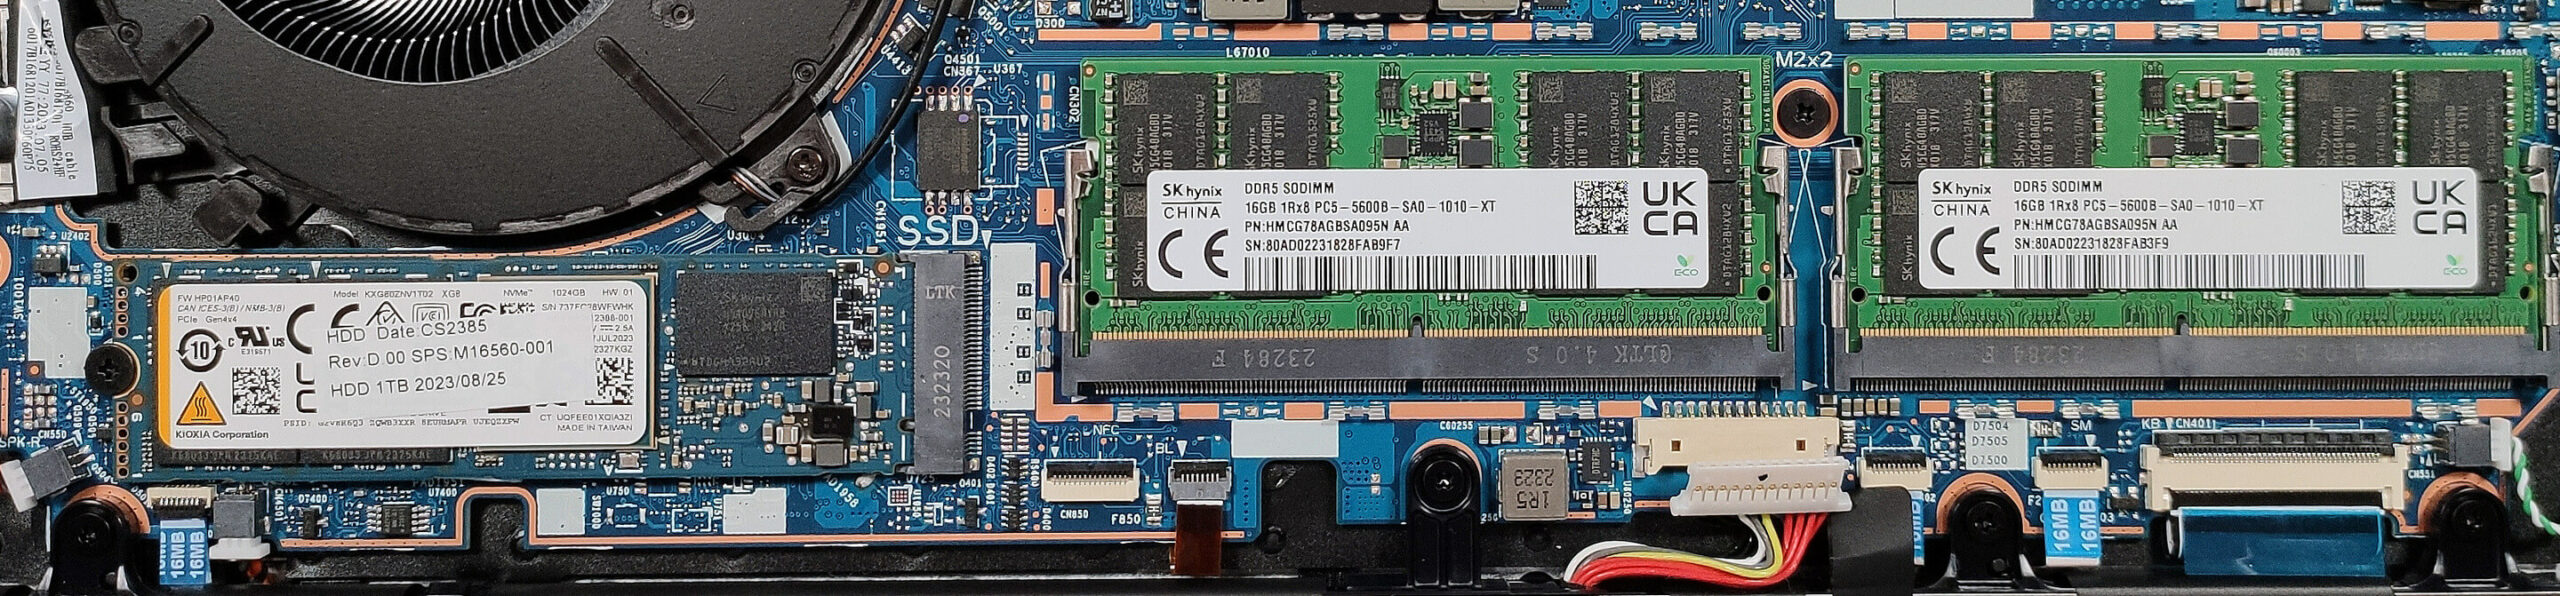
Upgrading the SSD
- Identify the M.2 slot which is protected by a cooling pad.
- Remove the screw holding the SSD in place, then gently pull out the preinstalled NVMe SSD.
- Insert the new 2280 Gen 4 SSD into the slot and secure it with the screw. Ensure the cooling pad is properly aligned for optimal heat dissipation.
You can buy 2280 Gen 4 SSD modules here: Buy from Amazon.com (#CommissionsEarned)
More info: The laptop has one M.2 slot for storage expansion, supporting 2280 Gen 4 SSDs.


Maintenance of the Cooling System
- Locate the cooling system components – one fan, two heat pipes shared between the CPU and GPU, one heat sink, and two heat spreaders.
- Remove the screws securing the fan and heat sink to the motherboard.
- Clean the fan and heat sink with compressed air. If replacing the thermal paste, clean the old paste off the CPU and the heat sink, then apply a new thin layer.
- Reattach the fan and heat sink, ensuring that the screws are tightened securely.
Caution: Ensure the thermal paste is applied thinly and evenly to prevent overheating.
More info: Although the cooling solution seems modest, it is designed to effectively manage the thermal output of the laptop’s components, ensuring stable performance under normal use.