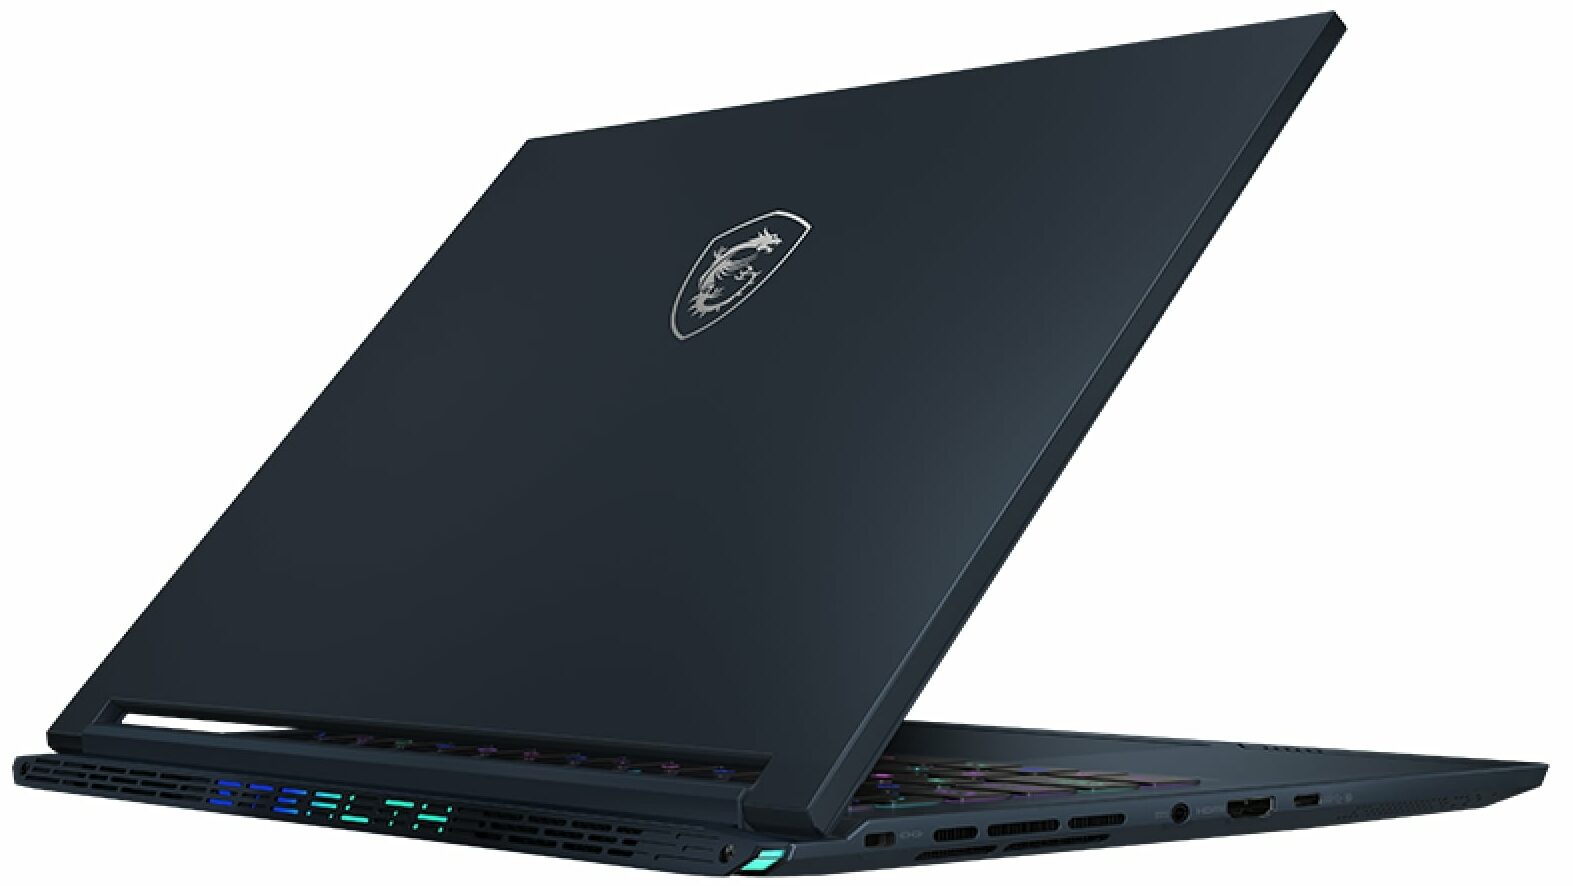
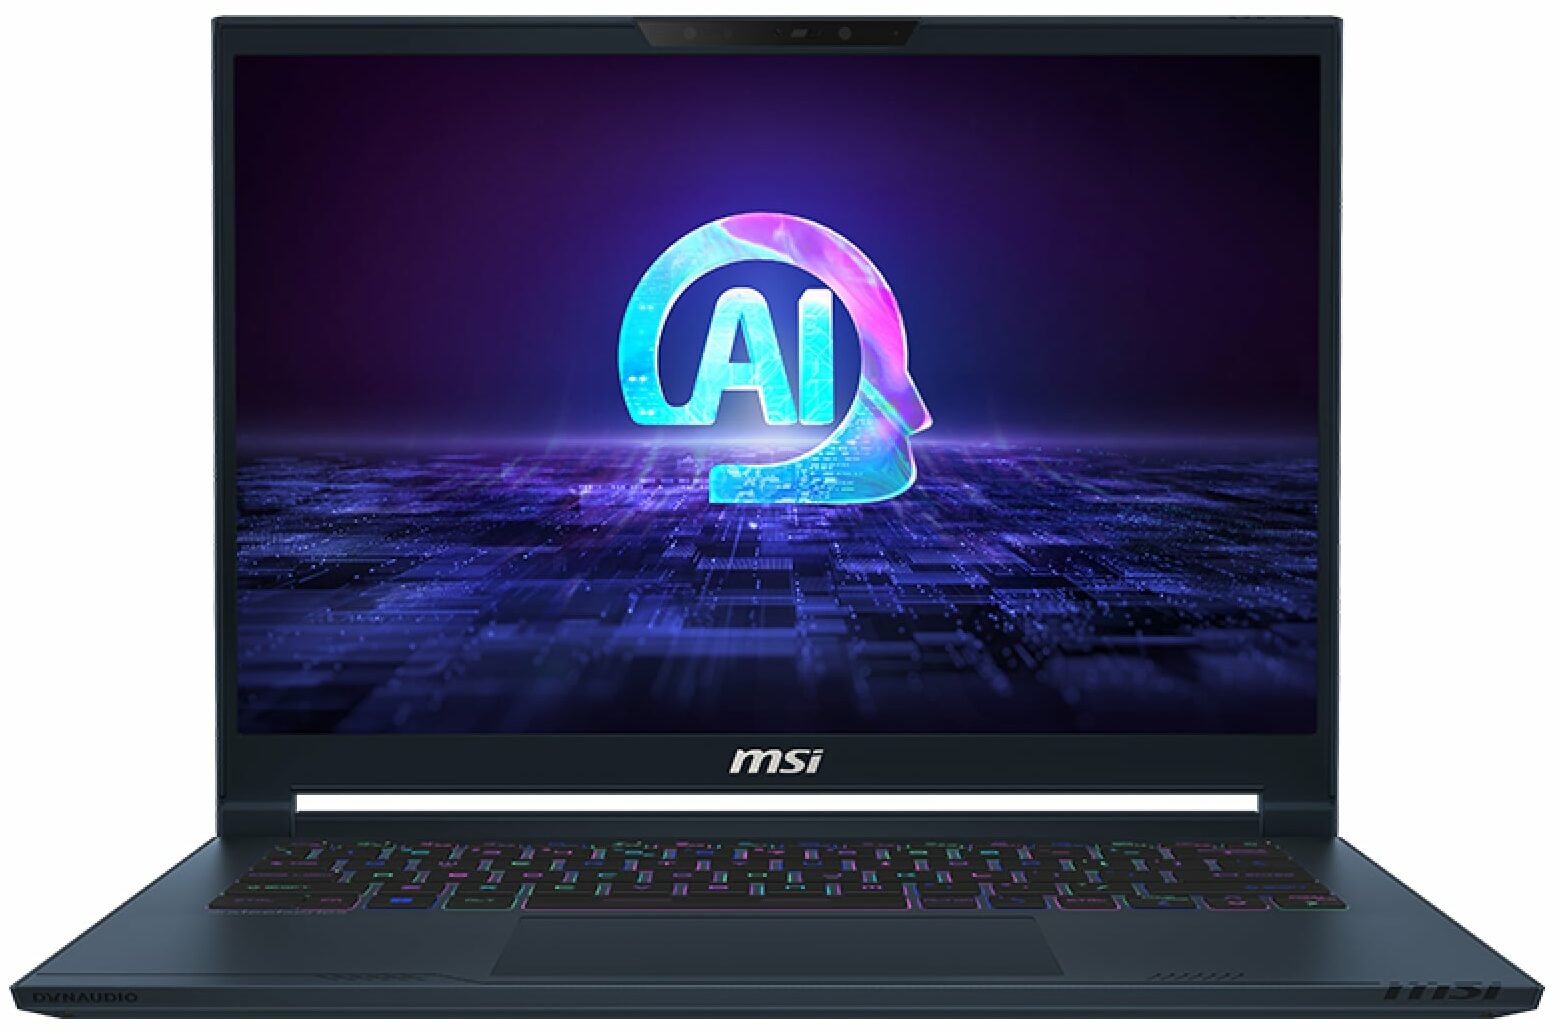
MSI Stealth 14 AI Studio


- Date Published: 30 Sep 2024
- Intel Core Ultra 7 155H
- NVIDIA GeForce RTX 4050 (Laptop, 90W)
- 14.0", WUXGA (1920 x 1200), 165 Hz, IPS
- 1000GB SSD
- 16GB RAM
- 1.70 kg (3.7 lbs)

Specs
- HDD/SSD
- 1000GB SSD
- M.2 Slot
- 1x 2280 PCIe NVMe 4.0 x4 See photo
- RAM
- 16GB RAM
- OS
- Windows 11 Pro
- Body Material
- Aluminum, Magnesium alloy
- Dimensions
- 315.6 x 246.25 x 19.9 - 21.8 mm (12.43" x 9.69" x 0.78")
- Weight
- 1.70 kg (3.7 lbs)
- Ports and connectivity
- 1x USB Type-A
- 3.2 Gen 1 (5 Gbps)
- 1x USB Type-C
- 3.2 Gen 2 (10 Gbps), DisplayPort
- 1x USB Type-C
- 4.0, Thunderbolt 4, Power Delivery (PD), DisplayPort
- HDMI
- 2.1 (8K@60Hz / 4K@120Hz)
- Card Reader
- Ethernet LAN
- Wi-Fi
- 802.11be
- Bluetooth
- 5.4
- Audio jack
- 3.5mm Combo Jack
- Features
- Fingerprint reader
- Web camera
- FHD IR with HDR, 3D Noise Reduction+ (3DNR+)
- Backlit keyboard
- Microphone
- Speakers
- 2x 2W Speakers + 2x 2W Woofers, Dynaudio, Nahimic 3, Hi-Res Audio
- Security Lock slot
- Kensington Lock
Portability
Review
MSI Stealth 14 AI Studio in-depth review
For power users and professionals who travel a lot, a small yet hardware-potent machine could be a dream come true. The MSI Stealth 14 AI Studio A1V has all the needed mouthwatering features to be a compact powerhouse for gaming or content creation. It relies on 28W Intel Raptor Lake-H CPUs and NVIDIA Ada Lovelace graphics cards with 90W TGPs. The device isn't hefty but it's not super thin at the same time since it has a big vapor chamber cooling and two SODIMMs under the hood. You don't get a plethora of connectors but the included ones are up to date including Thunderbolt 4 and an HDMI 2.1. The connectivity is the latest and greatest Wi-Fi 7 + Bluetooth v5.4.The 16:10 display variants are also top-tier. The base panel is a 240Hz 1600p IPS unit but you can opt for a superb 1800p 120Hz[...]
Read the full review
Pros
- Good performance for a 14-incher
- 2x SODIMMs for up to 96GB of DDR5 memory
- 1800p resolution + 120Hz refresh rate (SDC419B)
- Full sRGB and DCI-P3 coverage + accurate color with our "Design and Gaming" profile (SDC419B)
- High max brightness of 636 nits in HDR and 404 nits in SDR mode + infinite contrast ratio (SDC419B)
- Great per-key RGB keyboard by SteelSeries + smooth and accurate touchpad
- Solid magnesium aluminum chassis
- The Core Ultra 9 185H can maintain 3.6 Ghz / 2.9 Ghz P and E core clock during heavy loads
- The optional RTX 4070 offers 90W TGP and ~2000 MHz during gaming
- The MSI Center offers plenty of customizations
- Thunderbolt 4, 1x Type-C port + HDMI 2.1
- Vapor chamber cooling
- 1080p IR Web camera with privacy shutter
- MUX switch
- Compact and powerful
- The fans don't spin in idle if the GPU temperature is below 50°C
Cons
- Loud fan noise + the keyboard feels hot to the touch during gaming in "Extreme Performance"
- The "Balanced" preset offers just a ~45W GPU TGP
- No G-Sync or NVIDIA Advanced Optimus support
- Just three USB ports
- Strange fan hysteresis under heavy CPU stress alongside high chip temperature
- PWM usage (SDC419B)
Disassembly, maintenance and upgrade options
Opening the DeviceUndo the 8 Phillips-head screws securing the bottom panel. Lift the top two corners by inserting a thin plastic tool between the plate and the chassis. Flip the laptop and pry the sides, lifting the left side up to the level of the audio jack. Turn the laptop back over and pry the front. Lift the panel on the right and slide it to the left where the audio jack is located.More info: Here's how the bottom panel looks on the inside.Battery RemovalPull out the battery connector from the mainboard. Undo the 6 Phillips-head screws secu[...]
Read more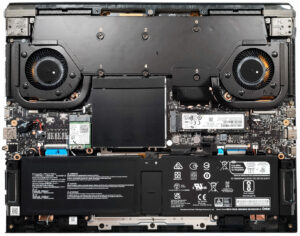


![[June 2026] Best-Selling Laptop Brands on Amazon Global – Apple’s Unrivaled Dominance in Units and Revenue](https://laptopmedia.com/wp-content/uploads/2026/07/GLOBAL-Best-Brands-400x225.jpg)
![[June 2026] Amazon Global: Top 10 Best-Selling Laptops – Apple’s New MacBook Neo Storms to #1, Reshaping the Market with Affordability](https://laptopmedia.com/wp-content/uploads/2026/07/Best-Selling-Laptops-GLOBAL-Top-10-400x225.jpg)
![[June 2026] Amazon Global: Top 10 Best-Selling Gaming Laptops – Acer’s Nitro V 16S AI Dominates Sales, While ASUS Leads Overall Revenue](https://laptopmedia.com/wp-content/uploads/2026/07/Best-Selling-Gaming-Laptops-GLOBAL-Top-10-400x225.jpg)
![[June 2026] Global Ranking of Best-Selling Laptop GPUs on Amazon – NVIDIA RTX 5060 is the Top-Selling Dedicated GPU](https://laptopmedia.com/wp-content/uploads/2026/07/Best-Selling-GPUs-GLOBAL-Top-10-400x225.jpg)
![[June 2026] Global Ranking of Best-Selling Laptop CPUs on Amazon – Apple M5 Dominates, AMD Ryzen 7 260 Gets Solid Premium Share](https://laptopmedia.com/wp-content/uploads/2026/07/Best-Selling-CPUs-GLOBAL-Top-10-400x225.jpg)