How to open Acer Nitro V 16 AI (ANV16-42) – disassembly and upgrade options

How to open the bottom panel
- Shut down the laptop completely and unplug the charger and all peripherals.
- Place the notebook upside down on a soft, clean surface to avoid scratches.
- Undo the ten bottom screws that secure the panel to the chassis. Keep track of their positions for easier reassembly.
- Insert a thin plastic pry tool between the bottom cover and the chassis along one of the side edges and gently start releasing the clips.
- Work your way around the perimeter. The panel comes off cleanly and there are no hidden fasteners.
- Once all clips are released, lift the bottom panel away from the base and set it aside.
Hint: Always use plastic tools instead of metal ones to avoid scratching the chassis or damaging the clips.
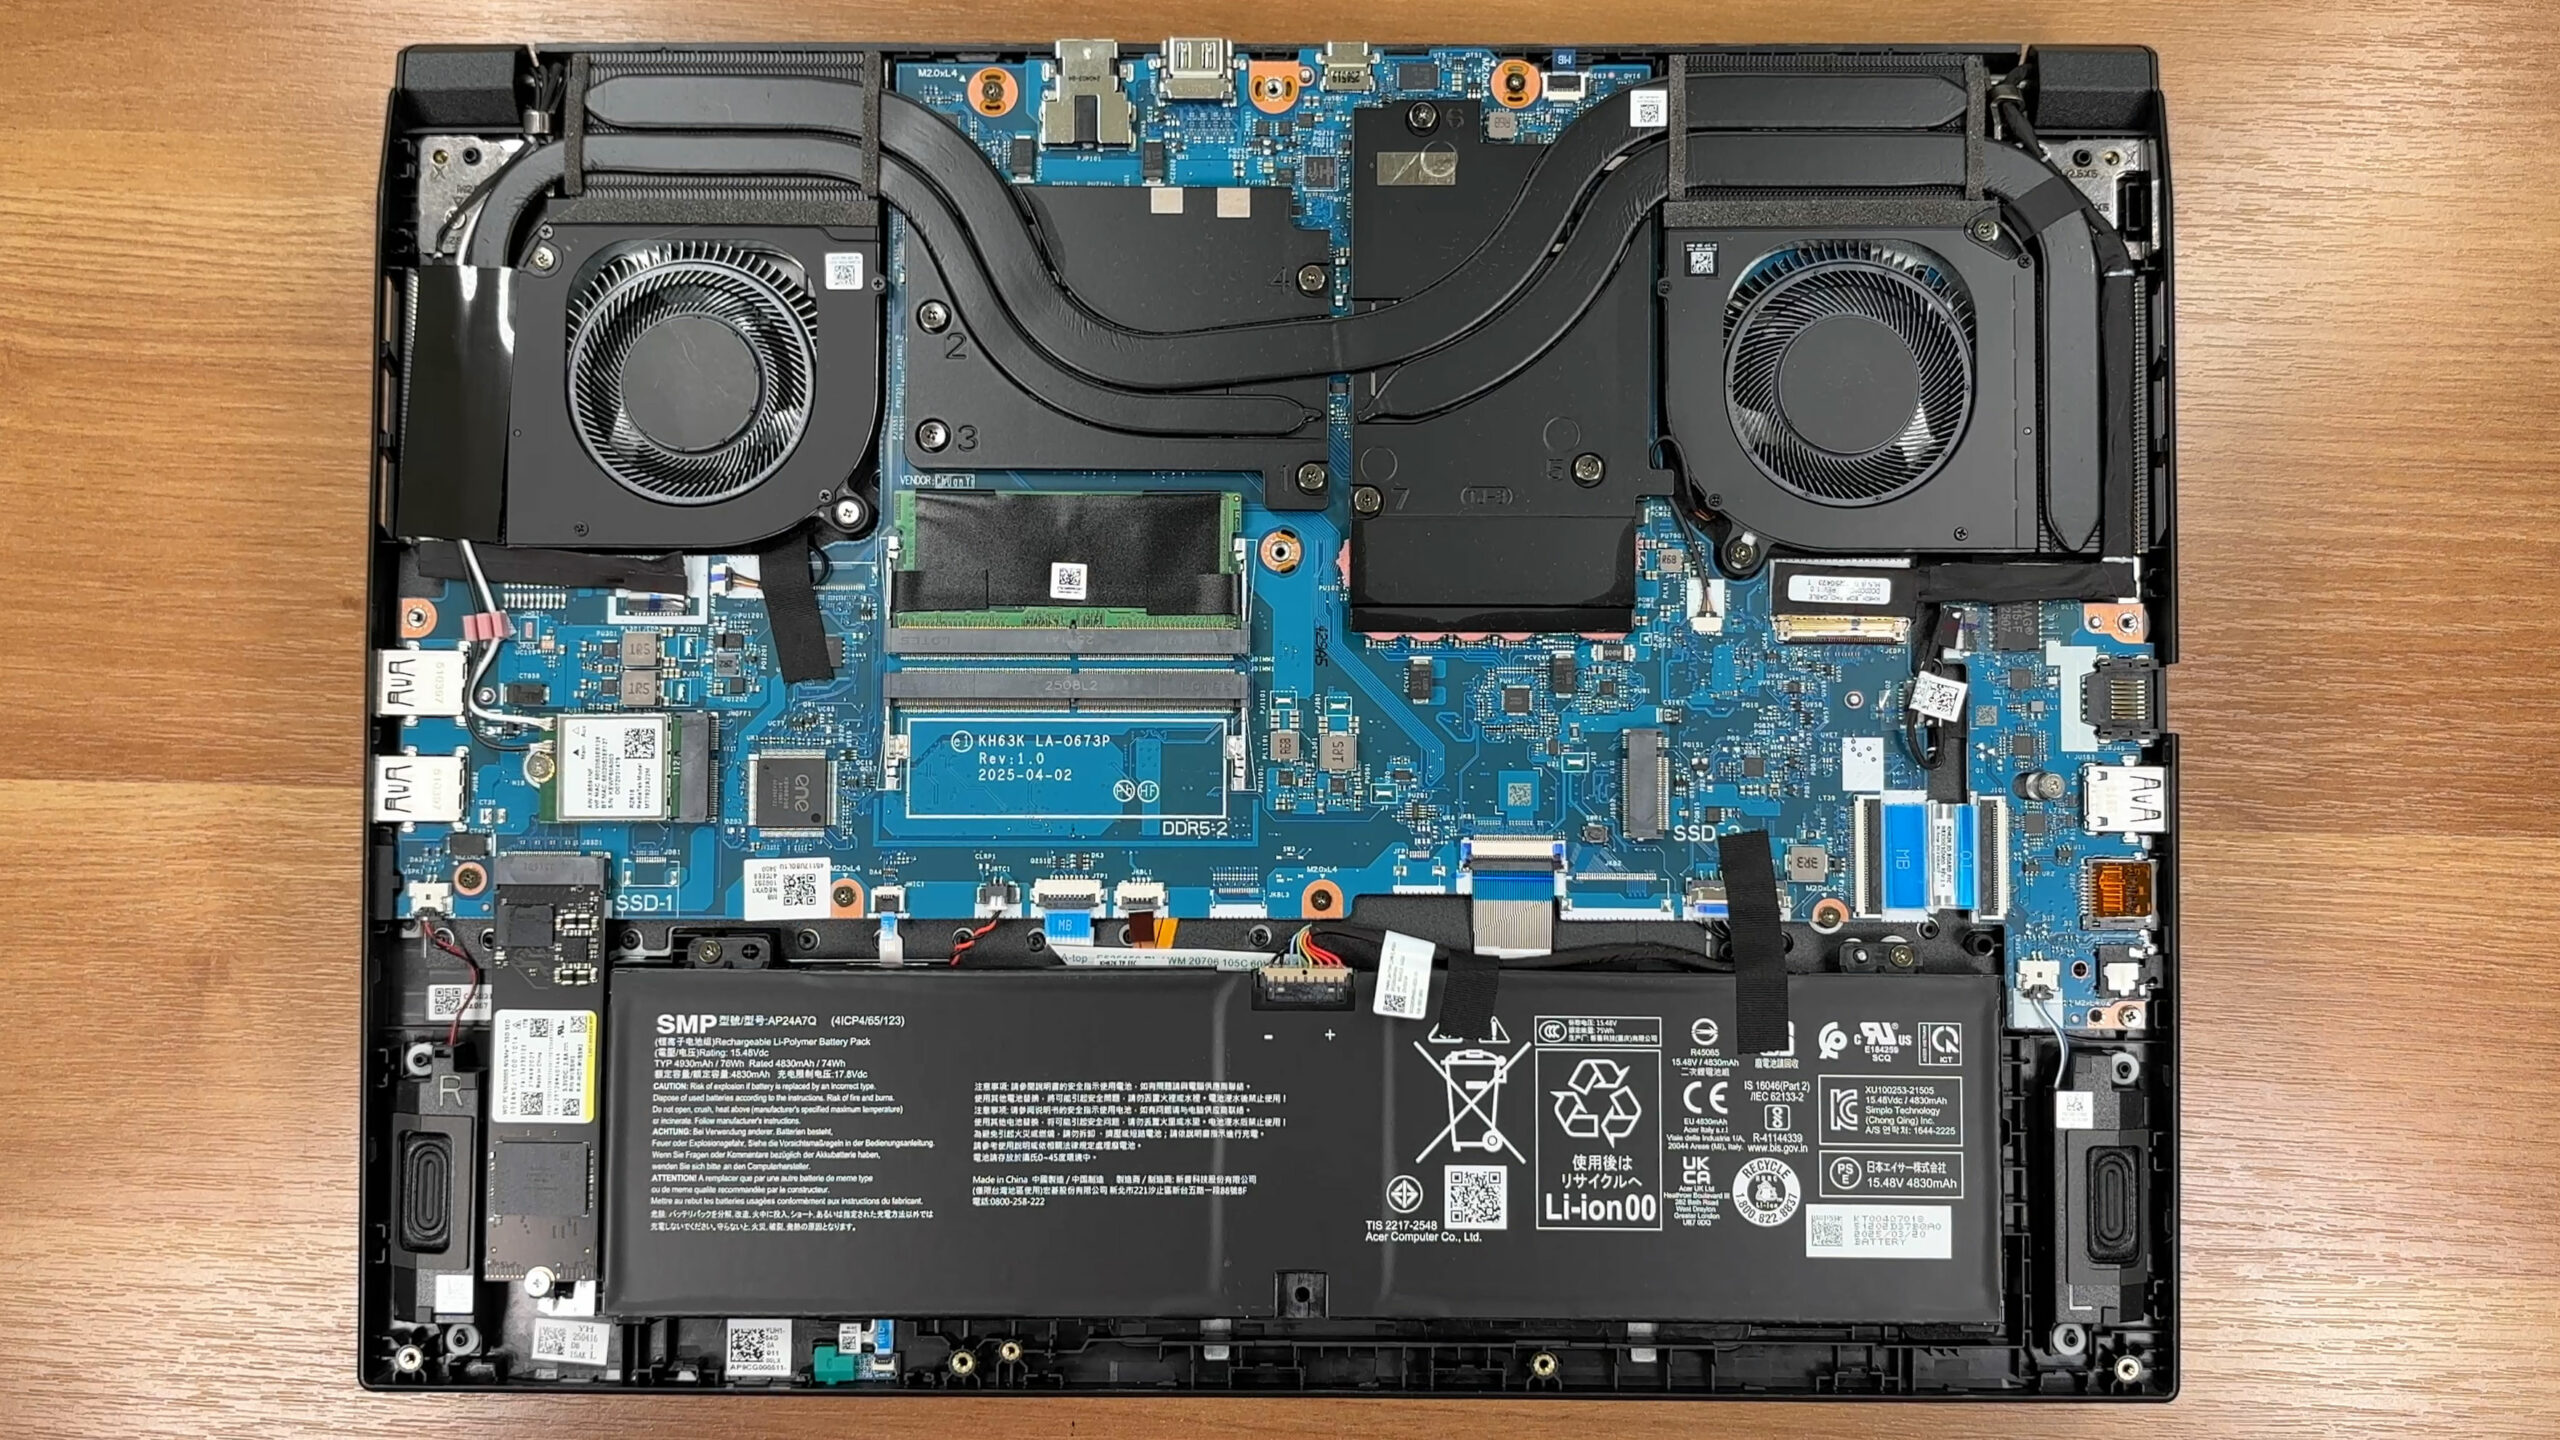
Battery
- Locate the 4-cell battery pack along the front edge of the chassis (model SMP AP24A7Q).
- Before working on any other component, gently disconnect the battery cable from the motherboard by pulling the connector straight out of its socket.
- Undo the screws that secure the battery to the chassis (a few Philips-head screws along the front edge).
- Lift the battery out of its bay.
- When installing a new pack, place it flat in the tray, align the screw holes, tighten the screws, and reconnect the cable firmly.
More info: The battery has a typical capacity of 76 Wh (74 Wh rated at 15.48 V) and is fully user-serviceable.
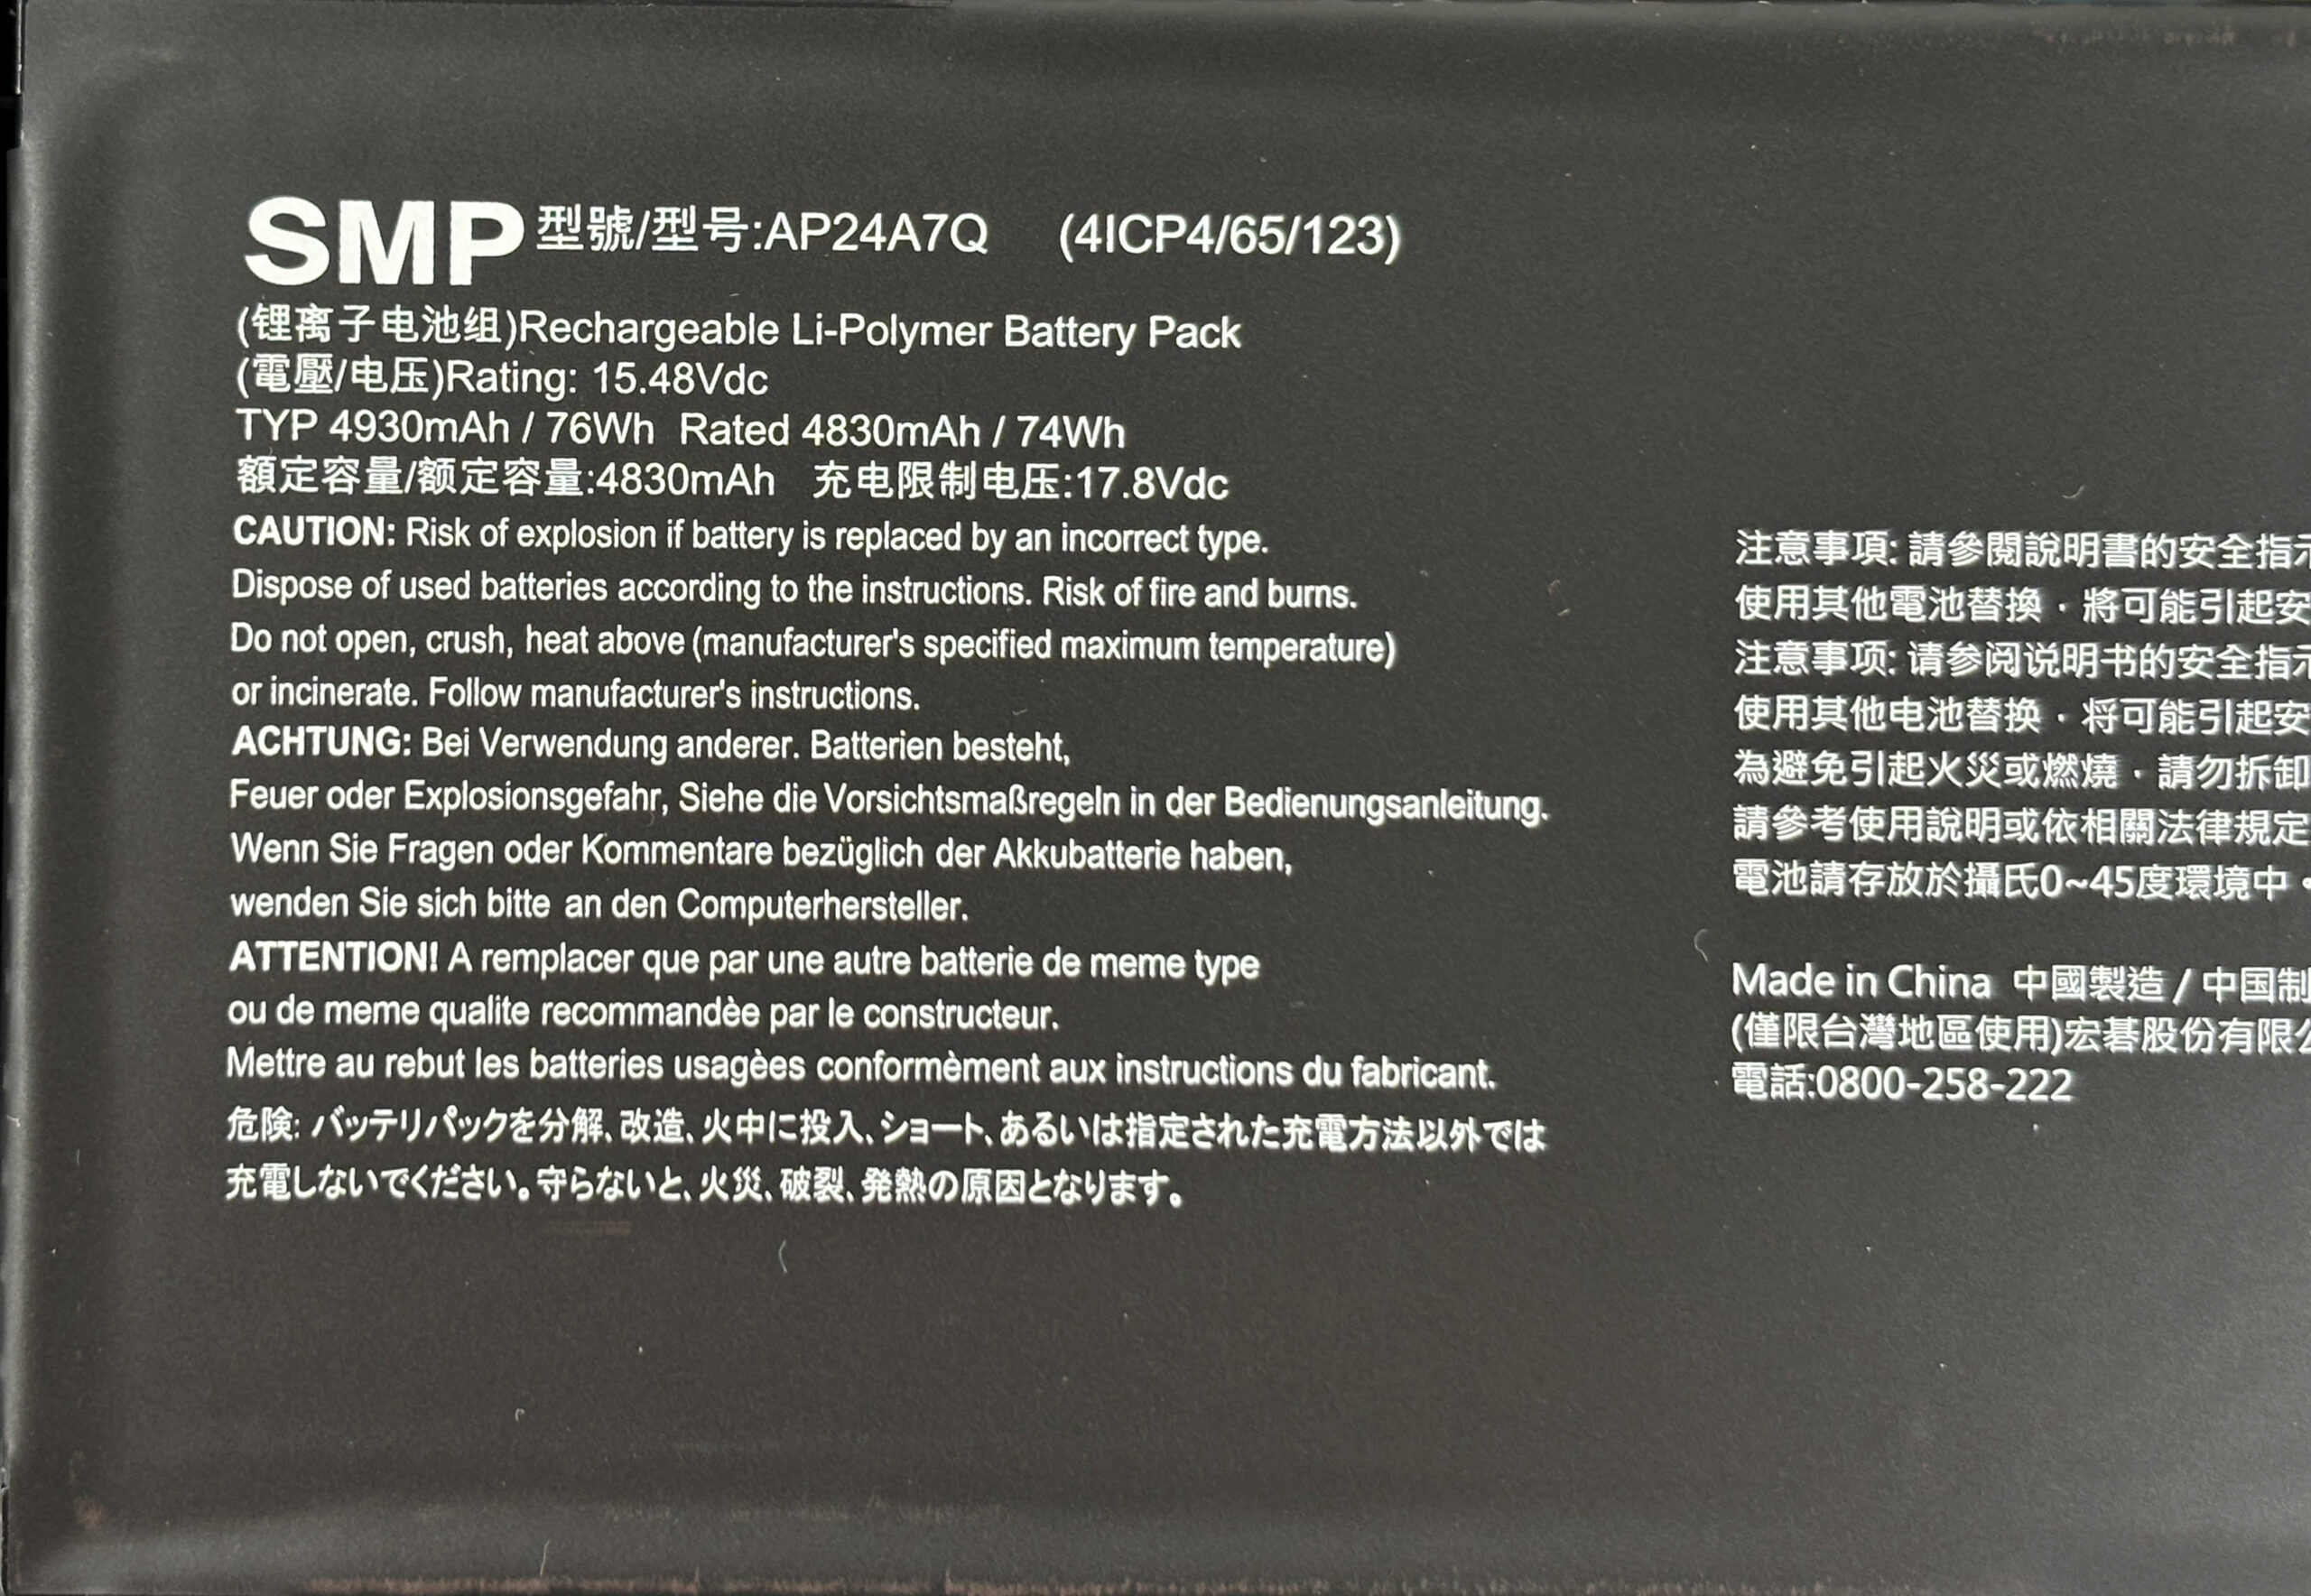
Memory (RAM) upgrade
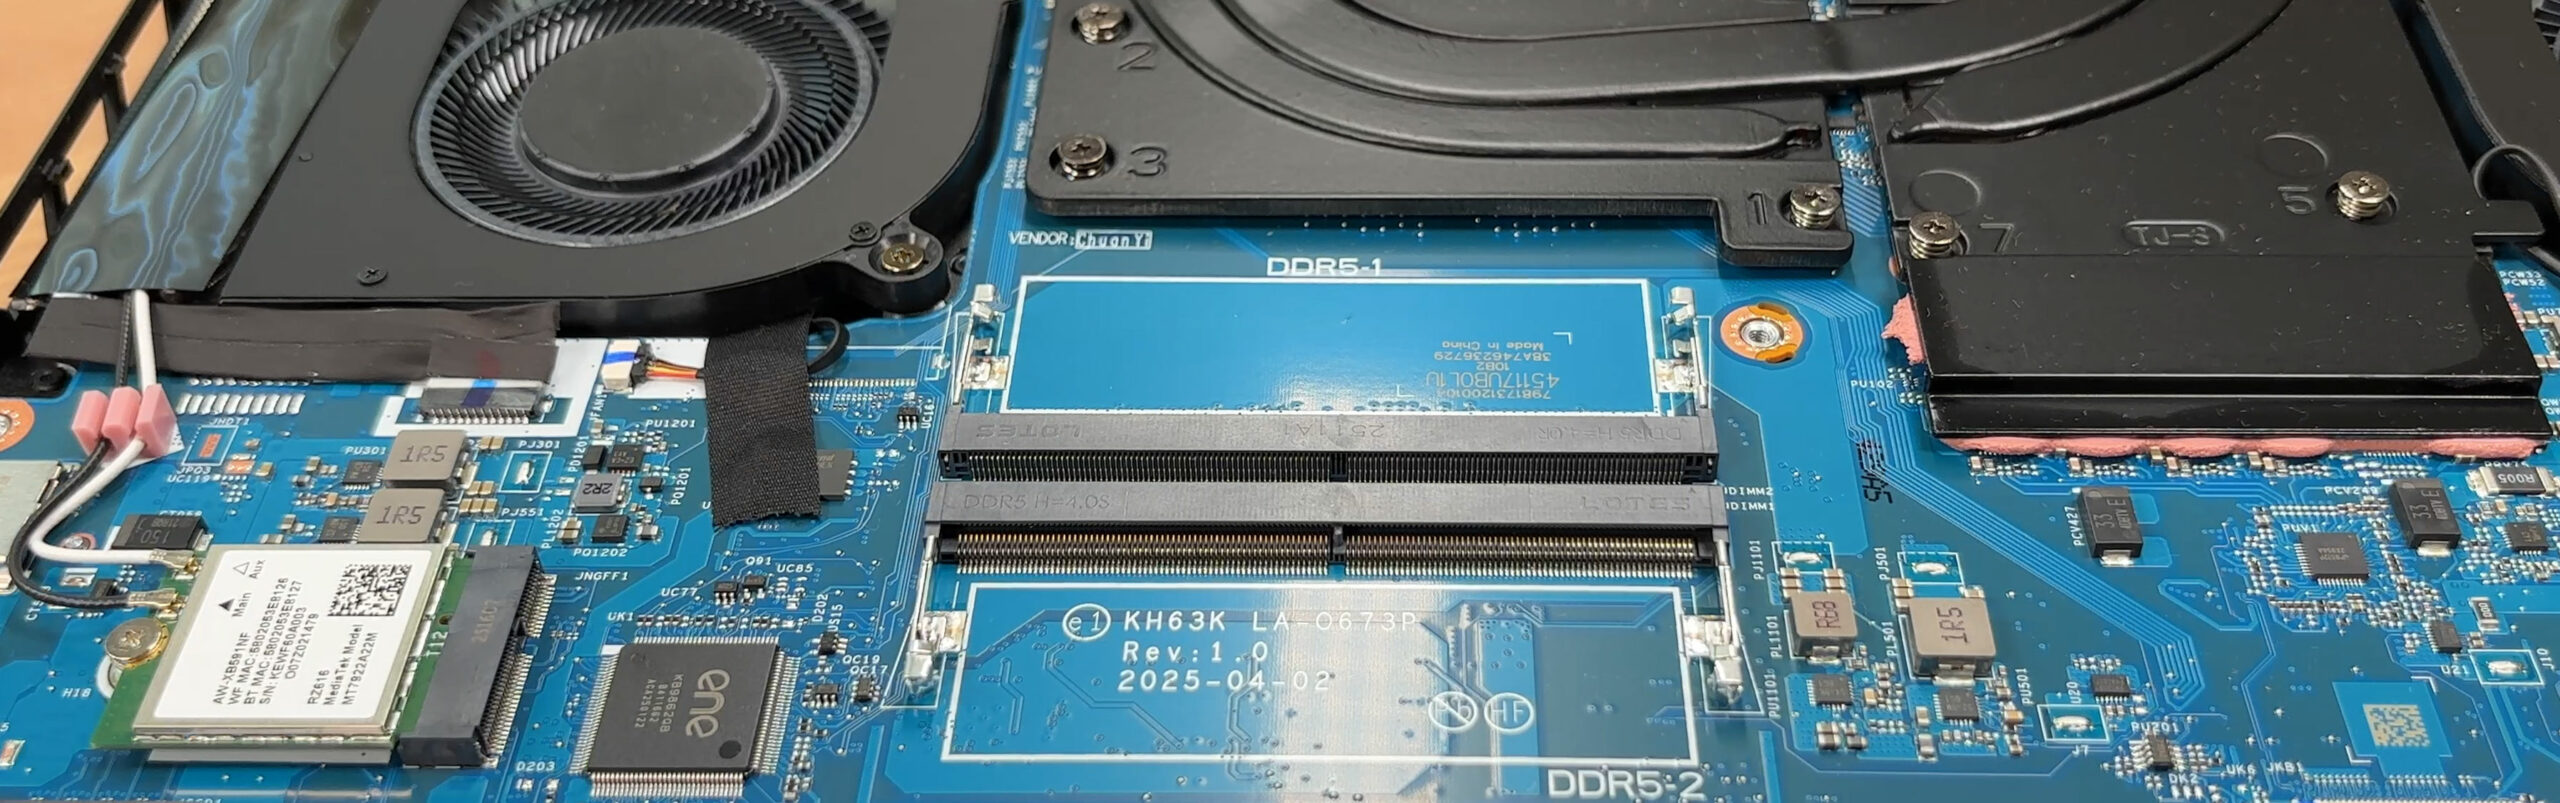
- In the center of the motherboard, locate the two DDR5 SO-DIMM slots between the cooling assembly and the battery.
- If any protective foam or light shielding is present, carefully lift it just enough to access the slots.
- To remove an existing module, push the metal retention clips on both sides outward. The RAM stick will pop up at an angle.
- Slide the module out along the same angle.
- Align the notch of the new DDR5 SO-DIMM with the key in the slot and insert it at about a 30° angle until fully seated.
- Press the module down gently until both clips click into place.
More info: The motherboard provides two standard DDR5 SO-DIMM slots with official support up to DDR5-5600 MT/s. There is no soldered RAM, so dual-channel is as simple as populating both slots.
You can buy DDR5 SO-DIMM RAM modules here: Buy from Amazon.com (#CommissionsEarned)
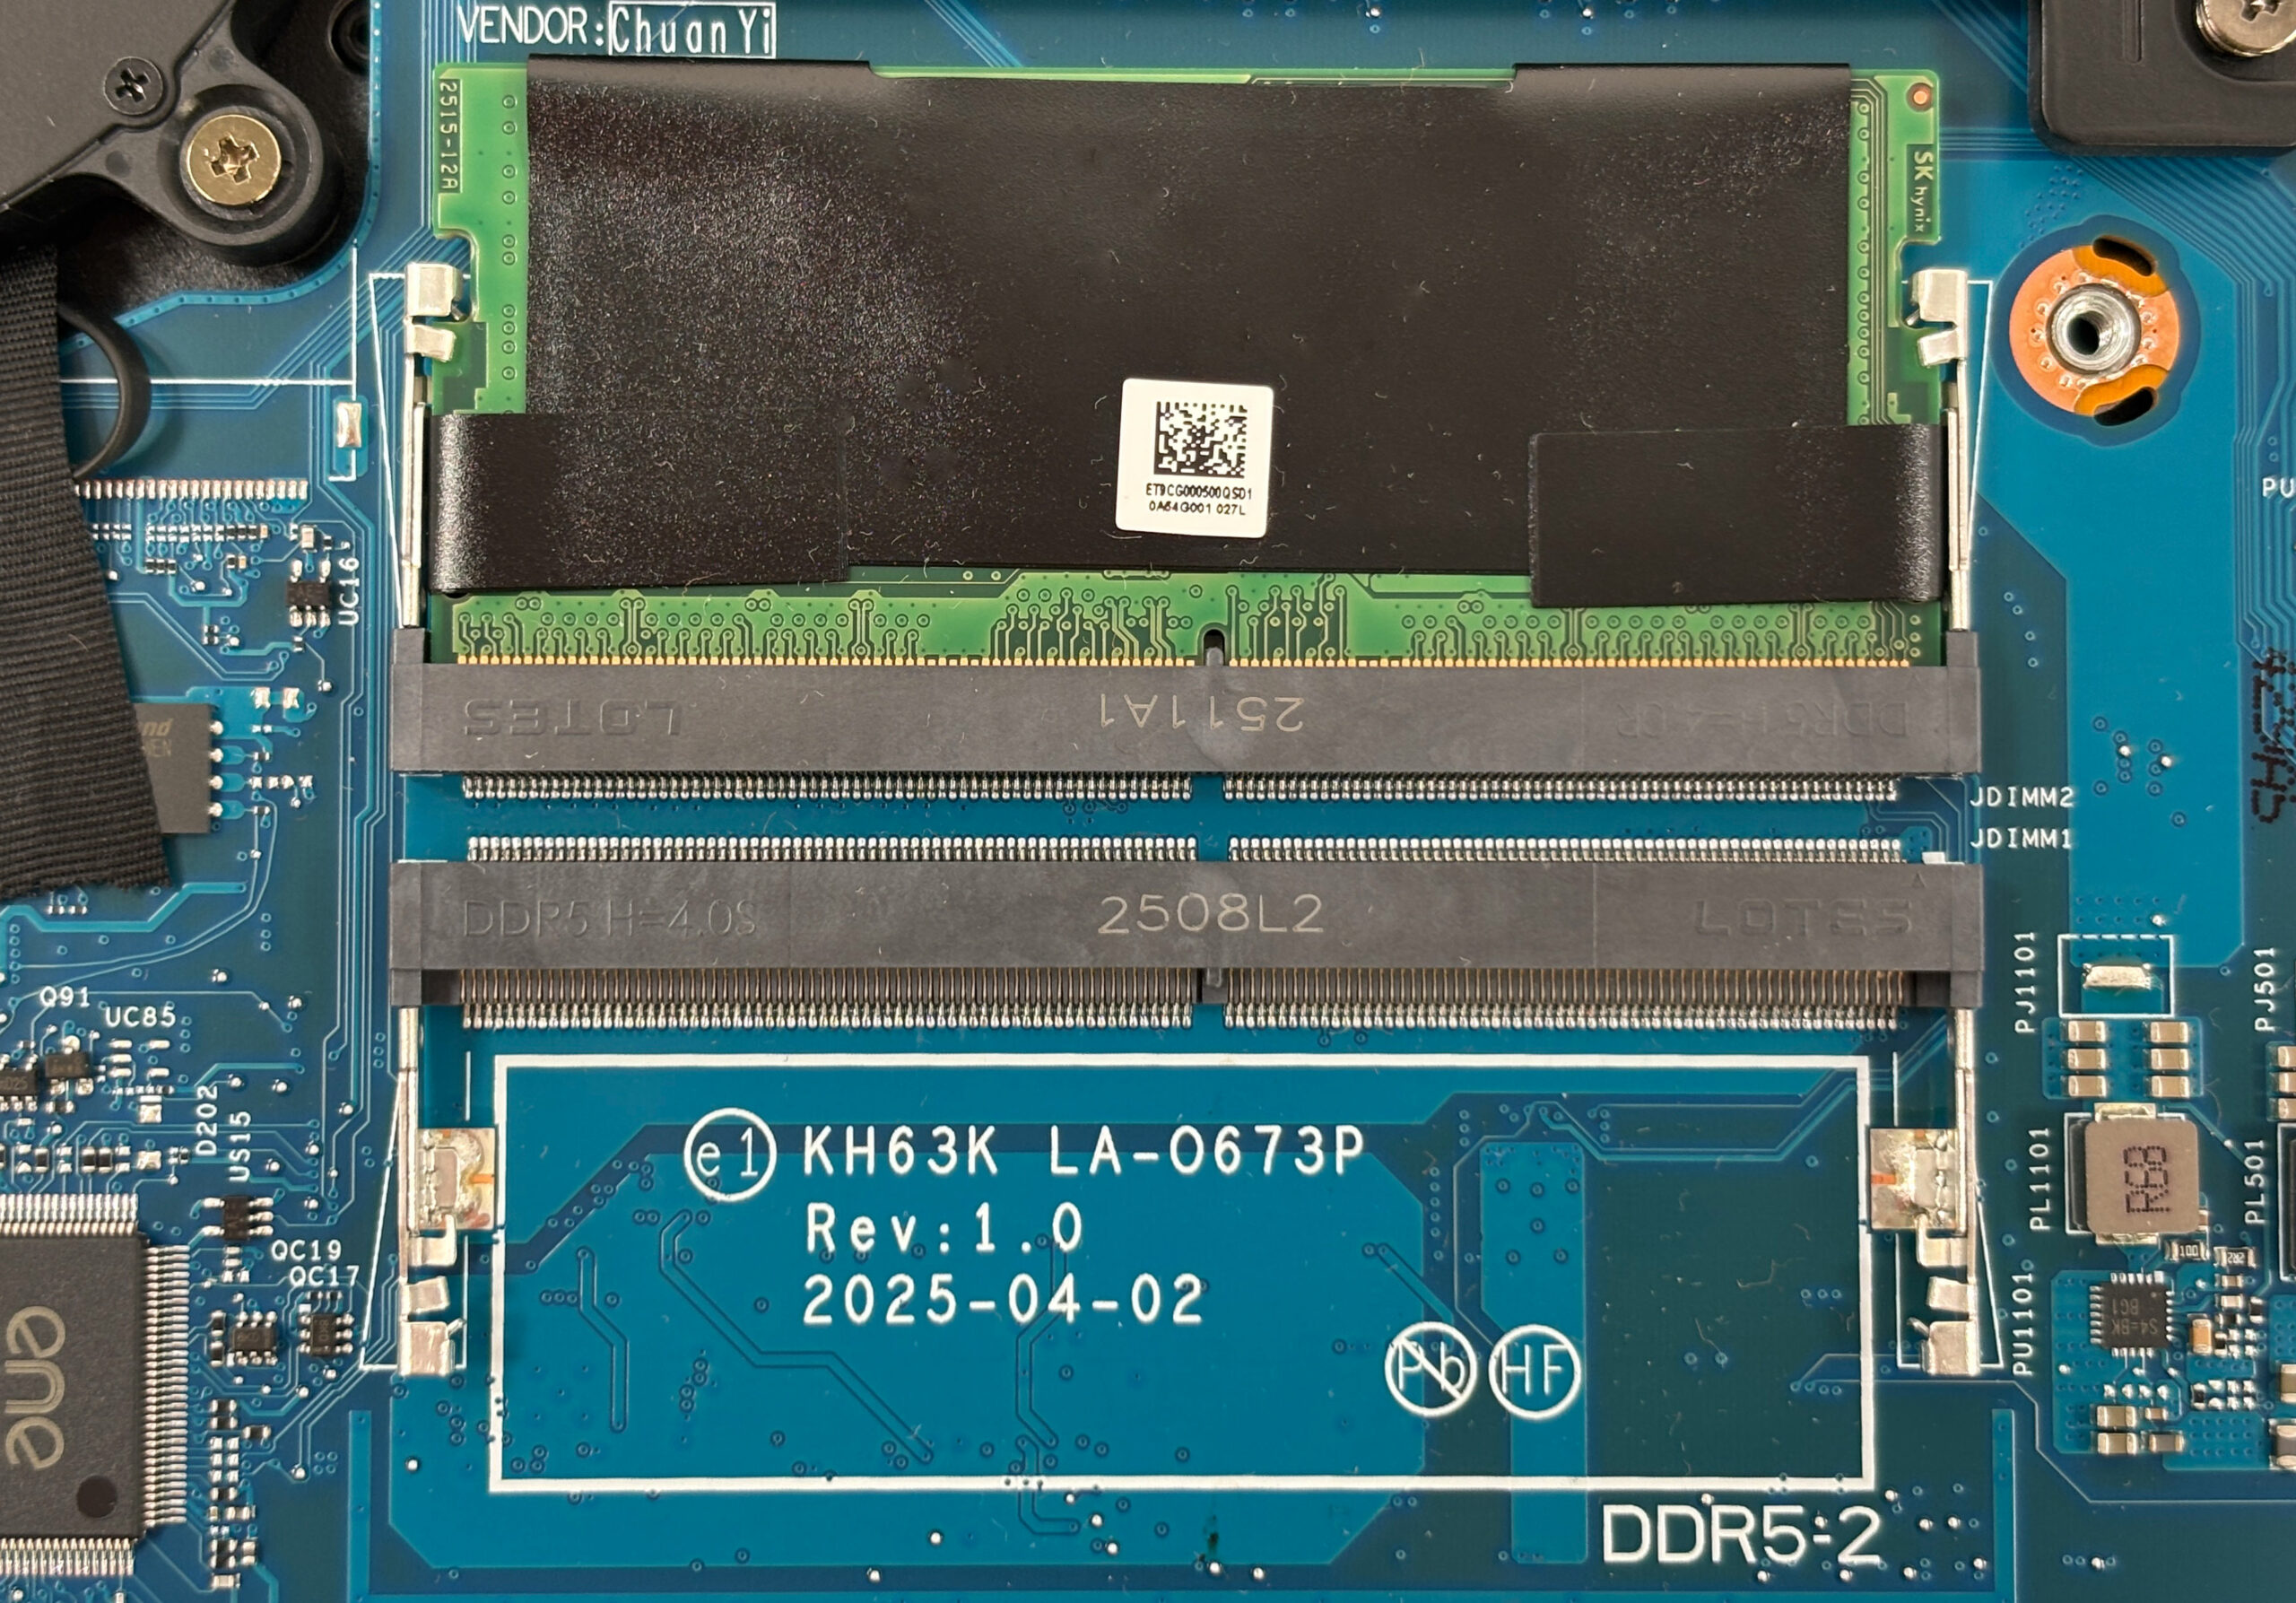
Storage upgrade
- Locate the two M.2 2280 slots in the central area of the motherboard. One is populated from the factory (e.g. Western Digital PC SN5000S 1 TB), while the second slot is left empty for upgrades.
- Gently peel back any EMI label or lift the thermal pad area just enough to access the mounting screw of the installed SSD.
- To remove an SSD:
- Undo the single mounting screw at the drive’s end.
- Let the SSD spring up slightly, then pull it out of the connector at an angle.
- To install a new SSD:
- Insert a 2280 PCIe Gen 4 NVMe SSD into the empty slot at about 30°.
- Press it down gently and secure it with the mounting screw.
- Reposition the thermal pad so it makes good contact with the SSD and the bottom cover.
More info: Both M.2 slots are wired for PCIe 4.0 x4 NVMe drives. There is no 2.5-inch bay, so all storage expansion happens via these two slots. Thermal pads on the SSD area press against the bottom panel to help spread heat during sustained transfers.
You can buy PCIe Gen 4 NVMe SSDs here: Buy from Amazon.com (#CommissionsEarned)
Hint: Don’t forget to check out our Top M.2 SSDs Performance Rankings for insights on the best storage options available.
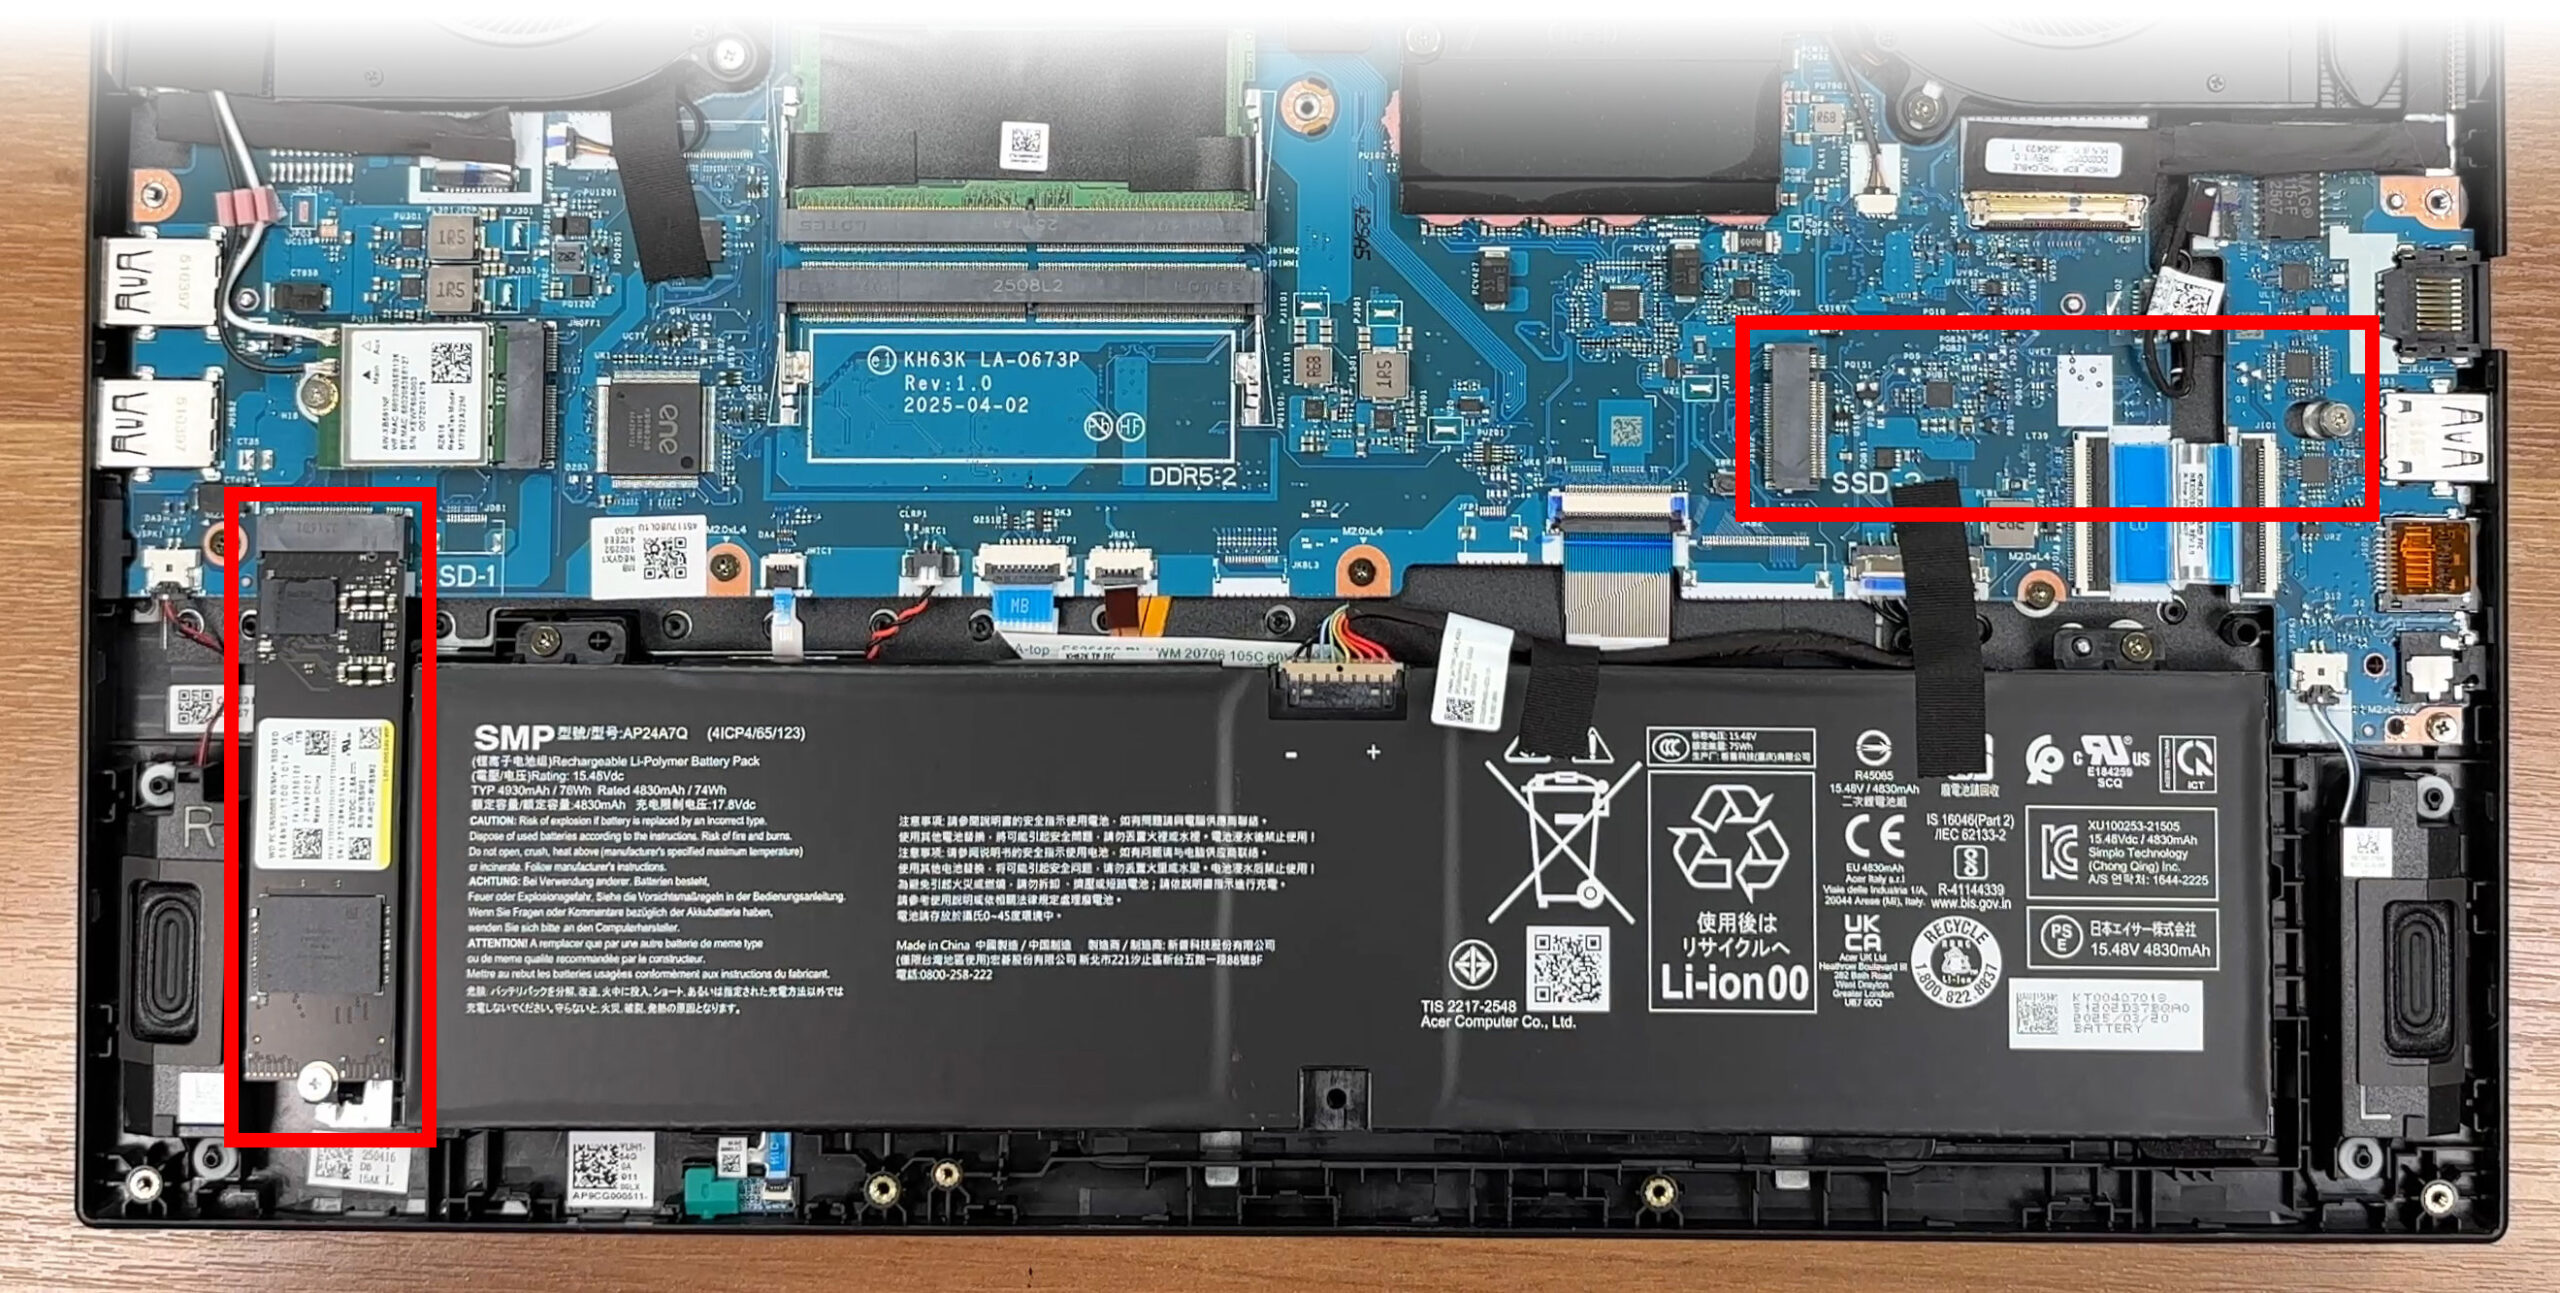
Wireless card
- Find the M.2 Key E wireless card (MediaTek MT7922A22M) near one of the corners of the motherboard.
- Note the routing of the two antenna leads (Main and Aux) and gently lift them straight up from their posts to disconnect.
- Undo the single screw that secures the Wi-Fi card.
- Allow the card to tilt up, then slide it out of the slot.
- Install the replacement module by reversing these steps and snap the antenna connectors back in place.
More info: The Wi-Fi card supports Wi-Fi 6E and Bluetooth 5.2 and can be upgraded later if you need a newer standard.
Cooling system
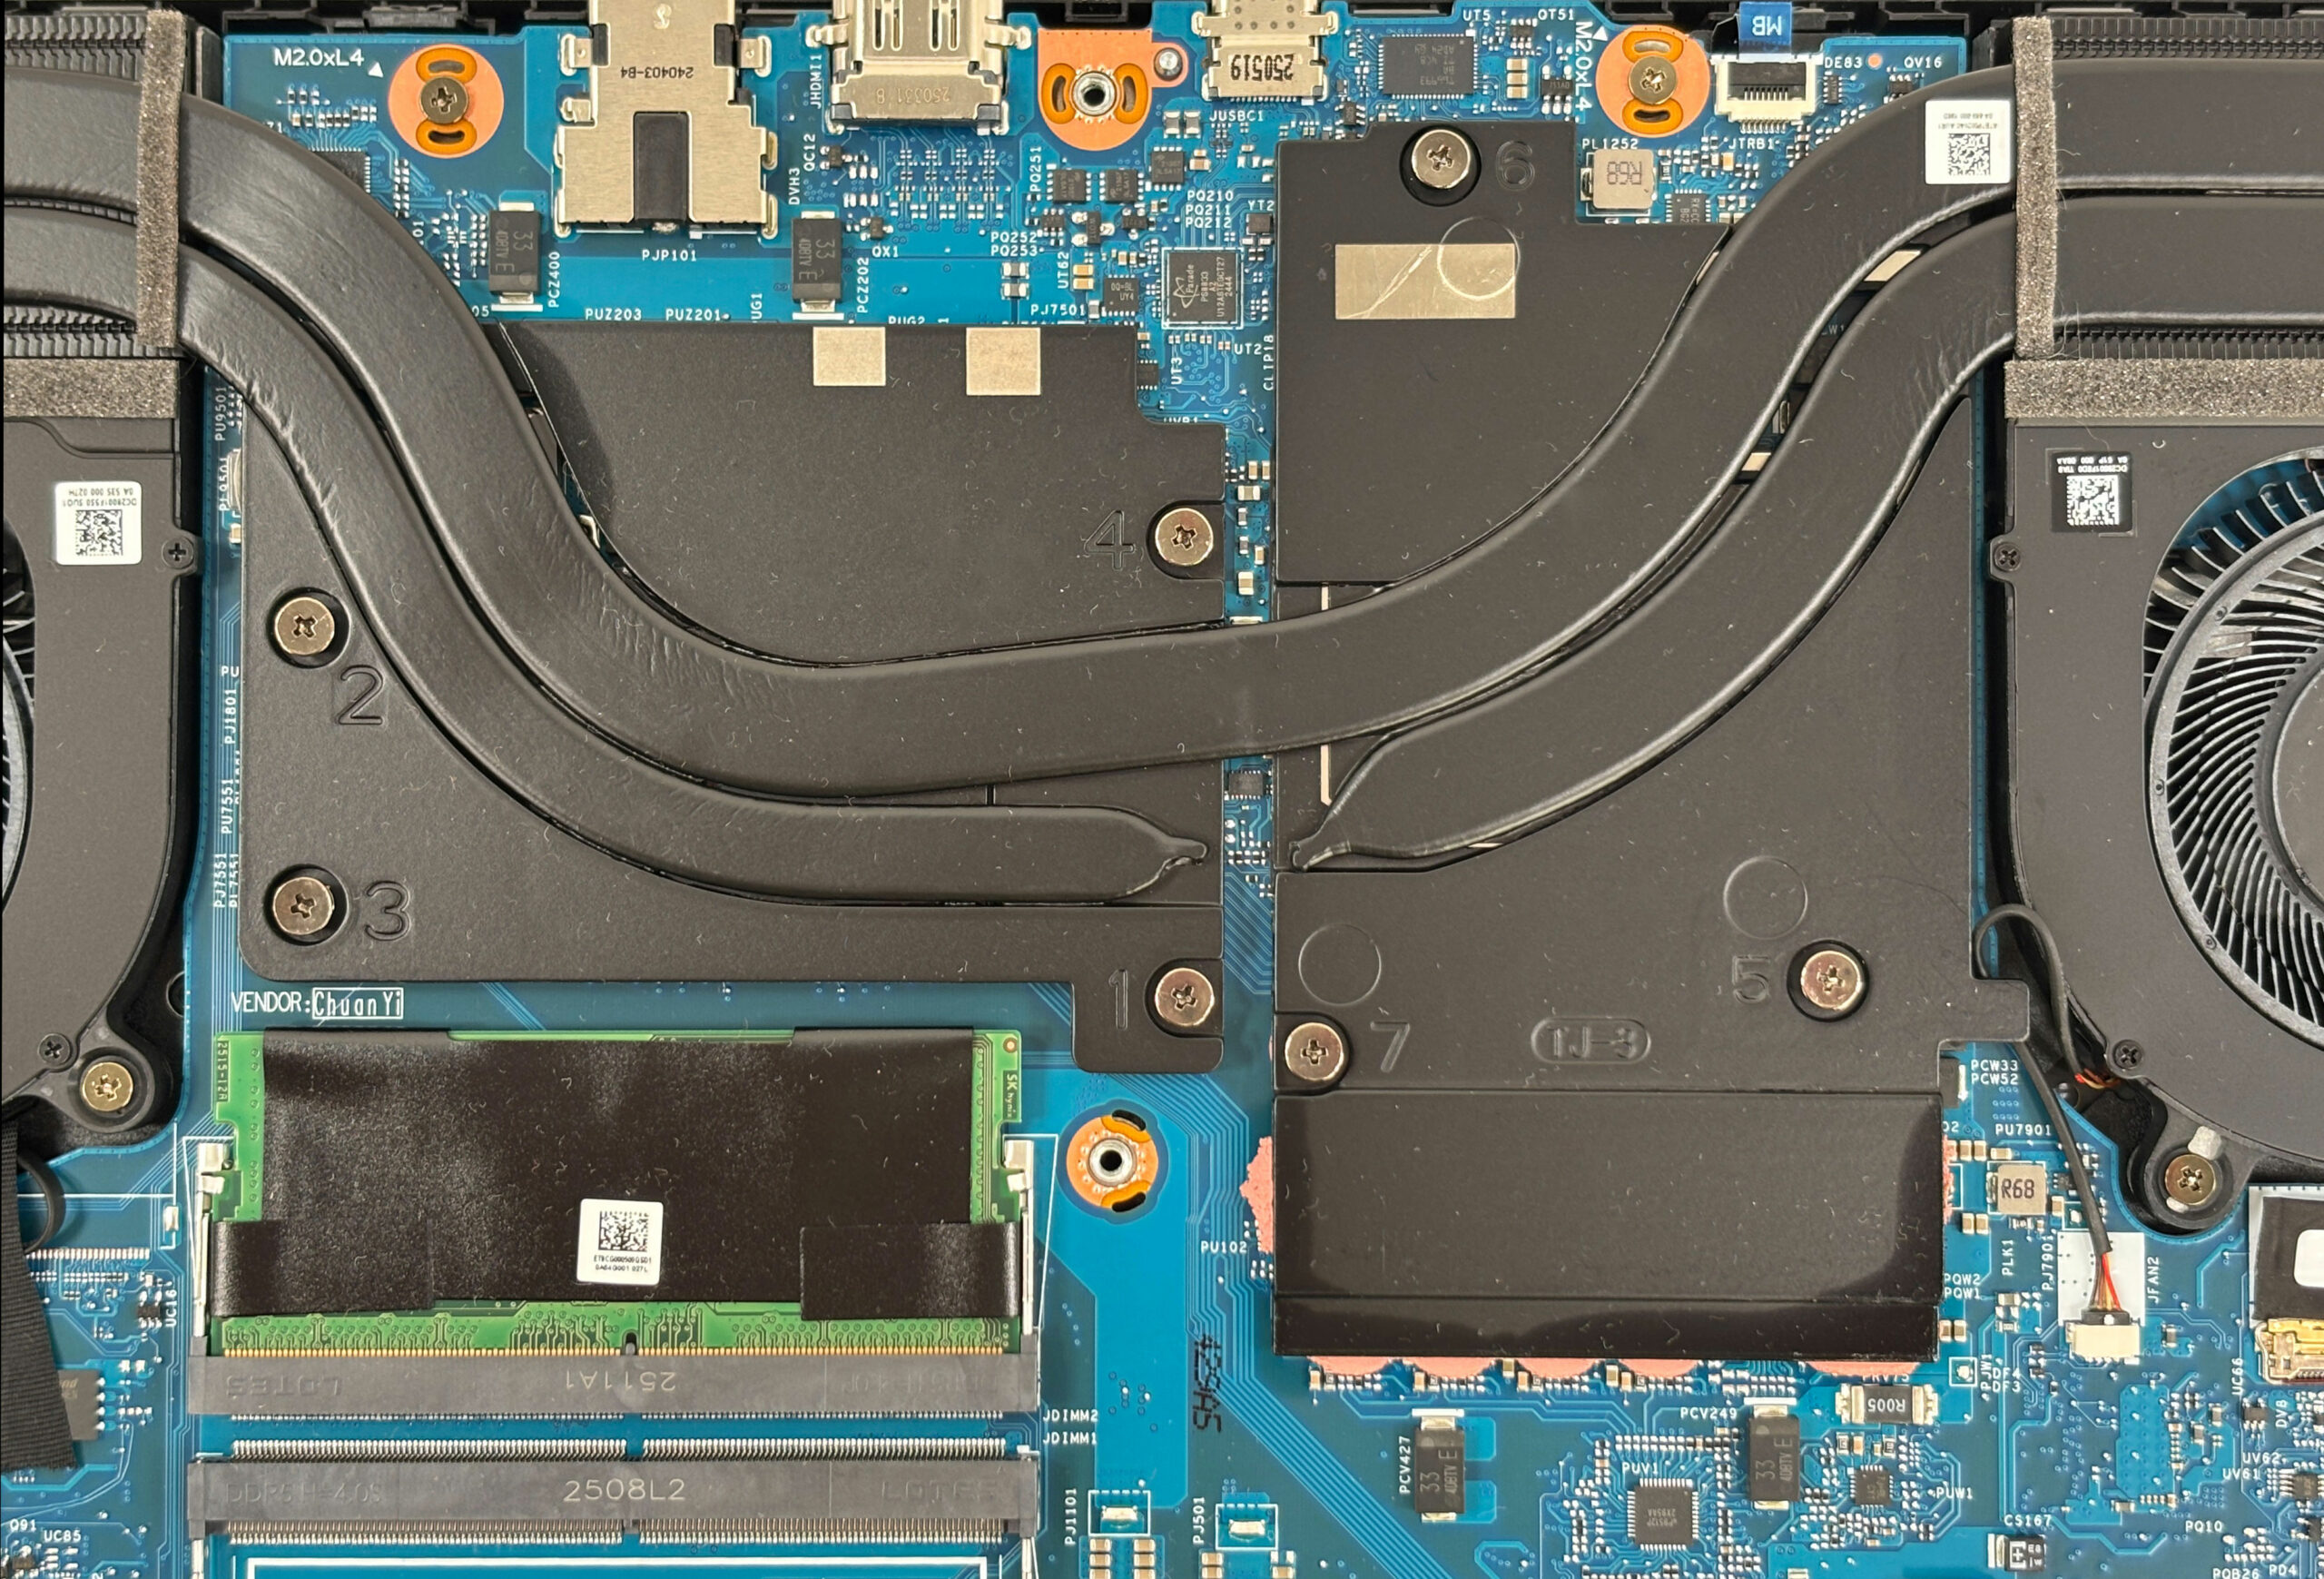
- At the top of the chassis, you’ll find the cooling assembly: two centrifugal fans in the corners and several shared copper heat pipes spanning the CPU and GPU.
- Foam strips and thermal pads around the heat pipes and fin stacks help guide airflow and cool nearby components such as VRMs and memory.
- For routine maintenance:
- Hold the fan blades in place and blow compressed air through the heatsink fins from the inside out to remove dust.
- Clean visible dust from the fan intakes on the bottom cover as well.
- If you intend to repaste the CPU and GPU, follow the numbered screw pattern on the heatsink (if present) when loosening and tightening, and apply fresh thermal paste sparingly.
More info: The dual-fan, multi-pipe design is typical for mid-range gaming laptops and should perform well as long as the fins and intakes are kept free of dust.
Summary: Overall, maintenance is beginner-friendly thanks to the standard screw layout, easy bottom cover removal, and wide-open access to memory, storage, and the battery.
Acer Nitro V 16 AI (ANV16-42) in-depth review
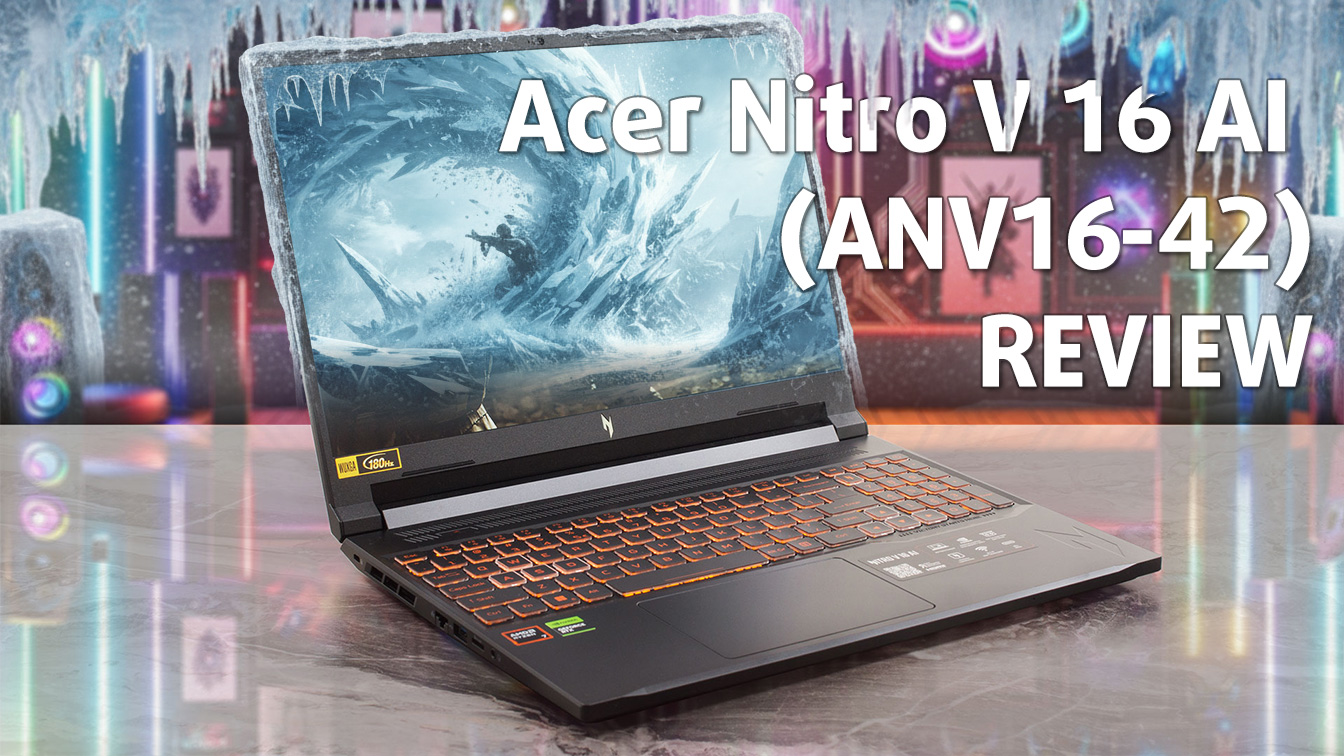
In the relentless race for the highest benchmark scores, many gaming laptops push their components to the absolute thermal limit. The Acer Nitro V 16 AI (ANV16-42) takes a different, smarter path. Instead of chasing a few extra points on a chart, Acer has engineered a machine that prioritizes what truly matters for a great long-term gaming experience: thermal stability, reliability, and impressive battery life. The result is a surprisingly balanced and responsible powerhouse that runs dramatically cooler than its direct competitors. But to achieve this cool-headed performance, there is one[...]
Pros
- Exceptional CPU thermal management keeps the system cool and stable
- Great battery life for a gaming laptop
- Fantastic upgradeability with two RAM and two M.2 slots
- PWM-free screen with a fast response time is great for the eyes
- Good port selection including a versatile USB4 port
- Solid and elegant design
Cons
- Base model display has very poor color coverage (50% sRGB)
- CPU performance is slightly lower than direct competitors
- No physical camera shutter or fingerprint reader
 Author: Dimitar Stalev

![[August 2026] Amazon Italy: Top 10 Best-Selling Laptops – Apple MacBook Neo Claims the Crown as Budget and Mid-Range Windows Machines Dominate Volume](https://laptopmedia.com/wp-content/uploads/2026/09/Best-Selling-Laptops-IT-Top-10-400x225.jpg)
![[August 2026] Amazon Italy: Top 7 Best-Selling Gaming Laptops – ASUS V16 Claims the #1 Spot Amid Strong Mid-Range Demand](https://laptopmedia.com/wp-content/uploads/2026/09/Best-Selling-Gaming-Laptops-IT-Top-10-400x225.jpg)
![[August 2026] Best-Selling Laptop Brands on Amazon Italy – Lenovo Dominates Market Share and Revenue Leadership](https://laptopmedia.com/wp-content/uploads/2026/09/IT-Best-Brands-400x225.jpg)
![[August 2026] Amazon India: Top 10 Best-Selling Laptops – Apple MacBook Neo Dominates the Charts with Massive Sales Lead](https://laptopmedia.com/wp-content/uploads/2026/09/Best-Selling-Laptops-IN-Top-10-400x225.jpg)
![[August 2026] Amazon India: Top 10 Best-Selling Gaming Laptops – HP Victus 15 Dominates the Market with Massive Unit Lead](https://laptopmedia.com/wp-content/uploads/2026/09/Best-Selling-Gaming-Laptops-IN-Top-10-400x225.jpg)