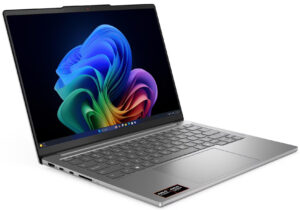
How to open Lenovo IdeaPad Pro 5 14″ Gen 10 (14AKP10) – disassembly and upgrade options
Before you start: Shut the laptop down, unplug the charger and peripherals, and hold the power button for a few seconds to discharge residual power. Work on a clean, non-conductive surface and, if possible, use an anti-static wrist strap.
Opening the bottom panel
- Place the laptop upside down with the rear vents facing away from you.
- Using a Torx T5 screwdriver, undo the nine screws that secure the aluminium bottom panel.
- Insert a thin plastic pry tool near one of the top corners between the panel and the chassis.
- Carefully twist the tool to release the first clip, then work your way along the edges. Some clips can be stubborn, so take your time and apply steady, even pressure.
- Once all clips are released, lift the bottom panel away and set it aside.
Caution: Do not use metal tools on the painted edges to avoid scratches and deformation of the aluminium cover.
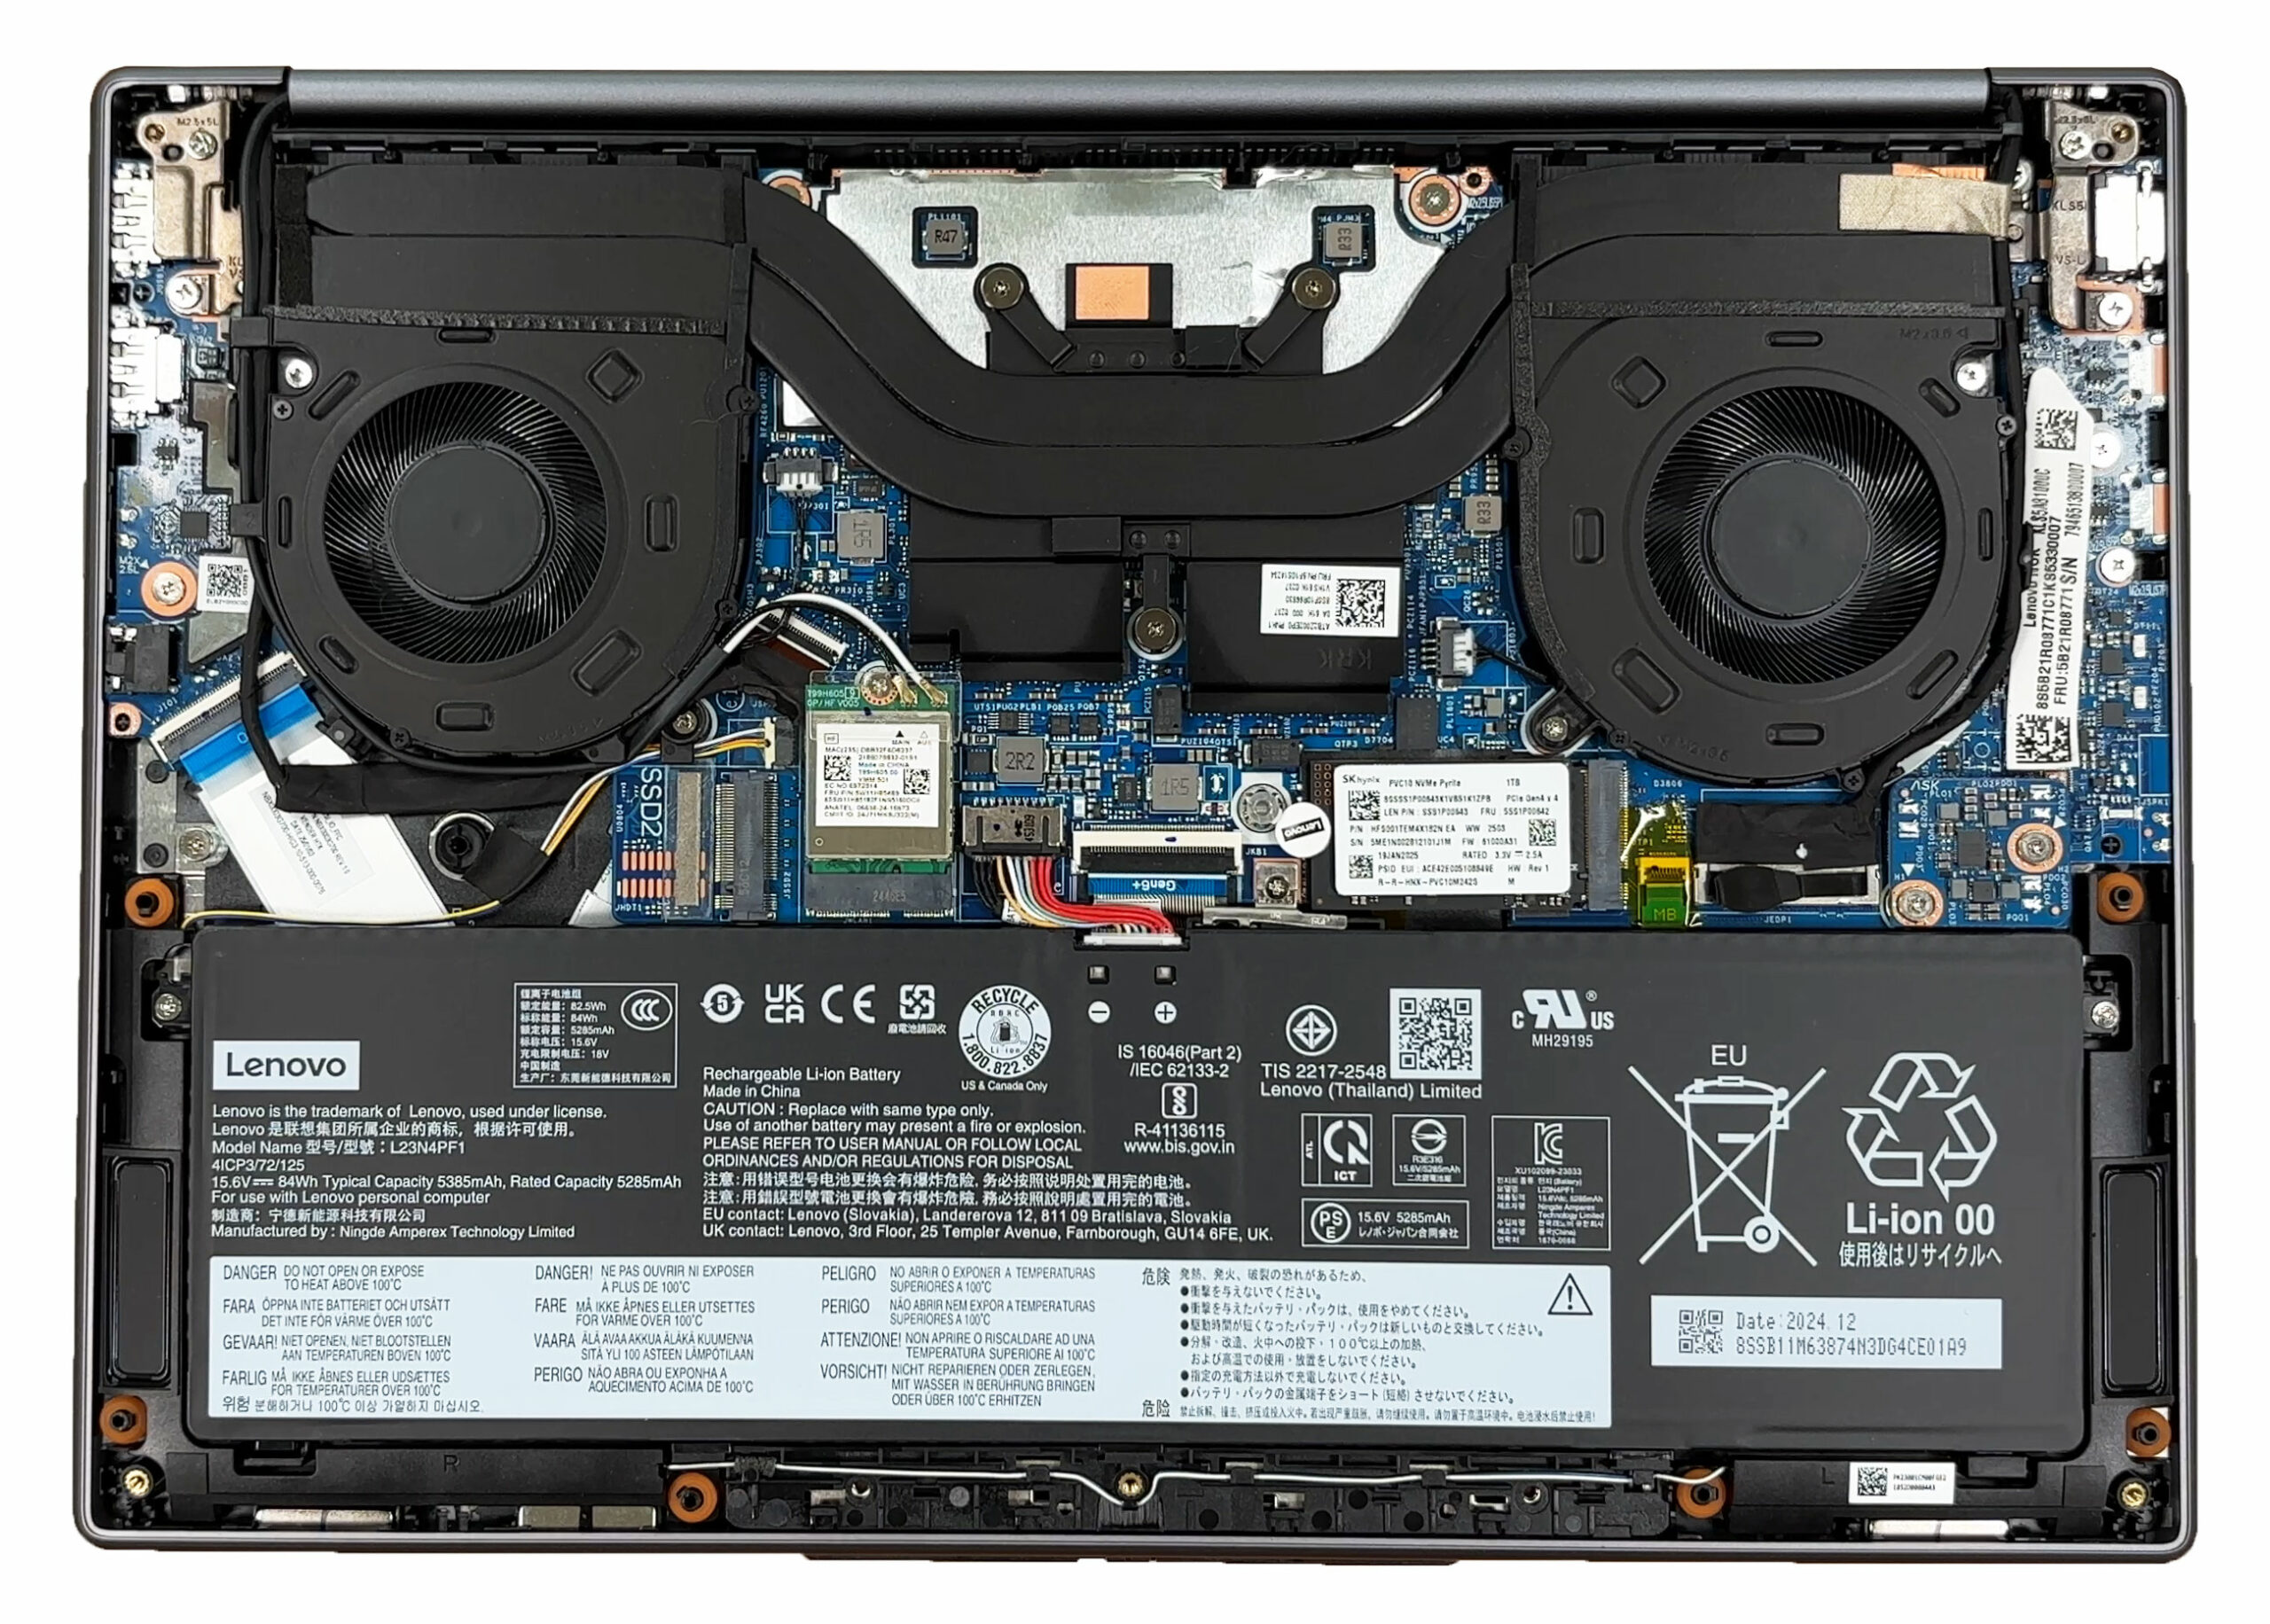
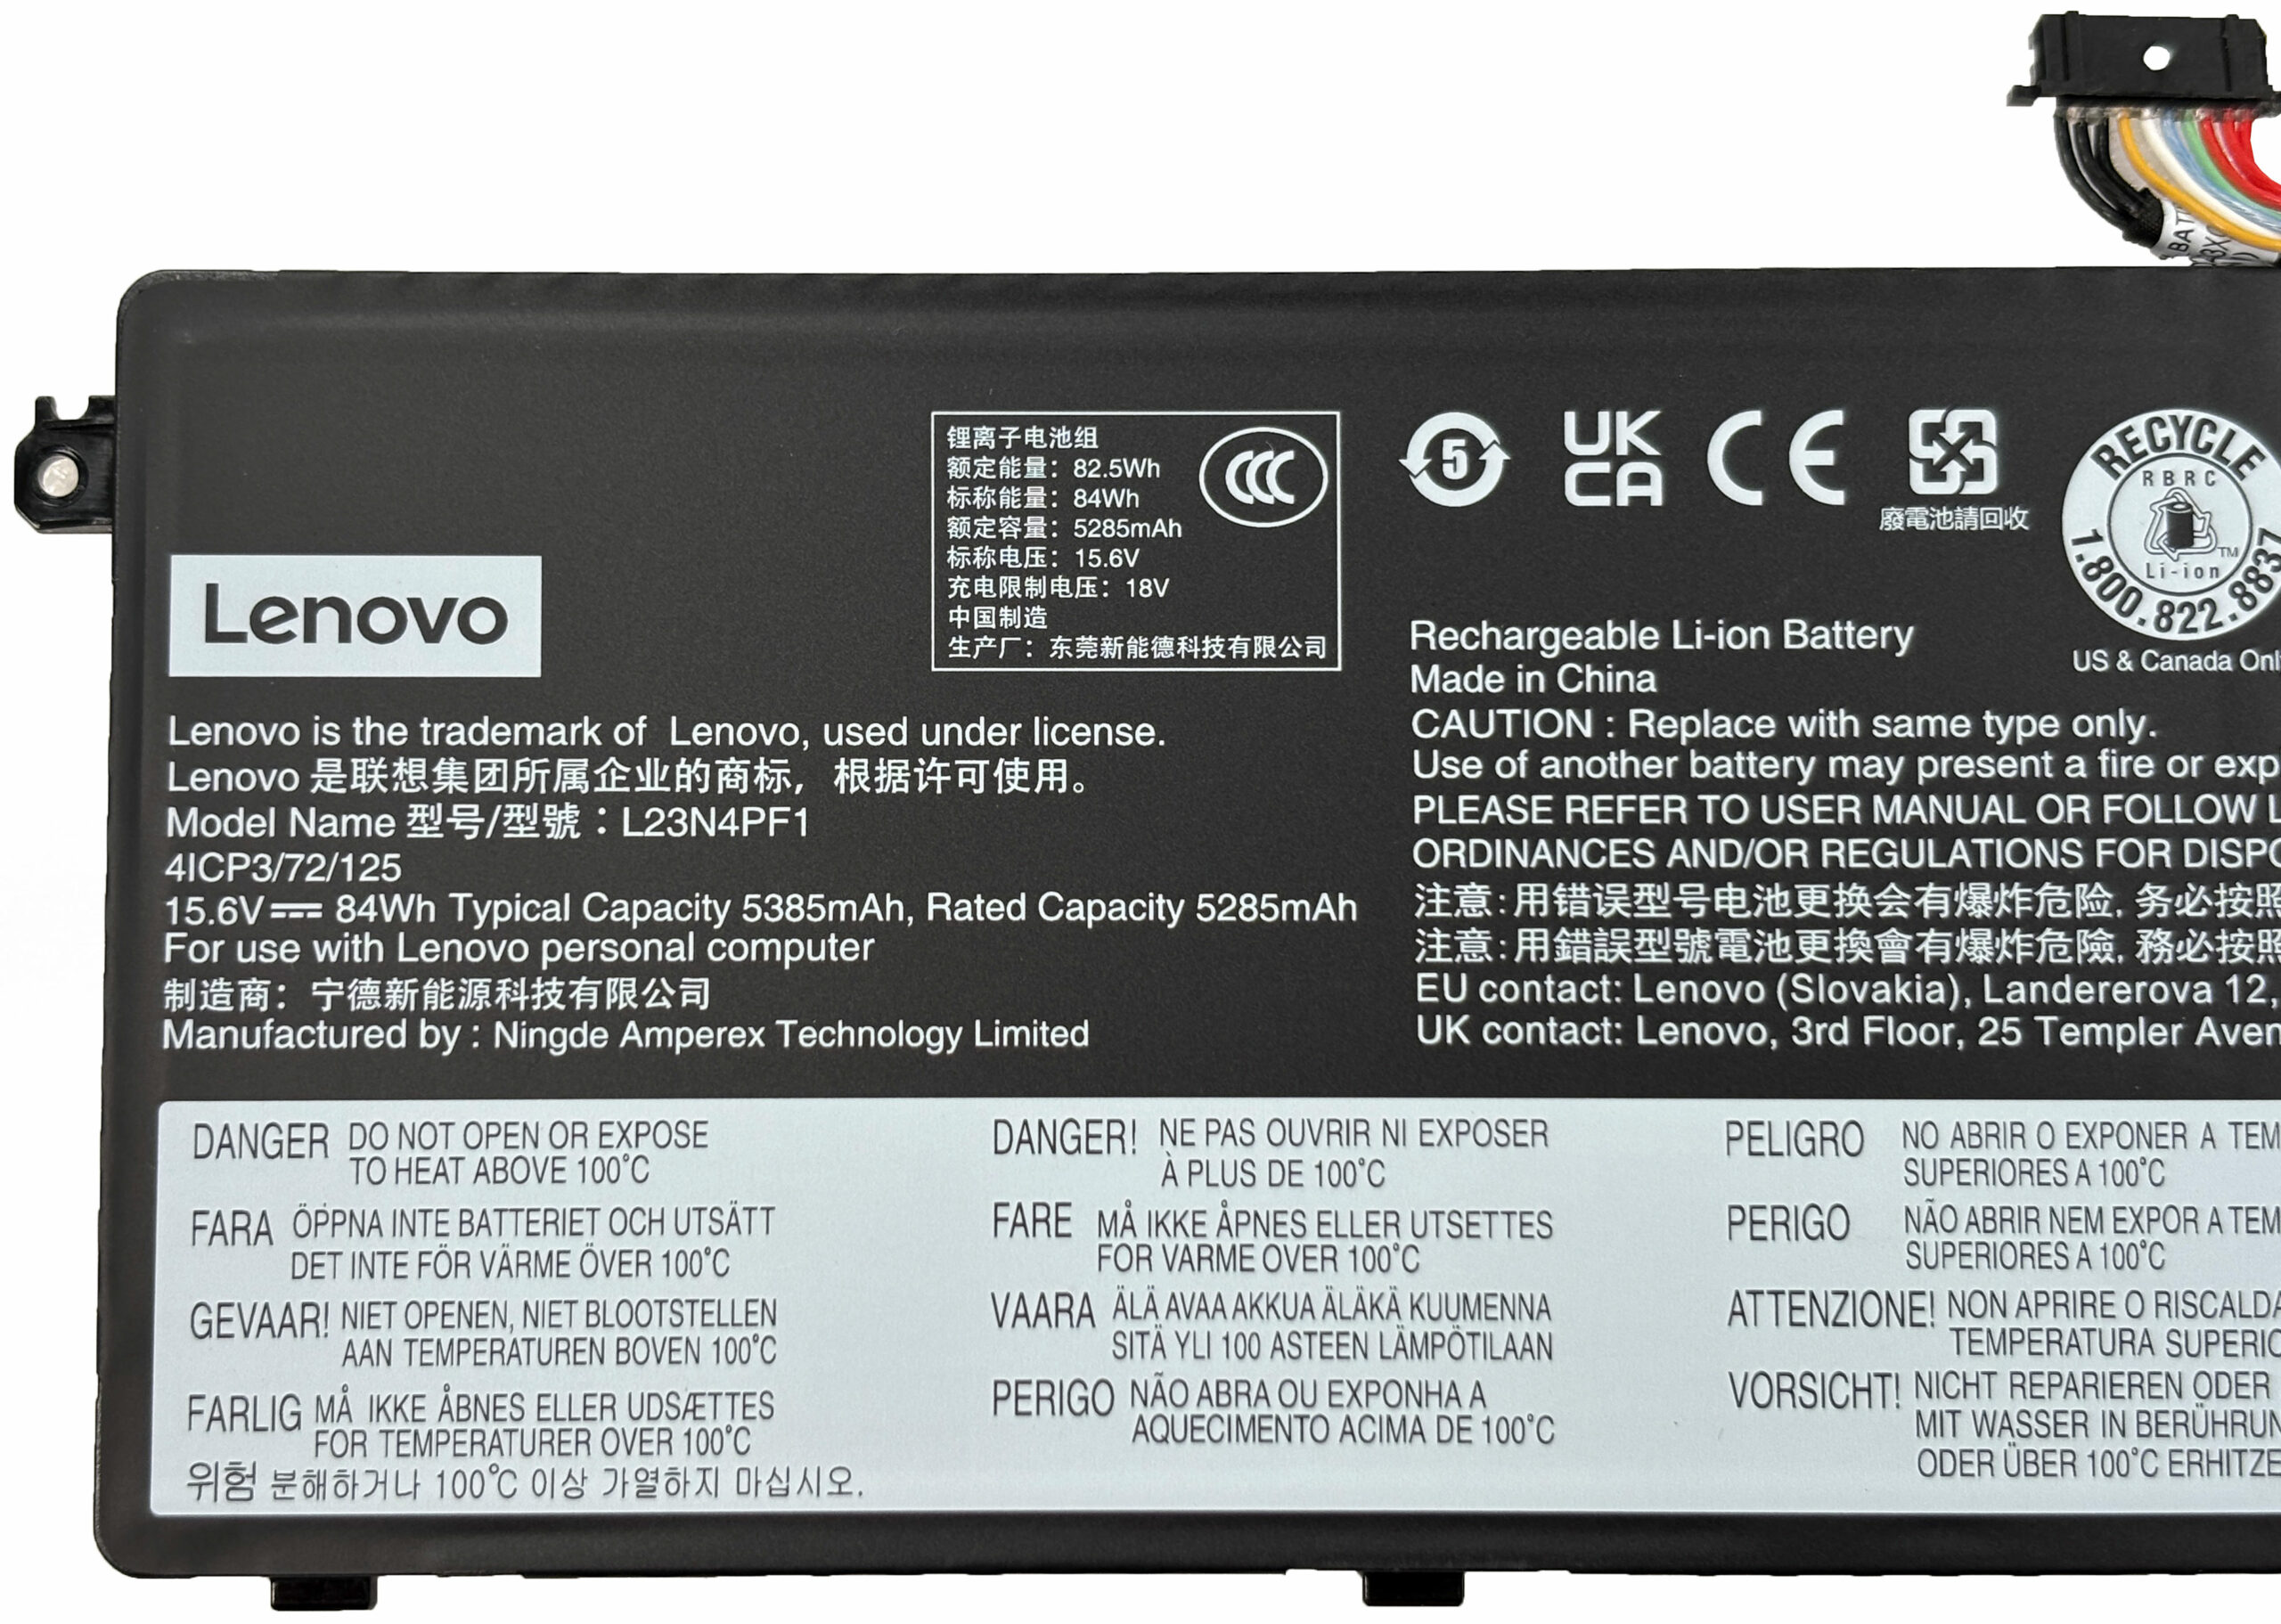
Battery removal and replacement
- Locate the large 84Wh Li-ion battery pack that occupies the lower half of the chassis.
- Find the battery connector and gently pull the pull-tab straight out of its socket on the motherboard to disconnect power.
- Undo the three Phillips-head screws that secure the battery to the chassis.
- Lift the battery out of the bay, taking care not to snag any nearby speaker or Wi-Fi antenna cables.
- To install a replacement, position the new battery in place, reinstall the three screws, and firmly reconnect the battery cable so the connector is fully seated.
Note: The 84Wh pack supports Lenovo Rapid Charge Express, so keeping it in good condition is important if you rely on fast top-ups.
Memory (RAM) information
- The IdeaPad Pro 5 (14AKP10) uses soldered LPDDR5X-8000 memory with no SO-DIMM slots.
- Lenovo offers 16GB, 24GB, and 32GB dual-channel configurations; the installed capacity cannot be upgraded after purchase.
- When planning a long-term configuration, choose the RAM option that best matches your workload (e.g. 24GB or 32GB if you work with large projects or many apps in parallel).
Storage upgrade options
- This laptop offers two NVMe SSD slots:
- M.2 2280 PCIe 4.0 x4 slot: Full-length slot, populated in our unit with a 1TB SK hynix P41 drive.
- M.2 2242 PCIe 4.0 x4 slot: Shorter slot, free from the factory in our configuration.
- To replace or upgrade the SSD in the 2280 slot:
- Remove any small metal cover or label above the drive by gently peeling it back, if present.
- Undo the SSD mounting screw; the drive will tilt up at an angle.
- Slide the SSD out of the connector.
- Insert the new 2280 PCIe 4.0 NVMe SSD at the same angle, push it down, and secure it with the screw.
- Reposition any thermal pad or shield so it makes proper contact with the SSD.
- To use the 2242 slot for an additional drive:
- Locate the shorter M.2 2242 bay on the motherboard.
- Insert a 2242 PCIe 4.0 NVMe SSD into the connector at a slight angle, press it down, and secure it with the mounting screw.
- If there is a thermal pad or foil, ensure it contacts the SSD to help dissipate heat.
Hint: Consider reviewing our Top M.2 SSDs Performance Rankings to select the best storage solution for your needs.
You can buy PCIe 4.0 NVMe SSDs here: Buy from Amazon.com (#CommissionsEarned)
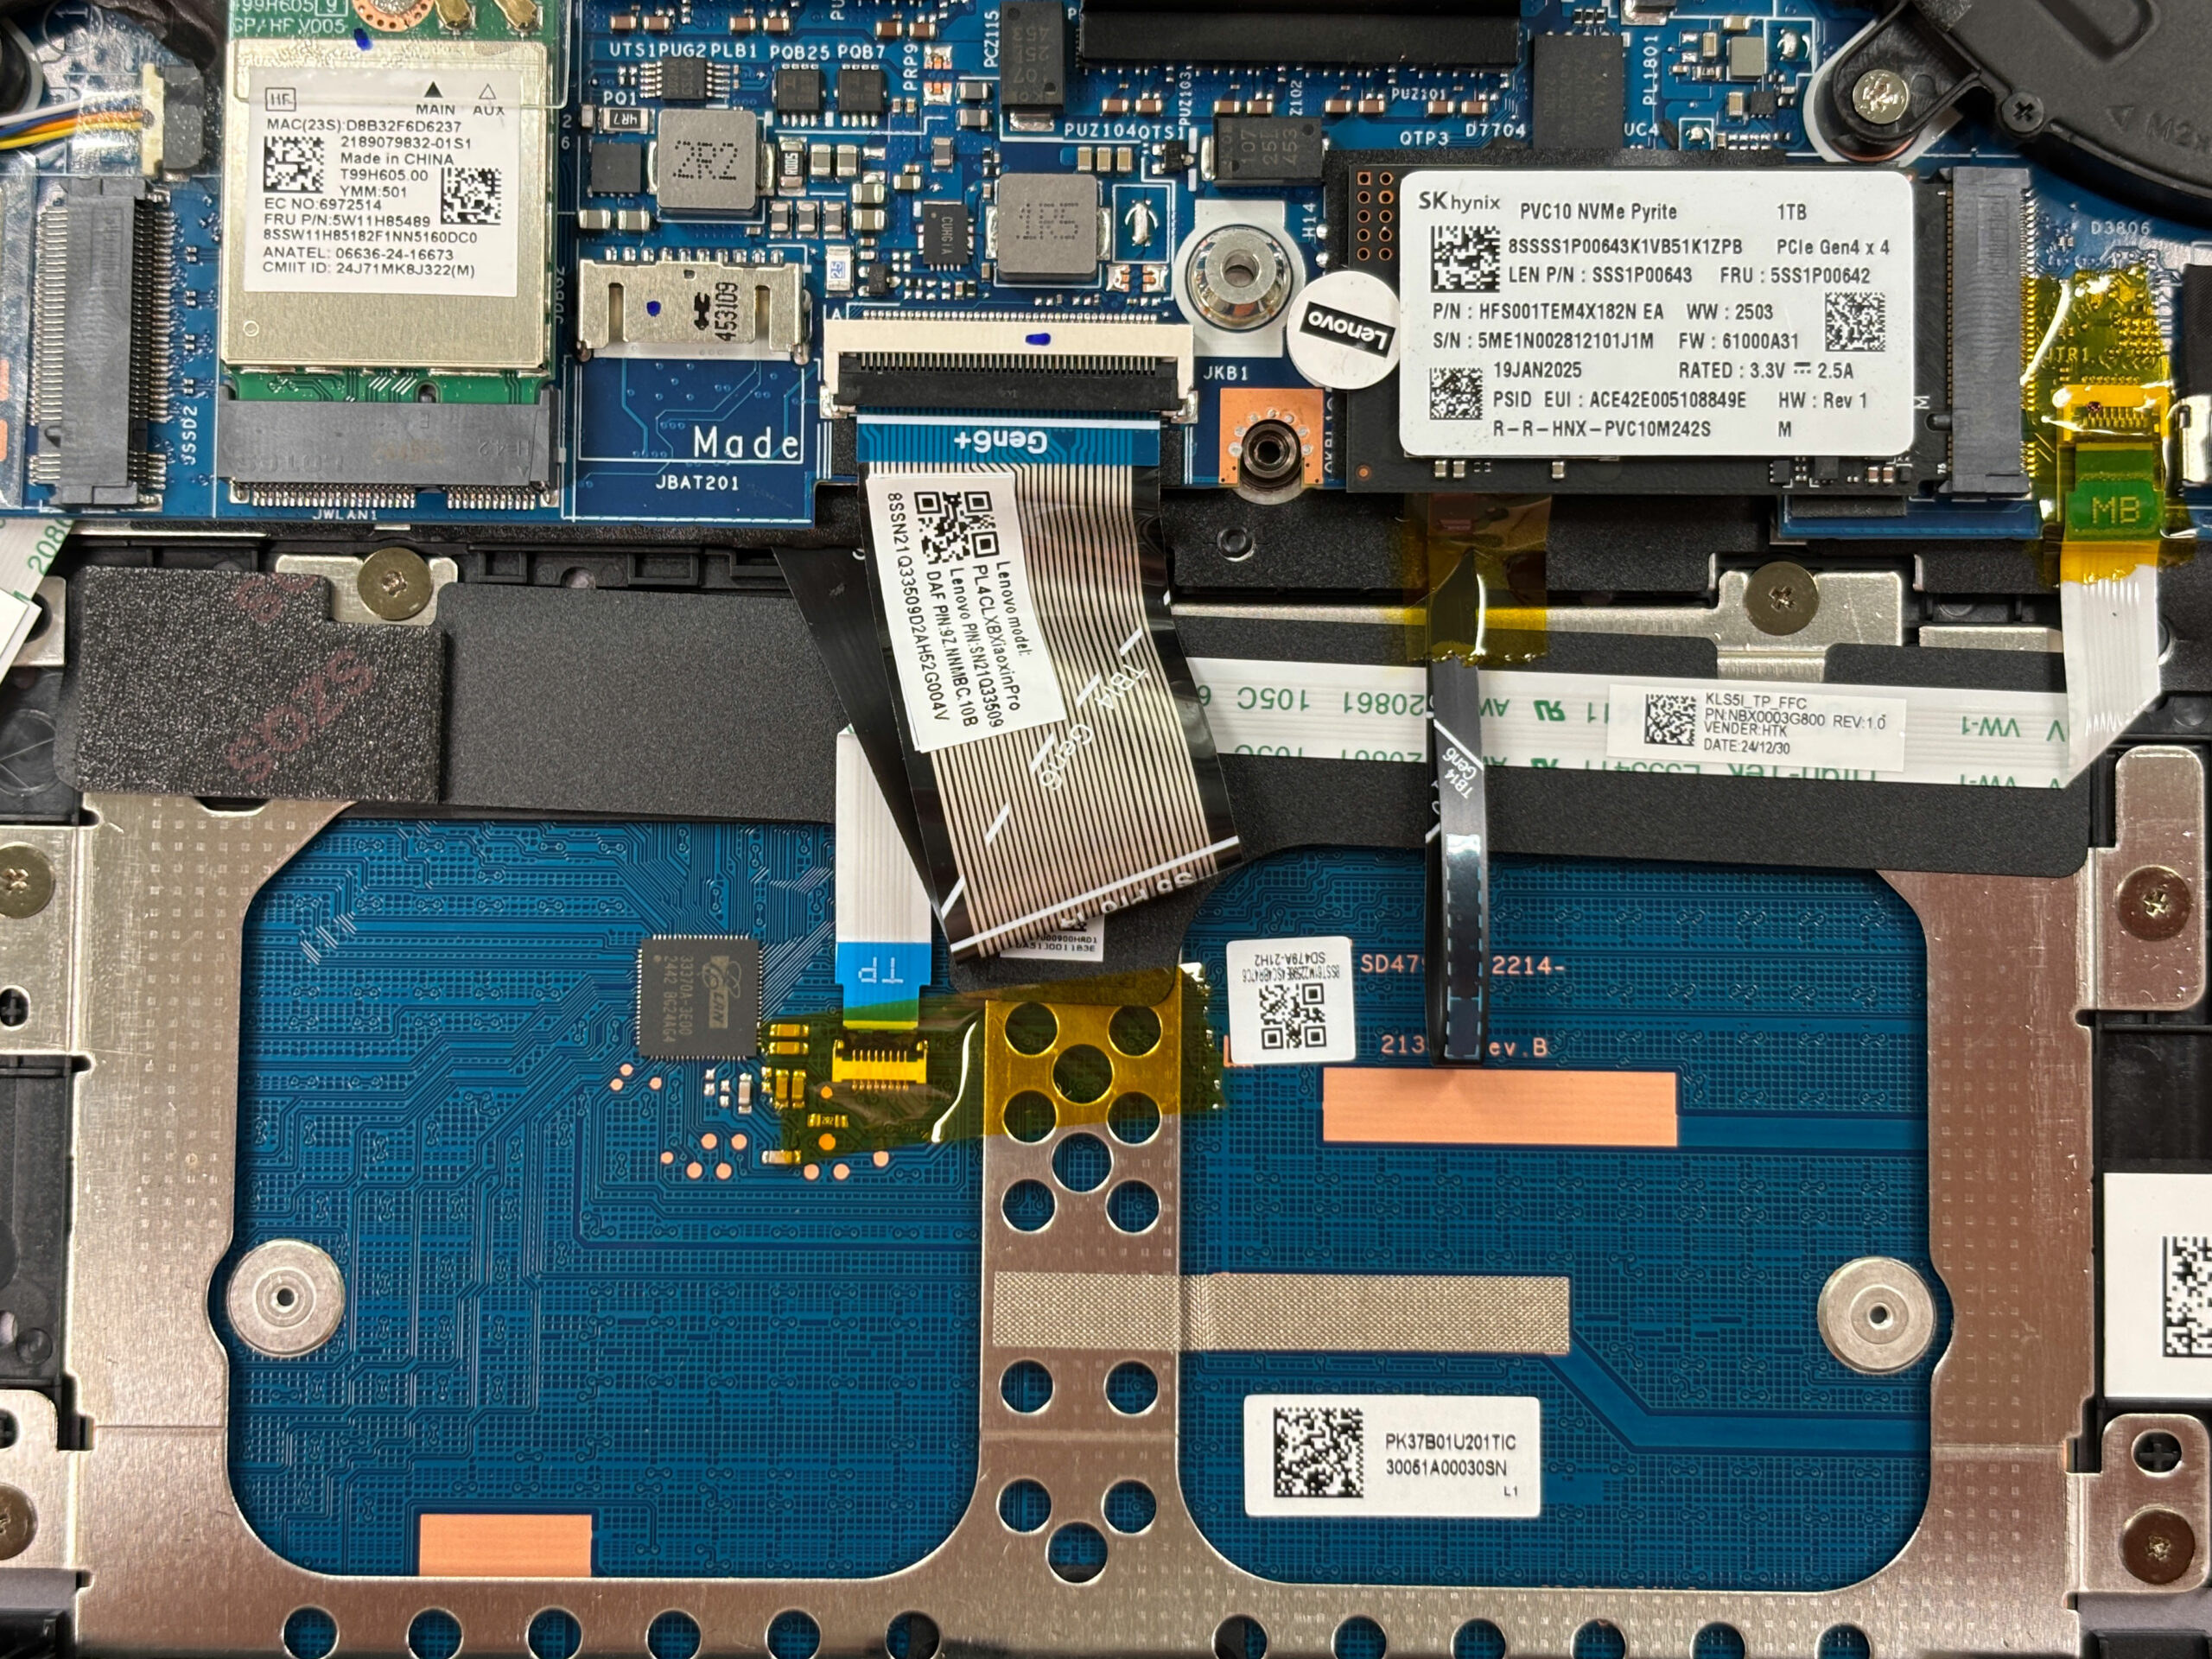
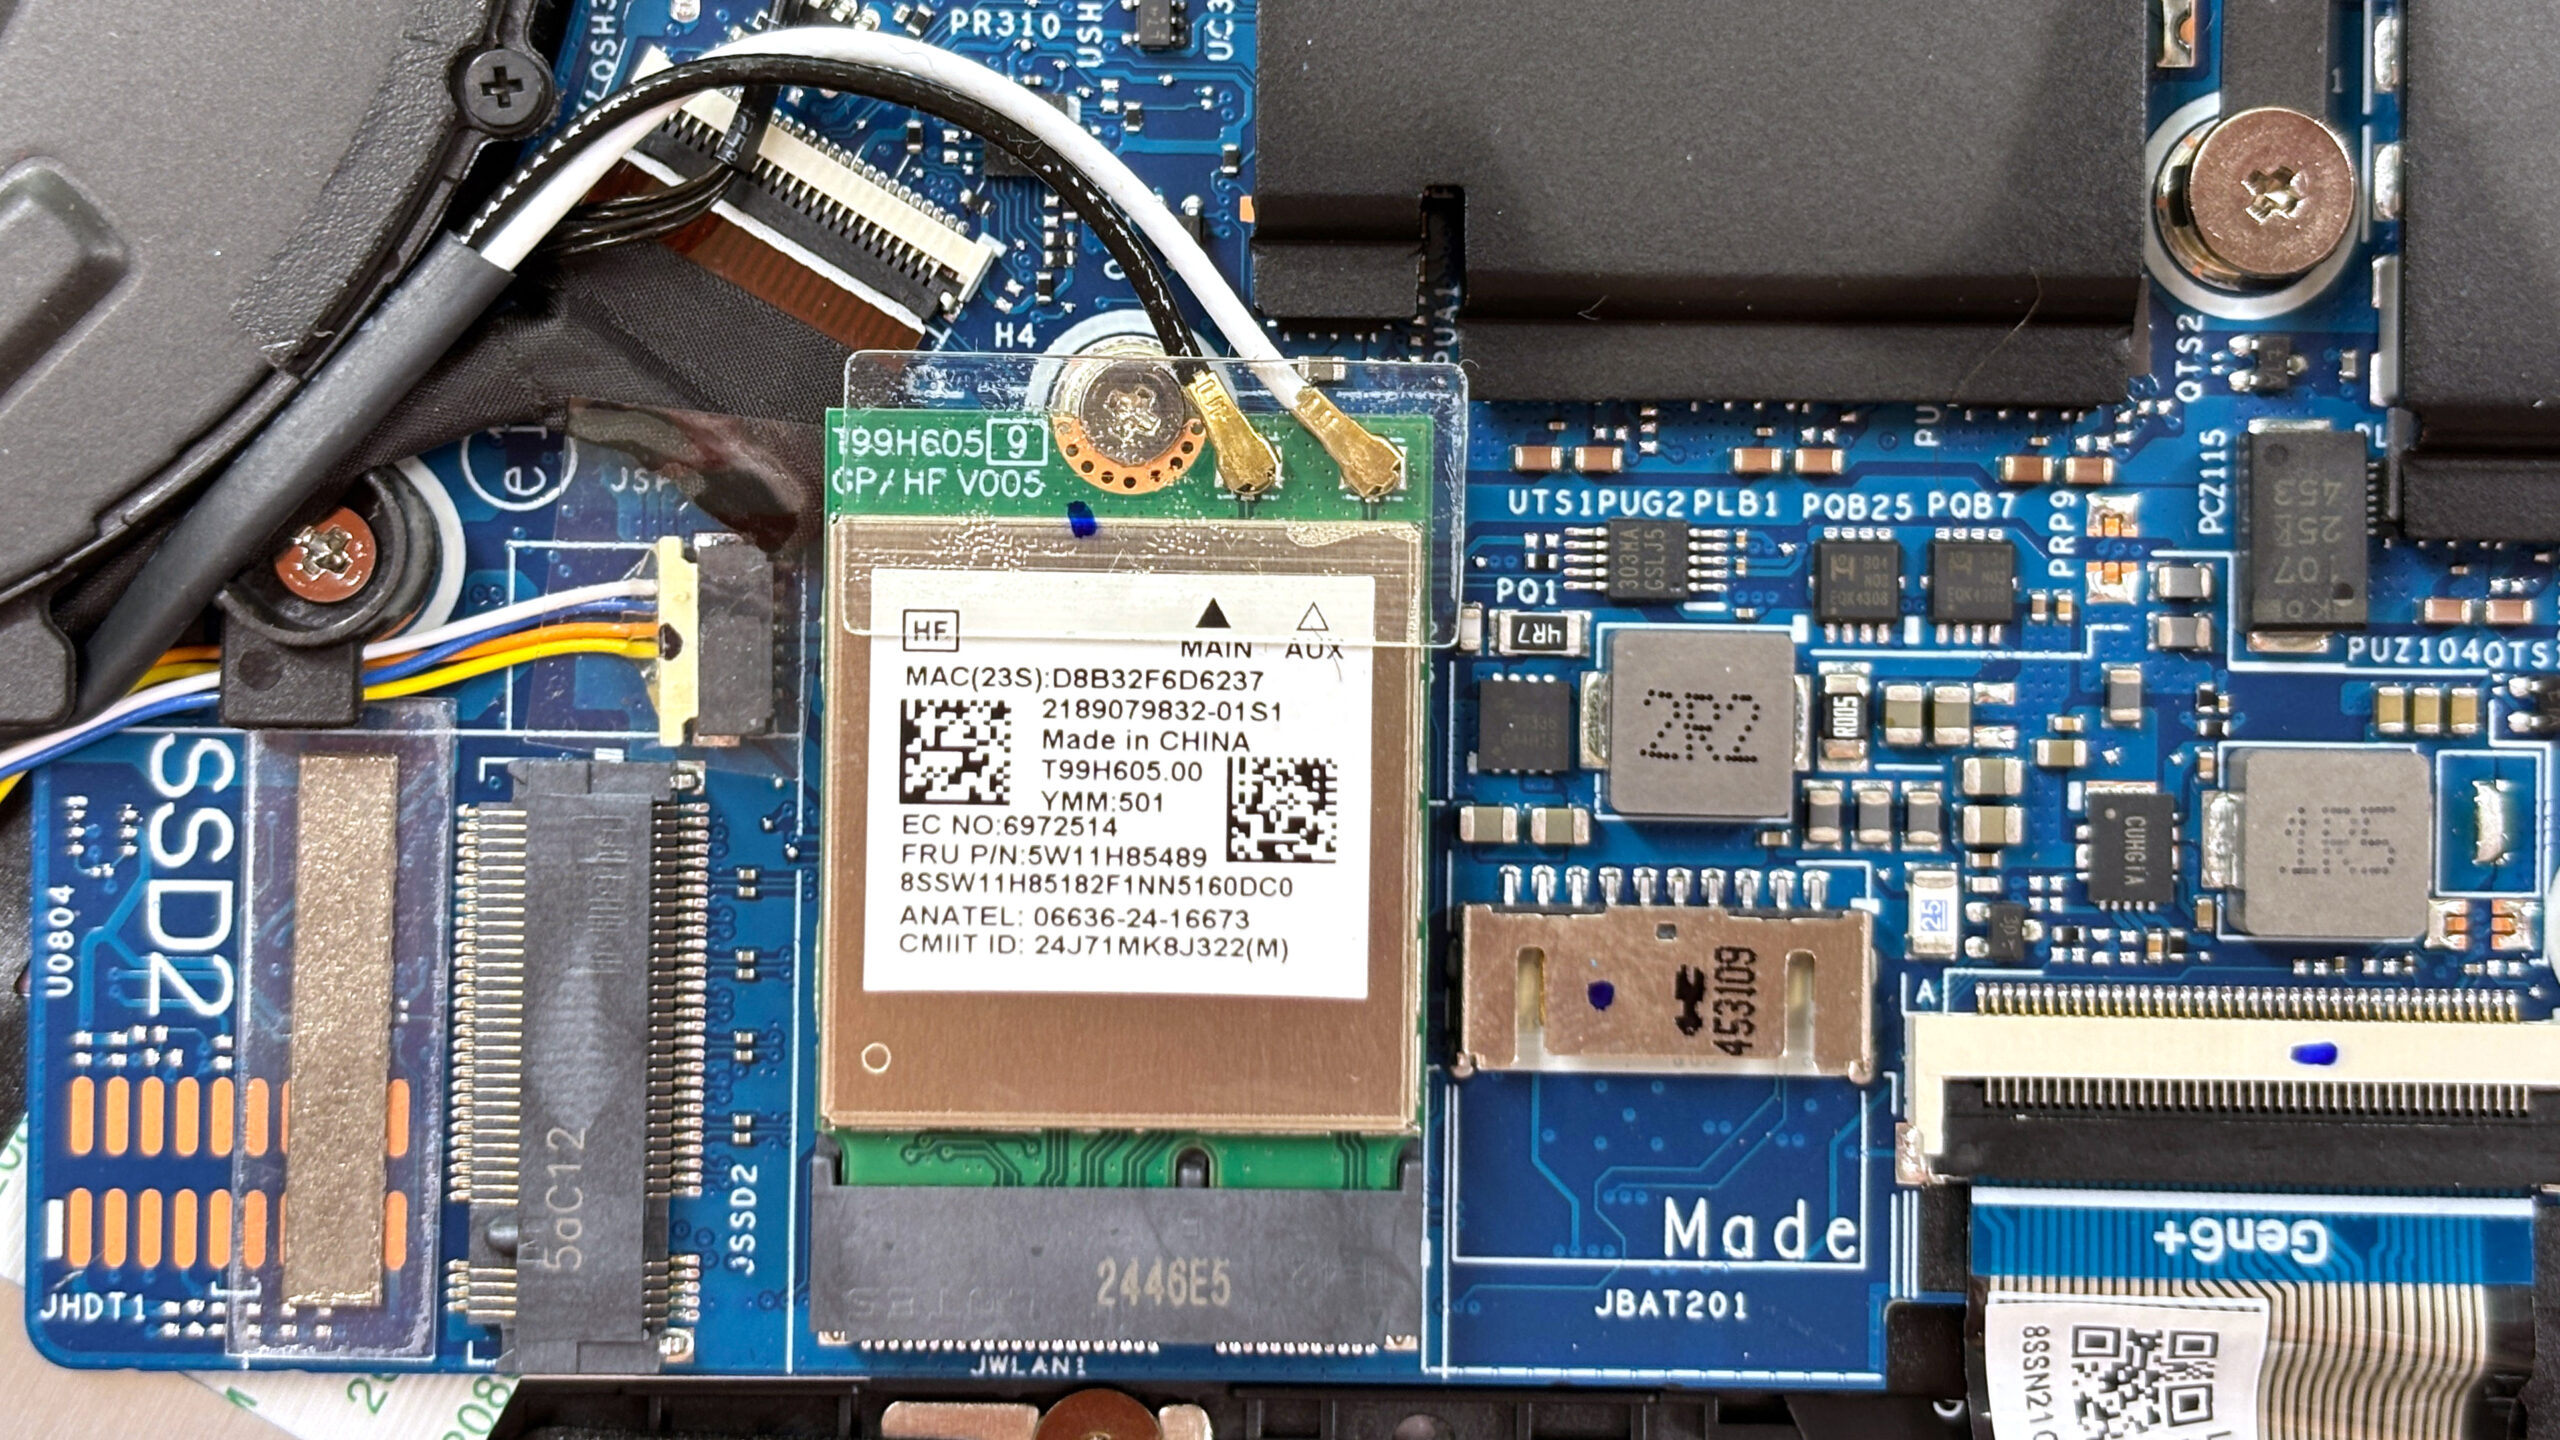
Wireless card and other serviceable components
- The wireless card is an M.2 2230 module. Depending on configuration, it can be a Wi-Fi 7 or Wi-Fi 6 solution; our unit uses a Wi-Fi 6 MediaTek card.
- To replace it:
- Gently lift the two antenna connectors (Main and Aux) straight up using a plastic tool.
- Undo the single screw securing the card.
- Slide the module out of its slot.
- Insert the new M.2 2230 Wi-Fi card at an angle, press it down, and secure it with the screw.
- Reconnect the antennas by pressing them straight onto their posts until they click into place.
- Speakers, touchpad ribbon, and hinge-mounted port boards are modular and can be replaced individually once the bottom cover is removed.
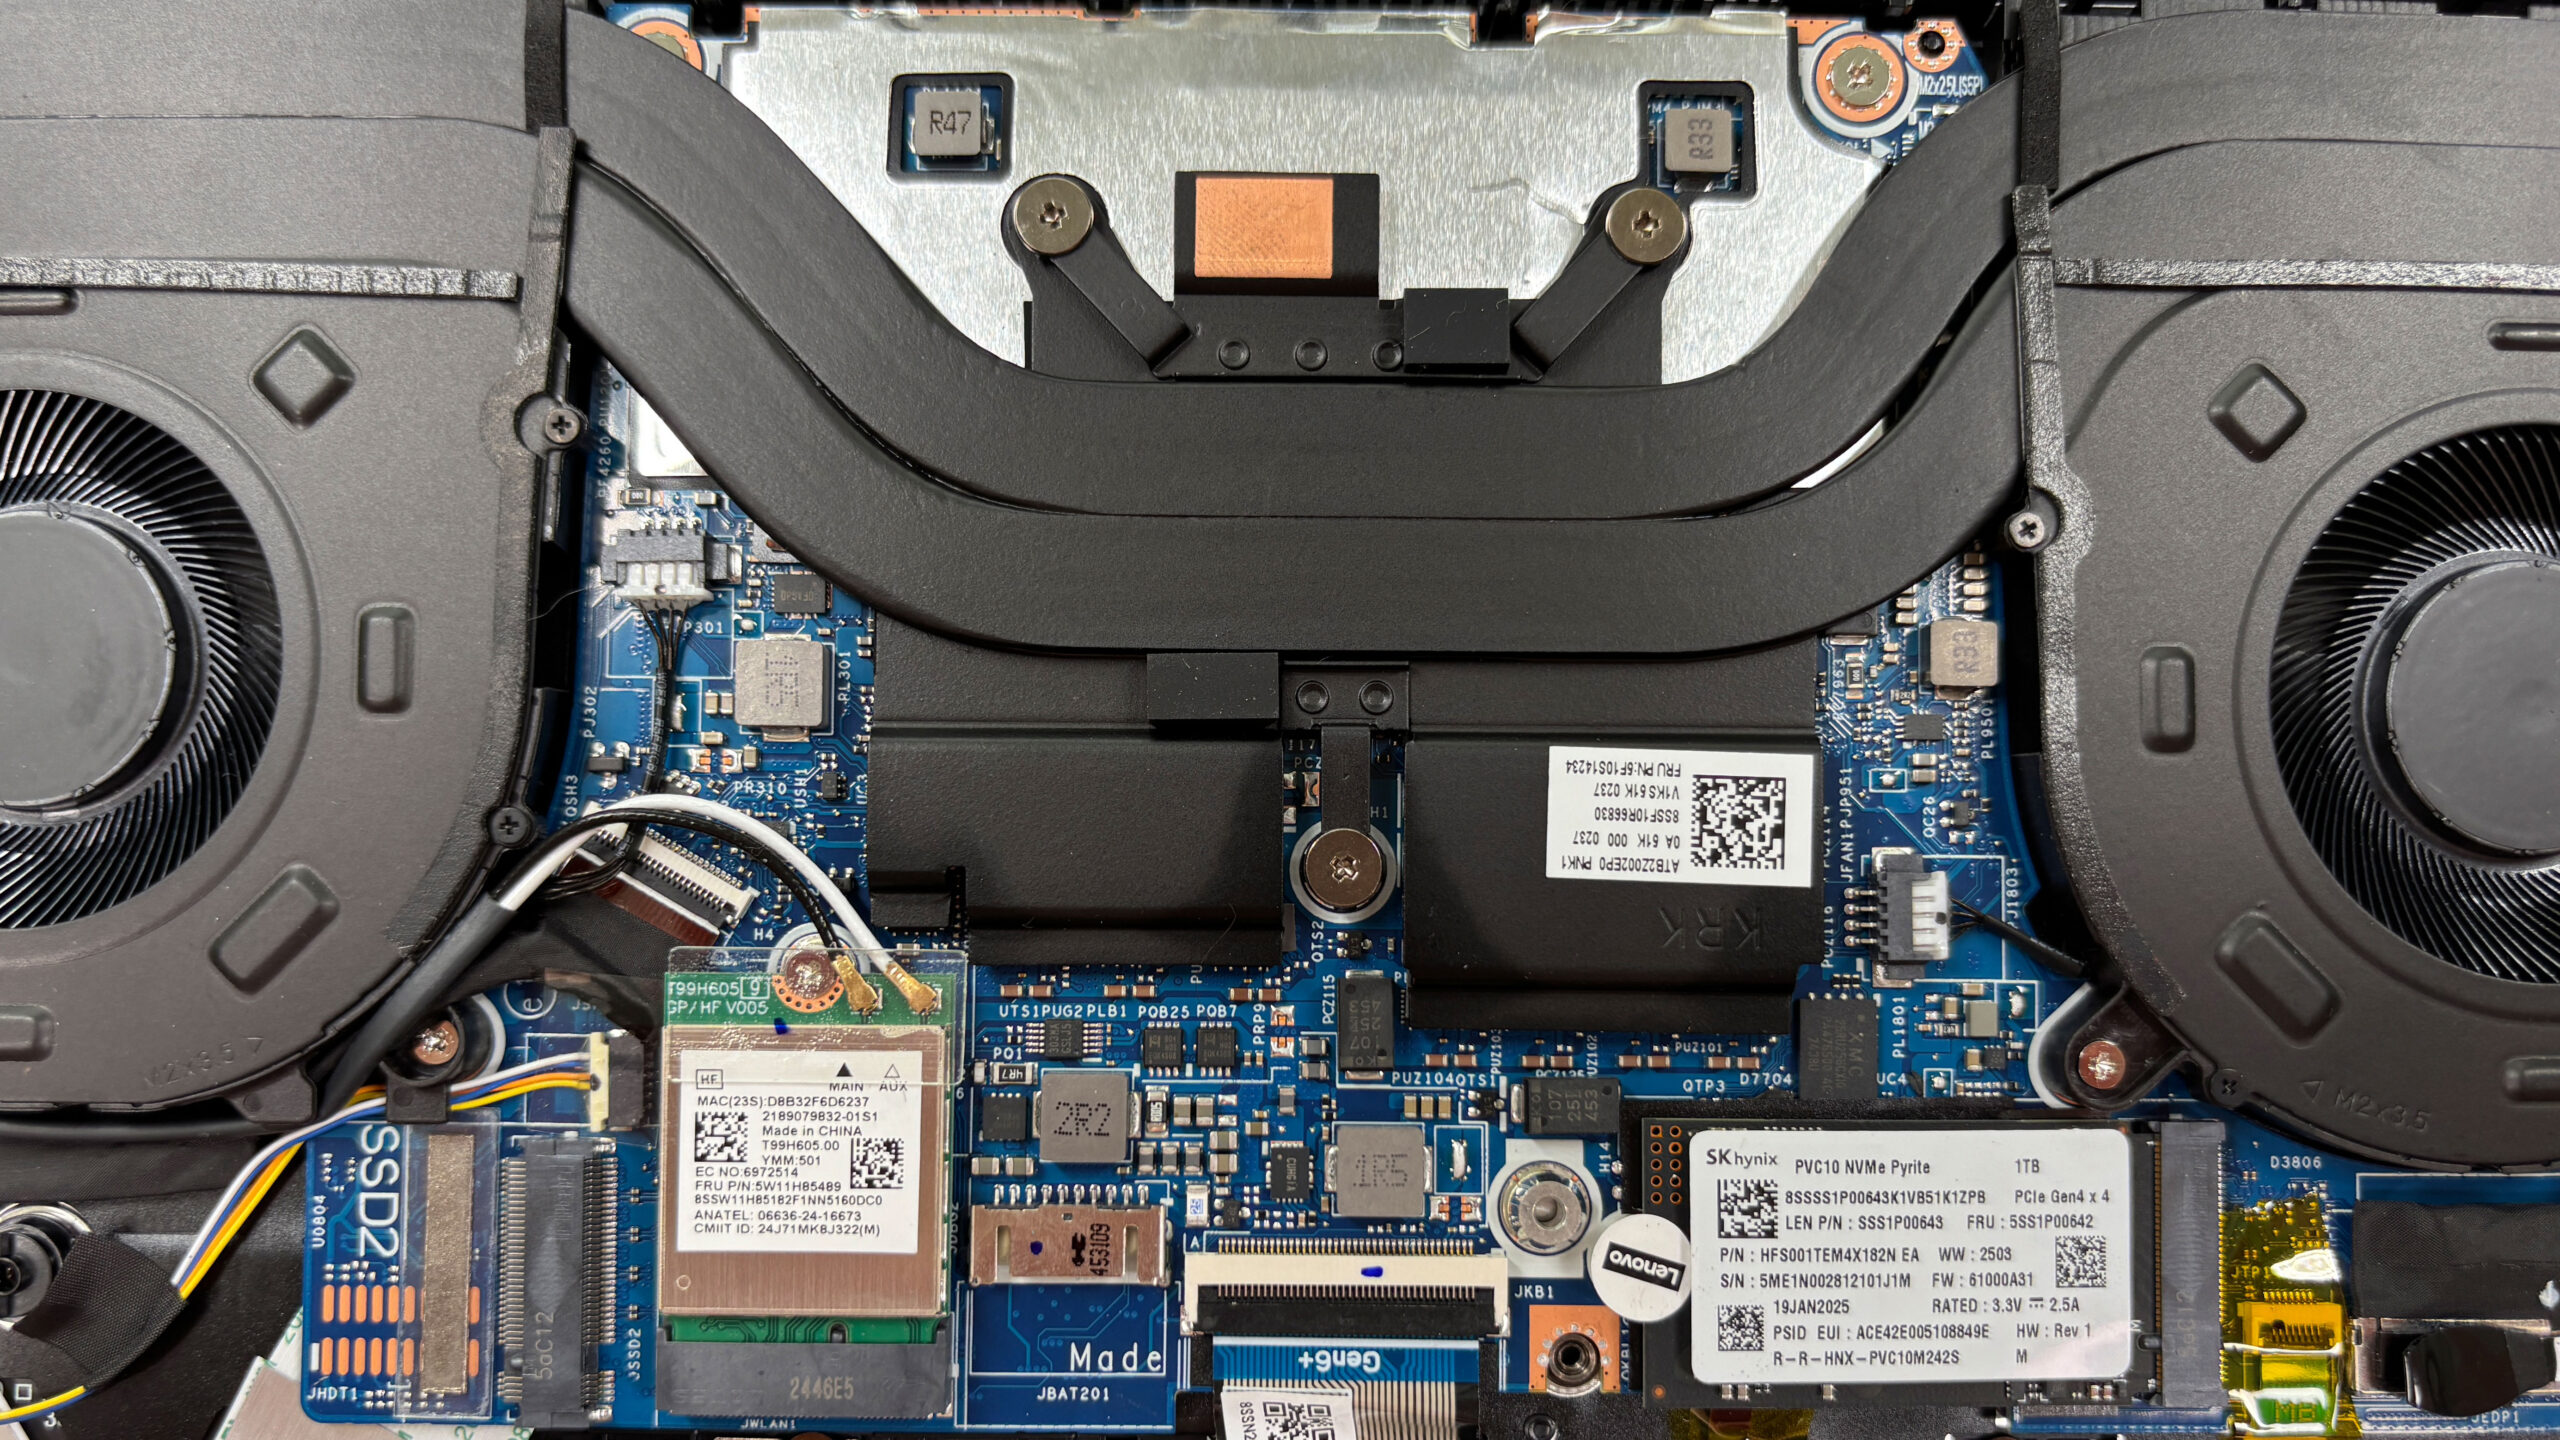
Cooling system and maintenance
- The cooling solution consists of two slim fans, two primary heatpipes running over the CPU and iGPU, and a third shorter pipe bridging the fans. Thermal pads cover VRMs and memory chips in an “X-shaped” layout typical for recent IdeaPad Pro and Yoga models.
- For routine cleaning:
- Ensure the battery is disconnected before working near the fans or heatsink.
- Hold each fan in place to prevent overspinning and use short bursts of compressed air through the rear and side vents to clear dust from the fins.
- Visually check that all thermal pads remain in their original positions on VRMs and memory areas.
- Heatsink removal and repasting are possible, but recommended only if you have experience and quality thermal paste; all screws and pads must be returned to their exact positions during reassembly.
More info: The main upgrade limitations of the IdeaPad Pro 5 (14AKP10) are the soldered LPDDR5X memory and the non-replaceable CPU/iGPU. Practical, user-friendly upgrades focus on the two PCIe 4.0 SSD slots, the replaceable Wi-Fi card, and the large 84Wh battery.
Reassembly tips
- Before reinstalling the bottom panel, verify that:
- The battery connector is firmly seated.
- All SSDs are properly secured and any thermal pads or shields are in place.
- The Wi-Fi card is screwed down and antennas are reattached.
- All fan and speaker connectors are plugged in.
- Align the aluminium bottom cover with the chassis and press gently around the edges until all clips click back into place.
- Reinstall the nine Torx T5 screws and tighten them evenly without overtightening.
- Power on the laptop and check in BIOS/Windows that your new drives are recognized and that the system operates normally.
Summary: Most other components, including the speakers, the touch‑pad ribbon, and the hinge‑mounted ports, are modular and can be changed individually if needed. The only true limitation is the soldered memory, so plan your RAM capacity at the point of sale. Overall, the IdeaPad Pro 5 scores high for maintenance: storage and wireless upgrades are easy, the battery is service‑friendly, and the cooling system can be cleaned without drama.
Lenovo IdeaPad Pro 5 (14", Gen 10) in-depth review
The Lenovo IdeaPad Pro 5 (14", Gen 10) arrives with a mission: to democratize the premium laptop experience. It packs features usually reserved for flagship devices - like a stunning 120Hz OLED display, an all-metal chassis, and powerful Ryzen AI processors—into a machine that remains surprisingly affordable. It’s a laptop that tries to do it all, balancing creative power, portability, and endurance in a sleek 14-inch package. But does this ambitious mix of high-end specs and mid-range pricing result in a perfect all-rounder, or are there hidden compromises lurking beneath its polished[...]
Pros
- Stunning 2.8K 120Hz OLED display with 100% DCI-P3 coverage
- Excellent sustained performance and thermal management
- Fantastic battery life (nearly 14 hours)
- Two M.2 SSD slots for storage expansion
- Premium all-aluminium build quality
- Comprehensive port selection including USB4 and SD card reader
Cons
- Soldered RAM limits future upgrades
- Highly reflective glossy screen
- SSD can run hot under heavy load
- No built-in Ethernet port


![[May 2026] Amazon Global: Top 10 Best-Selling Gaming Laptops – Budget-Friendly ASUS TUF Gaming A15 Dominates the Market](https://laptopmedia.com/wp-content/uploads/2026/06/Best-Selling-Gaming-Laptops-GLOBAL-Top-10-400x225.jpg)
![[May 2026] Amazon Global: Top 10 Best-Selling Laptops – Apple’s Affordable ‘MacBook Neo’ Takes the Crown Amidst Strong Air and Pro Sales](https://laptopmedia.com/wp-content/uploads/2026/06/Best-Selling-Laptops-GLOBAL-Top-10-400x225.jpg)
![[May 2026] Best-Selling Laptop Brands on Amazon Global – Apple Dominates in Units and Revenue](https://laptopmedia.com/wp-content/uploads/2026/06/GLOBAL-Best-Brands-400x225.jpg)