How to open Acer Aspire Vero 15 (AV15-53P) – disassembly and upgrade options
#CommissionsEarned

Step 1: Accessing the Internal Components
- Ensure the Acer Aspire Vero 15 (AV15-53P) is powered off and placed on a soft, clean surface to prevent scratches or damage.
- Remove the 11 Phillips-head screws from the laptop’s bottom panel.
- Gently lift the bottom plate near one of the top two corners to create a slight gap, then use a thin plastic tool to pry the panel off.
Hint: Be careful during this process to avoid damaging the internal clips or the chassis itself.
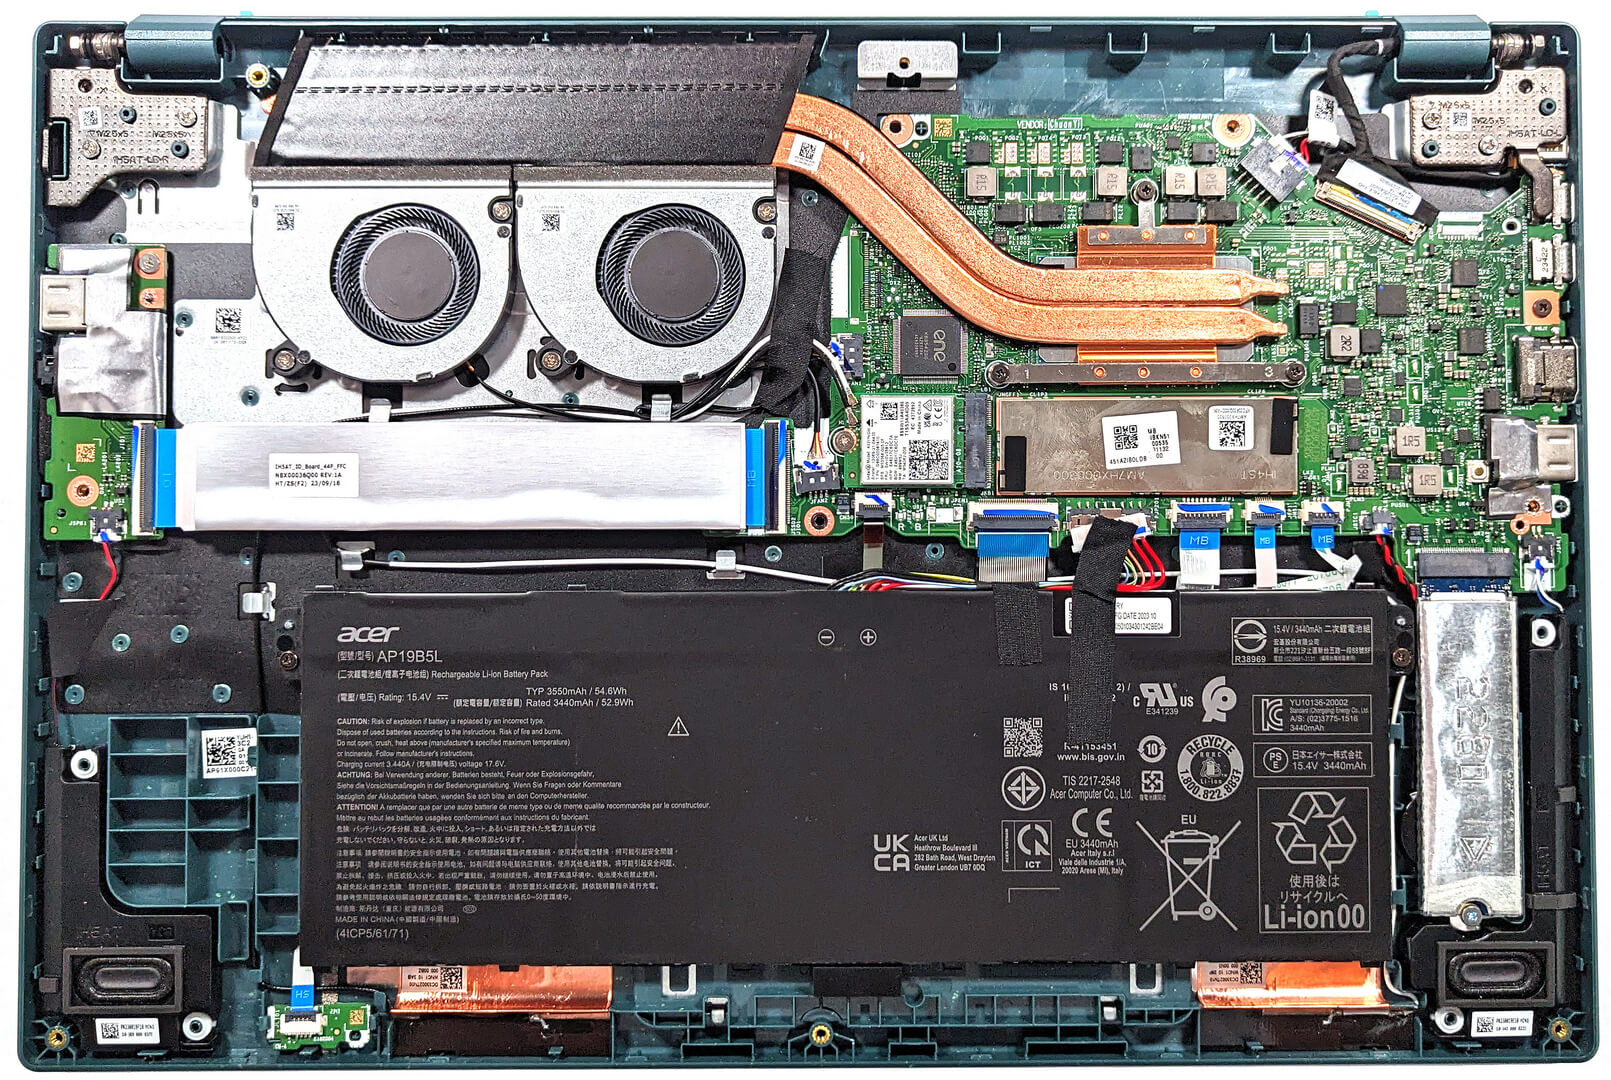
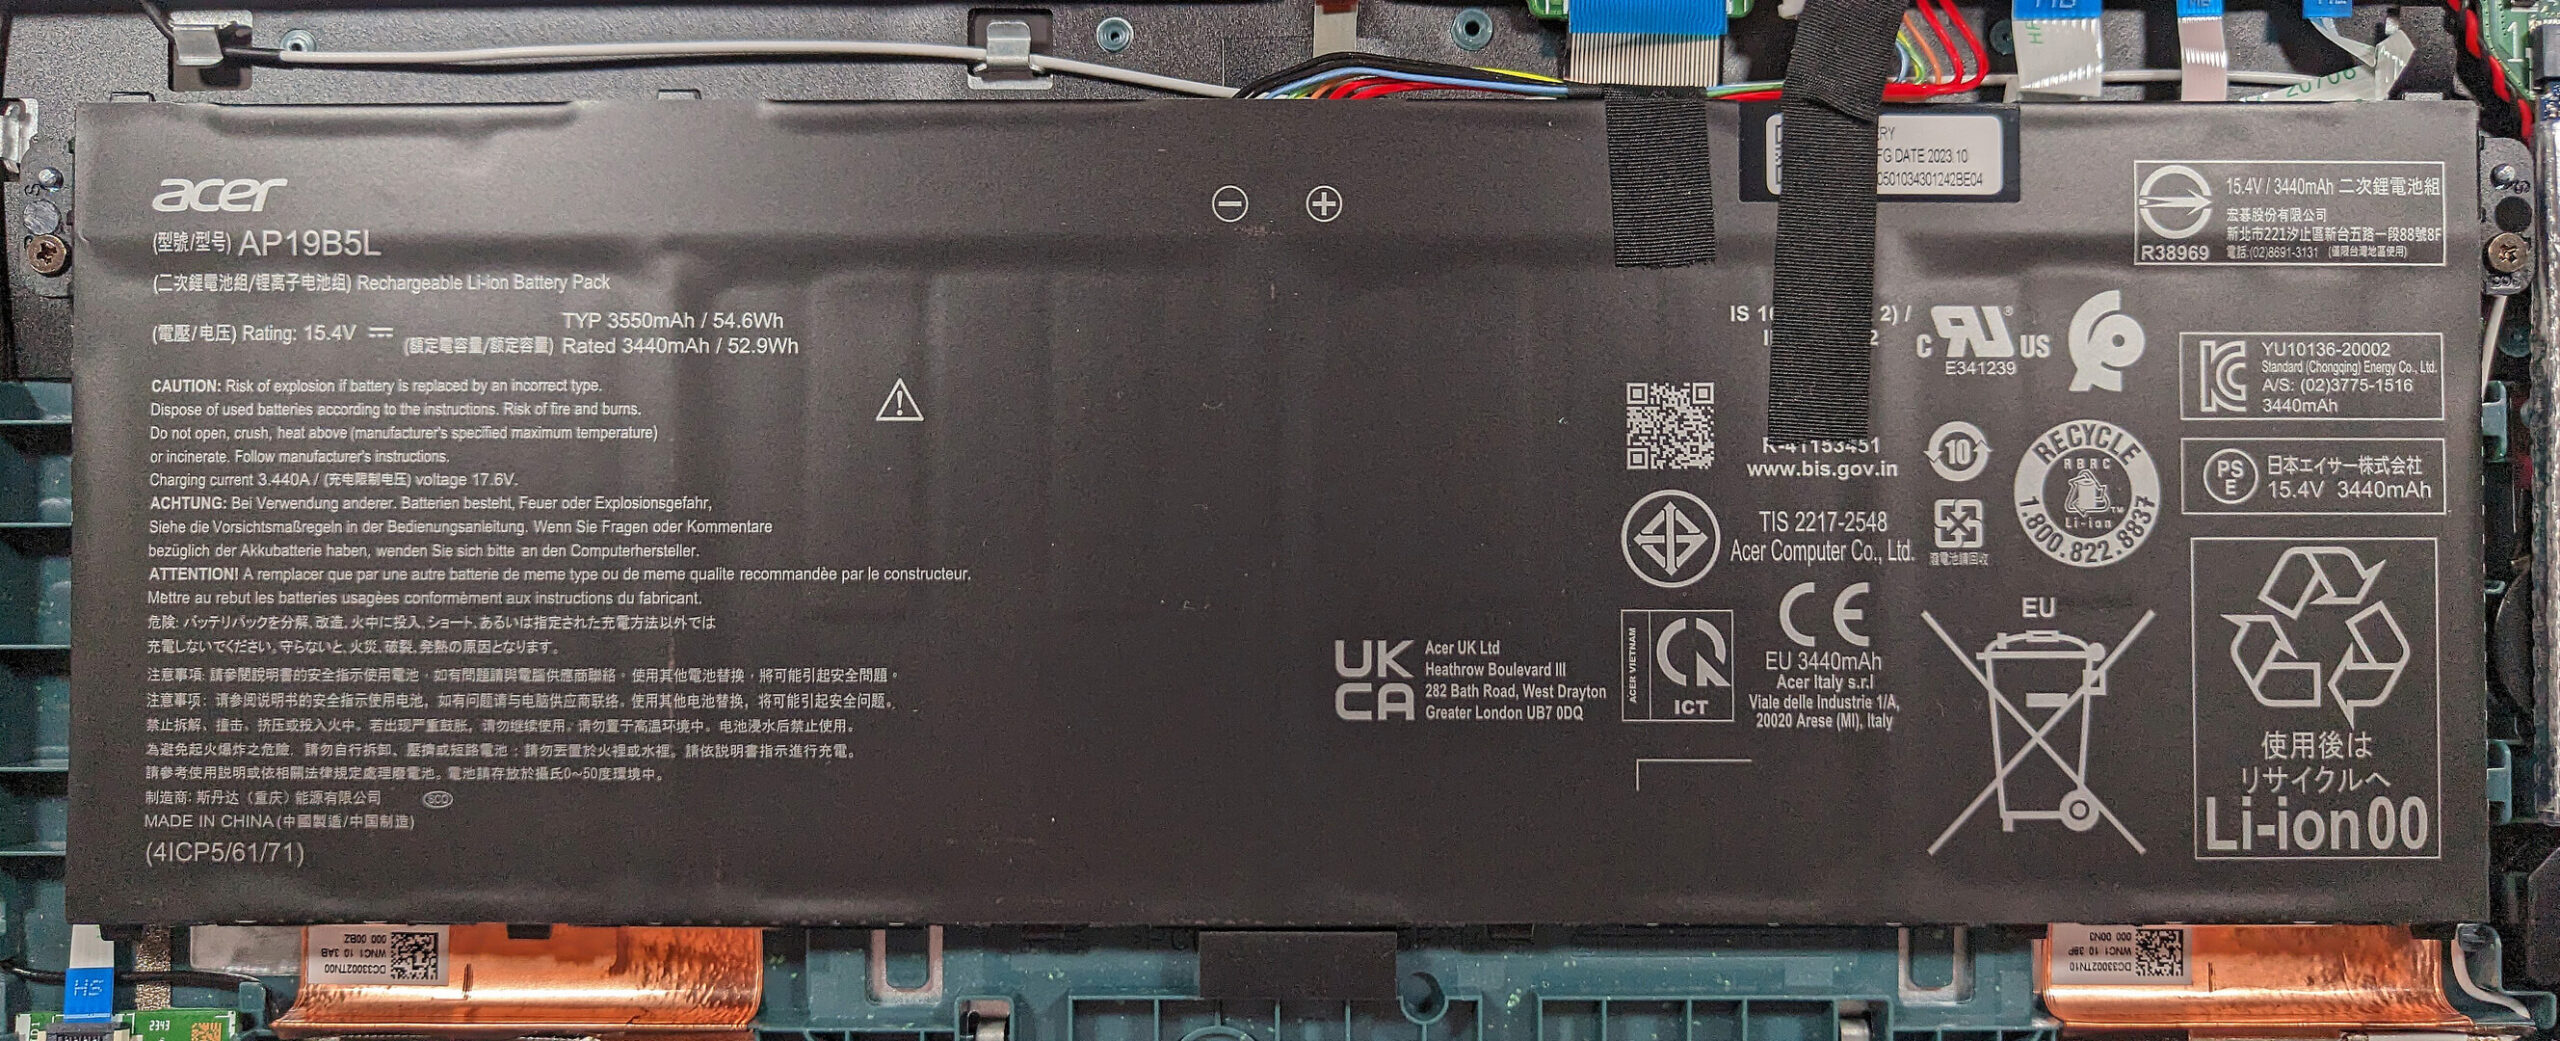
Step 2: Removing the Battery
- Disconnect the battery by pulling out its connector from the motherboard.
- Unscrew the two Phillips-head screws that secure the battery to the base, then remove the 54.6Wh battery from the device.
Caution: Handle the battery and its connector with care to avoid any damage.
More info: The optional 54.6Wh battery provides up to 12 hours and 30 minutes of web browsing, or 9 hours and 5 minutes of video playback, offering solid battery life for productivity and entertainment.
Memory
- The laptop comes with soldered 16GB of LPDDR5-4800MHz RAM, optimized for dual-channel performance to enhance multitasking and productivity.
More info: The memory is not upgradeable due to its soldered nature, but 16GB of LPDDR5 RAM should be sufficient for most users’ needs.
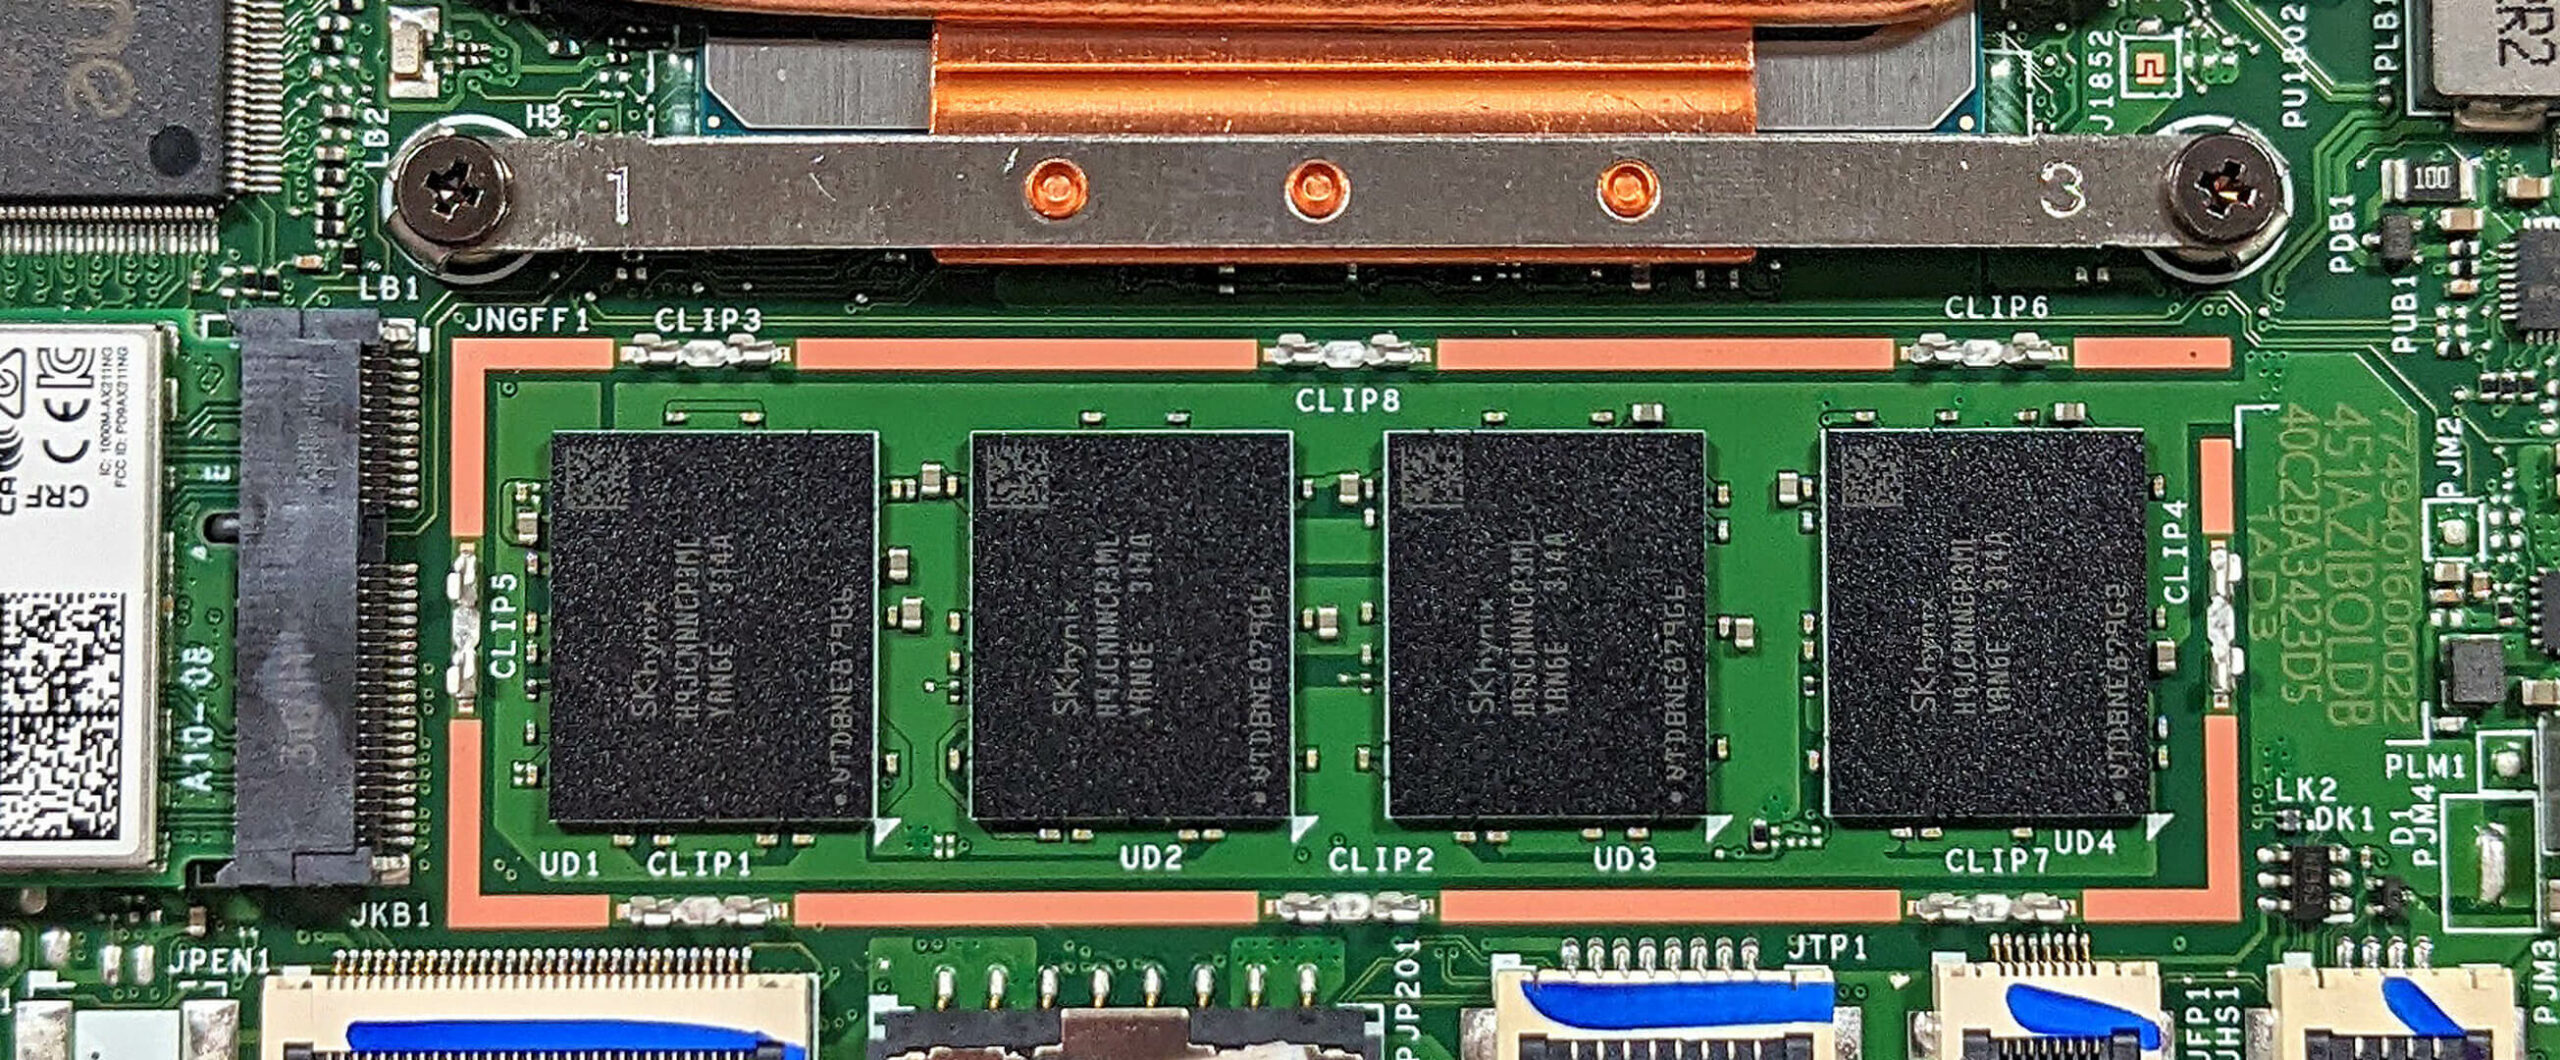

Storage Upgrade
- Identify the single M.2 slot on the motherboard that supports 2280 Gen 4 SSDs.
- Consider upgrading or adding a new NVMe SSD to expand storage capacity or improve data access speeds.
You can buy Gen 4 M.2 SSD modules here: Buy from Amazon.com (#CommissionsEarned)


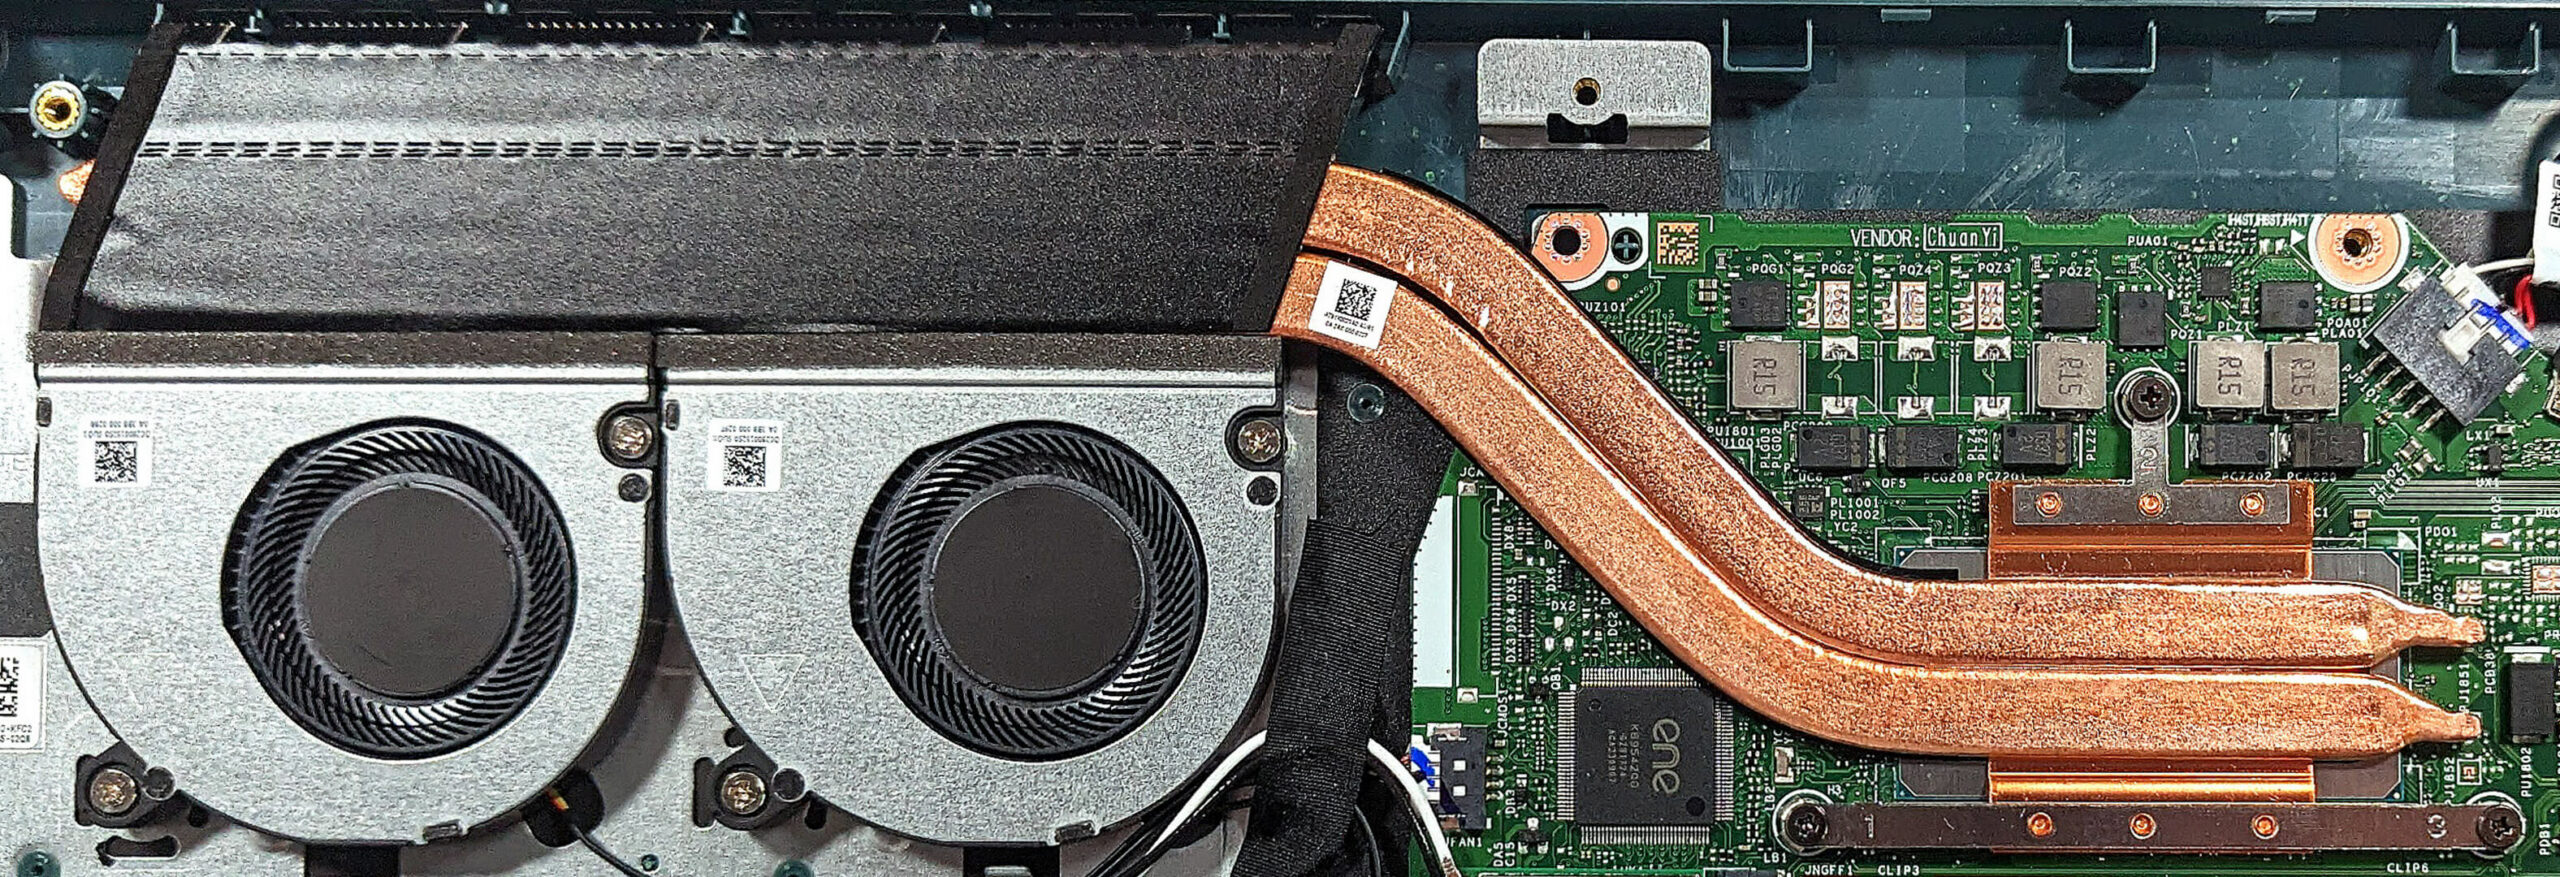
Step 3: Examining the Cooling System
- Review the cooling system, which includes two small fans, a pair of heat pipes, one long top-mounted heat sink, and a heat spreader, designed to efficiently manage the thermal output of the laptop.
#CommissionsEarned
Subscribe
0 Comments


![[June 2026] Best-Selling Laptop Brands on Amazon Global – Apple’s Unrivaled Dominance in Units and Revenue](https://laptopmedia.com/wp-content/uploads/2026/07/GLOBAL-Best-Brands-400x225.jpg)
![[June 2026] Amazon Global: Top 10 Best-Selling Laptops – Apple’s New MacBook Neo Storms to #1, Reshaping the Market with Affordability](https://laptopmedia.com/wp-content/uploads/2026/07/Best-Selling-Laptops-GLOBAL-Top-10-400x225.jpg)
![[June 2026] Amazon Global: Top 10 Best-Selling Gaming Laptops – Acer’s Nitro V 16S AI Dominates Sales, While ASUS Leads Overall Revenue](https://laptopmedia.com/wp-content/uploads/2026/07/Best-Selling-Gaming-Laptops-GLOBAL-Top-10-400x225.jpg)
![[June 2026] Global Ranking of Best-Selling Laptop GPUs on Amazon – NVIDIA RTX 5060 is the Top-Selling Dedicated GPU](https://laptopmedia.com/wp-content/uploads/2026/07/Best-Selling-GPUs-GLOBAL-Top-10-400x225.jpg)
![[June 2026] Global Ranking of Best-Selling Laptop CPUs on Amazon – Apple M5 Dominates, AMD Ryzen 7 260 Gets Solid Premium Share](https://laptopmedia.com/wp-content/uploads/2026/07/Best-Selling-CPUs-GLOBAL-Top-10-400x225.jpg)
