How to open Acer Nitro 18 AI (AN18-61) – disassembly and upgrade options

Before you start: Power the laptop off, unplug the charger and peripherals, and hold the power button for a few seconds to discharge residual power. Work on a clean, non-conductive surface and use ESD protection if available.
Opening the bottom panel
- Place the laptop upside down on a soft surface to avoid scratching the lid.
- Remove the bottom screws (keep track of their positions if lengths differ).
- Use a thin plastic pry tool to release the clips around the perimeter, starting near a corner where you can create a small gap.
- Work your way around the sides and front, then finish near the hinge area, and lift the bottom cover away.
Cooling system and cleaning
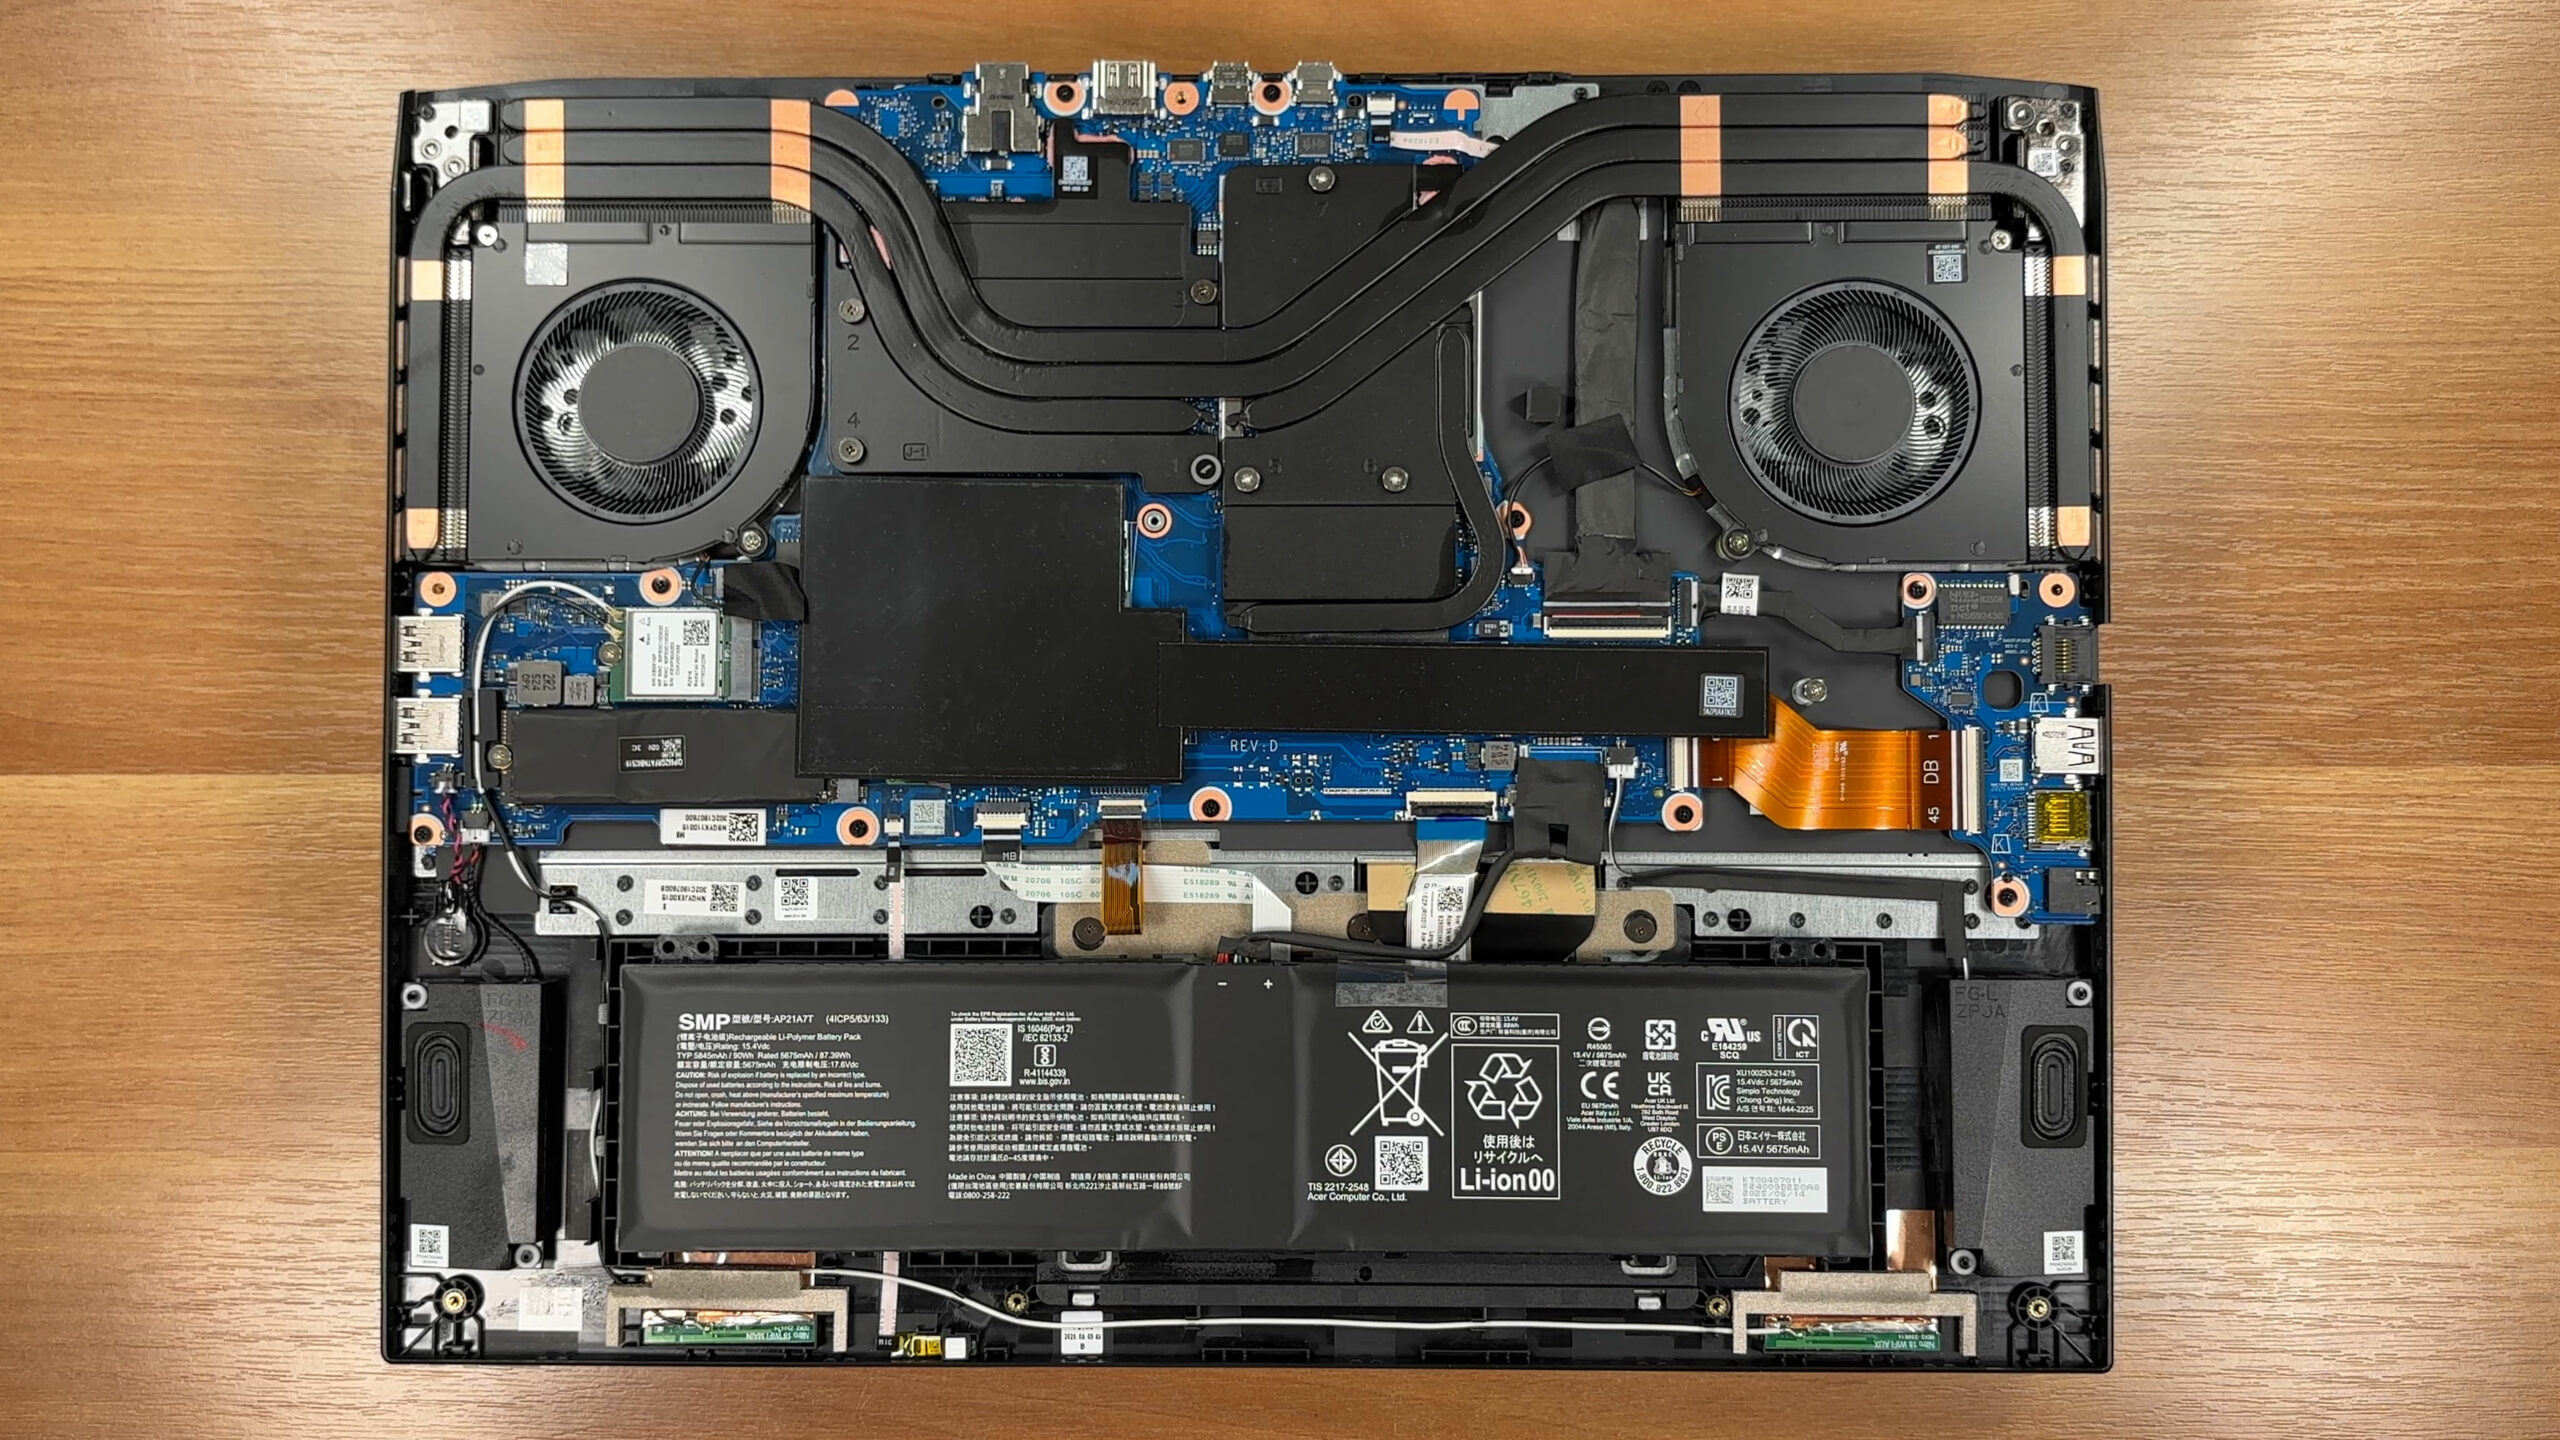
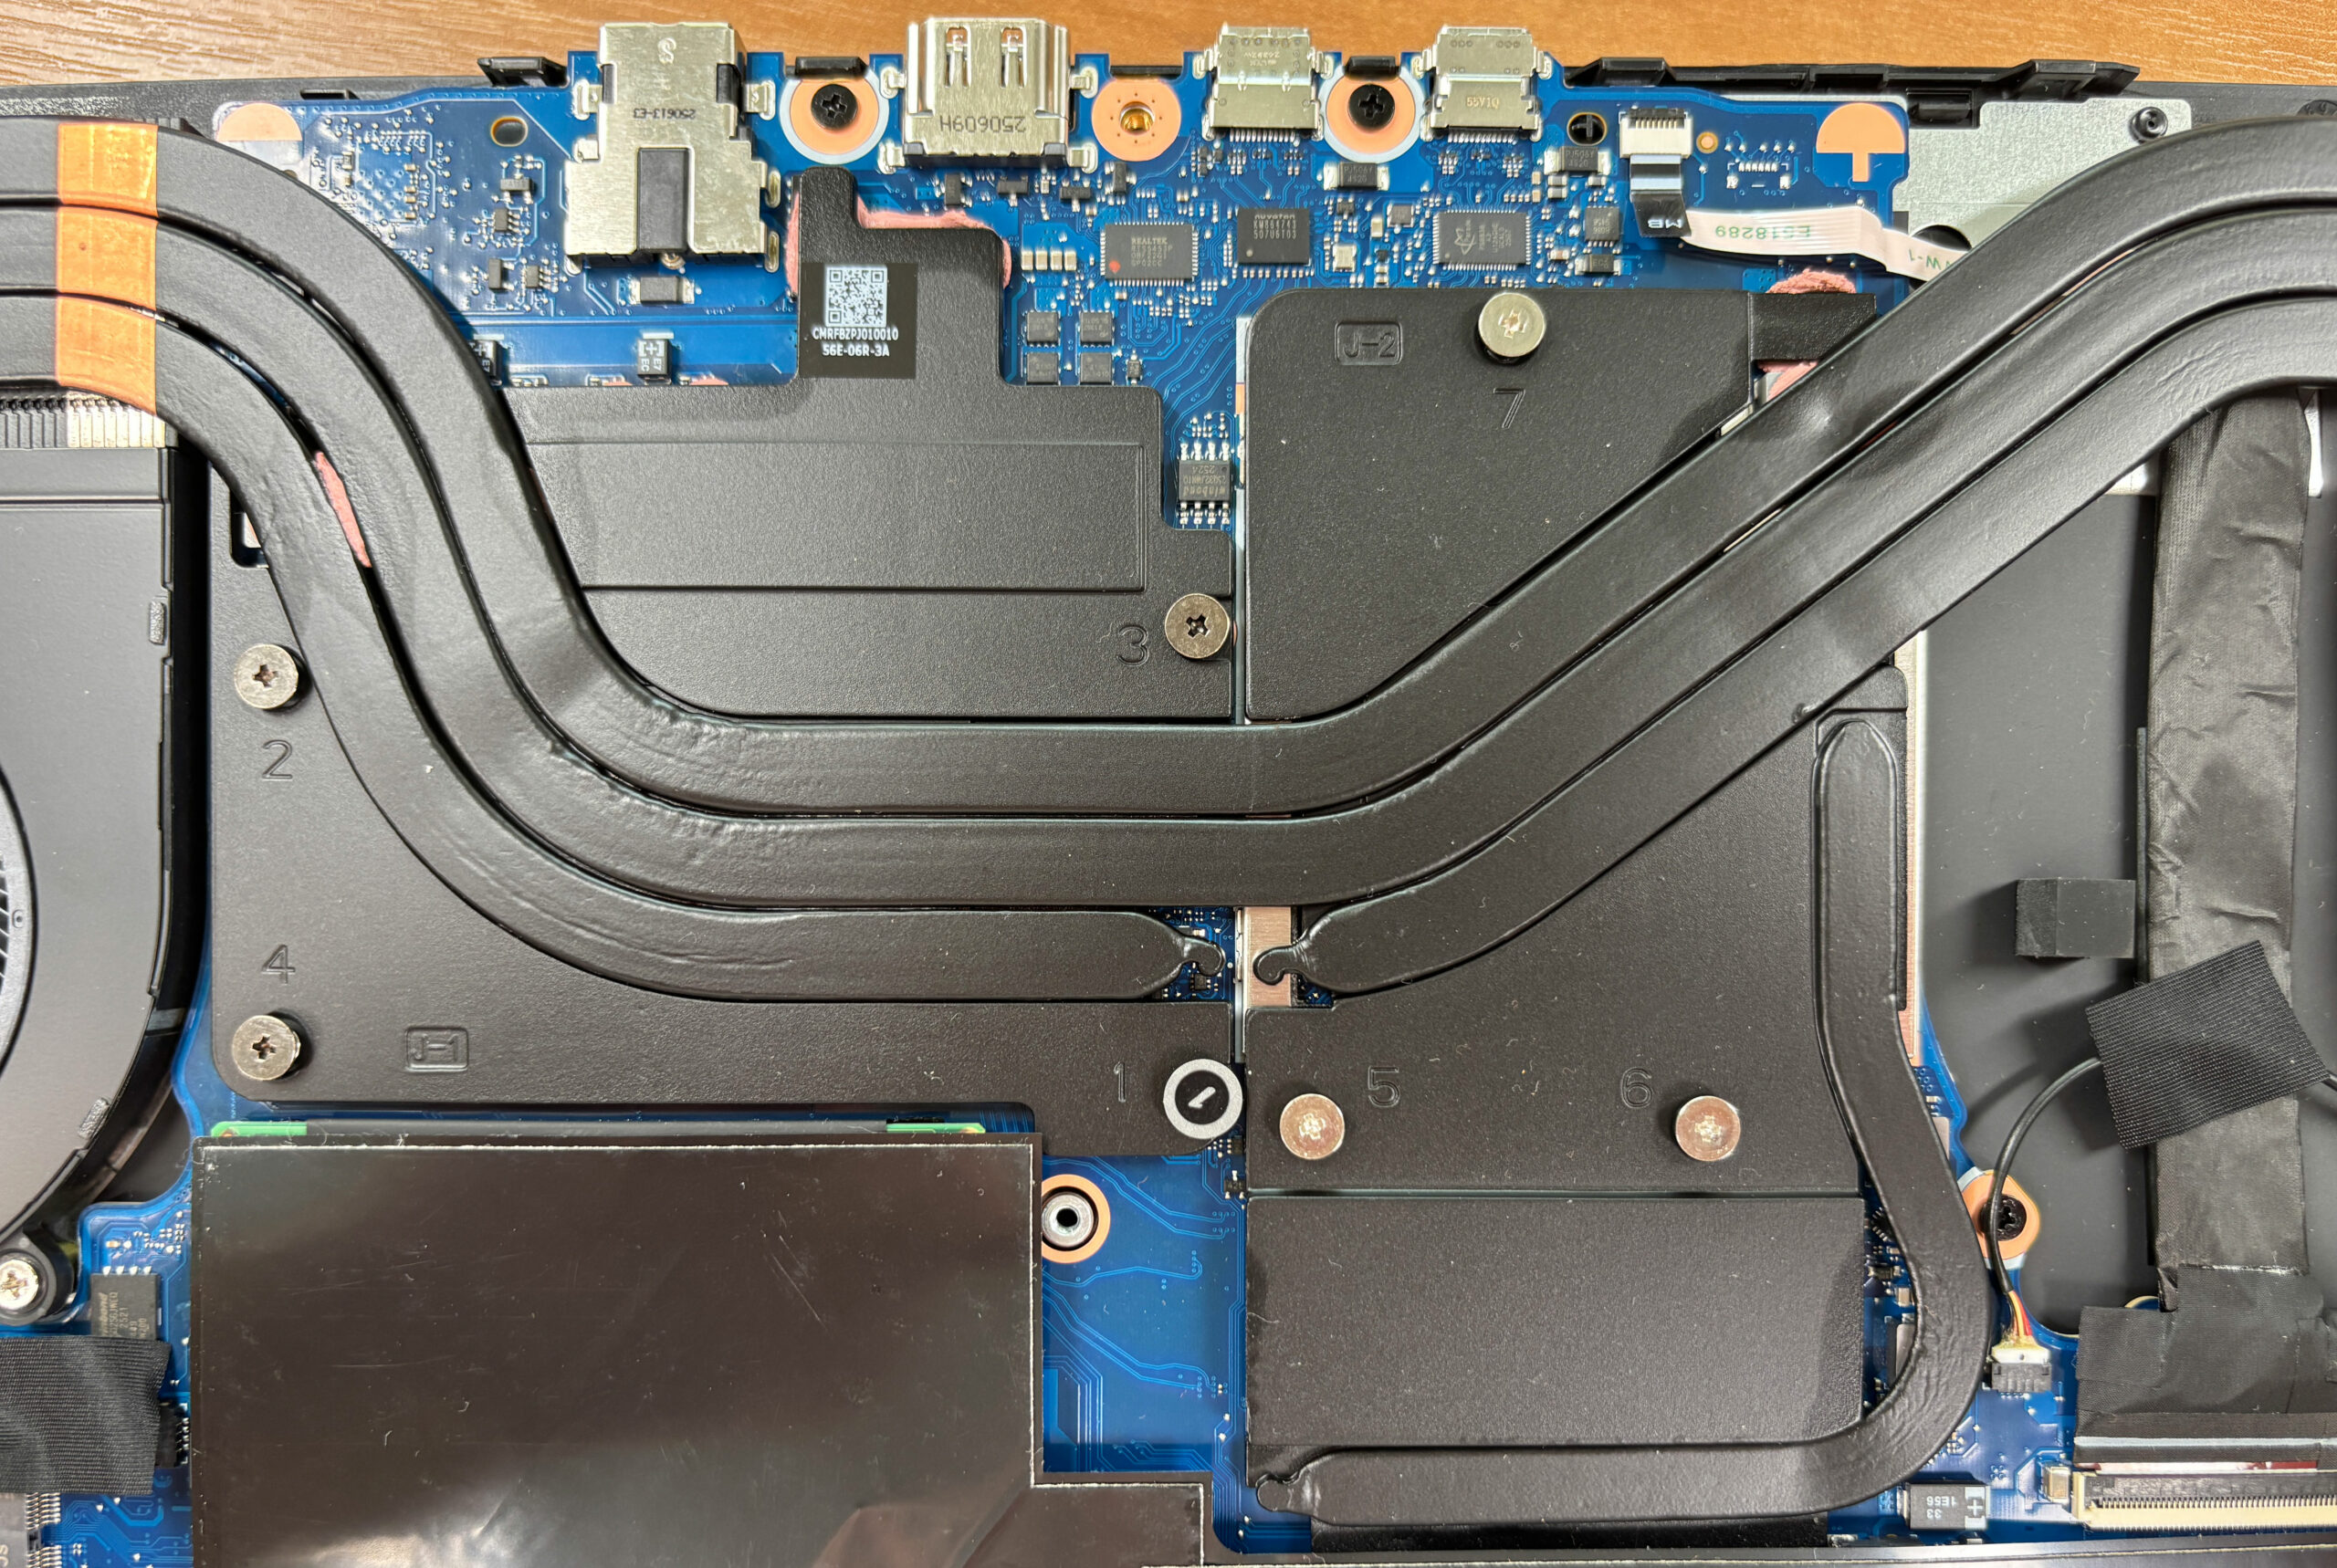
- Inside you’ll find a typical Nitro layout: two fans at the sides and a multi-pipe heatsink spanning the CPU and the discrete GPU.
- The cooling relies on twin radial blowers and several heat pipes that converge into fin stacks above the processor and graphics card.
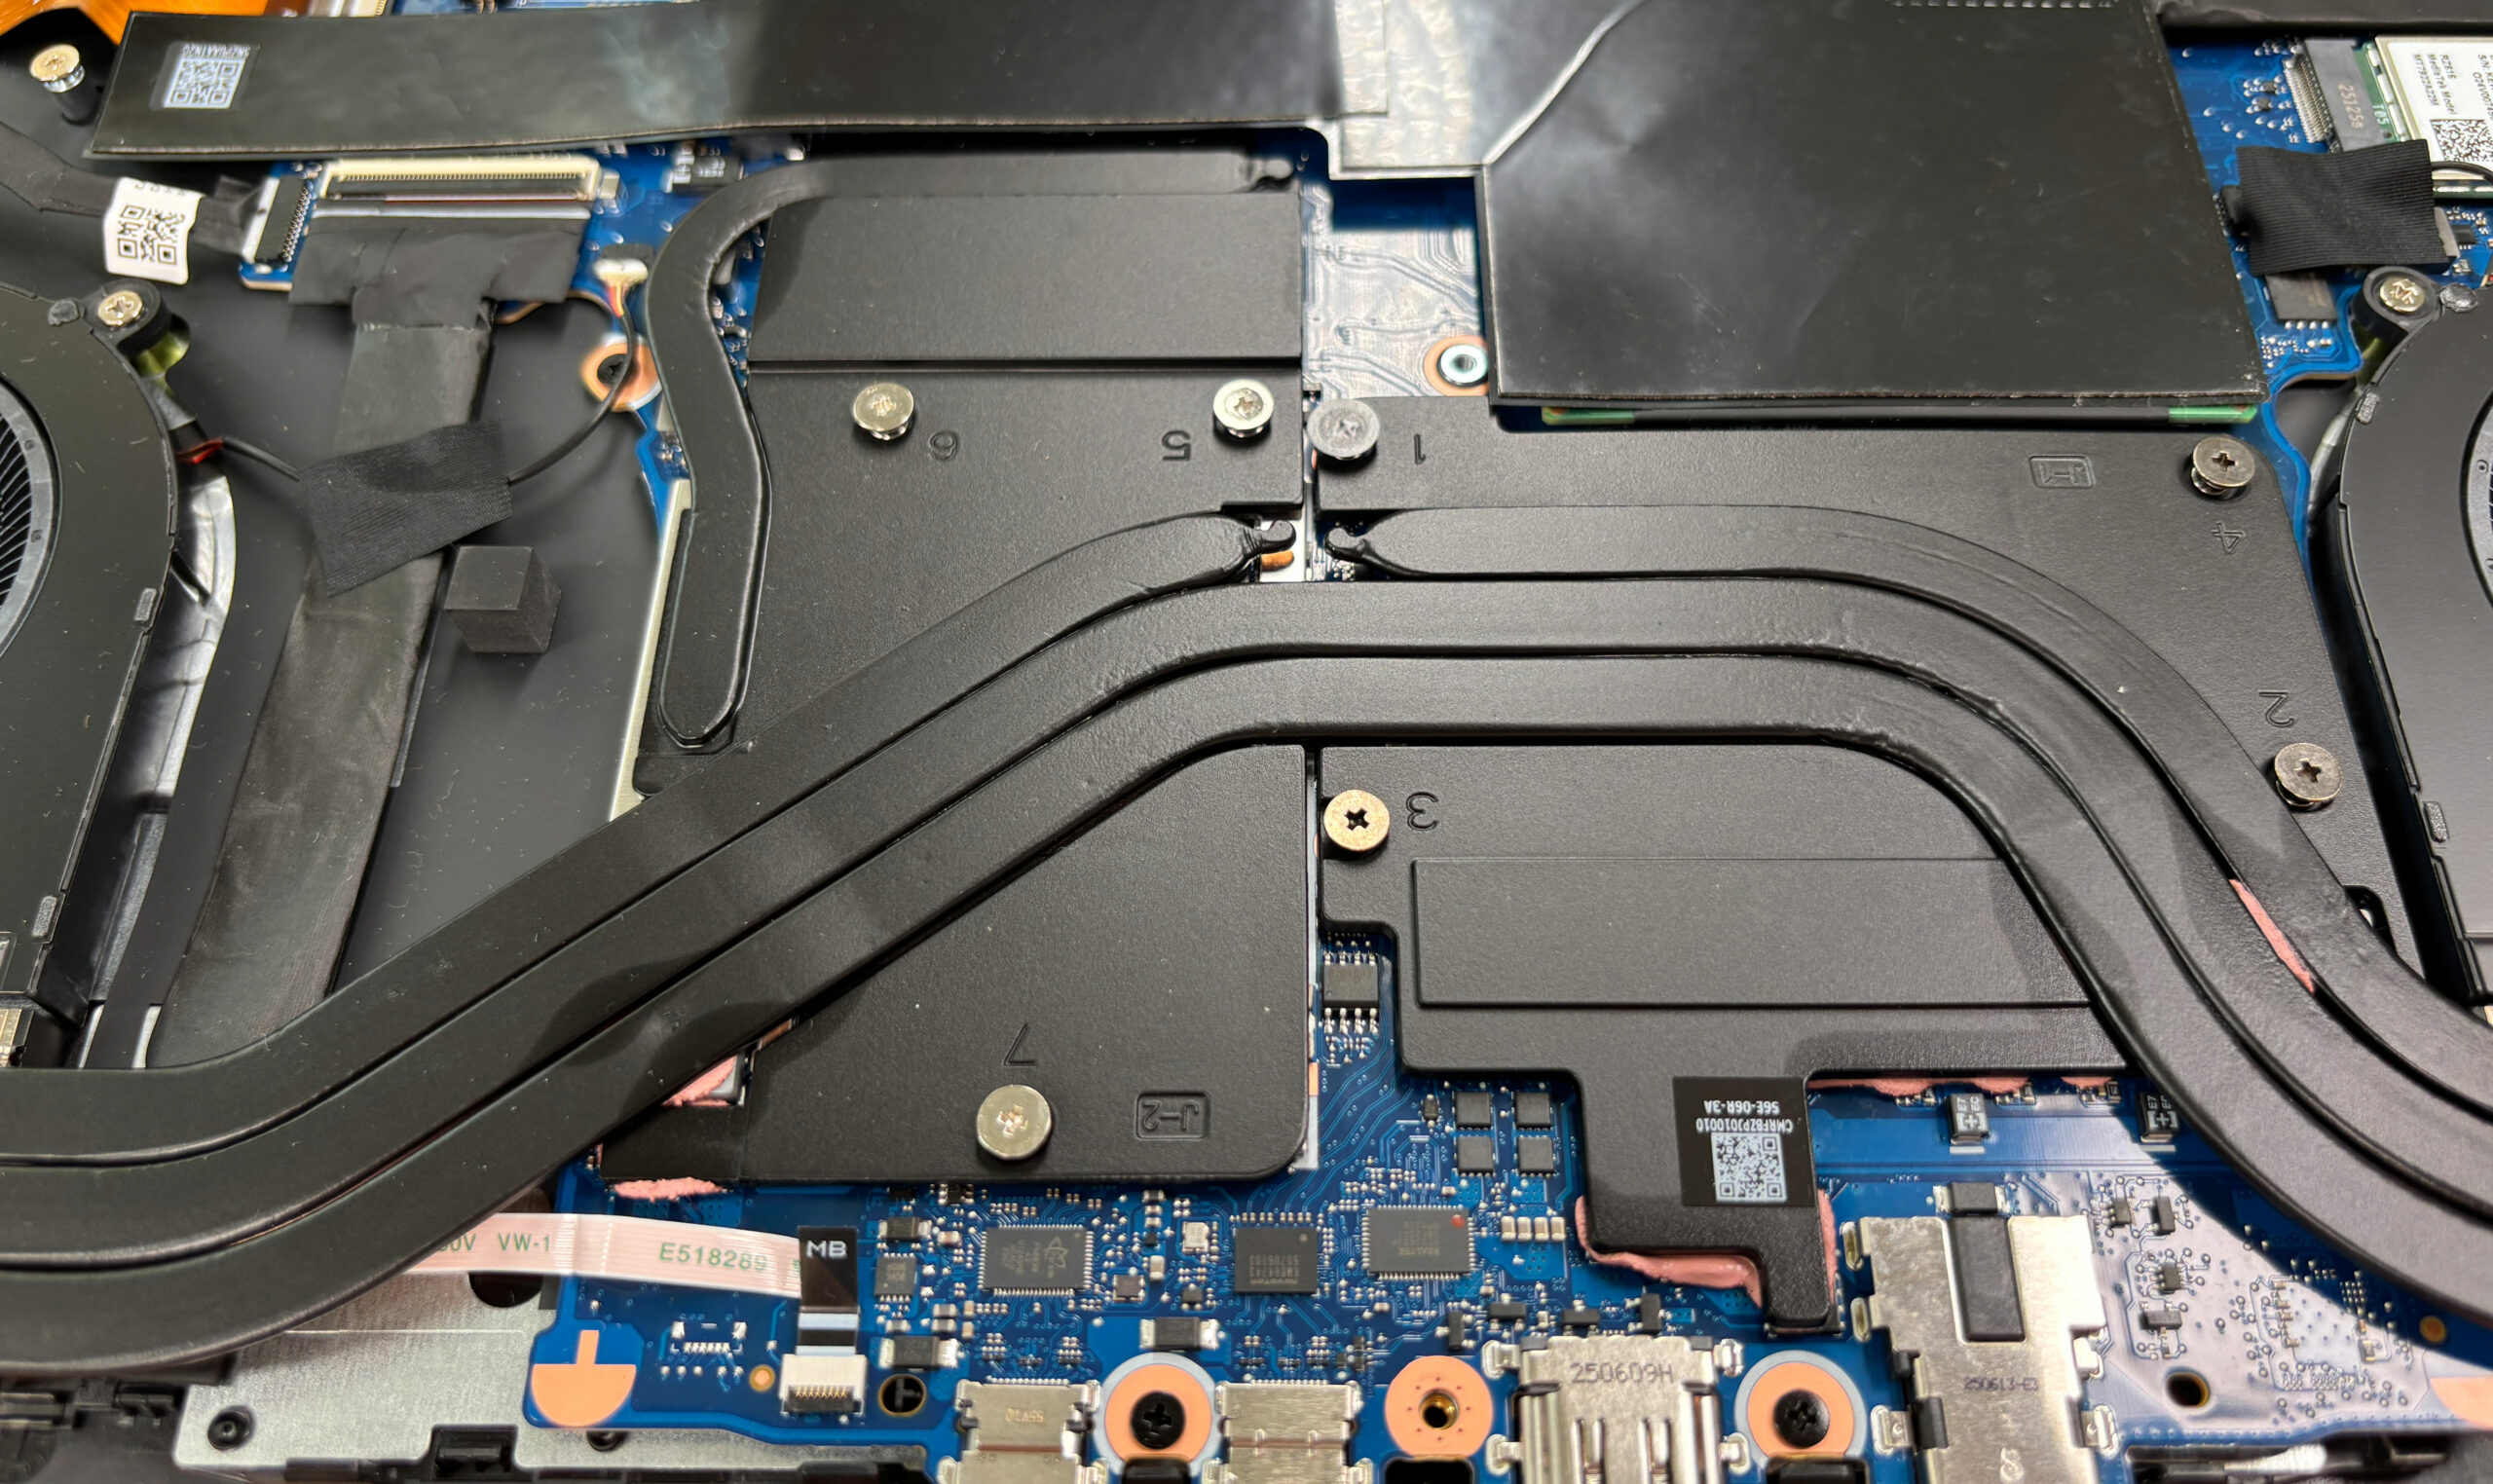
- The heat spreaders are stamped and numbered, which helps if you ever remove the assembly for repasting—follow the numbered order when loosening and tightening screws.
- For routine maintenance, you can clean dust from the fans and fin stacks with compressed air (hold the fan blades to prevent overspin) and wipe the intake areas before reinstalling the cover.
Memory upgrade
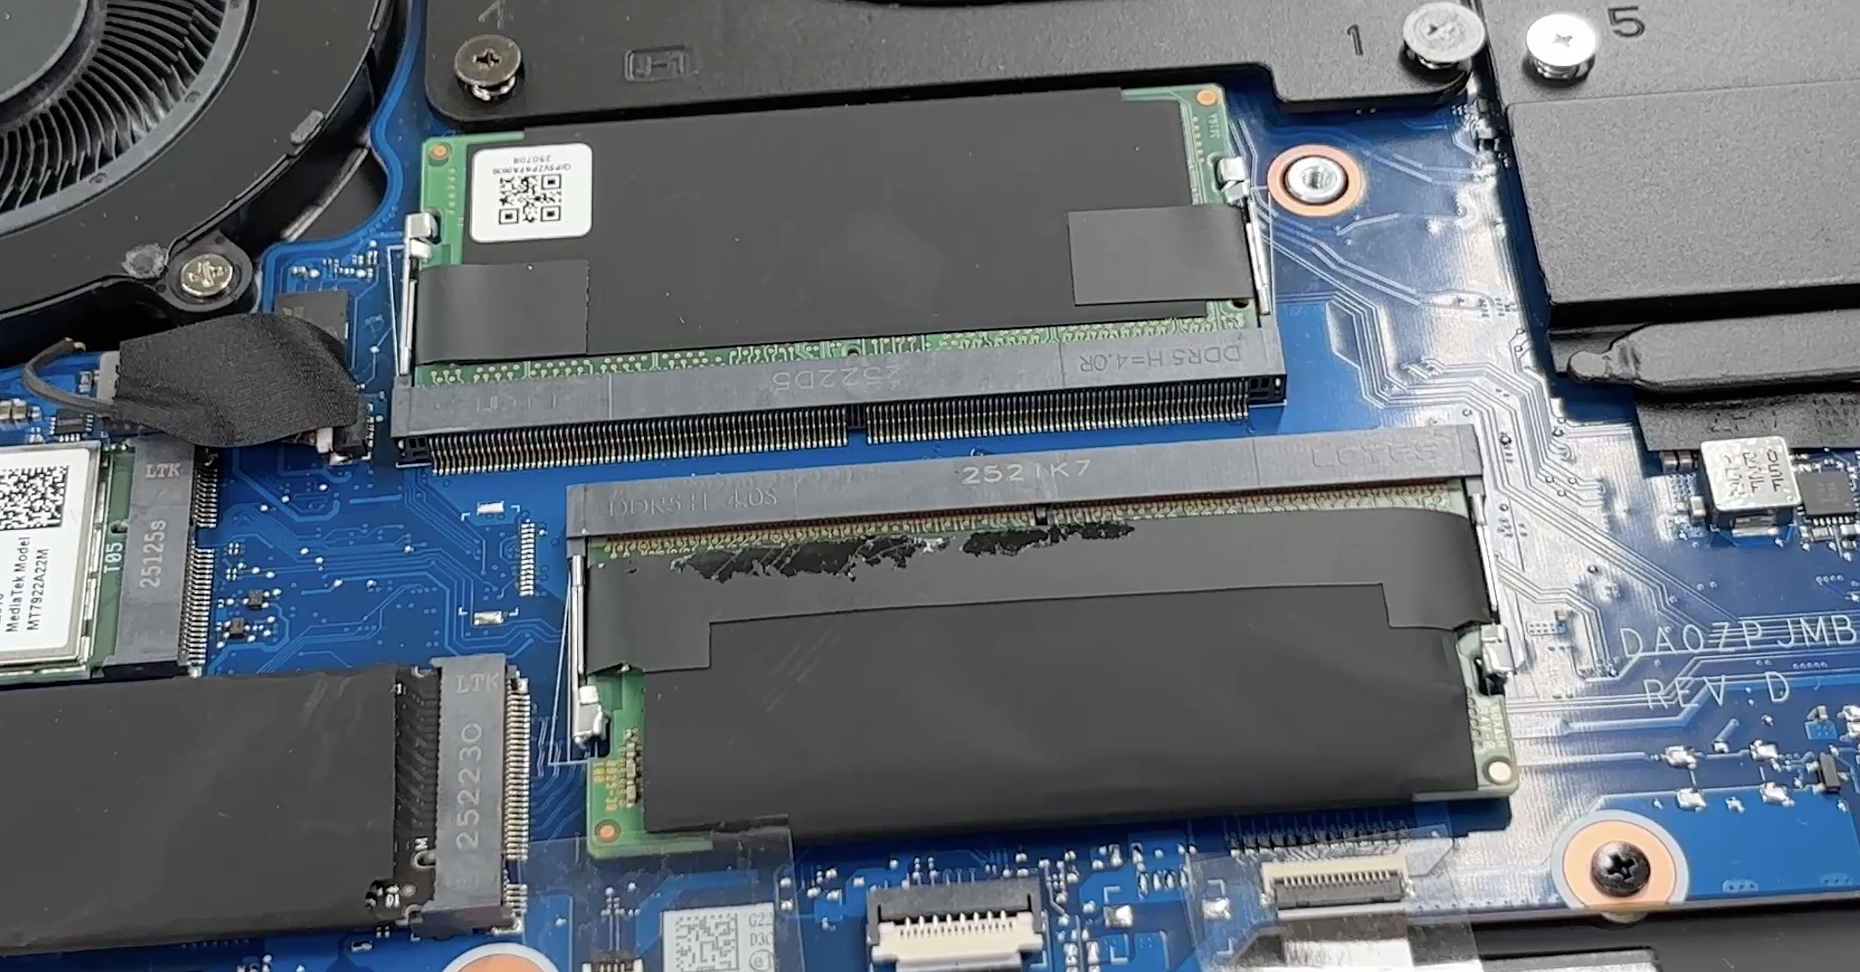
- Memory is fully upgradeable via two DDR5 SO-DIMM slots.
- Acer documentation for this series often lists support up to 32 GB and up to 5600 MT/s, but some similar Nitro platforms can accept higher capacities depending on CPU/memory controller limits and BIOS support.
- Both slots are accessible under the shields, so upgrading is straightforward: release the side clips, slide the old module out, insert the new SO-DIMM at an angle, then press it down until both clips lock.
- If you want the best performance, use a matched pair for dual-channel operation and stick to standard-height modules to avoid clearance issues with the shields.
Storage upgrade
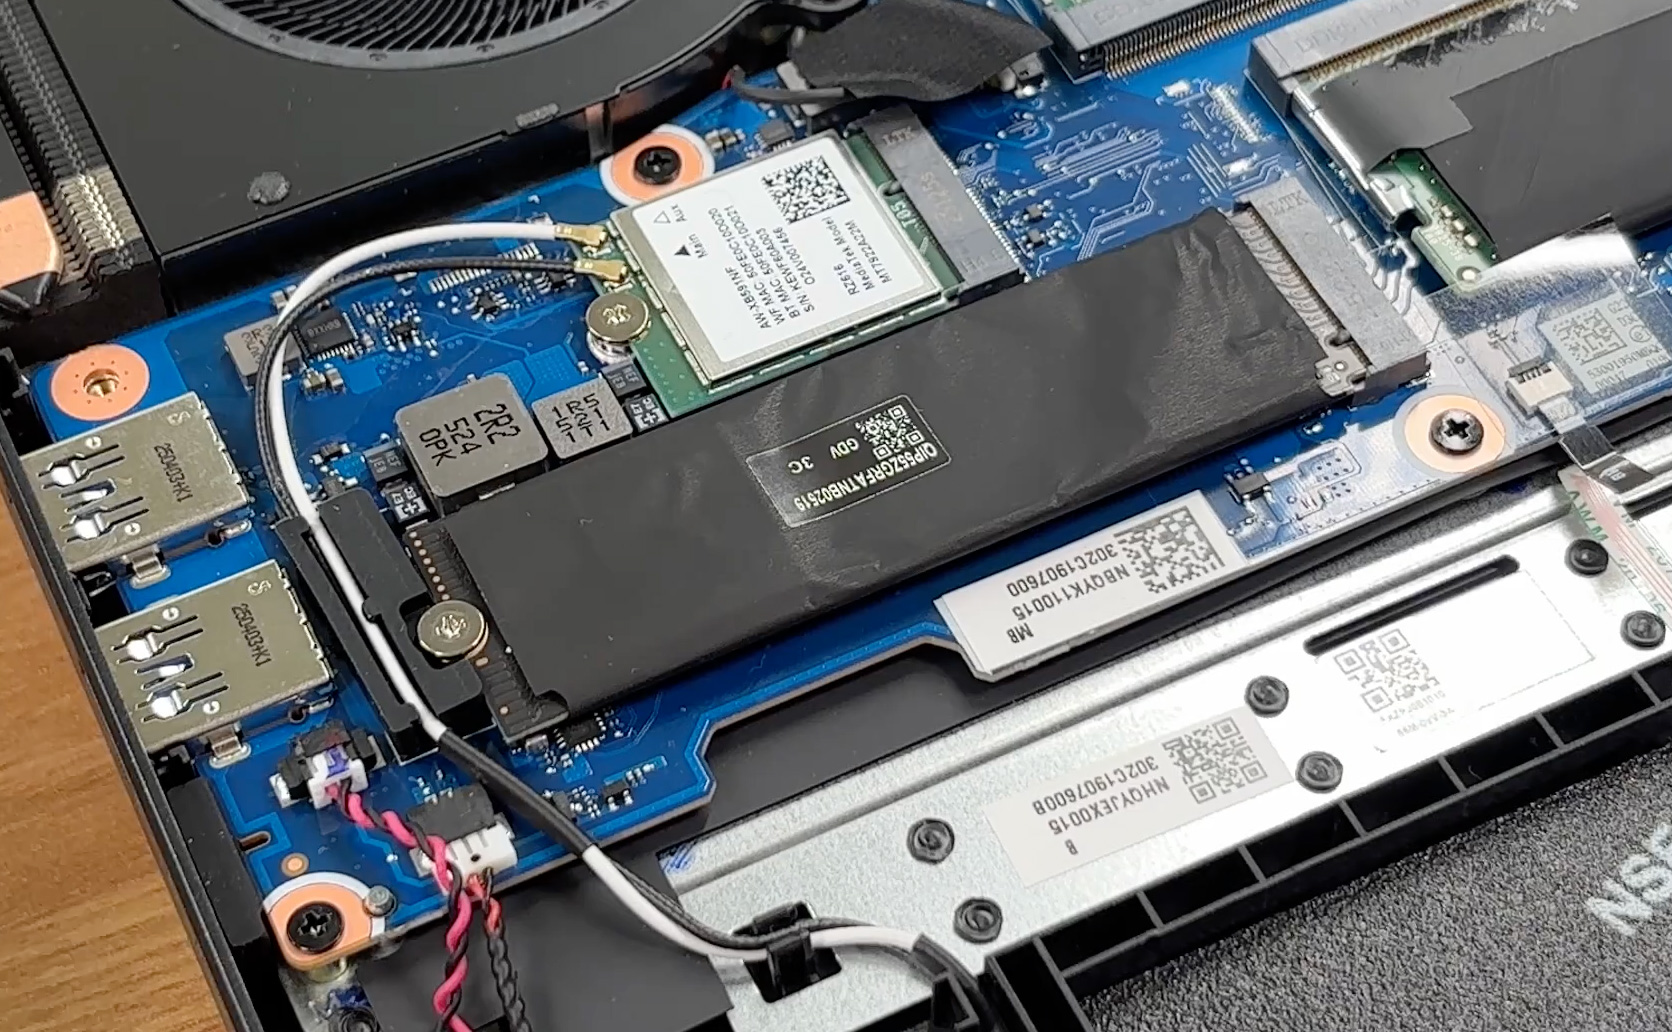
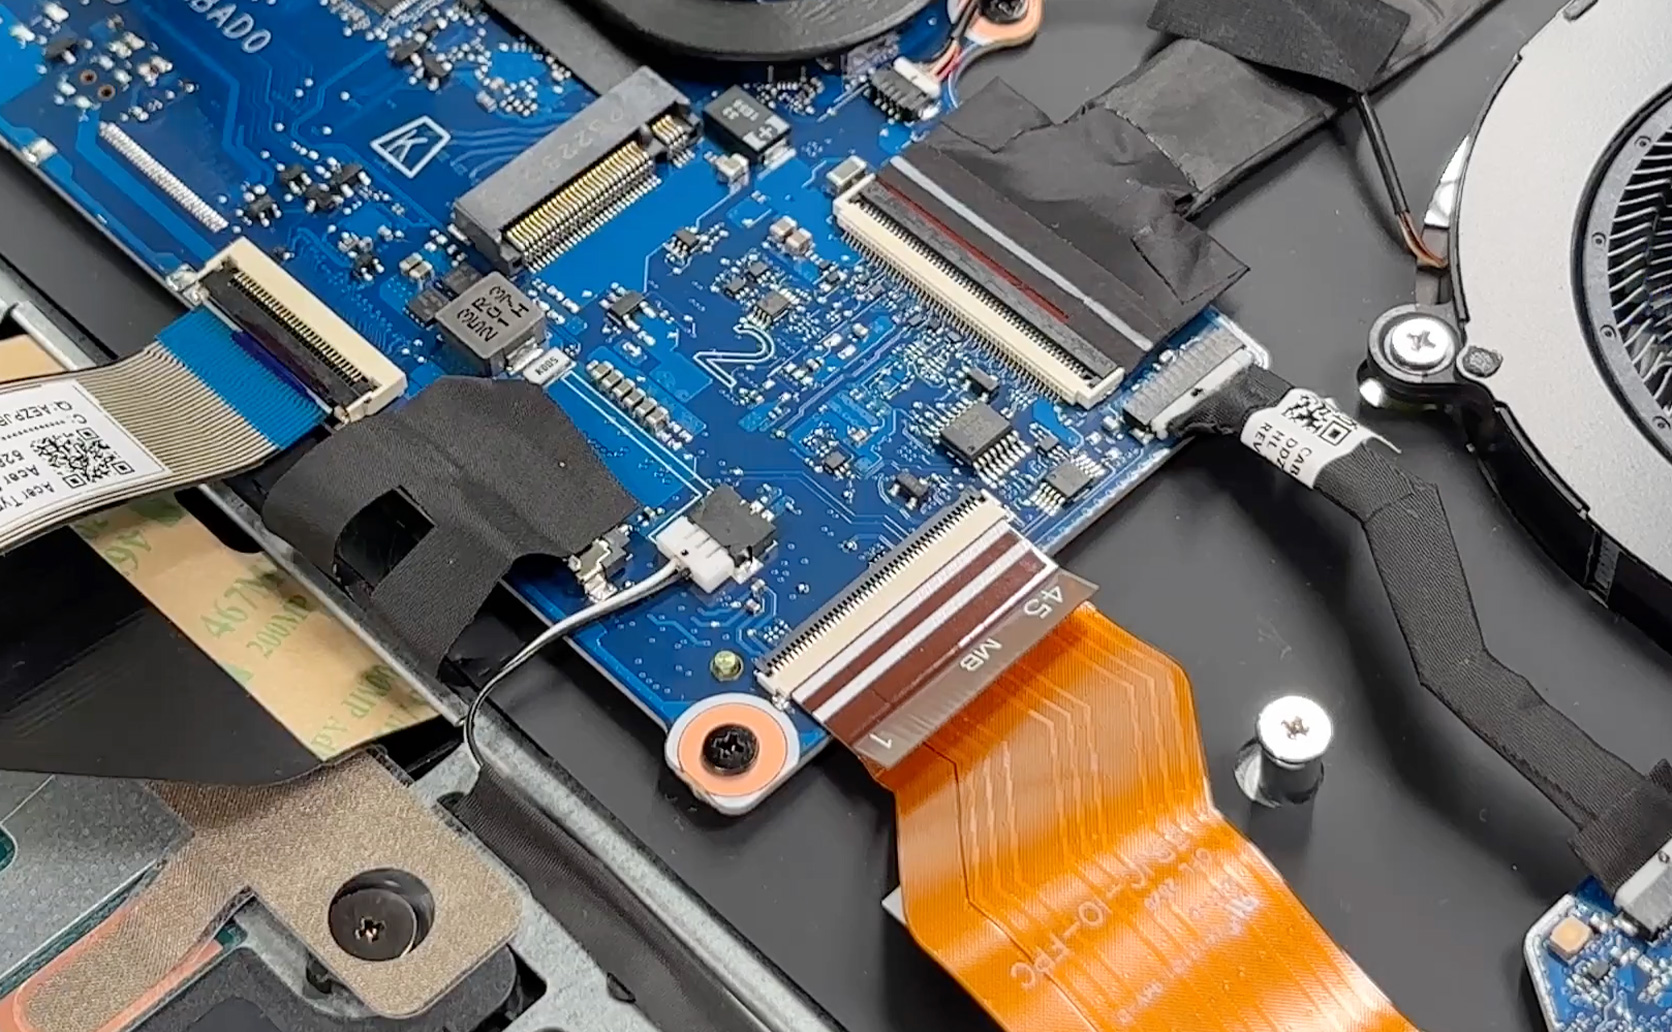
- Storage is handled by two M.2 2280 slots wired for PCIe 4.0 NVMe SSDs.
- Thermal pads and shielding are present. In our machine, one slot is populated and the second is open for expansion.
- To replace or add an SSD, remove the shield if required, undo the retention screw, slide the drive out, insert the new 2280 NVMe SSD, and reinstall the thermal interface so it maintains full contact.
- Avoid thick aftermarket heatsinks, since the factory shielding and pads are designed to fit the internal clearances.
Hint: Consider reviewing our Top M.2 SSDs Performance Rankings to select the best storage solution for your needs.
You can buy PCIe Gen4 NVMe SSDs here: Buy from Amazon.com (#CommissionsEarned)
Wireless card upgrade
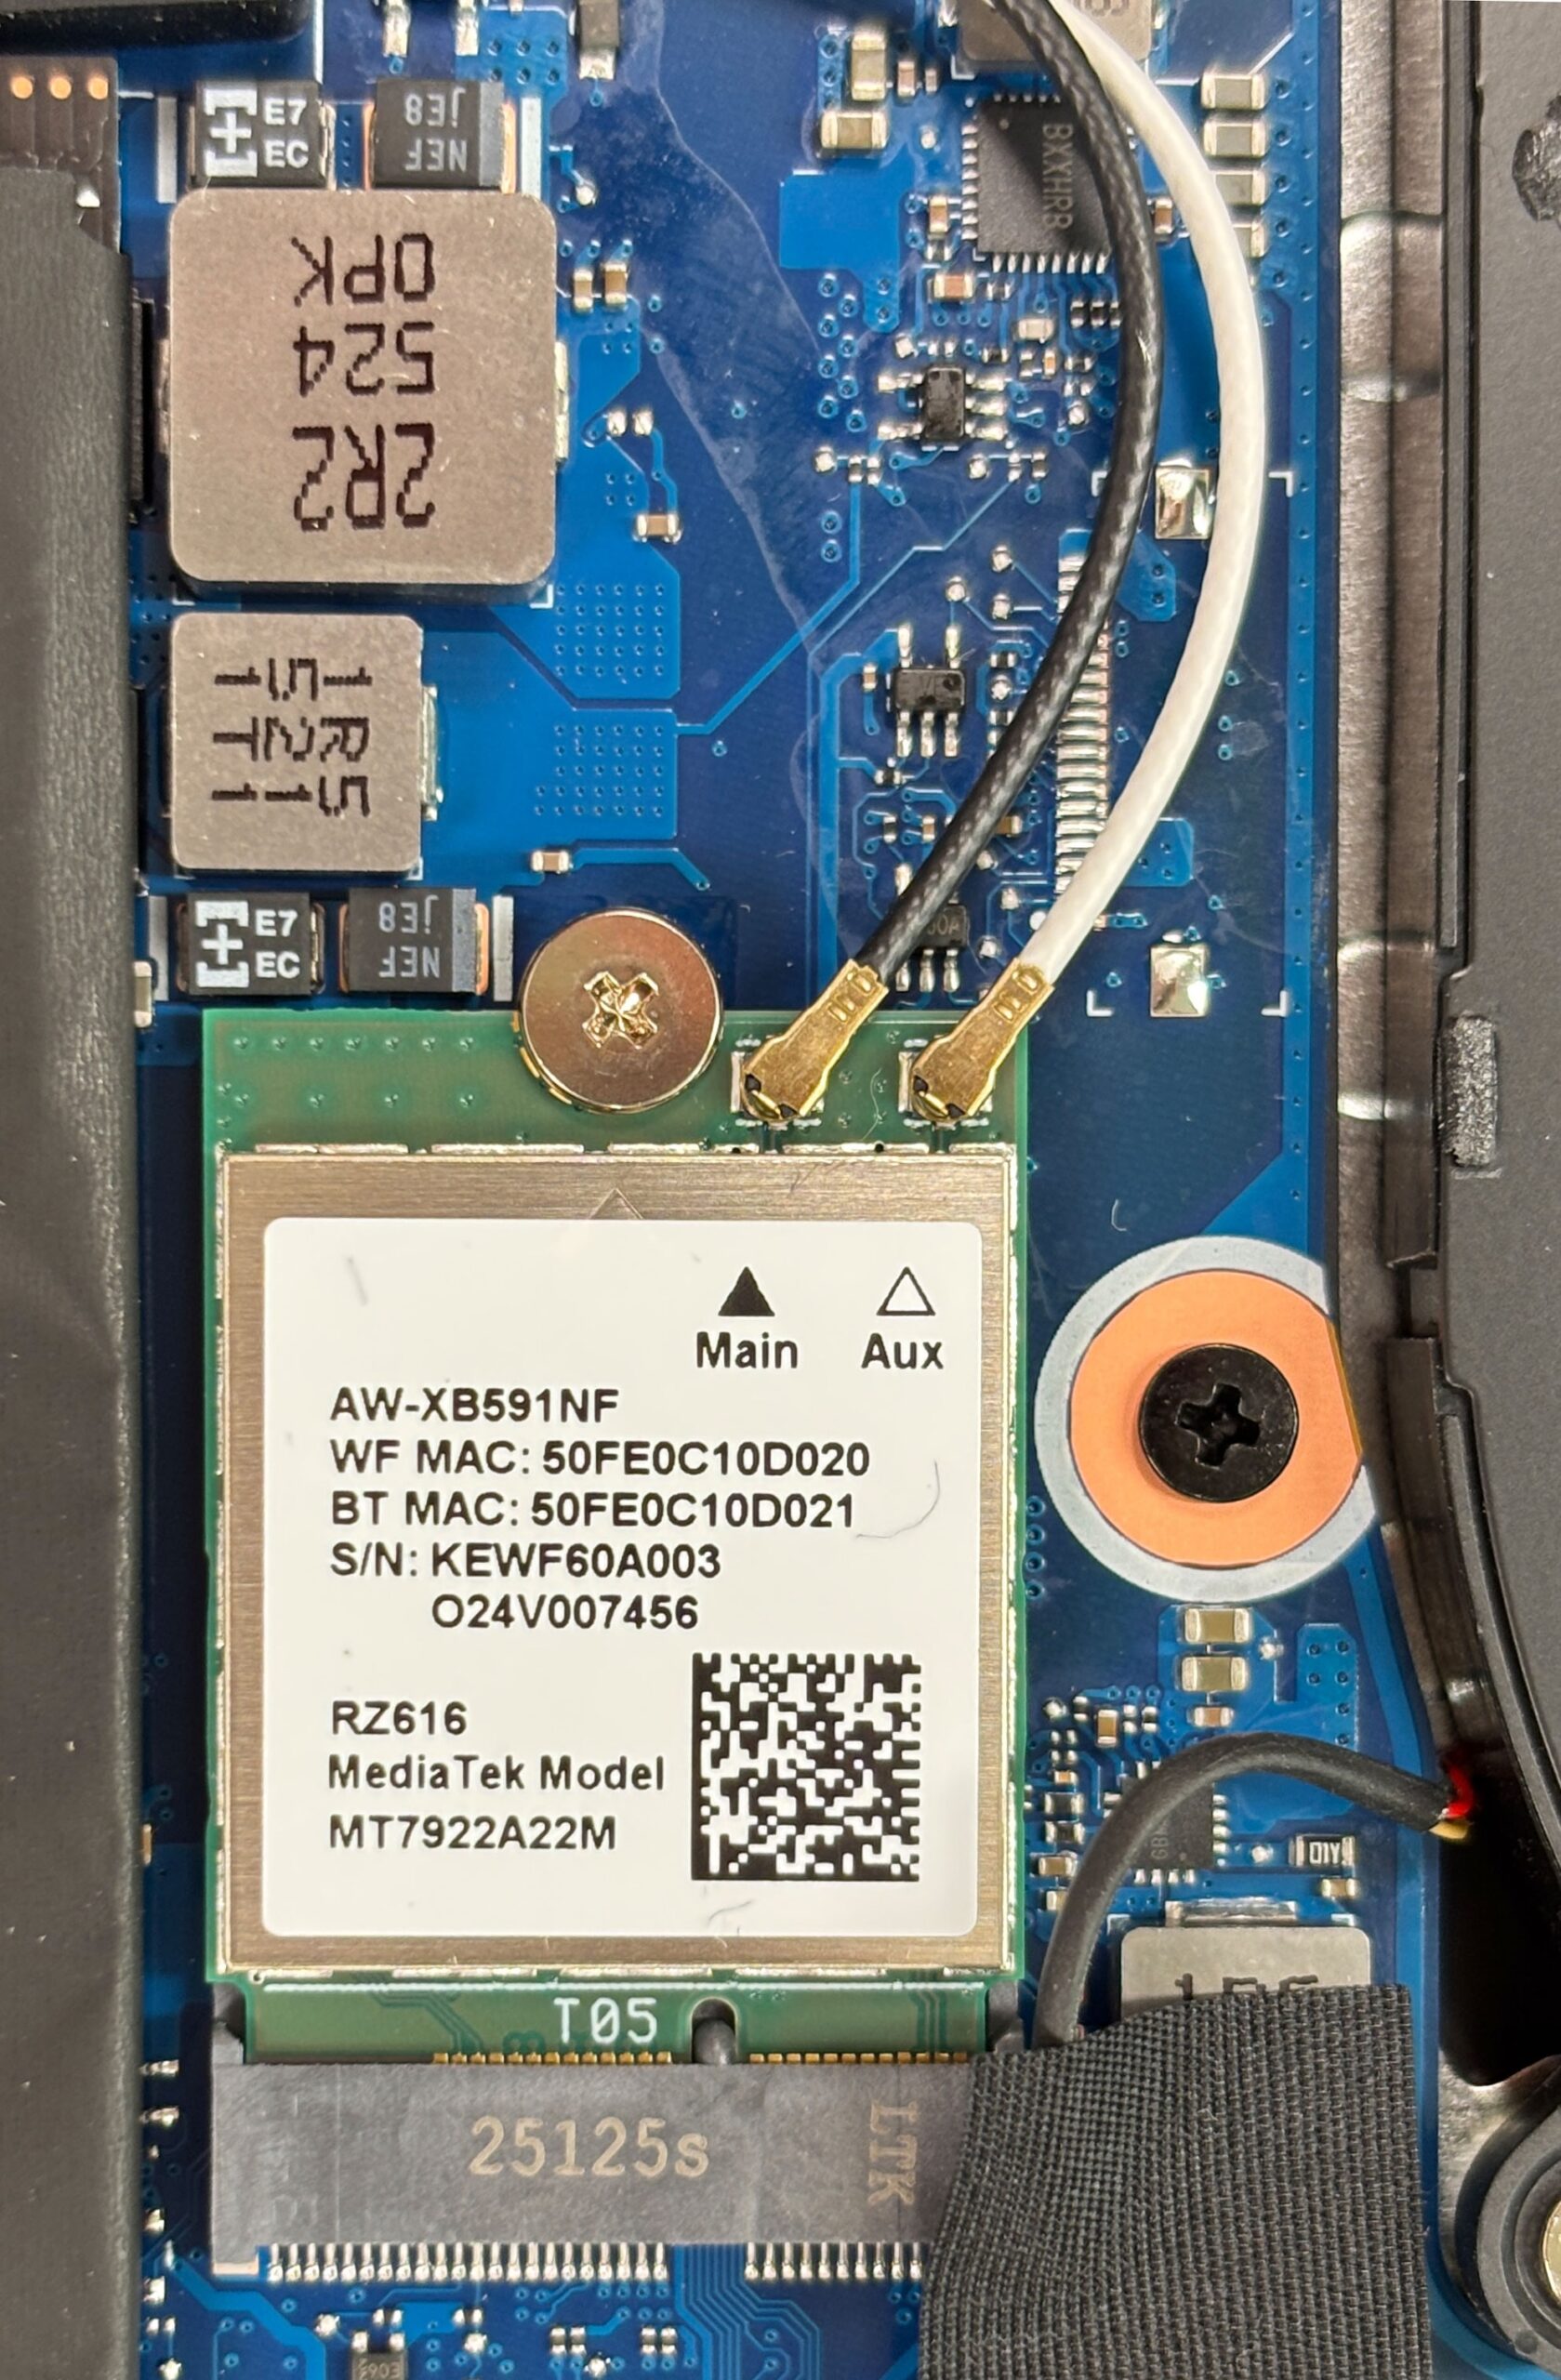
- The wireless module is replaceable and uses a standard M.2 card: MediaTek RZ616 (MT7922A2M), which provides Wi-Fi 6E.
- Bluetooth version can vary by implementation/driver stack, but this controller is commonly paired with Bluetooth 5.2 or 5.3; if a spec sheet claims “Bluetooth 5.4 or above,” verify the exact module and firmware in your configuration.
- To swap the card, disconnect the antenna leads by lifting them straight up, undo the single retention screw, slide the module out, install the new one, and press the antennas back down until they click.
Battery removal and replacement
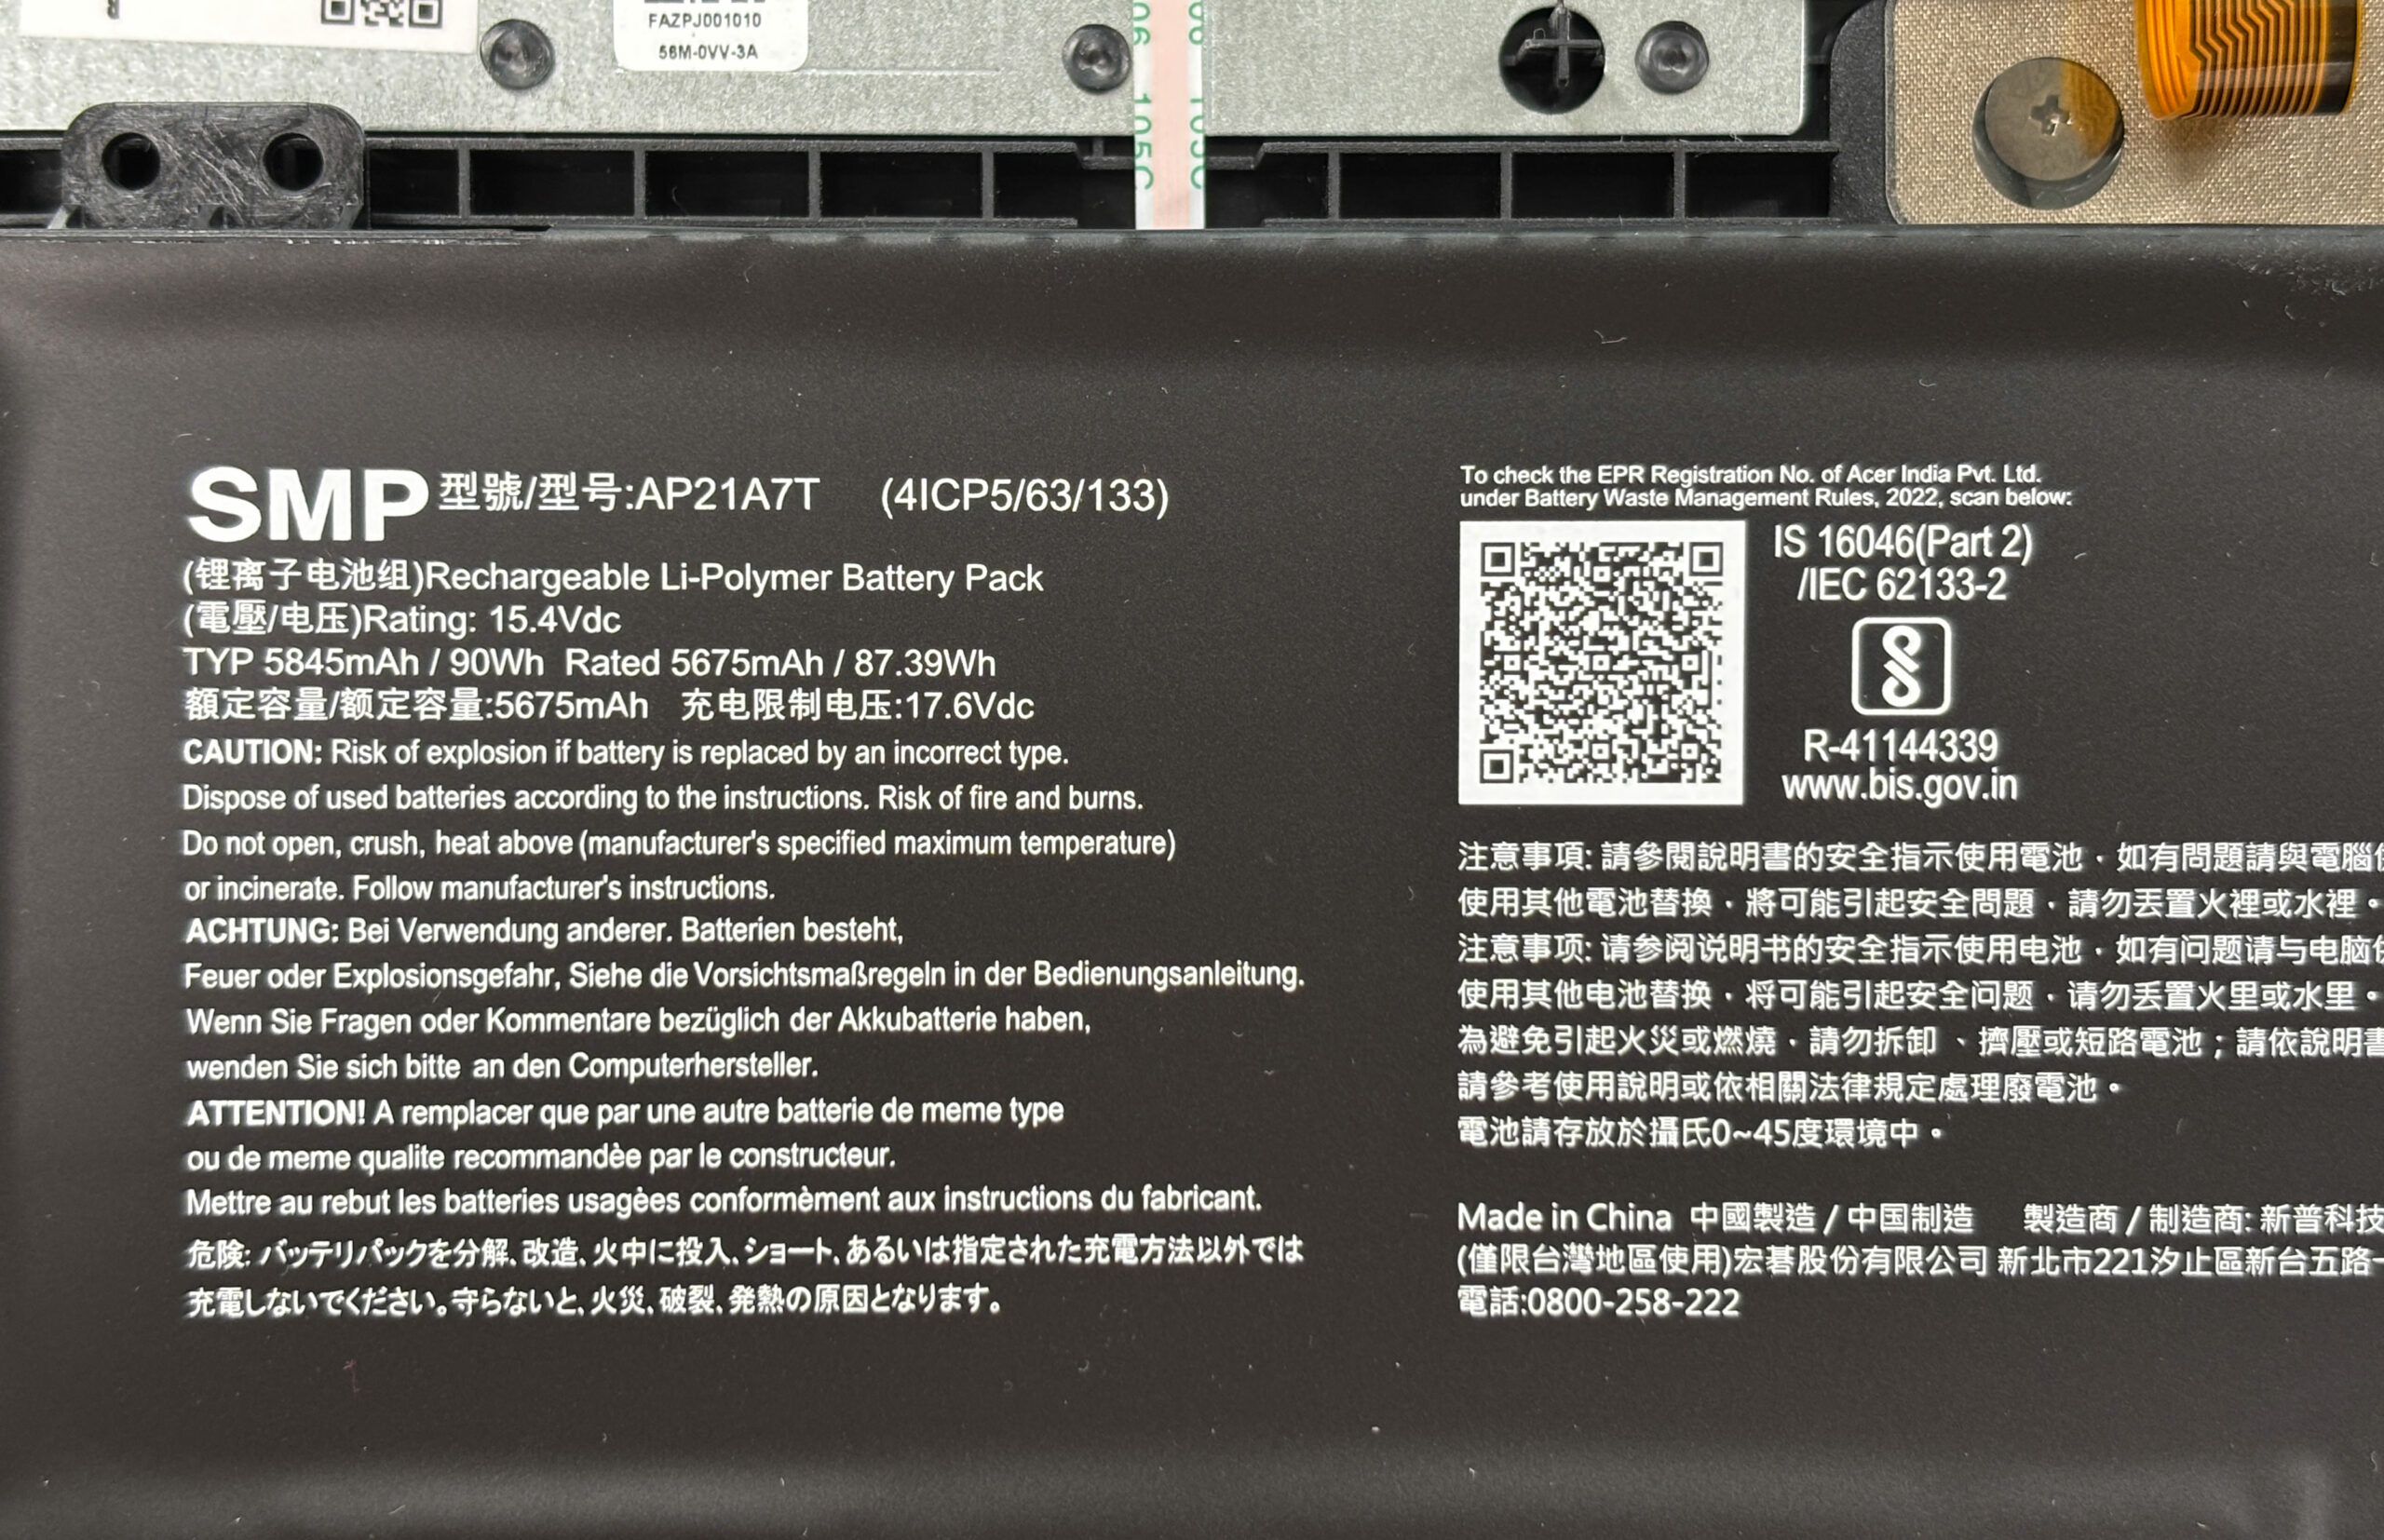
- The battery is a large Li-polymer pack labeled 90 Wh typical (5845 mAh) / 87.39 Wh rated (5675 mAh) at 15.4 V.
- Disconnect the battery cable from the motherboard before any other work.
- Once unplugged and any mounting screws (if present) are removed, the pack lifts out for replacement.
- When reinstalling, make sure the cable is routed cleanly and fully seated to avoid intermittent power issues.
Other serviceable parts and notes
- Other replaceable parts include both fans, the Wi-Fi card, both M.2 drives, and the two SO-DIMMs.
- The long stereo speakers sit on both sides of the battery and are accessible for cleaning or replacement once the bottom cover is removed.
- As usual for this class, the CPU and GPU are soldered and not user-upgradeable; practical upgrades focus on RAM, SSDs, Wi-Fi, and battery service.
Reassembly checklist
- Confirm both RAM modules are fully seated and latched.
- Confirm SSD screws are tight and thermal pads/shields are reinstalled properly.
- Confirm Wi-Fi antennas are snapped on and routed away from fan blades.
- Reconnect the battery last.
- Press the bottom cover around the perimeter until all clips engage, then reinstall the screws evenly.
Summary: The Acer Nitro 18 AI (AN18-61) offers easy access, two RAM slots, two PCIe 4.0 M.2 bays, and a serviceable ~90 Wh battery, making maintenance and future upgrades pleasantly straightforward.
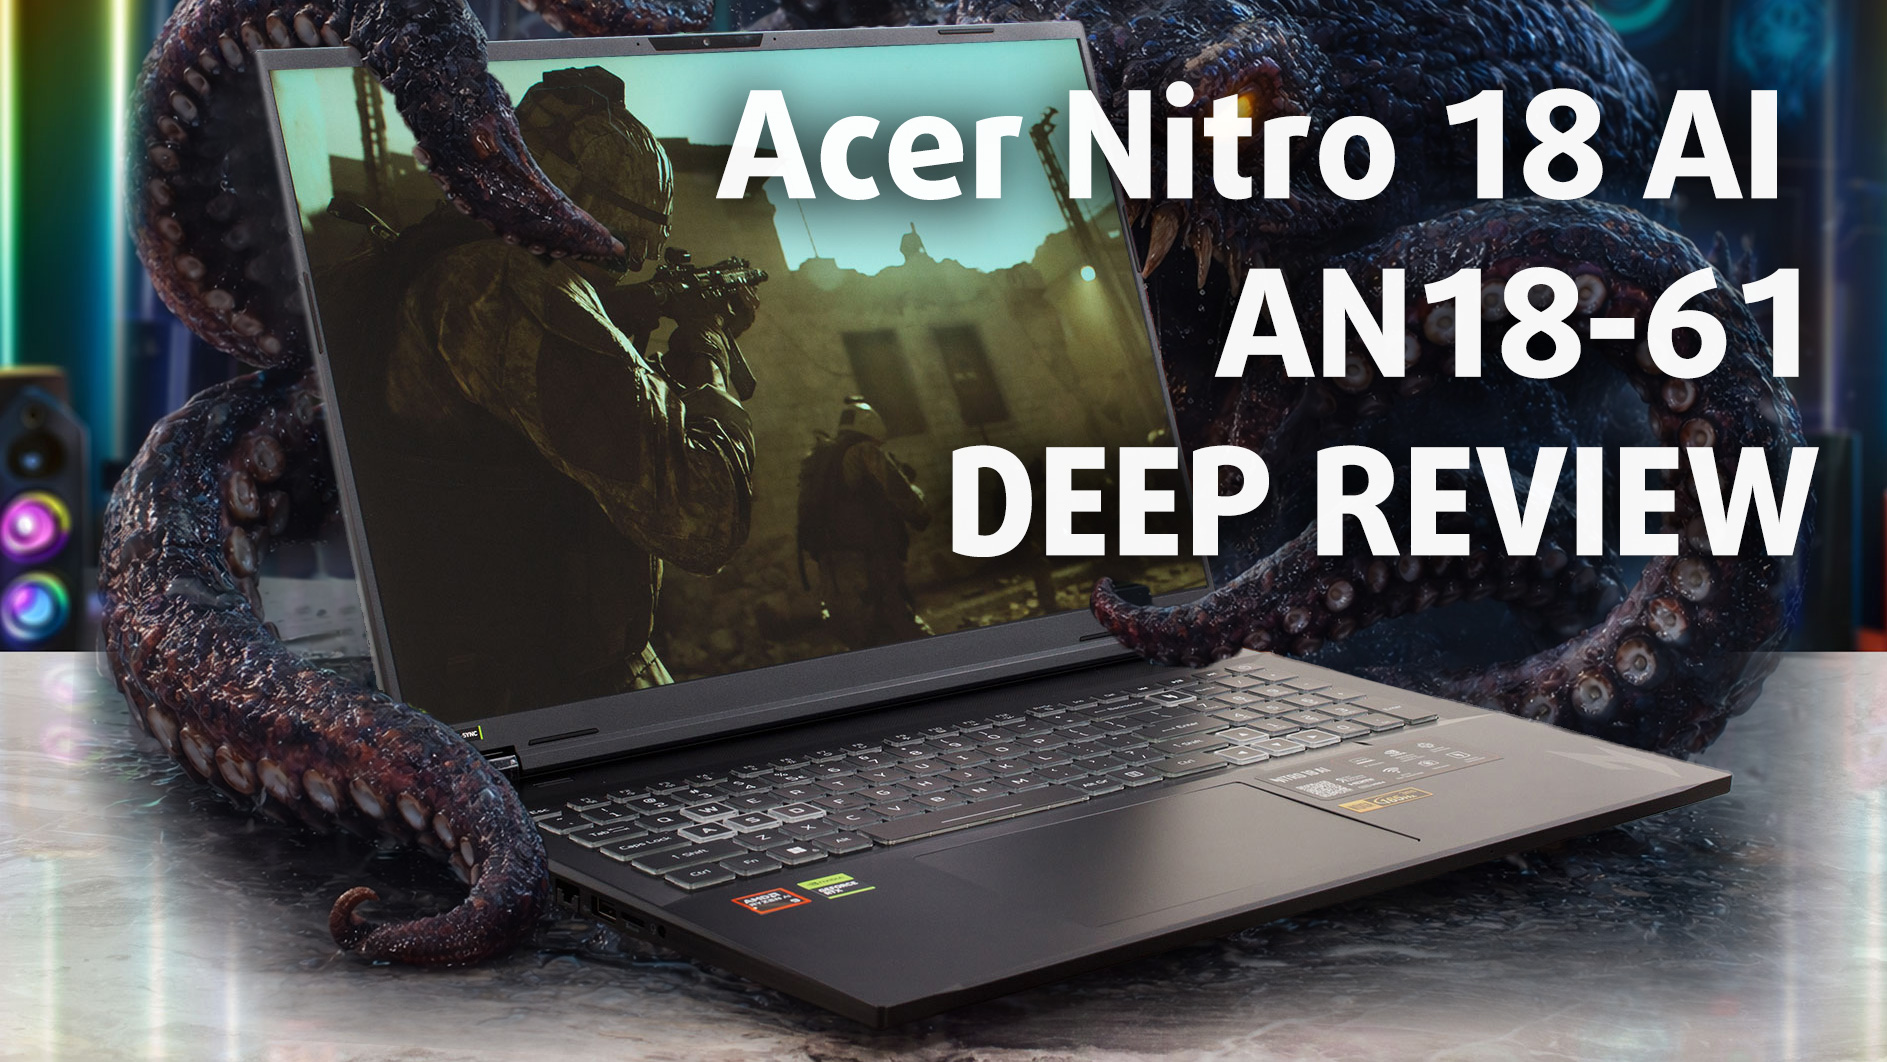
Acer Nitro 18 AI (AN18-61) in-depth review
The era of the massive gaming laptop is back, and the Acer Nitro 18 AI (AN18-61) is unapologetically leading the charge. This isn't a machine designed to slip unnoticed into a backpack; it is a dedicated battle station built to dominate your desk with an expansive 18-inch display and a chassis large enough to cool the most demanding hardware. Usually, upsizing a laptop brings diminishing returns, but Acer has used the extra space to pull off a surprising trick. Beyond the raw power and screen real estate, we discovered a hidden strength that defies the stereotypes of the "desktop replaceme[...]
Pros
- Excellent gaming performance with high sustained GPU clocks
- Great 165Hz QHD+ display with accurate colors and no PWM
- Exceptional battery life for an 18-inch gaming laptop (nearly 8 hours)
- Superb thermal management keeps the system cool and stable
- Fantastic upgradeability with two RAM and two M.2 slots
- Spacious keyboard with full-sized NumPad and huge trackpad
Cons
- Large, heavy chassis limits portability
- No physical privacy shutter or biometric login options
- Lid is prone to fingerprints and smudges
 Author: Dimitar Stalev

![[August 2026] Amazon USA: Top 10 Best-Selling Laptops – Apple MacBook Neo Dominates the Market with Massive Unit Sales!](https://laptopmedia.com/wp-content/uploads/2026/09/Best-Selling-Laptops-COM-Top-10-400x225.jpg)
![[August 2026] Amazon USA: Top 10 Best-Selling Gaming Laptops – ASUS ROG Strix G16 Dominates the Market with Massive Unit Sales](https://laptopmedia.com/wp-content/uploads/2026/09/Best-Selling-Gaming-Laptops-COM-Top-10-400x225.jpg)
![[July 2026] Amazon Global: Top 10 Best-Selling Laptops – Apple MacBook Neo Dominates the Charts as Budget and Premium Notebooks Split the Market](https://laptopmedia.com/wp-content/uploads/2026/08/Best-Selling-Laptops-GLOBAL-Top-10-400x225.jpg)
![[July 2026] Amazon Global: Top 10 Best-Selling Gaming Laptops – ASUS ROG Strix G16 Dominates the Global Market with Record-Breaking Unit Sales](https://laptopmedia.com/wp-content/uploads/2026/08/Best-Selling-Gaming-Laptops-GLOBAL-Top-10-400x225.jpg)
![[July 2026] Global Ranking of Best-Selling Laptop GPUs on Amazon – RTX 5060 Dominate Premium, Intel Still Rules Budget](https://laptopmedia.com/wp-content/uploads/2026/08/Best-Selling-GPUs-GLOBAL-Top-10-400x225.jpg)