How to open ASUS Zenbook S 14 UX5406 – disassembly and upgrade options
Opening the Device
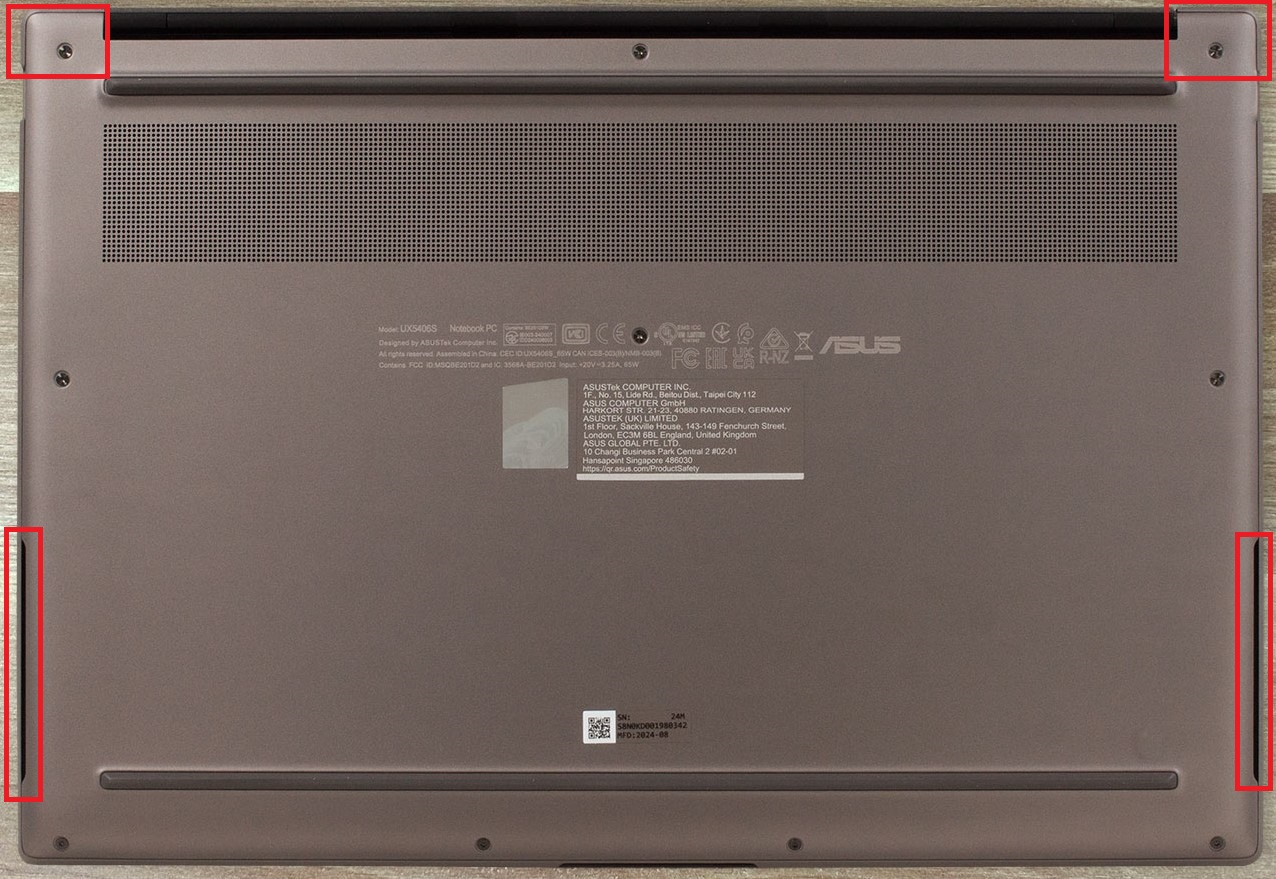
- Undo the 10 Torx-head screws securing the bottom panel.
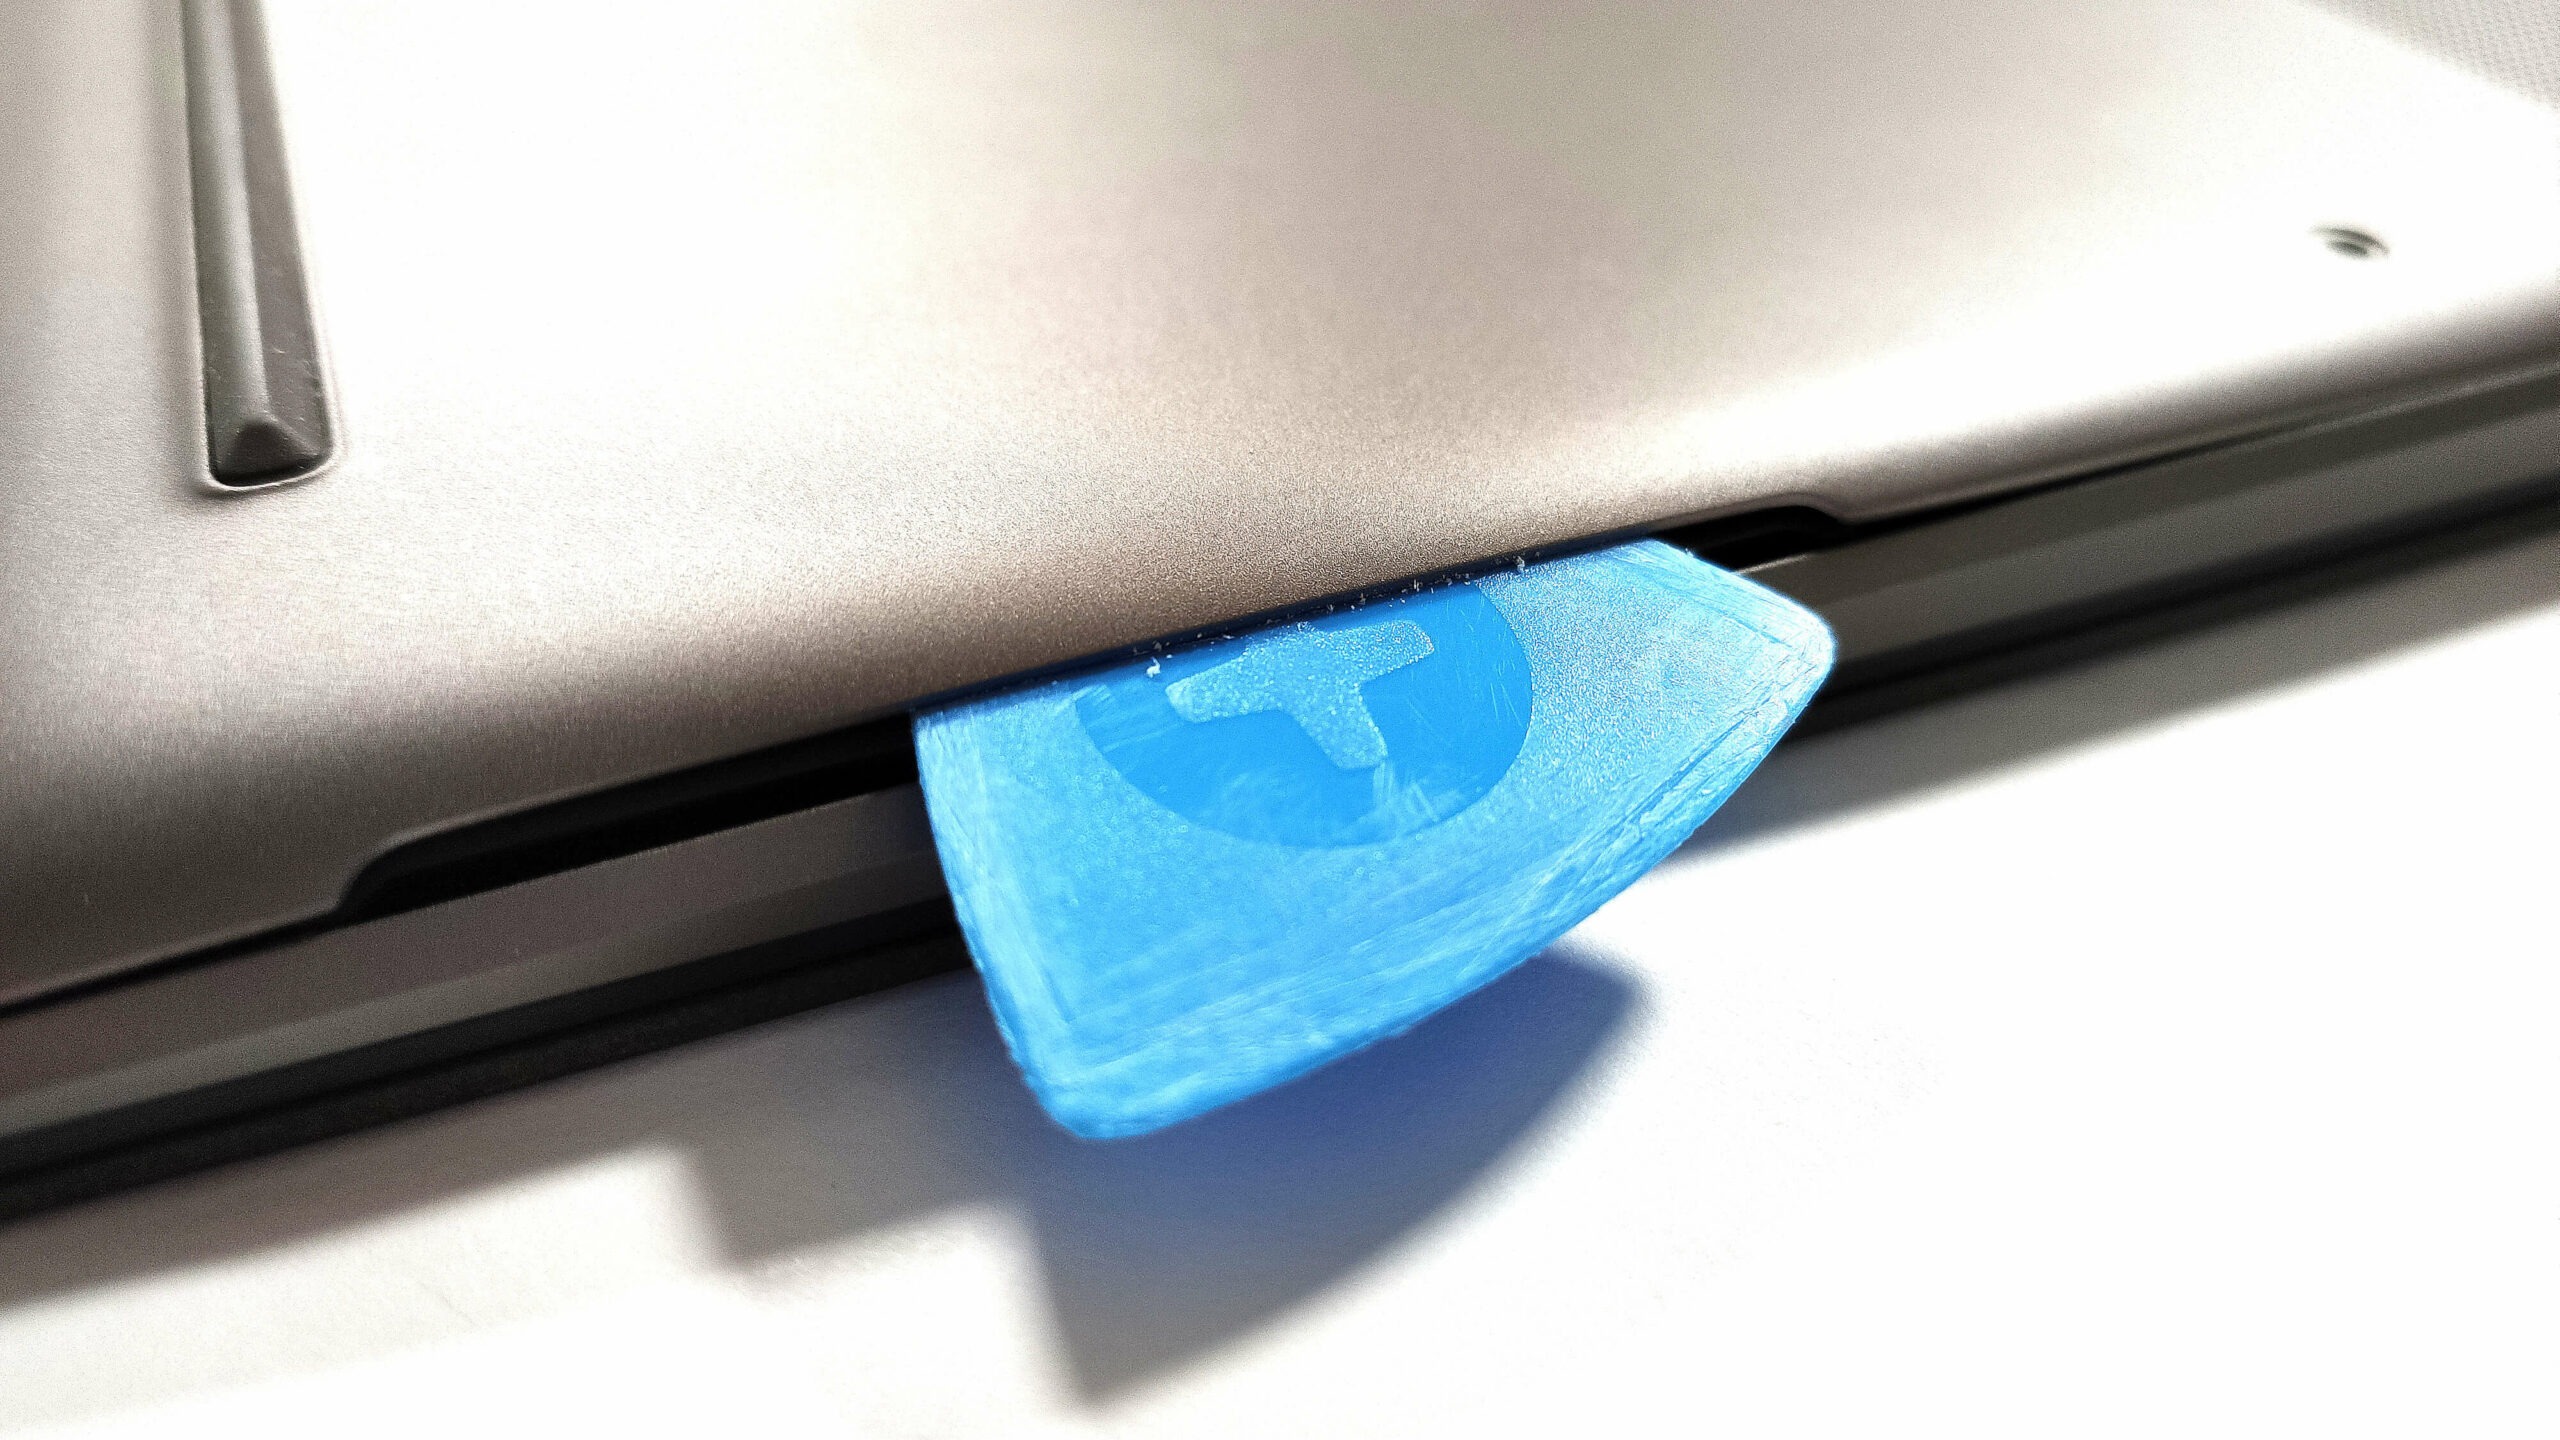
- If you’re confident, the easiest way to start is from the cutouts. Insert a thin plastic tool at a 45-degree angle, with the top side pointing inside the bottom panel.
- Pop half of the plate by lifting the tool, then work your way around the sides, back, and front.
- Alternatively, pry the top two edges (but note the stiff internal clips), then continue with the back, sides, and front.
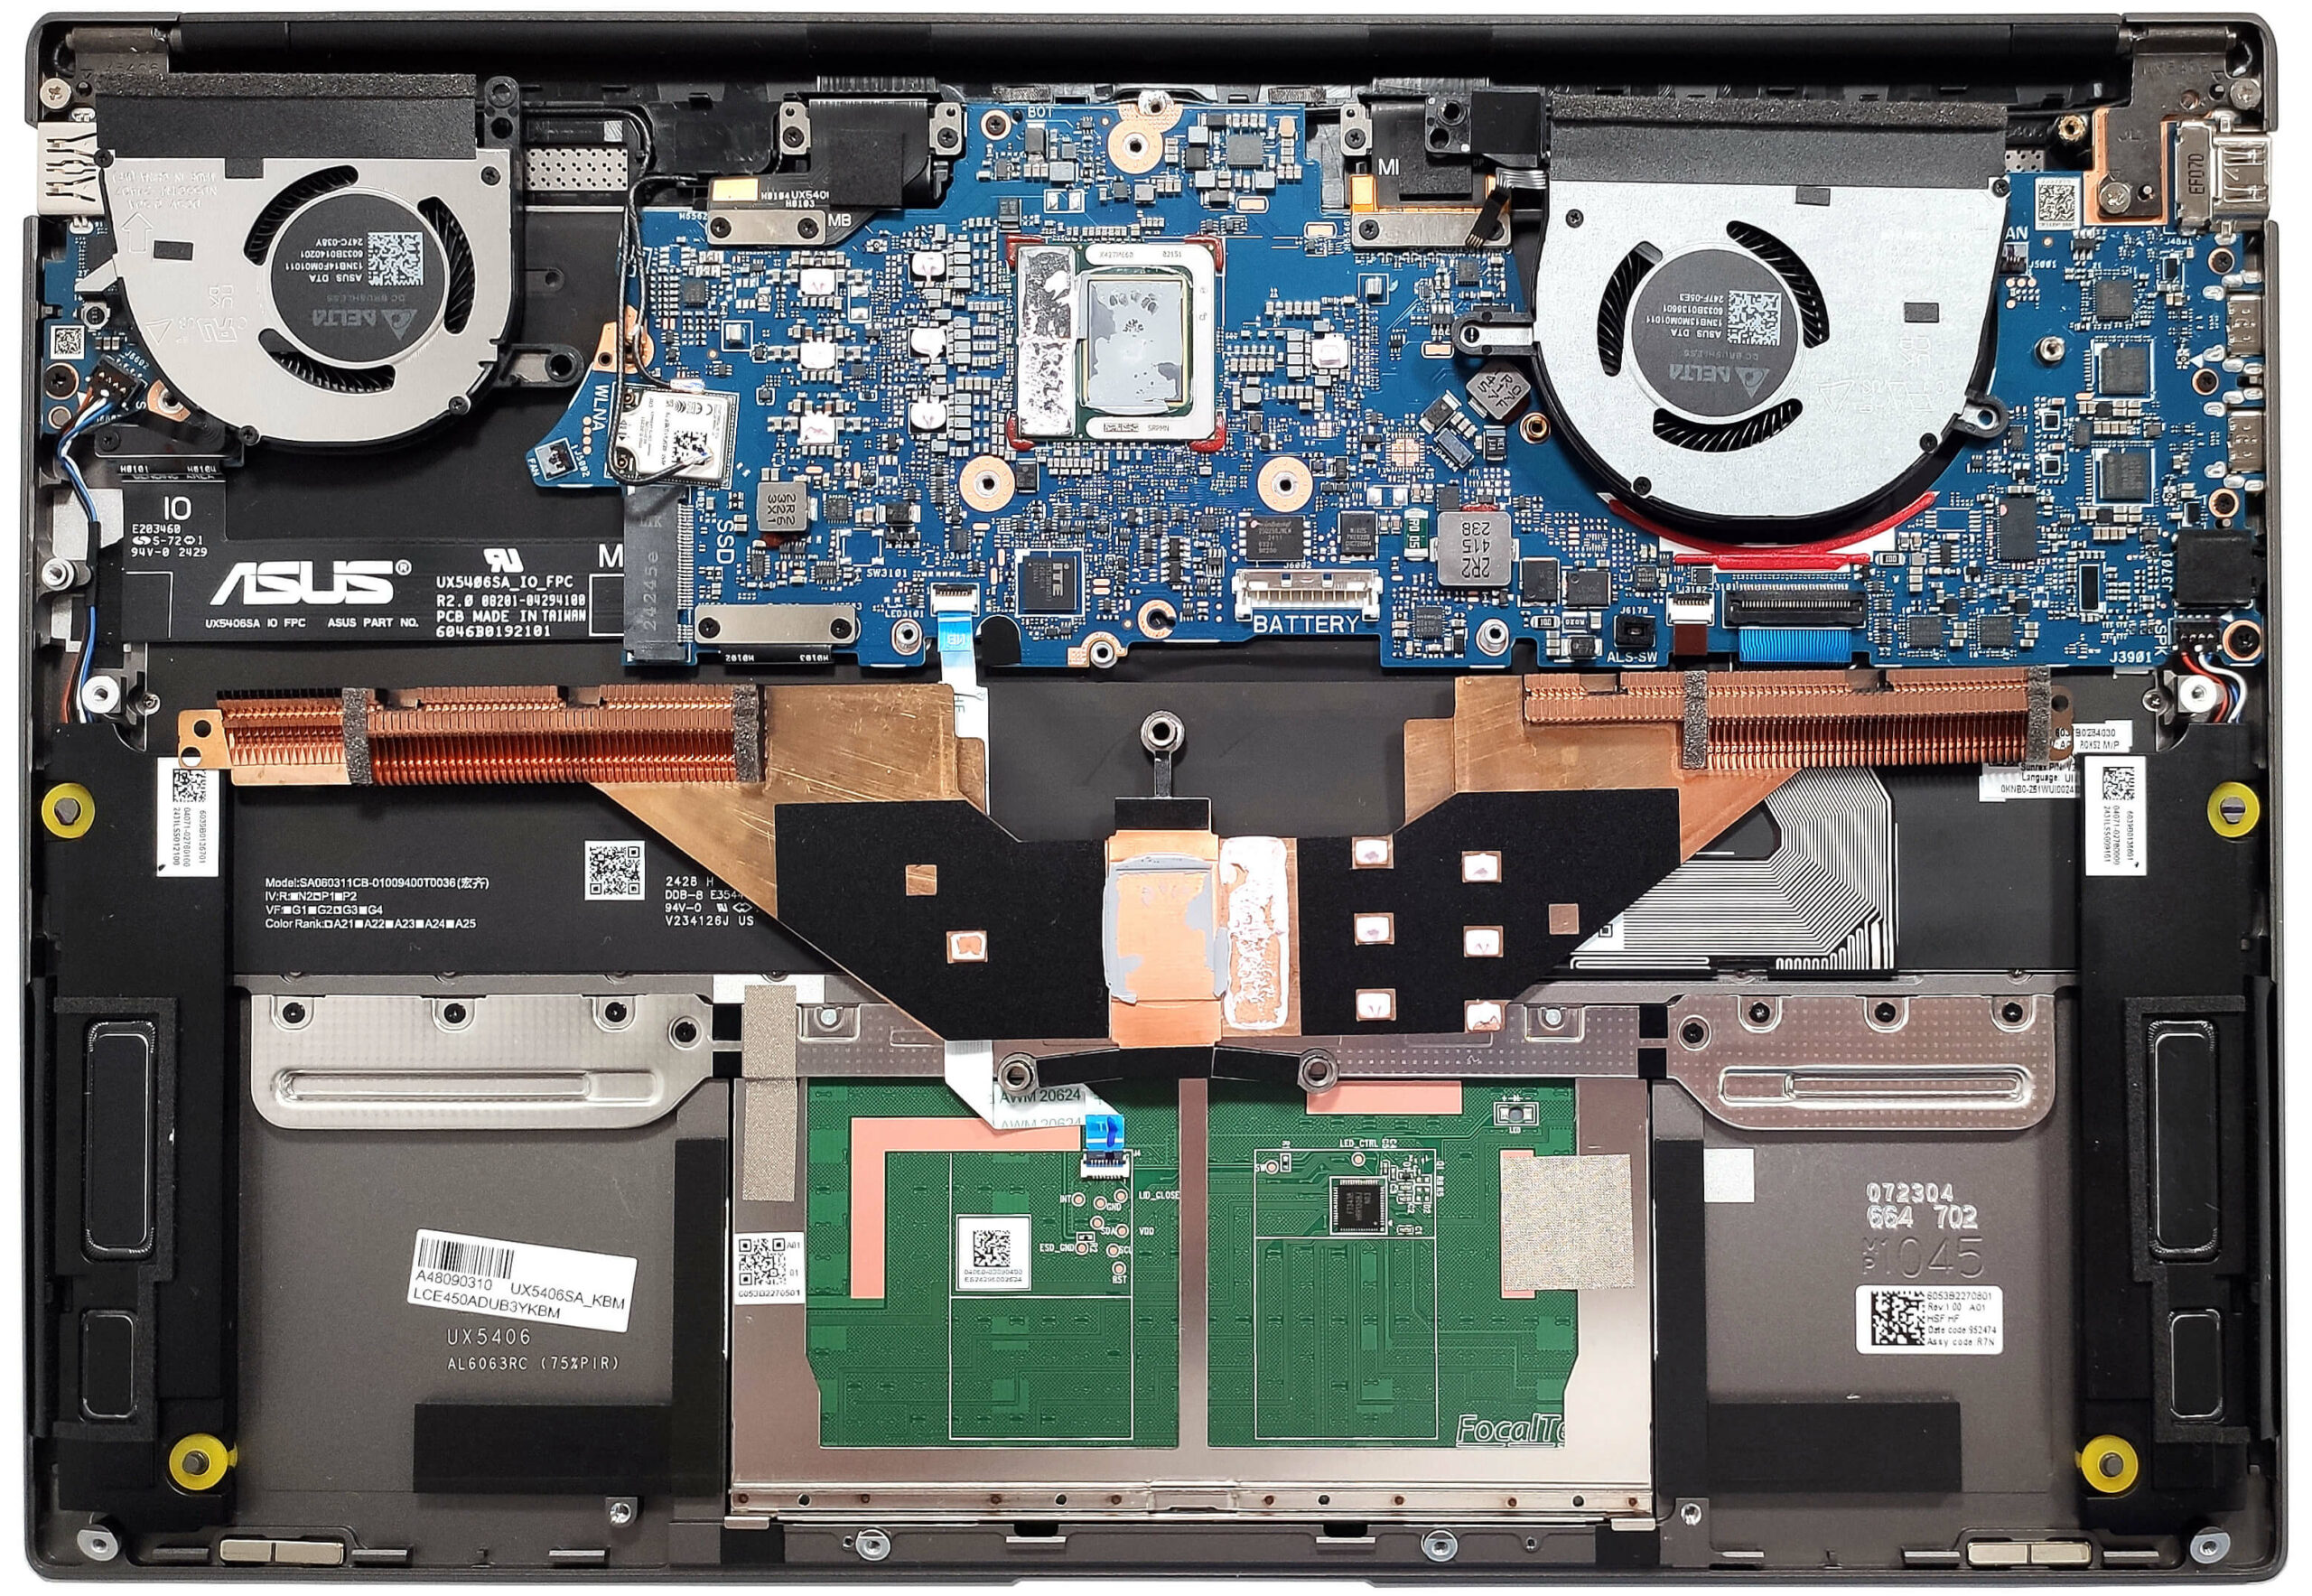
More info: Be cautious not to insert the tool horizontally as it may damage the speakers. Here’s the internal look of the device, with dust filters installed on the inside of the bottom panel to protect the fans.
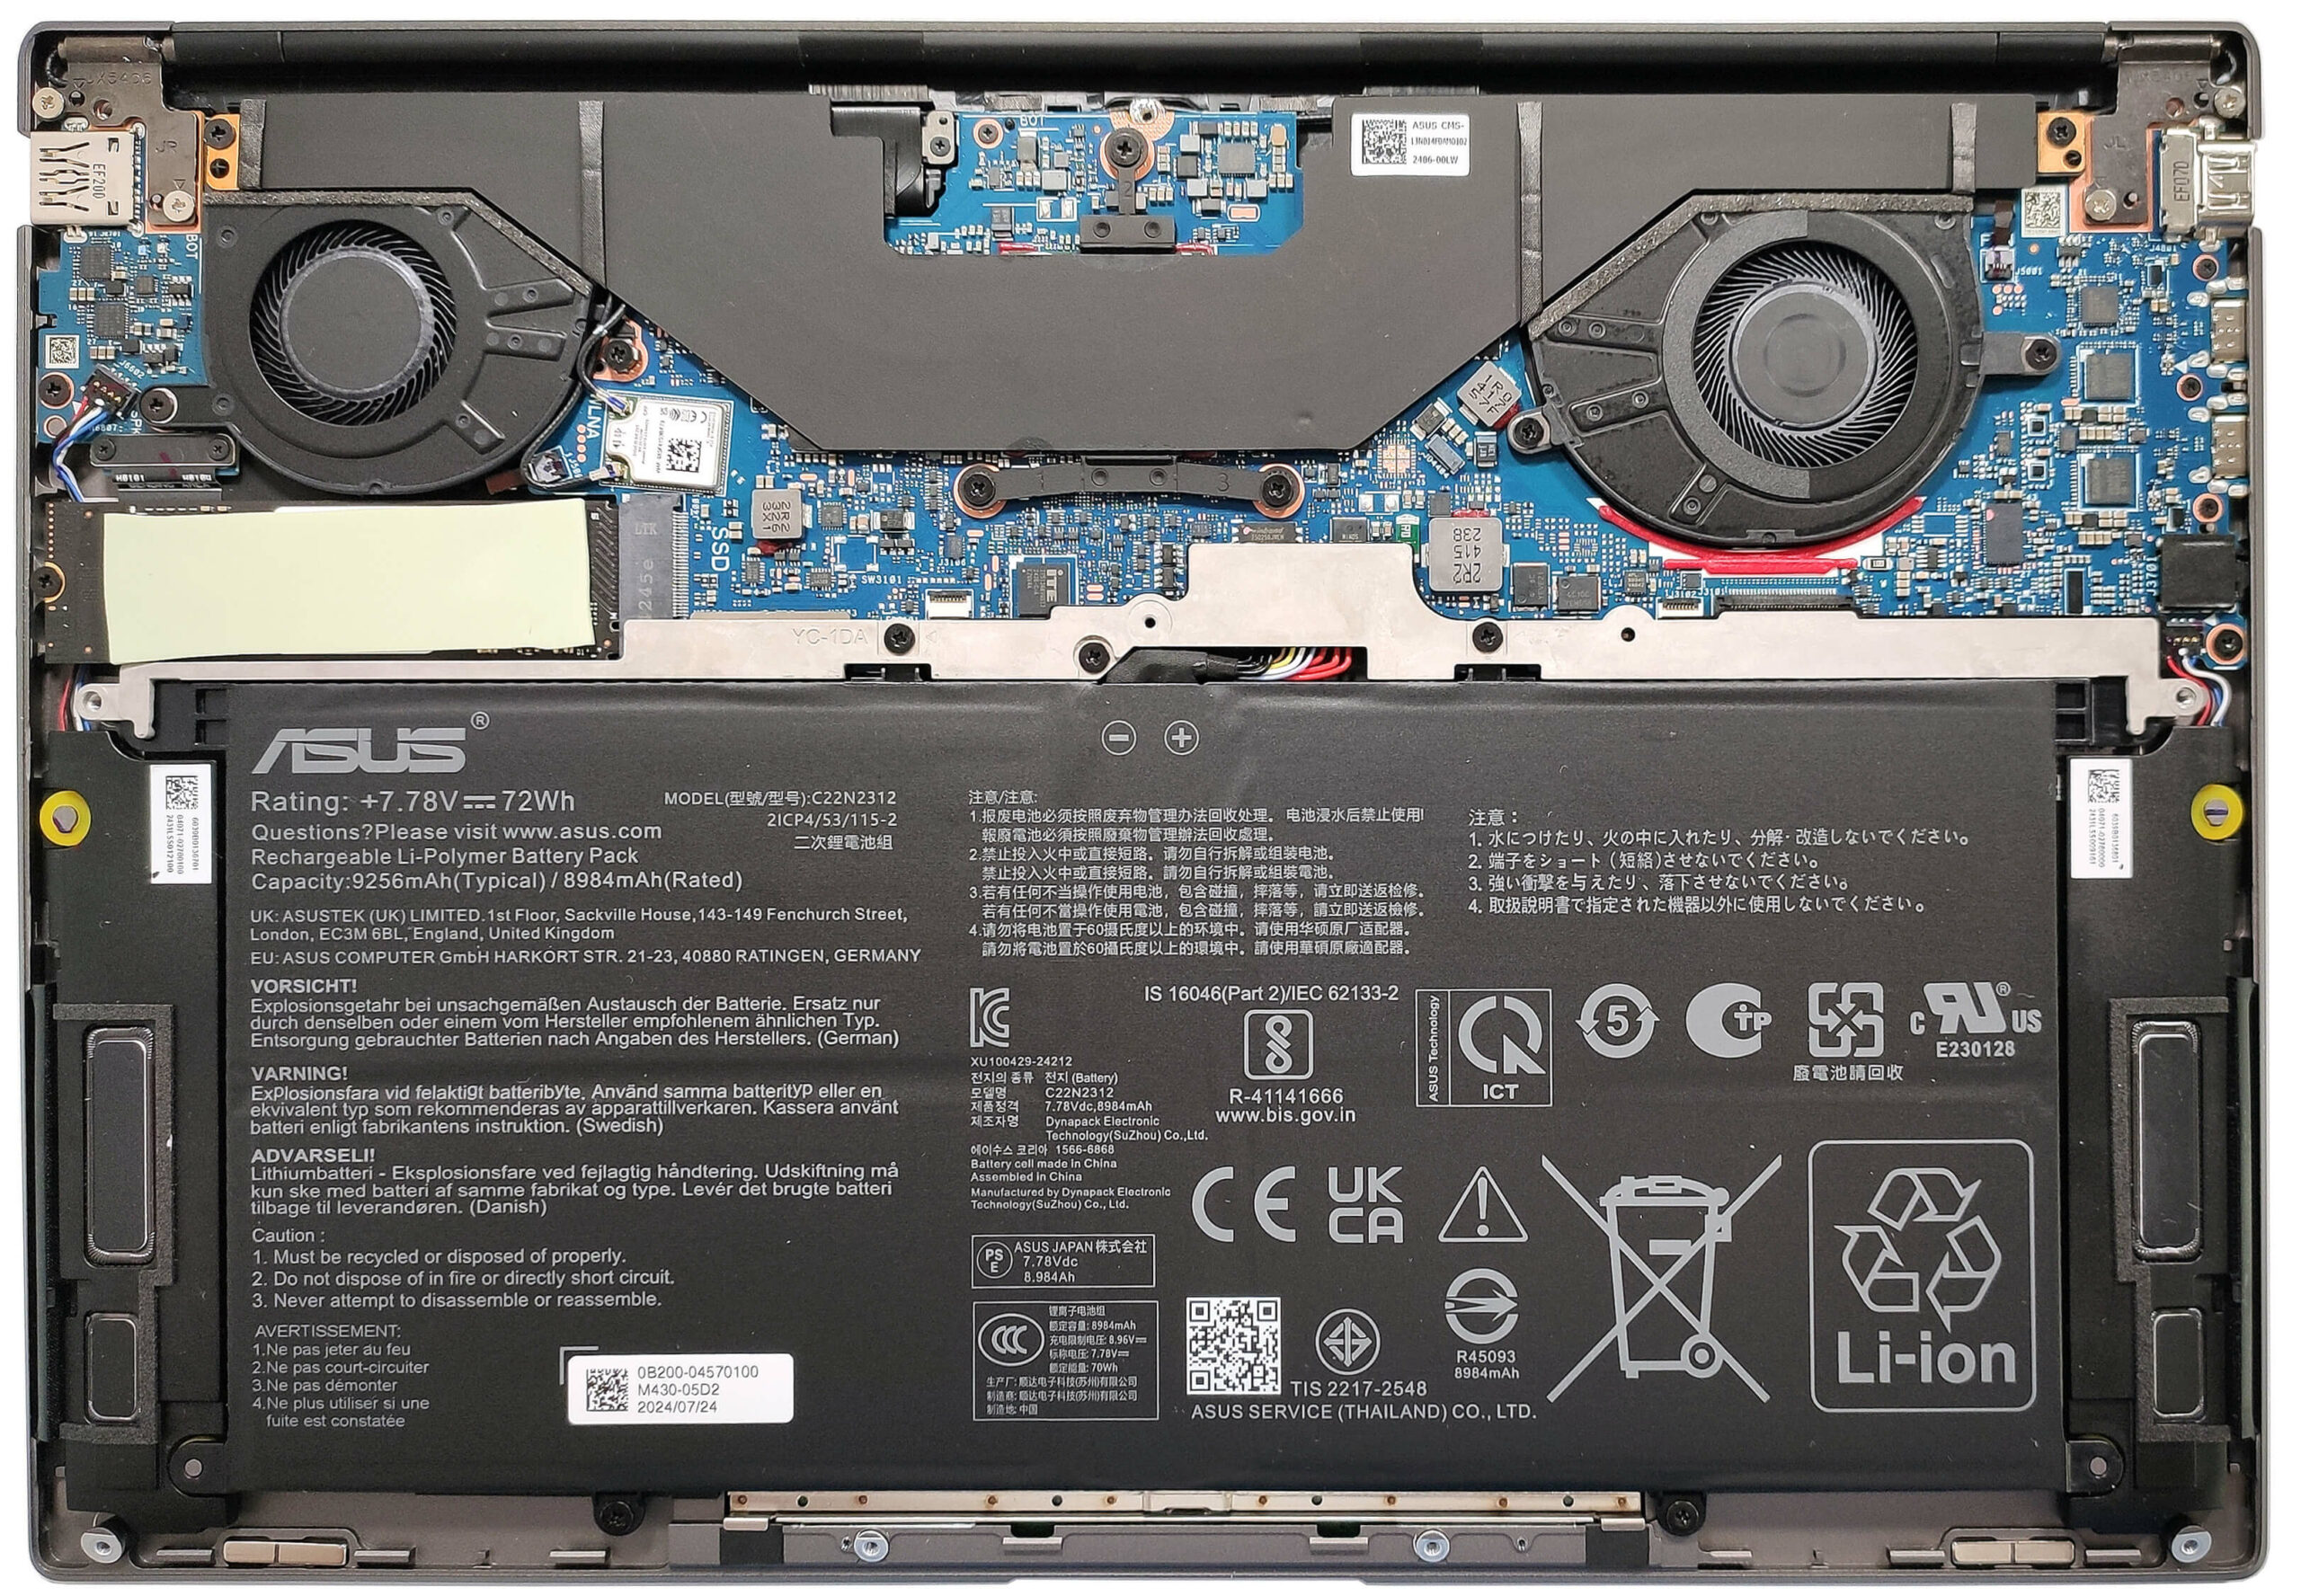
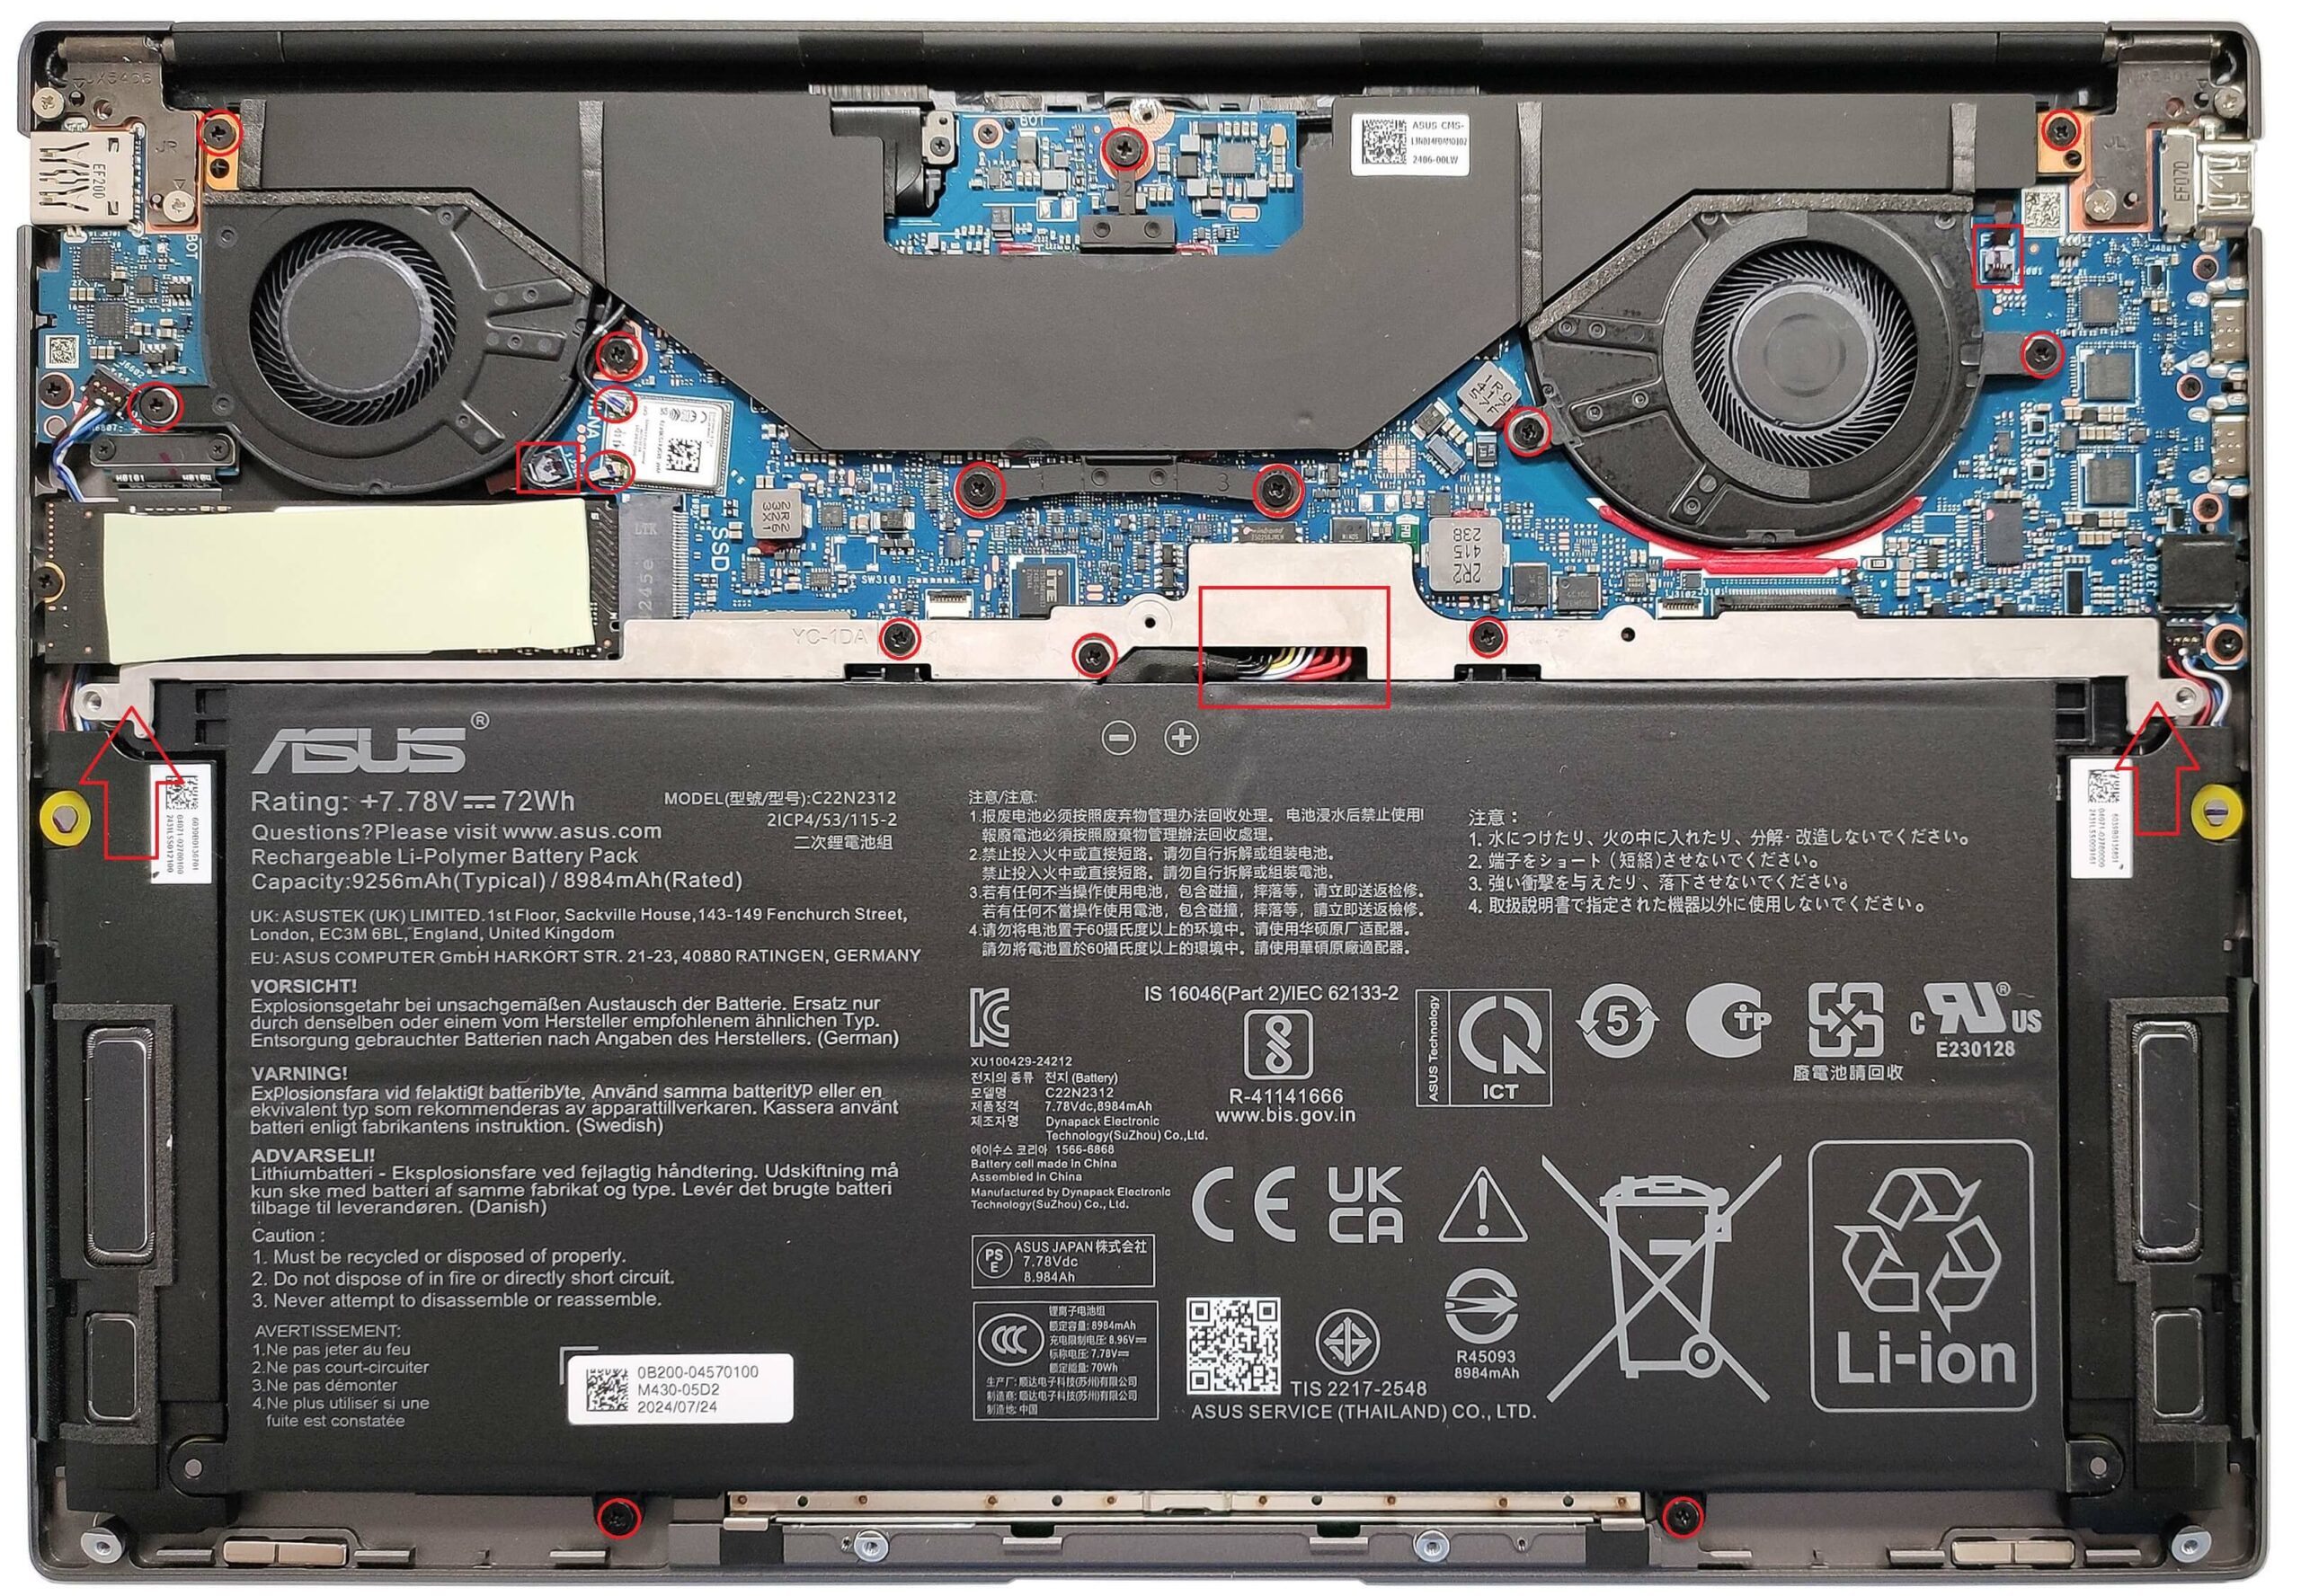
Battery Removal
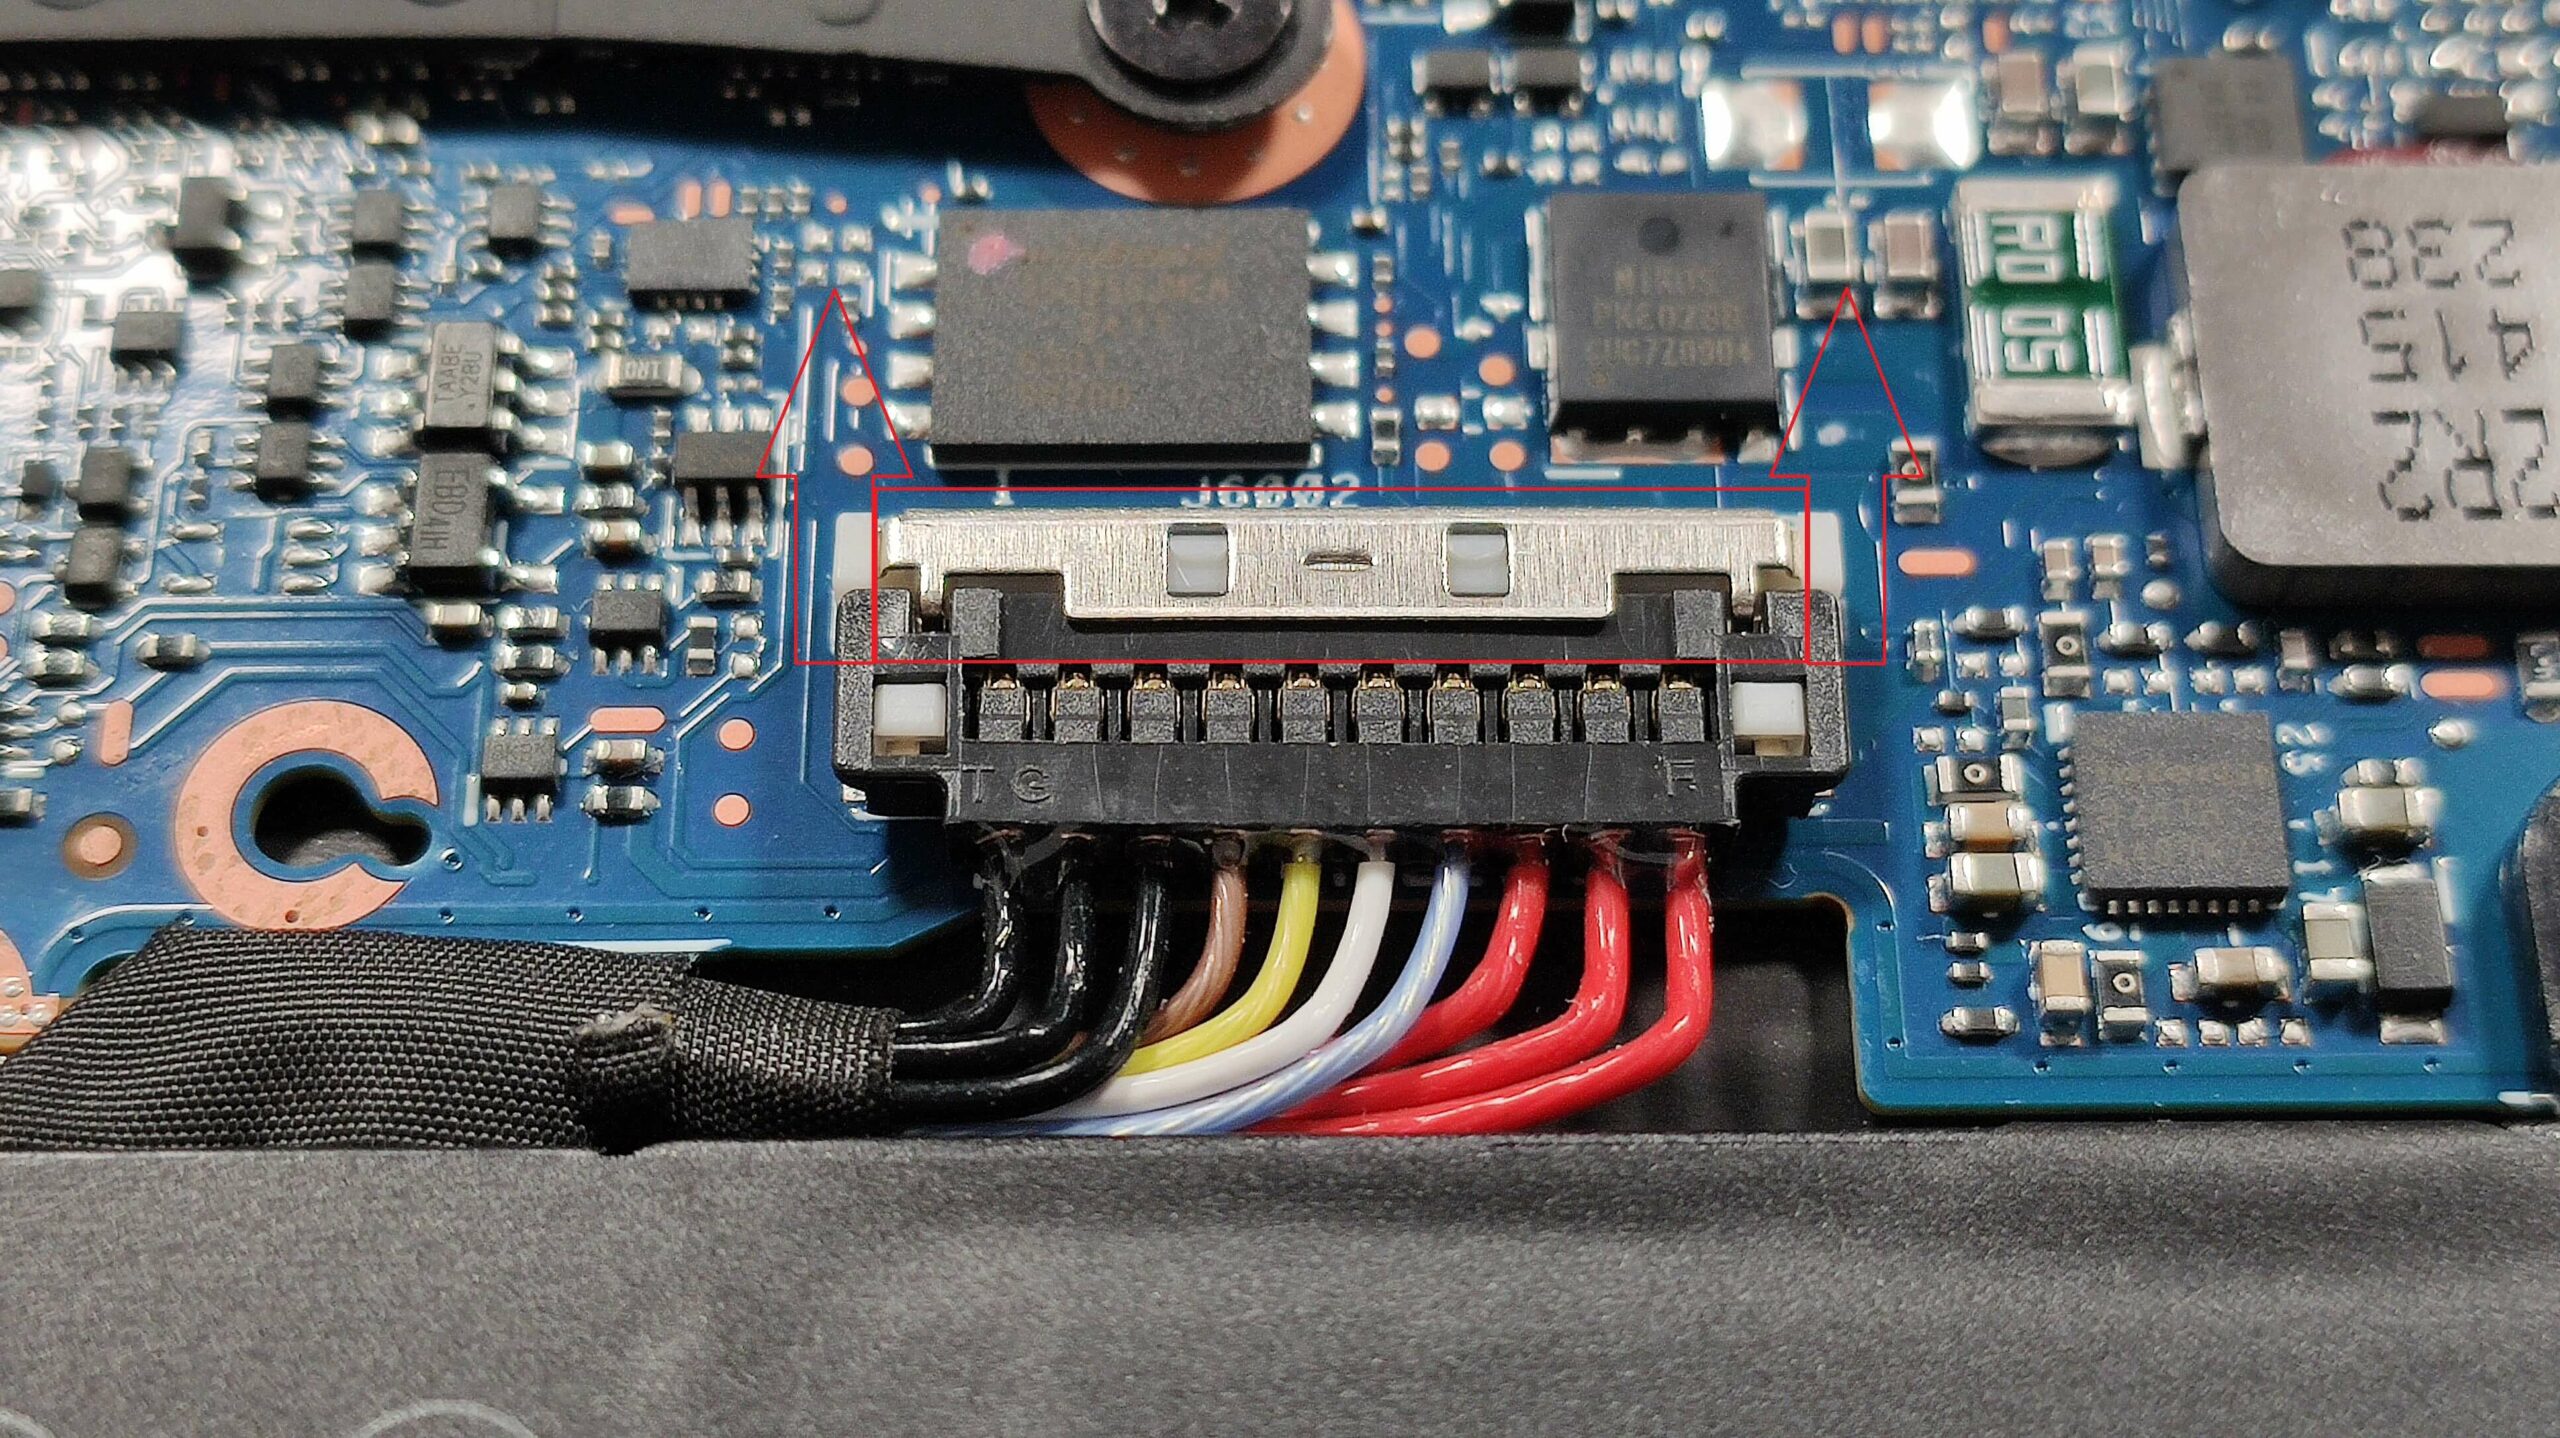
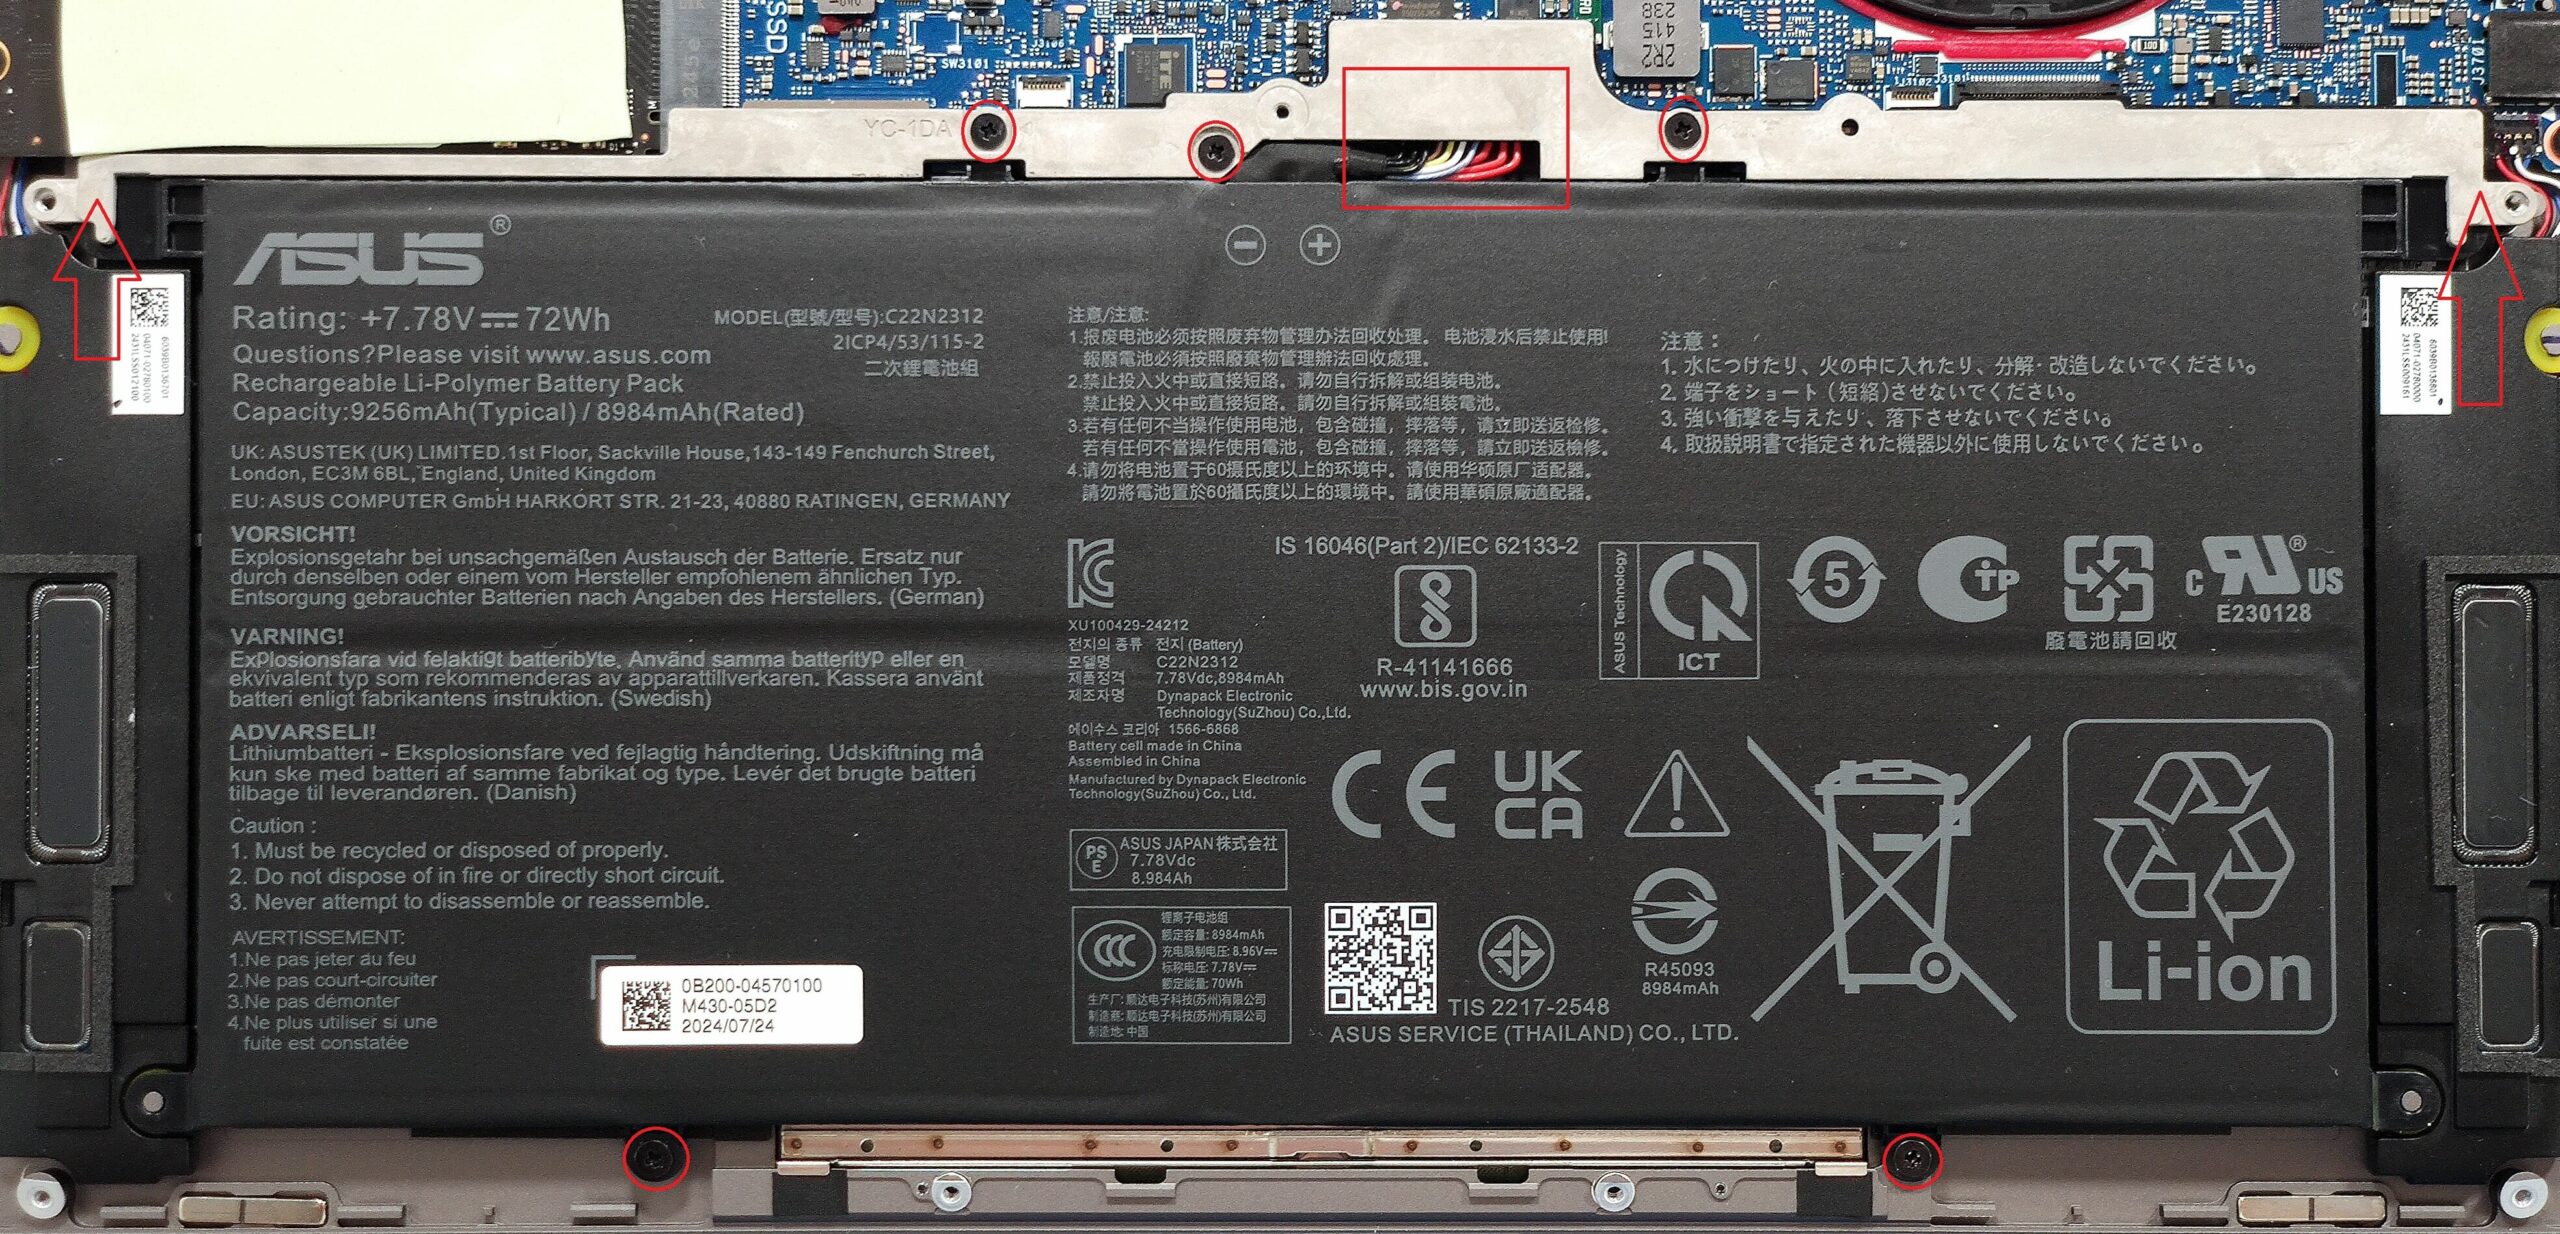
- Remove the plastic shroud covering the battery connector.
- Wear gloves to avoid short circuits.
- Undo the 3 Phillips-head screws on the top and the 2 screws at the bottom of the battery.
- Lift the plastic cover and slide the metal clip up to remove the battery plug.
Note: This device comes with a 72Wh battery, providing approximately 16 hours of video playback.
Memory Information
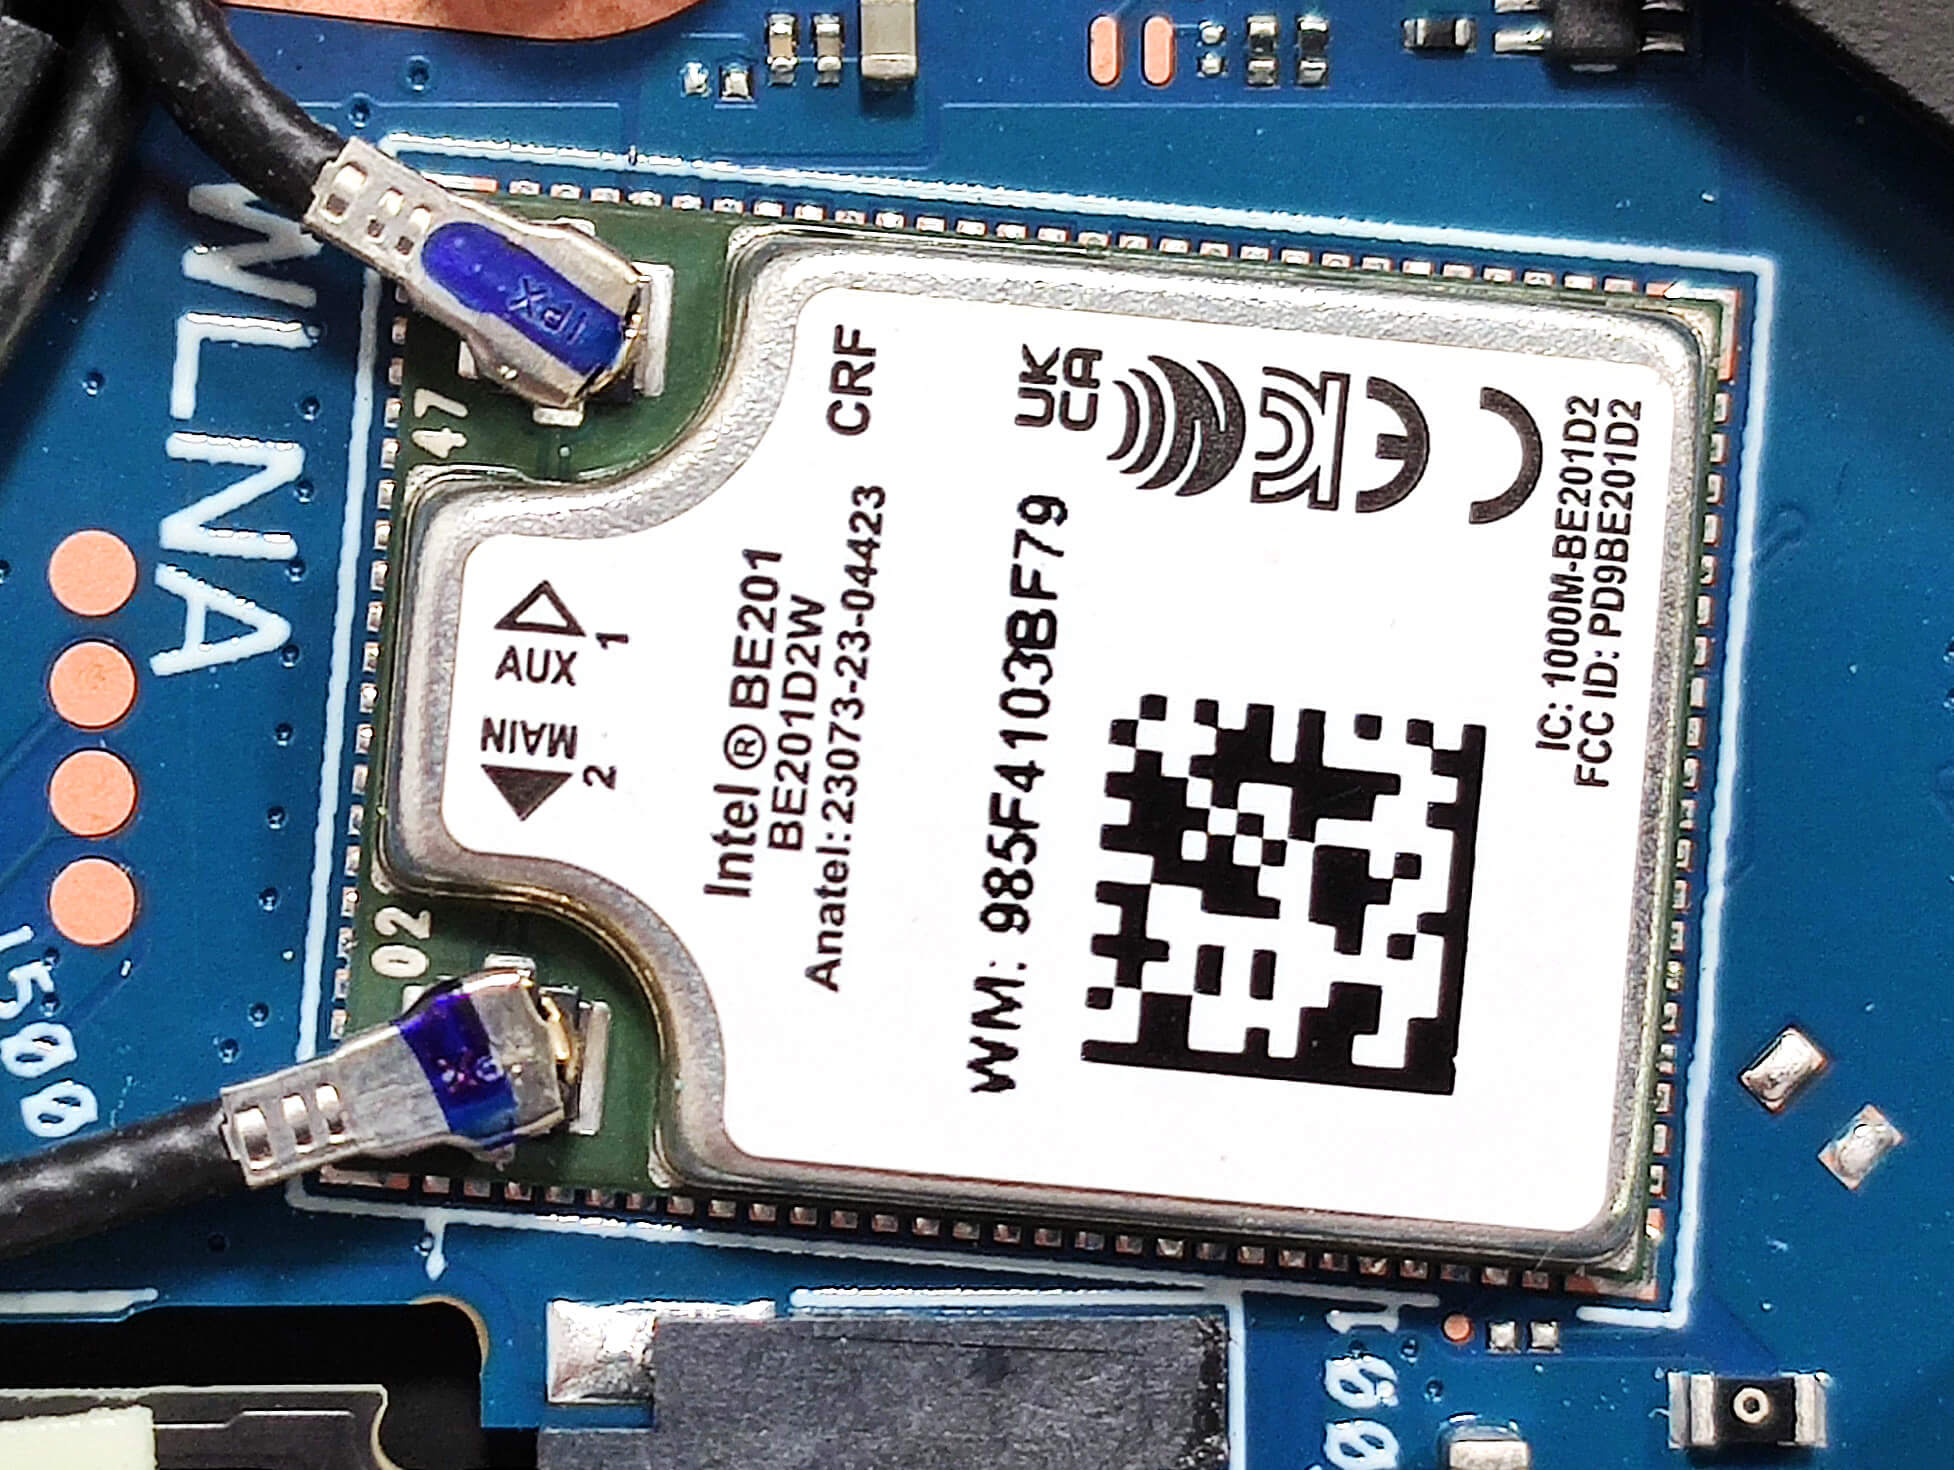
Note: The memory is soldered, and the laptop is available with 16GB or 32GB of LPDDR5x-8533 MHz RAM in dual-channel mode. The Wi-Fi card is also non-replaceable.
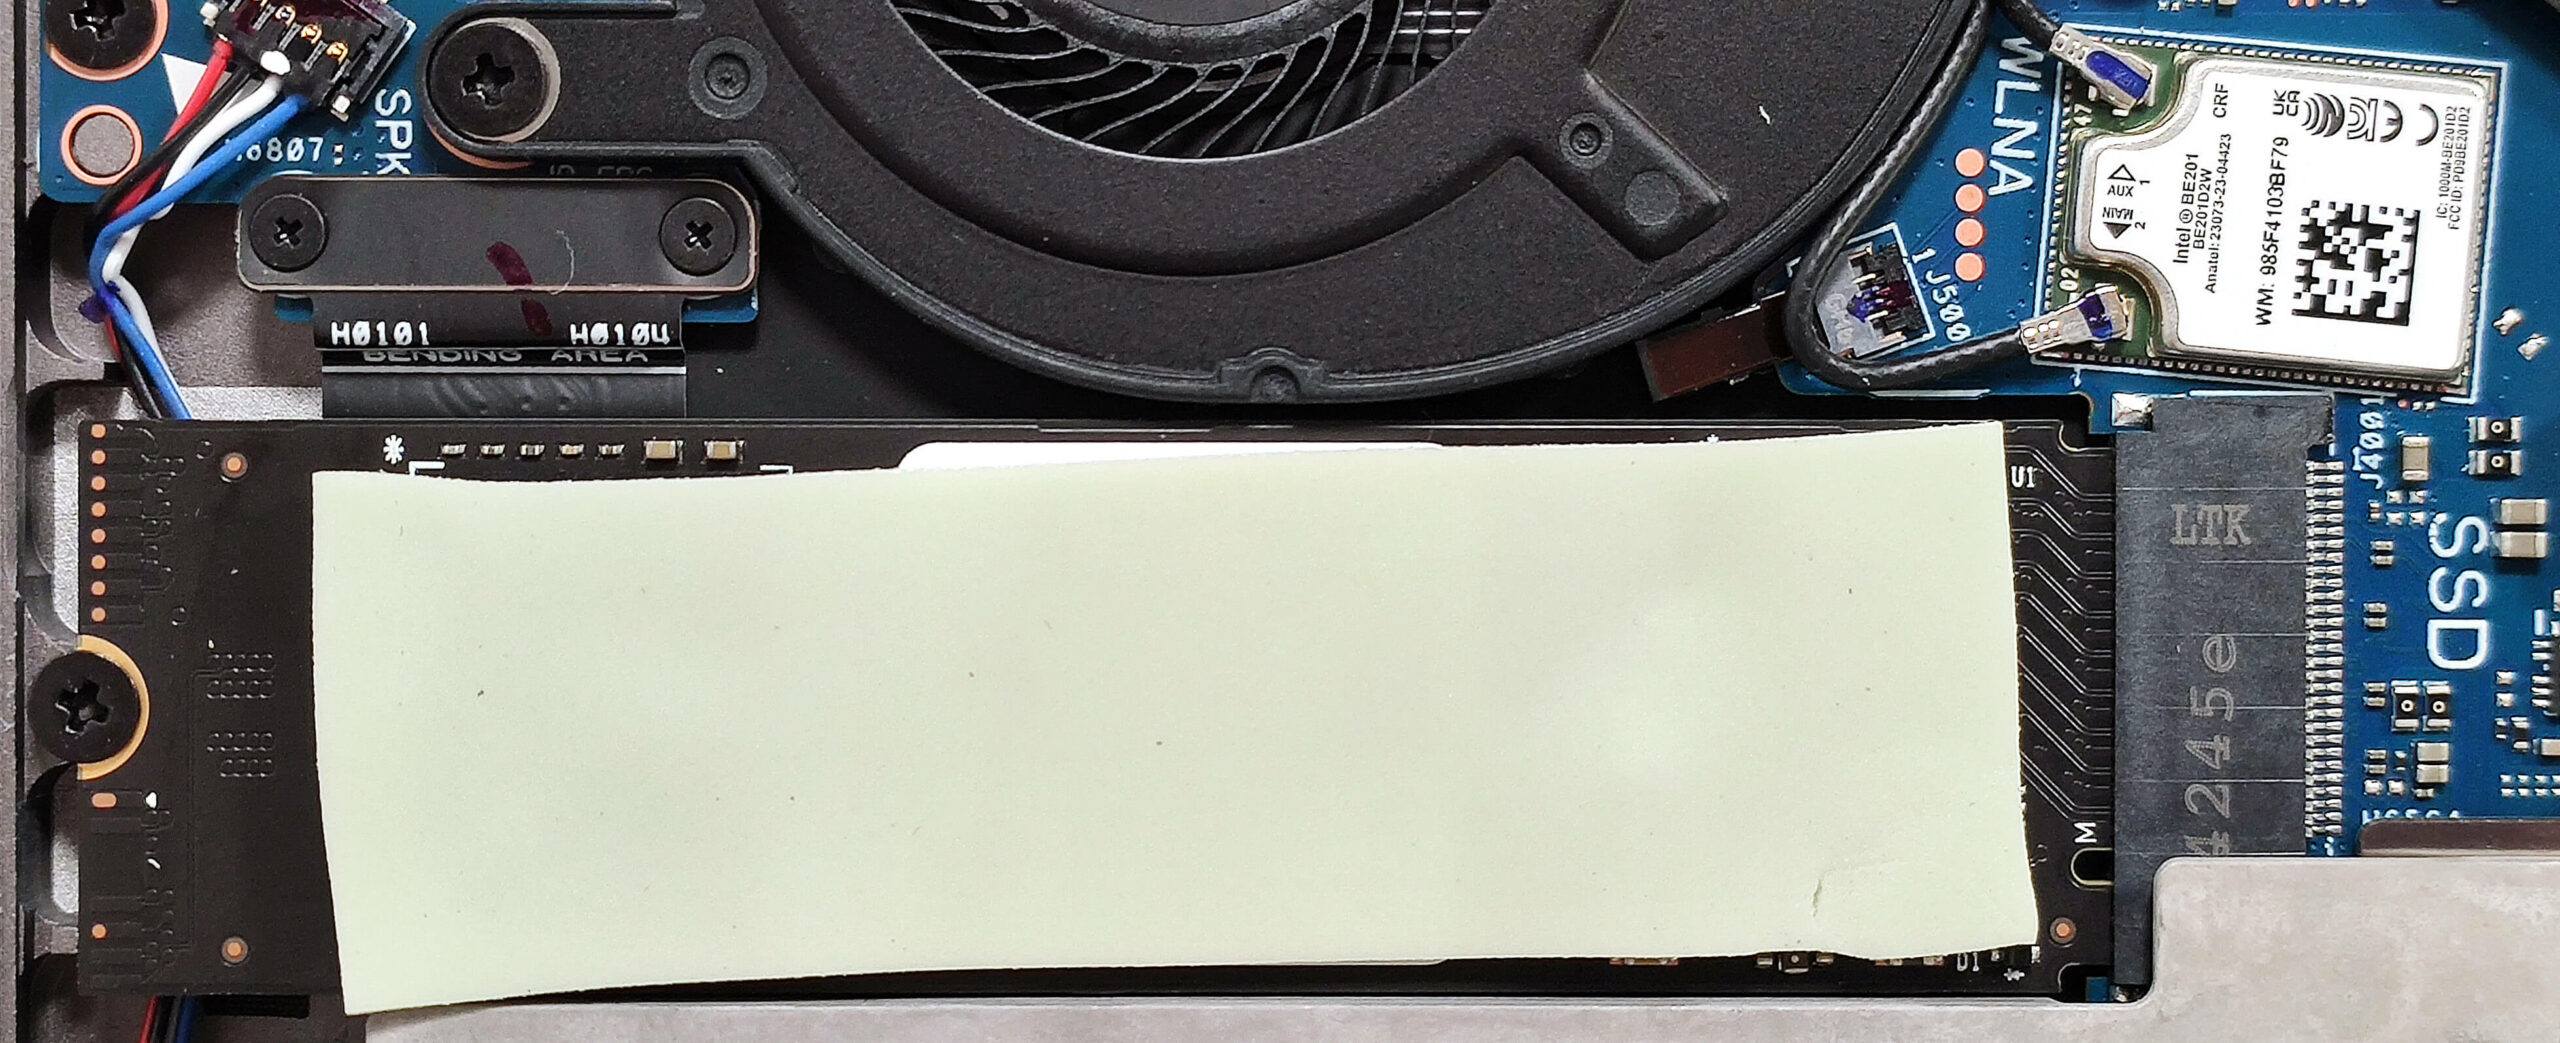
Storage Upgrade
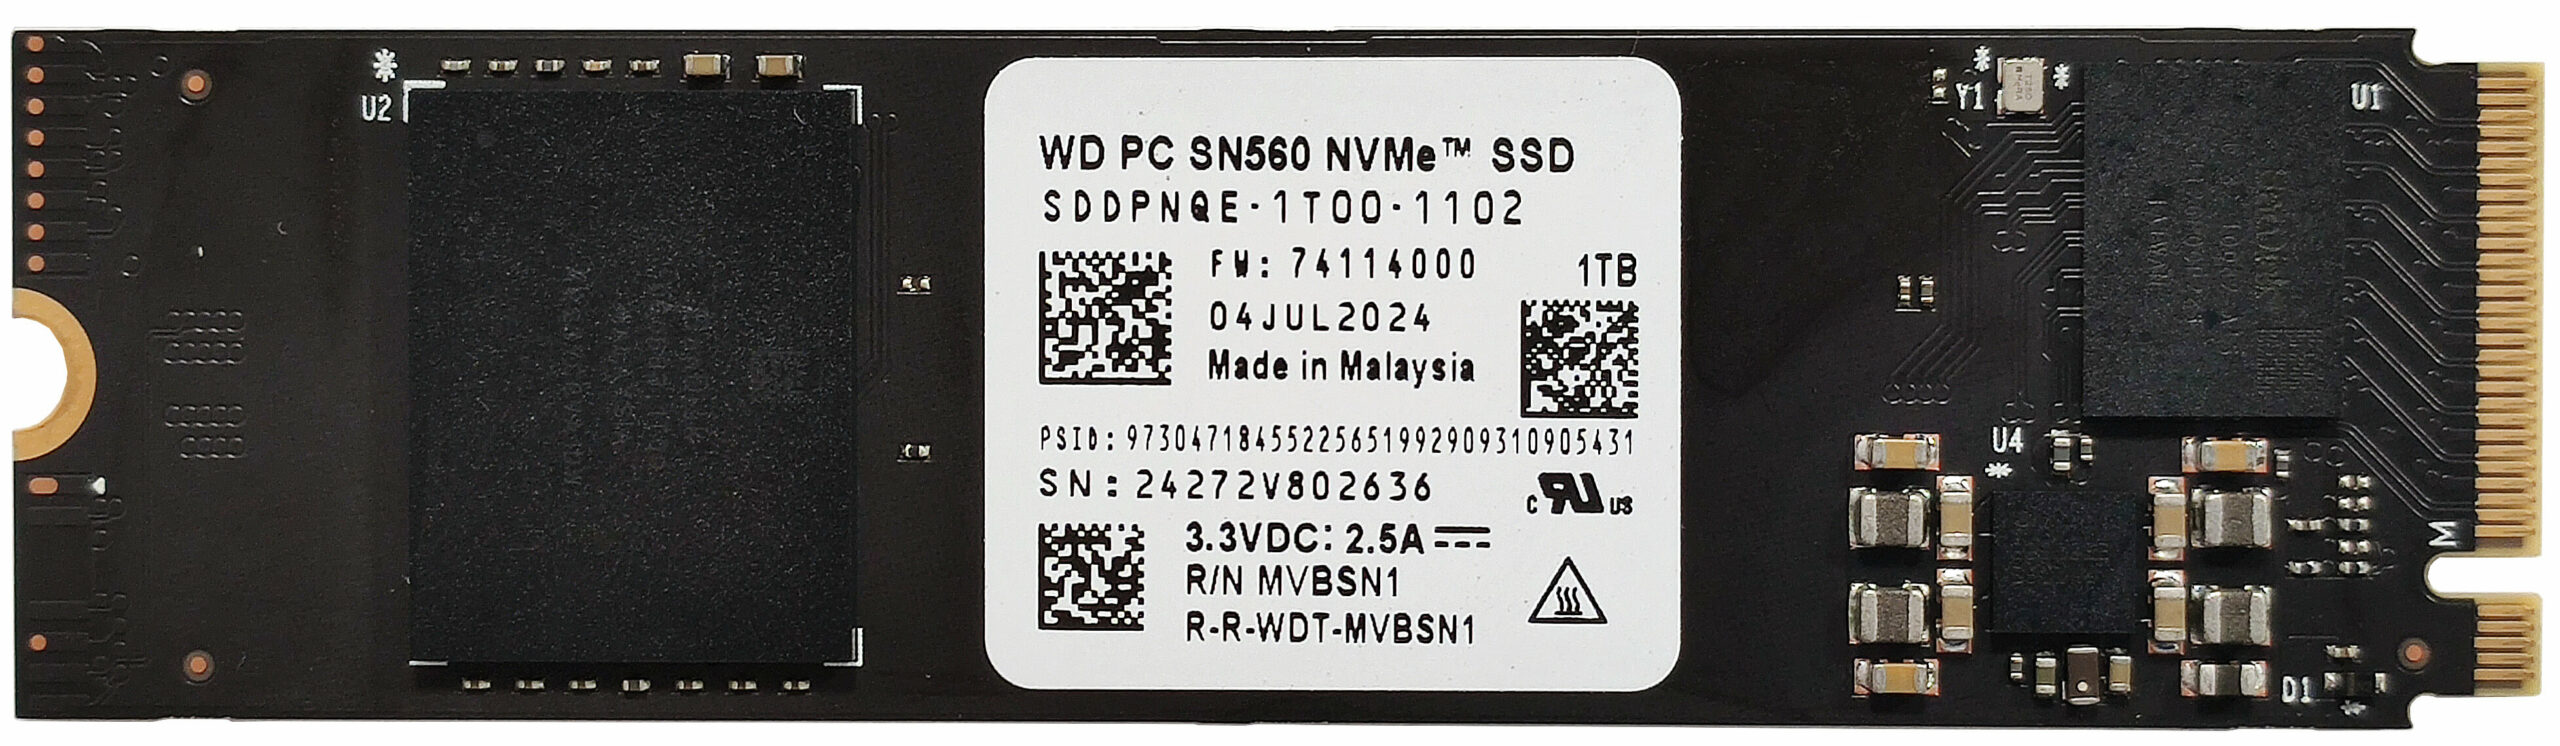
- There is a single M.2 slot compatible with 2280 Gen 4 SSDs.
- The NVMe drive is cooled by a long thermal pad that makes contact with the metal bottom plate.
Hint: Don’t forget to check out our Top M.2 SSDs Performance Rankings for insights on the best storage options available.
You can buy compatible SSDs here: Buy from Amazon.com (#CommissionsEarned)
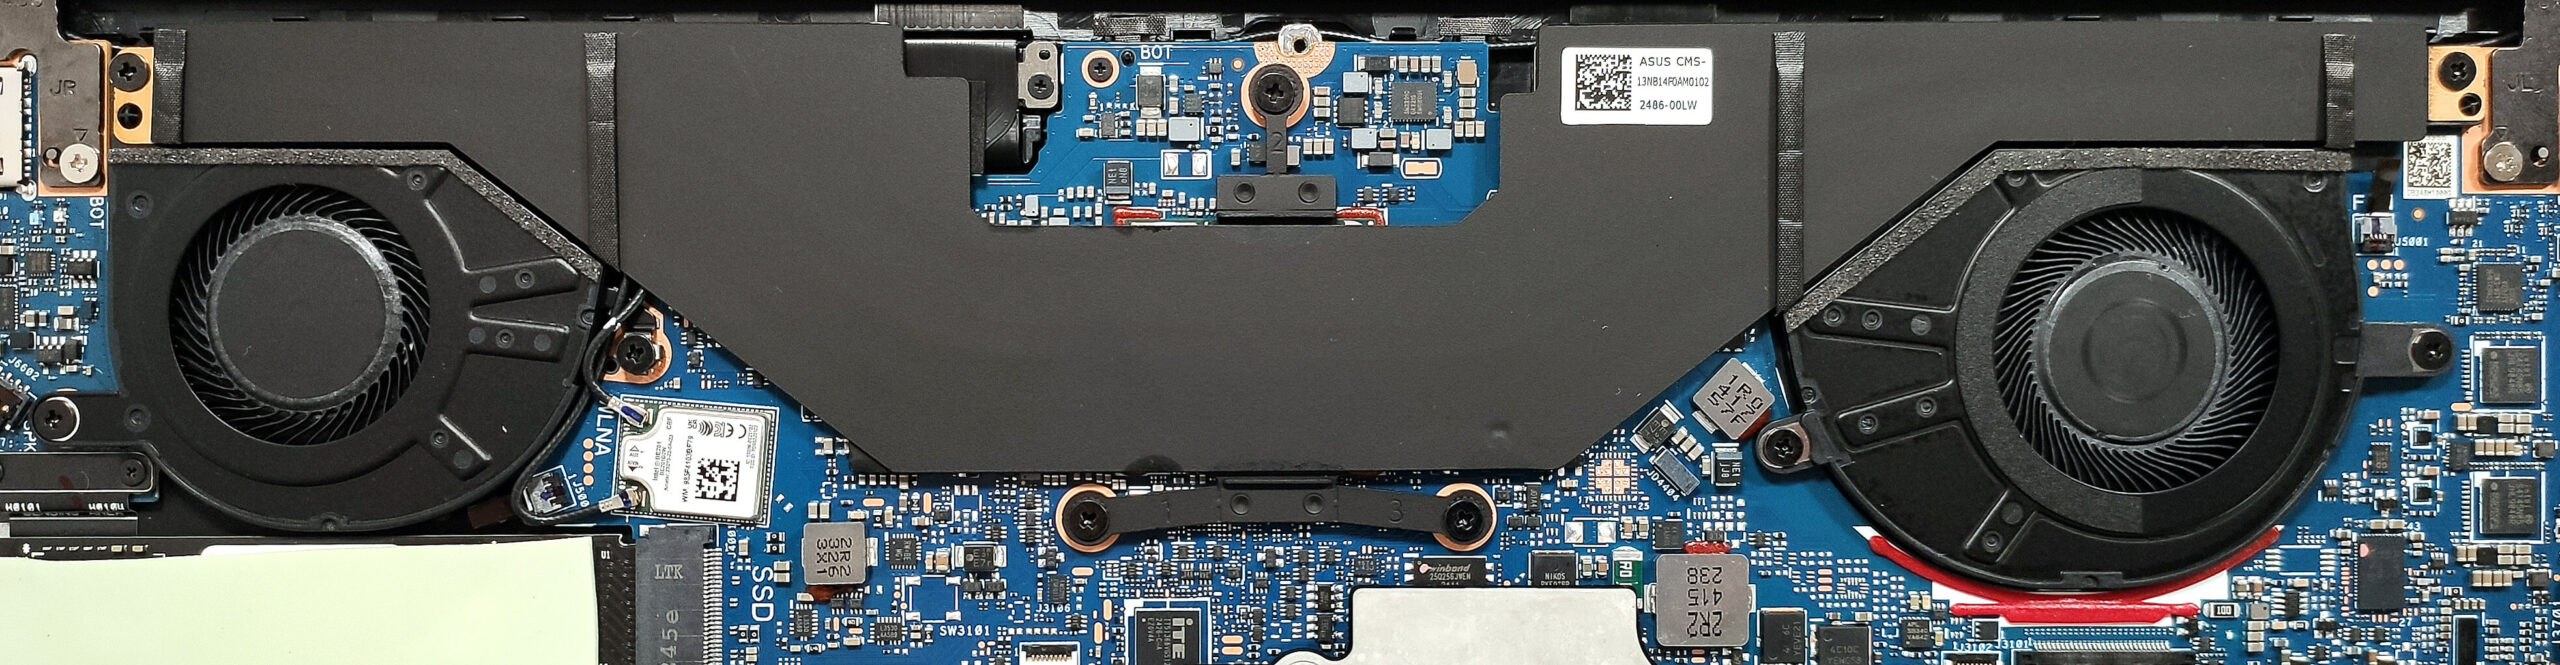
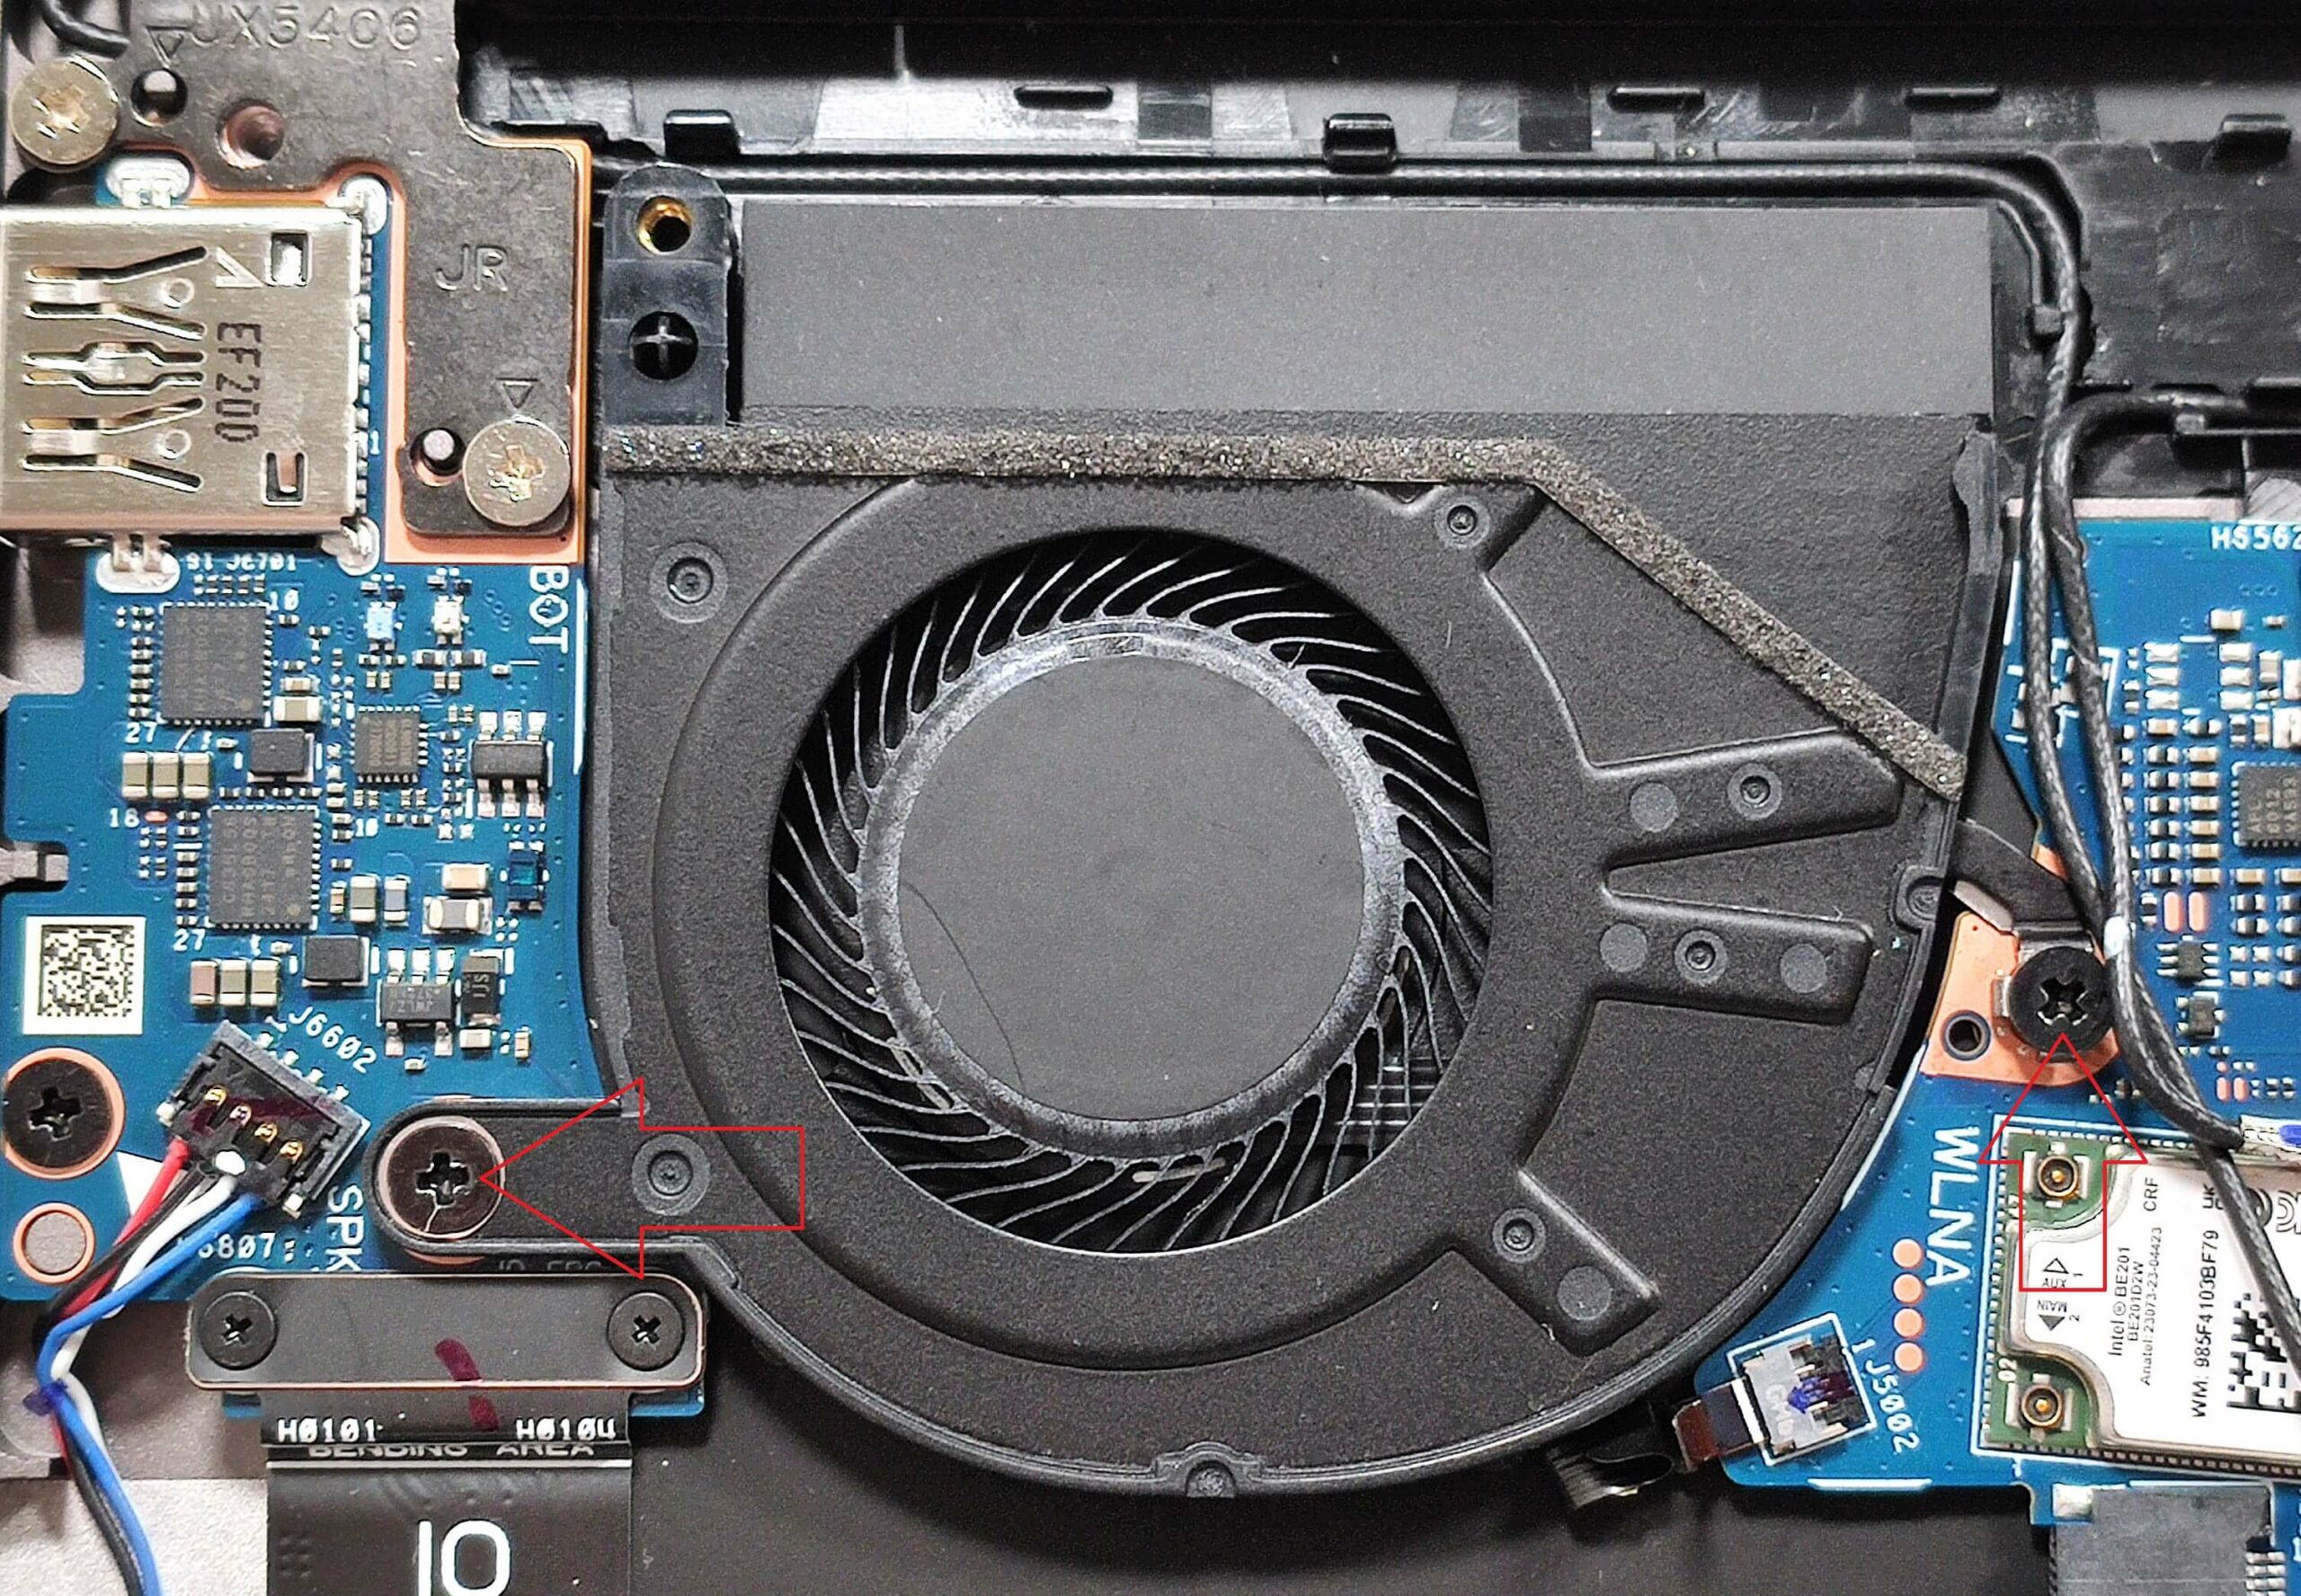
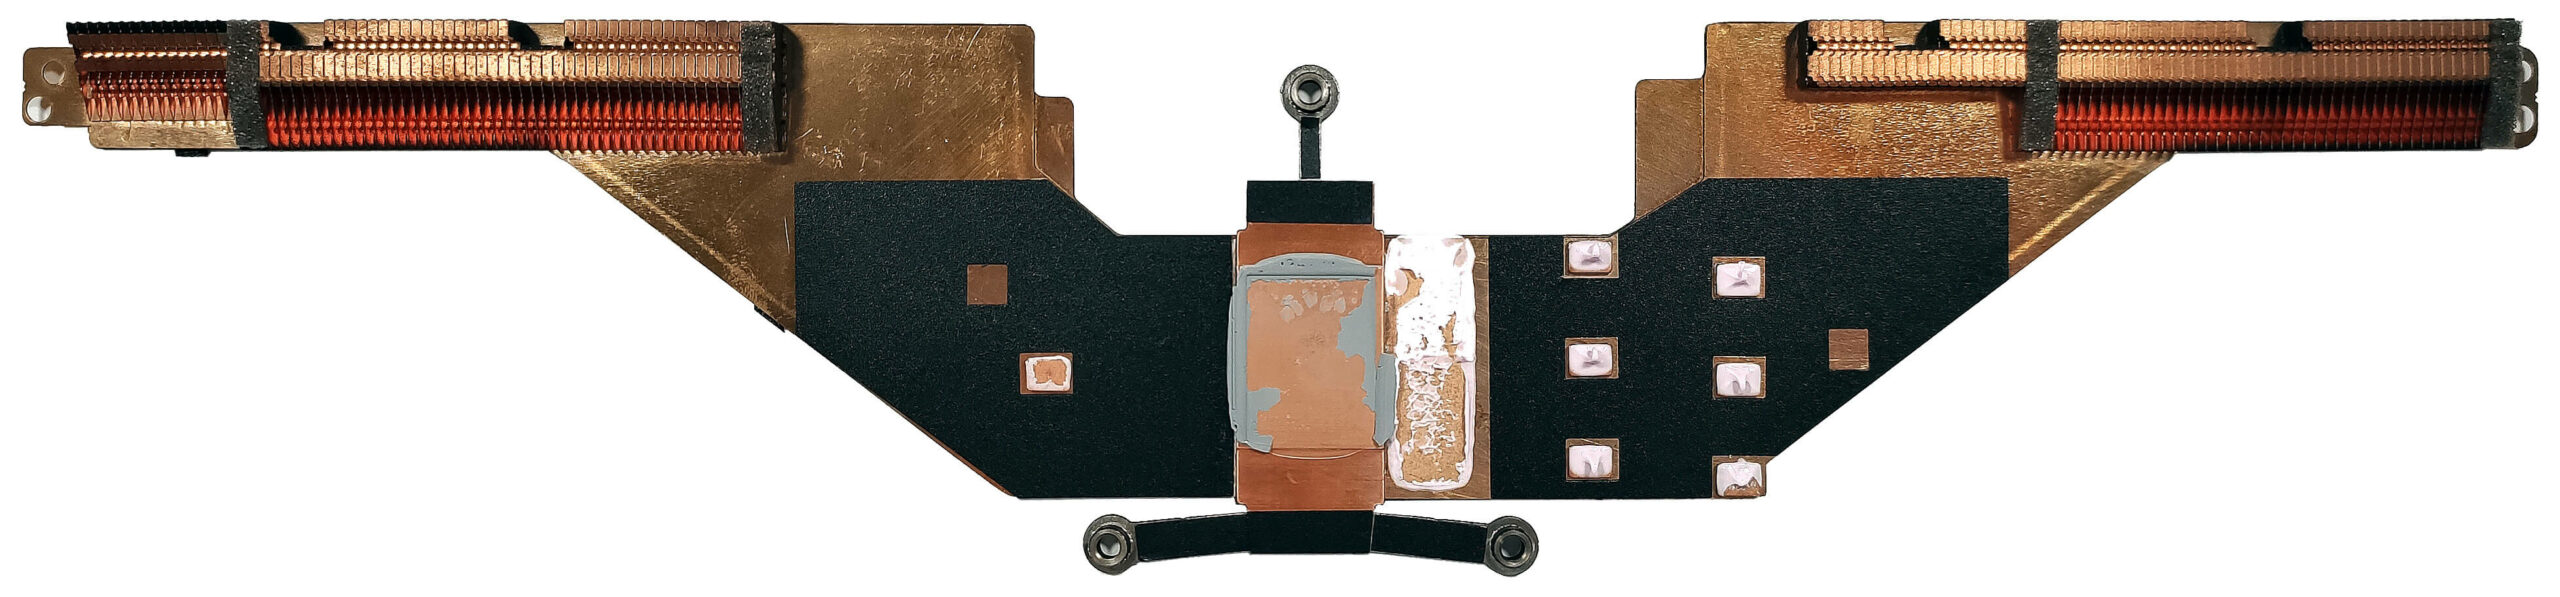
Cooling System Overview
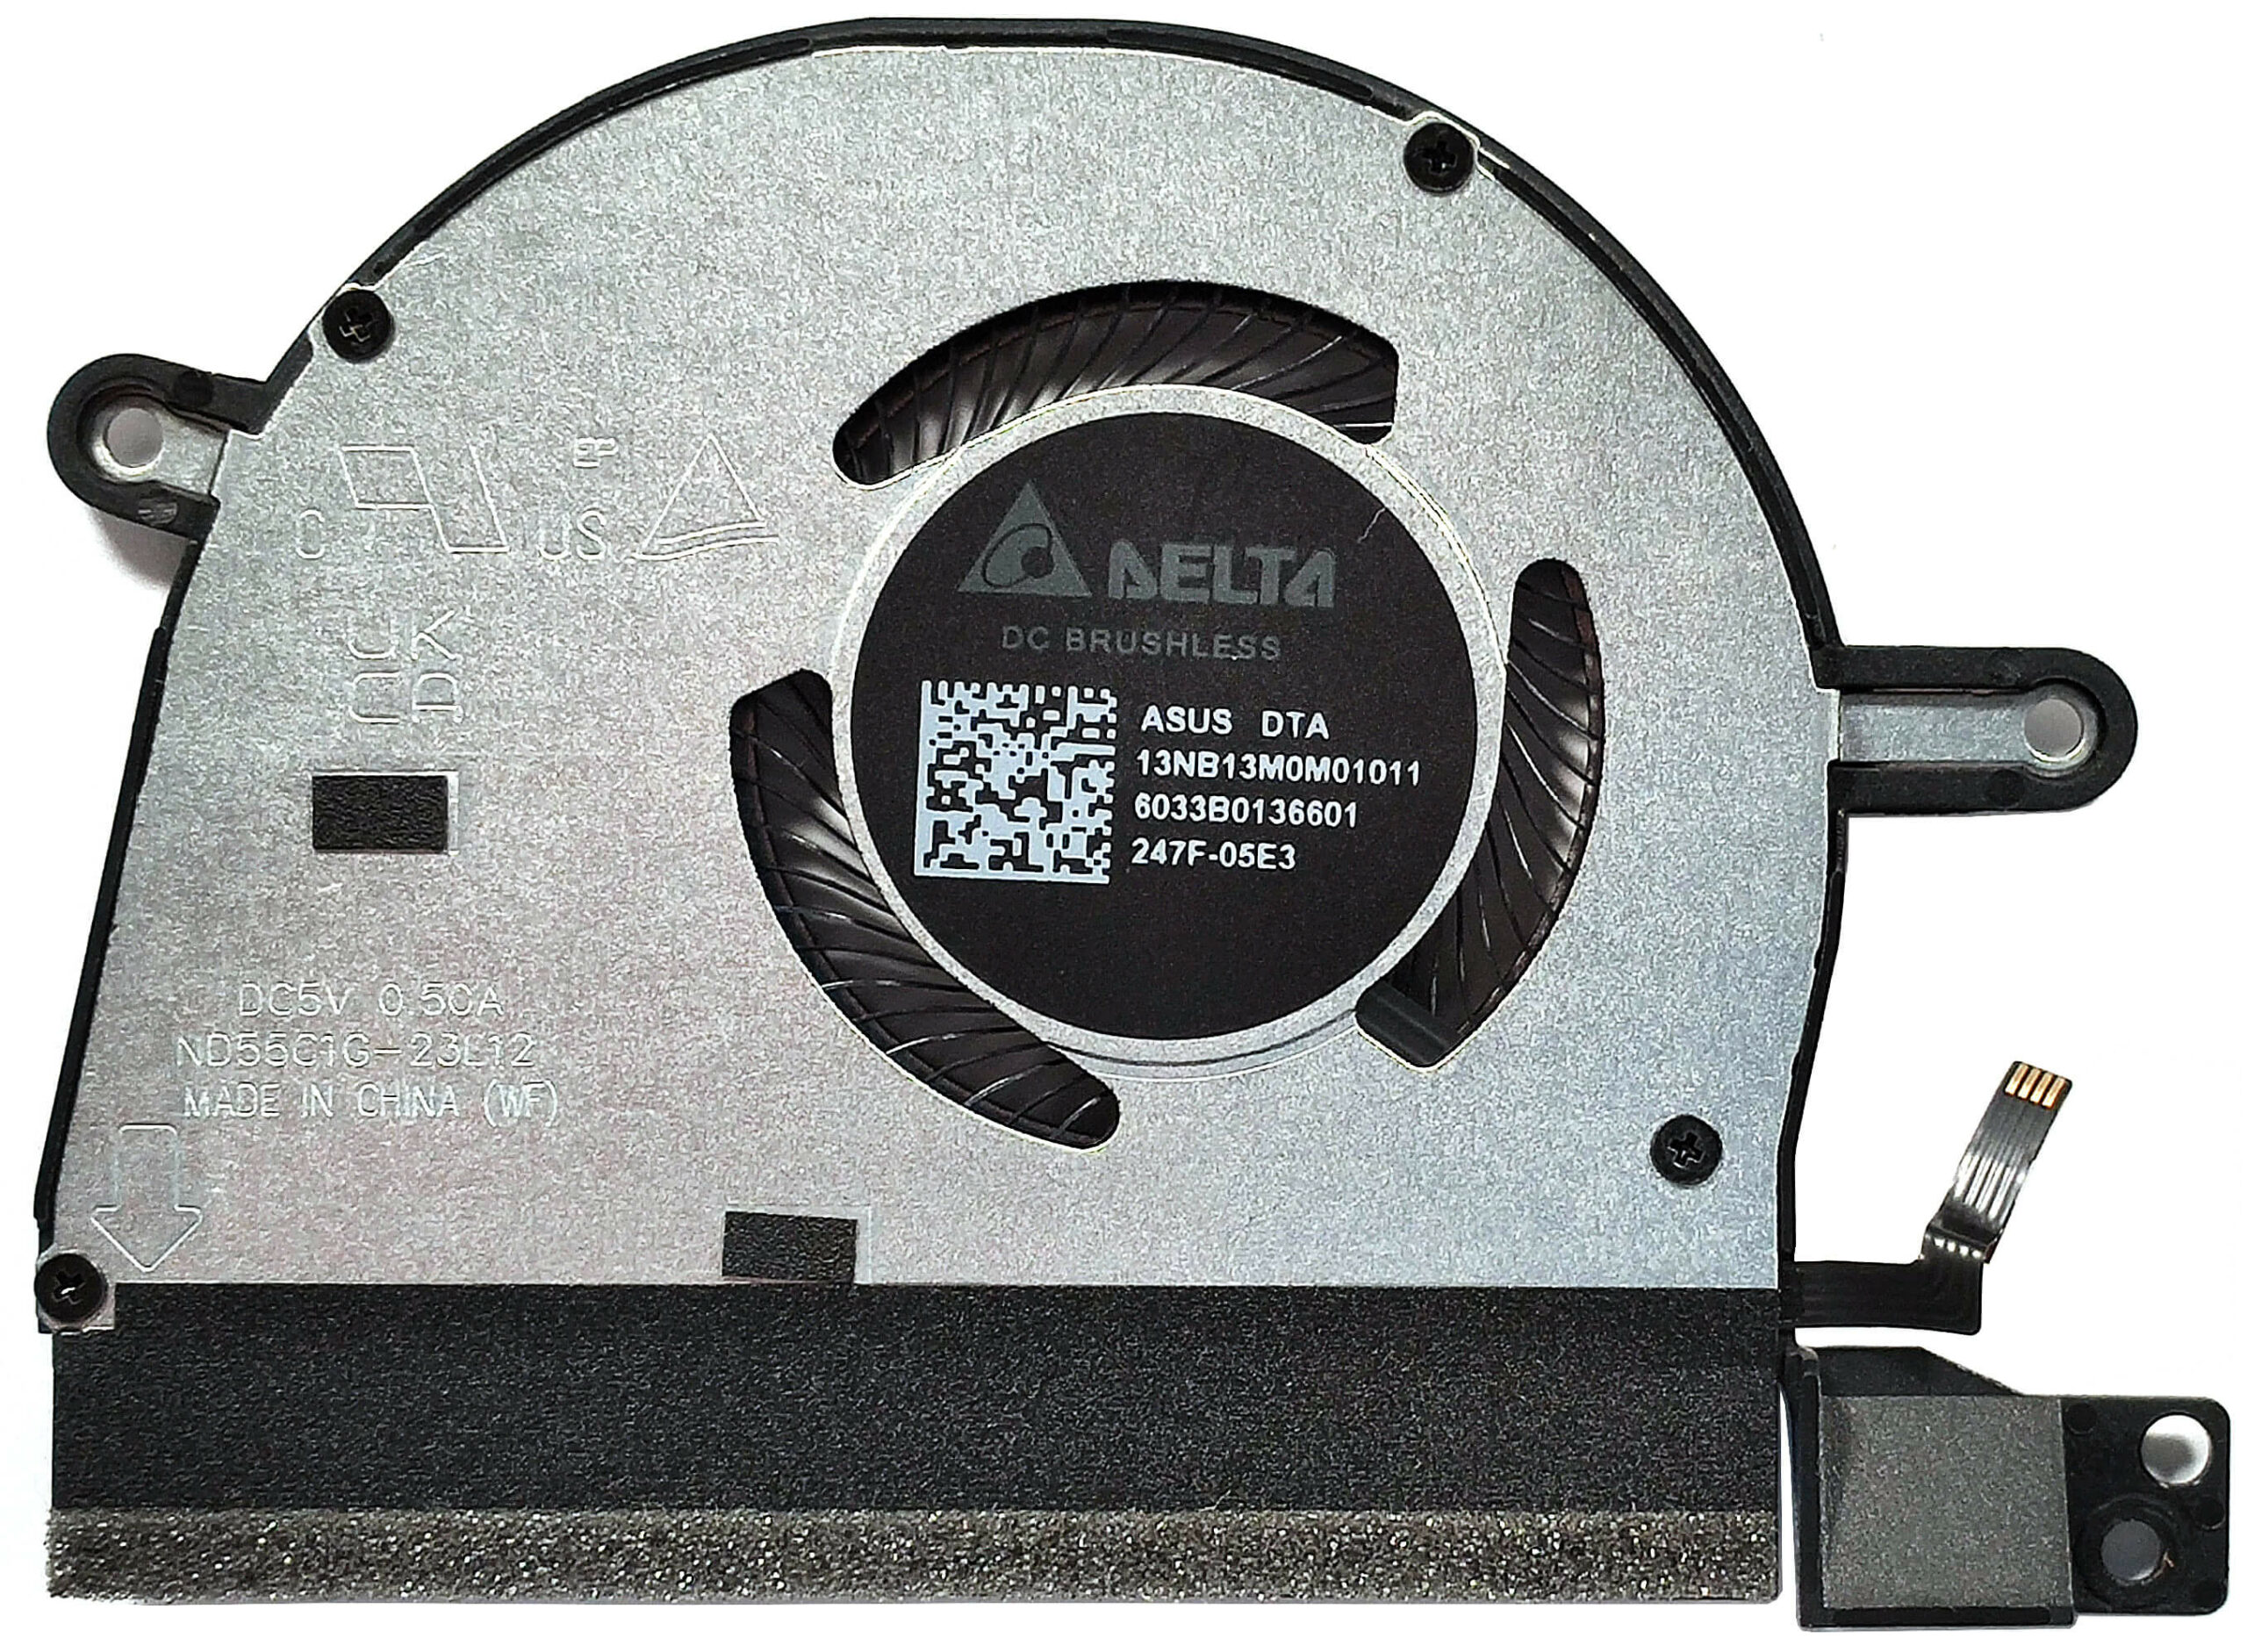
- The device features a thin vapor chamber cooling system with two fans and a pair of top-mounted heat sinks.
- To remove the thermal system, undo 9 Phillips-head screws (three around the SoC and three near each fan).
- If removing only the cooling system, skip the two screws on the sides of the fans.
Removing the Cooling System
- Carefully pry the vapor chamber unit using a lever tool and lift it away from the chassis.
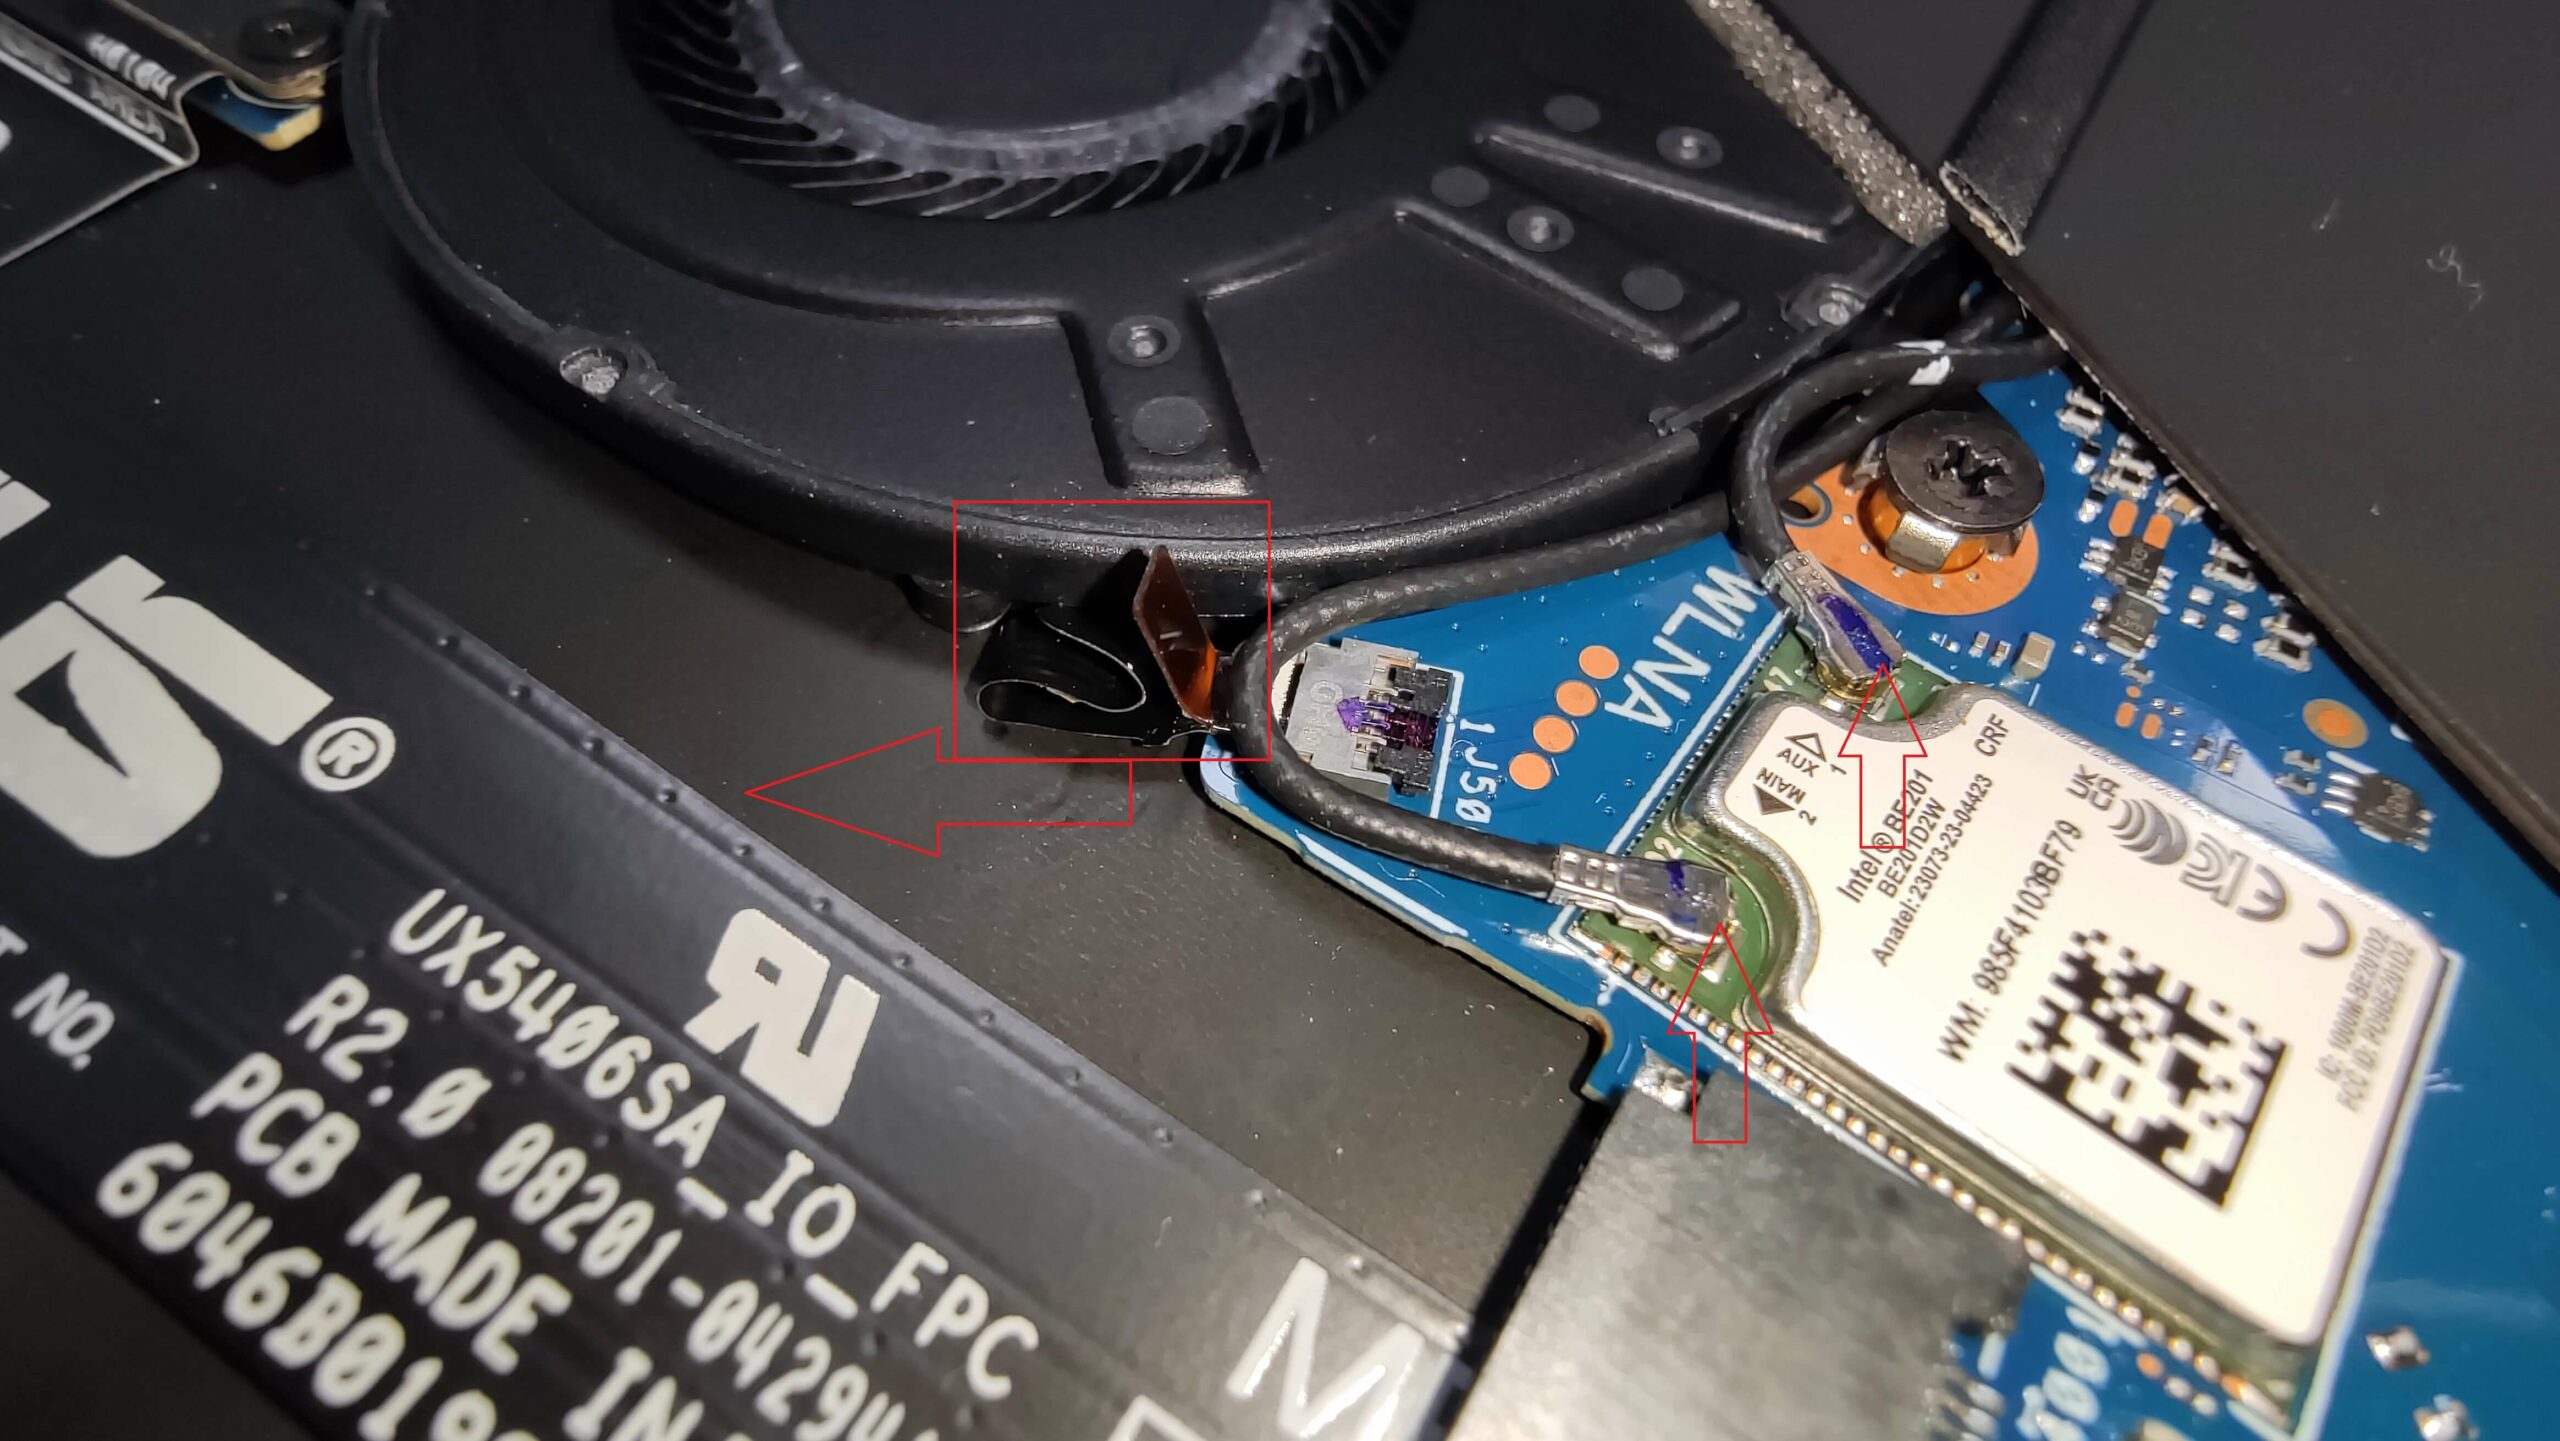
- Unplug the fan connectors (note: the Wi-Fi card cables may block the left fan ribbon connector).
- Disconnect the cables if necessary to access the fan connector.
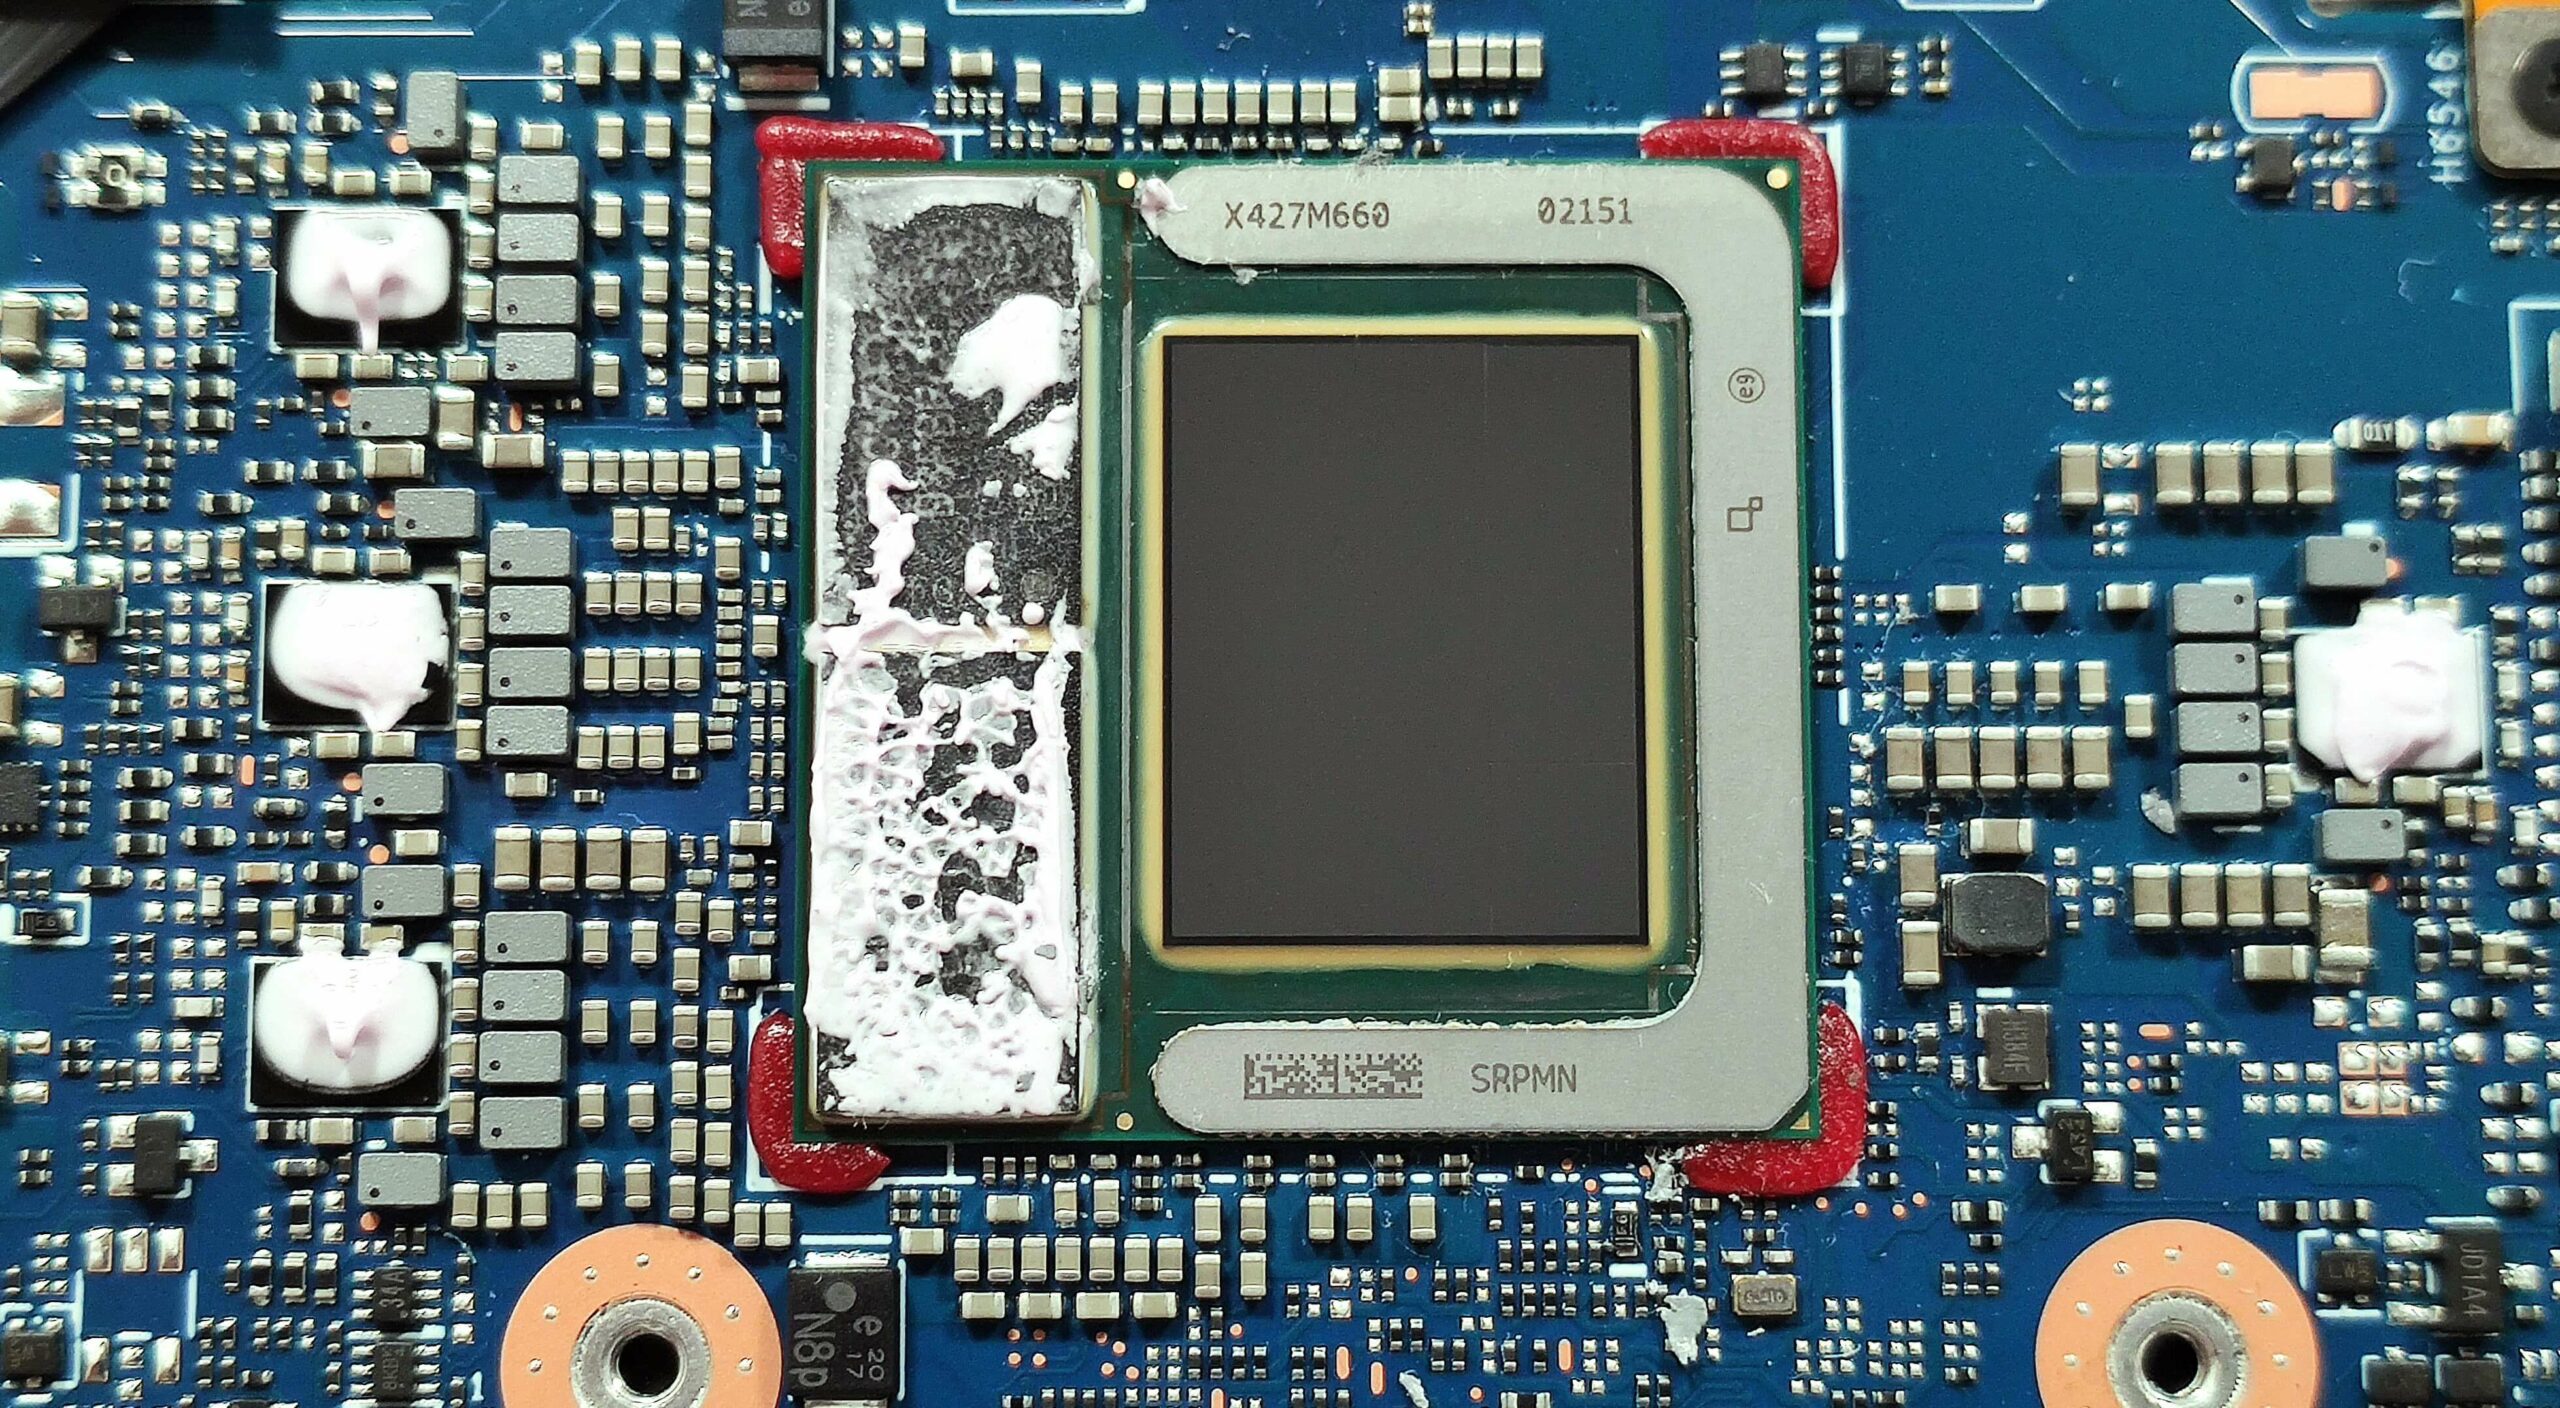
- Once removed, you can see the SoC and RAM chips with preapplied thermal putty for heat dissipation.
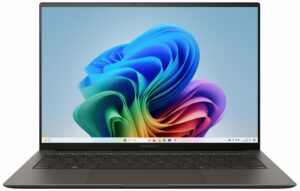
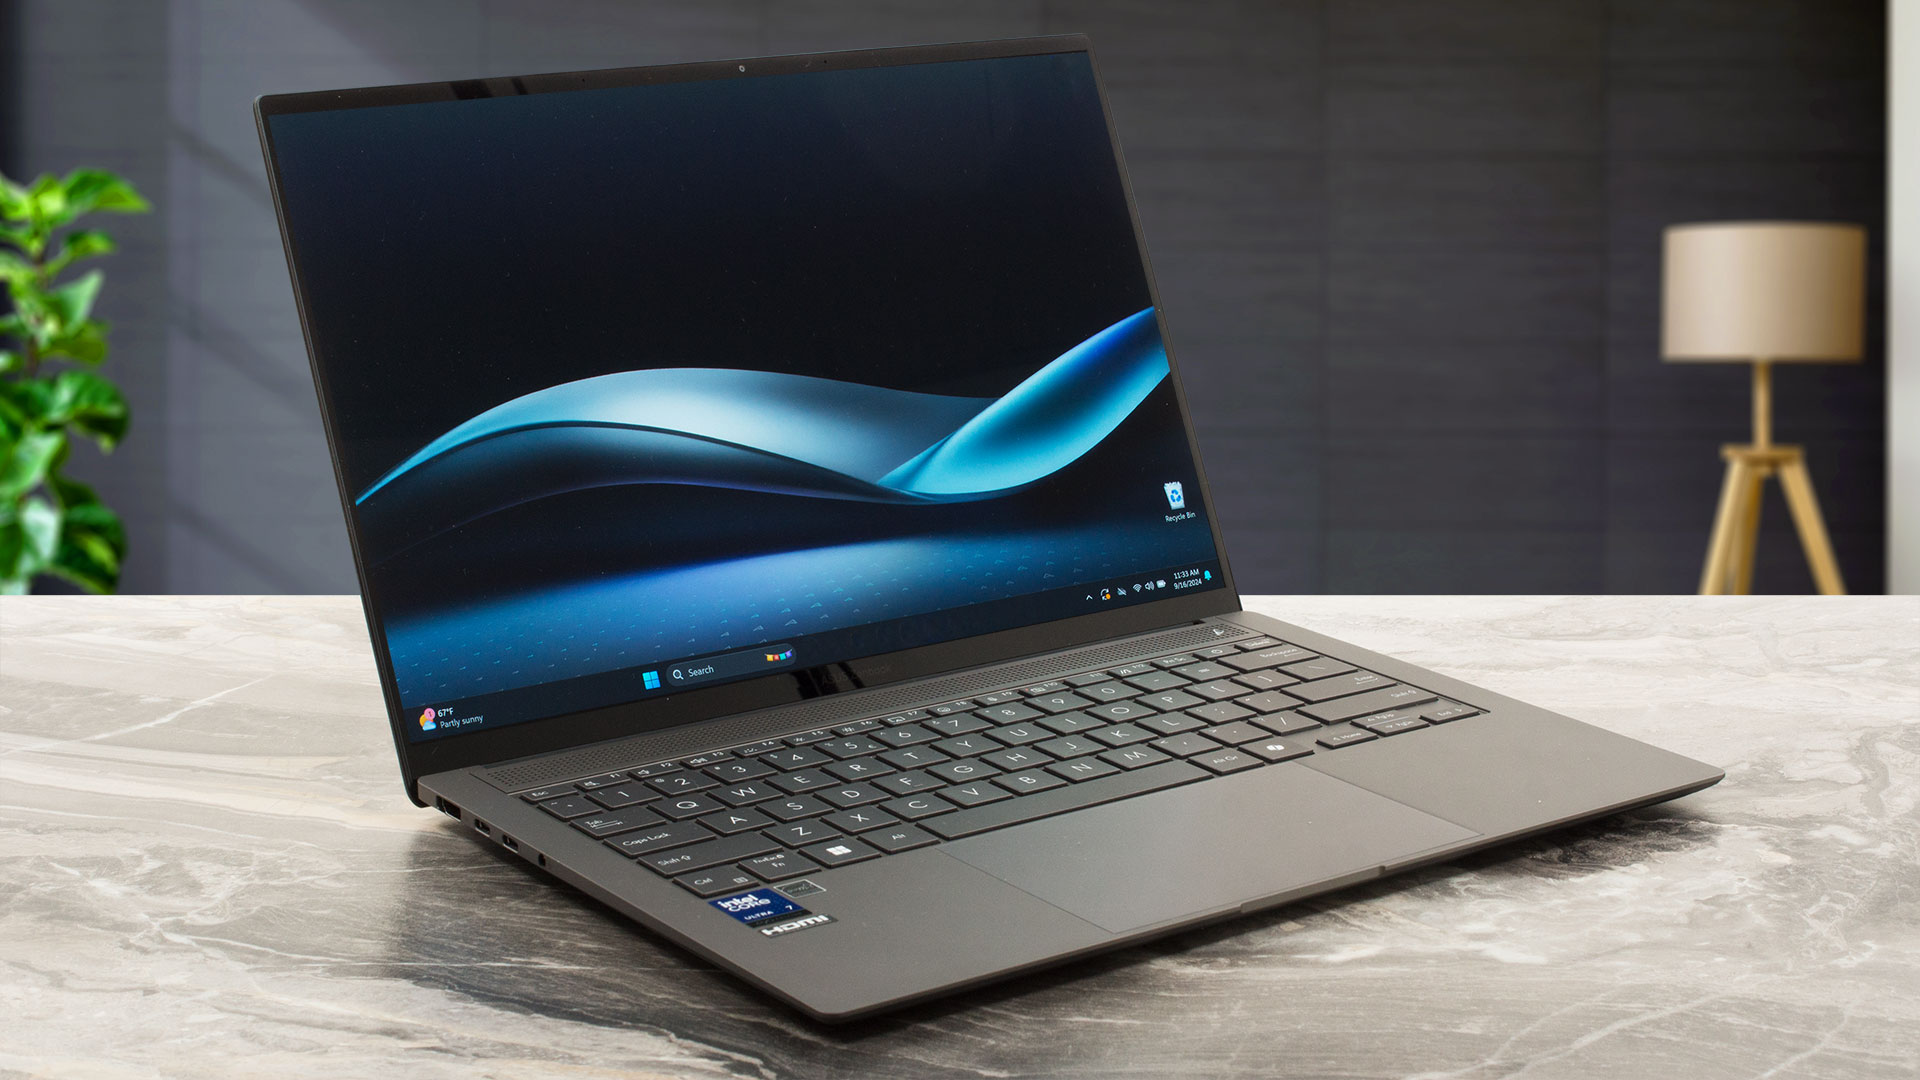
ASUS Zenbook S 14 (UX5406) in-depth review
The ASUS Zenbook S 14 UX5406 is not just an ultra-thin well-crafted laptop. The new Intel Lunar Lake CPUs power it (these are also known as Intel Core Ultra 200V or Core Ultra (Series 2)). You can choose from three chips with 17W base power and the top dog is a 30W model. The main focus here isn't top-of-the-line performance, this time it's all about efficiency and power management. Here, Intel ditches Hyper-Threading and that's why you get four P cores (Lion Cove) and the same amount of LP E cores (Skymont). Intel's Thread Director firmware hints to the OS about which and how many cores are b[...]
Pros
- Superb OLED display with 100% sRGB and DCI-P3 coverage (SDC419D)
- Infinite contrast ratio, 120Hz refresh rate, and 2880 x 1800 resolution (SDC419D)
- 591 nits in HDR and 364 nits max brightness in SDR mode (SDC419D)
- Tremendous color accuracy (SDC419D)
- Quality Harman Kardon-certified four-speaker audio system with Dolby Atmos support
- Vapor chamber cooling with two fans
- Comfortable keyboard
- Big and smooth touchpad
- 1080p IR Web camera
- Very good overall CPU and iGPU performance given the thin profile
- The fans aren't too noisy in "Full-speed mode" mode during heavy loads
- Up to 32GB of soldered LPDDR5x
- Long battery life
- The Core Ultra 7 258V can maintain 2.70 GHz / 3.35 GHz for the P and LP E cores in short loads
- Great solid premium build quality
- 2x Thunderbolt 4 ports + Type-C charging
Cons
- The P-core frequency drops down below the official base clock in long loads
- Only one M.2 slot + soldered RAM


![[June 2026] Best-Selling Laptop Brands on Amazon Global – Apple’s Unrivaled Dominance in Units and Revenue](https://laptopmedia.com/wp-content/uploads/2026/07/GLOBAL-Best-Brands-400x225.jpg)
![[June 2026] Amazon Global: Top 10 Best-Selling Laptops – Apple’s New MacBook Neo Storms to #1, Reshaping the Market with Affordability](https://laptopmedia.com/wp-content/uploads/2026/07/Best-Selling-Laptops-GLOBAL-Top-10-400x225.jpg)
![[June 2026] Amazon Global: Top 10 Best-Selling Gaming Laptops – Acer’s Nitro V 16S AI Dominates Sales, While ASUS Leads Overall Revenue](https://laptopmedia.com/wp-content/uploads/2026/07/Best-Selling-Gaming-Laptops-GLOBAL-Top-10-400x225.jpg)
![[June 2026] Global Ranking of Best-Selling Laptop GPUs on Amazon – NVIDIA RTX 5060 is the Top-Selling Dedicated GPU](https://laptopmedia.com/wp-content/uploads/2026/07/Best-Selling-GPUs-GLOBAL-Top-10-400x225.jpg)
![[June 2026] Global Ranking of Best-Selling Laptop CPUs on Amazon – Apple M5 Dominates, AMD Ryzen 7 260 Gets Solid Premium Share](https://laptopmedia.com/wp-content/uploads/2026/07/Best-Selling-CPUs-GLOBAL-Top-10-400x225.jpg)

is it possible to add a thermal pad between cover and vapor chamber?
Hi,
I have the same laptop, and my screen is broken as well. Unfortunately, the root cause hasn’t been identified yet.
Could you please help me with a question — is it possible to replace just the screen matrix, or does the entire top lid need to be replaced?
Really appreciate your response!
I had to send my in for an RMA a while back and it turned out the display cable got disconnected somewhere near the hinge. (result of some impacts in a backpack, might just be your issue).