How to open MSI Creator Z16 HX Studio (A13V) – disassembly and upgrade options
LaptopMedia.com
Guides
How to open MSI Creator Z16 HX Studio (A13V) – disassembly and upgrade options
| 0
#CommissionsEarned

Step 1: Accessing the Internal Components
- Ensure the MSI Creator Z16 HX Studio (A13V) is powered off and placed on a soft, clean surface to prevent scratches or damage.
- Remove the 6 Phillips-head screws from the bottom of the laptop.
- Lift the back panel near the hinges to create a slight gap, then use a thin pry tool to gently pop the plate off, starting from the back and working your way around the sides and the front.
Hint: Proceed with care to avoid damaging the internal clips or the chassis itself.
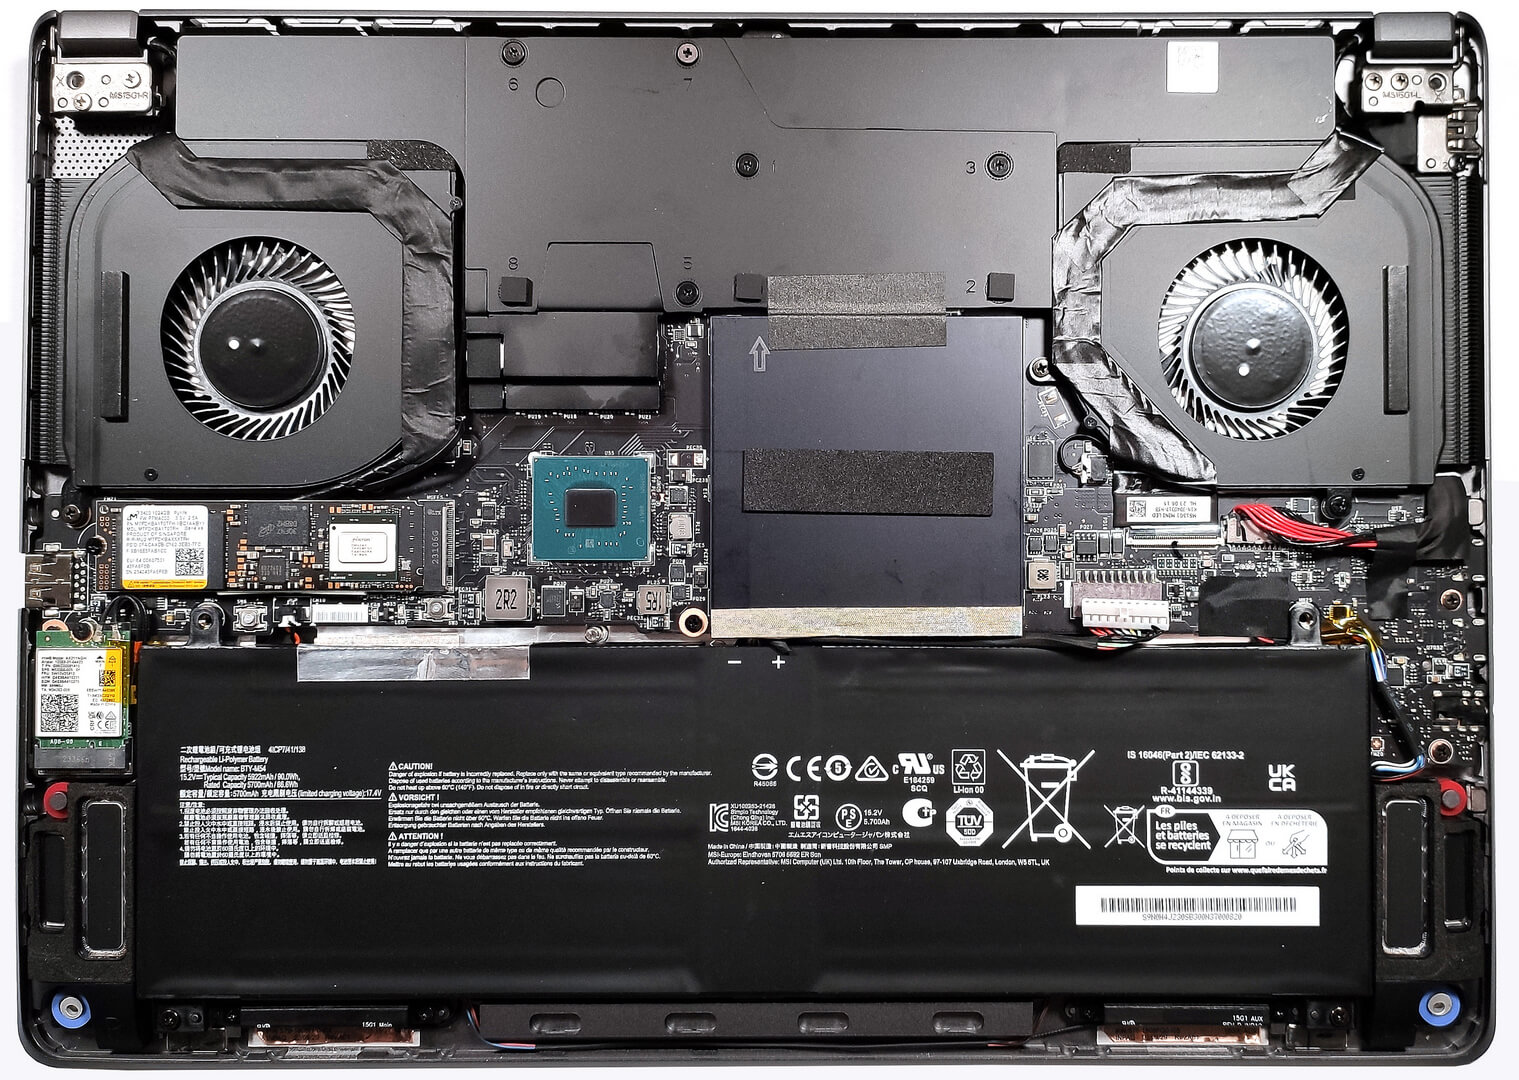
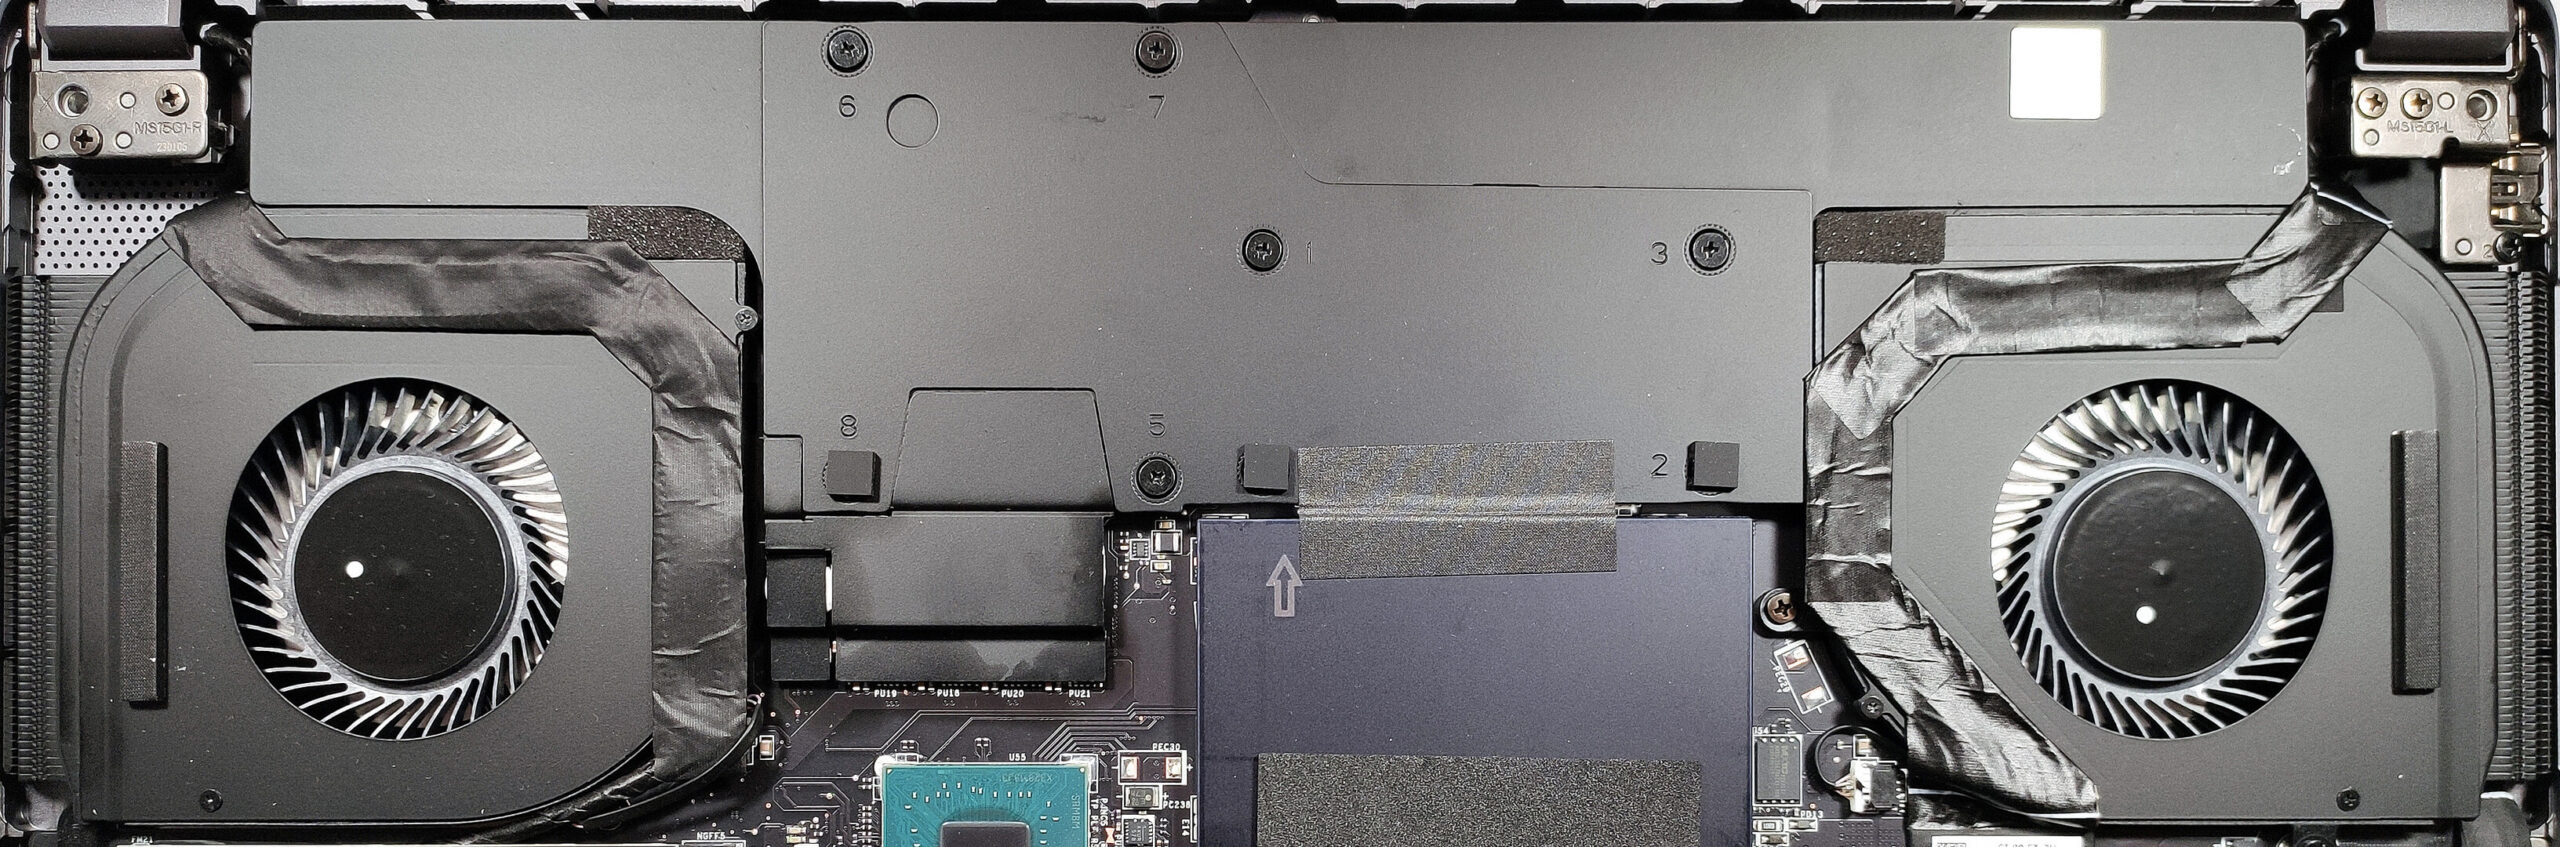
Step 2: Removing the Battery
- Disconnect the battery by unplugging its connector from the motherboard.
- Remove the two Phillips-head screws securing the battery to the chassis, then lift the 90Wh battery away from the device.
Caution: Handle the battery and its connector with care to avoid any damage.
More info: The 90Wh battery offers up to 5 hours and 53 minutes of web browsing or 7 hours and 9 minutes of video playback, providing decent battery life for creative work.

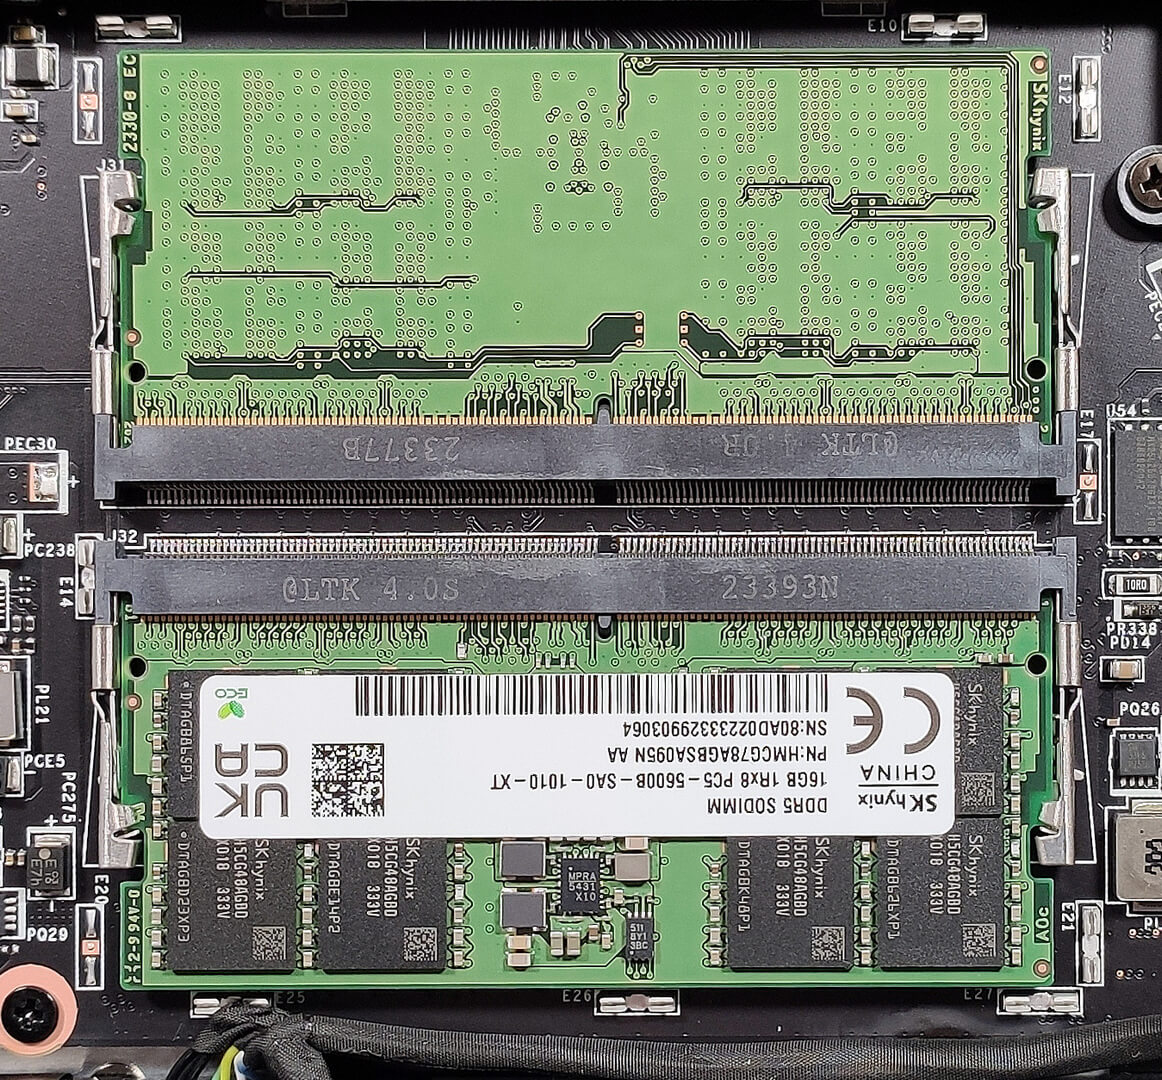
Memory Upgrade
- Locate the protective metal shroud covering the RAM area and access the two SODIMM slots underneath.
- Upgrade or install up to 64GB of DDR5-5600MHz RAM in dual-channel mode to enhance the laptop’s performance for intensive tasks and applications.
Hint: Ensuring both RAM slots are filled can optimize the laptop’s performance through dual-channel mode.
You can buy DDR5 RAM modules here: Buy from Amazon.com (#CommissionsEarned)

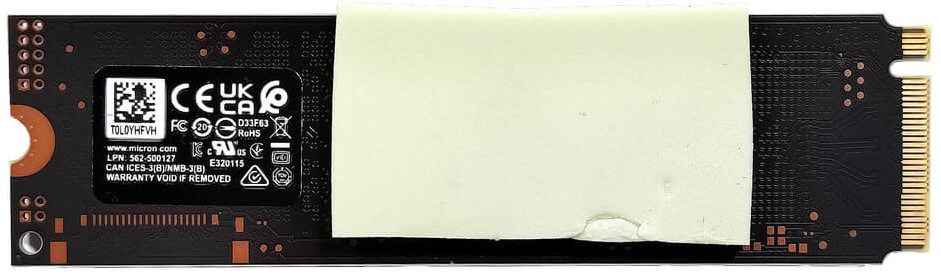
Storage Upgrade
- Find the single M.2 slot that supports the latest Gen 5 NVMe SSDs for ultra-fast storage solutions.
- Consider upgrading the storage with a Gen 5 NVMe to take full advantage of the laptop’s capabilities, especially for tasks requiring high read/write speeds.
More info: The thick cooling pad below the preinstalled SSD helps manage heat, ensuring sustained performance during heavy data transfers.
You can buy Gen 5 M.2 SSD modules here: Buy from Amazon.com (#CommissionsEarned)

Step 3: Examining the Cooling System
- Inspect the vapor chamber cooling system, which includes two fans and four heat sinks, designed to efficiently manage the thermal output of the laptop.

#CommissionsEarned
Subscribe
0 Comments