Inside Acer Predator 17X – disassembly, internal photos and upgrade options
One would assume that the Acer Predator 17X is hard to disassemble and you can’t access all of the hardware that easily since the machine packs a ton of hardware with unusual cooling design and, of course, a lot of storage options. However, this isn’t the case and the Predator 17X is just as easy to teardown as its standard counterpart, the Predator 17. Also, the provided service lid gives access to most of the upgrade options.
You can check here when the notebook appears on the market: http://amzn.to/1Q3JhZG
1. Service lid
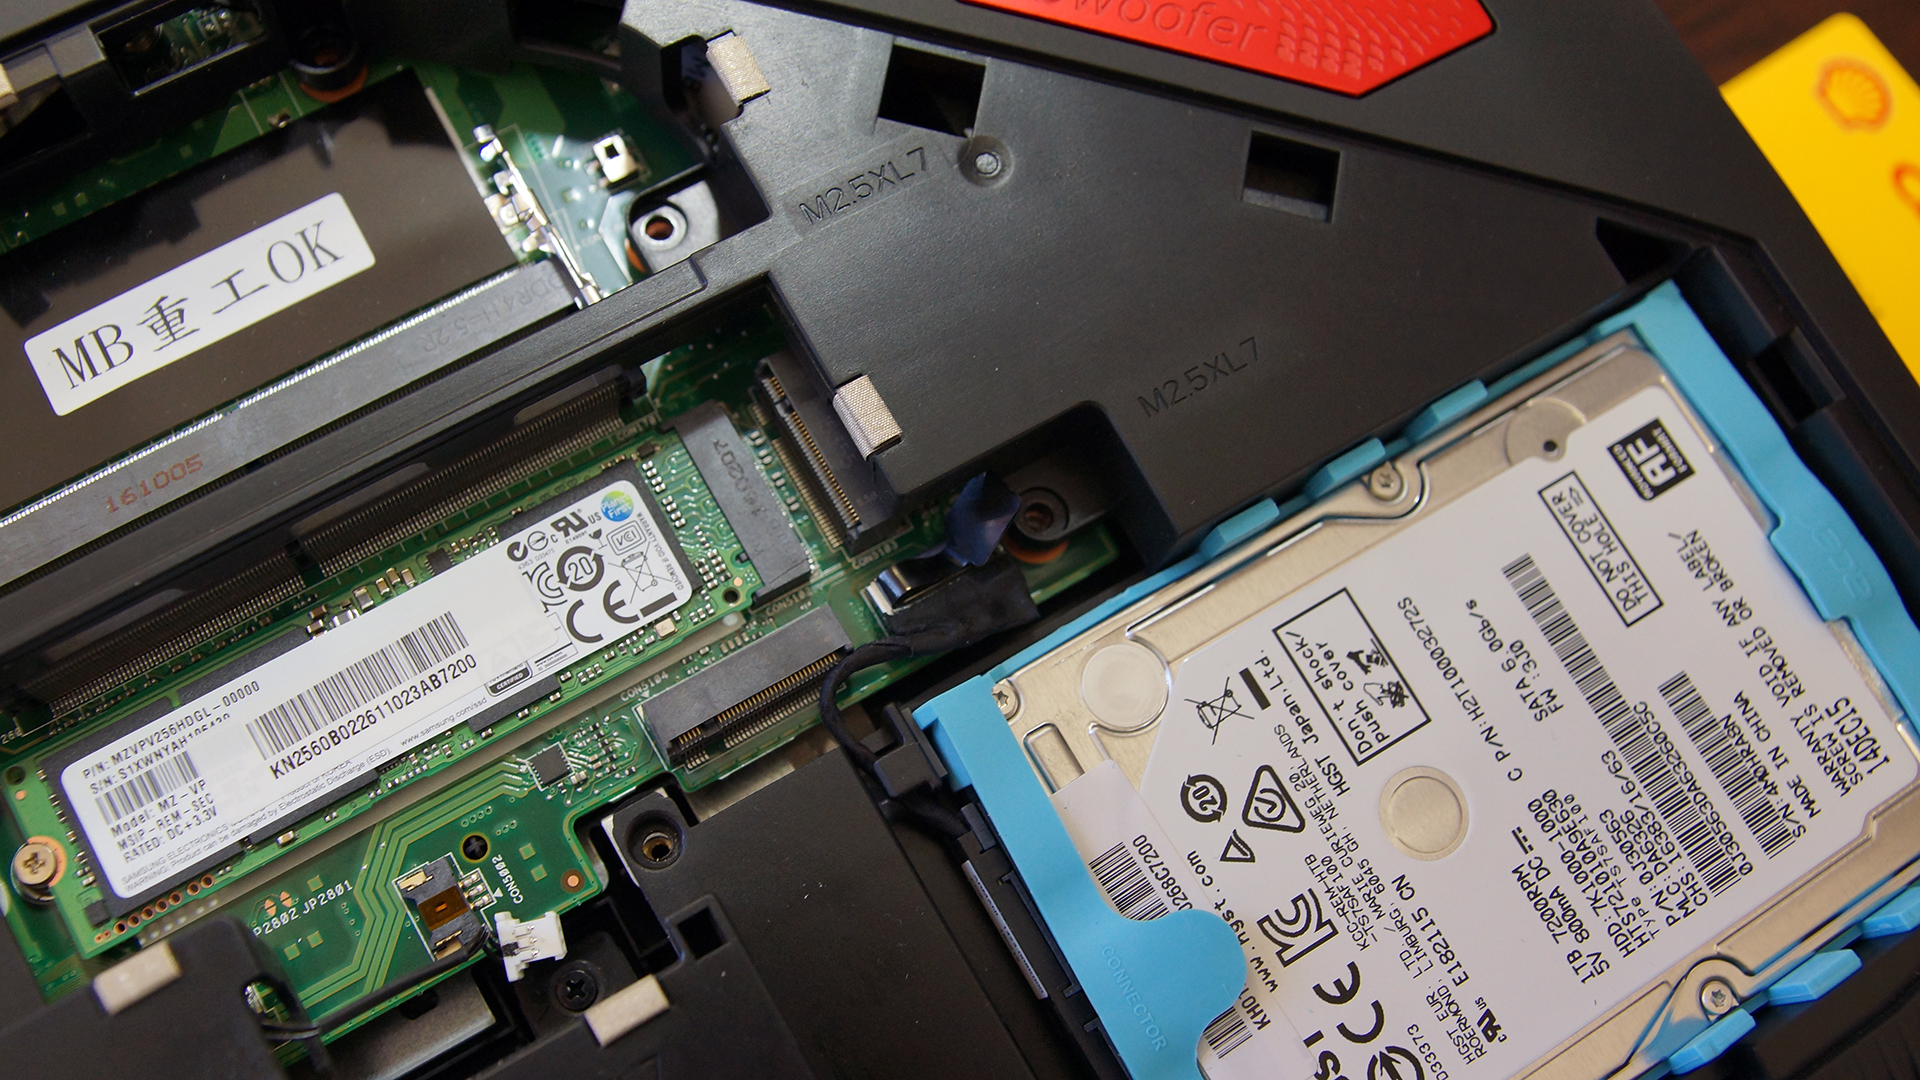
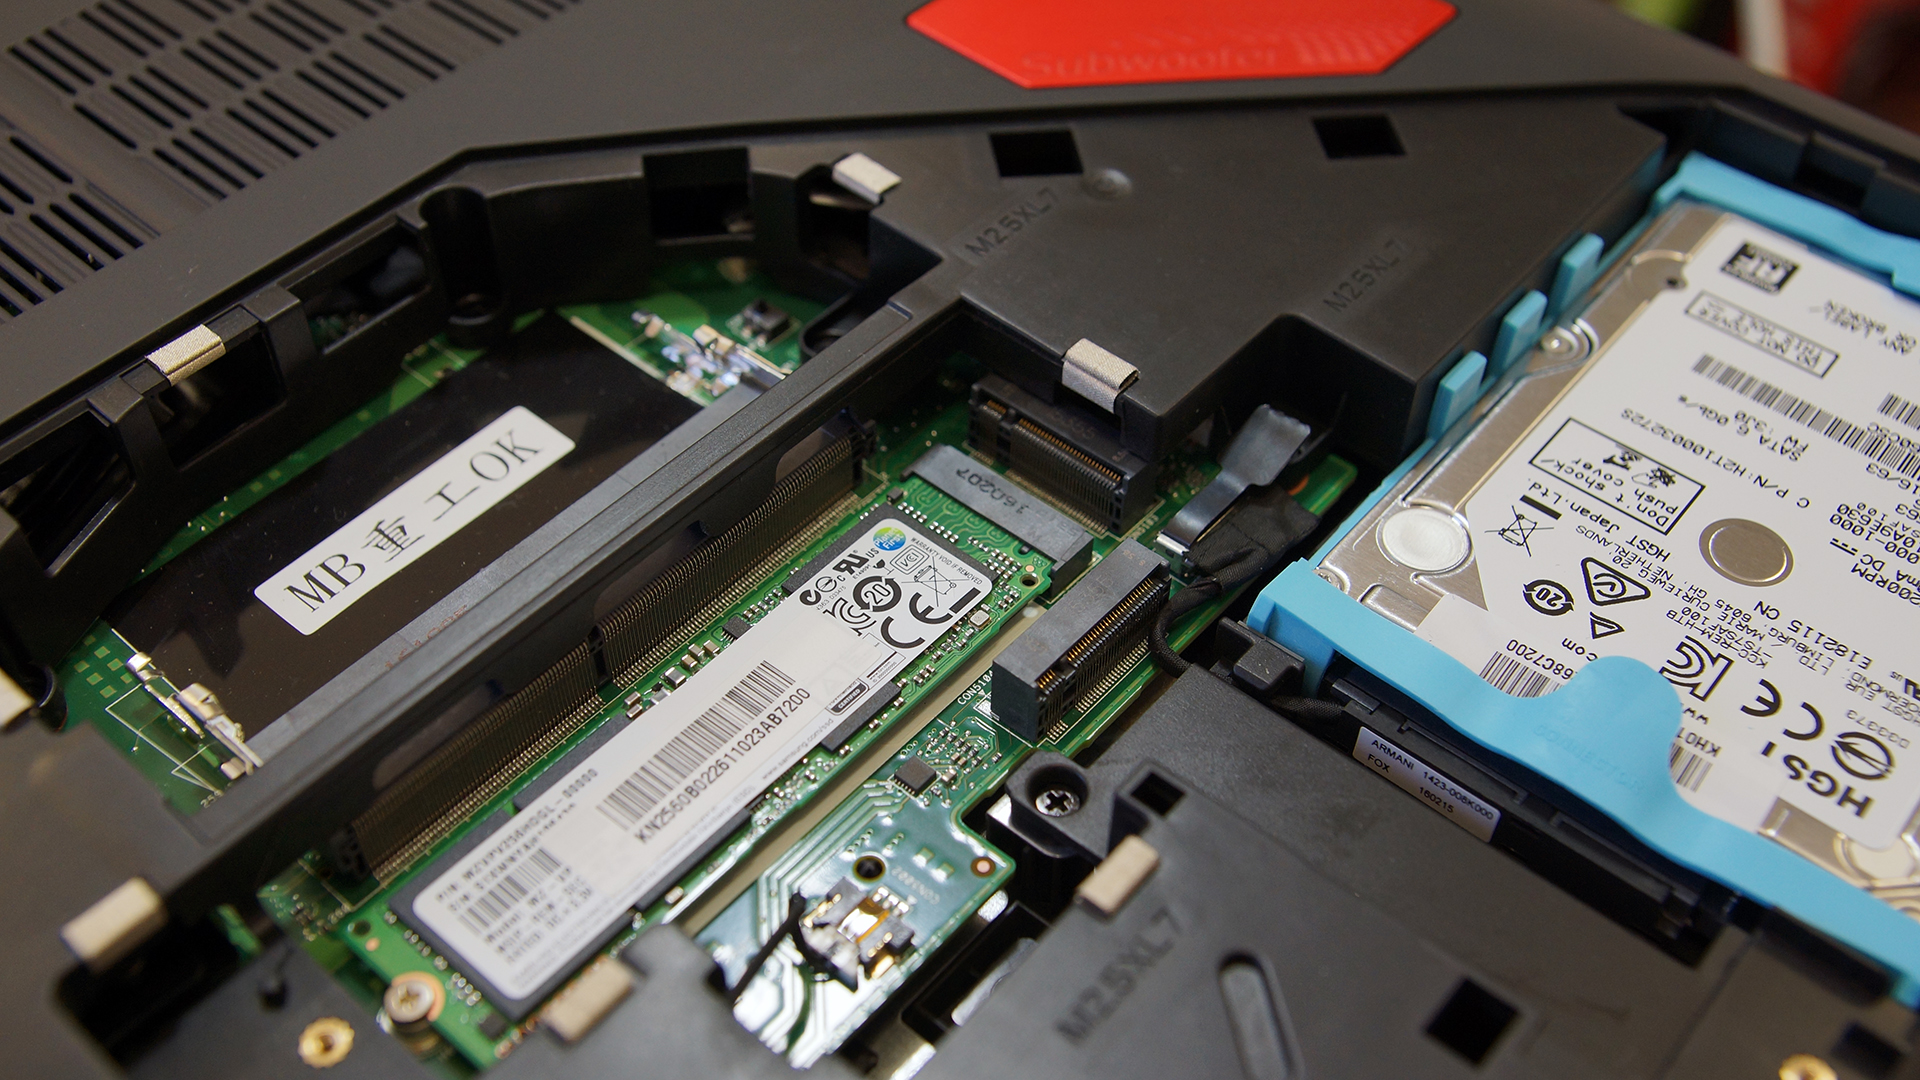
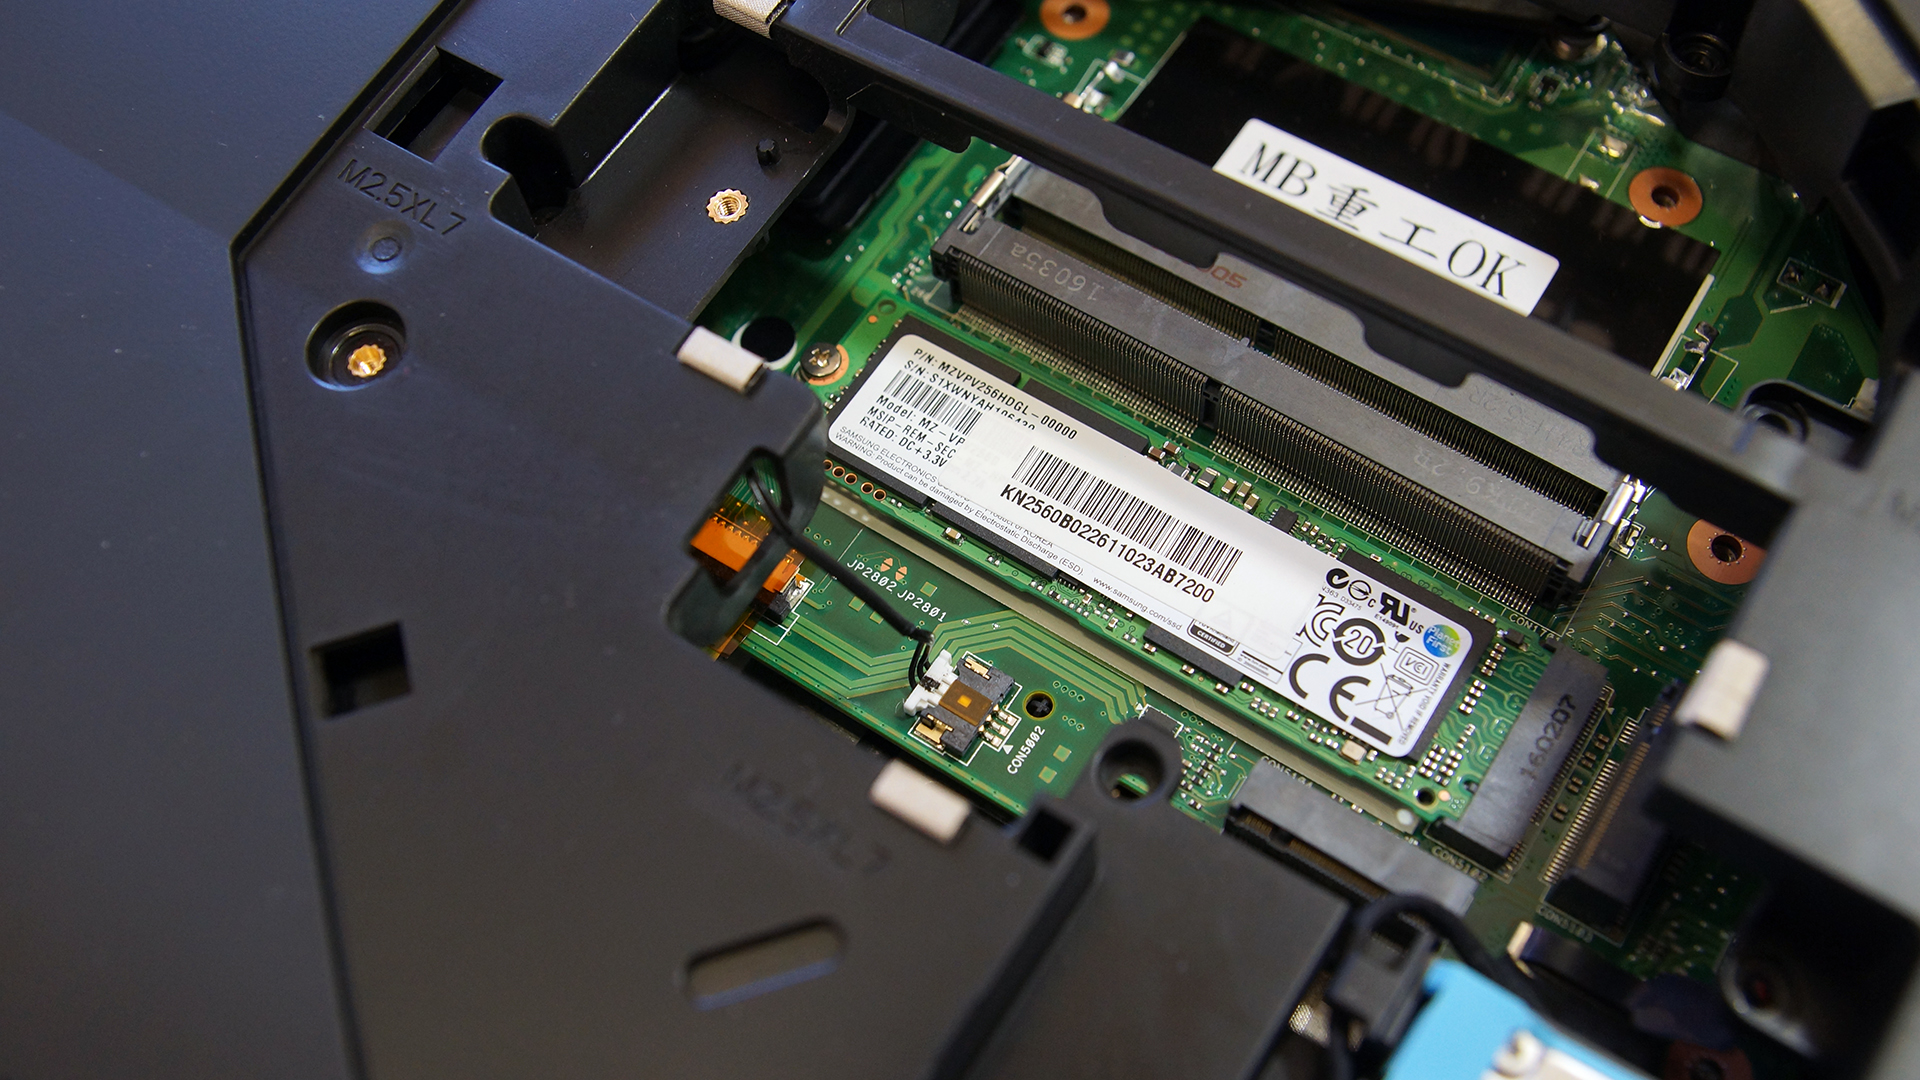
It’s a big one and you can’t miss it. As shown in the photos below, opening the service lid gives access to the 2.5-inch HDD (HGST 1TB @7200 rpm), two of the RAM slots supporting up to 16GB each and all three M.2 SSD slots.

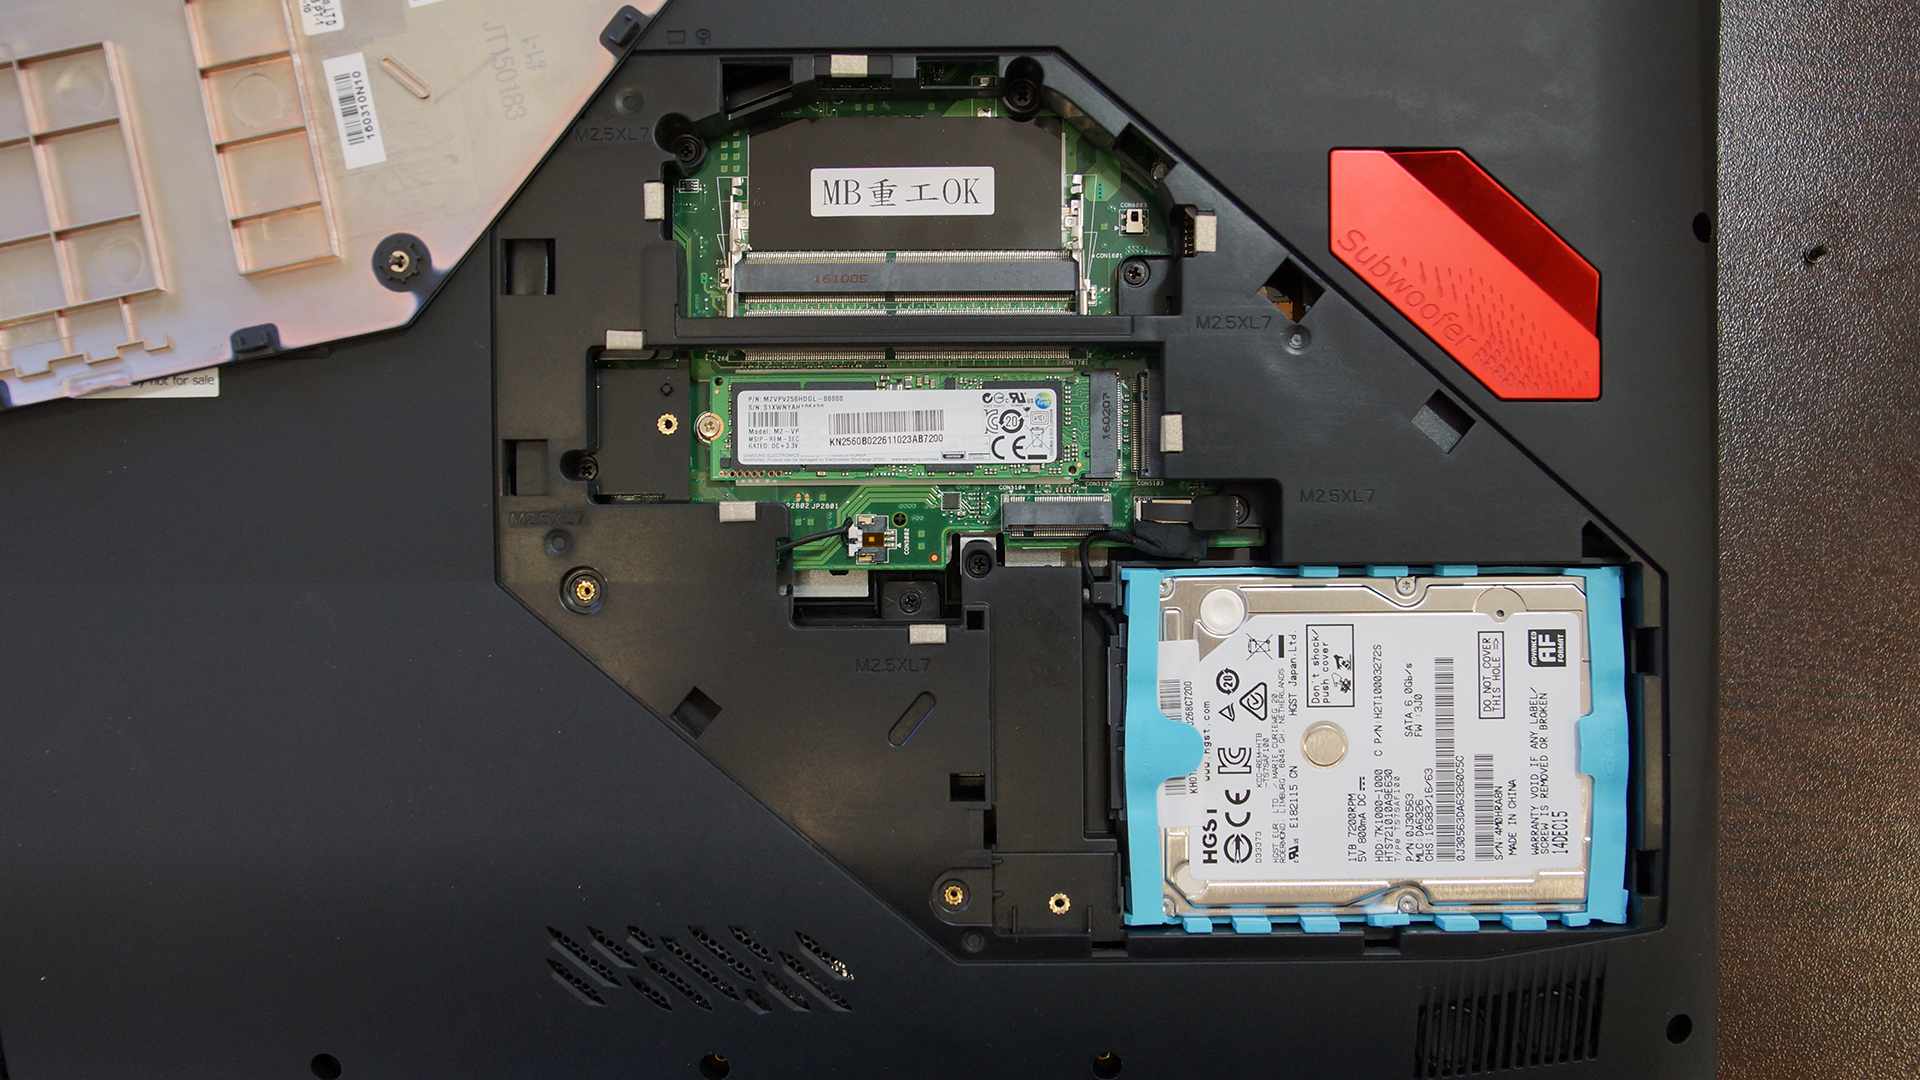
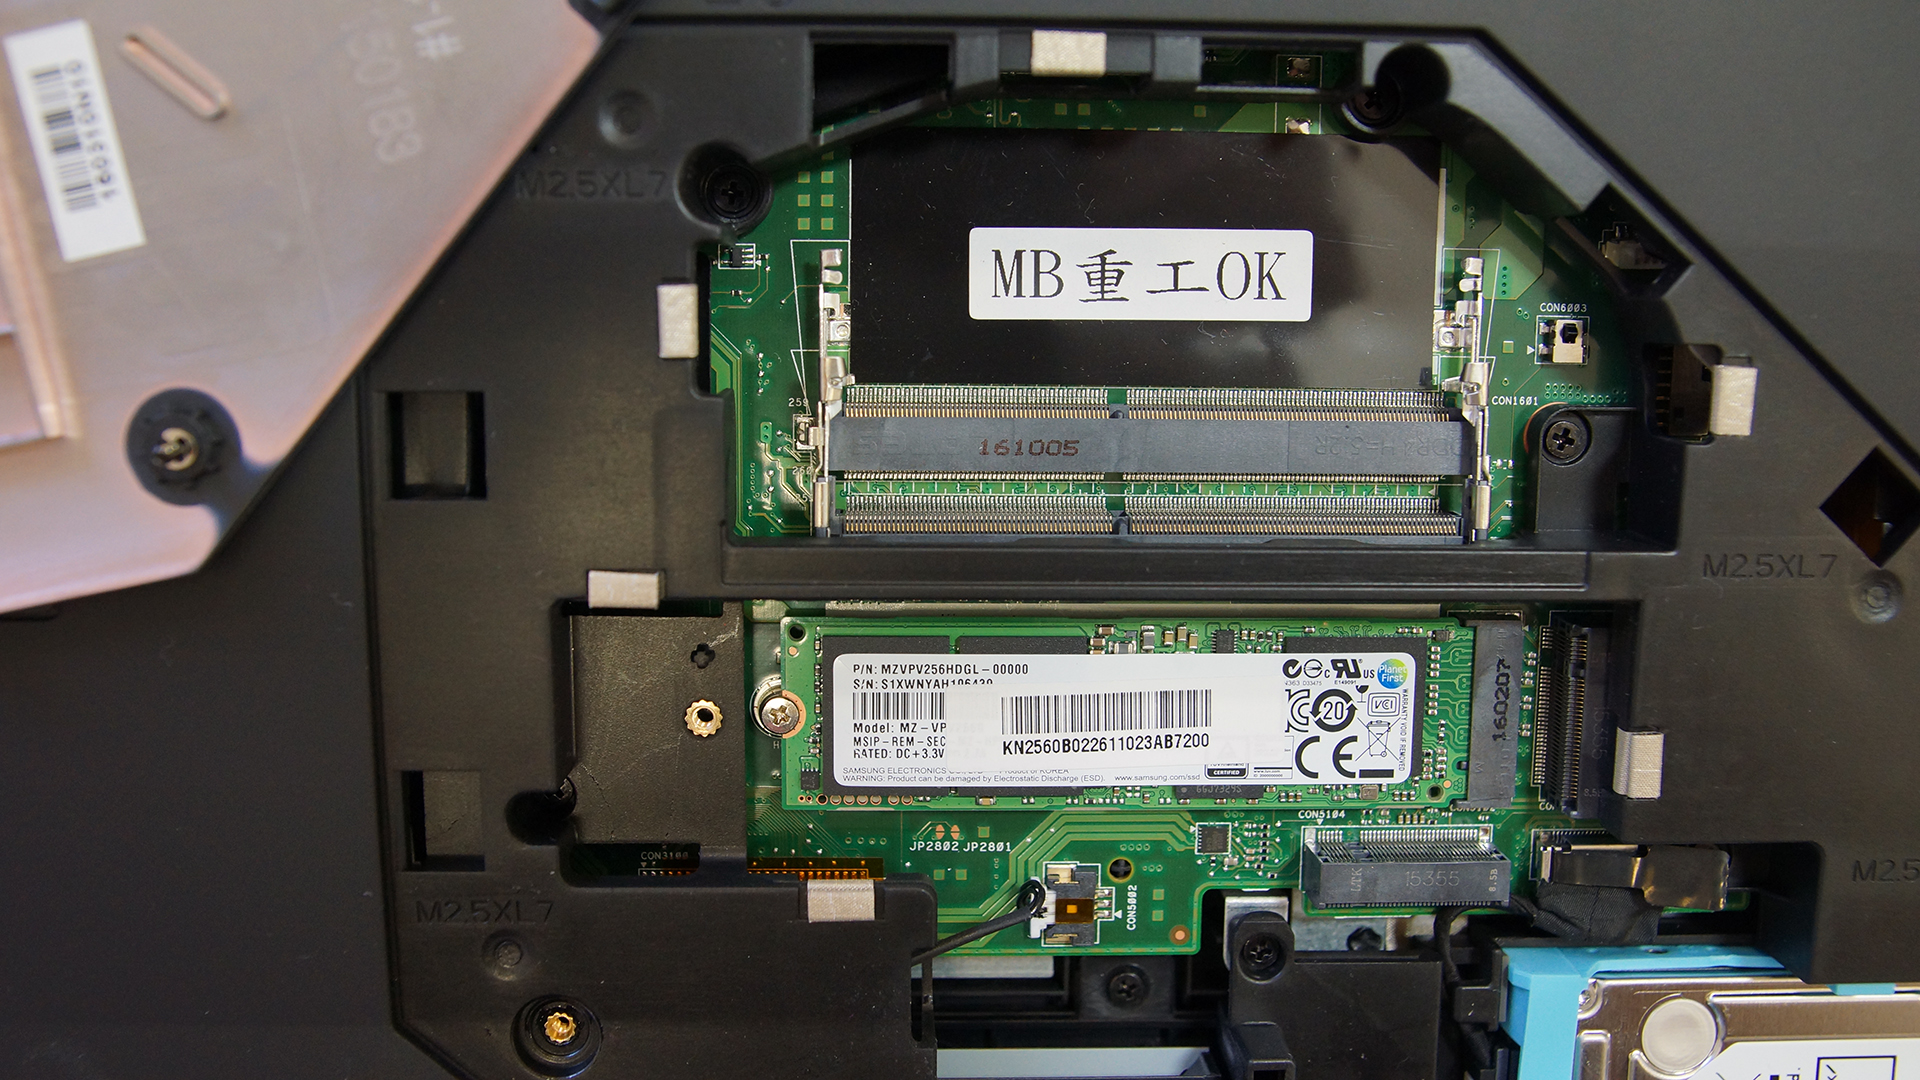

Just like last year, the M.2 slots support one 2280 (M key) and one 22110 (B key) standard but also adds a third one positioned right next to the HDD and luckily it’s 2280 (B key) again. All slots should support the PCIe NVMe standard but if you arrange them in a RAID 0 array, the SSDs will use the SATA interface. Our unit came with one 2280 M.2 SSD manufactured by Samsung with model number SM951 (MZVPV256HDGL) with a 256GB capacity supporting the NVMe controller.

2. Removing the bottom piece
If this isn’t enough for you and you are looking for the rest of the hardware such as the Wi-Fi module or battery pack, you should perform almost a full disassembly and as we stated before, it’s not as hard as you’d think. Just remove all the screws and pry up the bottom. Also, keep in mind that the other two RAM slots are located beneath the motherboard. You will have to detach almost everything to turn it around and upgrade or swap the RAM chips. We think that if you unit comes with up to 32GB of RAM, the manufacturer will probably put those chips on the hidden side of the motherboard giving you easy access to upgrade the other two slots on your own.
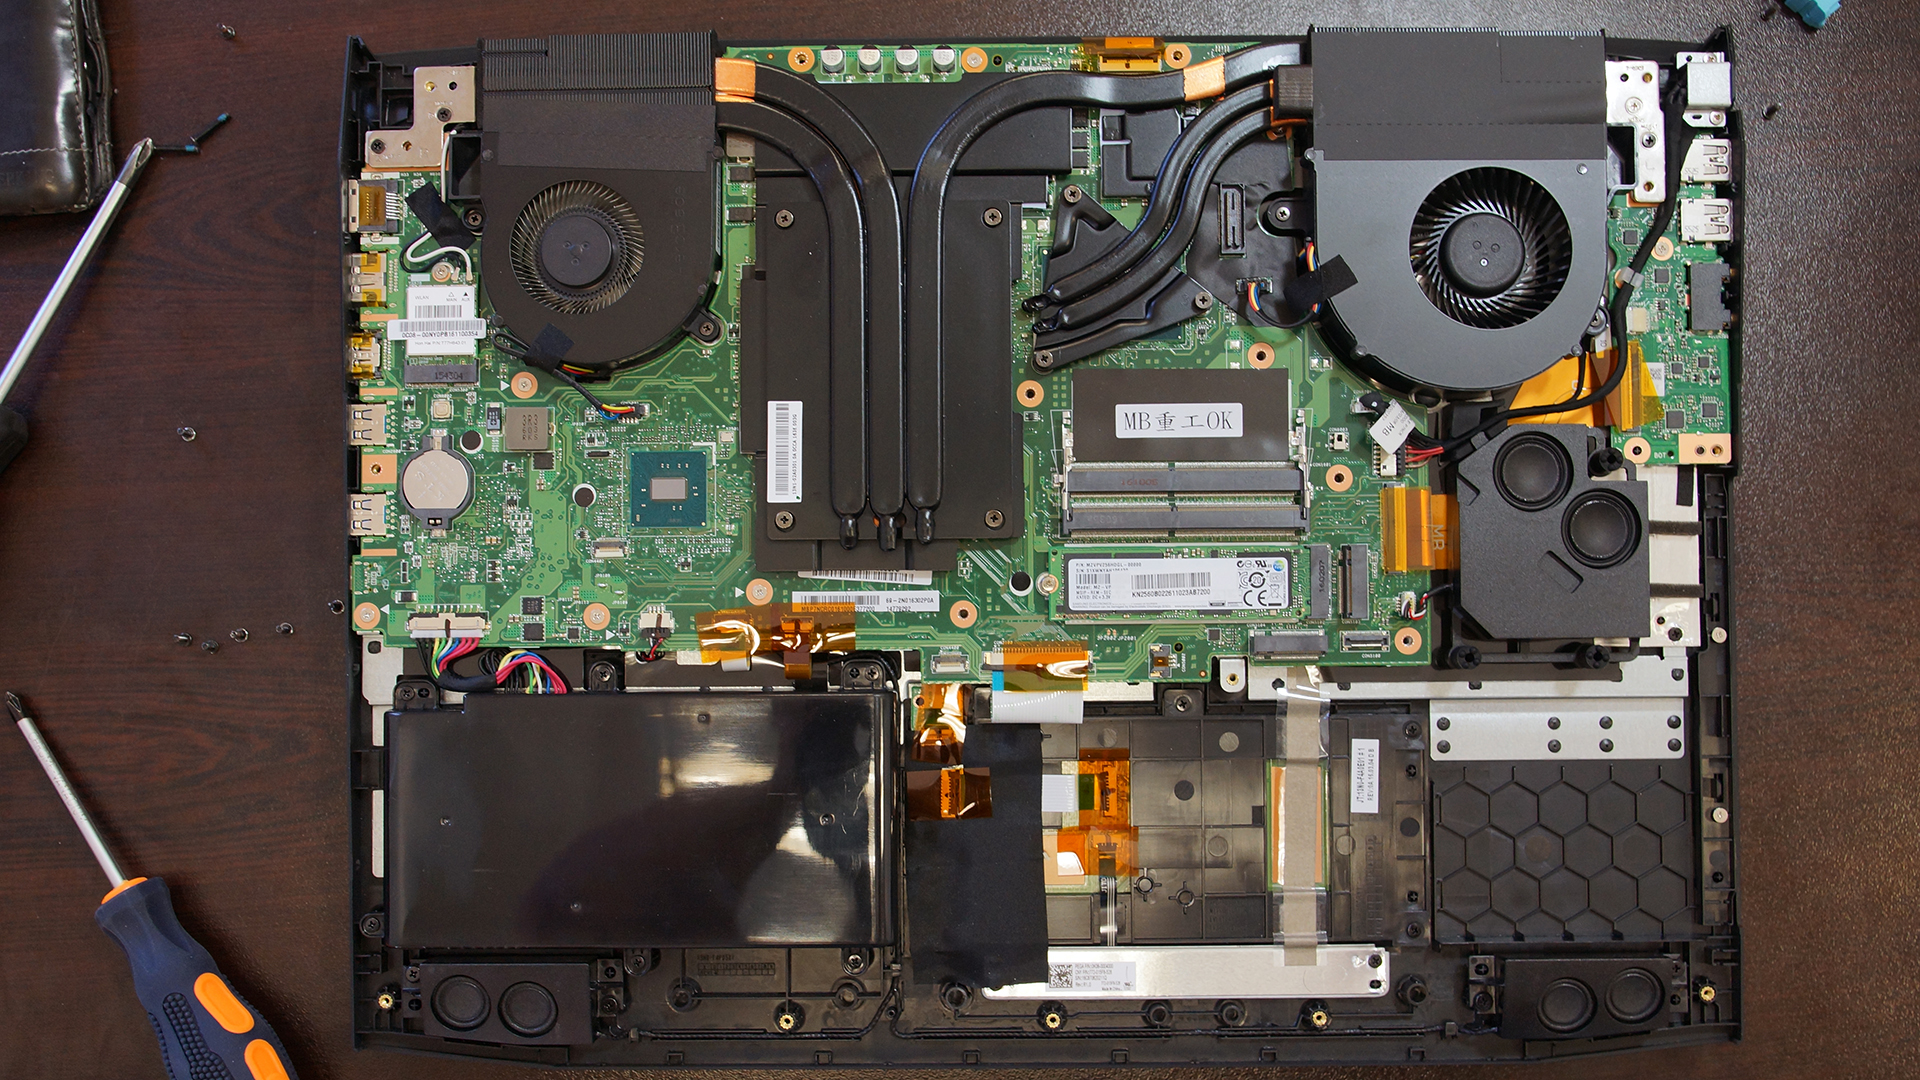
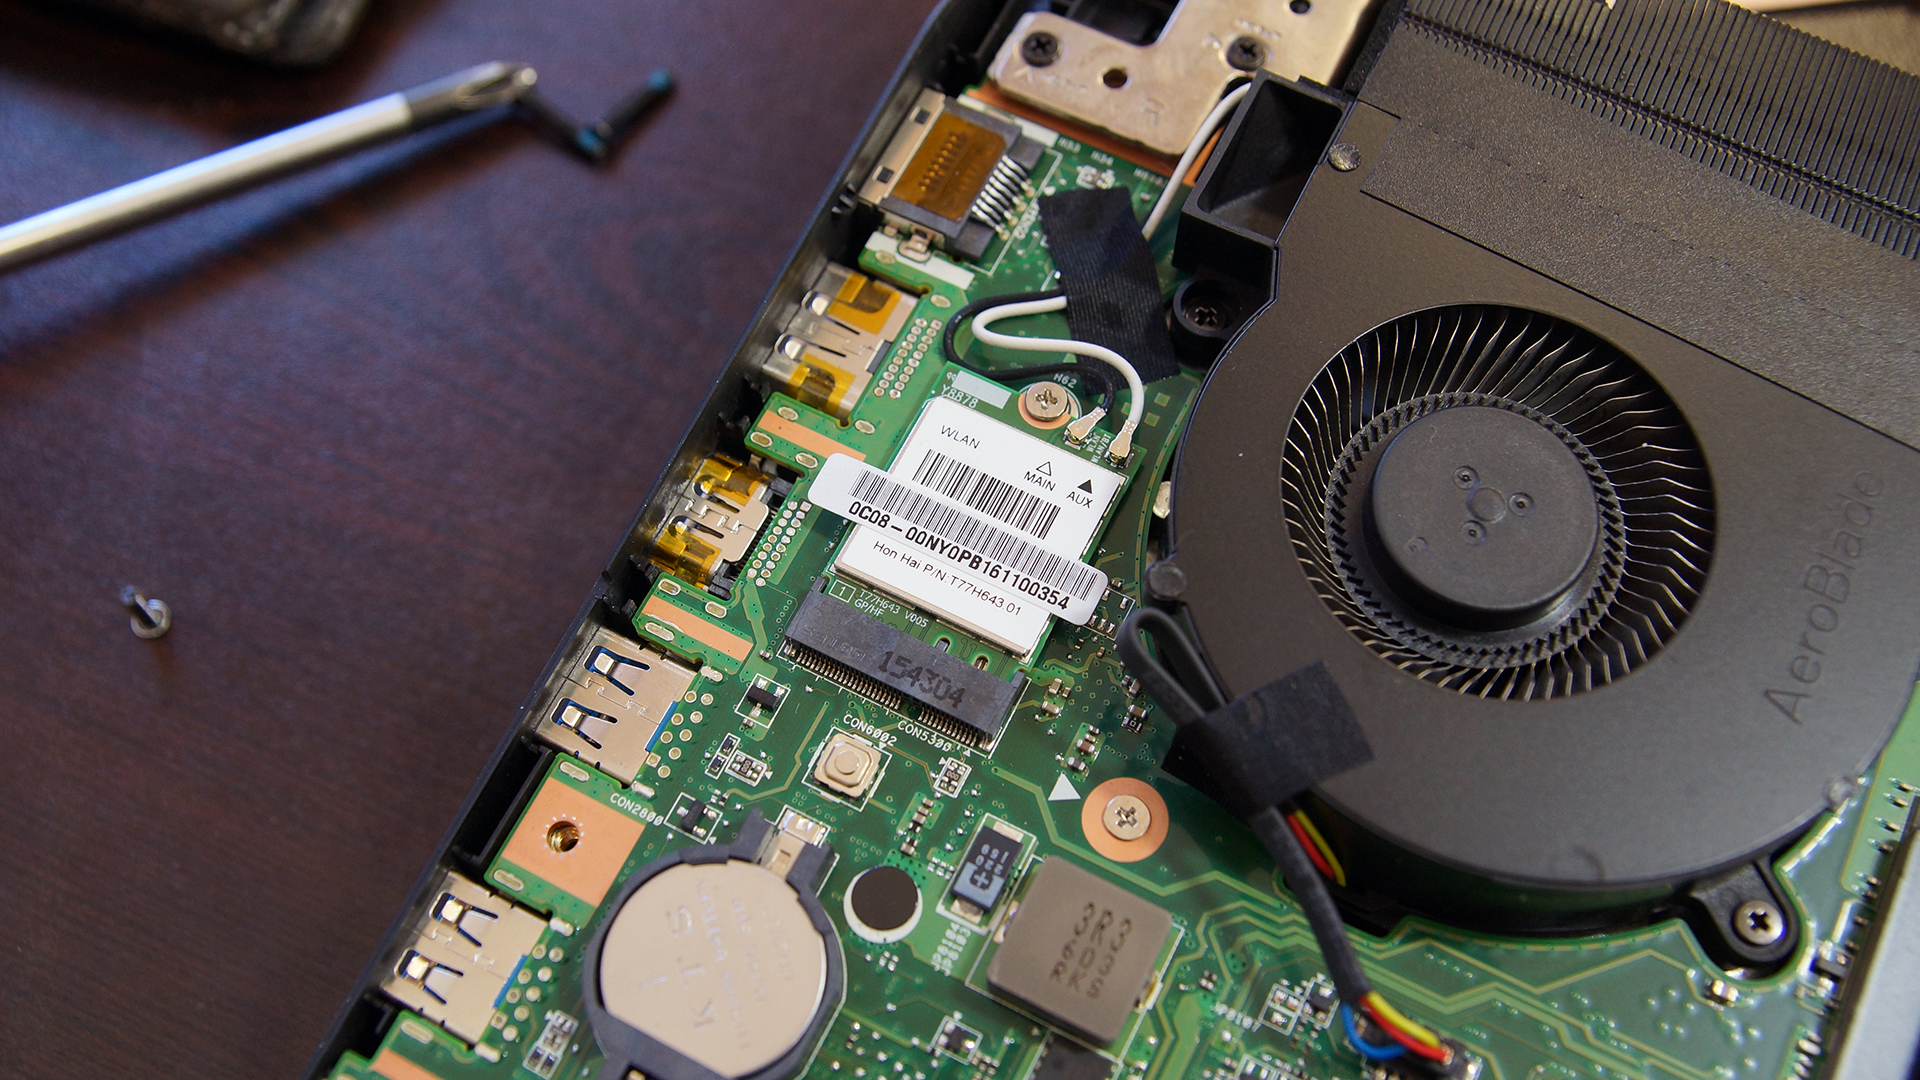
The Wi-Fi module is located near the right fan (or the left one if you turn it around).
The battery can be found near the bottom left corner of the photo and it’s rated at 88.8Wh.
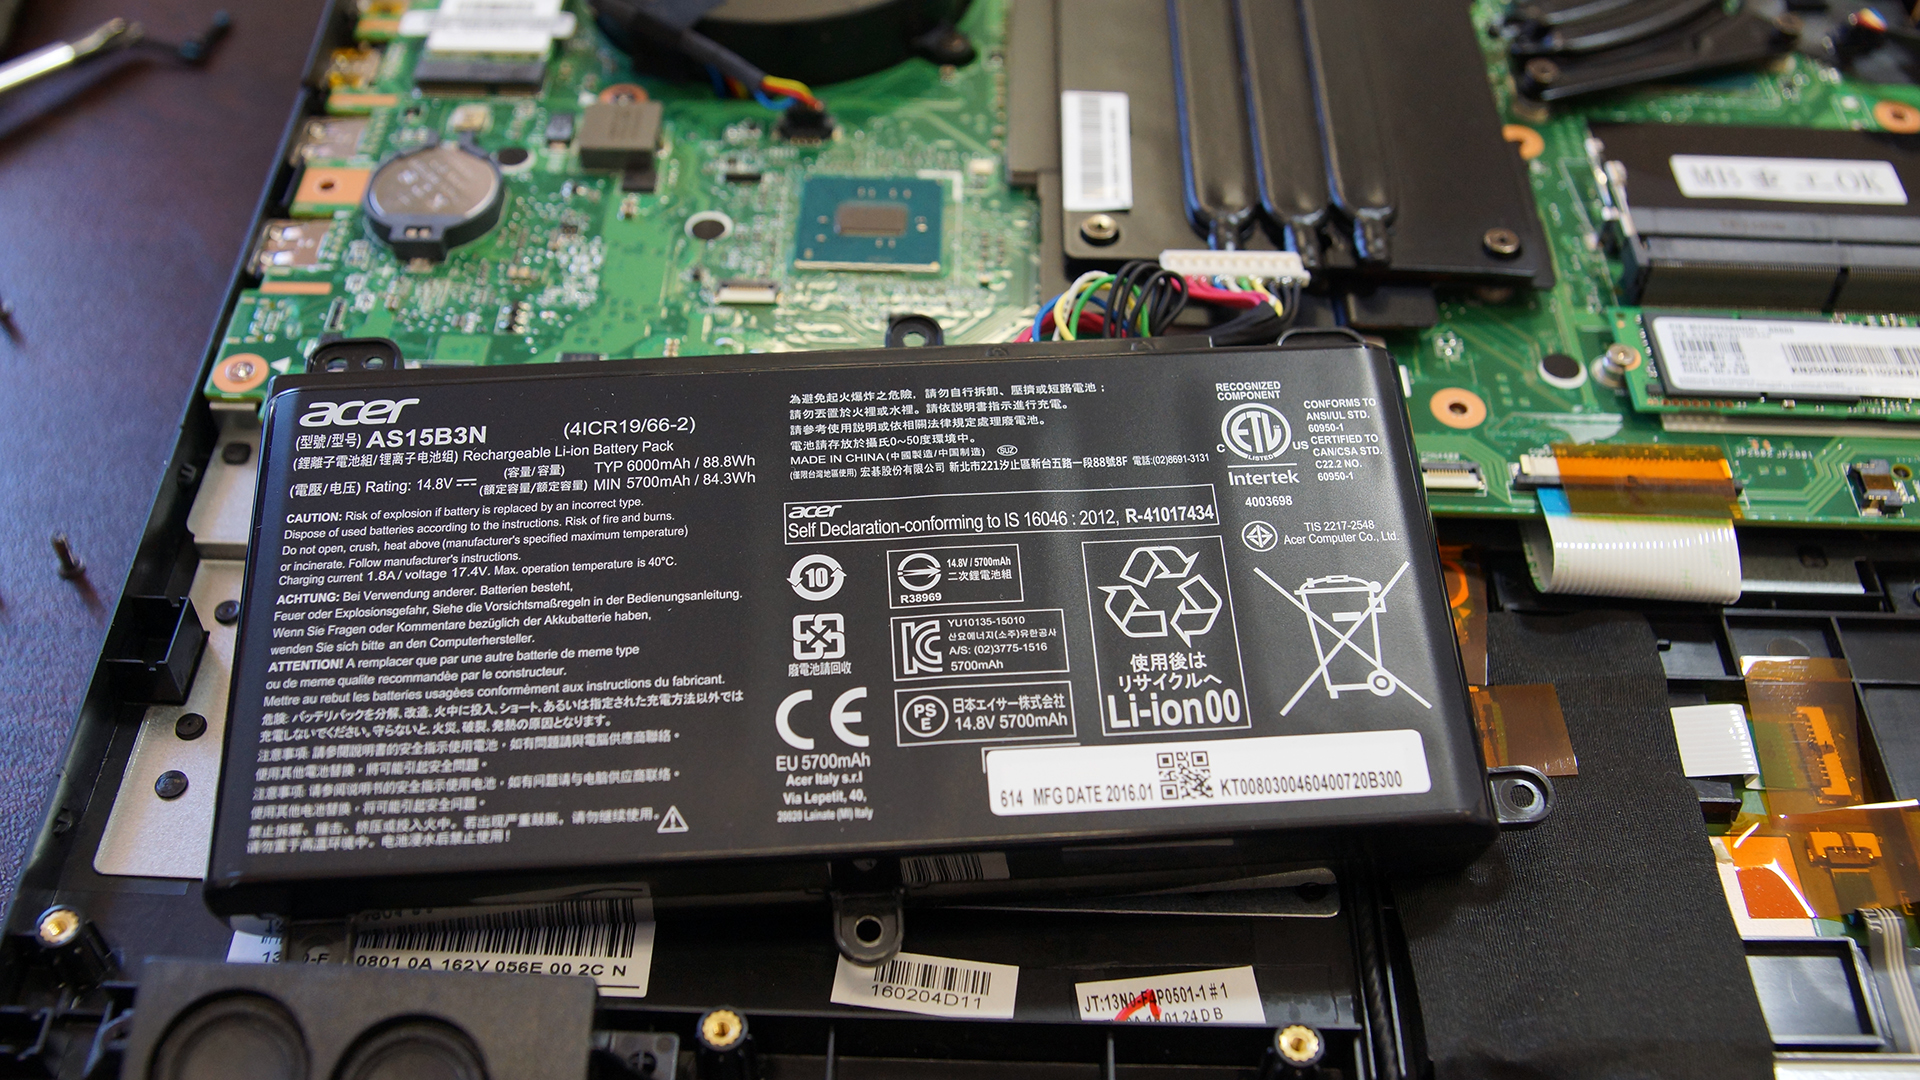
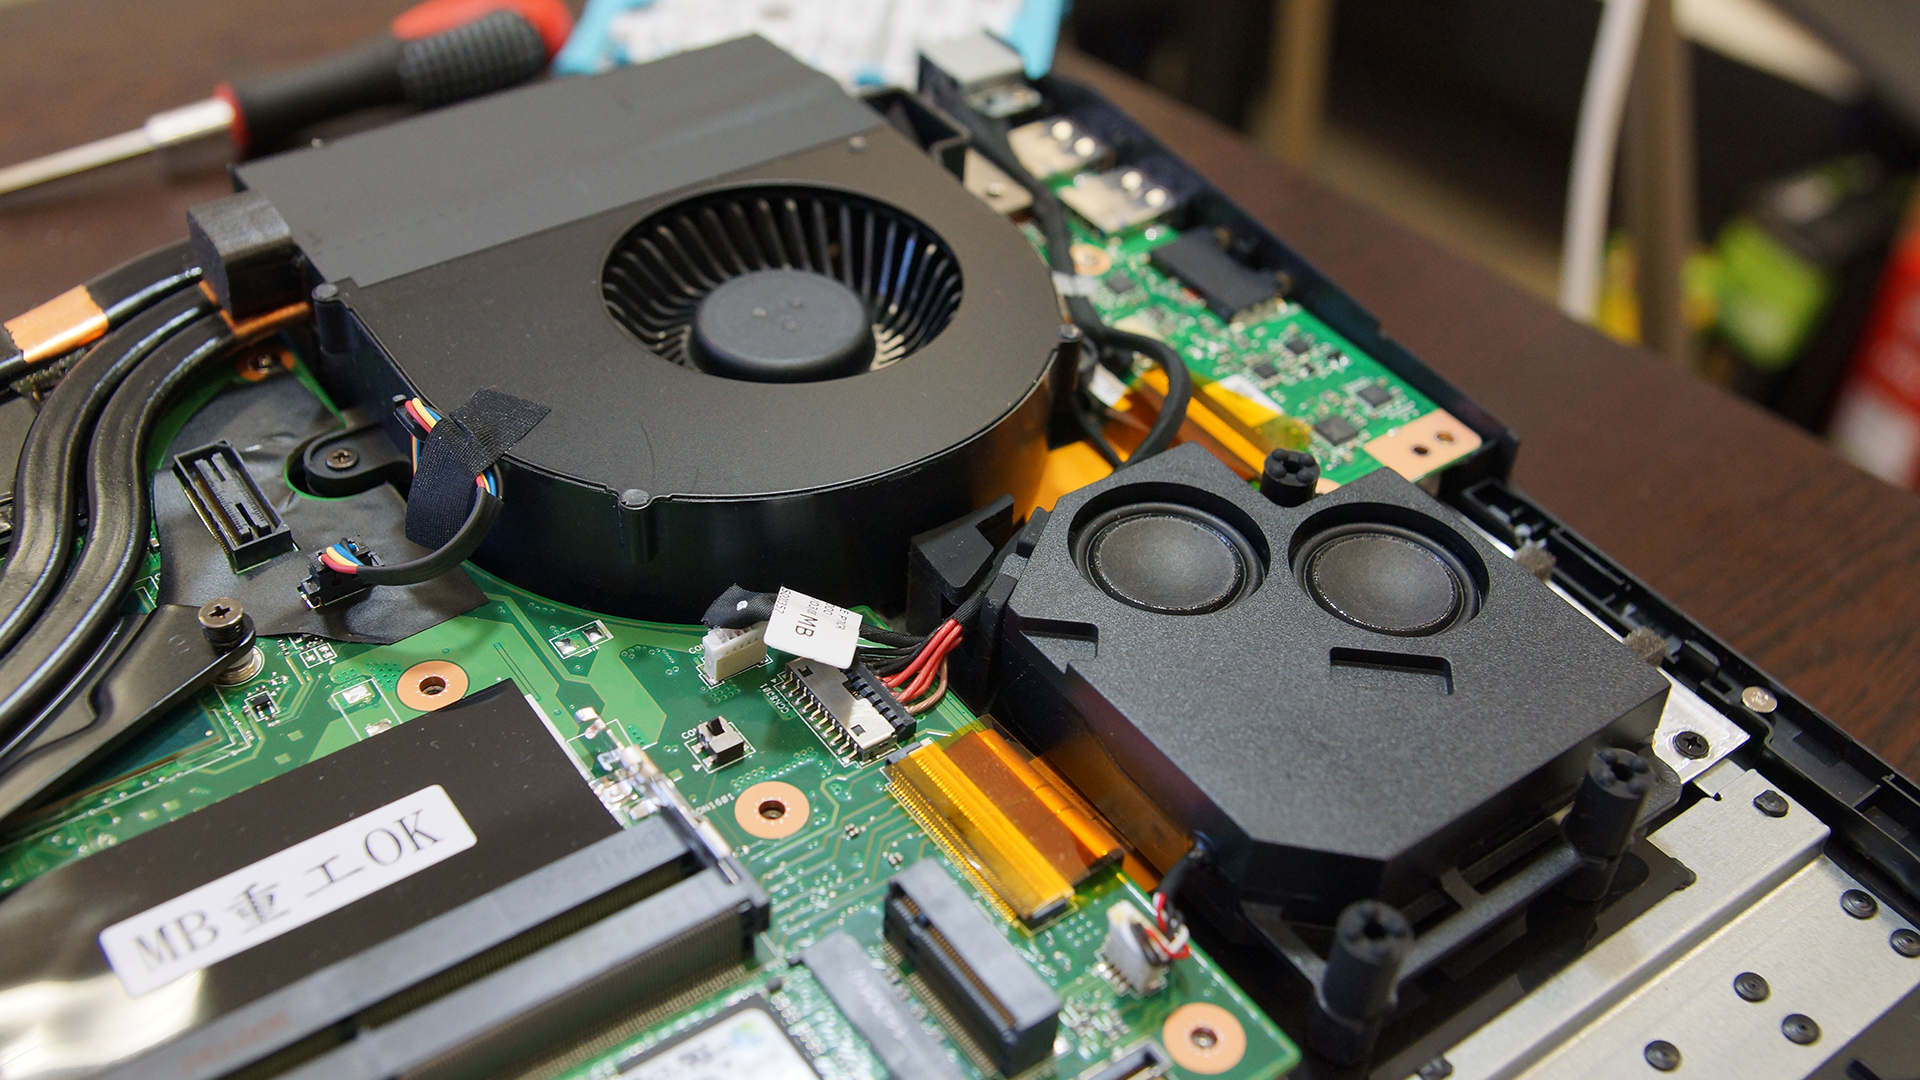
You can easily spot the loudspeakers positioned on the front and the double subwoofer near the left fan.

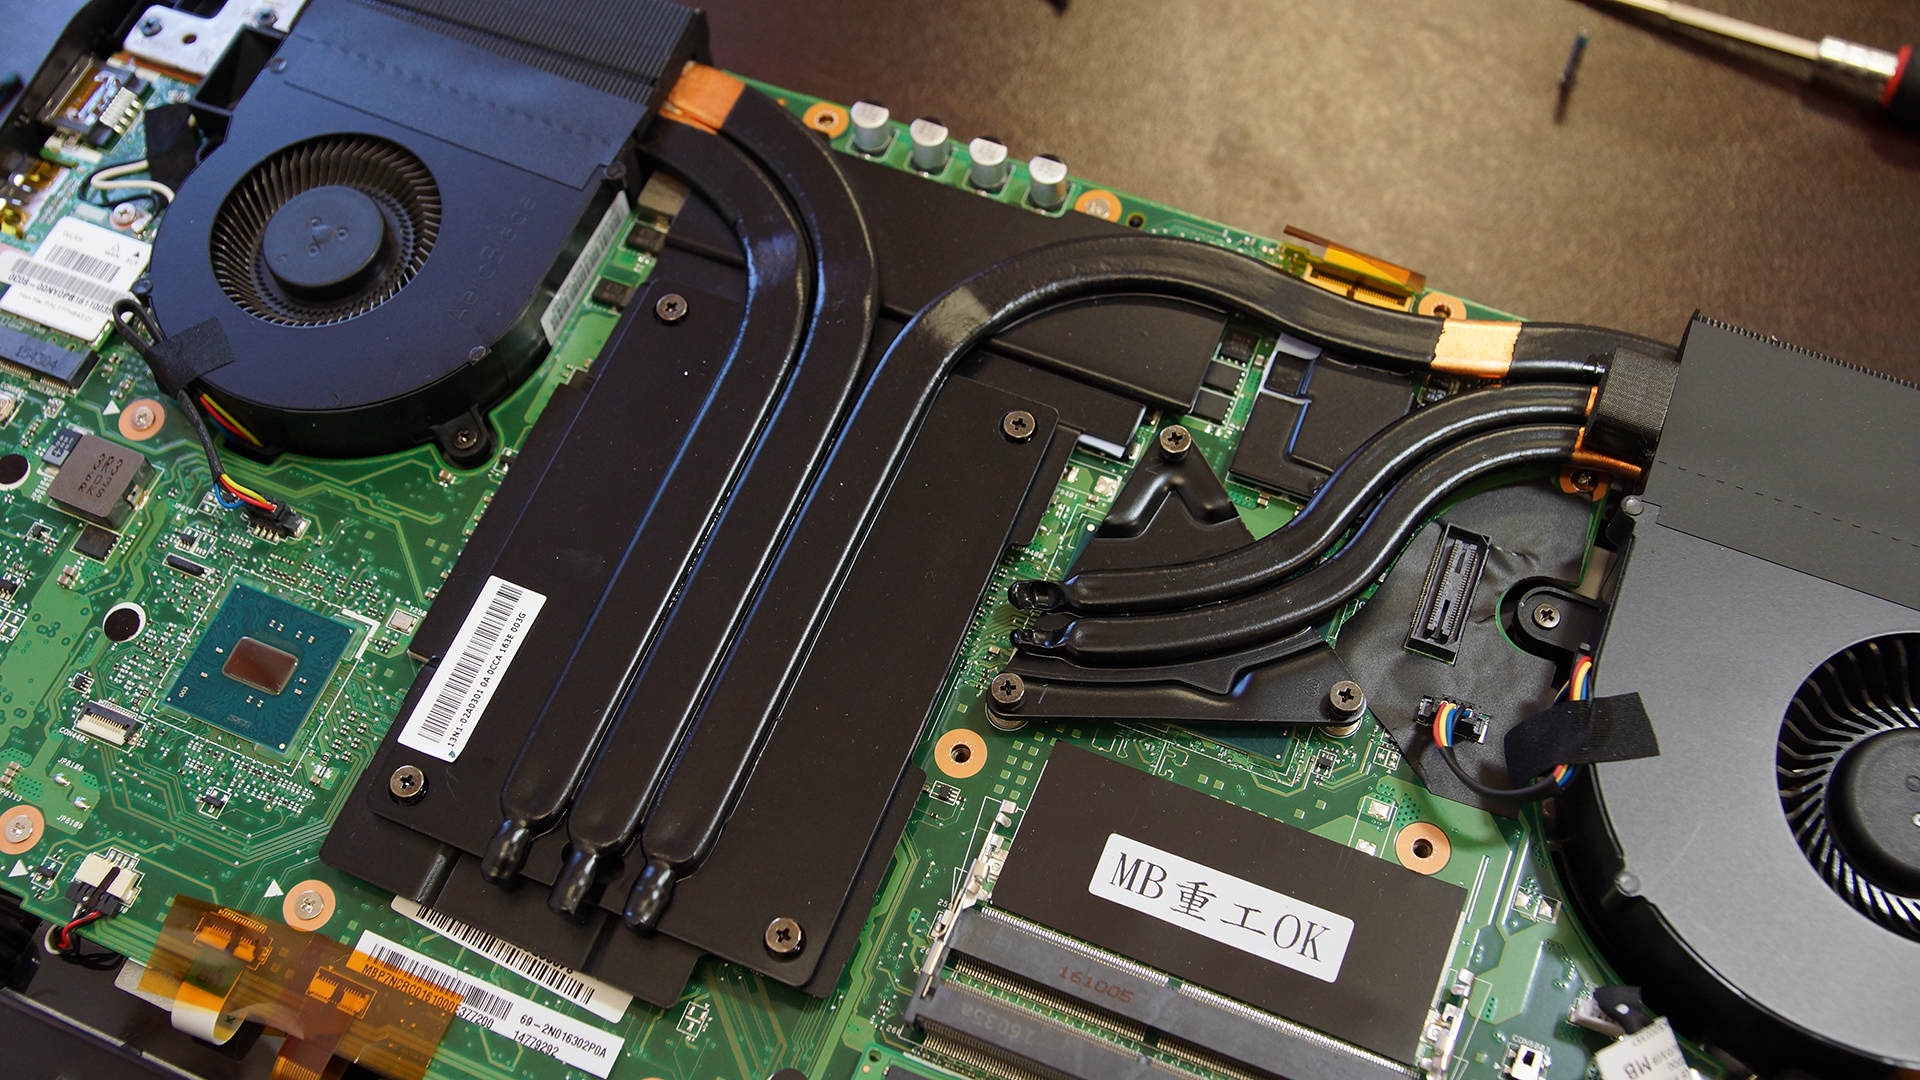
3. Cooling system
The cooling system on this thing is just as effective as it’s complicated. Well, it might seem complicated for some but in reality, the whole design is fairly simple.

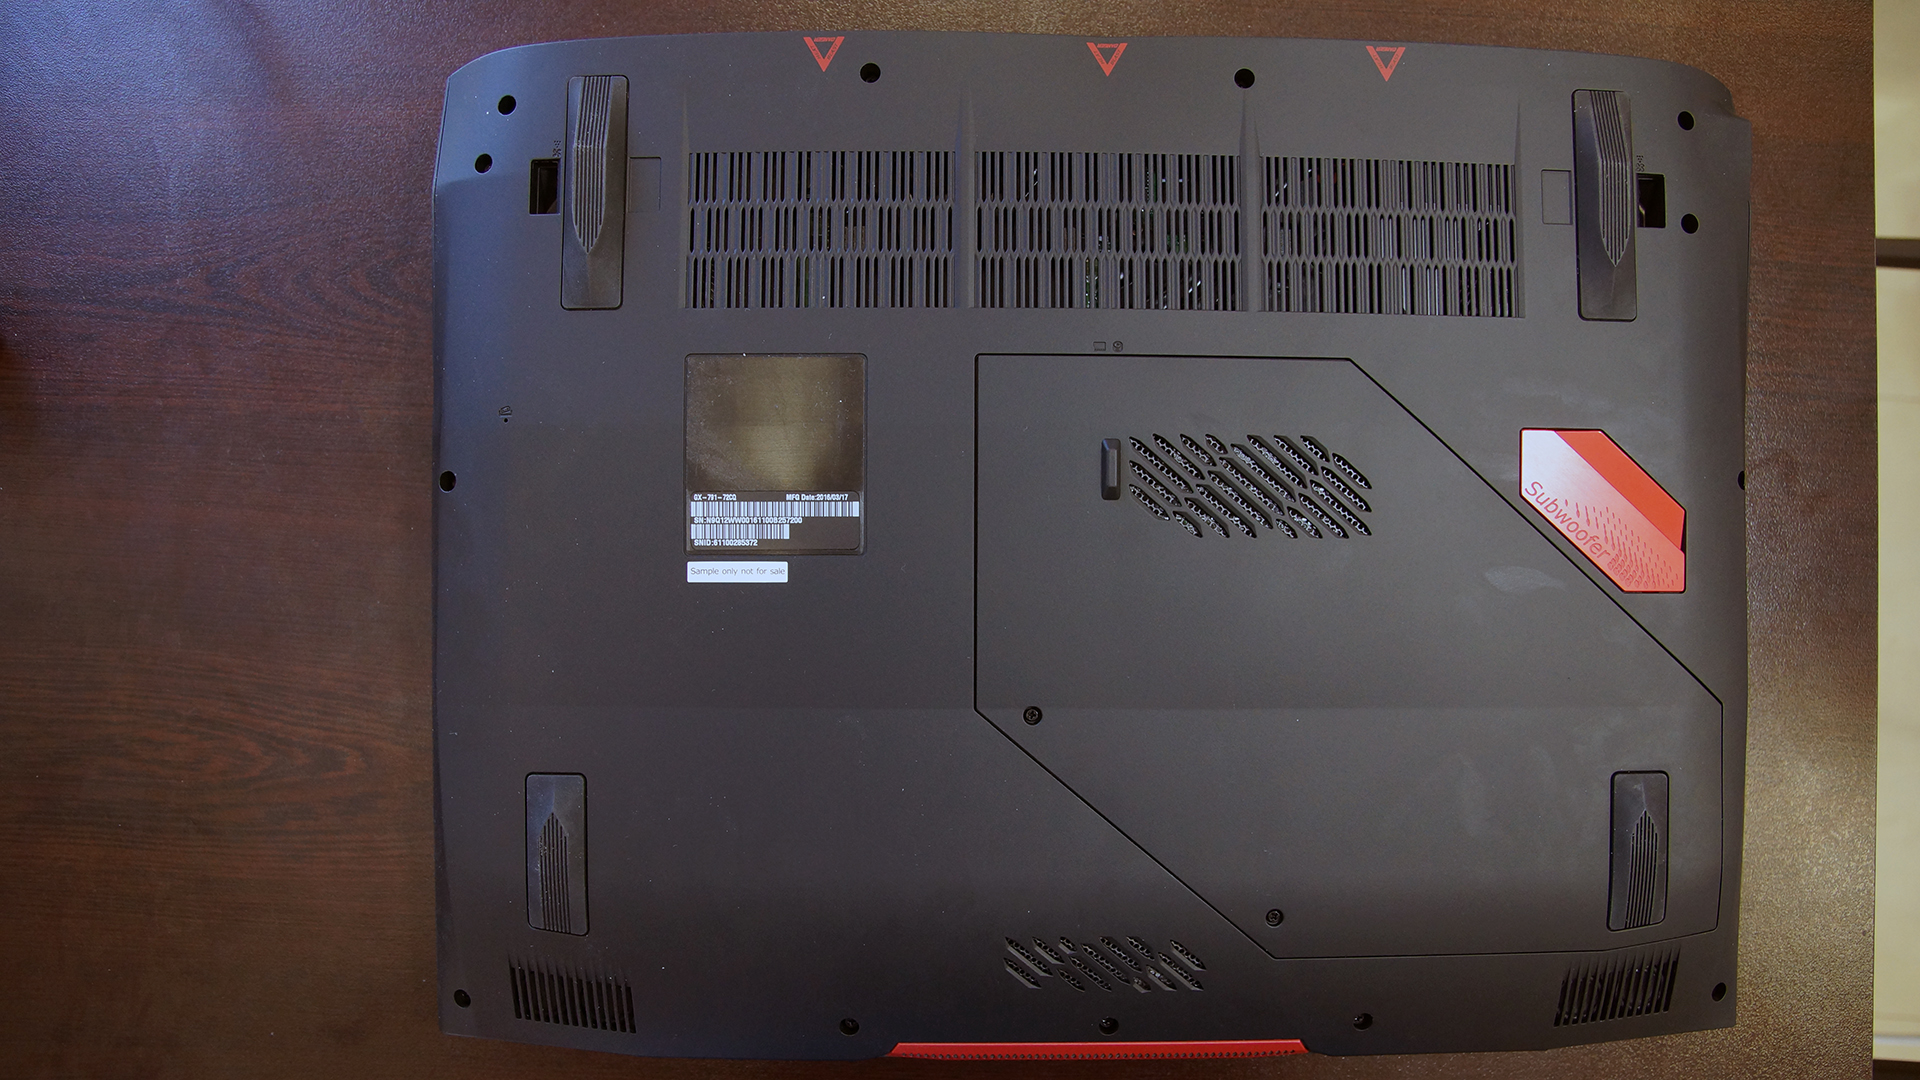
Here’s the front fan sucking in cool air from outside and distributing it to the rest of the chassis where the other two fans take care of the hot air and drive it out from the back. The cool air should also reach the RAM and storage as well.

There’s also a huge vapor chamber in the middle with several heat pipes.


Acer claims that the main fans will provide up to 15% better air flow and keep the components 9% cooler compared to conventional coolers. That’s because the fans use the so-called AeroBlade technology, which is basically thinner blades. The blades are metal and just 0.1 mm thick.

You can check here when the notebook appears on the market: http://amzn.to/1Q3JhZG


![[June 2026] Best-Selling Laptop Brands on Amazon Global – Apple’s Unrivaled Dominance in Units and Revenue](https://laptopmedia.com/wp-content/uploads/2026/07/GLOBAL-Best-Brands-400x225.jpg)
![[June 2026] Amazon Global: Top 10 Best-Selling Laptops – Apple’s New MacBook Neo Storms to #1, Reshaping the Market with Affordability](https://laptopmedia.com/wp-content/uploads/2026/07/Best-Selling-Laptops-GLOBAL-Top-10-400x225.jpg)
![[June 2026] Amazon Global: Top 10 Best-Selling Gaming Laptops – Acer’s Nitro V 16S AI Dominates Sales, While ASUS Leads Overall Revenue](https://laptopmedia.com/wp-content/uploads/2026/07/Best-Selling-Gaming-Laptops-GLOBAL-Top-10-400x225.jpg)
![[June 2026] Global Ranking of Best-Selling Laptop GPUs on Amazon – NVIDIA RTX 5060 is the Top-Selling Dedicated GPU](https://laptopmedia.com/wp-content/uploads/2026/07/Best-Selling-GPUs-GLOBAL-Top-10-400x225.jpg)
![[June 2026] Global Ranking of Best-Selling Laptop CPUs on Amazon – Apple M5 Dominates, AMD Ryzen 7 260 Gets Solid Premium Share](https://laptopmedia.com/wp-content/uploads/2026/07/Best-Selling-CPUs-GLOBAL-Top-10-400x225.jpg)

nice breakdown, any chance there is a step by step guide to changing the ram on the slots under the motherboard, so basically you have to remove the whole mother board.
Can you explain why you say the open ssd slots are b keys when the pins are on the left, but it only has 5 pins on the notch. it is my understanding that the b key has 6 pins and the m key has 5. You say it is NVME standard, but everywhere I look says NVME is the m key and has 5 pins on the right side of the sad. Can you please elaborate which ssd will fit. Or do you have to flip the ssd over so it will fit the 5 pins?
Hello! On the two M.2 slots that are above each other, the bottom one is the one that supports NVMe. The rest are all SATA. So if you have 2 SATA M.2 SSD’s in RAID 0 (Like the default configuration), remove all of the SSDs, put the NVMe SSD into the bottom slot like I mentioned at first, then move the two SATA SSDs into the two remaining M.2 slots. Then reassemble the case and power it up. It’ll boot like normal. This is how my 17X is set up right now!