Inside Acer Swift 3 (SF313-52) – disassembly and upgrade options
Does a different aspect ratio make a whole lot of difference on the inside of a laptop?
Check out all Acer Swift 3 (SF313-52) prices and configurations in our Specs System or read more in our In-Depth review.
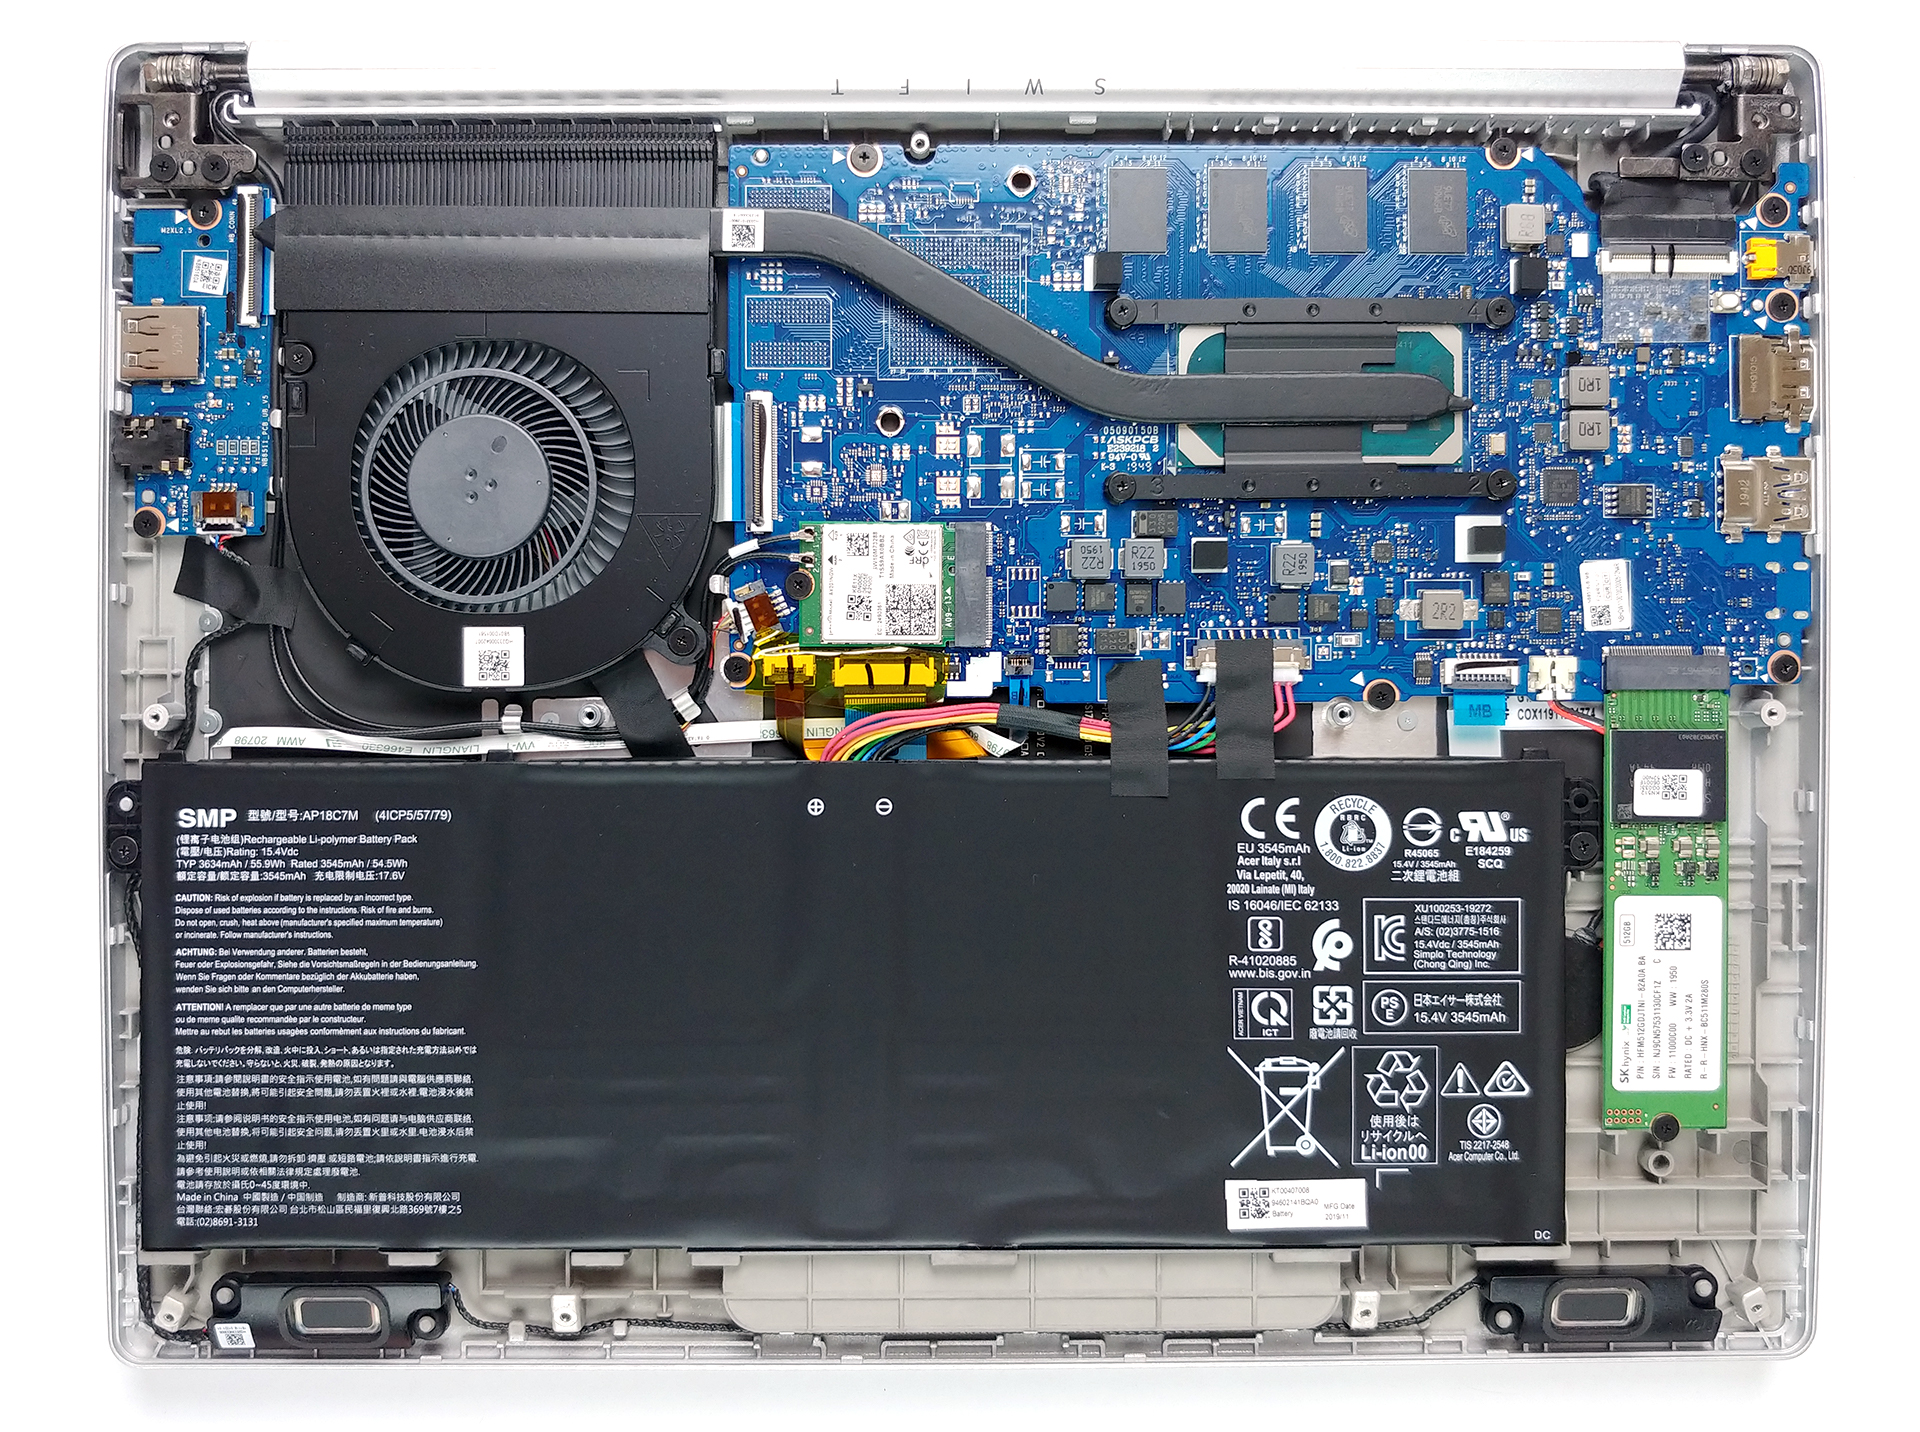
1. Remove the bottom plate
Nothing too exciting here – 11 Torx-head screws holding the bottom plate and some clips, which should be pried up with a plastic tool. A cool tip would be to start from the backside, around the hinges, as it is the easiest way we found.
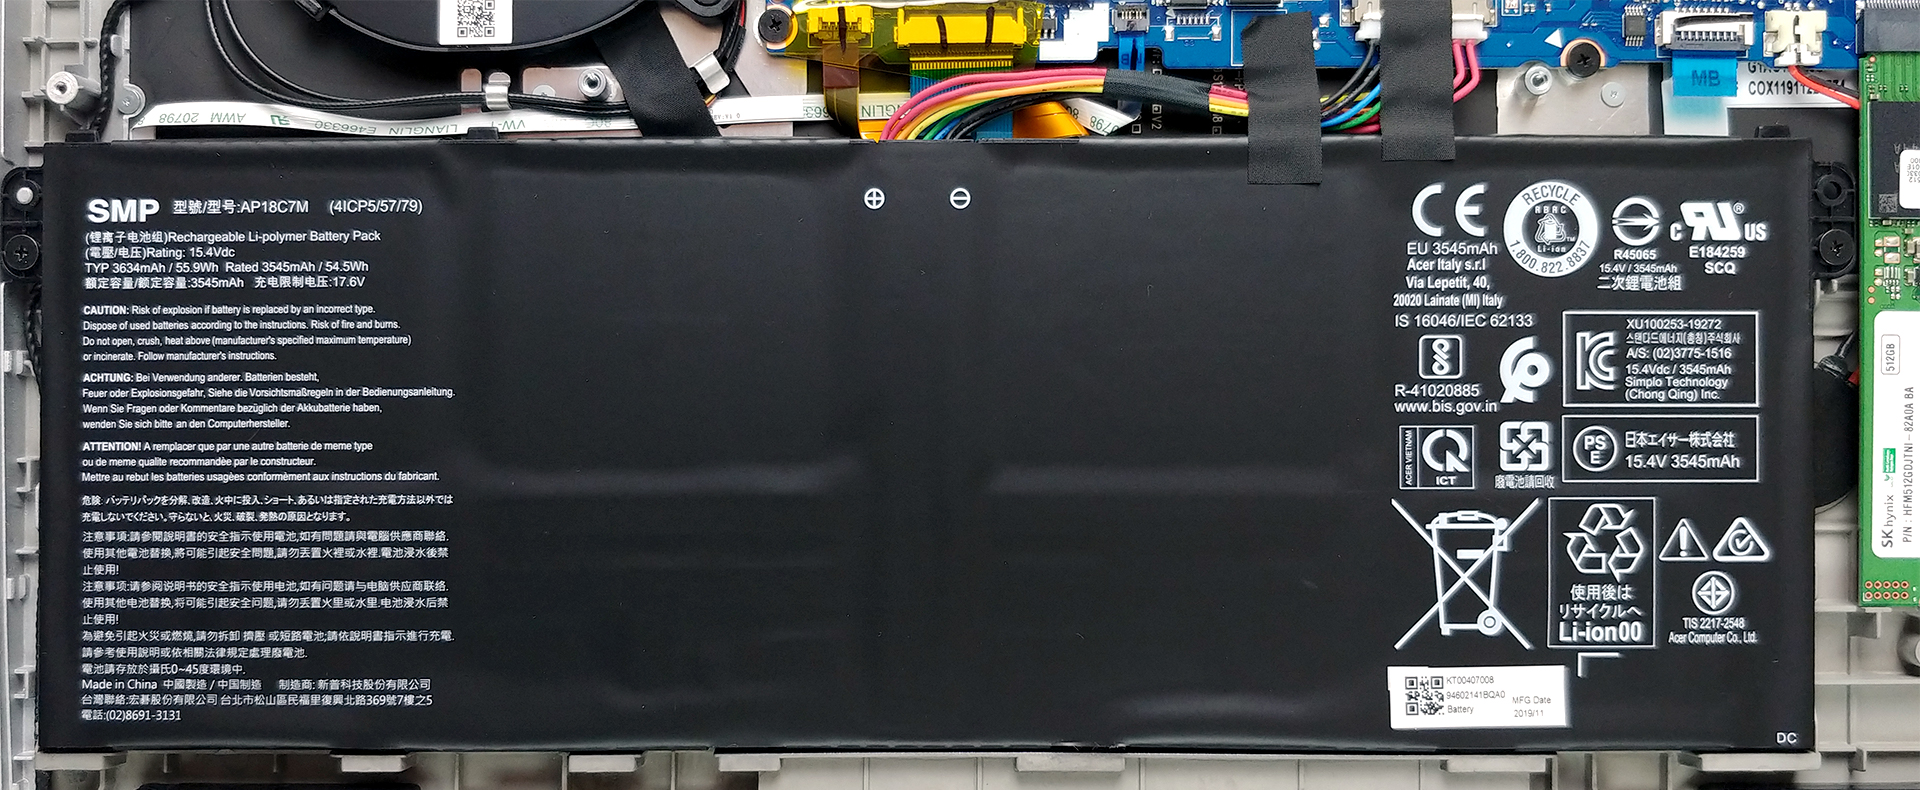
2. Battery
On the battery side, there is a quite big 55.9Wh unit.
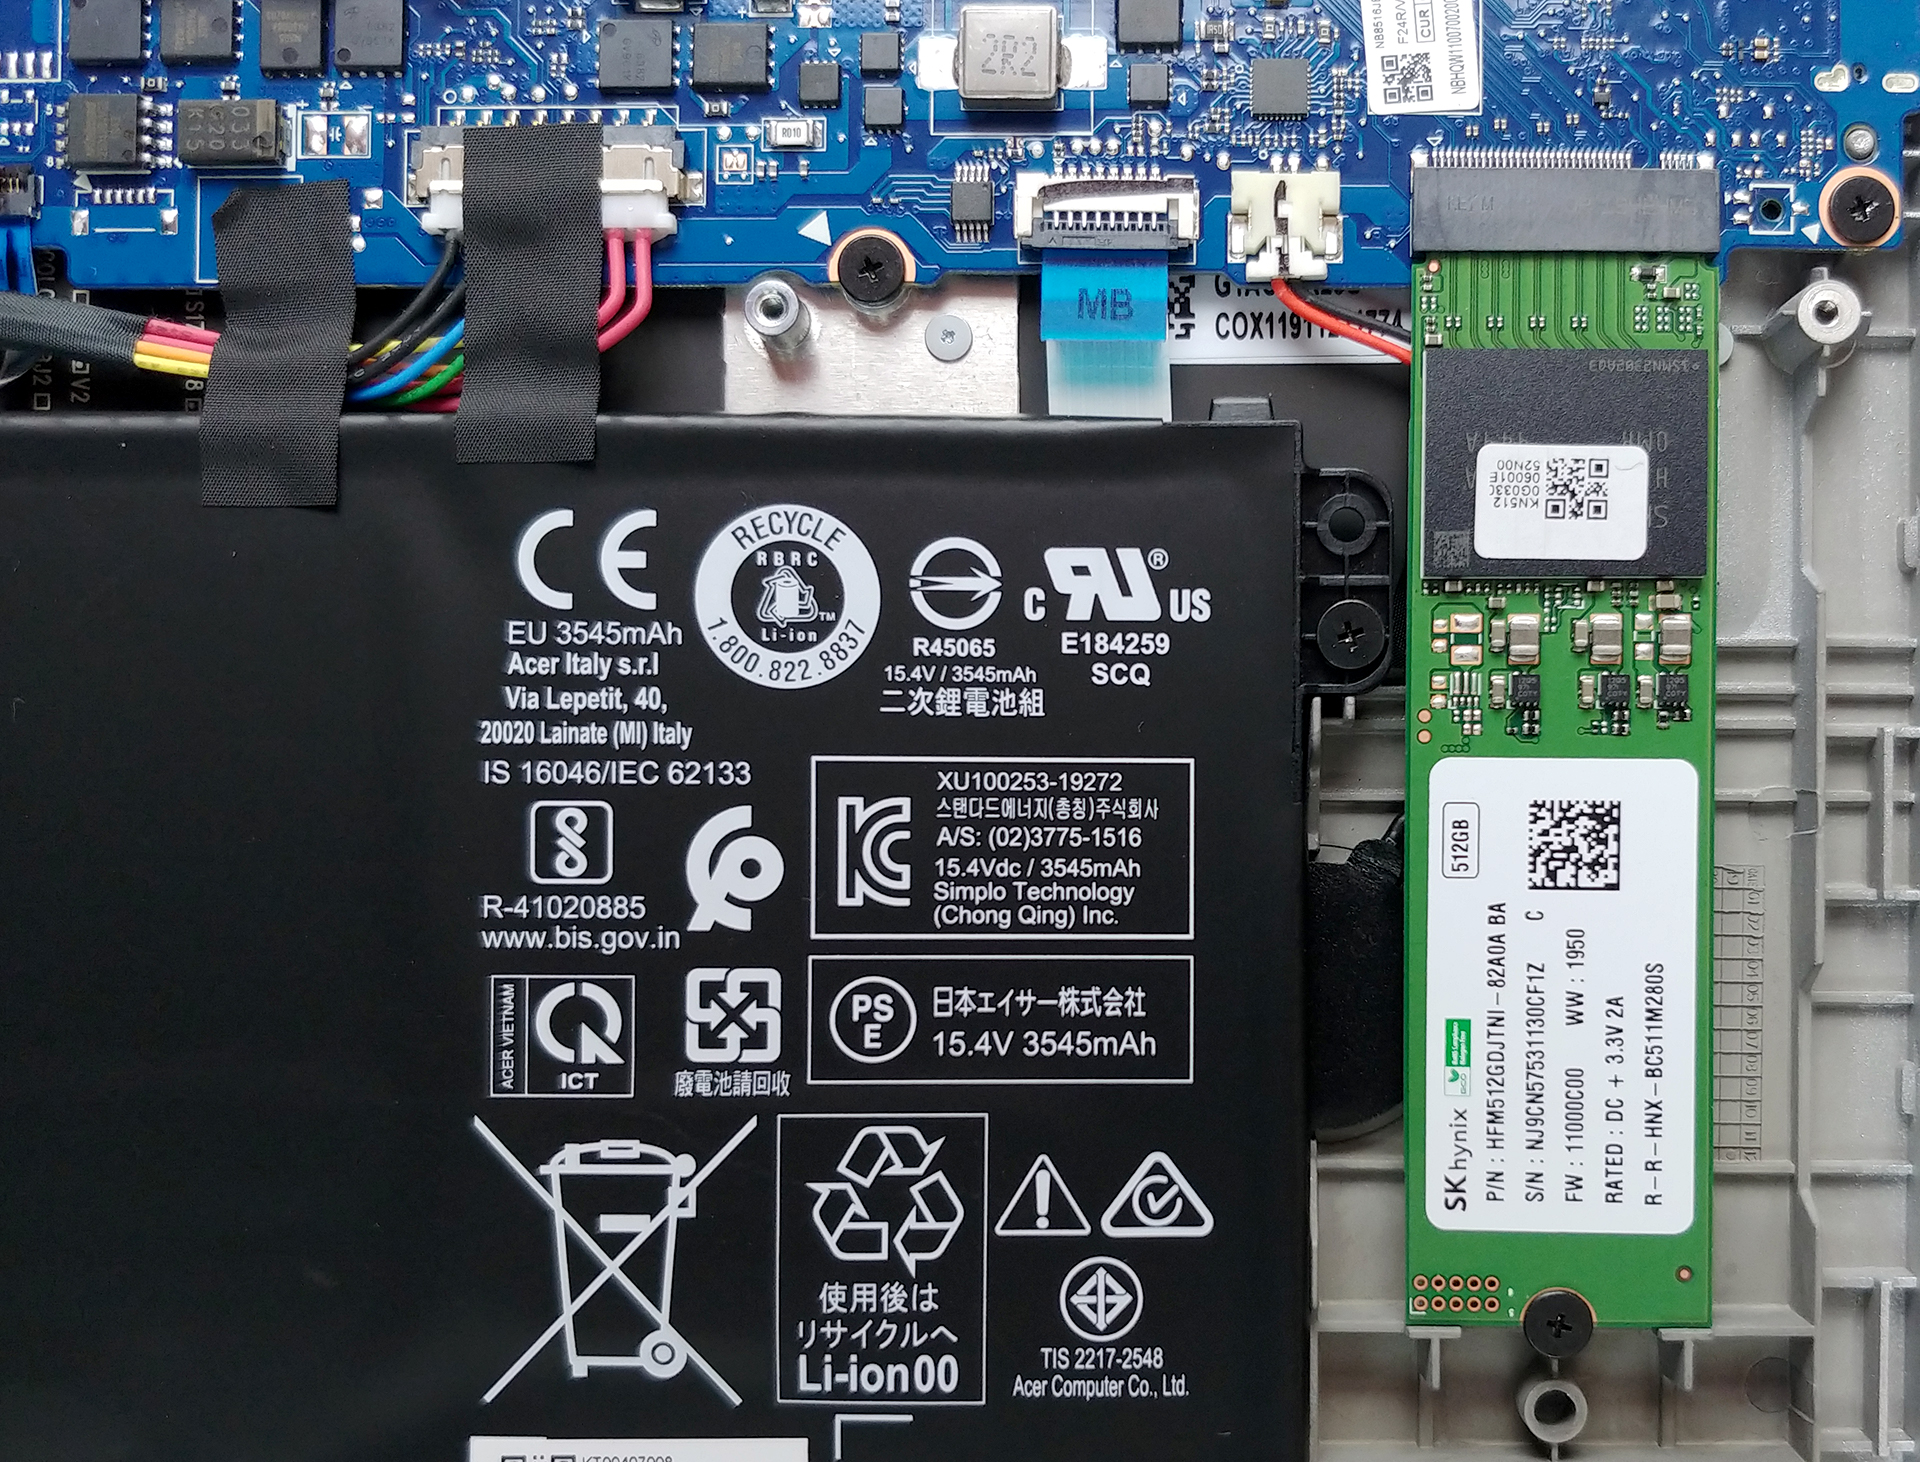
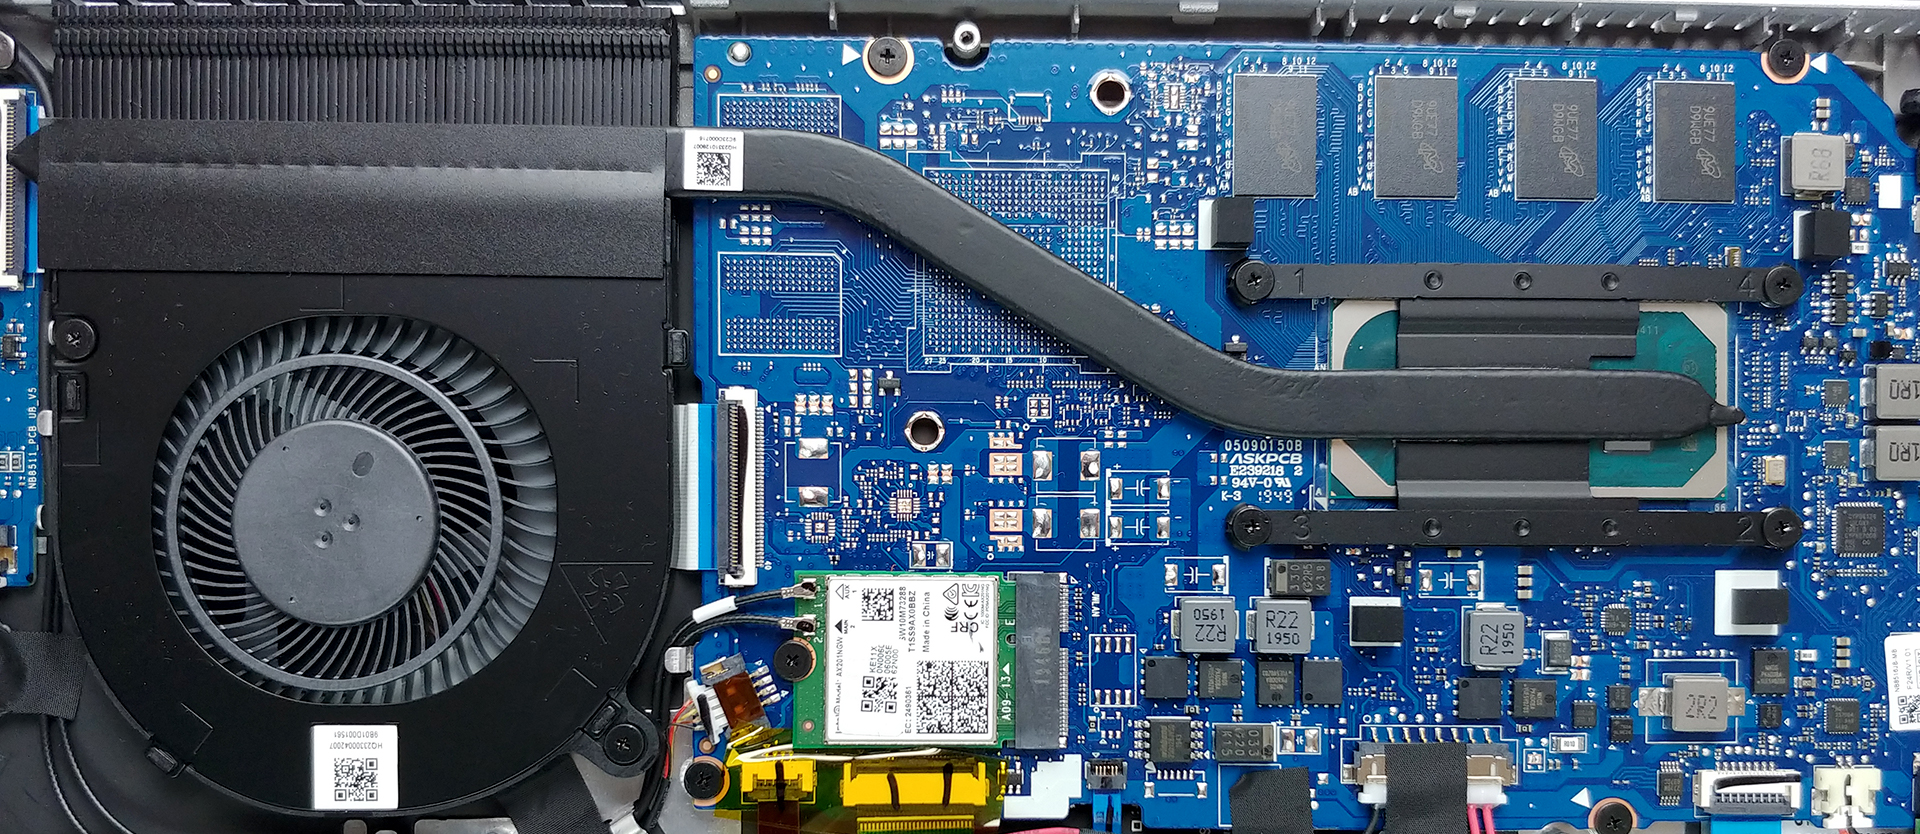
3. Memory and storage
Expectedly or not, the Swift 3 (SF313-52) does not allow upgrading its RAM, as all of the chips are soldered to the motherboard. Thankfully, there is a single M.2 slot that supports PCIe drives. By the way, the memory is of LPDDR4 type – it’s quite fast!
4. Cooling system
While the cooling features a single, rather thin heat pipe, we were blown away by the fan (get it?). It looks huge in the tiny 13-inch package.
Check out all Acer Swift 3 (SF313-52) prices and configurations in our Specs System or read more in our In-Depth review.


![[June 2026] Best-Selling Laptop Brands on Amazon Global – Apple’s Unrivaled Dominance in Units and Revenue](https://laptopmedia.com/wp-content/uploads/2026/07/GLOBAL-Best-Brands-400x225.jpg)
![[June 2026] Amazon Global: Top 10 Best-Selling Laptops – Apple’s New MacBook Neo Storms to #1, Reshaping the Market with Affordability](https://laptopmedia.com/wp-content/uploads/2026/07/Best-Selling-Laptops-GLOBAL-Top-10-400x225.jpg)
![[June 2026] Amazon Global: Top 10 Best-Selling Gaming Laptops – Acer’s Nitro V 16S AI Dominates Sales, While ASUS Leads Overall Revenue](https://laptopmedia.com/wp-content/uploads/2026/07/Best-Selling-Gaming-Laptops-GLOBAL-Top-10-400x225.jpg)
![[June 2026] Global Ranking of Best-Selling Laptop GPUs on Amazon – NVIDIA RTX 5060 is the Top-Selling Dedicated GPU](https://laptopmedia.com/wp-content/uploads/2026/07/Best-Selling-GPUs-GLOBAL-Top-10-400x225.jpg)
![[June 2026] Global Ranking of Best-Selling Laptop CPUs on Amazon – Apple M5 Dominates, AMD Ryzen 7 260 Gets Solid Premium Share](https://laptopmedia.com/wp-content/uploads/2026/07/Best-Selling-CPUs-GLOBAL-Top-10-400x225.jpg)
