Inside Acer Swift 5 – disassembly, internal photos and upgrade options
Just like most ultrabooks out there, the Acer Swift 5 doesn’t offer a big room for upgrade but if you ever need to change the SSD, which you might want to do since most of the configurations come with a SATA drive instead of PCIe NVMe, or you just need to clean up the fan and change the thermal paste, here’s how to do it.
You can find the available configurations here: http://amzn.to/2qj3EWL
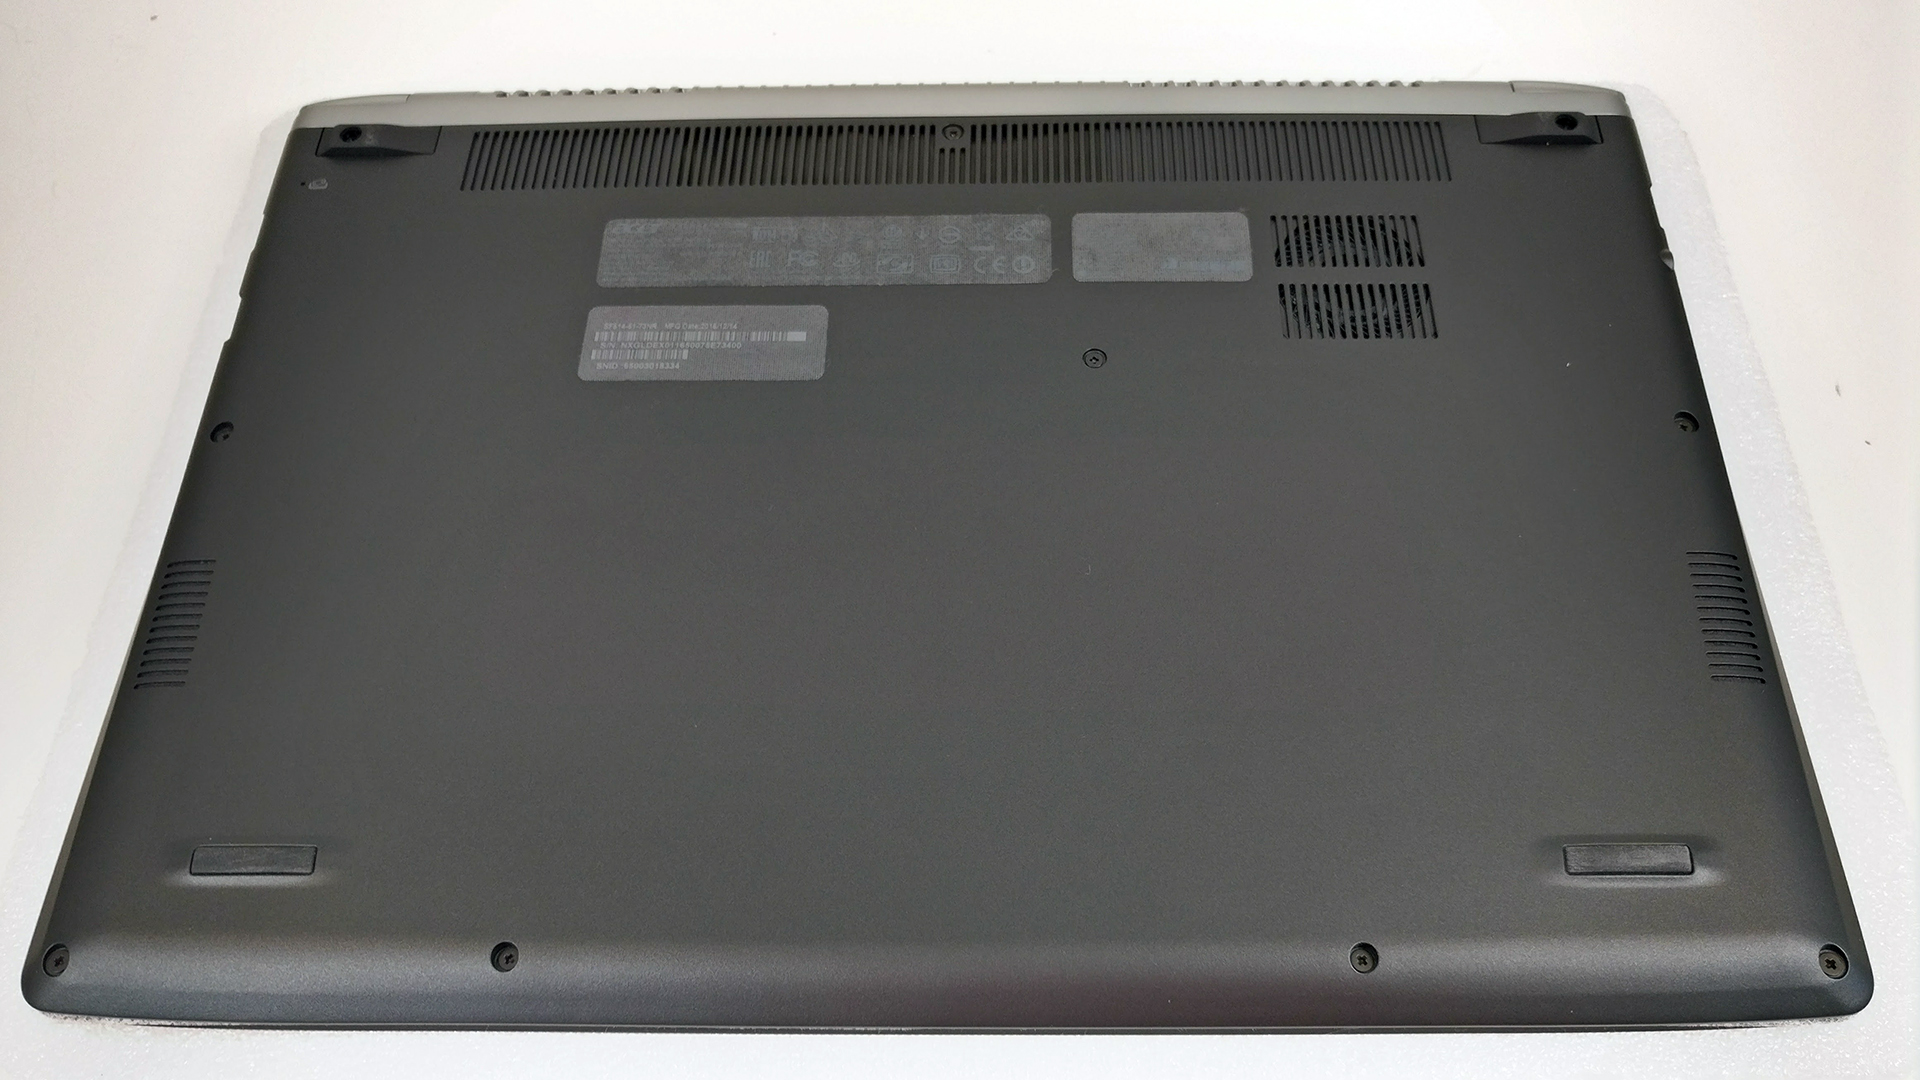
1. Removing the bottom plate
Just unscrew all the bolts around the bottom of the chassis then gently pry up the plate. It will reveal everything you’d need to change, repair, clean.
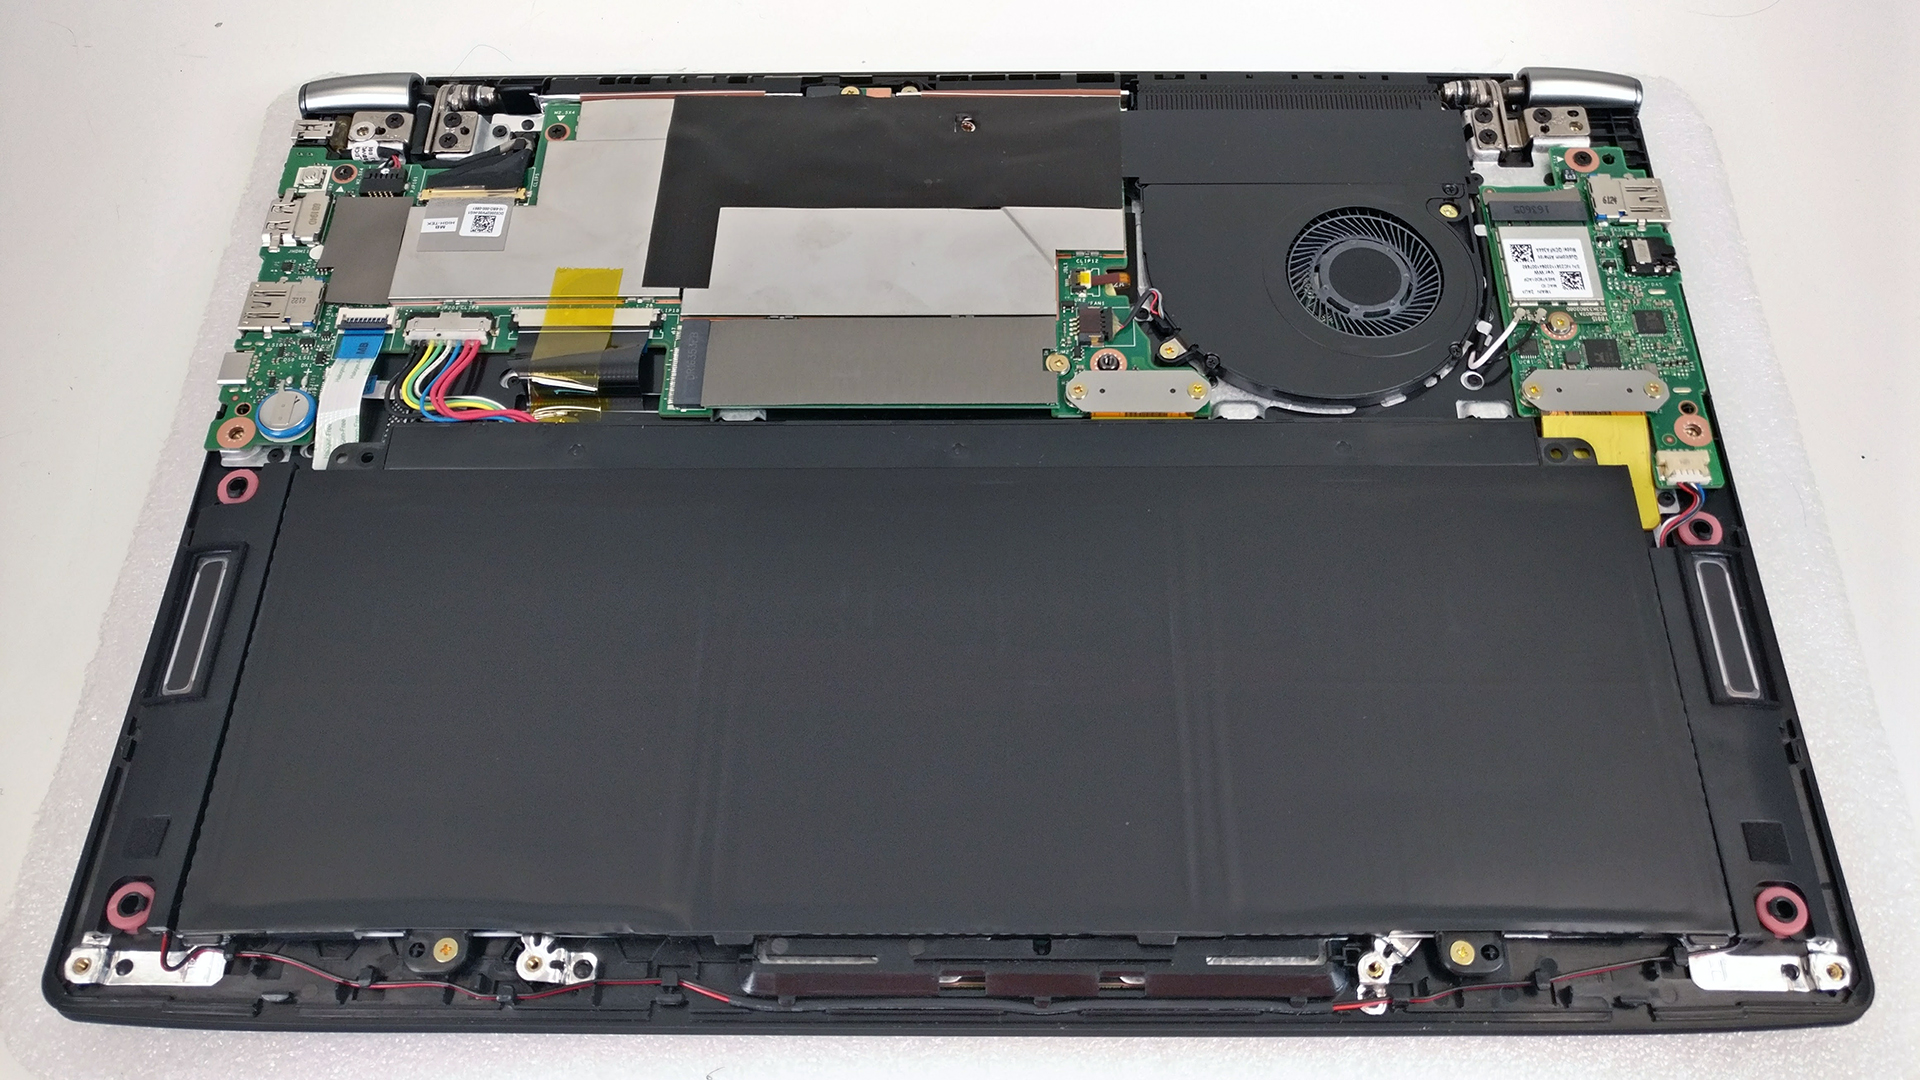
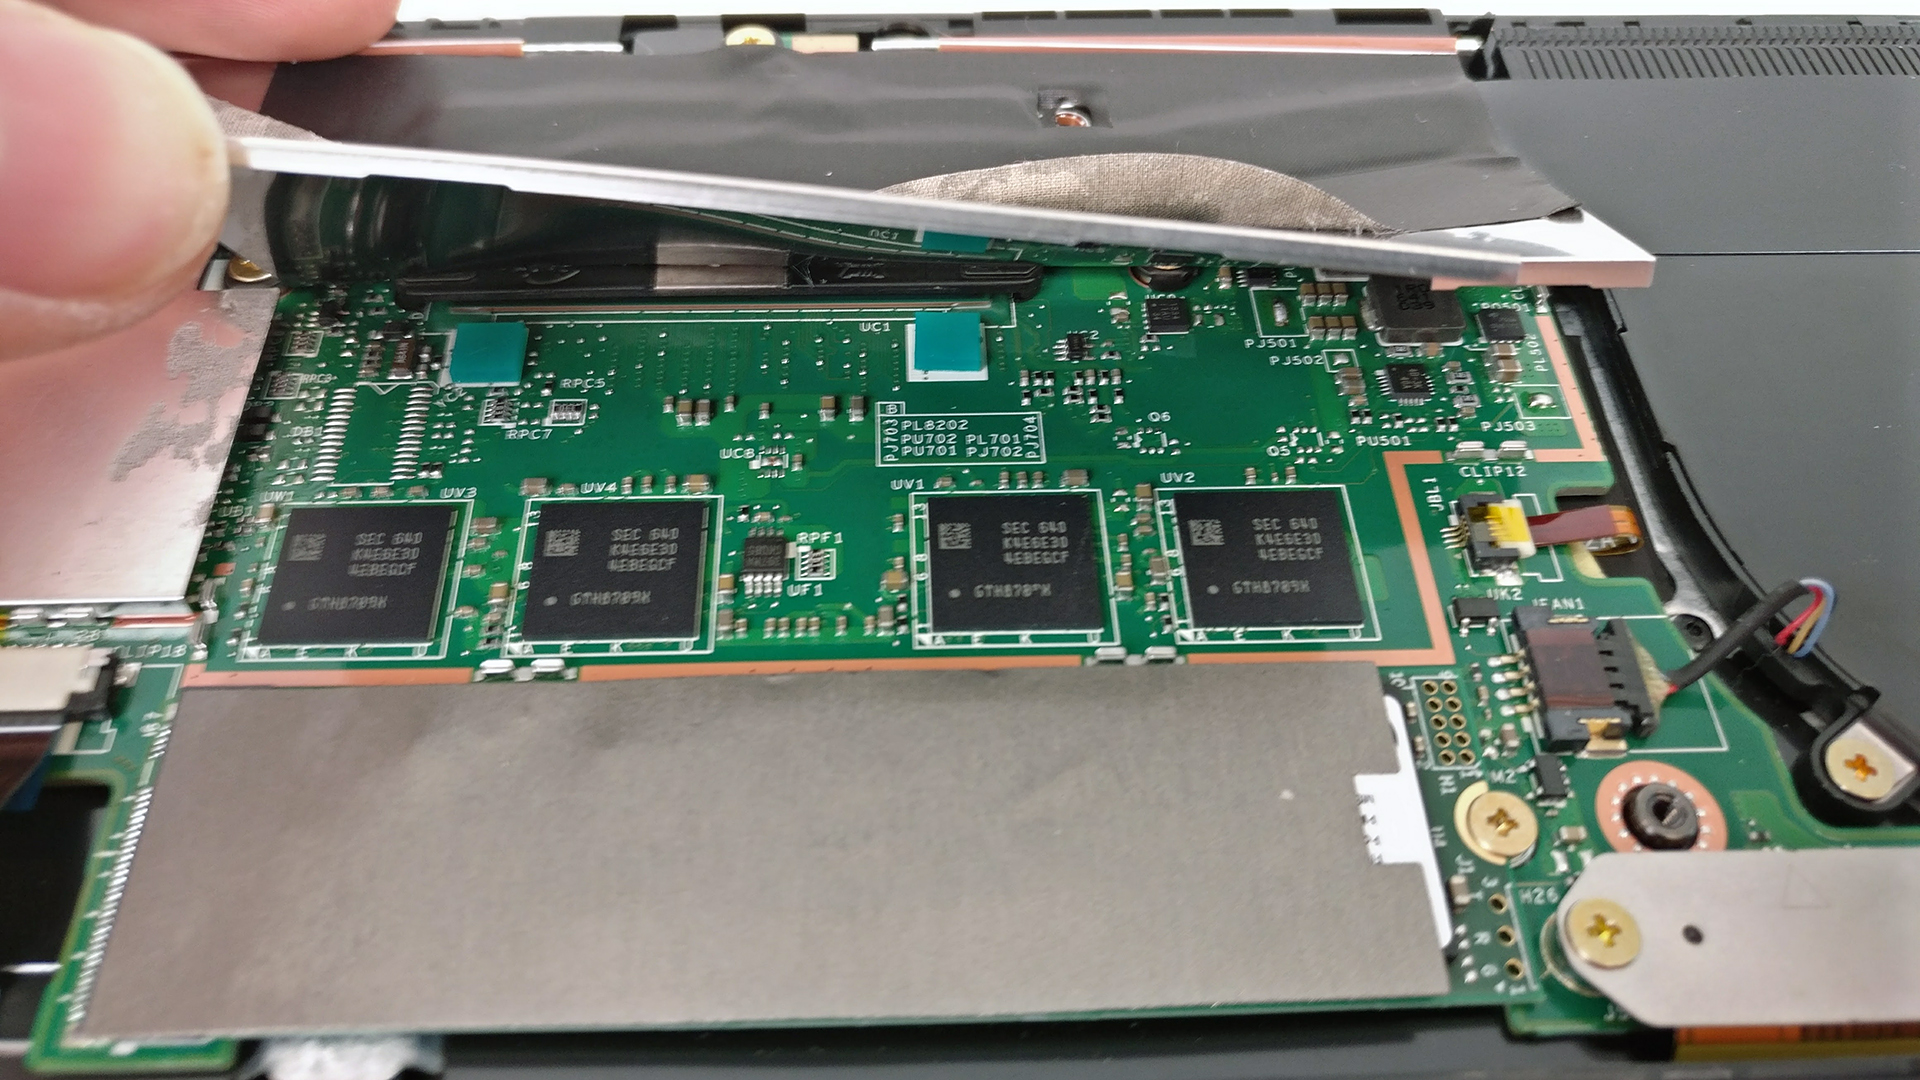
2. Storage and memory
As we already expressed our disappointment, the notebook comes with a generic Lite-On M.2 SATA SSD instead of a PCIe NVMe drive like we are used to seeing in this price range. It’s 256GB in capacity and 2280 in size.

And like most ultrabooks, the Swift 5 doesn’t offer RAM upgrade since the 8GB LPDDR3-1600 chip is soldered to the motherboard.
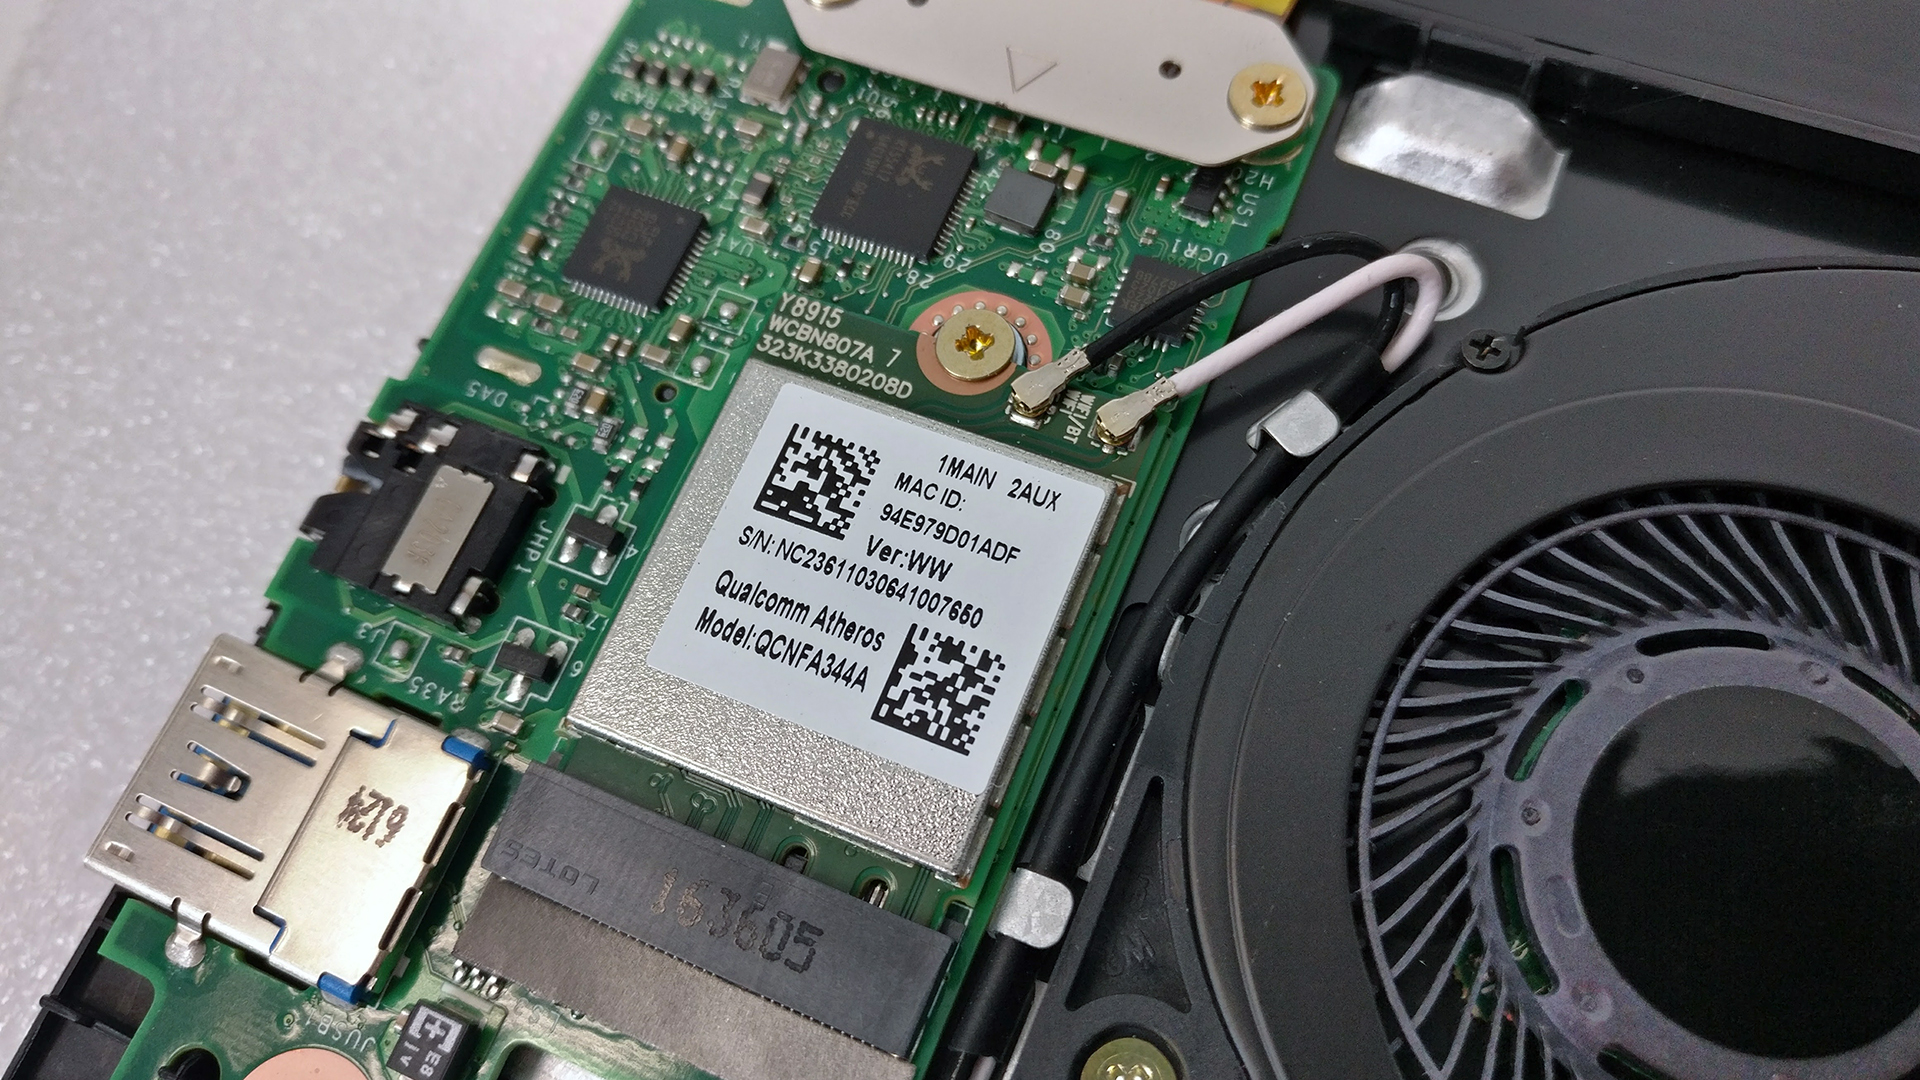
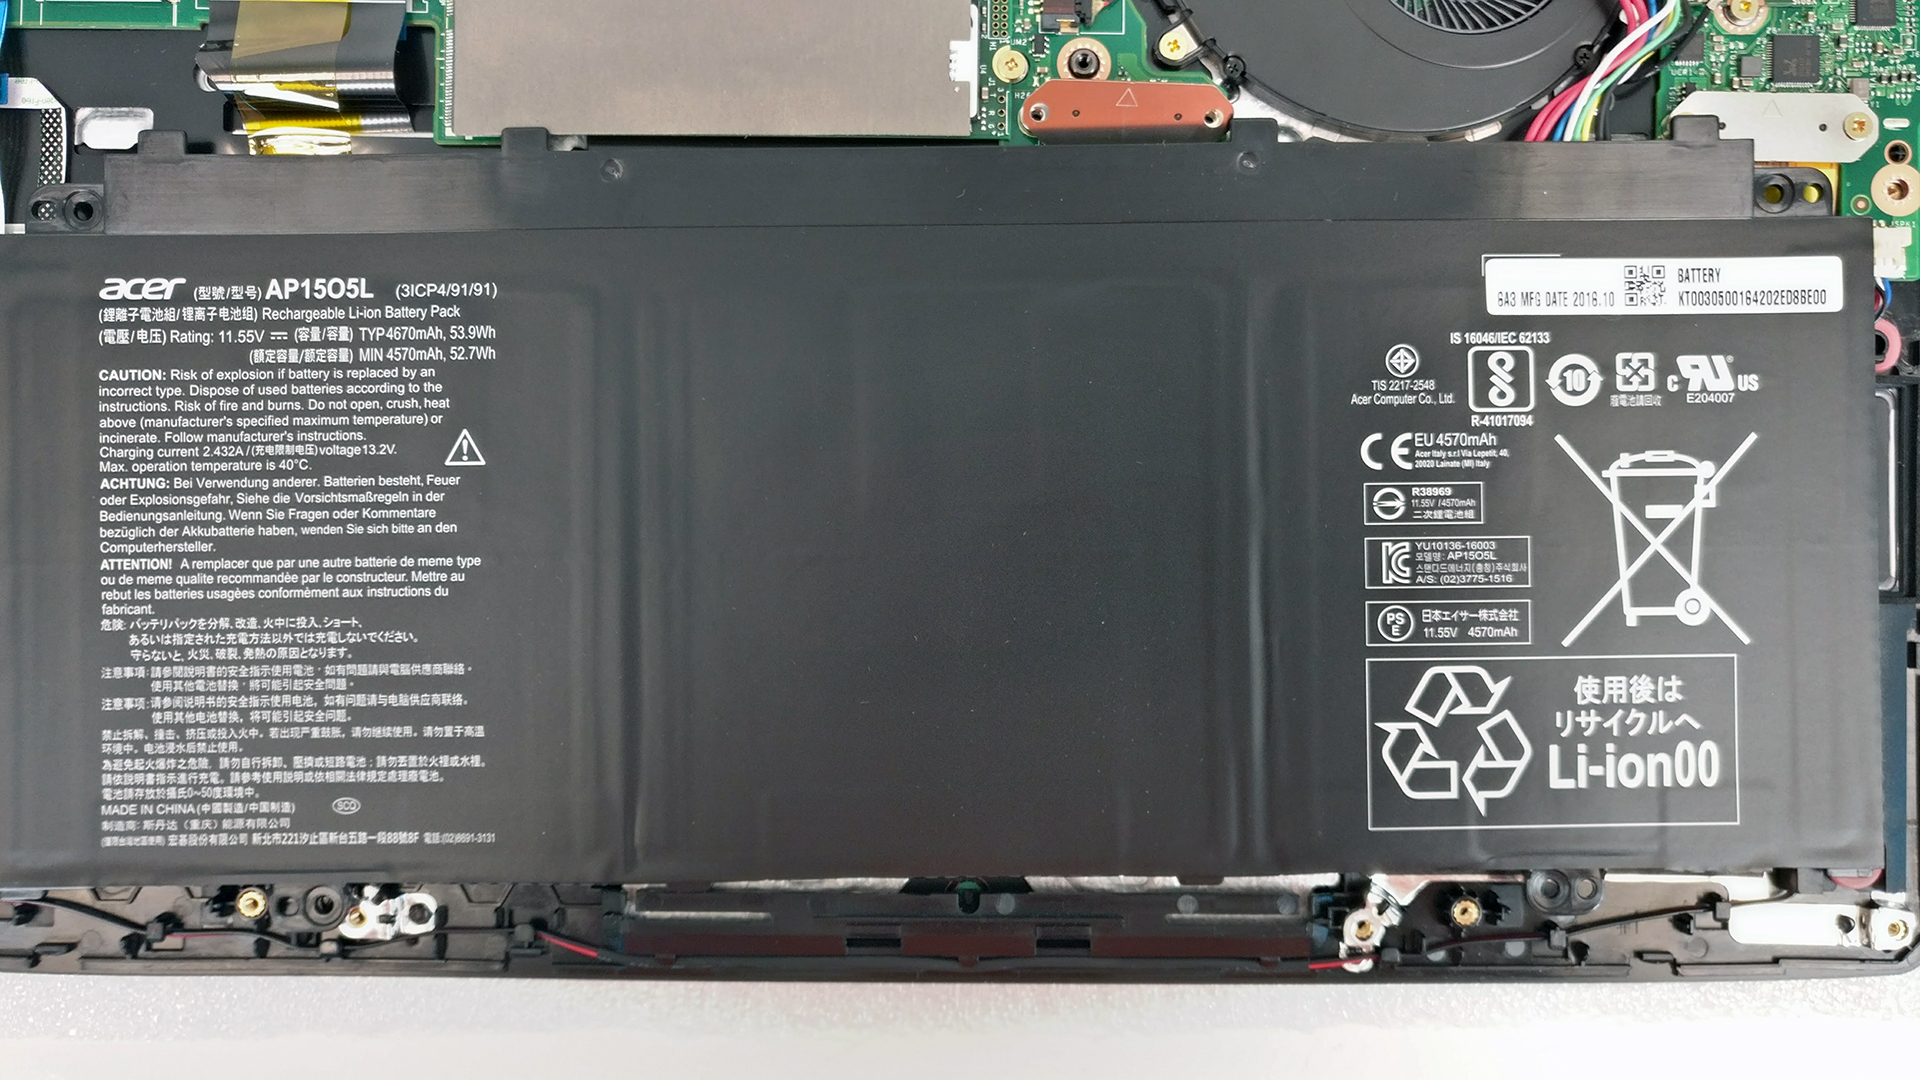
3. Battery and Wi-Fi card
The Wi-Fi module can be found next to the cooling fan. It’s manufactured by Qualcomm and the model is Atheros QCNFA344A.
The battery takes up most of the space inside the chassis and it’s rated at the whopping 53.9Wh resulting in excellent battery runtimes.
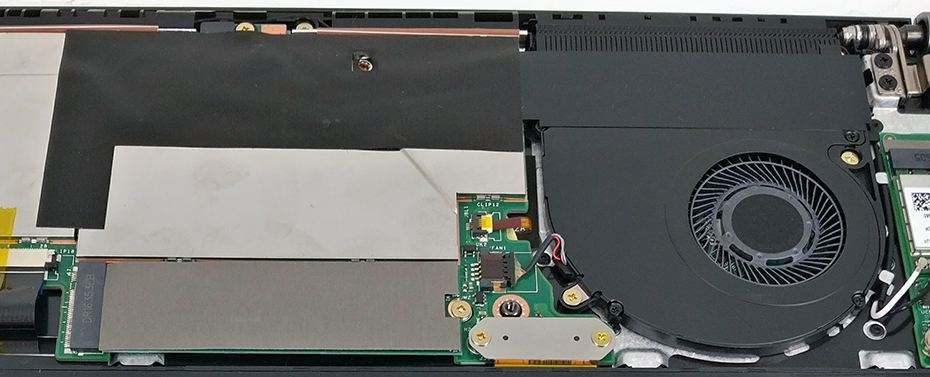
4. Cooling system
The cooling system consists of a single heat pipe and one cooling fan, which proved to be more than enough to keep the CPU and iGPU cool even under heavy workload.
You can find the available configurations here: http://amzn.to/2qj3EWL
And here, you can read all about the Acer Swif 5.


![[June 2026] Best-Selling Laptop Brands on Amazon Global – Apple’s Unrivaled Dominance in Units and Revenue](https://laptopmedia.com/wp-content/uploads/2026/07/GLOBAL-Best-Brands-400x225.jpg)
![[June 2026] Amazon Global: Top 10 Best-Selling Laptops – Apple’s New MacBook Neo Storms to #1, Reshaping the Market with Affordability](https://laptopmedia.com/wp-content/uploads/2026/07/Best-Selling-Laptops-GLOBAL-Top-10-400x225.jpg)
![[June 2026] Amazon Global: Top 10 Best-Selling Gaming Laptops – Acer’s Nitro V 16S AI Dominates Sales, While ASUS Leads Overall Revenue](https://laptopmedia.com/wp-content/uploads/2026/07/Best-Selling-Gaming-Laptops-GLOBAL-Top-10-400x225.jpg)
![[June 2026] Global Ranking of Best-Selling Laptop GPUs on Amazon – NVIDIA RTX 5060 is the Top-Selling Dedicated GPU](https://laptopmedia.com/wp-content/uploads/2026/07/Best-Selling-GPUs-GLOBAL-Top-10-400x225.jpg)
![[June 2026] Global Ranking of Best-Selling Laptop CPUs on Amazon – Apple M5 Dominates, AMD Ryzen 7 260 Gets Solid Premium Share](https://laptopmedia.com/wp-content/uploads/2026/07/Best-Selling-CPUs-GLOBAL-Top-10-400x225.jpg)

the last picture isn’t the good one.
it’s from http://laptopmedia.com/review/acer-aspire-v-15-nitro-black-edition-vn7-593g-review-a-big-upgrade-over-its-predecessor-but-with-a-price-bump-as-well/
same bad picture about cooling system here : http://laptopmedia.com/review/acer-swift-5-review-sleek-and-portable-14-inch-device-without-the-trade-offs/
else great job 😉
thank to erase this comment