Inside ASUS VivoBook Flip 14 TM420 – disassembly and upgrade options
Choosing AMD’s platform was one of the best decisions ASUS has made for their VivoBook Flip 14 TM420.
Check out all ASUS VivoBook Flip 14 TM420 prices and configurations in our Specs System or read more in our In-Depth review.
1. Remove the bottom plate
Like most laptops nowadays, you need to remove the bottom panel to access the internals. To do this, undo all 10 Phillips-head screws, and pry the panel with a plastic tool.

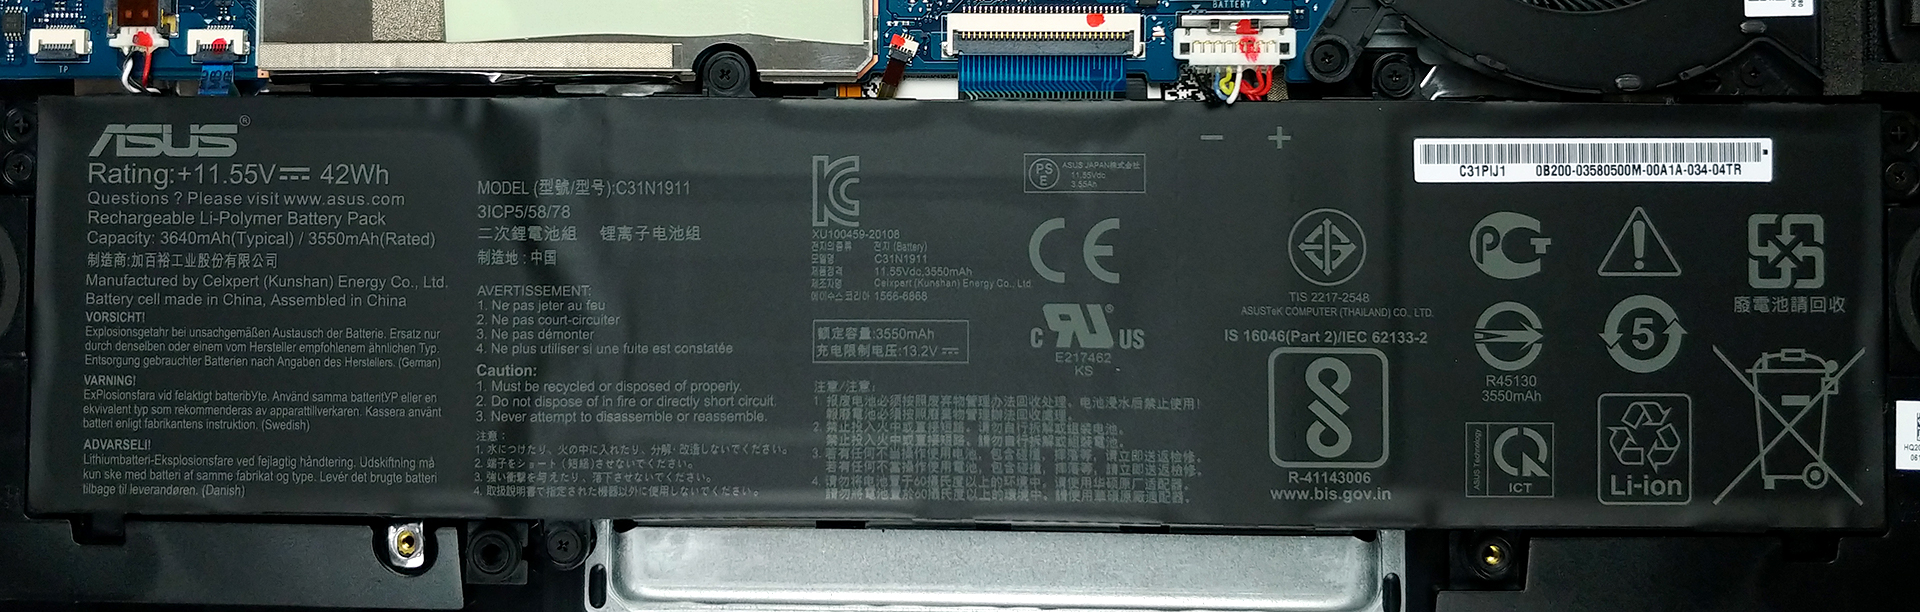
2. Battery
First, comes the battery. This unit is equipped with a rather underwhelming 42Wh unit.
3. Memory and storage
In terms of memory, there are plenty of options to choose from. For starters, all configurations come with either 4GB or 8GB of soldered memory, which is further expandable to 12GB or 16GB via a single SODIMM slot. Storage-wise, the things are a bit more simple, as there is only one M.2 PCIe x4 slot, which is already occupied, so you need to remove it to install a bigger or a faster one.
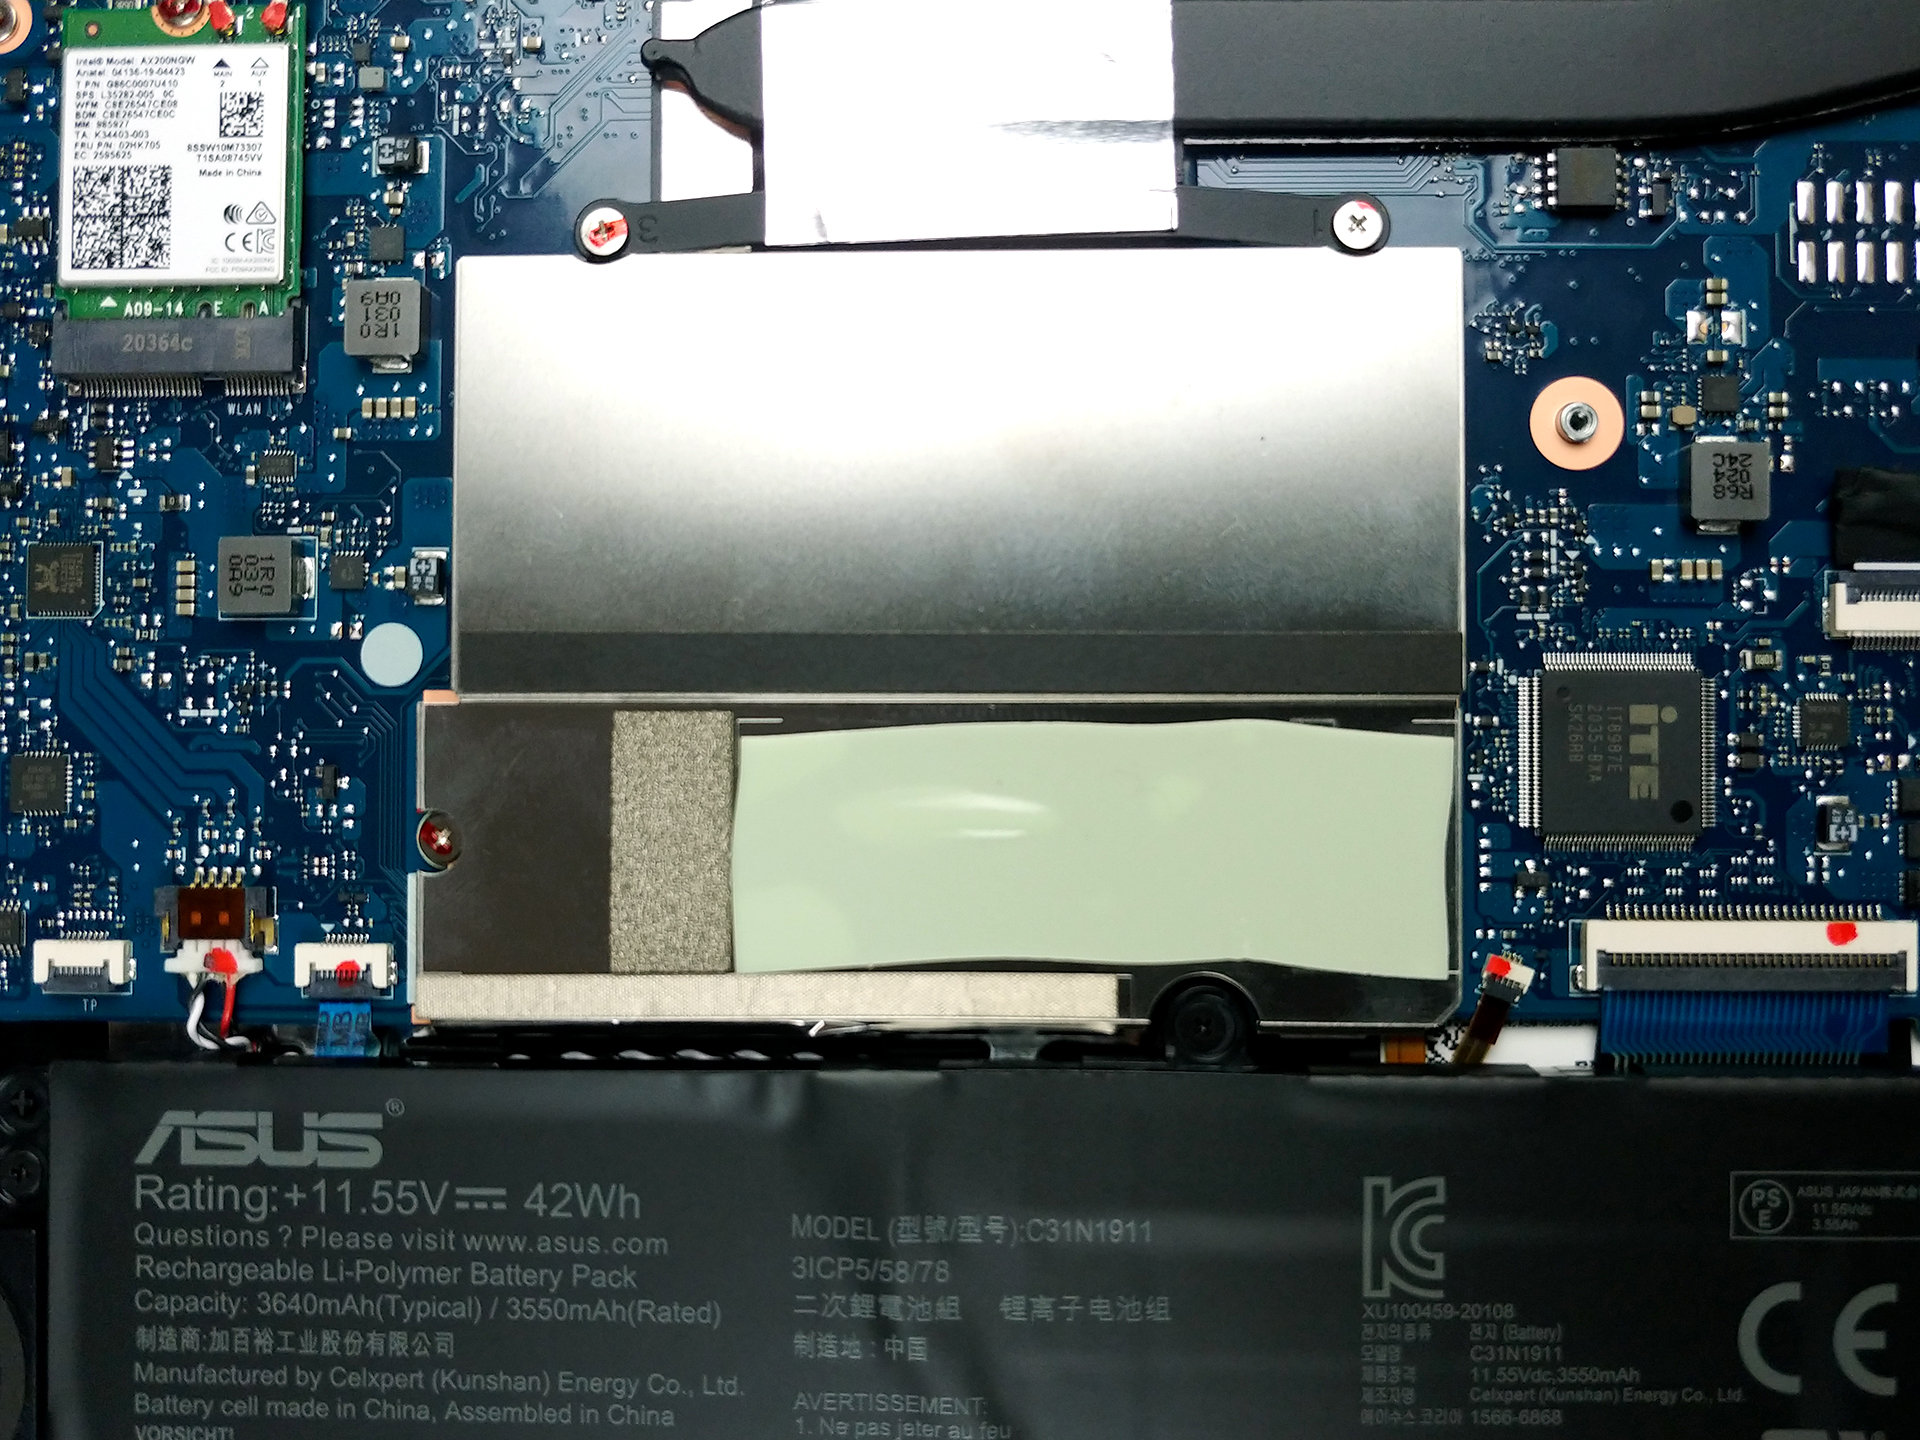
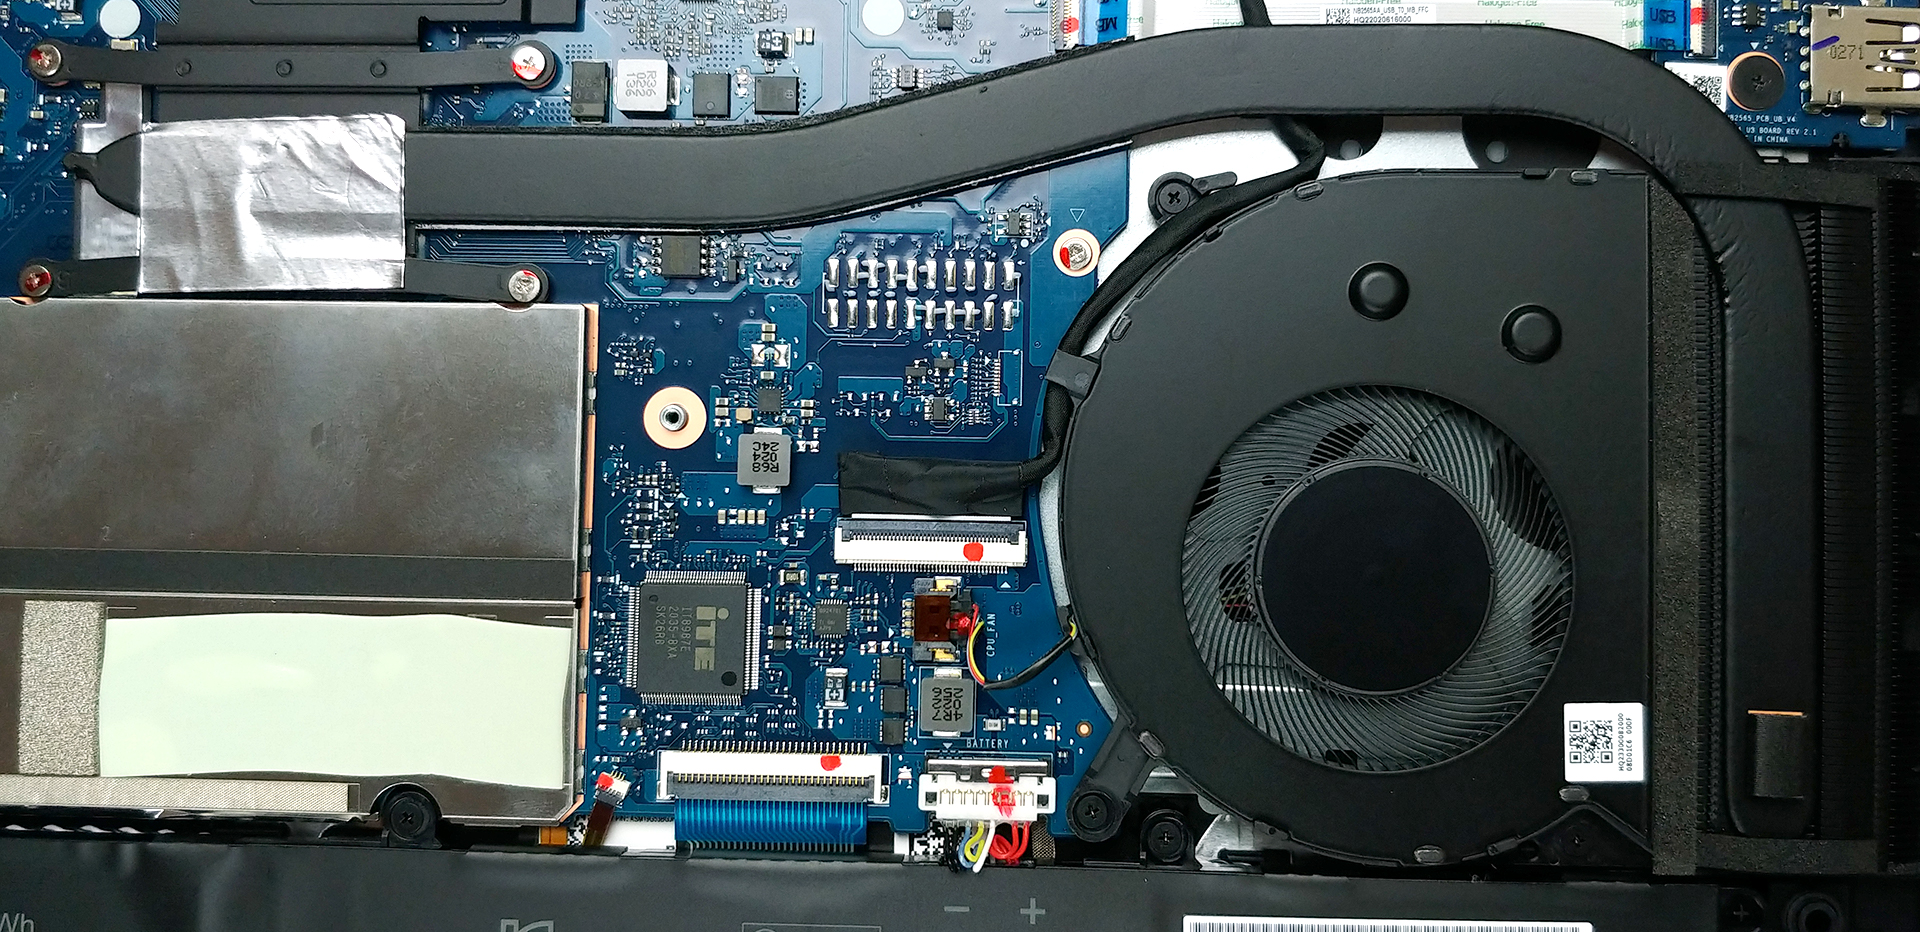
4. Cooling system
As far as the cooling goes, there is one heat pipe that drives the heat from the CPU up to a heat sink, located on the side of the notebook. Then, a medium-sized fan blows the heat away from the chassis.
Check out all ASUS VivoBook Flip 14 TM420 prices and configurations in our Specs System or read more in our In-Depth review.


![[June 2026] Best-Selling Laptop Brands on Amazon Global – Apple’s Unrivaled Dominance in Units and Revenue](https://laptopmedia.com/wp-content/uploads/2026/07/GLOBAL-Best-Brands-400x225.jpg)
![[June 2026] Amazon Global: Top 10 Best-Selling Laptops – Apple’s New MacBook Neo Storms to #1, Reshaping the Market with Affordability](https://laptopmedia.com/wp-content/uploads/2026/07/Best-Selling-Laptops-GLOBAL-Top-10-400x225.jpg)
![[June 2026] Amazon Global: Top 10 Best-Selling Gaming Laptops – Acer’s Nitro V 16S AI Dominates Sales, While ASUS Leads Overall Revenue](https://laptopmedia.com/wp-content/uploads/2026/07/Best-Selling-Gaming-Laptops-GLOBAL-Top-10-400x225.jpg)
![[June 2026] Global Ranking of Best-Selling Laptop GPUs on Amazon – NVIDIA RTX 5060 is the Top-Selling Dedicated GPU](https://laptopmedia.com/wp-content/uploads/2026/07/Best-Selling-GPUs-GLOBAL-Top-10-400x225.jpg)
![[June 2026] Global Ranking of Best-Selling Laptop CPUs on Amazon – Apple M5 Dominates, AMD Ryzen 7 260 Gets Solid Premium Share](https://laptopmedia.com/wp-content/uploads/2026/07/Best-Selling-CPUs-GLOBAL-Top-10-400x225.jpg)
