Inside ASUS VivoBook S14 S433 – disassembly and upgrade options
ASUS has tried its best to improve the design of this notebook. However, they have ditched some neat features like the ErgoLift hinge, and especially the ScreenPad 2.0, probably in order to keep the price down.
Check out all ASUS VivoBook S14 S433 prices and configurations in our Specs System or read more in our In-Depth review.
1. Remove the bottom plate
This device’s bottom plate is fixed in place by 9 Torx-head screws. Remove them and you would be able to pop the panel with a plastic pry tool.

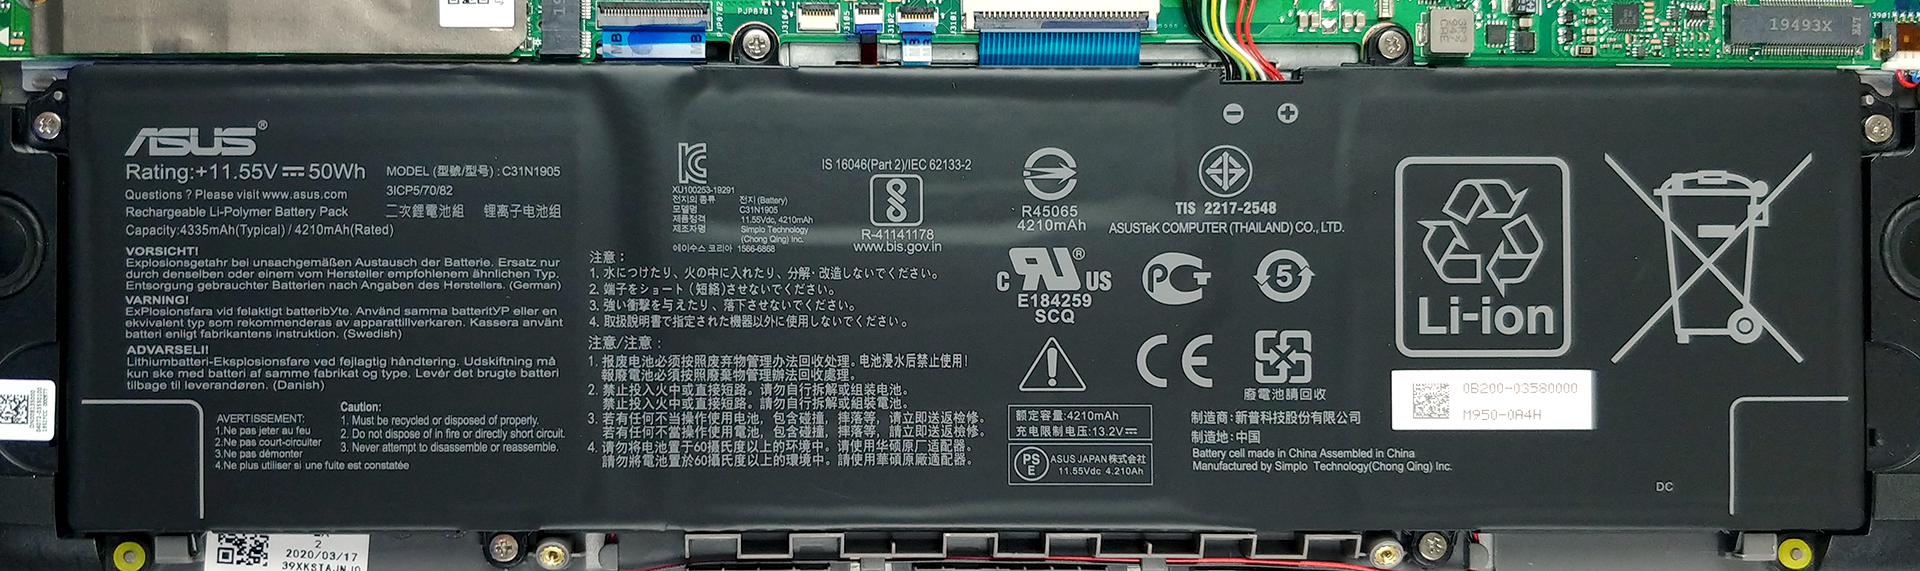
2. Battery
Here, the battery is decent for a device with this size – a 50Wh unit.
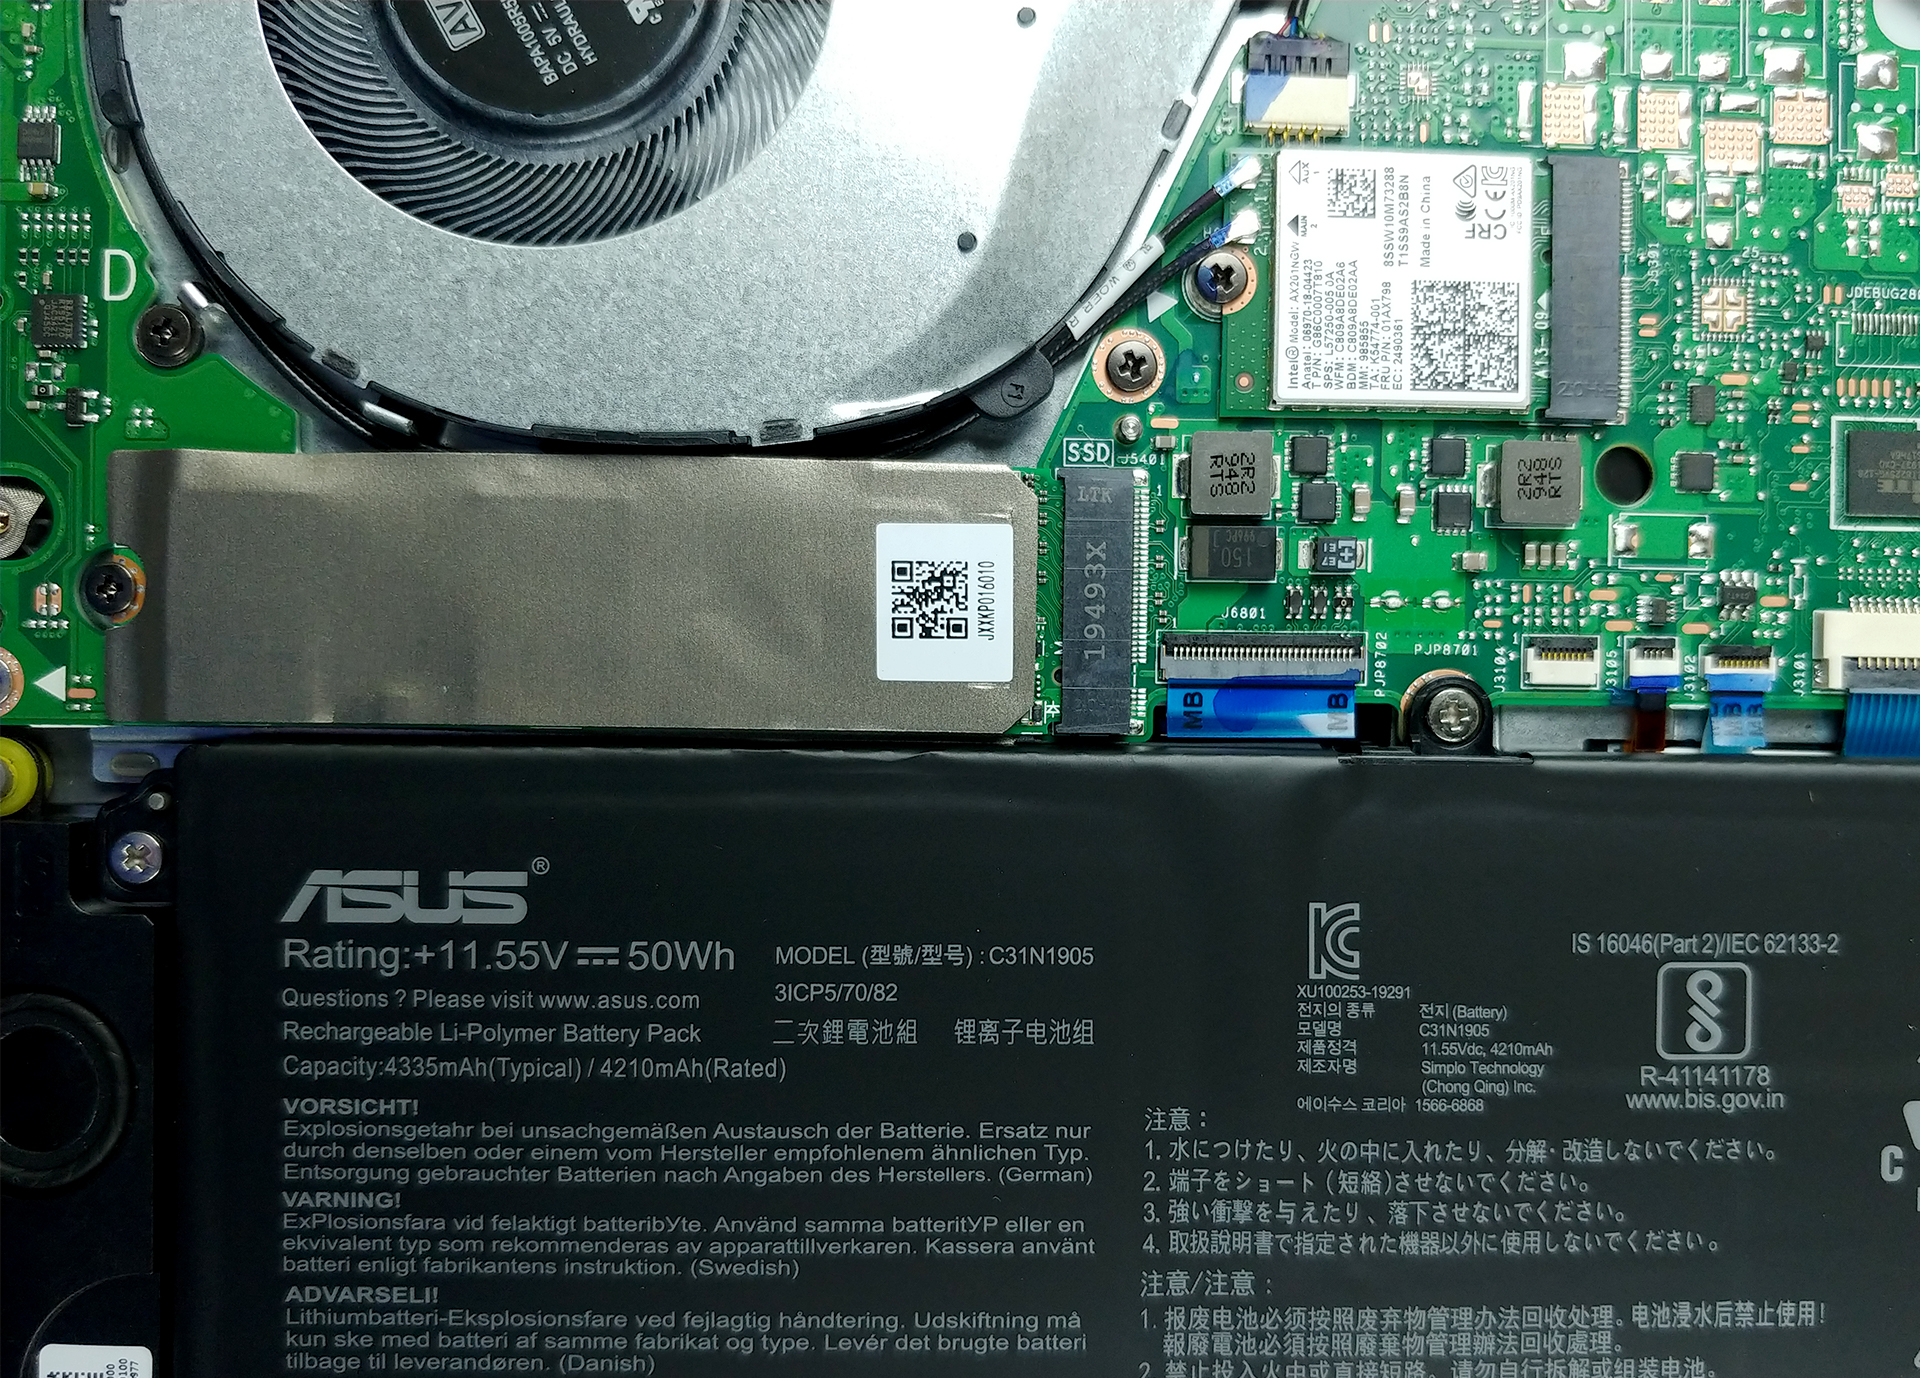
3. Memory and storage
In terms of upgradability, there is nothing much to say – all of the memory is soldered to the motherboard, and the only storage option is an M.2 PCIe x2 drive.
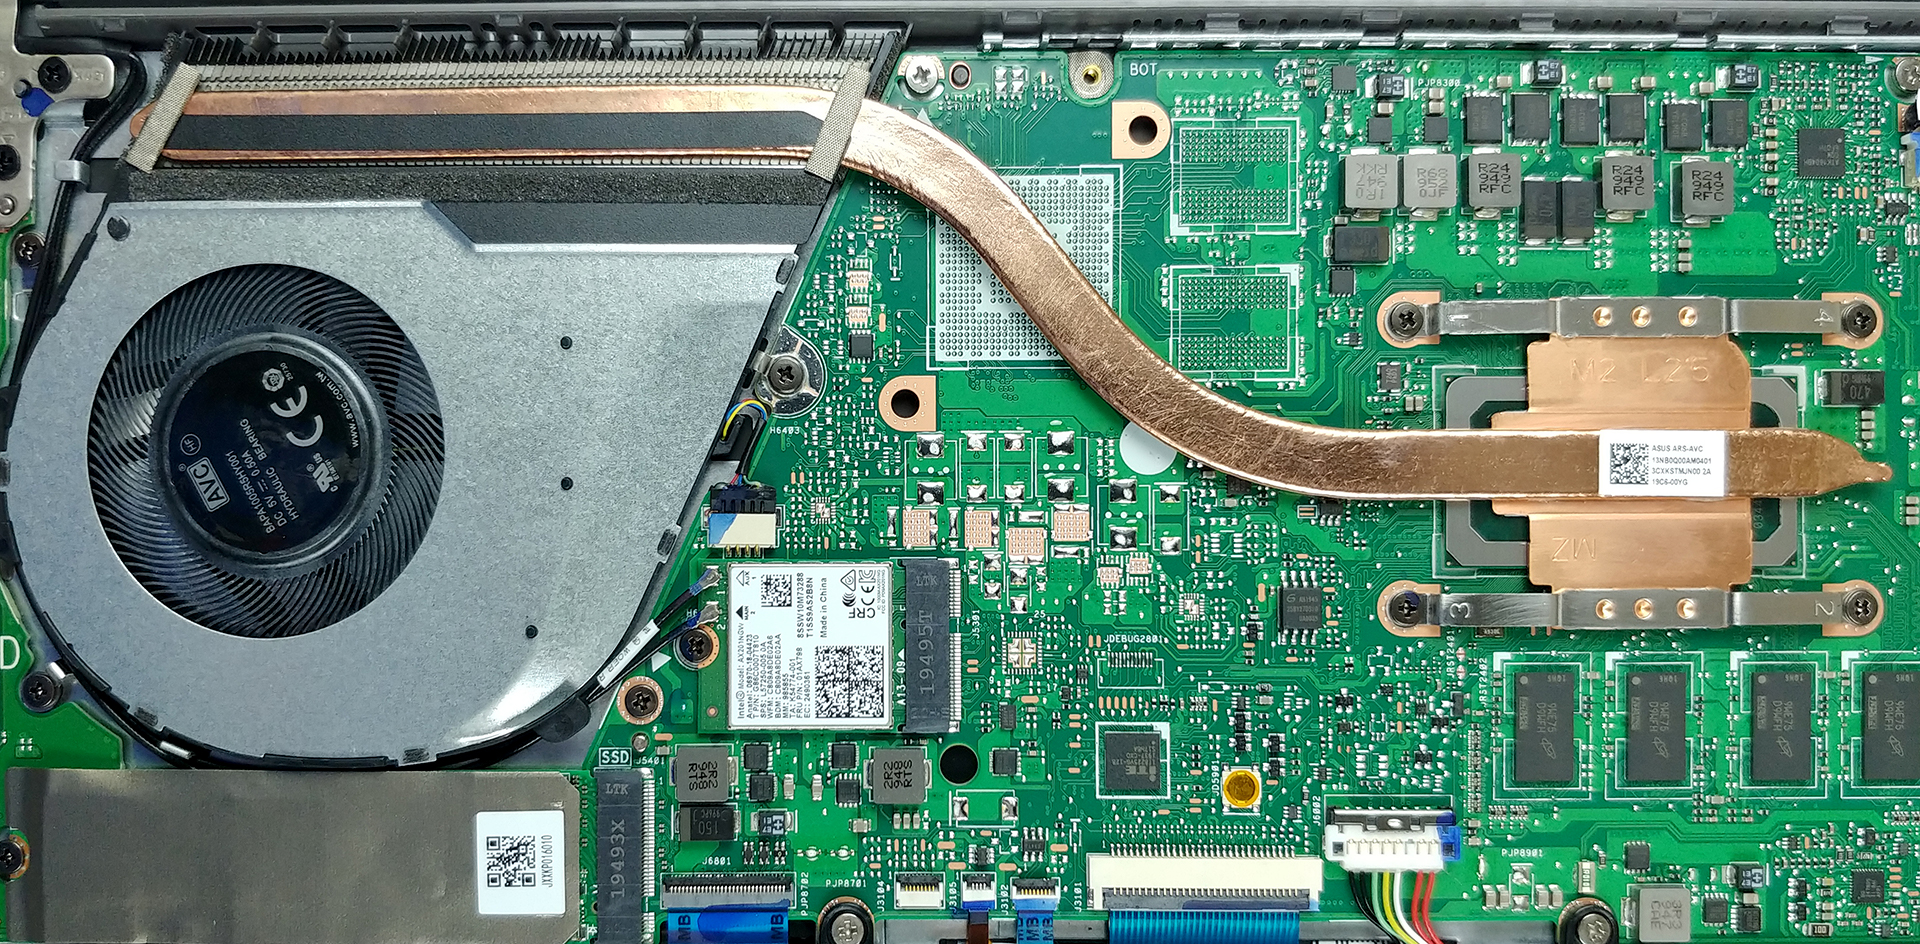
4. Cooling system
Let’s take a look at the cooling. It has pretty much the same design as the older VivoBook S14 S432 – a thin but yet long heat pipe, and a reasonably big heat sink to dissipate the heat.
Check out all ASUS VivoBook S14 S433 prices and configurations in our Specs System or read more in our In-Depth review.


![[June 2026] Best-Selling Laptop Brands on Amazon Global – Apple’s Unrivaled Dominance in Units and Revenue](https://laptopmedia.com/wp-content/uploads/2026/07/GLOBAL-Best-Brands-400x225.jpg)
![[June 2026] Amazon Global: Top 10 Best-Selling Laptops – Apple’s New MacBook Neo Storms to #1, Reshaping the Market with Affordability](https://laptopmedia.com/wp-content/uploads/2026/07/Best-Selling-Laptops-GLOBAL-Top-10-400x225.jpg)
![[June 2026] Amazon Global: Top 10 Best-Selling Gaming Laptops – Acer’s Nitro V 16S AI Dominates Sales, While ASUS Leads Overall Revenue](https://laptopmedia.com/wp-content/uploads/2026/07/Best-Selling-Gaming-Laptops-GLOBAL-Top-10-400x225.jpg)
![[June 2026] Global Ranking of Best-Selling Laptop GPUs on Amazon – NVIDIA RTX 5060 is the Top-Selling Dedicated GPU](https://laptopmedia.com/wp-content/uploads/2026/07/Best-Selling-GPUs-GLOBAL-Top-10-400x225.jpg)
![[June 2026] Global Ranking of Best-Selling Laptop CPUs on Amazon – Apple M5 Dominates, AMD Ryzen 7 260 Gets Solid Premium Share](https://laptopmedia.com/wp-content/uploads/2026/07/Best-Selling-CPUs-GLOBAL-Top-10-400x225.jpg)

Daaamn.. So the only way to get the 16GB variant is buy the model with 16GB already?