Inside ASUS ZenBook Duo UX481 – disassembly and upgrade options
This device is clearly something else in the world of laptops. Not only it aims to change the way we look at the conventional laptop, but it also tries to make a bold statement for its manufacturer – ASUS.
Check out all ASUS ZenBook Duo UX481 prices and configurations in our Specs System or read more in our In-Depth review.

1. Remove the bottom plate
So ASUS was playing some hide and seek game with us as well. They are hiding six of the total of 10 Torx-head screws with rubber caps. Fear not, however, they are super easy to remove and you won’t be tearing them apart in the process.
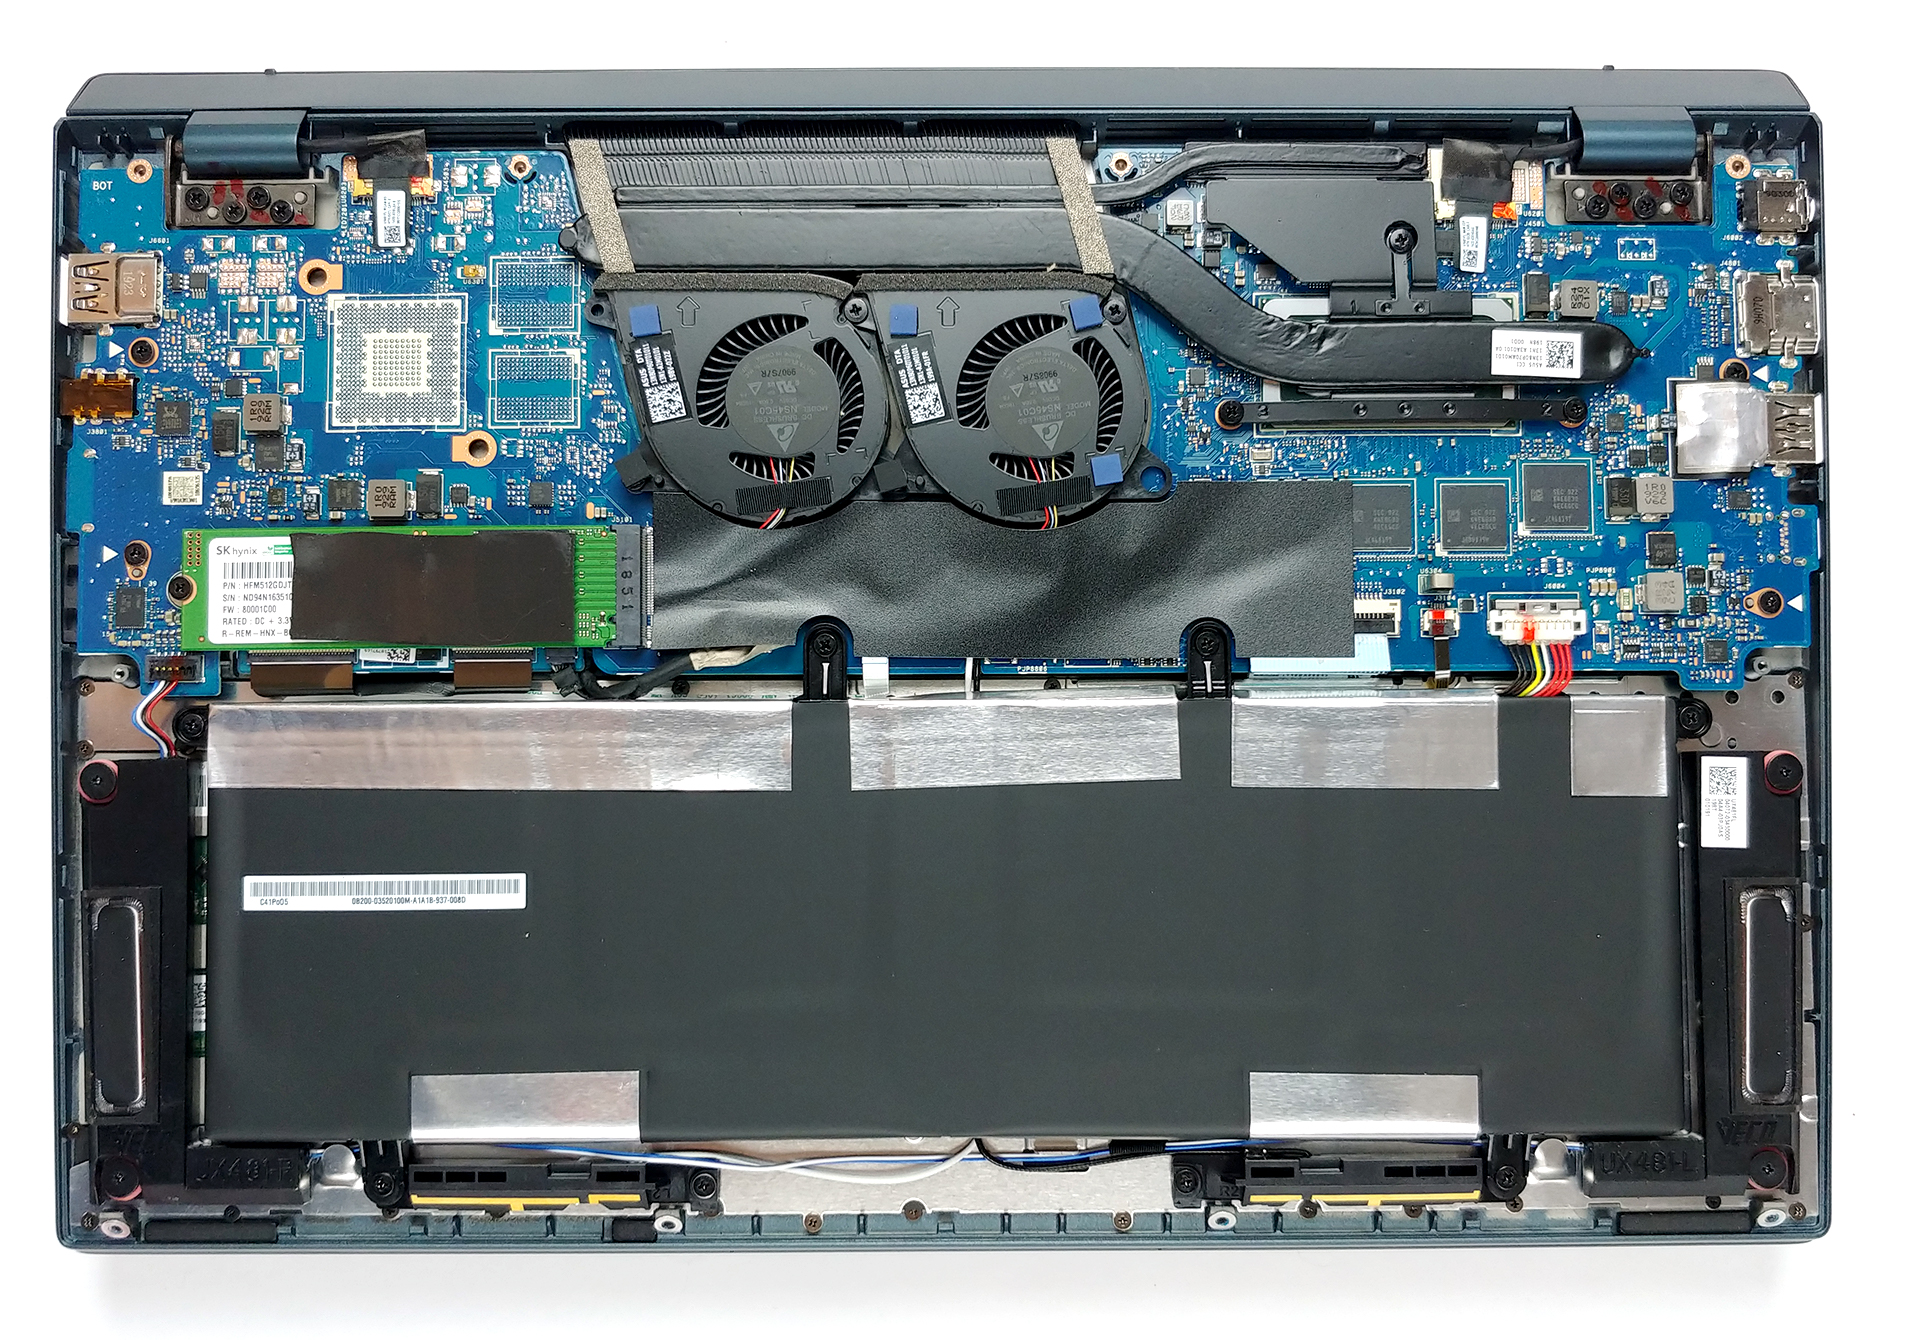
2. Battery
The laptop is equipped with a whopping 70Wh battery pack. Keep in mind you would want to remove the connector from the motherboard before you do anything on the inside. By the way, if you want to remove the battery itself, there are six Phillips-head screws waiting for you.

3. Memory and storage
Sadly, all of the memory on this notebook is soldered to the motherboard. While there is only one M.2 storage slot, the good thing is that it supports PCIe x4 drives.

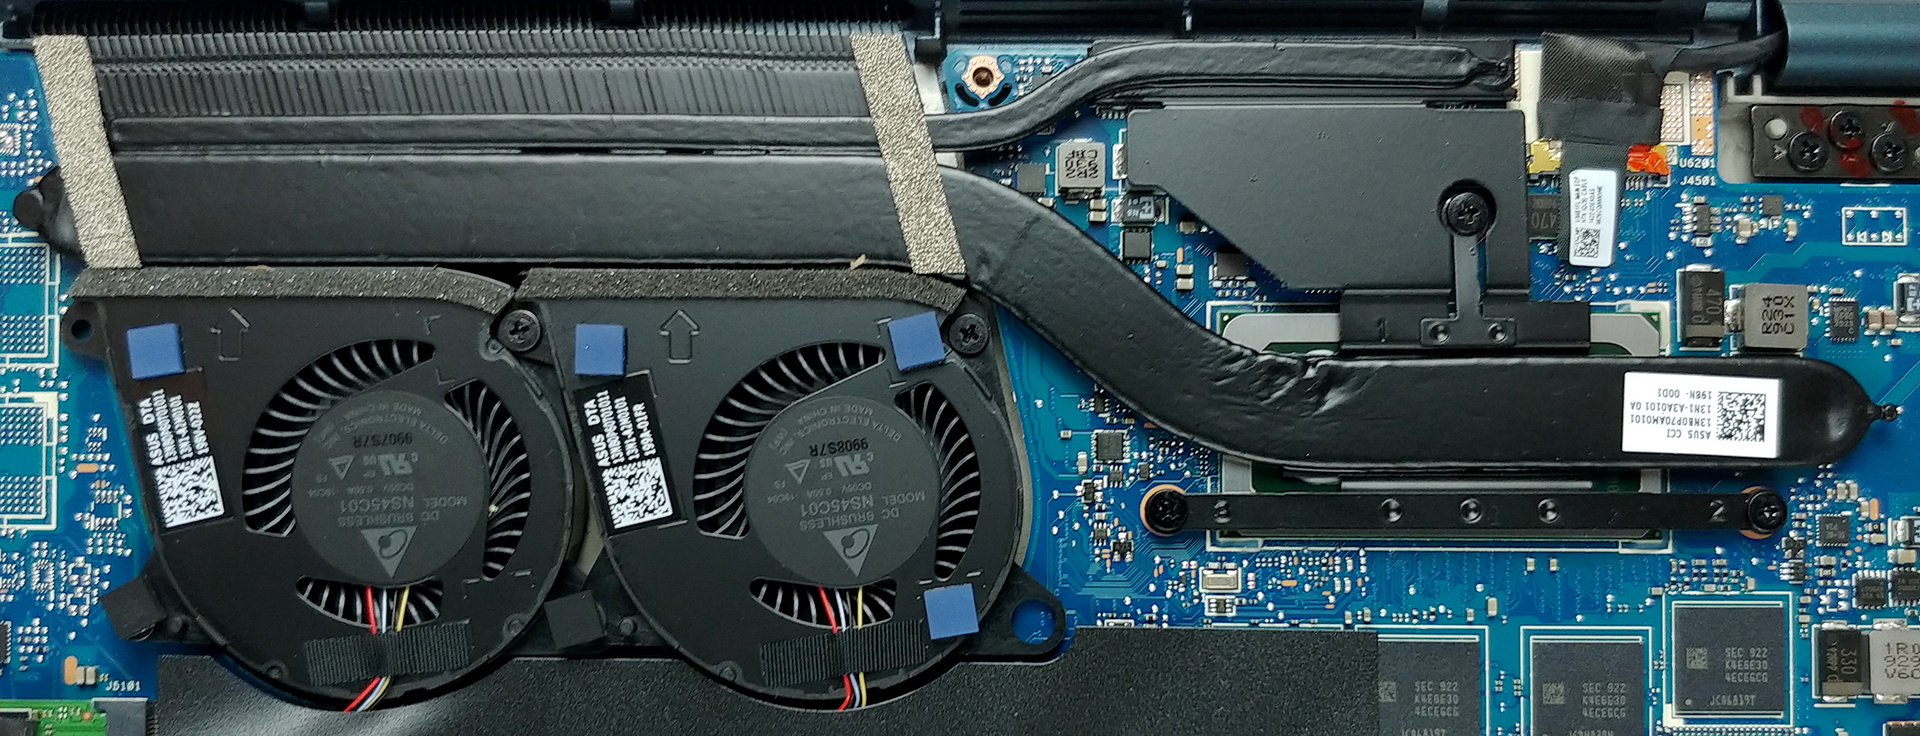
4. Cooling system
ZenBook Duo UX481’s cooling solution comprises two rather small fans, one long heat spreader and a single, but yet bulky heat pipe.
Check out all ASUS ZenBook Duo UX481 prices and configurations in our Specs System or read more in our In-Depth review.


![[June 2026] Best-Selling Laptop Brands on Amazon Global – Apple’s Unrivaled Dominance in Units and Revenue](https://laptopmedia.com/wp-content/uploads/2026/07/GLOBAL-Best-Brands-400x225.jpg)
![[June 2026] Amazon Global: Top 10 Best-Selling Laptops – Apple’s New MacBook Neo Storms to #1, Reshaping the Market with Affordability](https://laptopmedia.com/wp-content/uploads/2026/07/Best-Selling-Laptops-GLOBAL-Top-10-400x225.jpg)
![[June 2026] Amazon Global: Top 10 Best-Selling Gaming Laptops – Acer’s Nitro V 16S AI Dominates Sales, While ASUS Leads Overall Revenue](https://laptopmedia.com/wp-content/uploads/2026/07/Best-Selling-Gaming-Laptops-GLOBAL-Top-10-400x225.jpg)
![[June 2026] Global Ranking of Best-Selling Laptop GPUs on Amazon – NVIDIA RTX 5060 is the Top-Selling Dedicated GPU](https://laptopmedia.com/wp-content/uploads/2026/07/Best-Selling-GPUs-GLOBAL-Top-10-400x225.jpg)
![[June 2026] Global Ranking of Best-Selling Laptop CPUs on Amazon – Apple M5 Dominates, AMD Ryzen 7 260 Gets Solid Premium Share](https://laptopmedia.com/wp-content/uploads/2026/07/Best-Selling-CPUs-GLOBAL-Top-10-400x225.jpg)

Can you upgrade the GPU of a zenbook book duo ux481
Would I be able to change the MX 250 for a RTX graphic card?
How do you remove the rubber caps on the back panel to remove the 10 Torx-head screws?