Inside Dell Inspiron 17 3780 – disassembly and upgrade options
Dell Inspiron 17 3780 certainly does feel a little bit dated. However, it is rather easy to dig inside. You just need to take care of something, that is rarely seen on a modern laptop.
Check out all Dell Inspiron 17 3780 prices and configurations in our Specs System or read more in our In-depth Review.
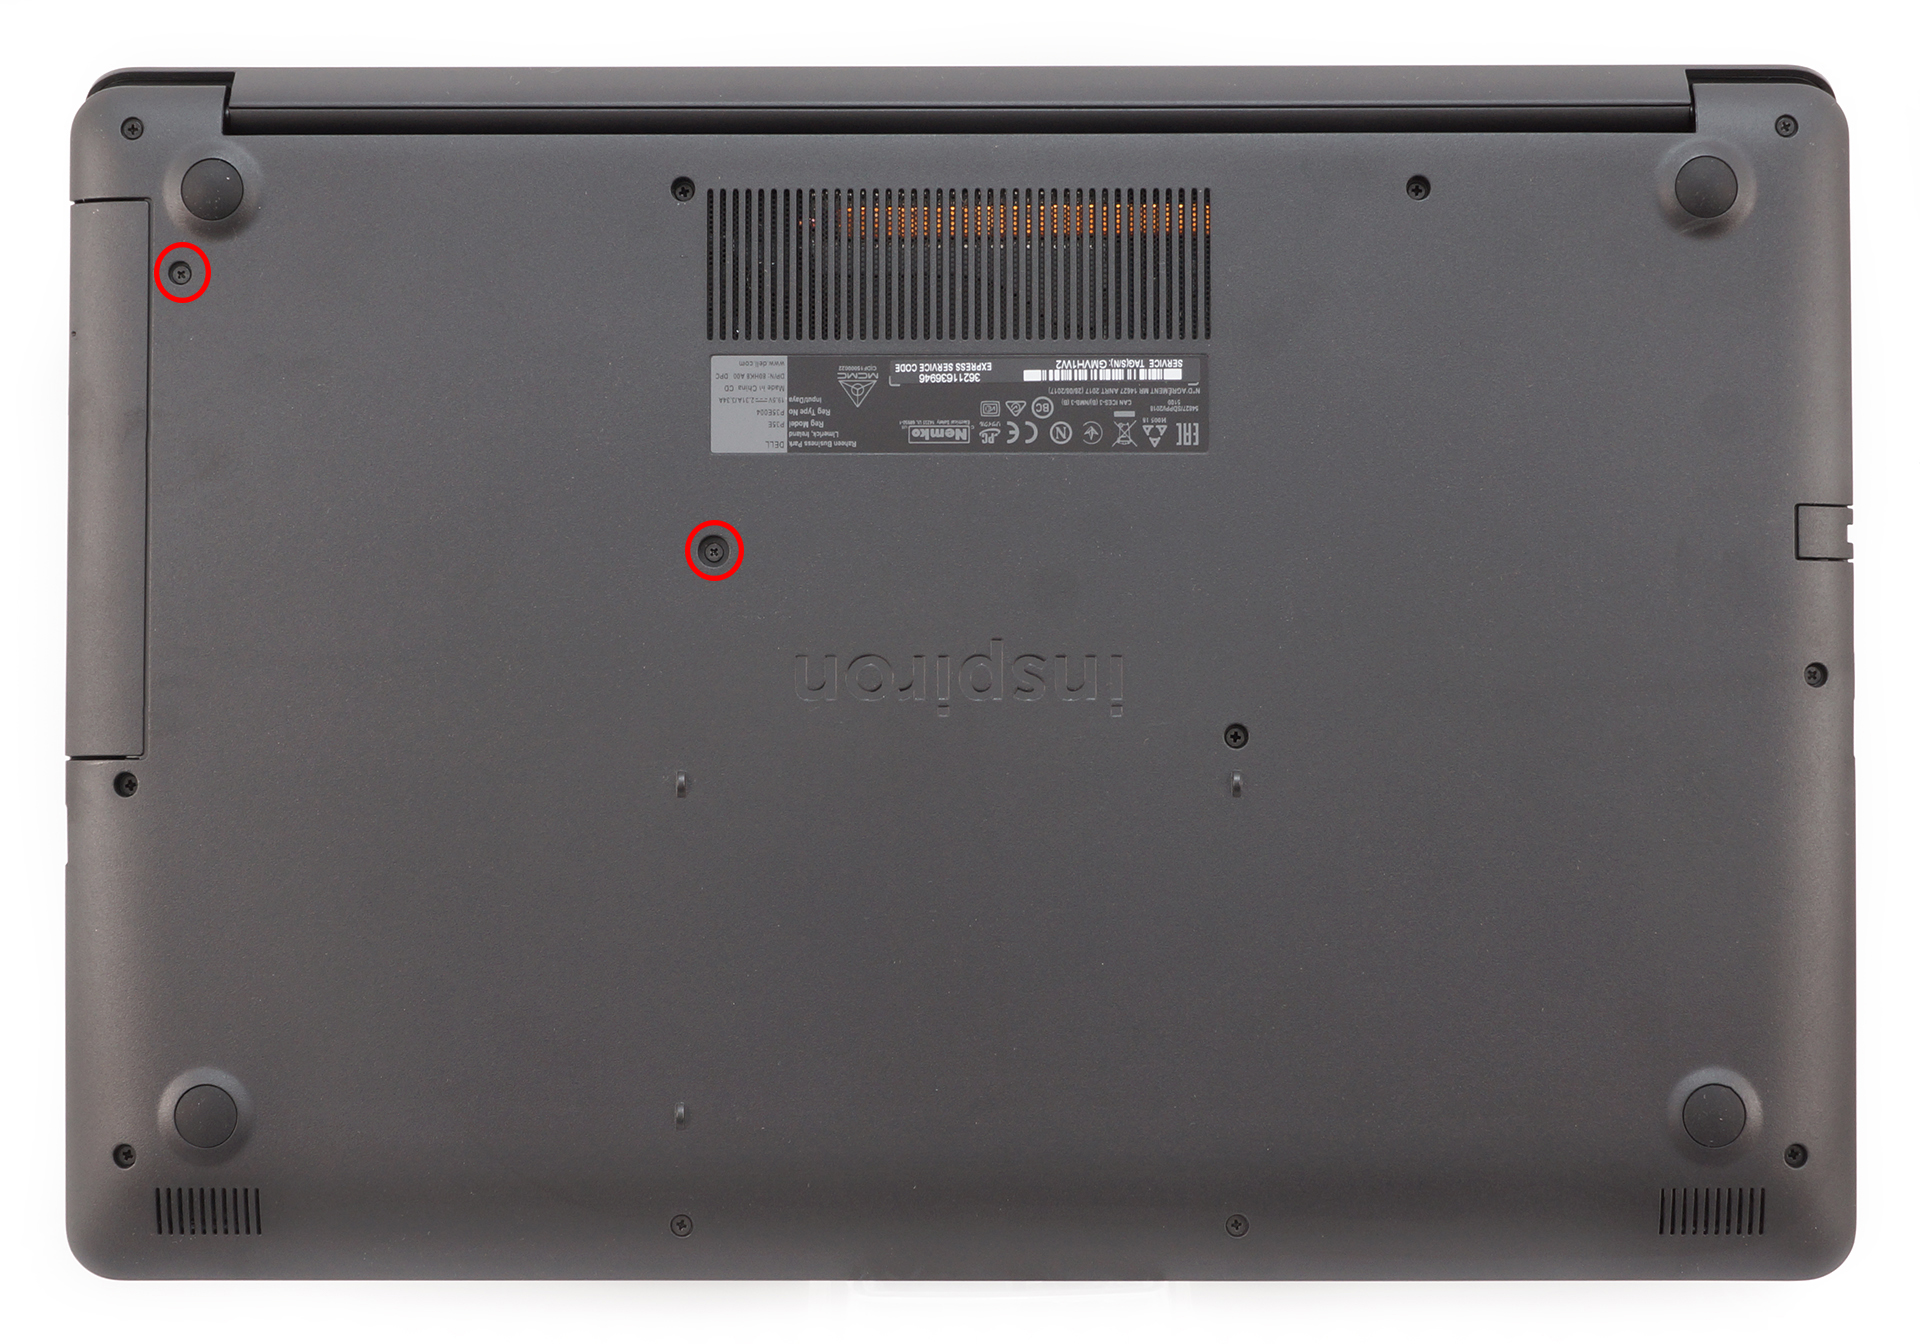
1. Remove the bottom plate
If you haven’t figured it out yet, we were talking about the DVD optical drive. There are a couple of screws you need to undo before you pull it away from the chassis. Then just continue with unscrewing everything you see, and you are free to pry the bottom plate up.
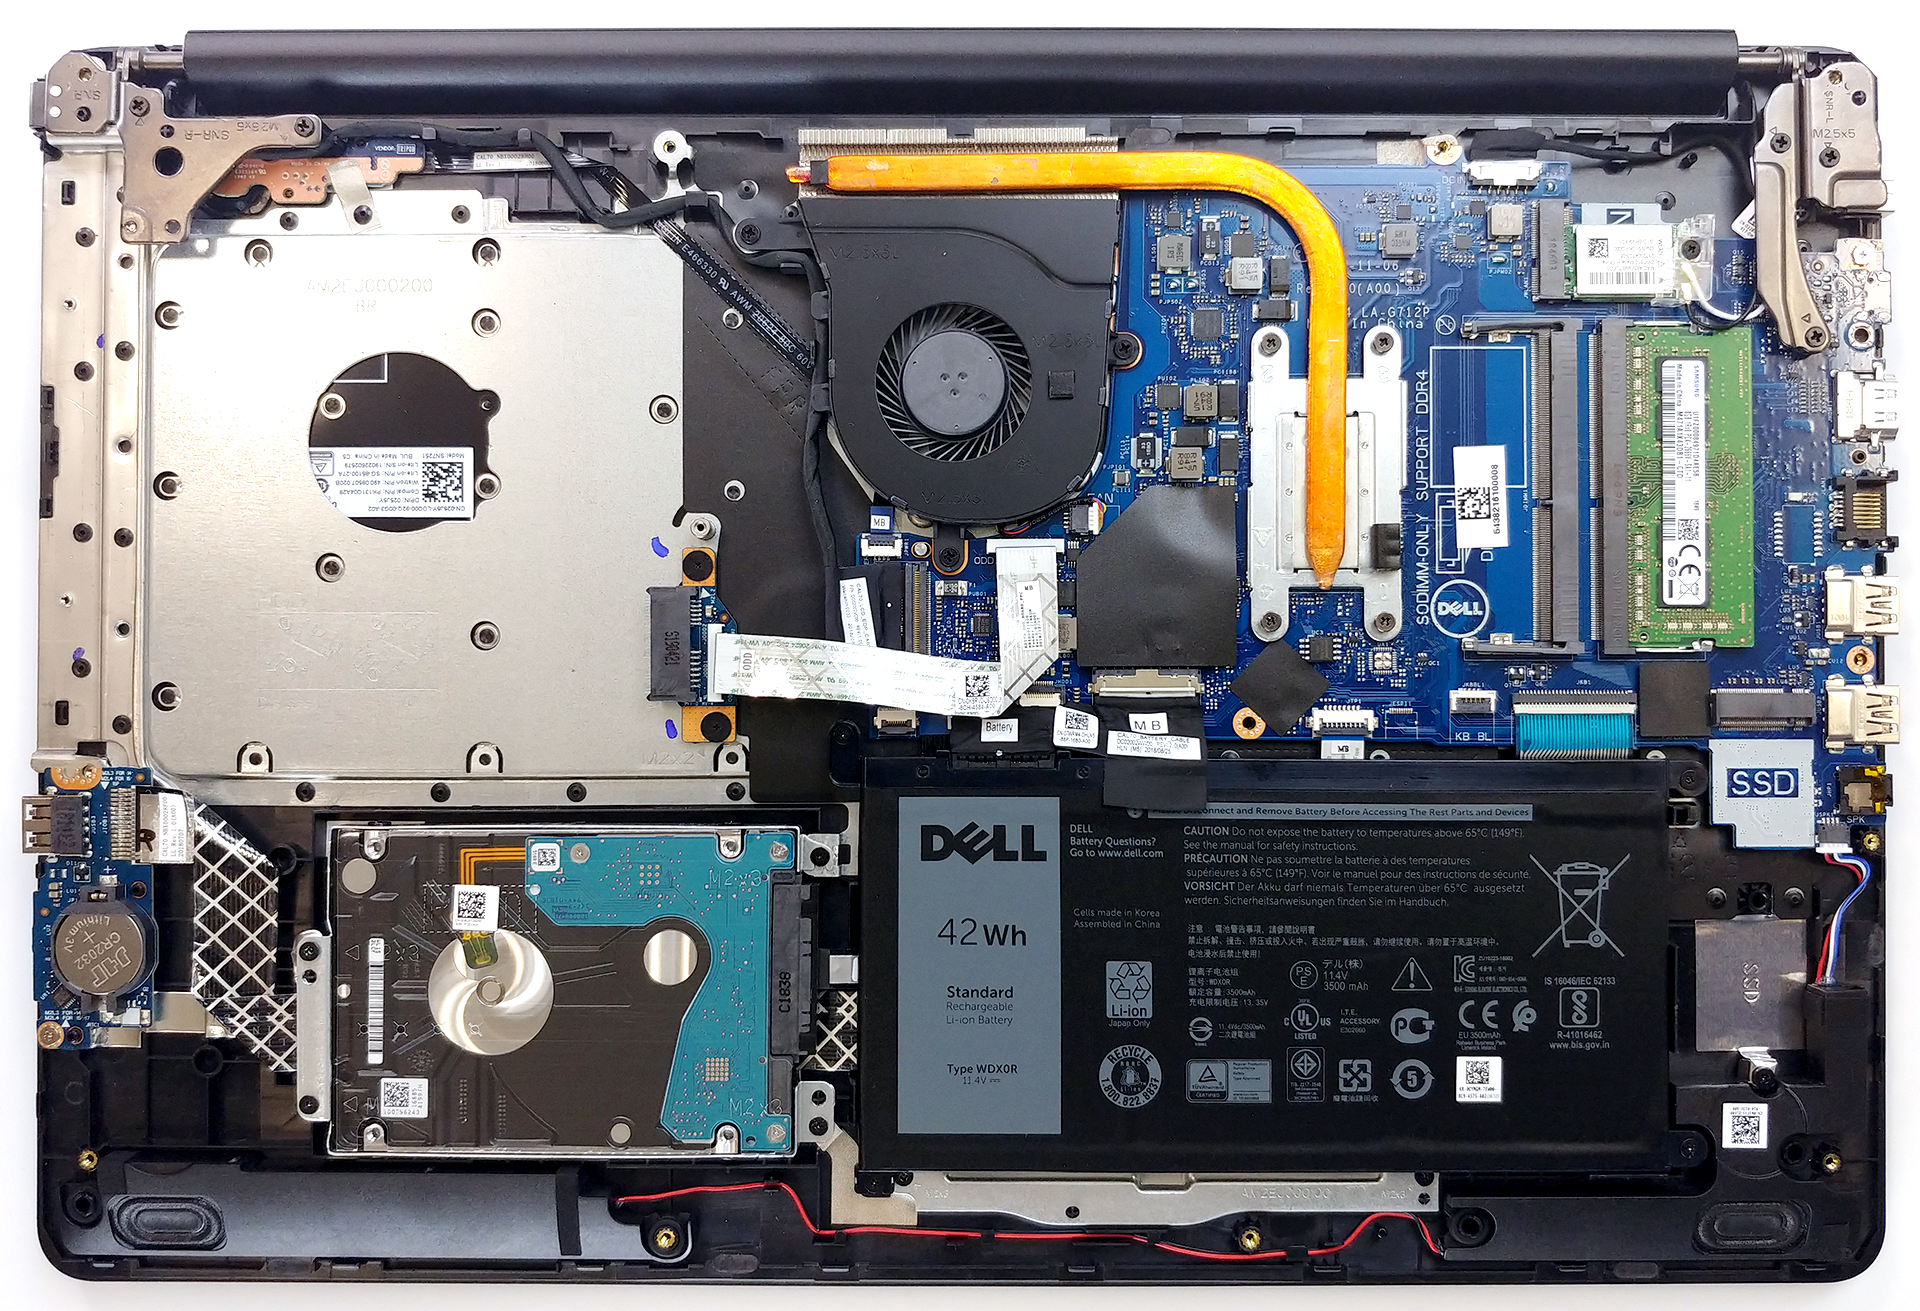
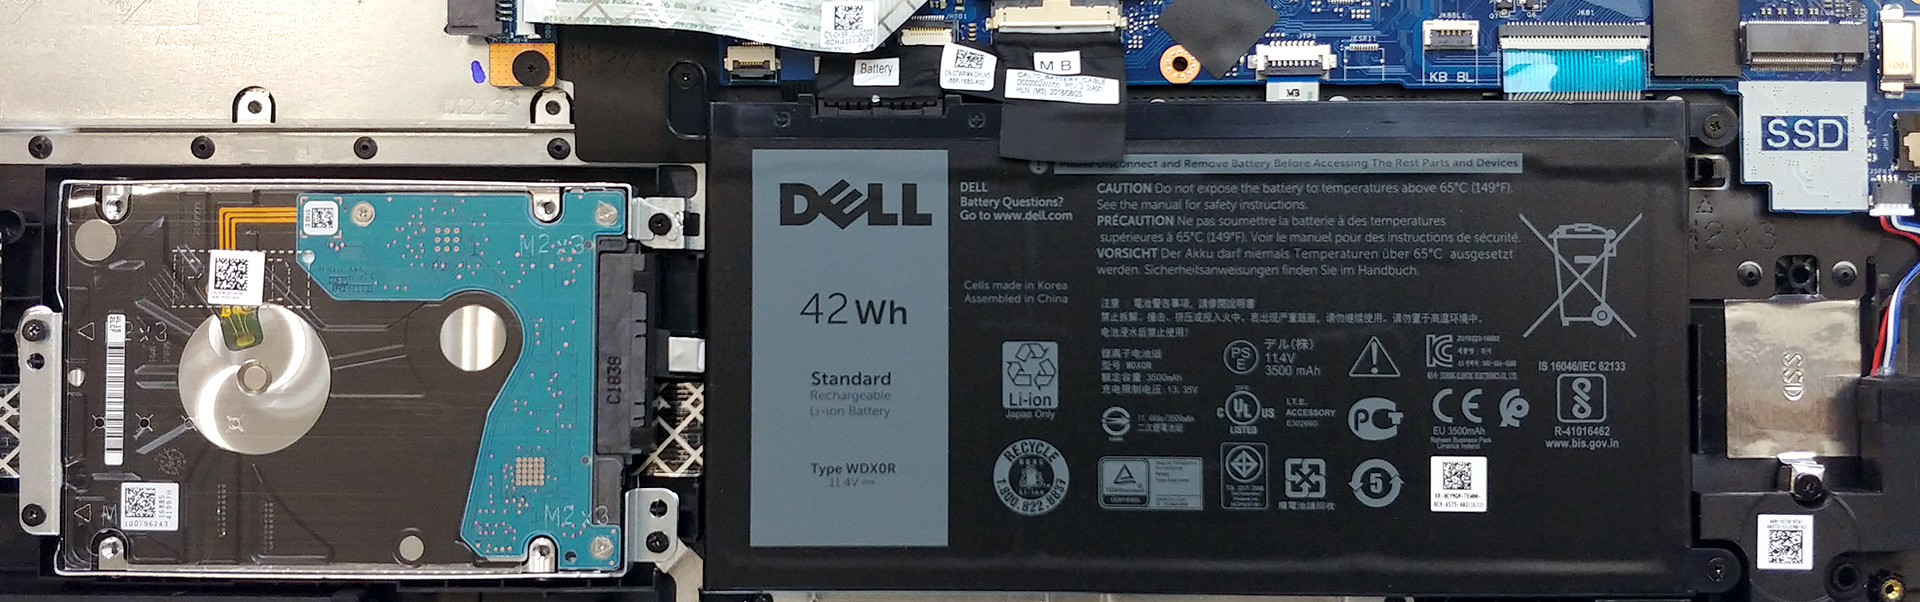
2. Battery and storage
Most of the bottom side of the body is taken by the battery and the storage devices. Fist, you would want to unplug the battery, so you don’t accidentally damage something while disassembling. After that, remove all four Phillips-head screws, located at the edges of the 42Wh battery. On both sides of the battery, you can see the storage options – a SATA slot on the left and an M.2 PCIe slot on the right.
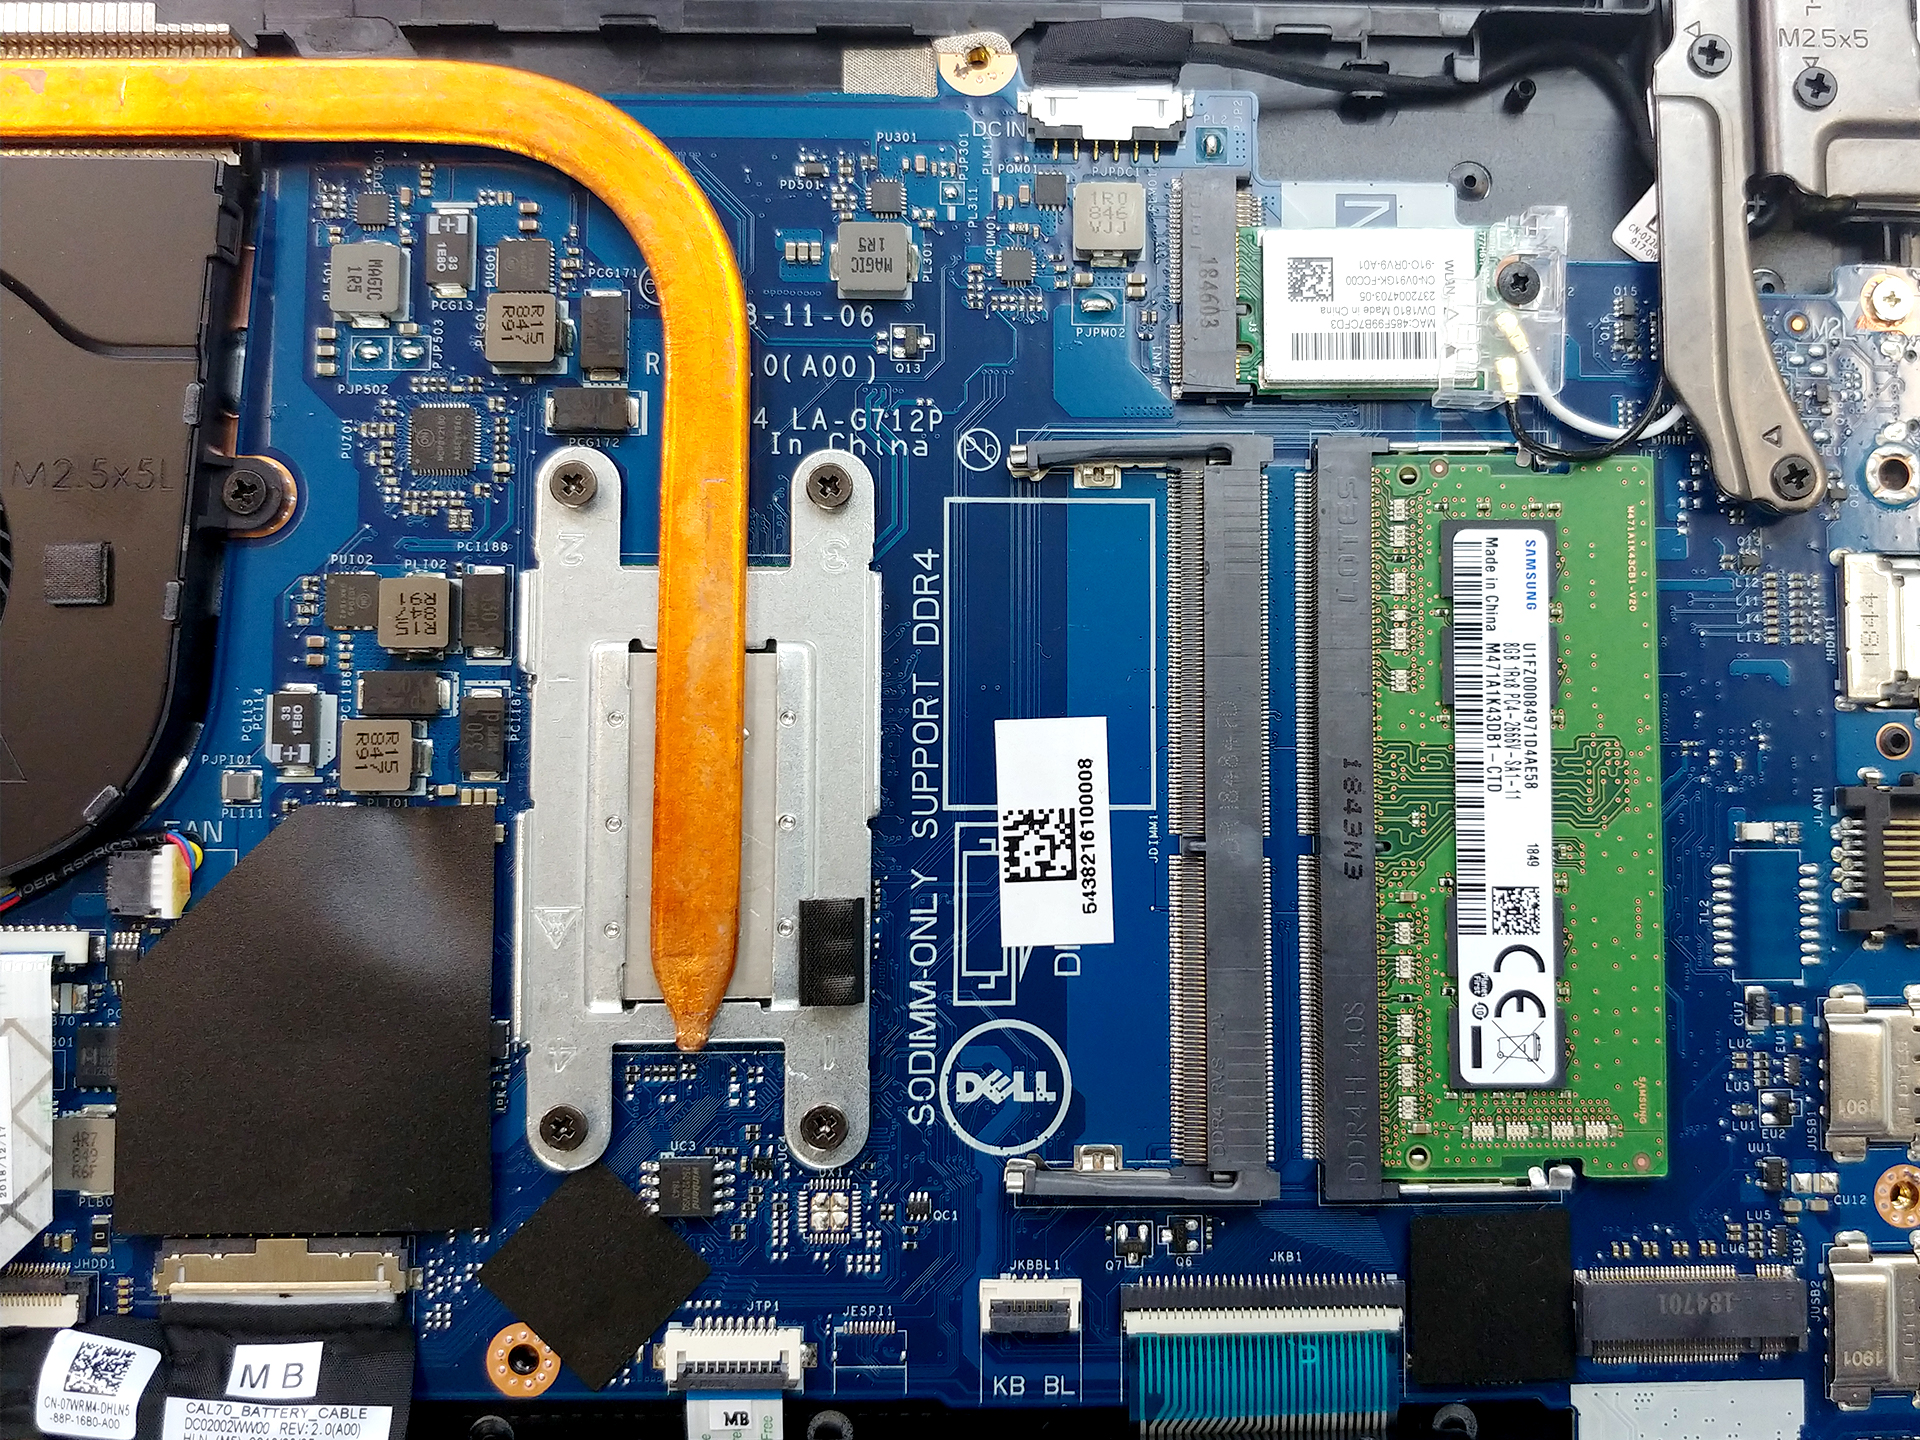
3. Memory
Memory-wise there are two RAM DIMMs that support up to 32 GB of DDR4 memory.
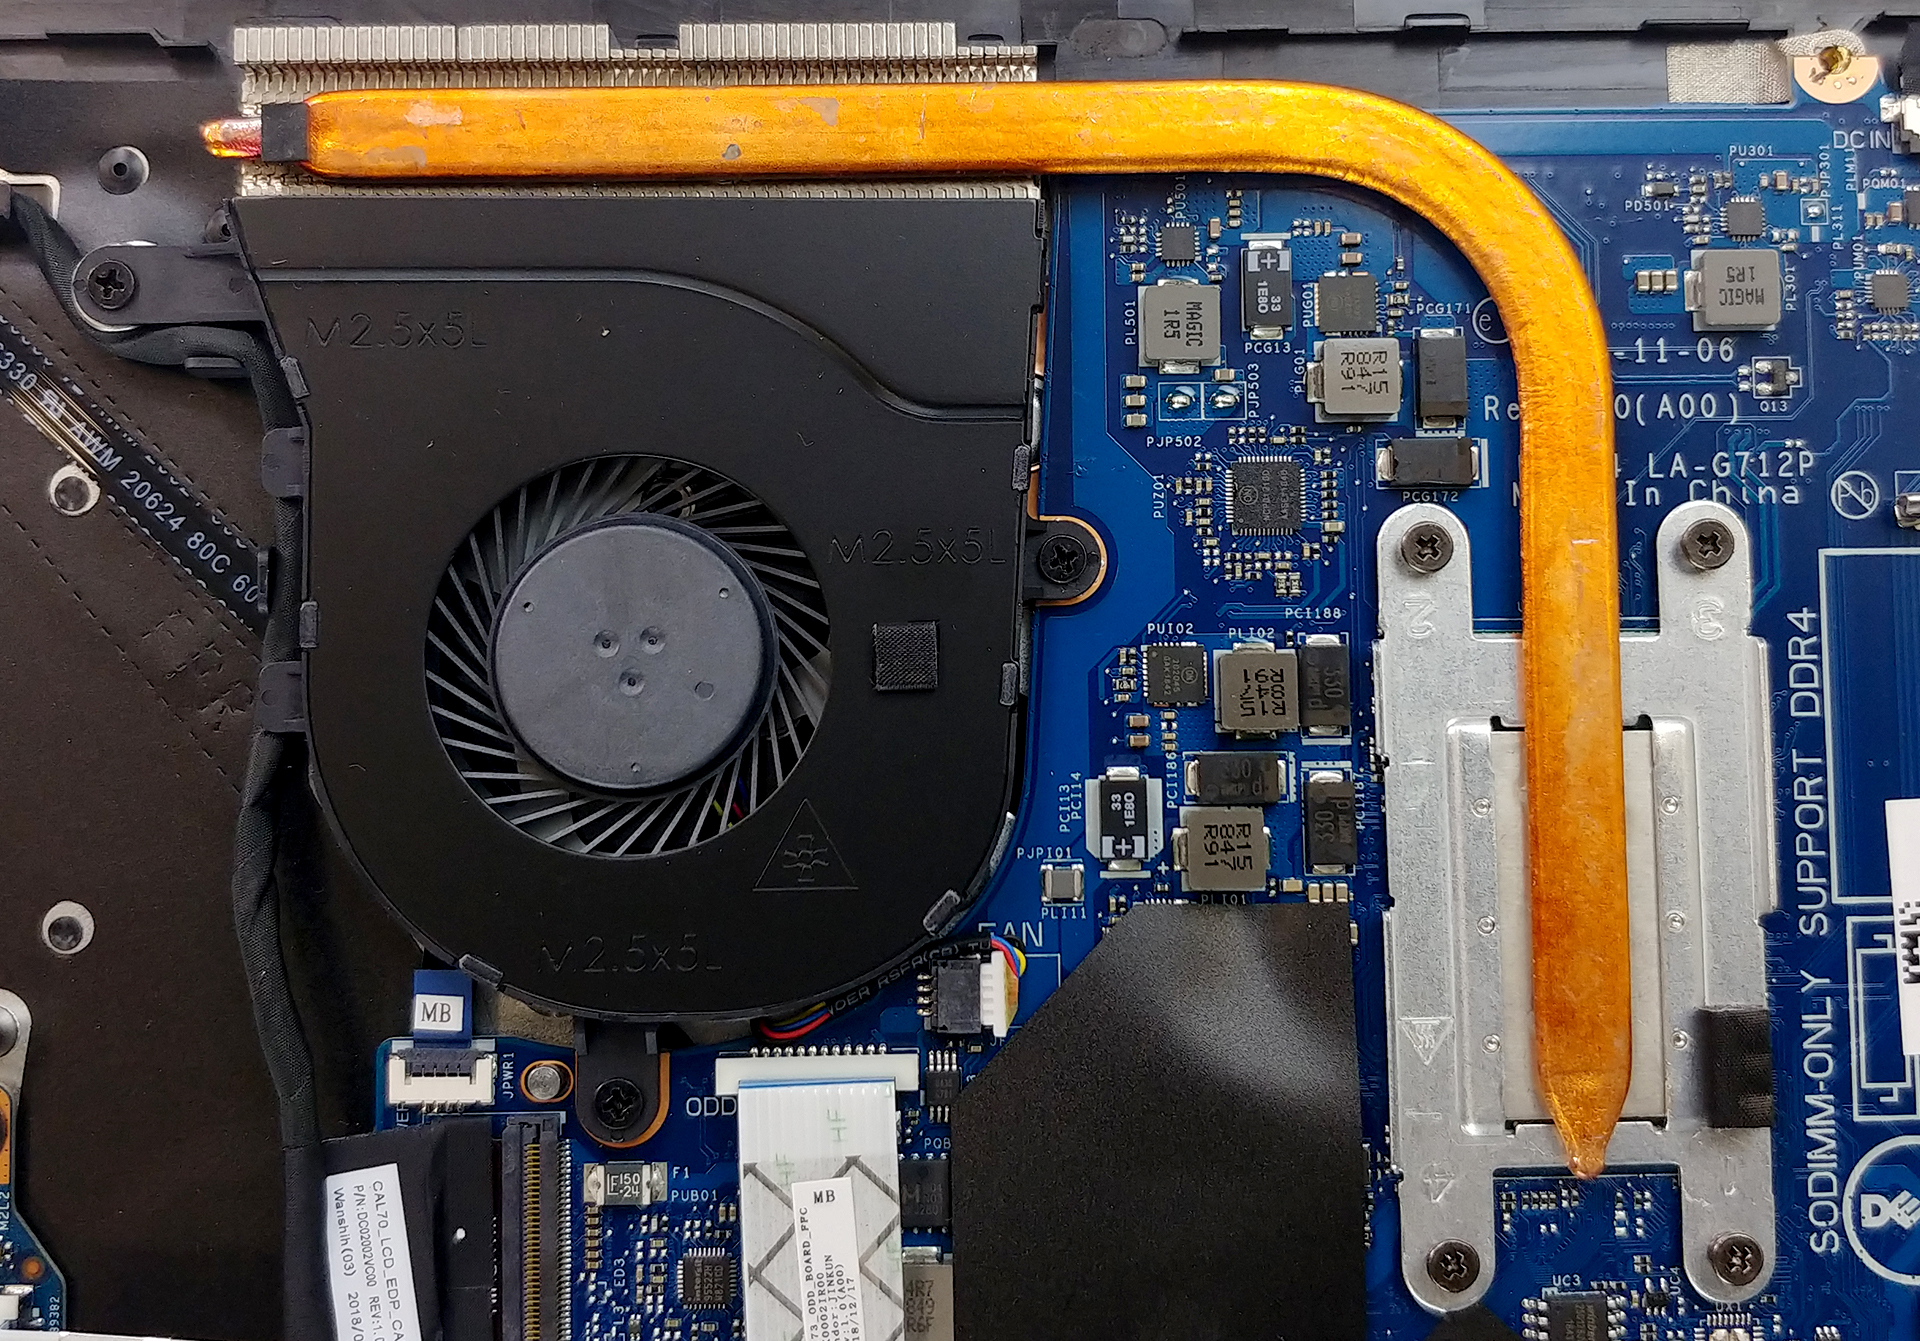
4. Cooling system
Cooling is realized by the classic single heat pipe and fan design. Nothing special here, but it seems to be enough for just the CPU itself.
Check out all Dell Inspiron 17 3780 prices and configurations in our Specs System or read more in our In-depth Review.


![[June 2026] Best-Selling Laptop Brands on Amazon Global – Apple’s Unrivaled Dominance in Units and Revenue](https://laptopmedia.com/wp-content/uploads/2026/07/GLOBAL-Best-Brands-400x225.jpg)
![[June 2026] Amazon Global: Top 10 Best-Selling Laptops – Apple’s New MacBook Neo Storms to #1, Reshaping the Market with Affordability](https://laptopmedia.com/wp-content/uploads/2026/07/Best-Selling-Laptops-GLOBAL-Top-10-400x225.jpg)
![[June 2026] Amazon Global: Top 10 Best-Selling Gaming Laptops – Acer’s Nitro V 16S AI Dominates Sales, While ASUS Leads Overall Revenue](https://laptopmedia.com/wp-content/uploads/2026/07/Best-Selling-Gaming-Laptops-GLOBAL-Top-10-400x225.jpg)
![[June 2026] Global Ranking of Best-Selling Laptop GPUs on Amazon – NVIDIA RTX 5060 is the Top-Selling Dedicated GPU](https://laptopmedia.com/wp-content/uploads/2026/07/Best-Selling-GPUs-GLOBAL-Top-10-400x225.jpg)
![[June 2026] Global Ranking of Best-Selling Laptop CPUs on Amazon – Apple M5 Dominates, AMD Ryzen 7 260 Gets Solid Premium Share](https://laptopmedia.com/wp-content/uploads/2026/07/Best-Selling-CPUs-GLOBAL-Top-10-400x225.jpg)
